Adobe Photoshop Lightroom is a great tool for post-processing your work, especially if you tend to shoot RAW most of the time. It’s quick, easy to manage and offers an extremely wide range of color adjustment, as well as other kinds of processing. But what if you need to retouch your photographs? Does that mean Photoshop is the only way to go? While I certainly use Photoshop for more complicated retouching, I’m glad that Lightroom offers options that are sufficient at least 90% of the time. In this short and simple tutorial, I will teach you how to use the Spot Removal tool in Lightroom. This simple yet powerful tool will then let you remove small objects out of your photographs or fix flaws, such as skin blemishes or sensor dust spots. You will be able to perform these actions very easily and quickly and, more importantly, all within the Lightroom environment.

Table of Contents
Where to Find It?
 Lightroom is a very photography-centered piece of software. Unlike Photoshop, which, from the very start, had a very broad range of applications, Lightroom doesn’t need many tools. Luckily, this makes finding them that much more simple – all the tools, including Spot Removal, are located under the Histogram. You can, alternatively, press the “Q” button to access the tool in the Develop Module.
How Spot Removal Works
Basically, the spot removal tool requires you to choose an area to repair. It then samples a nearby area and either clones it or uses it for reference to heal the selected area. Personally, I always recommend using the heal method, as cloning rarely gives as good of results. However, there are cases where you simply want to copy an area of the image, and that’s when you use the clone method. With both tools, you are also able to adjust the feather and opacity of the spot removal, giving you more control over how your final results look.
I use the spot removal tool primarily when editing portraits and landscapes. When editing portraits, I use it to remove skin blemishes, crumbs or lint on clothing, or stray hairs. I also tend to use it to remove distracting objects such as branches or trash from my images. When editing landscapes, I use the tool to clone out small objects and sensor dust. For more complex removal jobs, I’d still suggest using Photoshop.
What’s Wrong with the Photograph?
I will be working on a photograph a friend of mine snapped while enjoying a walk in a park, and you can see it shown above. Nothing is really wrong with it per se – I think it’s a great, fun street shot. However, since Spot Removal is so simple to use, I would like to get rid of a small white spot right between the dog’s front legs. Take a look:

Let’s Get Rid of It!
Most of the time, Spot Removal works with just a single click. In order to remove the white spot (which may have been a chewing gum once, but let’s not think about that), first, select the tool by pressing “Q” on the keyboard. You will notice your mouse pointer has been replaced by a circle, which defines how big is the area to be affected. My settings are currently at 75 (Size) and 100 (Opacity). Let’s go ahead and just click on the white spot we dislike so much. Here’s what happened:

Now, if we remember that it was the white spot that bothered me most, Lightroom did a great job of removing it. Ok, so there’s part of a dog’s leg floating in the air, so what? Alright, fine. Maybe some of my settings were a little wrong to begin with… Thankfully, fixing it is very simple. Here are the options:
- Change the Size of the Spot Removal tool: to do that I can either adjust the slider with that particular Spot selected or remove it completely by pressing “Delete” on my keyboard. Then, I can place a new one that’s smaller. Before I place my Spot I can also change the diameter of it by scrolling my mouse wheel up (to increase) or down (to decrease), which is very handy and saves me time. Regardless of which way I do it, Size of 45-50 seems to do the trick much more accurately, but it’s still not perfect.
 There is no trace of a dog’s leg floating out of nowhere, true, but there is a hard shadow right on the edge of my Spot. If I make it any smaller, it won’t cover the whole white-chewing-gum-thing I’m trying to remove, so the only way I can fix this, after selecting the right Size of 45, is by cloning from a slightly different place.
 - Tell Spot Removal Tool where to Clone from: there are, again, two ways to do it. If you want to specify a different cloning place with an already placed Spot, click and drag the second circle to a more suitable place in the image. Alternatively, when placing a new Spot, you can click and drag it initially to bypass Lightroom’s attempt and show where you want it to clone from yourself.
 Much better!


Other Settings
 Not a complex tool, Spot Removal offers two modes – Clone and Heal. If you want Lightroom to strictly clone from a specified place, set Spot Edit to Clone. I find it to work best on most occasions, especially with random textures. In Clone, the Spot will also have a less defined, dissolving edge.
If you choose Heal, Lightroom will attempt to make subtle changes to the way Spot is filled. It lets you avoid direct cloning and, thus, is sometimes less evident, because new details are not identical to the source (that is why we had a hard shadow on the edge of our Spot before we moved it). It may also have rougher, more defined edges. You will notice that Spot Edit was set to Heal in our case and worked very well in the end. I may have as well set it to Clone, however, and the result would likely be just as good. Play around to see which one works better with each retouching you do.
If you want more of an overlay effect, you should also adjust the Opacity slider. In my case, I wanted the white spot completely gone, and that is why I used 100% Opacity. Had I used 60 or 70 percent, the chewing gum would be slightly visible with other detail, possibly, blending in better. Opacity slider is useful if you want to turn down certain detail of your image and make them less noticeable rather than hide them completely.
The Result
That’s about all there is to Spot Removal tool. Once I worked out my settings, I removed some more white spots that were too visible in the image. The environment may not have been that clean in reality, but for me, photography has always been about the way I see things, not how someone else does.

Don’t forget – you can use this great tool to retouch skin or remove bigger objects from your image. It may not be as powerful as Photoshop’s Clone Stamp or Spot Healing Brush tools, but then again, Lightroom is not about excessive retouching in the first place.
Spot Removal Tool Video Tutorial
If you would like to find out how the Spot Removal tool works in detail, check out the below video by John Bosley:
Spot Visualization Tool and Video Tutorial
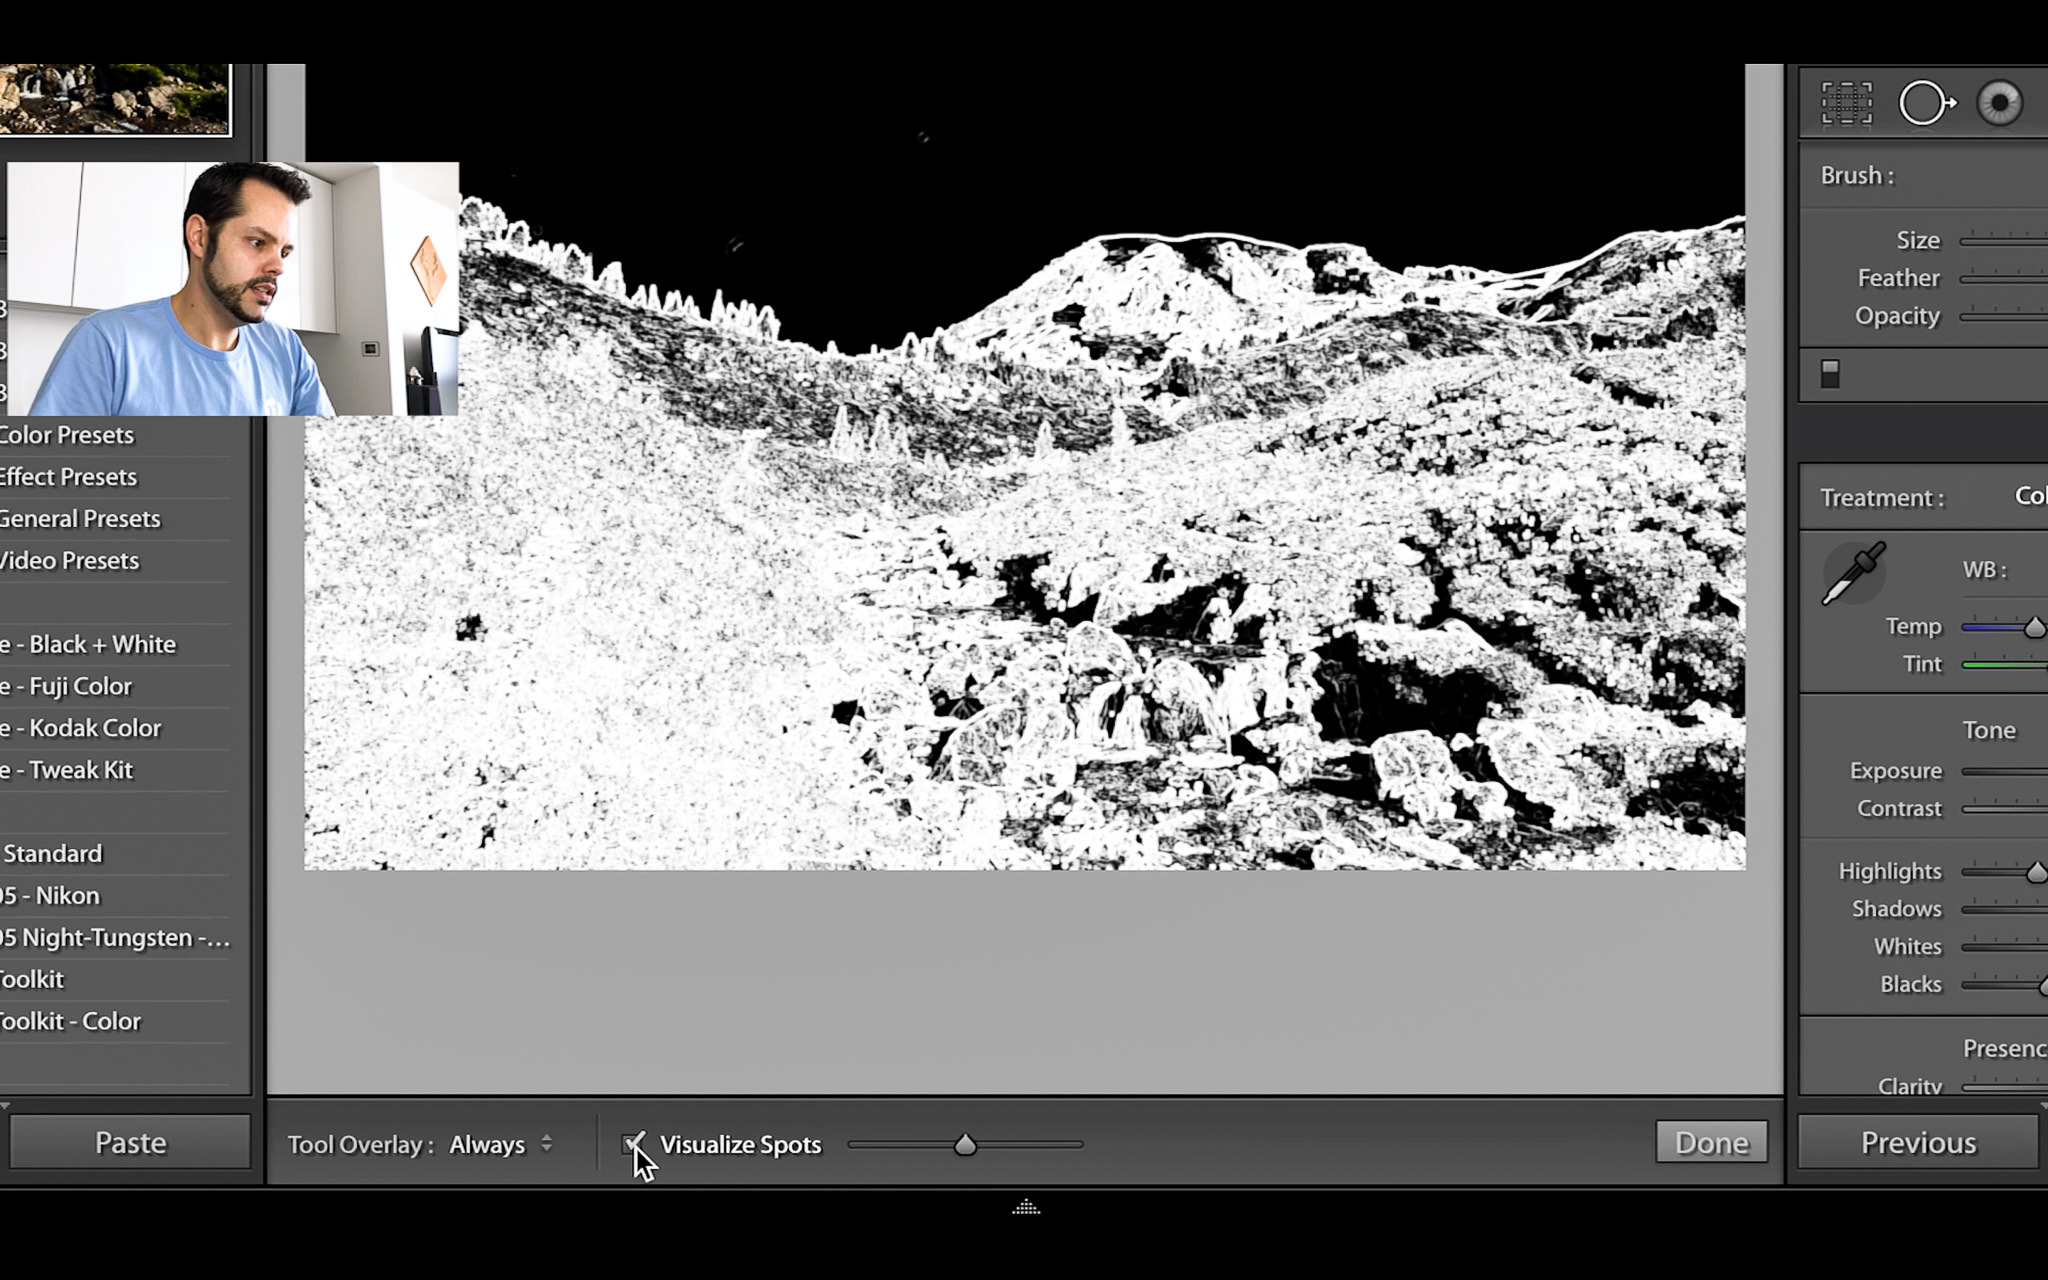
The spot removal tool also includes a spot visualization tool. This allows you to see spots in your image that you might have missed without it. It’s especially useful for tracking down spots created by sensor dust. Here’s a video of the spot visualization tool in action:
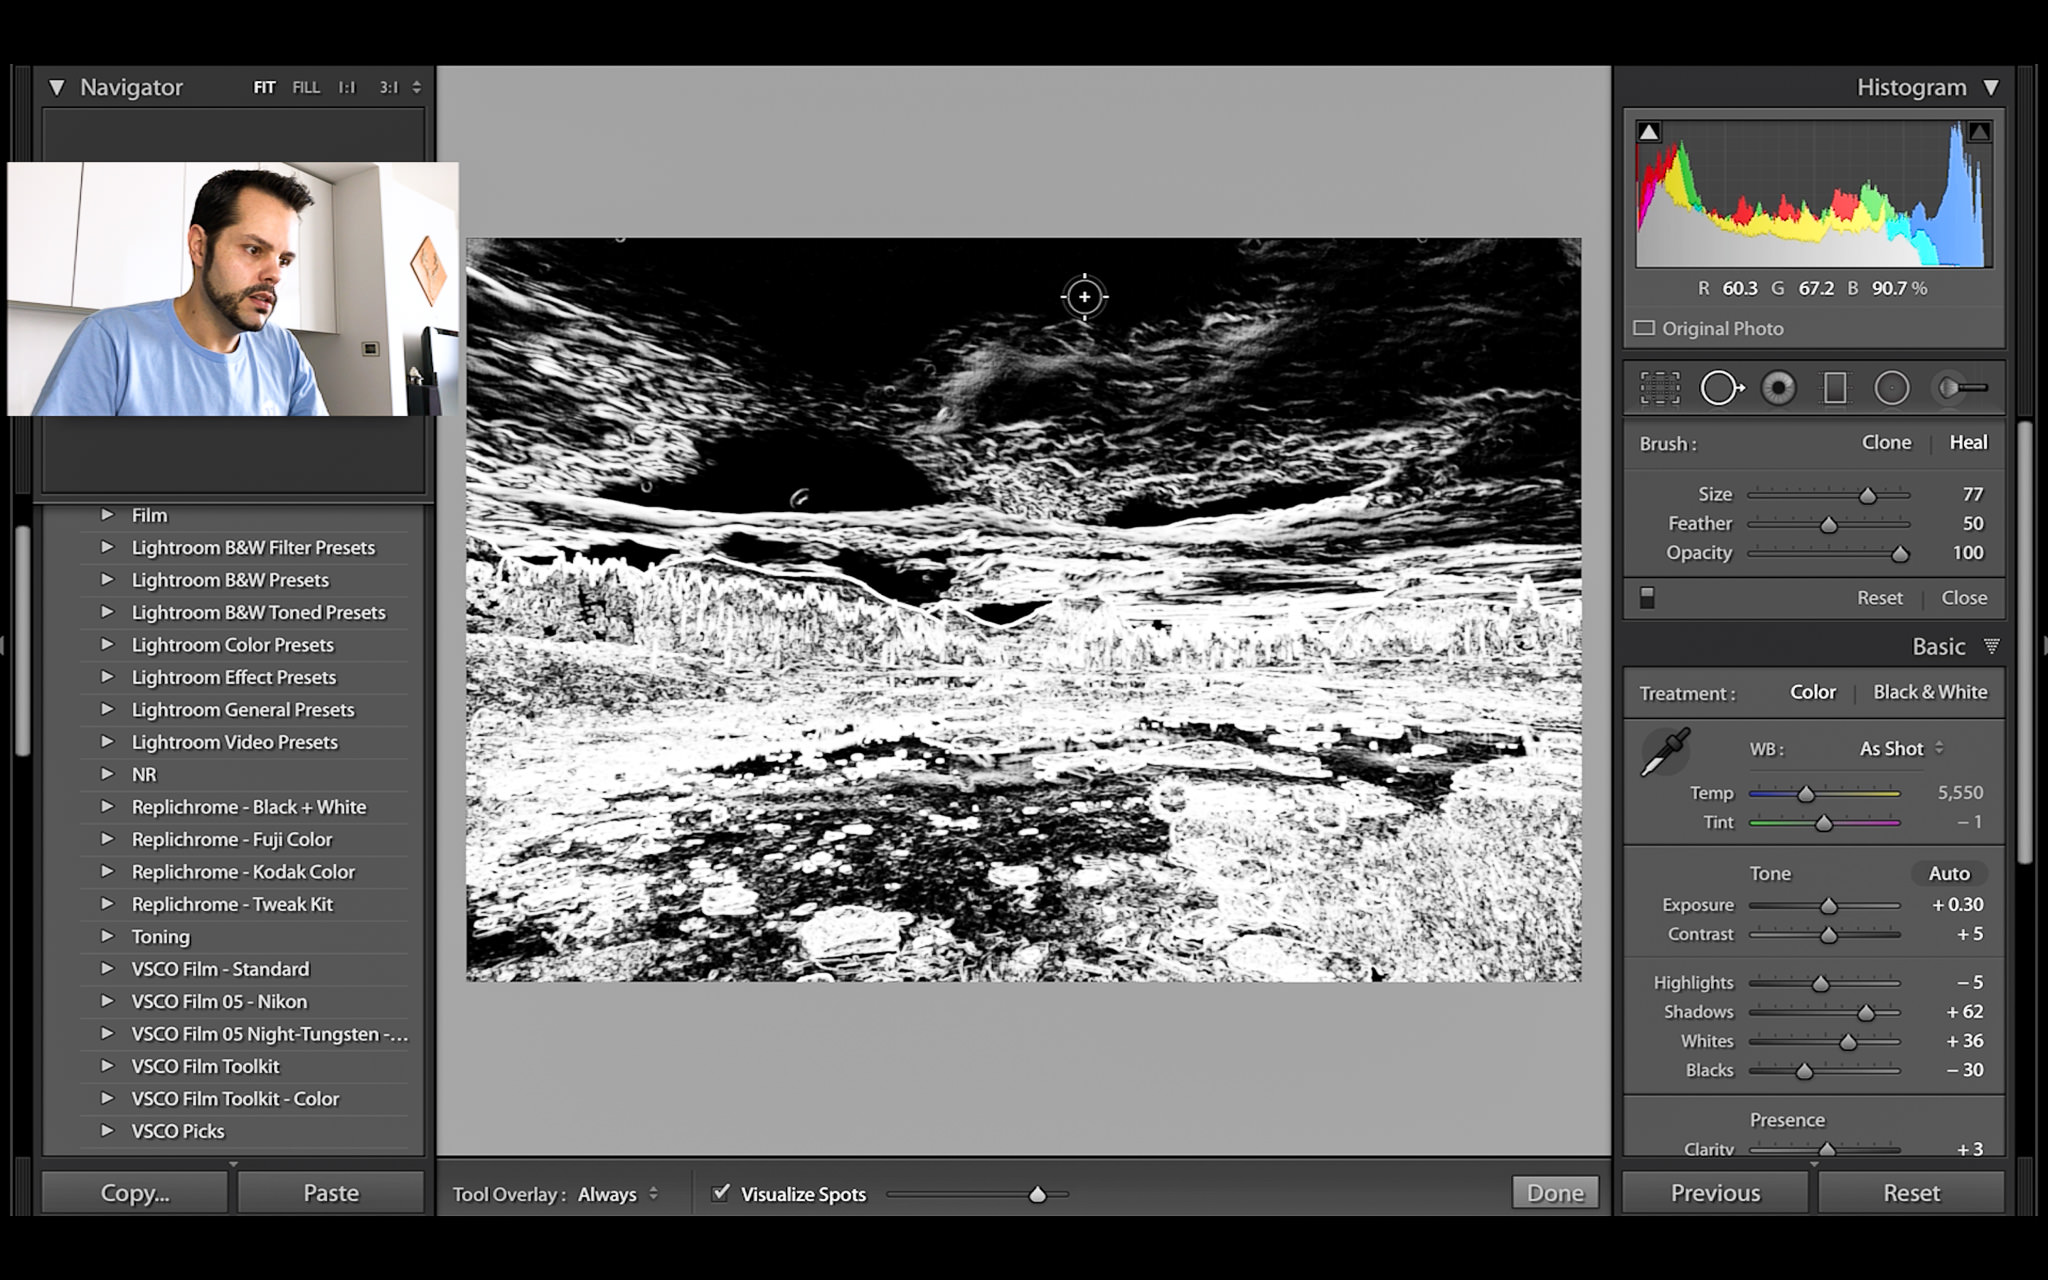
As you can see, by simply checking a box the entire image transforms, allowing you to more easily see sensor dust spots. You can always use the slider to adjust the sensitivity if you don’t initially see any spots. If you see too many spots, try decreasing the sensitivity or zooming in to an area to see how many spots are actually there. Many times, the spot visualization tool will show more spots than are actually in your image.

Of course, you should not rely solely on the spot visualization tool to find spots in your images. Many spots can be hidden in objects like clouds. These are very difficult to see with the spot visualization tool, yet easy to see when looking at the normal image. Spot removal works the same regardless of whether you use the spot visualization tool or not.
Since Lightroom is a non-destructive post-processing software package, all adjustments to images are added as invisible “layers” and each adjustment is recorded in the history tab. This means that tools like the spot healing tool can slow down your editing when heavily used. Out of all of the different tools in Lightroom, the spot healing tool tends to have the biggest impact on system performance. For that reason, we recommend that you apply spot healing after all other adjustments are made, since it is known to dramatically slow down editing in Lightroom.
Hi- curious if the clone tool is still working the same as when this was written.
***
Tell Spot Removal Tool where to Clone from: there are, again, two ways to do it. If you want to specify a different cloning place with an already placed Spot, click and drag the second circle to a more suitable place in the image. Alternatively, when placing a new Spot, you can click and drag it initially to bypass Lightroom’s attempt and show where you want it to clone from yourself.
***
I am running the current version of Lightroom classic and the tool does not allow me to re-position the clone area, and there is no second area to drag around the screen. The clone is done automatically and is often wrong…am I missing something here?
Thanks
Mark
Hey, thanks! Exactly what I was looking for.
Thanks for the information! I always have problems using this, but with your help, a few things got clearer!
I shoot almost strictly film (b&w); develop and scan myself. this is my dust removal tool. works great. tedious sometimes, but… Lightroom is all I have. no photoshop yet.
Great to know about this tool in lightroom.. I used to switch to Photoshop for this feature..
Thanks a lot..