Lightroom is an amazing program with a myriad of great features to improve the look of your photographs. In addition to all the image editing and cataloging tools, Lightroom also has some cool built-in features to make it a little more personal. In this short tutorial, I will show you how to brand and customize your favorite RAW converter. A little :)
1) Identity Plate
You can brand your copy of Lightroom for your photography business by inserting your logo to the top left corner of the software through the “Identity Plate” setup. You can get to the “Identity Plate Setup” by clicking on Edit -> Identity Plate Editor. Make sure to check the “Enable Identity Plate” checkbox, otherwise you will see the default Lightroom logo at the top left of the window. In the editor, you can either use a stylized text Identity Plate, or a graphical Identity Plate.
 Stylized text Identity Plate allows you to input any text you want to show at the left side of your Modules Panel. Use the drop-down menus to set the font, style, size and color of any text (or a part of it). Using text makes it very easy and quick to change the Identity Plate at any time.
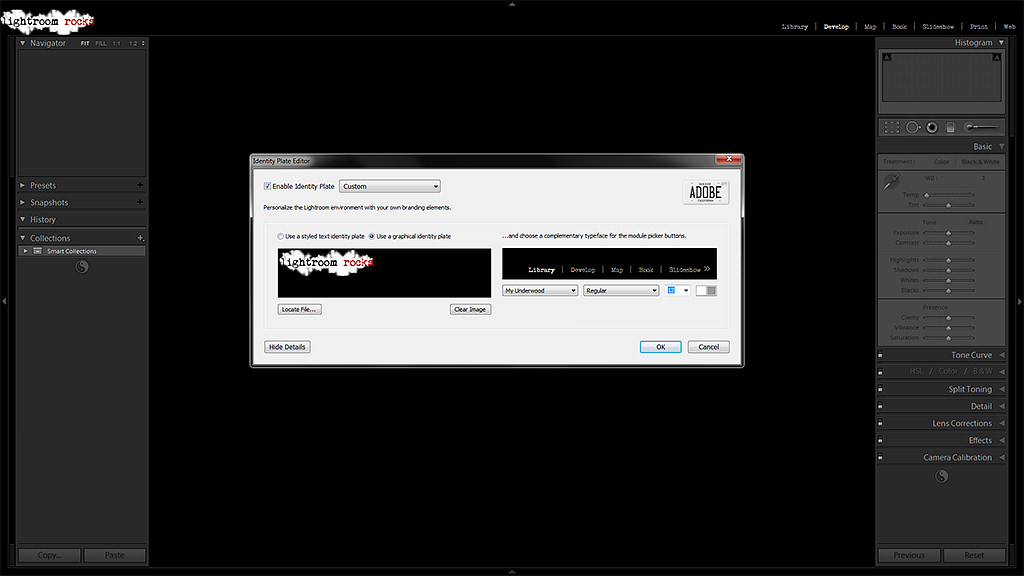 Using Graphical Identity Plate allows for more flexibility – you can turn any image into an Identity Plate. Using PNG instead of JPEG format offers transparency, which, again, helps you make your logo blend in better with the graphical interface of Lightroom. One thing you need to be aware of is the height of the image you want to use – keep it at about 50-60 px, otherwise Lightroom will not fit it in the narrow Modules Panel.
Tip – if you want to see the changes live as you make them, make sure to keep your Modules Panel (top-most panel in Lightroom) down before opening the Identity Plate Editor.
2) Changing Module Pick Buttons
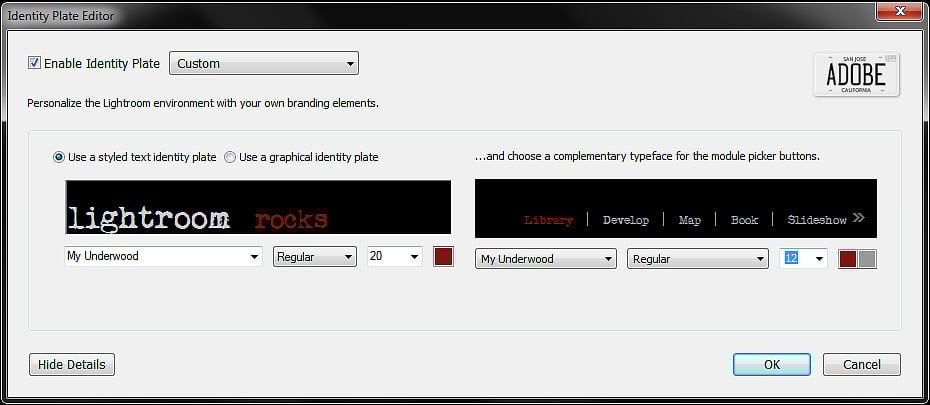
While you cannot change the actual names of different Modules in Lightroom, you can change their font, size, style and color so that they compliment your Identity Plate. You can use the same font you use in your logo or pick any other font you like. Within the same Identity Plate window, navigate to the right side of the window where you see “Library | Develop | Map | Book | Slideshow” and change the font, style, size and colors. If the controls are not visible, click the “Show Detail” button at the bottom left corner of the Identity Plate Editor window:
3) Interface Preferences
 If you go to Edit->Preferences… and click the Interface tab, you will find a number of other settings you can adjust to make Lightroom a better environment to work in.
“End Marks” are graphical elements you can find at the end of left and right Panels in Lightroom, as well as some other places throughout the Interface. You can either pick one from the drop down menu or disable them altogether. You can also change the Font Size used in the program, however you will need to restart Lightroom in order for the changes to take effect.
Next down are the “Lights Out” options. Lightroom allows you to dim or completely turn off all elements of the program except for the image itself for preview purposes (press “L” to go to “Lights Dim” or “Lights Off” modes). Choose the color you want the screen to go to from the drop down menu when you dim or turn off the interface (default is Black). You can also specify the percentage of “Lights Dim” mode (default is 80%). Along with that, in the next section of the Interface Preferences window, you can change the background color of Lightroom. You can even pick a “Pinstripes” texture if you like. Play around, see what fits you best.
Tip – I set my Lights Out color to white. This lets me preview the image in a black background when in normal working environment (Lights On) and see how it looks in a white one when I choose the “Lights Dim” or “Lights Off” viewing modes.
Although these customizations are rather small, they could make your work in Lightroom just a little more enjoyable. Plus, if you have a photography business, it is always nice to show off your branding in front of your clients when they review images with you.
Roman,
I am new to Lightroom and this threw some light on how to turn normal images to branded ones. Though I felt somewhat tricky finally understood how to add brand logo or name.
Thanks,
Hey awesome article! But I still can’t figure out how to save my “logo” on my images? I have lightroom2
Roman,
Thanks again for more great tips. Will you be providing any tips on creating Presets, possibly sharing some of your favorite presets and/or referring us to websites that you get Presets from? I’ve just started playing around with presets that I downloaded from lightroomkillertips.com and they make the world of difference, although I still haven’t figured out how to create my own and how to copy the same presets to multiple pictures without having to go in and select the preset individually. Any help on this topic would be greatly appreciated.
All the Best!
I will, Chelsea, all planned! Before I do that, however, I’d like to write about all the Panels you can find in Lightroom, like this article.
Grear article! Can you write an article about how to use Lightroom as an organizational tool, to show us how to efficiently label and keyword after editing, and ultimately how to sharpen and resize photos for digital and print output? Thanks!
It’s in my plans, but I figured I’d get there step by step first explaining the panels :)
Thanks!!! Great idea!
Though LR4 under my Mac has all of this, including Preferences is under the LIGHTROOM drop down, between the Apple and FILE drop downs upper left.
Yeah.. I need a Mac to know all that. ;)