Most of my previous Mastering Lightroom series articles were about specific techniques and features of Adobe’s popular post-processing tool for photographers. Of course, learning these techniques is very important, yet for someone who’s just started using Lightroom, other questions come to mind first. Where do you start? What do you do first? How to keep your catalogs uncluttered and organized? Answers to these questions can be extensive, but in this article, I will try to describe a very simple, basic workflow I often use myself. This workflow allows me to keep my catalogs tidy yet at the same time helps me get to actual post-processing very quickly and in just a few steps. Many of you already have your favorite workflows, I’m sure, and some will involve different or more steps than this one. With this article, my goal is to get those of you completely new to Lightroom up and running quickly so that, with practice, you can decide on your own approach.
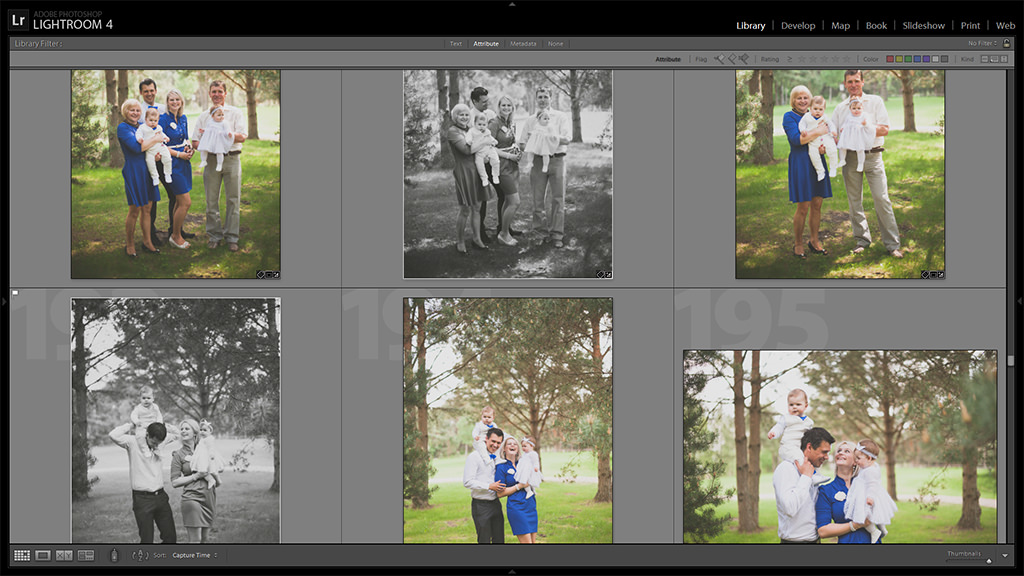
Table of Contents
1) Import
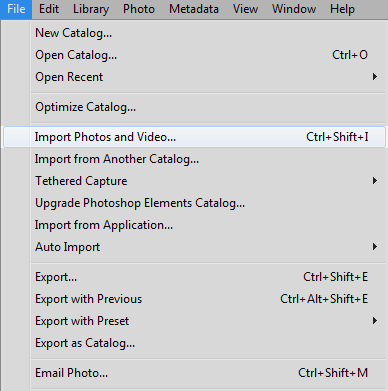 Lightroom is a catalog-based post-processing application. For someone new to such photo managing approach, it may sound complicated at first, but actually isn’t. What it means is that Lightroom doesn’t work with the original files, but stores information about them – along with rendered previews – in a set of files that make up a Catalog. We’re not going to talk about advantages and disadvantages of such a system, suffice to say both are present. More importantly with Lightroom, in order to edit images, you first need to import them into the Catalog. To import your images, start Lightroom and select “Import…” from the bottom of the left-side panel while in Library module (hit “E” to engage Library module or select from the Module panel at the top of the screen). Alternatively, you can import photographs by selecting “Import Photos and Video…” from File menu (Ctrl+Shift+I for Windows users).
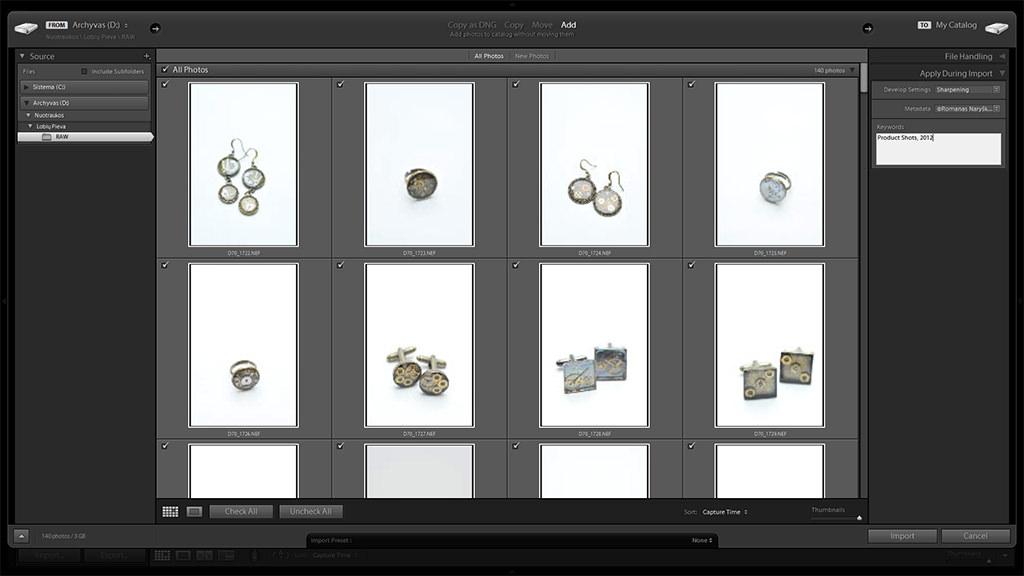
Once you’ve done that, the Import window will pop up. This is where you find the images you want to post-process and assign keywords to. We will be covering Importing more thoroughly in a separate article – information provided below is enough to get you started quickly.
- Choose Source – find the location of the photographs you want to import and edit within Lightroom.
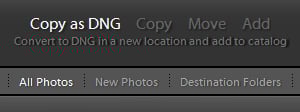
- Copy as DNG, Copy, Move or Add – this setting can be found at the top of the Import window. Choose how you want the images to be added to your Catalog here. If you’re importing straight from a memory card, the option of simply adding photographs to Catalog will not be available as you must store them on your internal or external hard drive. If you’re not sure whether you should use DNG or proprietary RAW format, read our “DNG vs RAW format” article.
- File Handling – not much to worry about here – I usually leave these check-boxes blank. Just make sure you select 1:1 previews. It will take longer for Lightroom to import photographs, but if you zoom in and out a lot to check image sharpness and noise, for example, 1:1 previews will greatly speed things up. If you suspect you may have duplicate photographs among those you want to import, you should check the “Don’t Import Suspected Duplicates” box. If you’re importing images from a memory card or flash-drive and want to back-up to another location, select the second check-box and specify destination.
- File Renaming – this tab is only available if you’re moving/copying images from another location, otherwise it’s unavailable. If you want to rename original image files you’re about to import (and copy/move) from, say, a memory card, use the provided renaming templates or create your own.
- Apply During Import – there are three settings available in this tab, all of which ought to be discussed in much more detail in a separate article dedicated to importing images. For our current purposes, keywords are most important here, so make sure to specify them. They will allow you to find related images much more efficiently through filters in Library module if you ever need to.
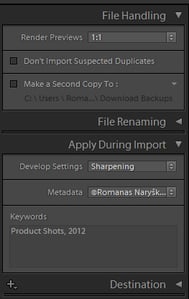
- Destination – this tab is only available if you’re moving/copying images from another location. If you simply want to add photographs to Catalog, these settings won’t be visible. Other than that, everything’s quite straightforward – specify where you want the files moved/copied to before import.
2) Pick or Reject
Lightroom has the usual range of filters available, including color and rating. All these filters will be covered more extensively in a separate article. For now, we just need the flags. I find them very useful and quick to use. Basically, Lightroom has two flags you can put on each photograph. One of them is called Pick and is assigned by hitting the “P” key, the other one is called Reject and is assigned by hitting the “X” key. In total, this can give you three choices for an image. You can either “pick” it, “reject” it or leave it without a flag. To remove a flag from a photograph – regardless if it’s a Pick or Reject flag – just hit “U” on your keyboard.
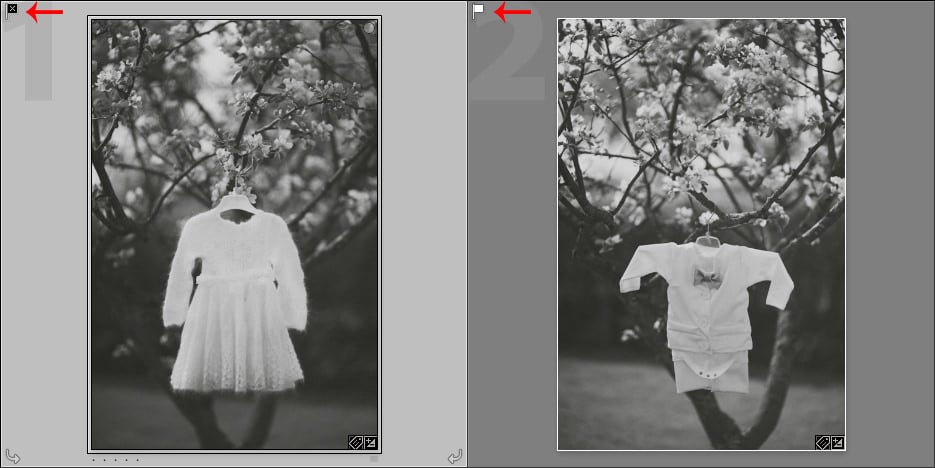
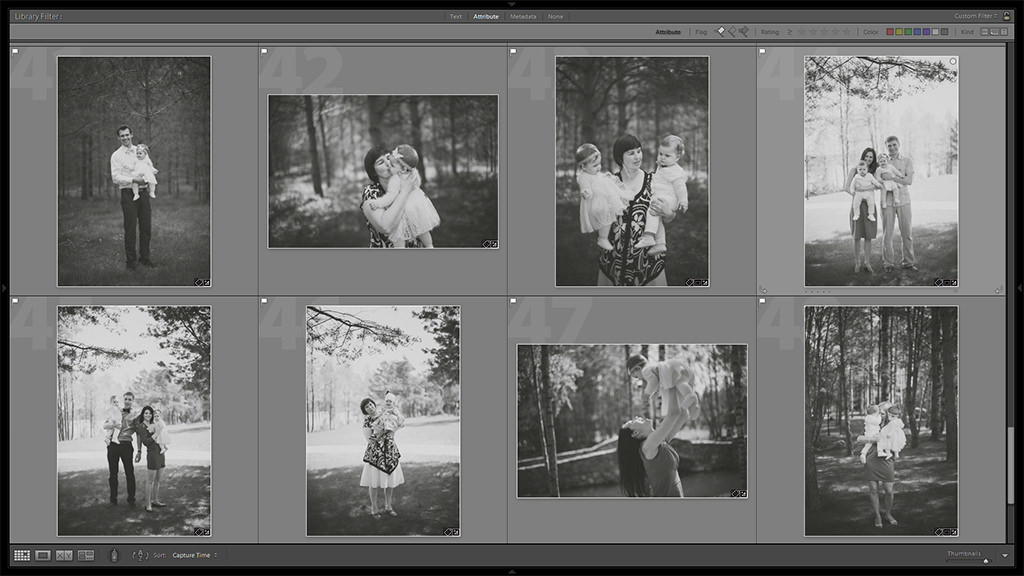
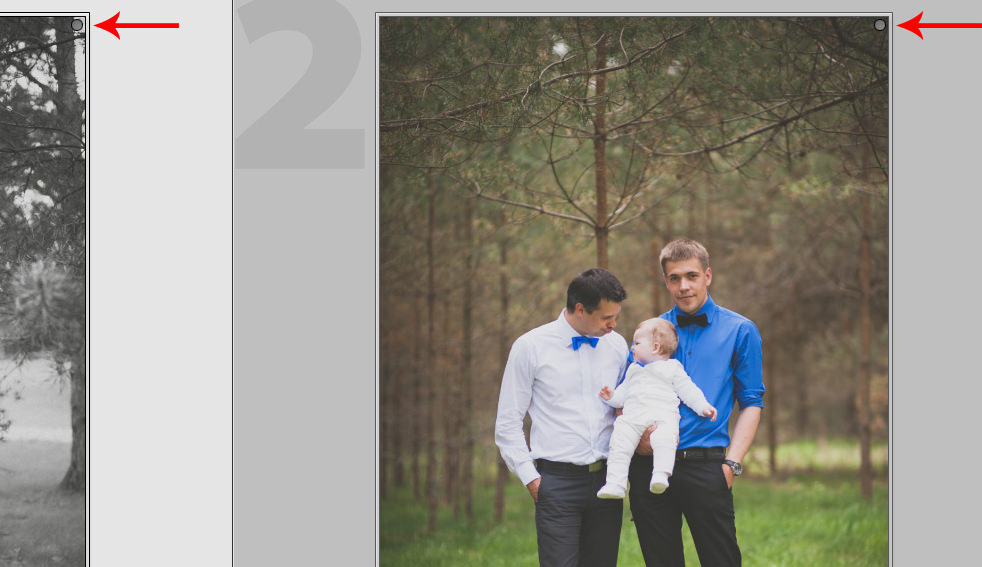
When going through imported images I am about to post-process, I mark them with corresponding flags right away. If I chose not to sort out photographs I don’t like prior to importing, I will assign Reject flag to them and, once I’ve looked through all the images, remove them by hitting Ctrl+Backspace (or choosing the “Remove Rejected Photos” from the “Photo” menu). I also find it very convenient separating images I want to be in B&W from those I want in color, and because usually I convert up to 30-50% of images to B&W for my wedding couples (less or equal to those in color), I assign the Pick flag to the ones I want in B&W as I sort through my images. In case it sounds a bit complicated, let me simplify – hit “X” on images you don’t like and want to remove, hit “P” for images you want in B&W, then delete (either from Catalog or hard drive) Rejected images by hitting Ctrl+Backspace and apply flag filters to edit color and B&W images separately. In the following screenshot, I have the Pick Flag filter enabled, which allows me to see just the Picked photographs to convert to B&W:
Alternatively, if there are images you are unsure of, you may mark the ones you like best with the Pick flag, mark those you want to remove with the Reject flag and assign images you want to convert to B&W to Quick Collection by hitting “B”, of which I will explain in the next section of this article. This way, you mark the images you like, those you dislike, and leave the ones you’re unsure of unmarked. You can then edit selected photographs by applying corresponding filter, as shown in the previous screenshot.
You may also choose to do the sorting in Library module as you get to work with large thumbnails, which quickens the whole process, but may not be such a good idea on low resolution monitors as it will be hard to see whether photograph in question is well focused or not.
3) Assign to Collection
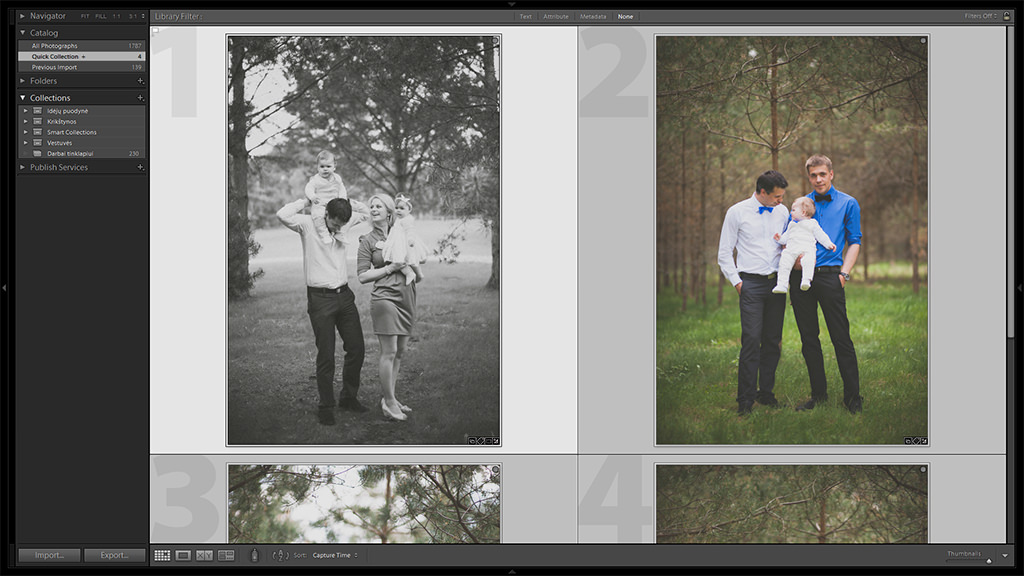
Collections are the best way to organize your photographs within Lightroom for quick access. They are much like simple folders within your operating system – you create a Collection and then assign images to it by drag-and-drop. It doesn’t physically copy the photographs within Lightroom nor hard drive, but acts more like a shortcut would. Basically, you still have only one image in Lightroom even after copying it to a specific Collection (or several Collections) – it’s just that you can access it from different places. For example, if you have a Collection where you store all portraits, but also a Collection where you store all your B&W images, you could place a B&W portrait into both Collections. Also, if you select that image in your portraits Collection and then go to your B&W image Collection where it’s also stored, it’ll be already selected there as well.
In any case, once you sort through your photographs and remove the ones you don’t like, it’s best to put them into a separate Collection. What this does is allows you to easily find the images among all the thousands you may have in your current Catalog, but also prevents you from permanently deleting images from it accidentally. Removing an image while being in a specific Collection will delete it from that Collection, but not from the Catalog.
To create a Collection, simply click “+” on the Collections tab which you can find on the right-side panel. A menu will pop-up – choose “Create Collection…” and name it. You can either select the images you want assigned to that Collection after you’ve created it and drag-and-drop, or you can select them prior to creating a Collection and tick “Include selected photos” check-box as you create a Collection.
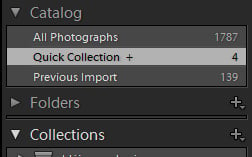
In the previous section of this article, I mentioned assigning images to a Quick Collection by hitting “B”. You can remove images from quick collection by selecting them and hitting “B” again. Images assigned to Quick Collection will be marked with a grey dot and will appear in “Quick Collection+” section of the Catalog tab on the right-side panel. It’s rather convenient temporarily assigning images to Quick Collection as if it were a filter if, for example, you want to convert them to B&W all at once or perform some other action to a set of several different images quickly. That is, of course, not the only use Quick Collection has. Collections will be covered more thoroughly in upcoming Mastering Lightroom series articles.
4) Process and Export
That’s it! All you’ve got to do now is post-process your photographs as you wish. With the help of either filters (flags, more specifically) or Quick Collection you now have color and B&W images separated so you can batch-process them quickly. Once you’re done with all the adjustments, turn off filters and select images to export.
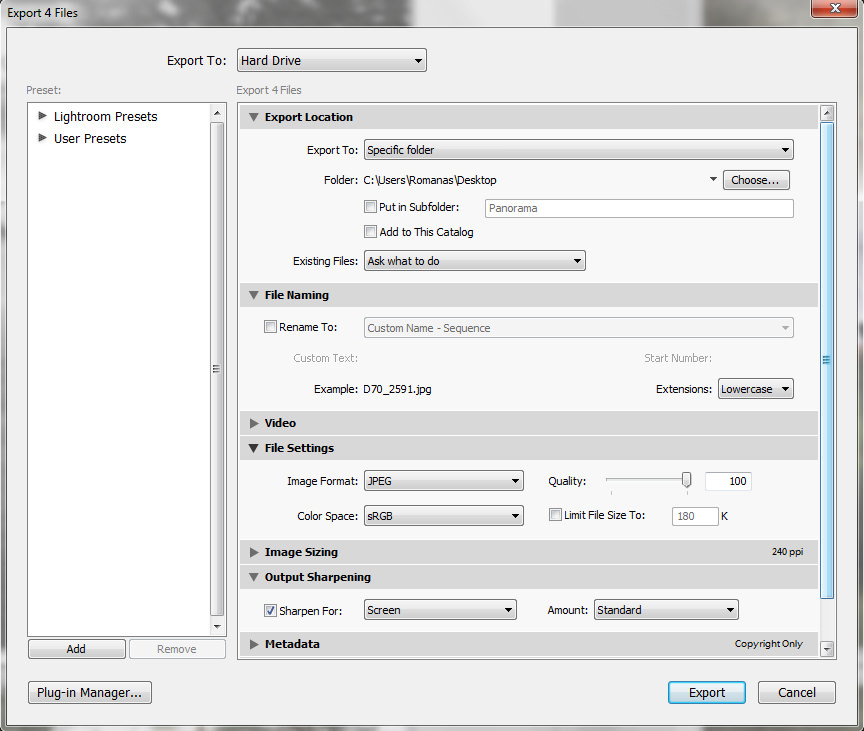
Exporting is easy – once you’ve selected photographs you want to export, right click on any one of them and choose “Export”->”Export…”. A new window will pop up and here are the most important settings you should revise (exporting will be covered in more detail in a separate article):
- Export Location – specify where you want Lightroom to save your images.
- File Naming – choose whether you want to rename the images on export or keep original file names. In case you do want to rename images, there’s a number of naming presets to choose from.
- File Settings – specify file format (JPEG, TIF, DNG, etc.) of exported images as well as quality.
- Image Sizing – if you want to export resized images, this is the best way to do it (for example, if you want to showcase your work on a personal blog, etc.). Specify dimensions.
- Output Sharpening – apply additional sharpening to exported files. Especially useful if downsizing images on export or for print, where you’d want to slightly oversharpen the digital file.
- Metadata – specify how much and what sort of metadata will be stored with the image once exported.
5) Final Words
It may seem to you at first that, for a very basic workflow, there’s quite a lot of points mentioned above. The truth is, however, you will only need to do a large portion of these actions just once or twice – most of the settings rarely need to be changed. In other words, what you’re left with is importing, assigning keywords, sorting through with the help of flags and separating B&W images from the color ones for quicker conversion. That’s it! Very simple. I use this workflow quite often – in fact, whenever I just want to process my images as quickly as possible and get back to shooting or writing. This workflow allows me to do just that without leaving my Catalog in a complete mess.
There are a lot of settings and options that, at first glance, require a lot more in-depth explaining, and that’s true up to a point. But to actually start working with Lightroom, you don’t need to know everything about it. You just need to know where to start – filling the blanks takes time and effort and can be done with practice. With this article, I did my best to show you one of the possible starting points. Hopefully, if you’re completely new to Lightroom, this article was of use to you.
I couldn’t use this article because it is not for beginners. It is for people that are beyond beginner. Even before the place where the author begins, there is a lot to know. It’s not their fault. Every tutorial I have ever viewed assumes that the viewer is up to speed on several things. A real problem for the viewer if they are not. A newbie won’t get much out of it they are turned off right away by getting lost in the first instruction.
Also, the images I see are not what I see on my Lightroom screen. I am using Lr (2015) or am I using Lr CC? I don’t know because I guess my computer has a few version on it and sometimes I am using one version and other times another. That is how much of a beginner I am at this point. I don’t even know why I am using one version one time and another the next.
So, as far this article goes, I will have to find a simpler version of this subject that holds my 5 year old computer savvy hand.
Some great tips here. I am a pro wedding and events photographer and created a workflow process that uses Lightroom to manage and edit the 1000s of images efficiently. I have shared my process on my blog, I hope some people find it useful:
Hi Romanas,
I just discovered your blog a couple of weeks ago. It’s awesome! :)
I’ve been using Lightroom for some time now but only a couple of month ago really started to dig deeper into the software. I always was wondering how to handle exported images.
See, my problem is this: I have my Lightroom catalogue with all the raw photos and so on, and once I am done editing them, I export to some folder in order to share the pictures. But this folder is not connected with the catalogue in any way. This is somewhat weird to me. How do you handle those exported jpgs? Do you delete them once you shared them or is there a way to just sort of link them to the RAW files they where created from and include them in the catalogue, so they are handled like the jpg+RAW pictures if you turn on to record both in camera, you know? I just don’t want to end up with all the unorganized folders of exported jpgs all over my drive.
Also I was wondering if there is a way to automatically convert selected RAW photos to jpgs once you are finished with editing and maybe don’t need the RAW files any more.
I understand, that it’s better to keep the RAW files or convert them to DNG, but some are just not as important, so it would be enough for me to just get rid of the RAW file and keep the final edited jpg in my Lightroom catalogue. I hope I make sense :)
Cheers,
Petr
Hey petr,
No, the JPEGs will not be in your catalog unless you create the folder (do so in Lightroom) or add an existing folder to Lightroom’s catalog. The easiest way to do this might be to go to the Library module and click the + sign on the “Folders” panel and choose “Add Folder.” In the file management utility that comes up, you can create the folder or navigate to an existing folder. You will be prompted as well to select which images you wish to include.
If you get rid of the RAW files, you can still do some editing to the JPEGs, but once the RAW are gone, they are gone, as I’m sure you already know! Oh, and DNG is just another form of RAW; it’s Adobe’s RAW version for the sake of compatibility. I convert all my RAW files to DNG upon importing. I mean, hek, I shoot Nikon (their RAW format is called NEF), but I don’t ever plan to use these NEF RAW files in anything other than in Lightroom—each camera manufacture has their own software to work with their own RAW files…I just use Lightroom, but there are times when Lightroom isn’t updated yet to accept a RAW file from, say, a brand new camera, so having your camera’s software might be very handy then. So DNG and JPEG are two different, unrelated animals.
And no, to the best of my knowledge there is no way to auto convert RAW to JPEG within Lightroom other than by exporting them.
Hope this helps,
keith
Hi, can you please let me know how you processed these pictures? I mean the one with the guy in blue shirt.
I really like the strong colors in the shirt but soft in the background (trees, grass, etc).
I really like it.
Thanks!
I’m not sure exactly how he did his adjustments, but try this:
first, adjust the white balance to how you want it. Next, try opening the shadows, reducing highlights, and setting your white and black points.
Then choose the camera profile of your liking (in the Camera Calibration panel, click the options to the right of the “profile” label). Then continue adjusting by adding a bit of a Tone Curve to bring out some contrast. Adjust the clarity as well. And then get to the HSL/Color/B&W panel and choose the HSL tab and choose the “Saturation” label. Click the little TAT (Target Adjustment Tool) in the upper left corner, and then head over to the image, clicking and dragging up or down on an area you want to either make more or less saturated, respectively. Watch your results and experiment accordingly.
Hope this helps.
I think nice to have all light room tutorials in separate sub menu or tab. Right now need to search the website for previous light room posts.
Shak,
you can find all the Lightroom posts under Photography Tips section at the top of the website. Just go to Post-Processing Tips for Beginners to find them. We will make navigating easier soon, though, thank you for your suggestion!
Thanks for yet another very informative post. No matter how much one knows about Lightroom, it’s always refreshing going back to basics and discovering other people’s workflow tips.
Do you know of any compiled list of keyboard shortcuts for LR5, something ready to print and keep by the computer as a quick-reference? I’ve always worked via mouse only, and am starting to see the benefits of using the keyboard, but until I get in that habbit, a reference card would be most helpfull.
Best regards from Portugal!
JADiniz,
I’m not sure if such lists are available anywhere, but I will work on it myself right away and publish. Thank you for reading!
I love Lightroom, Roman. I’ve been using it ever since it came out with version 1. I’m still learning new things and using it in ways I had not done before. One of the first things you mention above is “keywords…..” I have 10 years worth of digital pictures, and while adding keywords is a never ending process for me (my older pictures may not be keyworded or have very few), they make it very easy to find certain pictures. If I want all pictures with all 3 of my nephews and my one niece together in one image, I need only enter all 4 names, and all images with each of the 4 names pop up!
I’m wondering if I can ask a more complicated question and see if you’ve had any experience with this? I recently started fooling with removing Chromatic Aberrations….I had one image I recently took inside of a church, looking up at the dome with windows and columns. There is a lot of noticeable purple and green fringing along the columns and window frames.
I can and have removed most of that fringing with Lightroom, but, now, I cannot seem to Export the file. I either get an “not enough memory” error, or, it looks as if the image is being exported, except there is no disc activity, and there is no file when the apparent export is finished. I’ve tried reducing JPEG quality as well as restricting the dimensions in an effort to reduce the final output file size, but I still cannot get it to Export. Maybe I have to go really low?
When I go back in the LR history, before I checked the remove Chromatic Aberrations box, I can then Export the file.
Have you ever seen anything like this? Sounds like a bug, and I need to enter a trouble report on a Lightroom Forum.
Just an update here, Roman. Another thought crossed my mind. I’m wondering if my problem is being caused not so much by checking the CA box but perhaps is being caused by the total number of edits I have used? The particular image I’m having trouble with has some 30+ edits to it.
I was finally able to “fix” this problem. What I did was to go back in history to right before I checked the CA box. Then, I exported the file, full size, as a TIFF. Then, I reimported that TIFF. At that point, the number of edits basically has been reset back to 0. I then proceeded to check the CA box and adjust the green and purple fringe sliders up a bit. Then, I was able to export the resultant file with no problem, as a JPEG. I’ve now done this twice with no problem.
This is what is leading me to think that you can only have so many edits, but I’ll do some more checking.
Hello, Richard, it’s nice to see you here!
I must say I’ve never encountered your problem before even though, sometimes, I do make rather extensive edits myself with quite a few changes. I’m glad you found a way to “solve” it, but I’m pretty sure we both think it’s much too cumbersome. Does it happen with any other of your photographs, or just one? Have you tried restarting Lightroom or your computer when it happened? Have you tried canceling any other action you may have made and not the CA removal? Have you tried, instead of canceling an action, clearing the History? History takes quite a bit of resources and makes Lightroom slower. Please, try my suggestions and let me know how it goes. If none of it works, I will try to replicate the problem myself.
Hi, Romanas.
I just tried sending you a reply, but something went wrong. Here it is again….hope it’s not a duplicate.
I have already tried to restart LR as well as my PC several times…..no help.
Now that I think about it, I have seen this problem before, but I don’t think I had used CA removal before. I’ve seen it only with a few RAW files from my D600 I bought in December. Those files are about 35 Mb in size.
What I did yesterday was to go back to that problem file and make a virtual copy of the original RAW file. Then I checked the Remove Chromatic Aberration box and slide the Green and Purple amount sliders to the right a bit. These were the only 3 edits I made. I was able to Export the JPEG at 80% quality with no problem at all.
So I think it is a combination of the rather large RAW file, my limit of 4 GB memory, and the number of edits. I don’t think, now, that it is necessarily the CA box I checked.
I’ll have to play around with this some more, but won’t be able to do so for another day or two.
Thanks for looking into this!
Both comments came in, Richard. I now removed the first one, don’t worry about it. :) I will wait for your update, really interested in this.
when I read your post, my first thought was lack of memory, then I saw you have 4gb of ram. I suspect that is causing the issue. If you can upgrade to 8gb, I *think* you will have fewer issues.