It’s challenging to photograph subjects that are extremely close to the camera lens, particularly when it comes to flash photography and lighting. For some lenses, the effective working distance is practically zero when trying to shoot at maximum magnification. It becomes difficult to achieve soft, even lighting while avoiding unwanted shadows. Luckily, there are still several ways photographers can cast high-quality light on a close subject – even if it’s almost touching the lens!
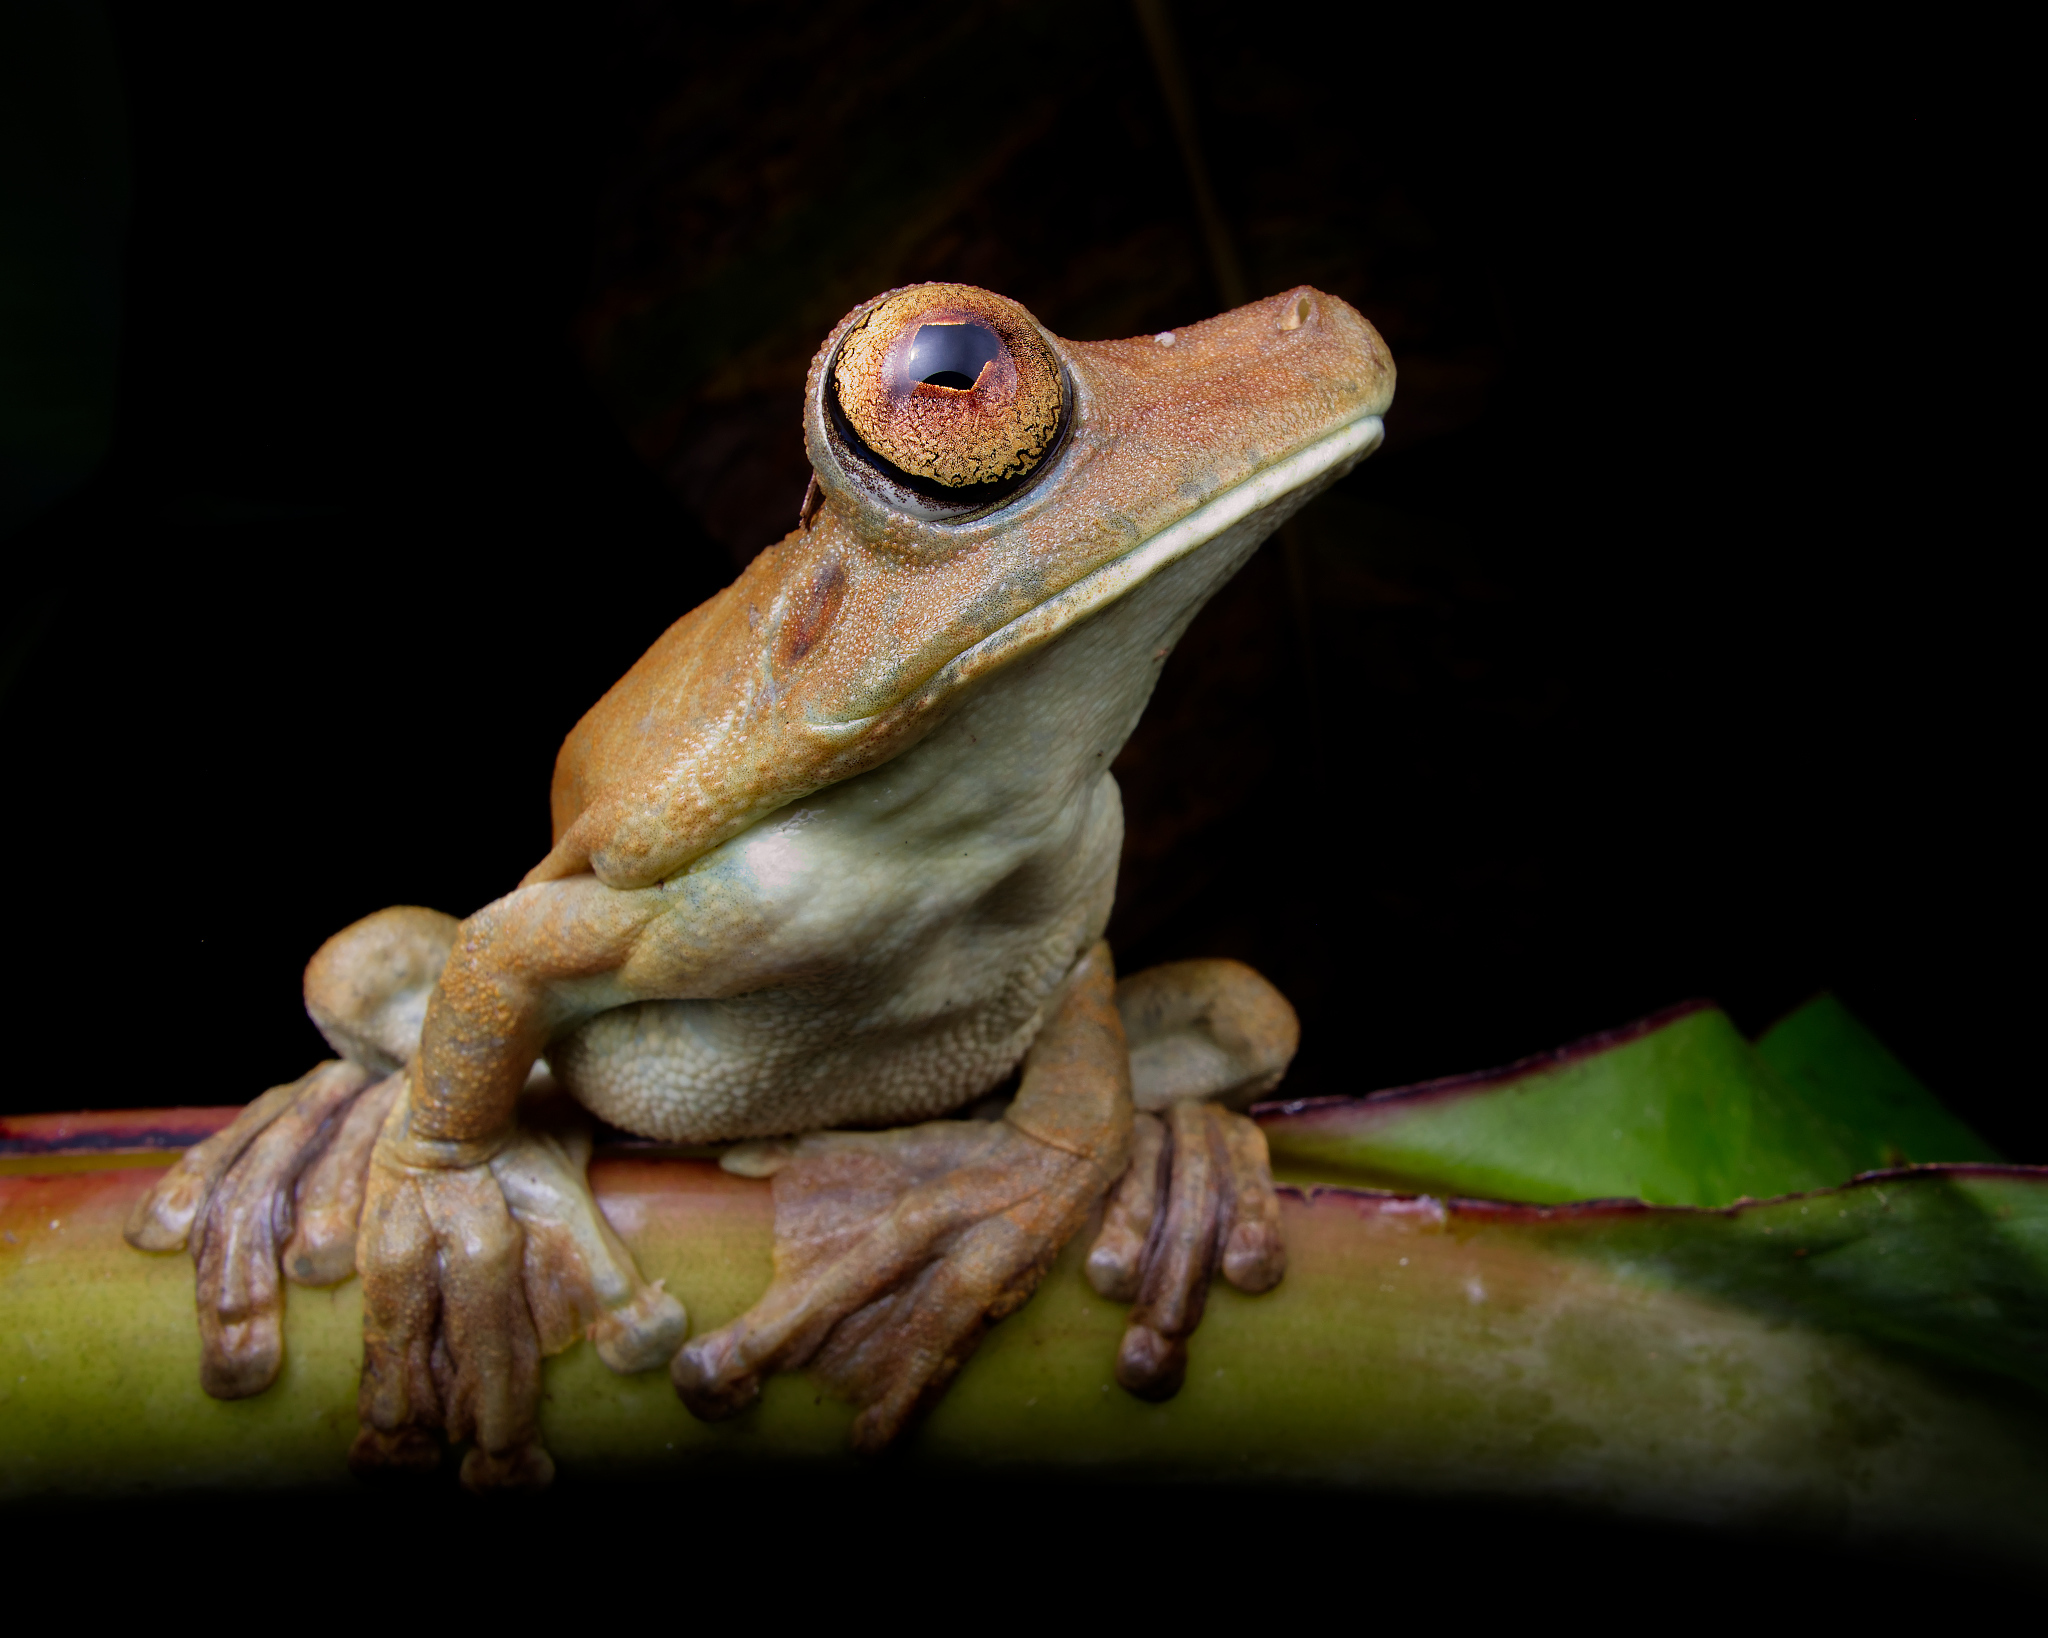
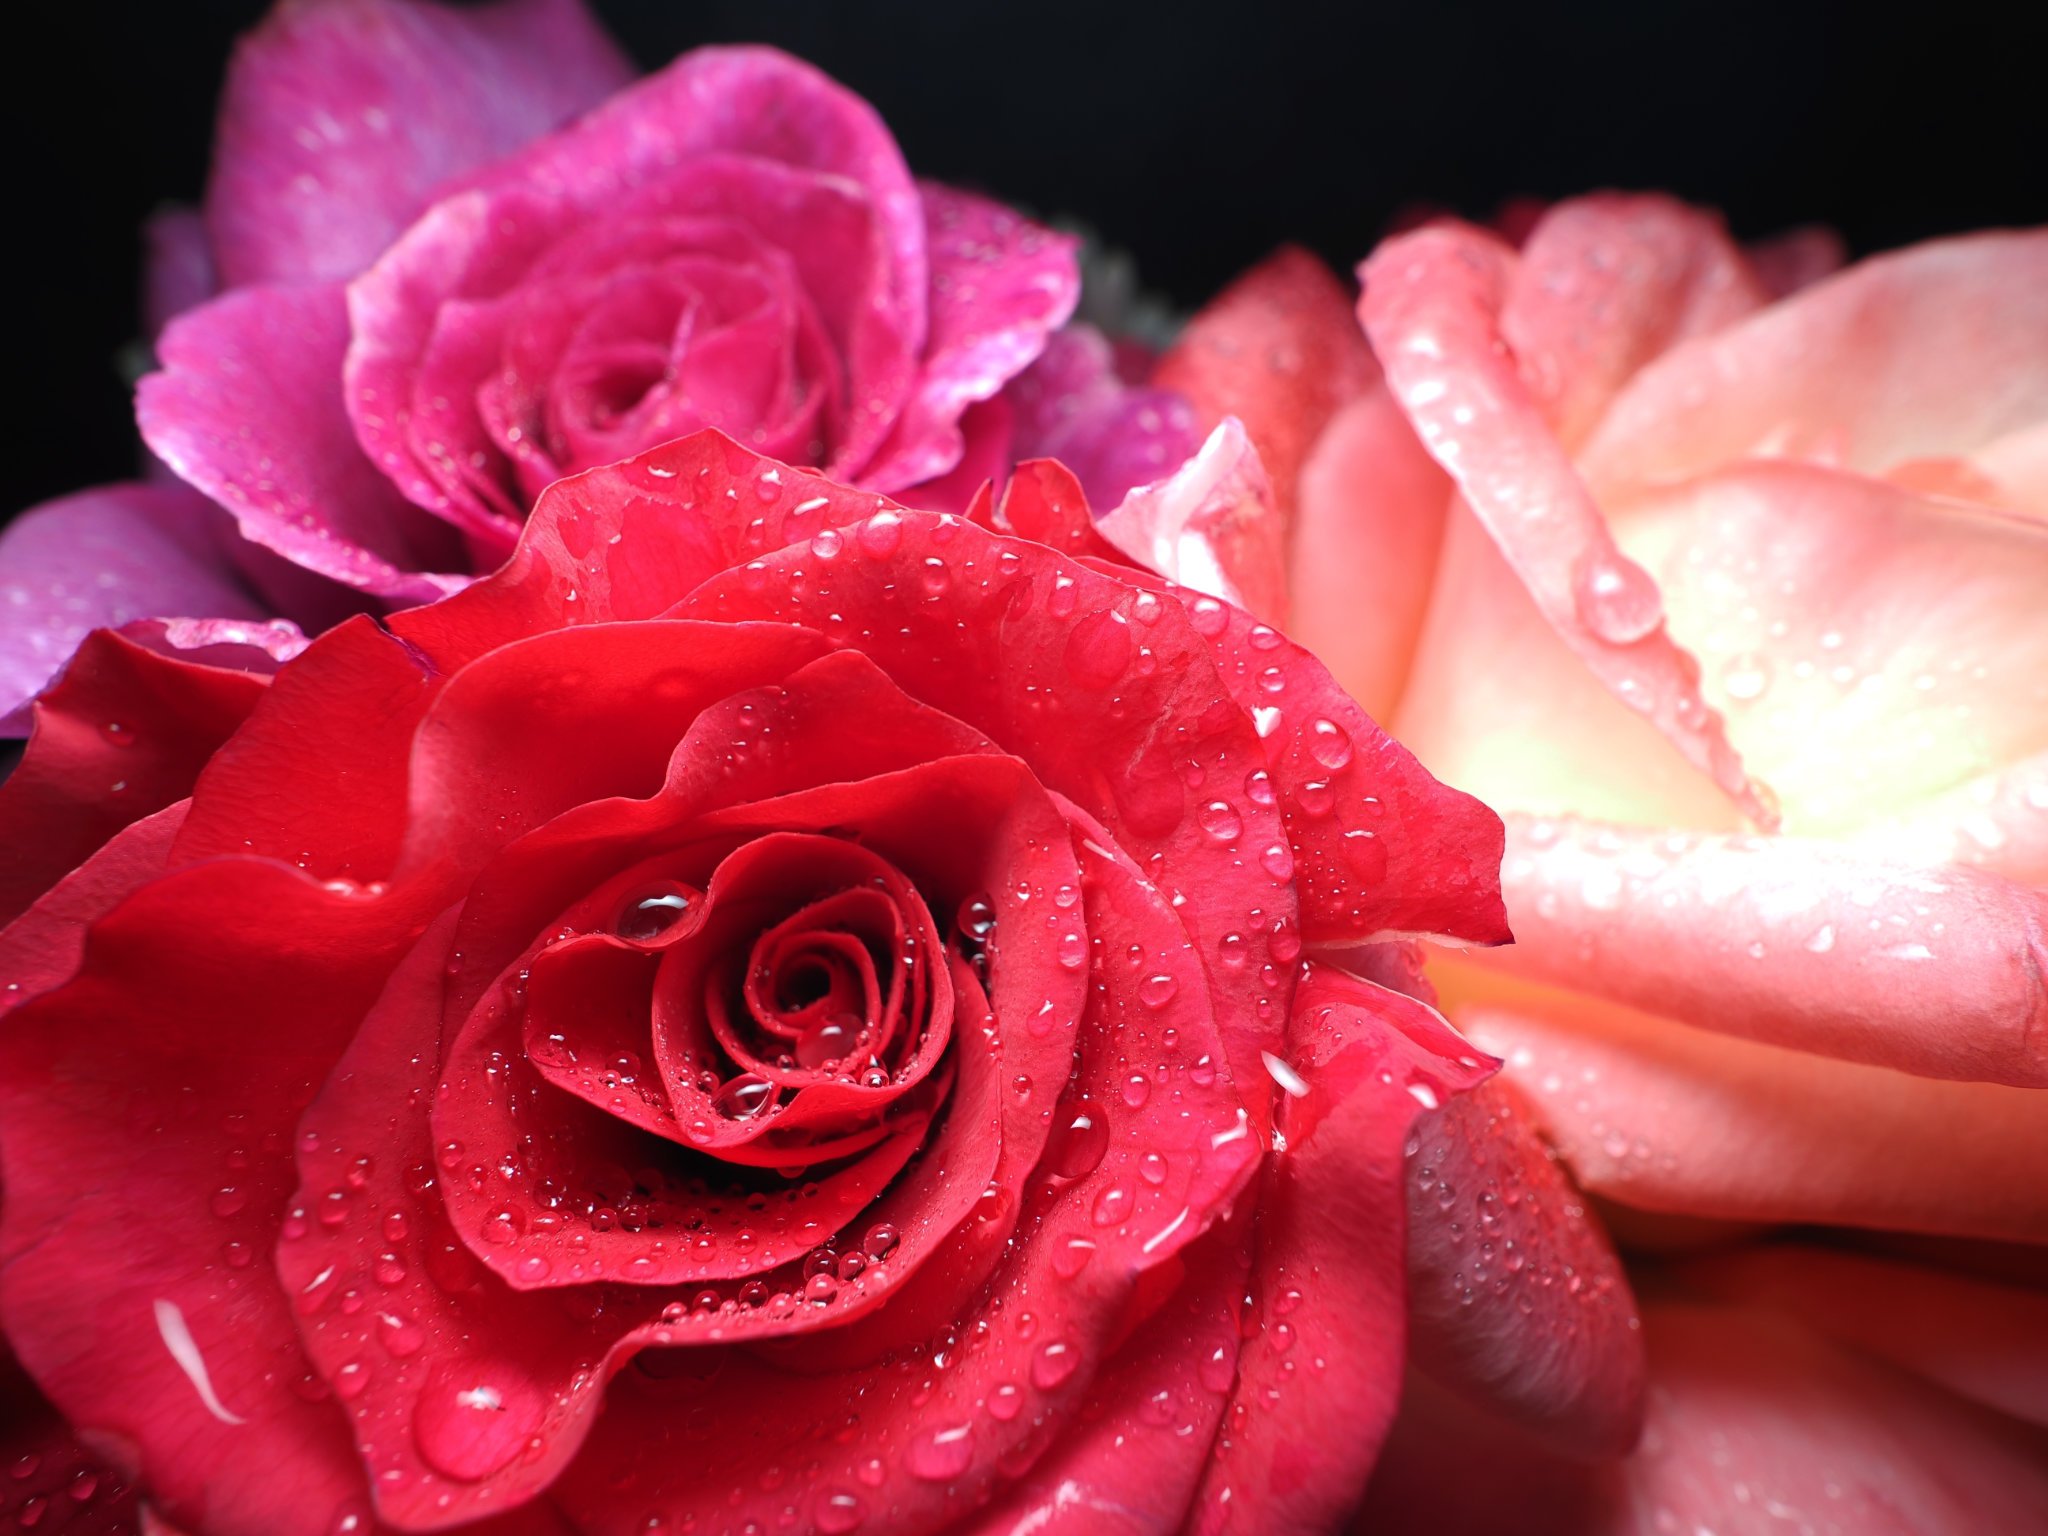
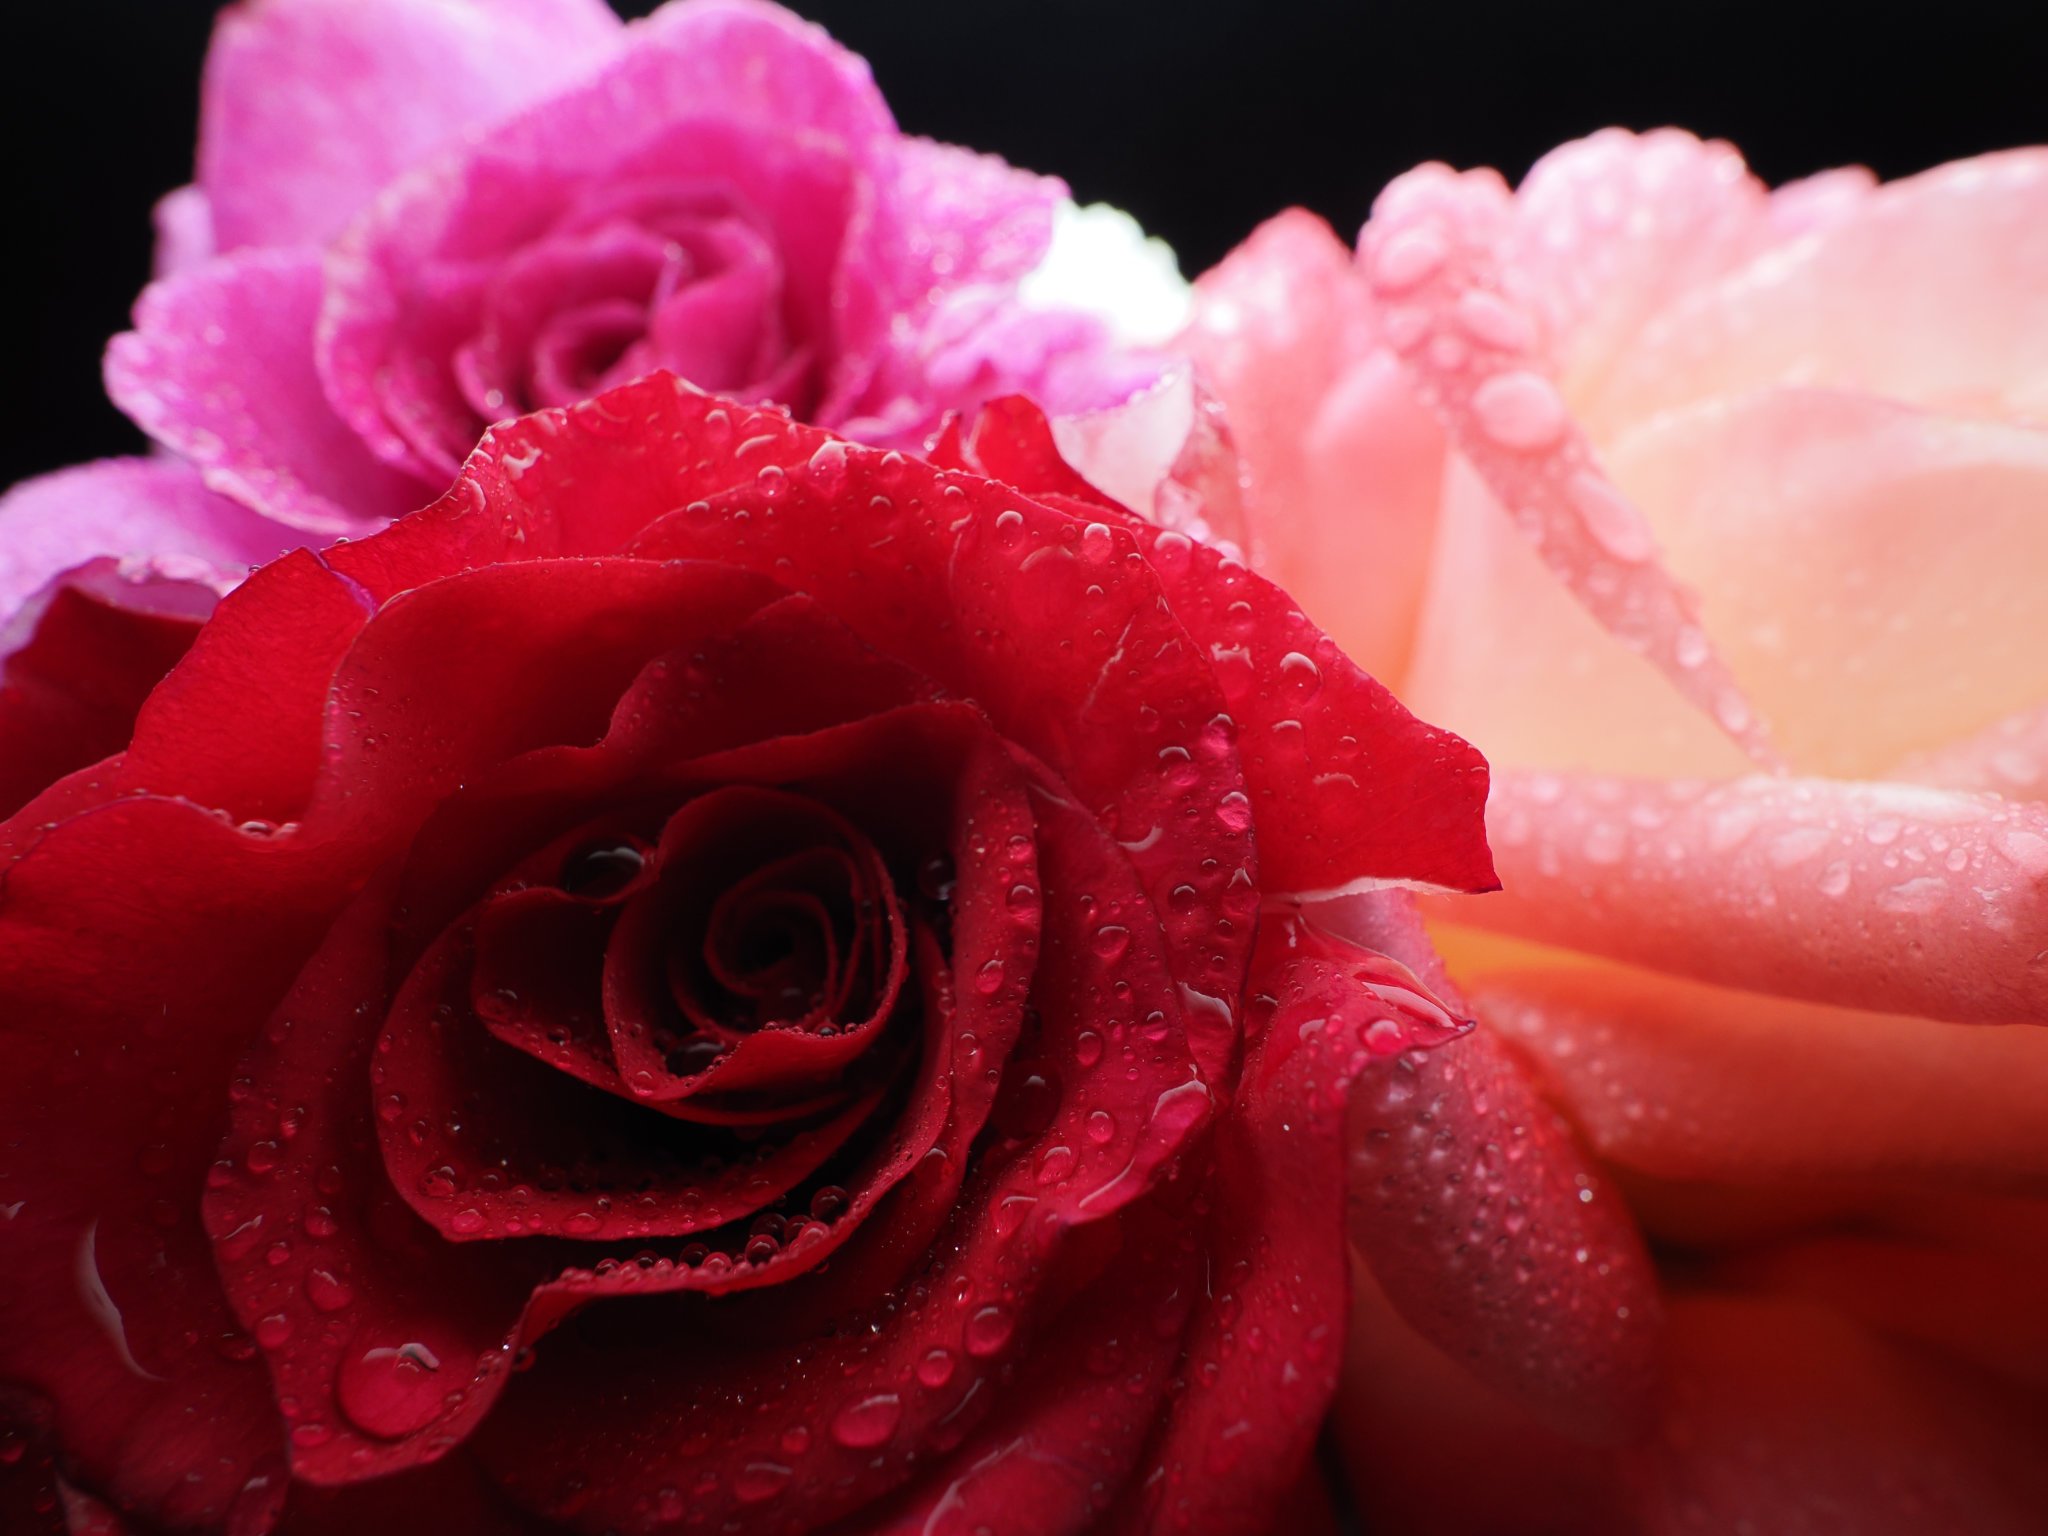
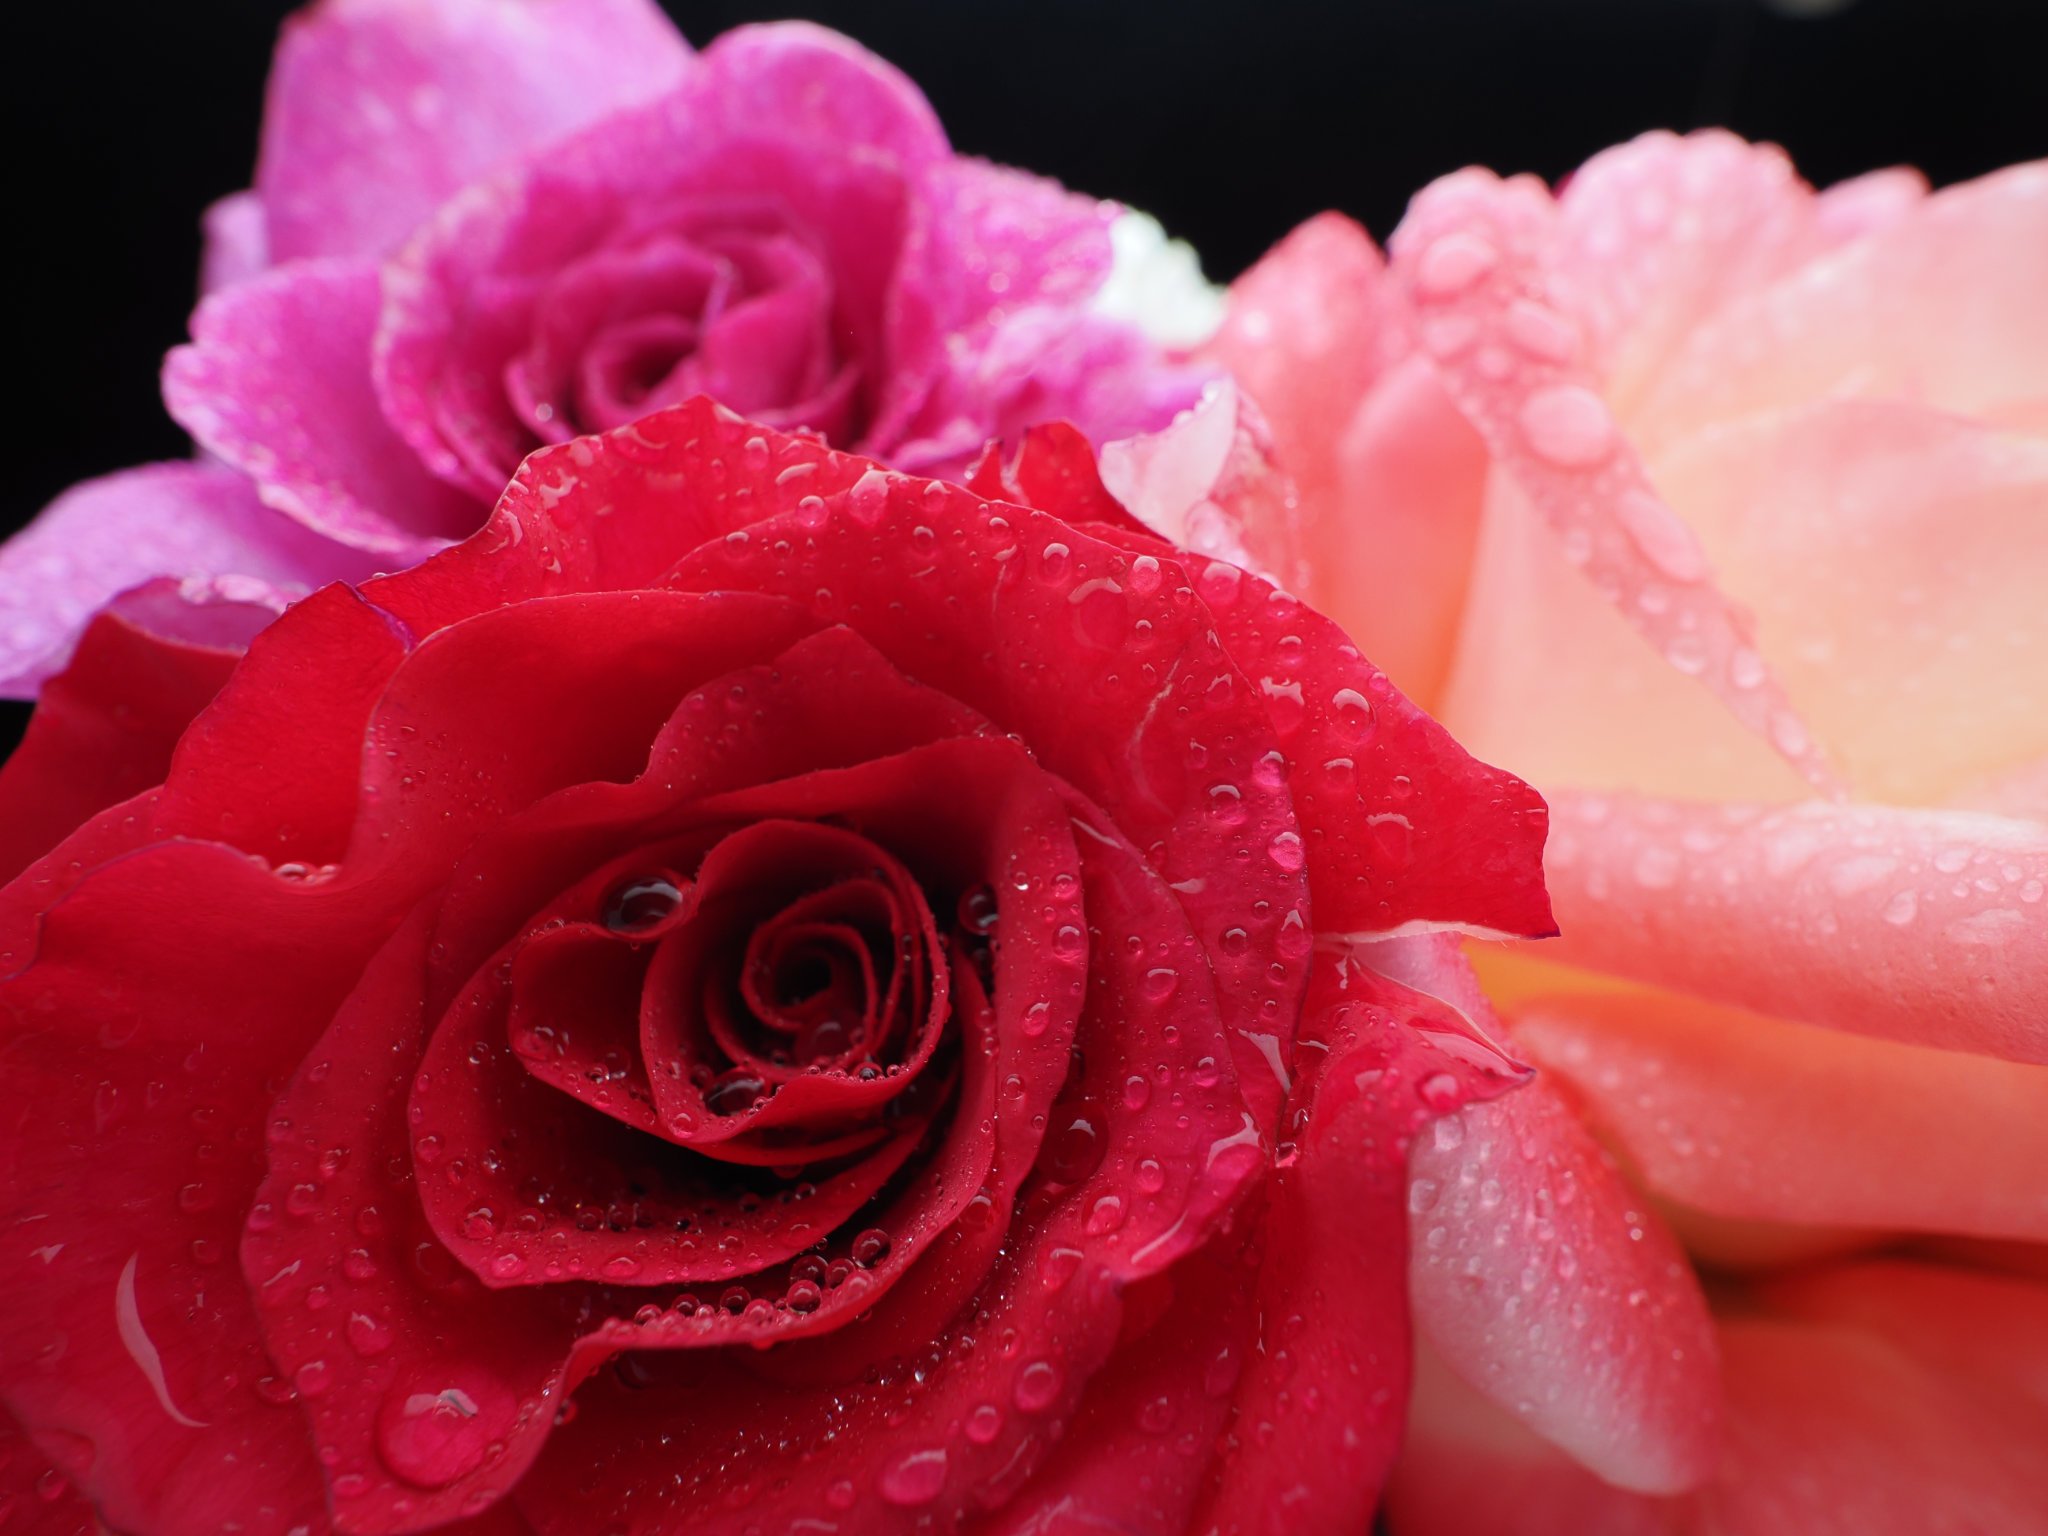
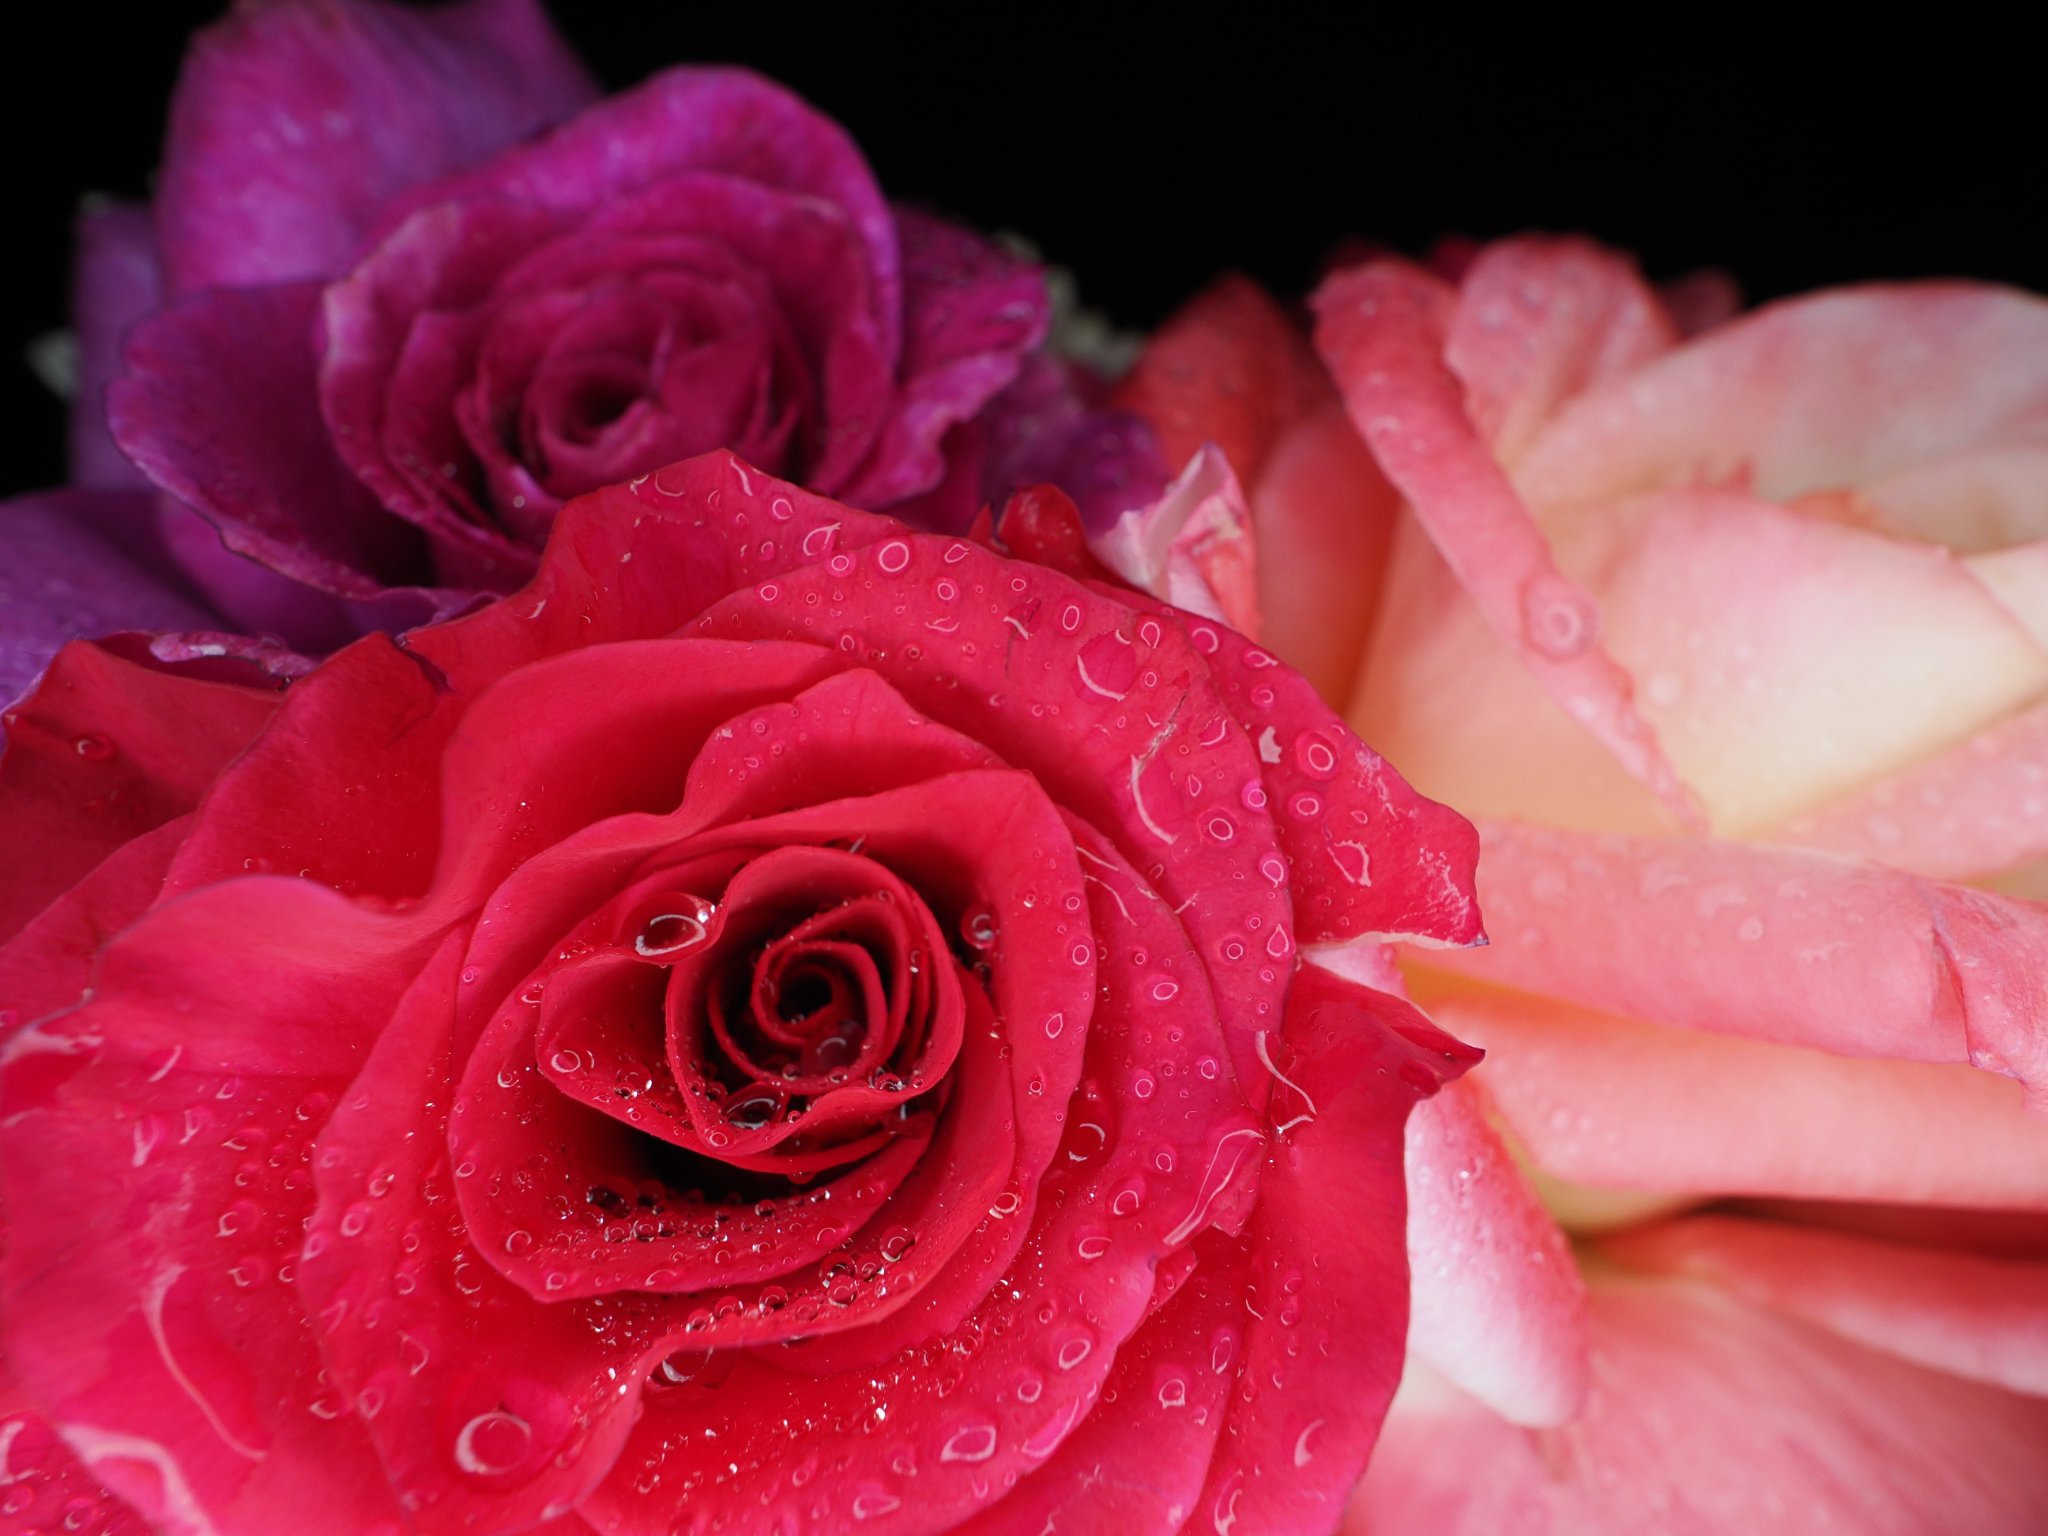
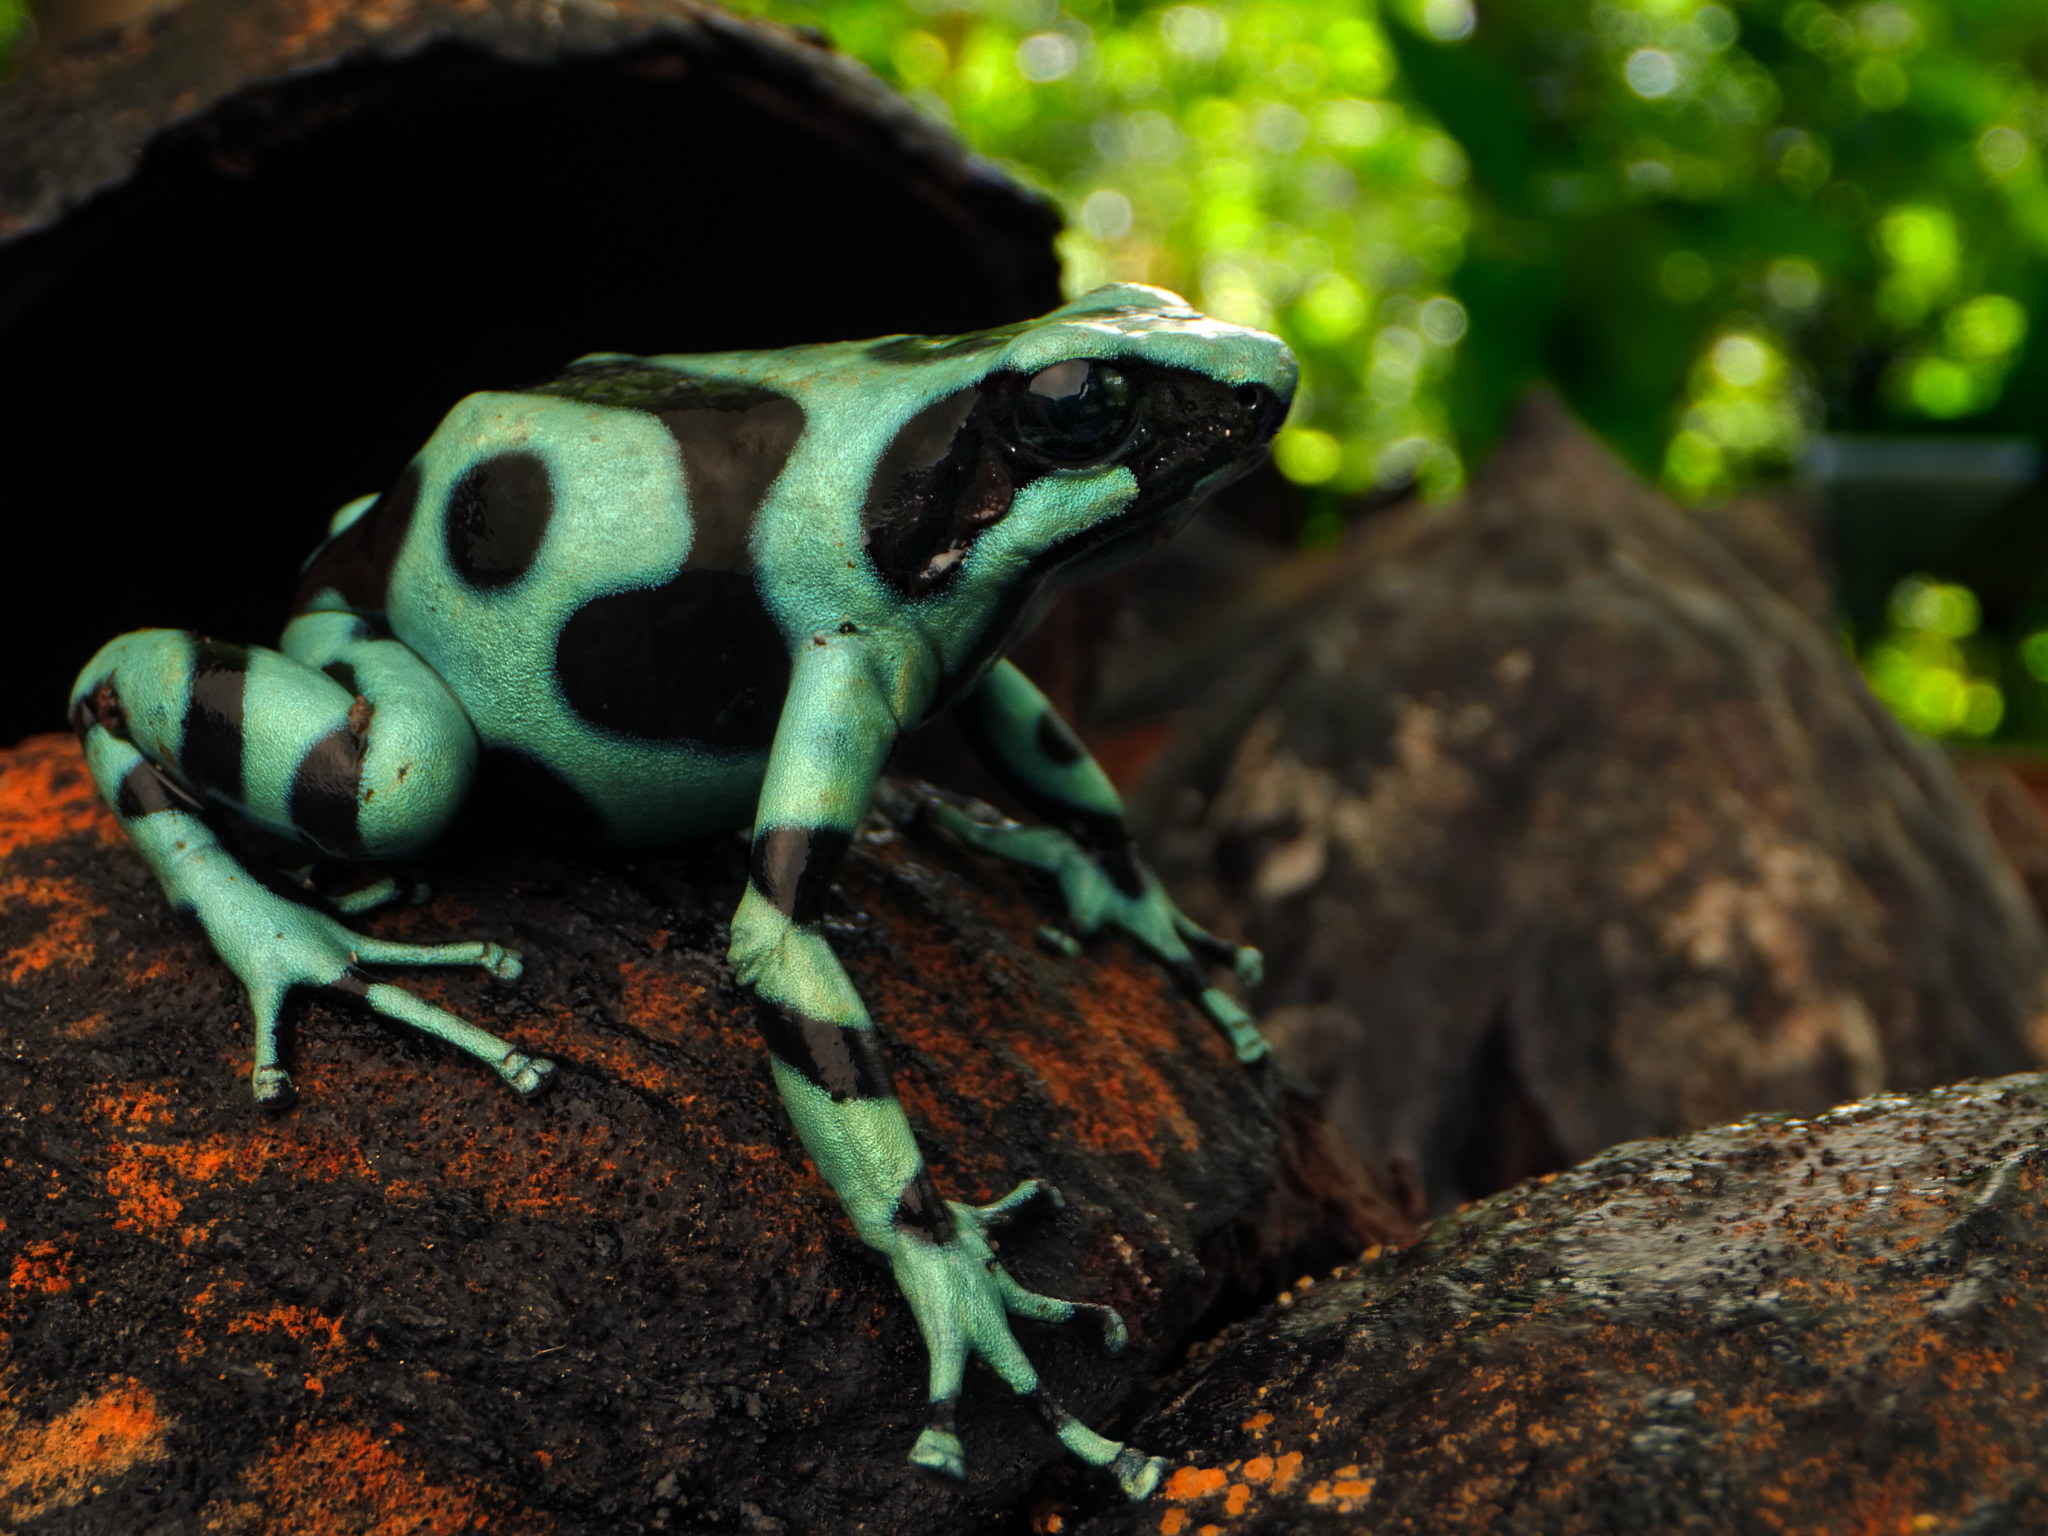
DC-G9 + LEICA DG SUMMILUX 9mm F1.7 @ 9mm, ISO 100, 1/250, f/11.0
Table of Contents
Challenges with Lighting Macro Photos
If your subject is a thumb’s width away from the lens, there are several lighting challenges that you need to address. For starters, it’s hard to cast light on the subject from an attractive angle. On-camera flash will usually be pointing way too high, casting bizarre light on your subject.
In order to cast some light on the subject so that it’s not predominantly shaded, photographers will instead place the flash super close to the lens or use a twin flash or ring flash (more on those soon) to eliminate the shadows. Either way, off-camera flash is usually used.
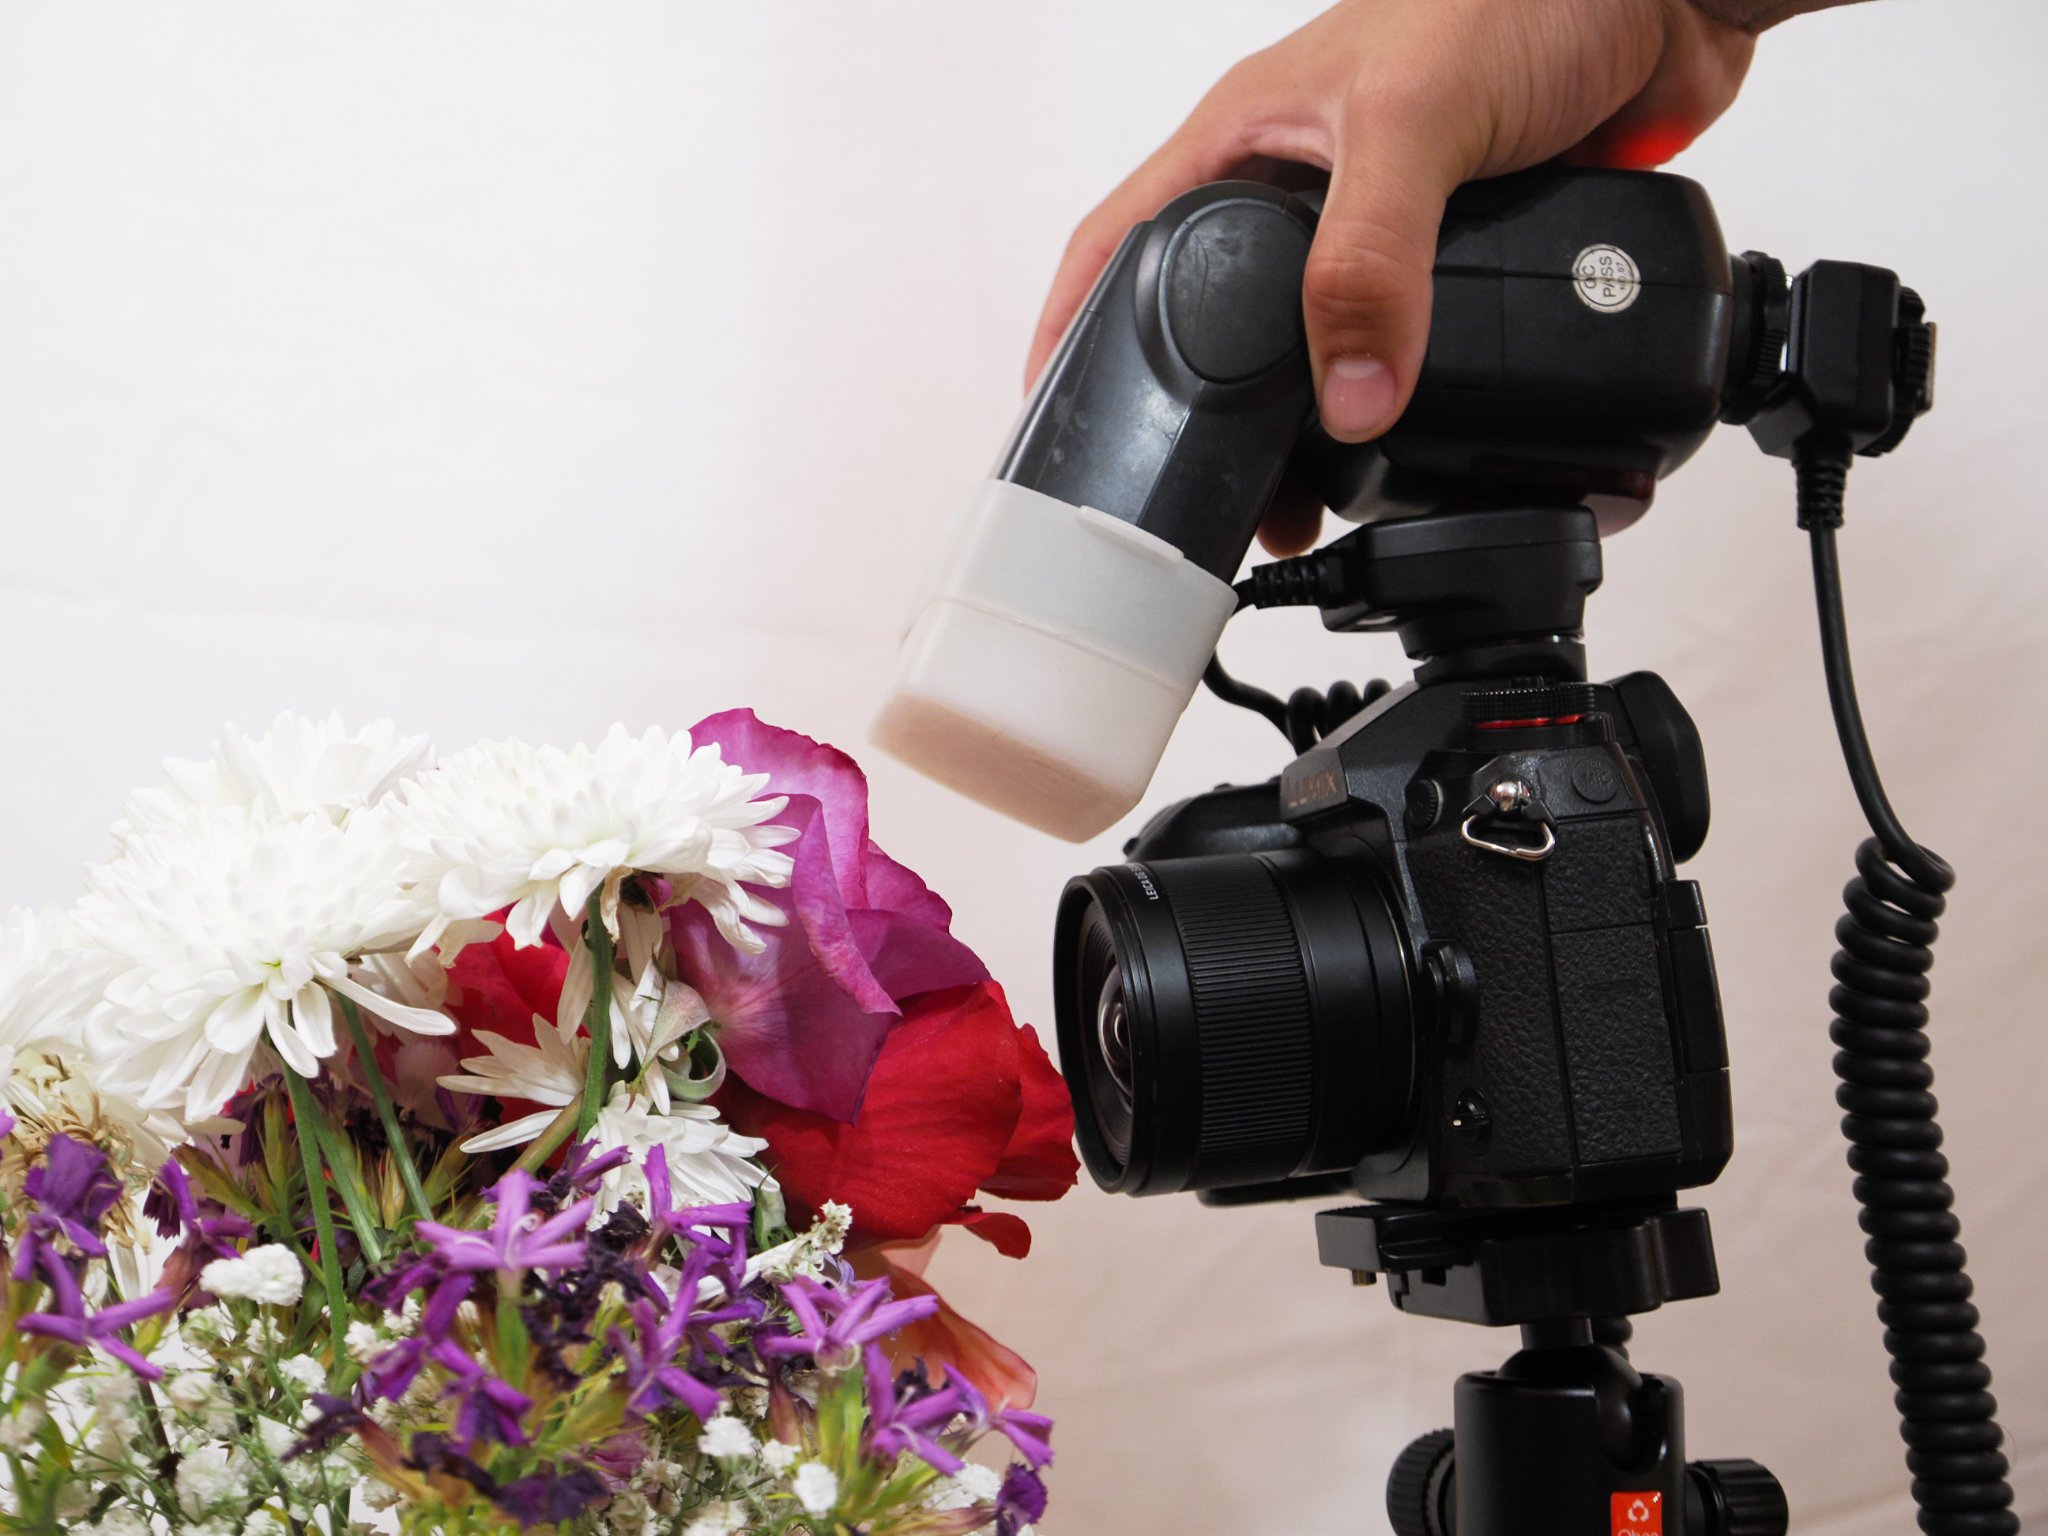
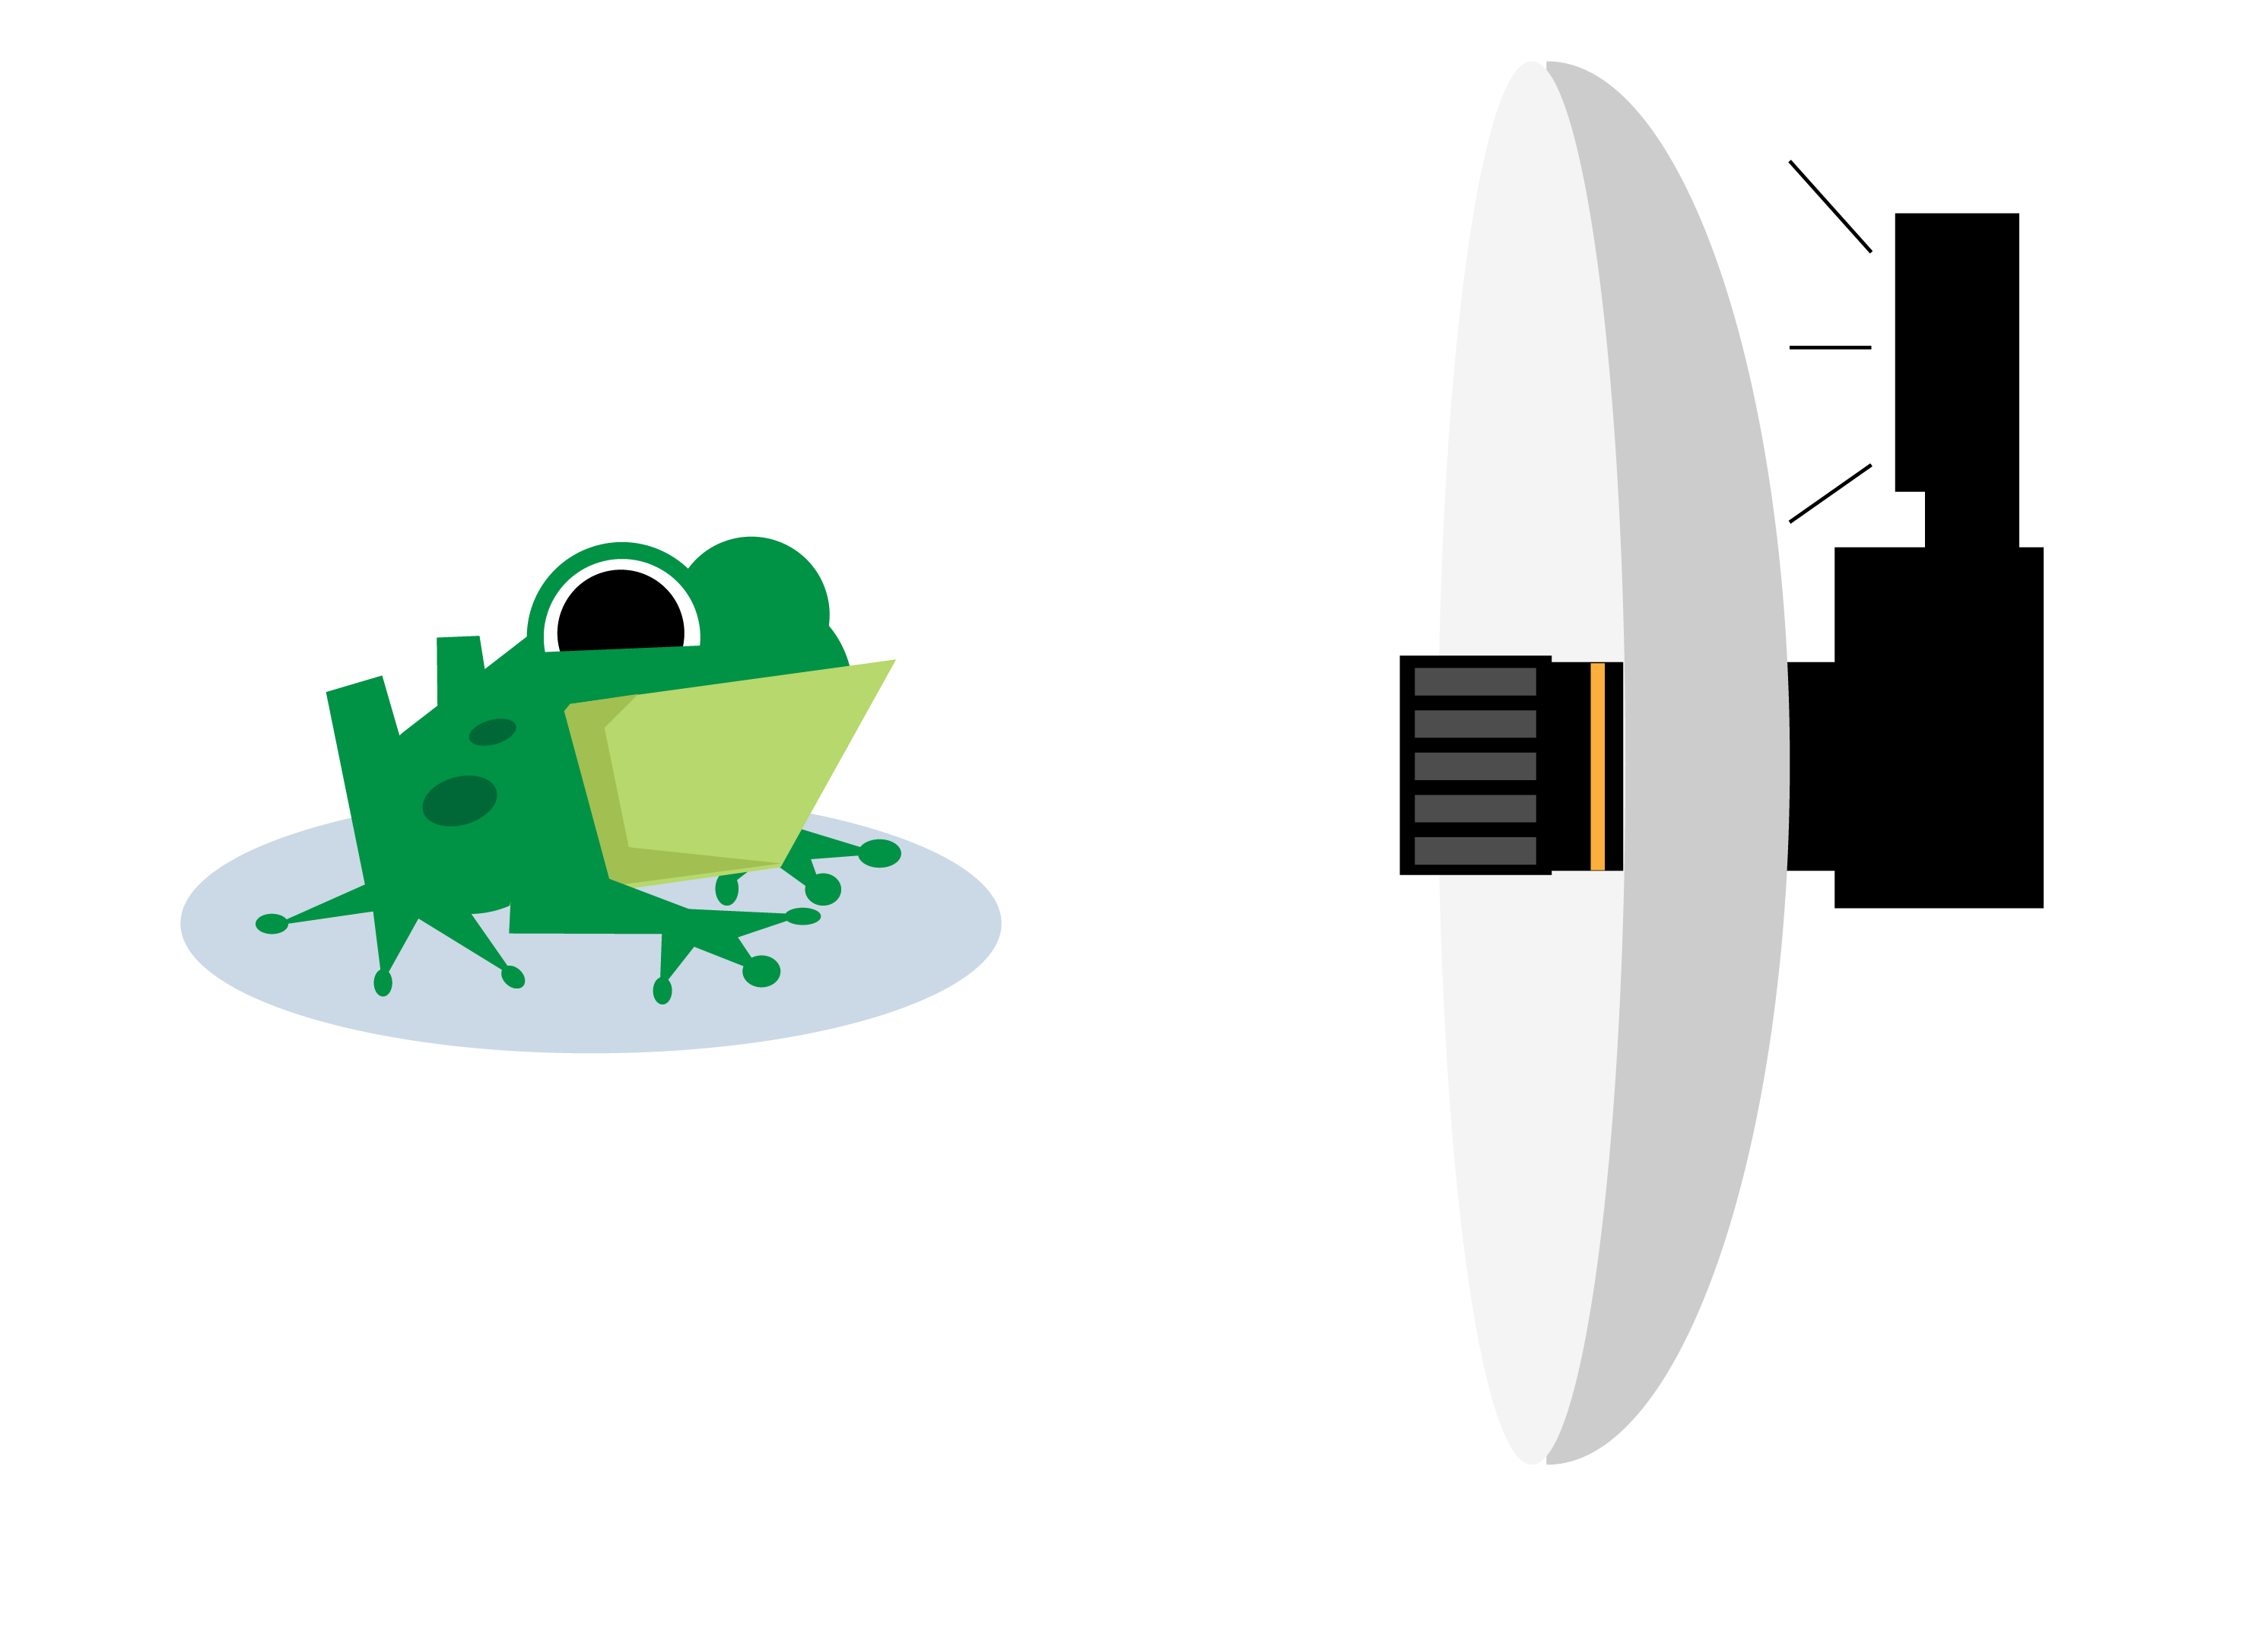
If you can’t employ an off-camera flash, another good option is to put a large ring-shaped diffuser around the very front of your lens, while firing the flash toward that diffuser. The image below demonstrates what I mean:
Recommended Flash Setups
The basic principle behind using a flash for macro photography is that the light needs to hit the subject from as many angles as possible, not just directly above. Good lighting setups for close-up photography usually involve a diffuser that somewhat surrounds the lens. Here are four techniques that can significantly enhance your results.
1. On-Camera Flash with Diffuser
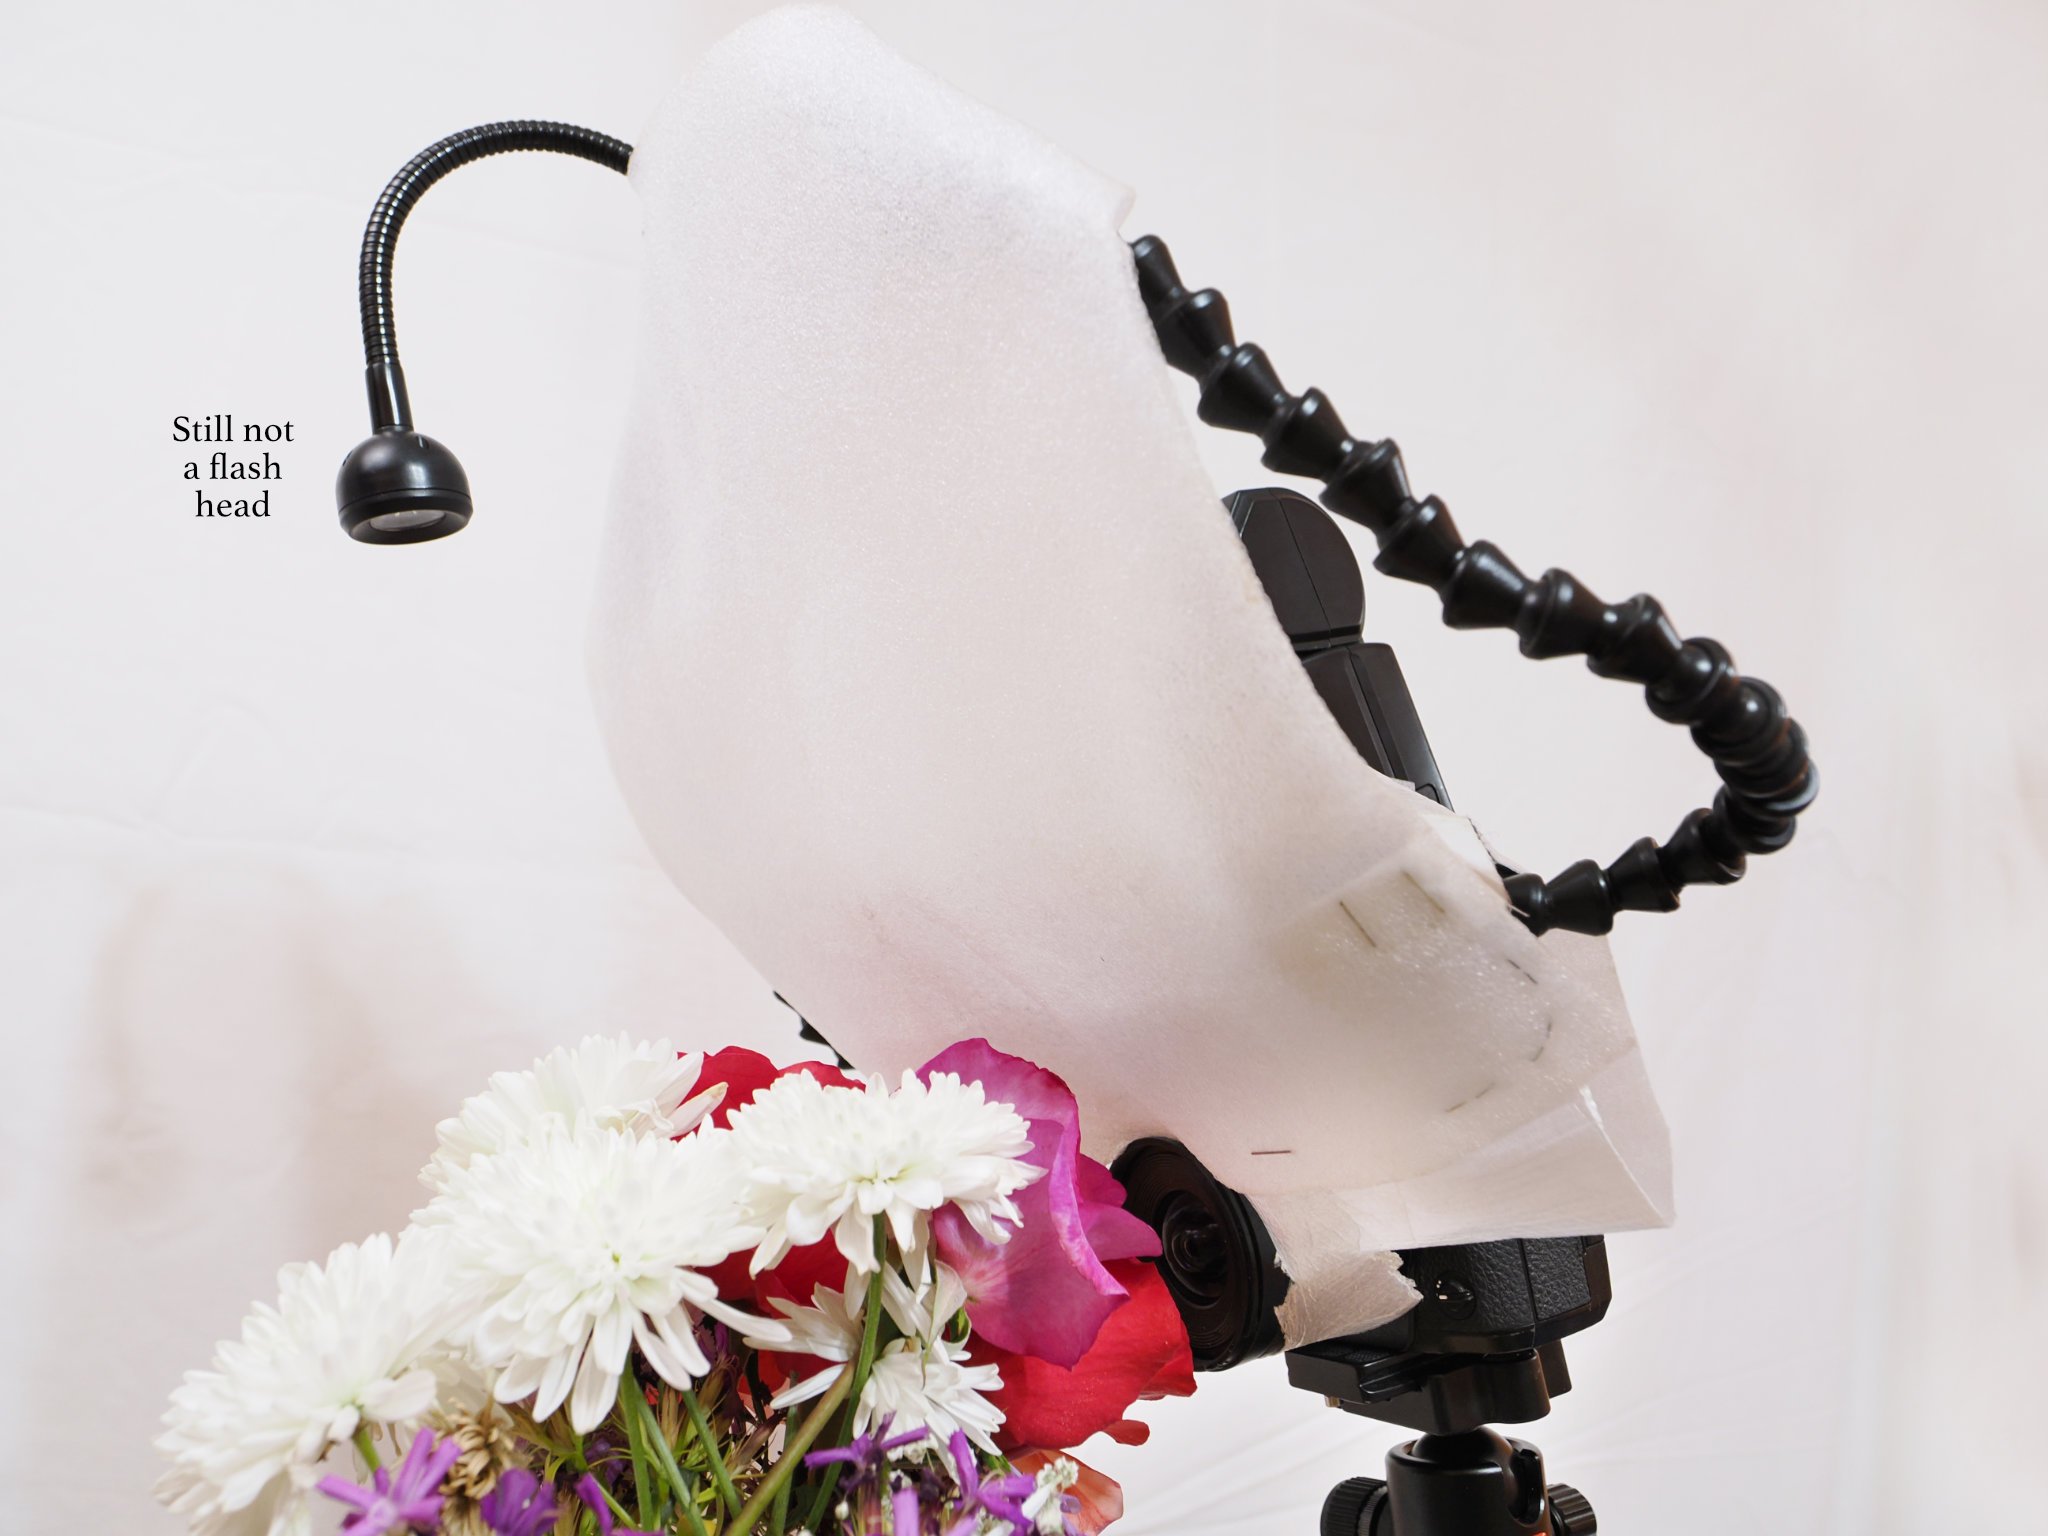
Utilizing an on-camera flash with a diffuser is a popular and convenient option. It allows you to soften the light nicely, while being very convenient. A well-designed diffuser can help direct the light from below as well as from above. This helps eliminate unflattering shadows caused by the lens or subject.
Keeping the flash on-camera is always nice because there are no loose parts. There is no need to position the flash with a stand or hold it with your other hand. This way you can focus on composition.
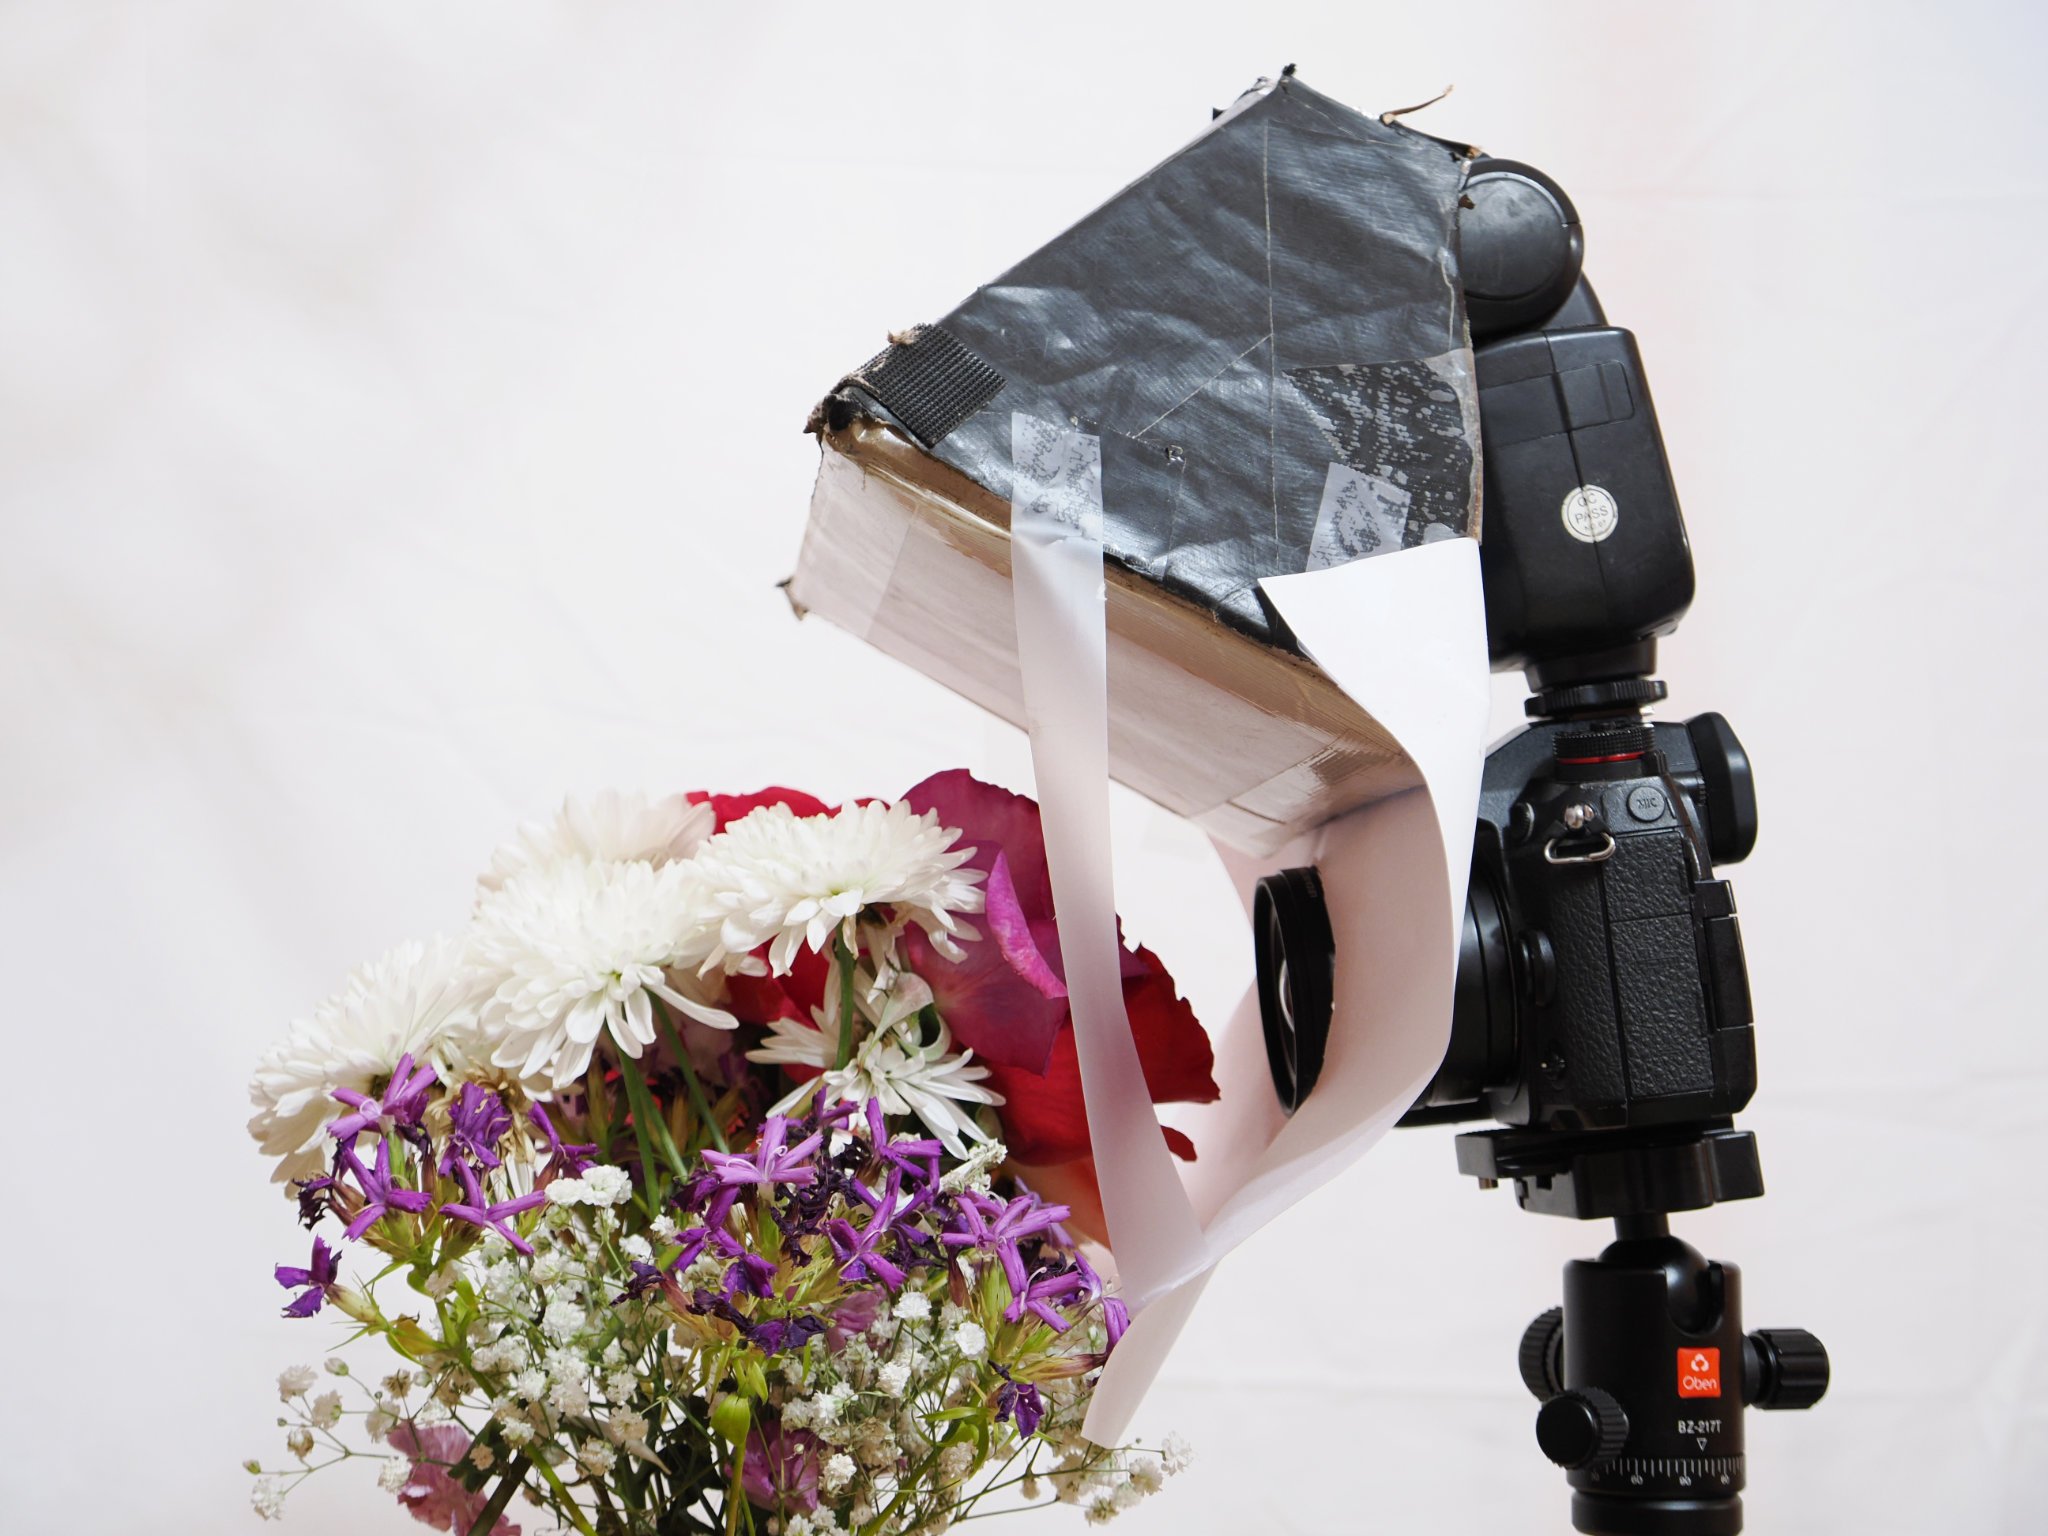
The annoying part is that I cannot direct you to a diffuser available online that does this perfectly. Although there are lots of flash diffusers available online, I’ve yet to see one that is really designed to light subjects at close range. I recommend making your own instead.
The good news is that it’s not rocket science to design your own diffuser that gets the job done. The key is that light from the flash should wrap around the lens, to light the subject from all angles and not just from above.
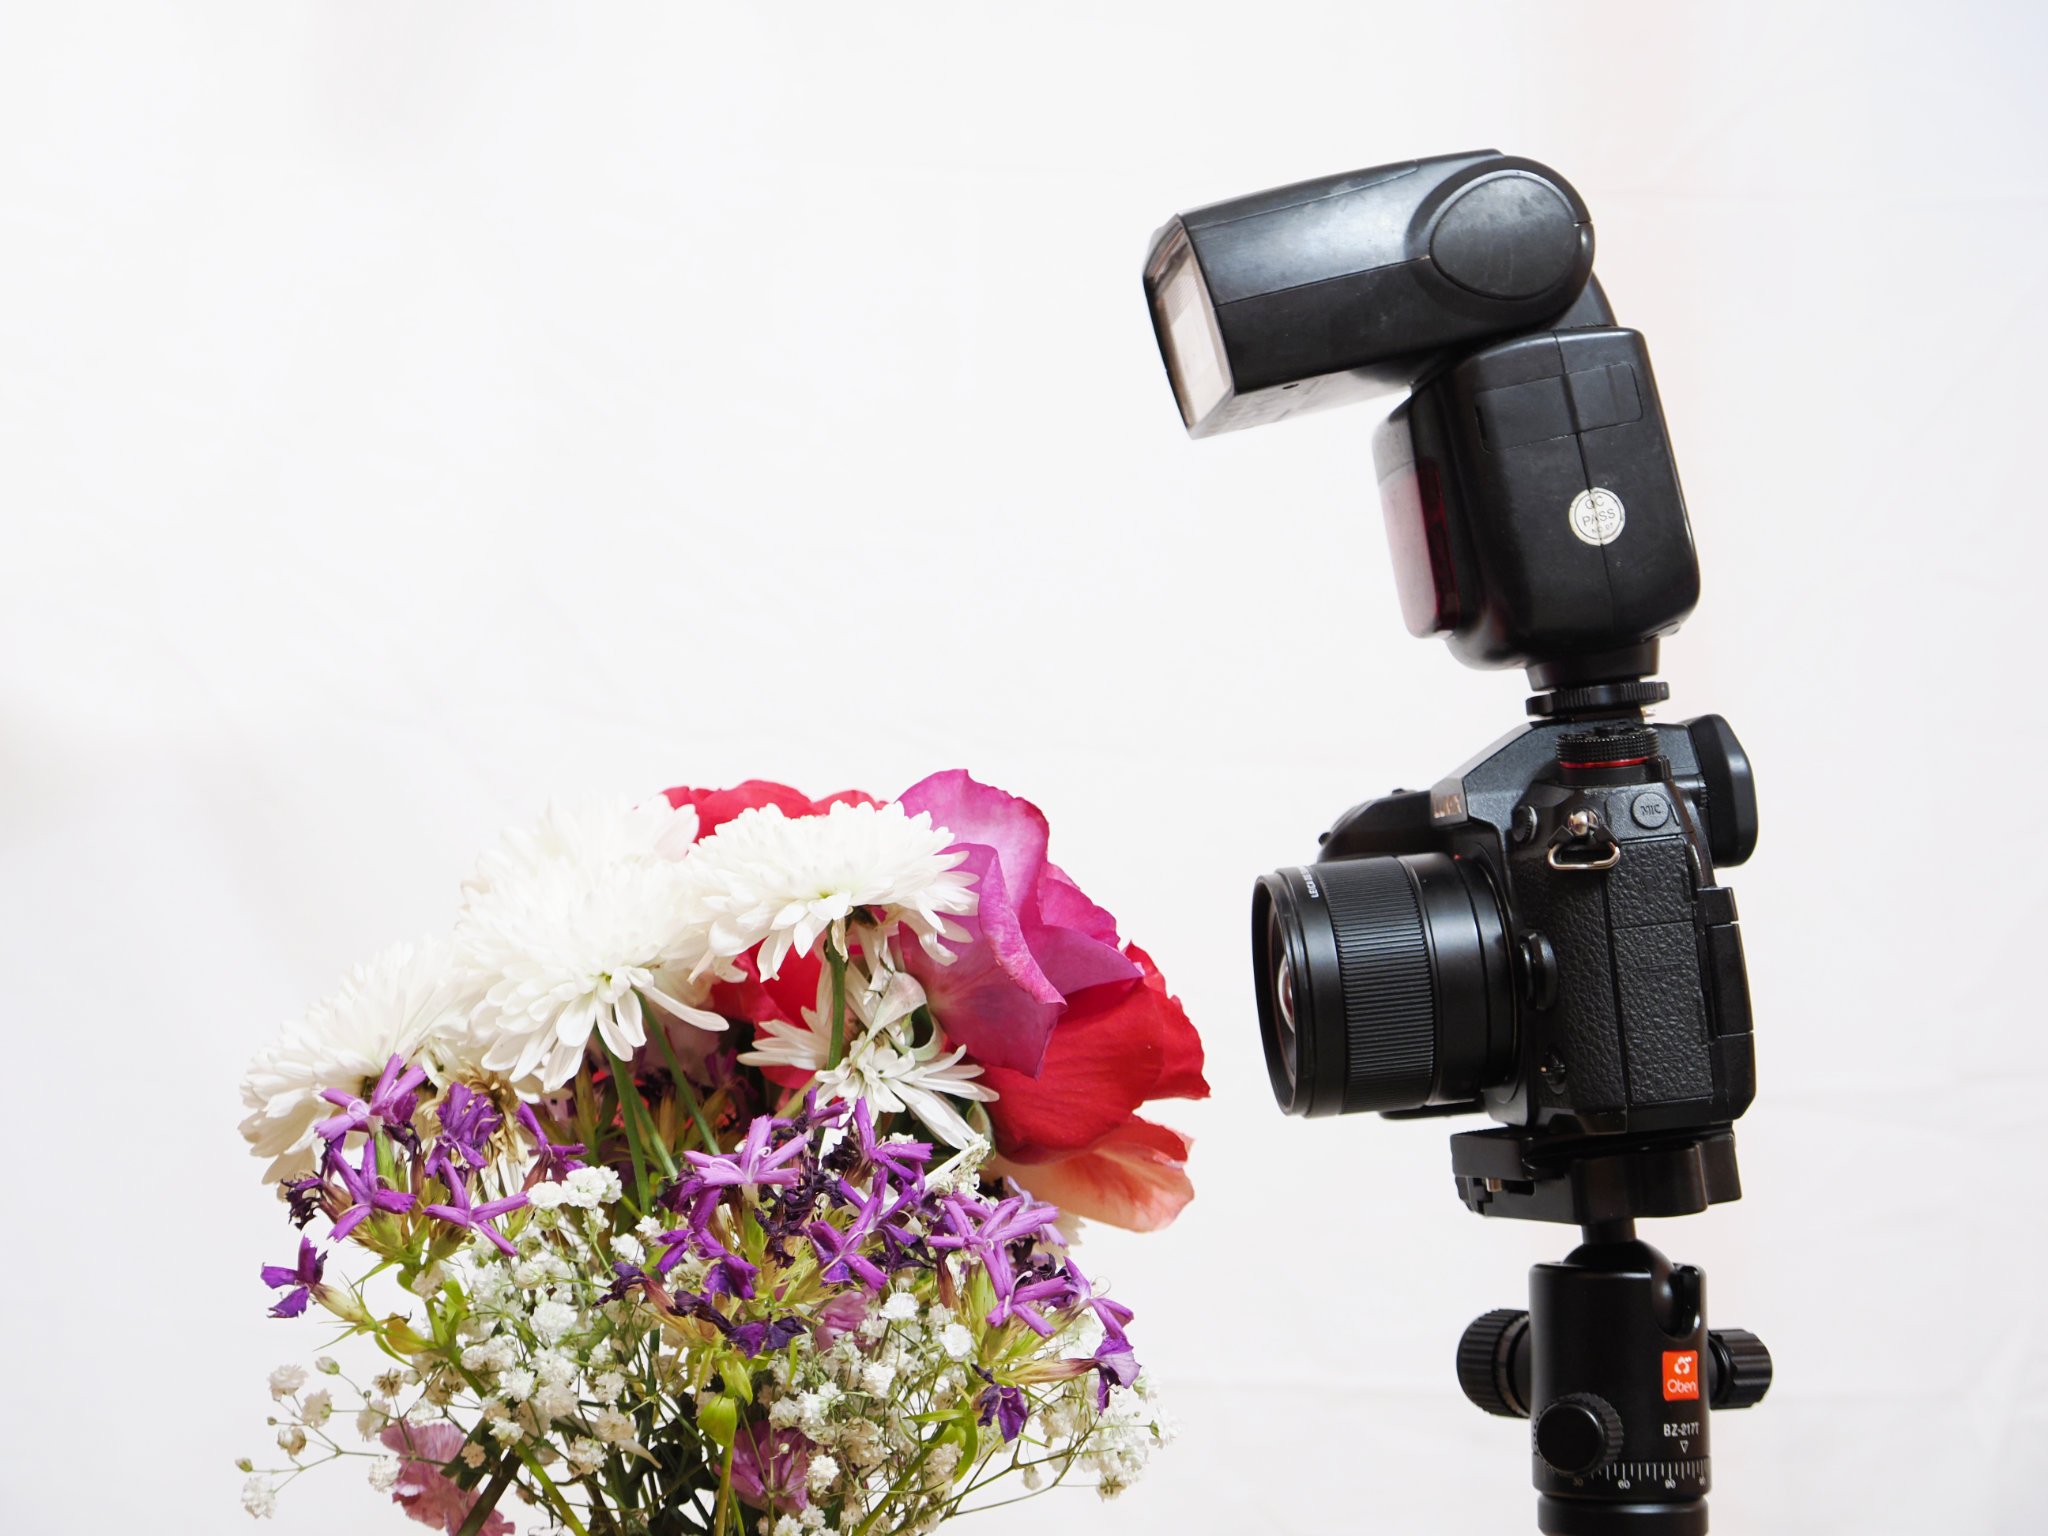
1. Off-Camera Flash with Diffuser
Employing an off-camera flash provides greater control over the lighting setup. By placing the flash off to the side or above the subject, you have more flexibility with your lighting. Similar to the on-camera setup, using a diffuser is crucial to soften the light and reduce shadows and highlights.
Flash positioning is everything using this technique. There is a tiny area to place the flash so that it’s not too far back or too far forward. Using a diffuser helps throw light at the subject from as many angles as possible to get more even lighting. It’s easier to demonstrate with images, so scroll through the slides below:
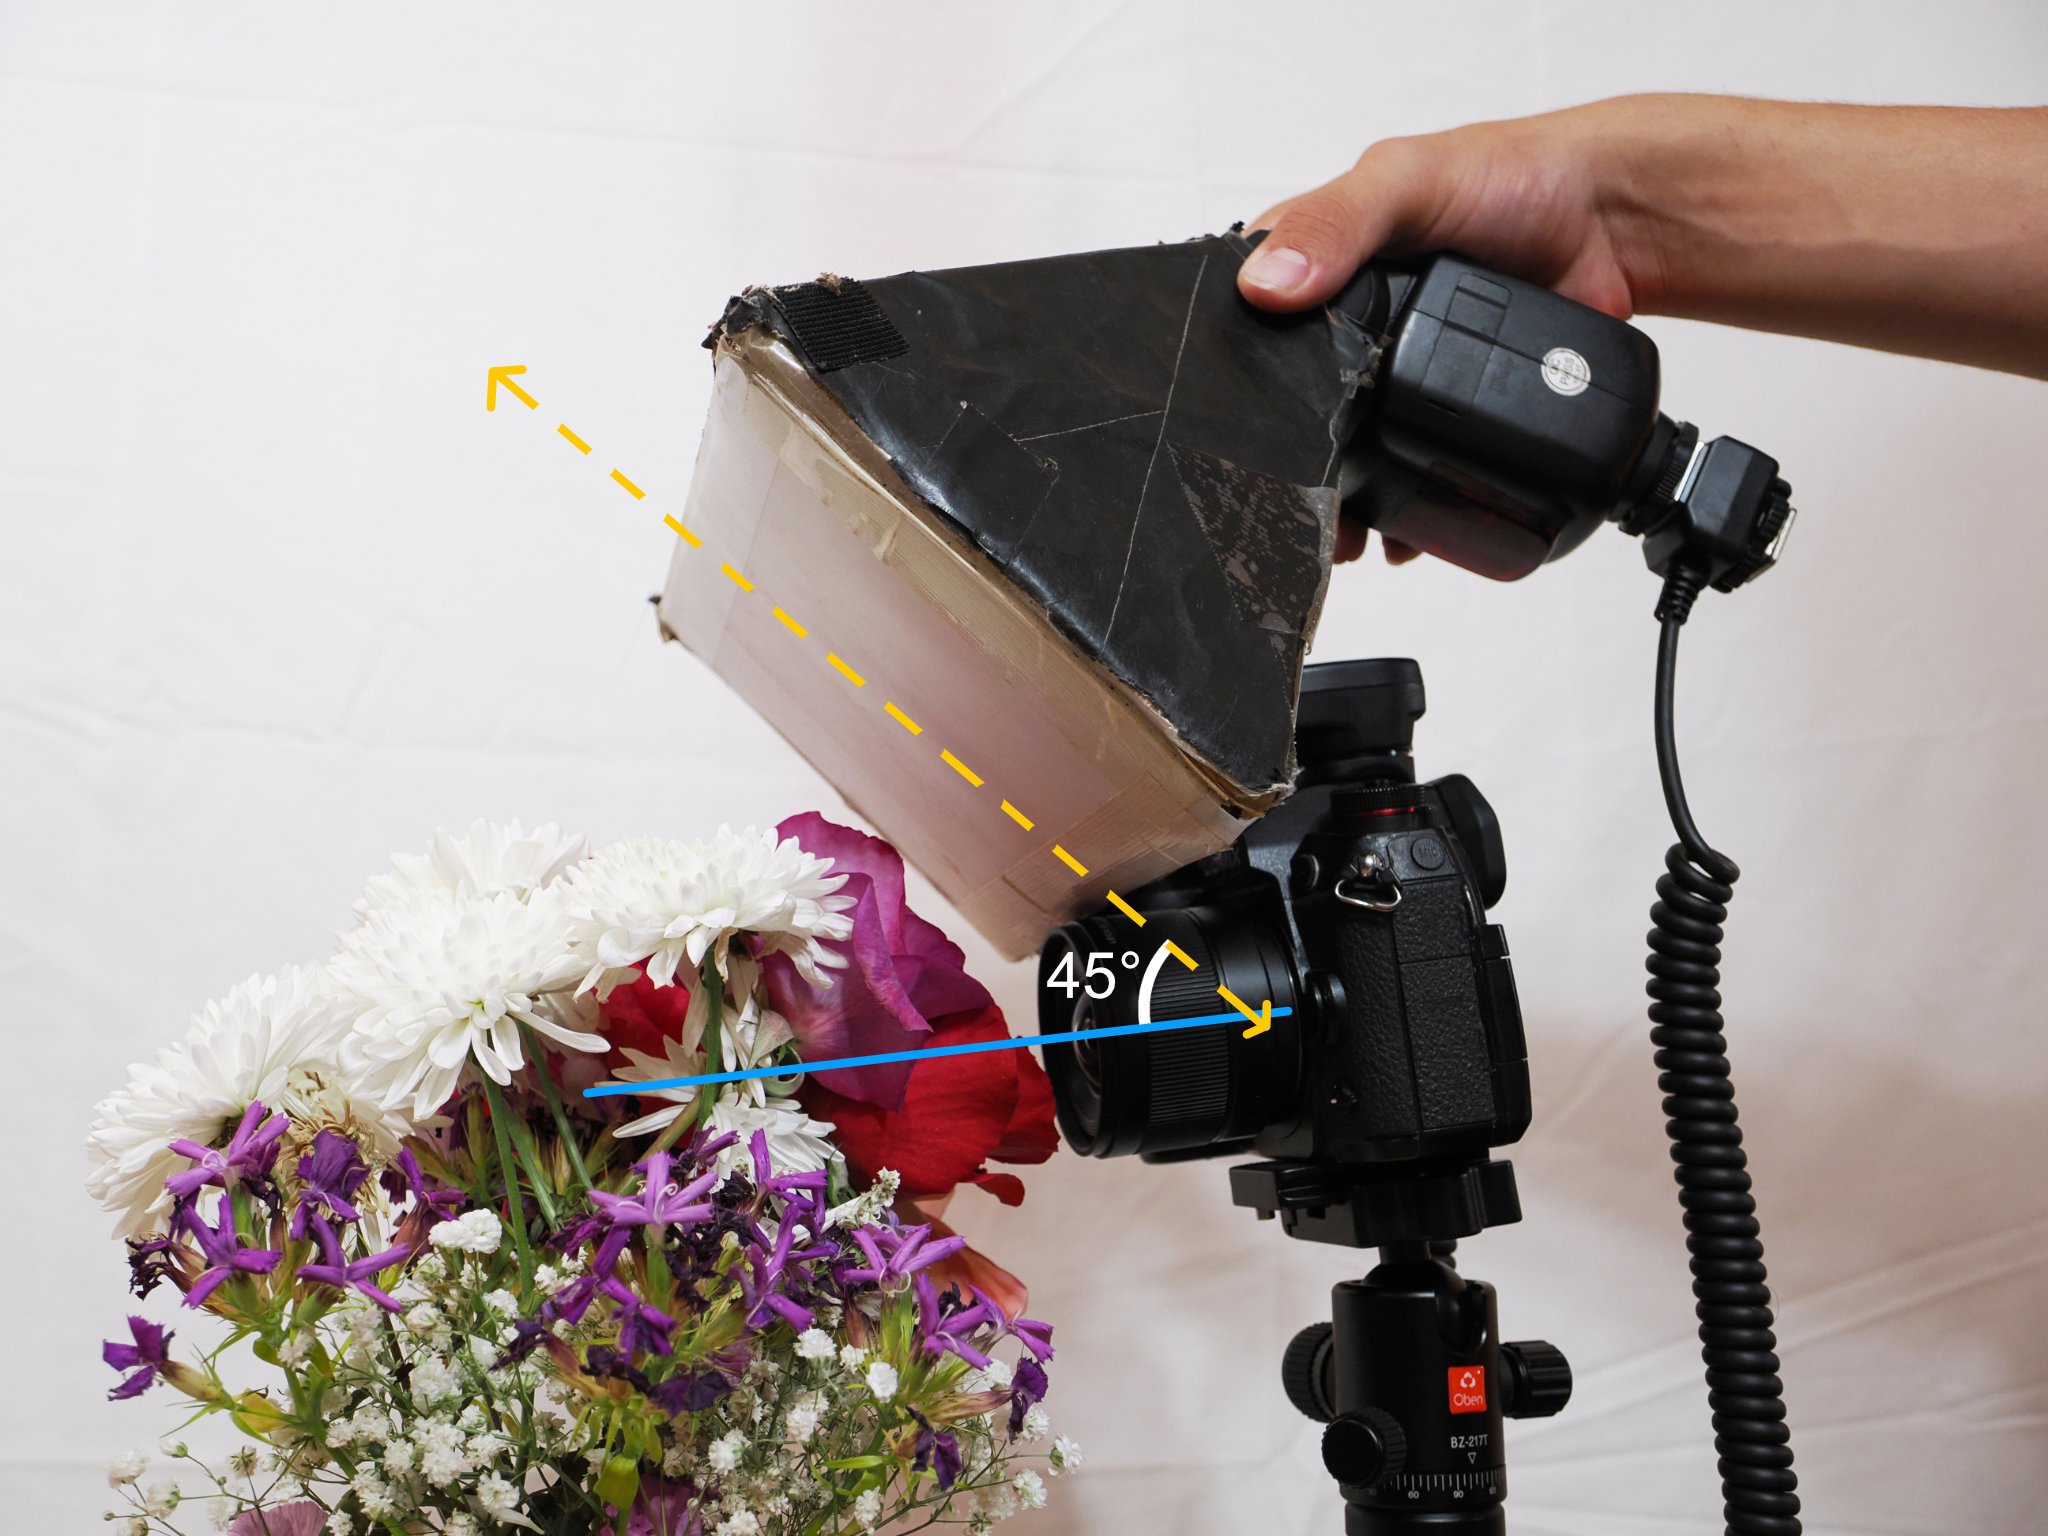
The ideal position of a diffuser should have the bottom of the diffuser meet the lens tip at a 45 degree angle 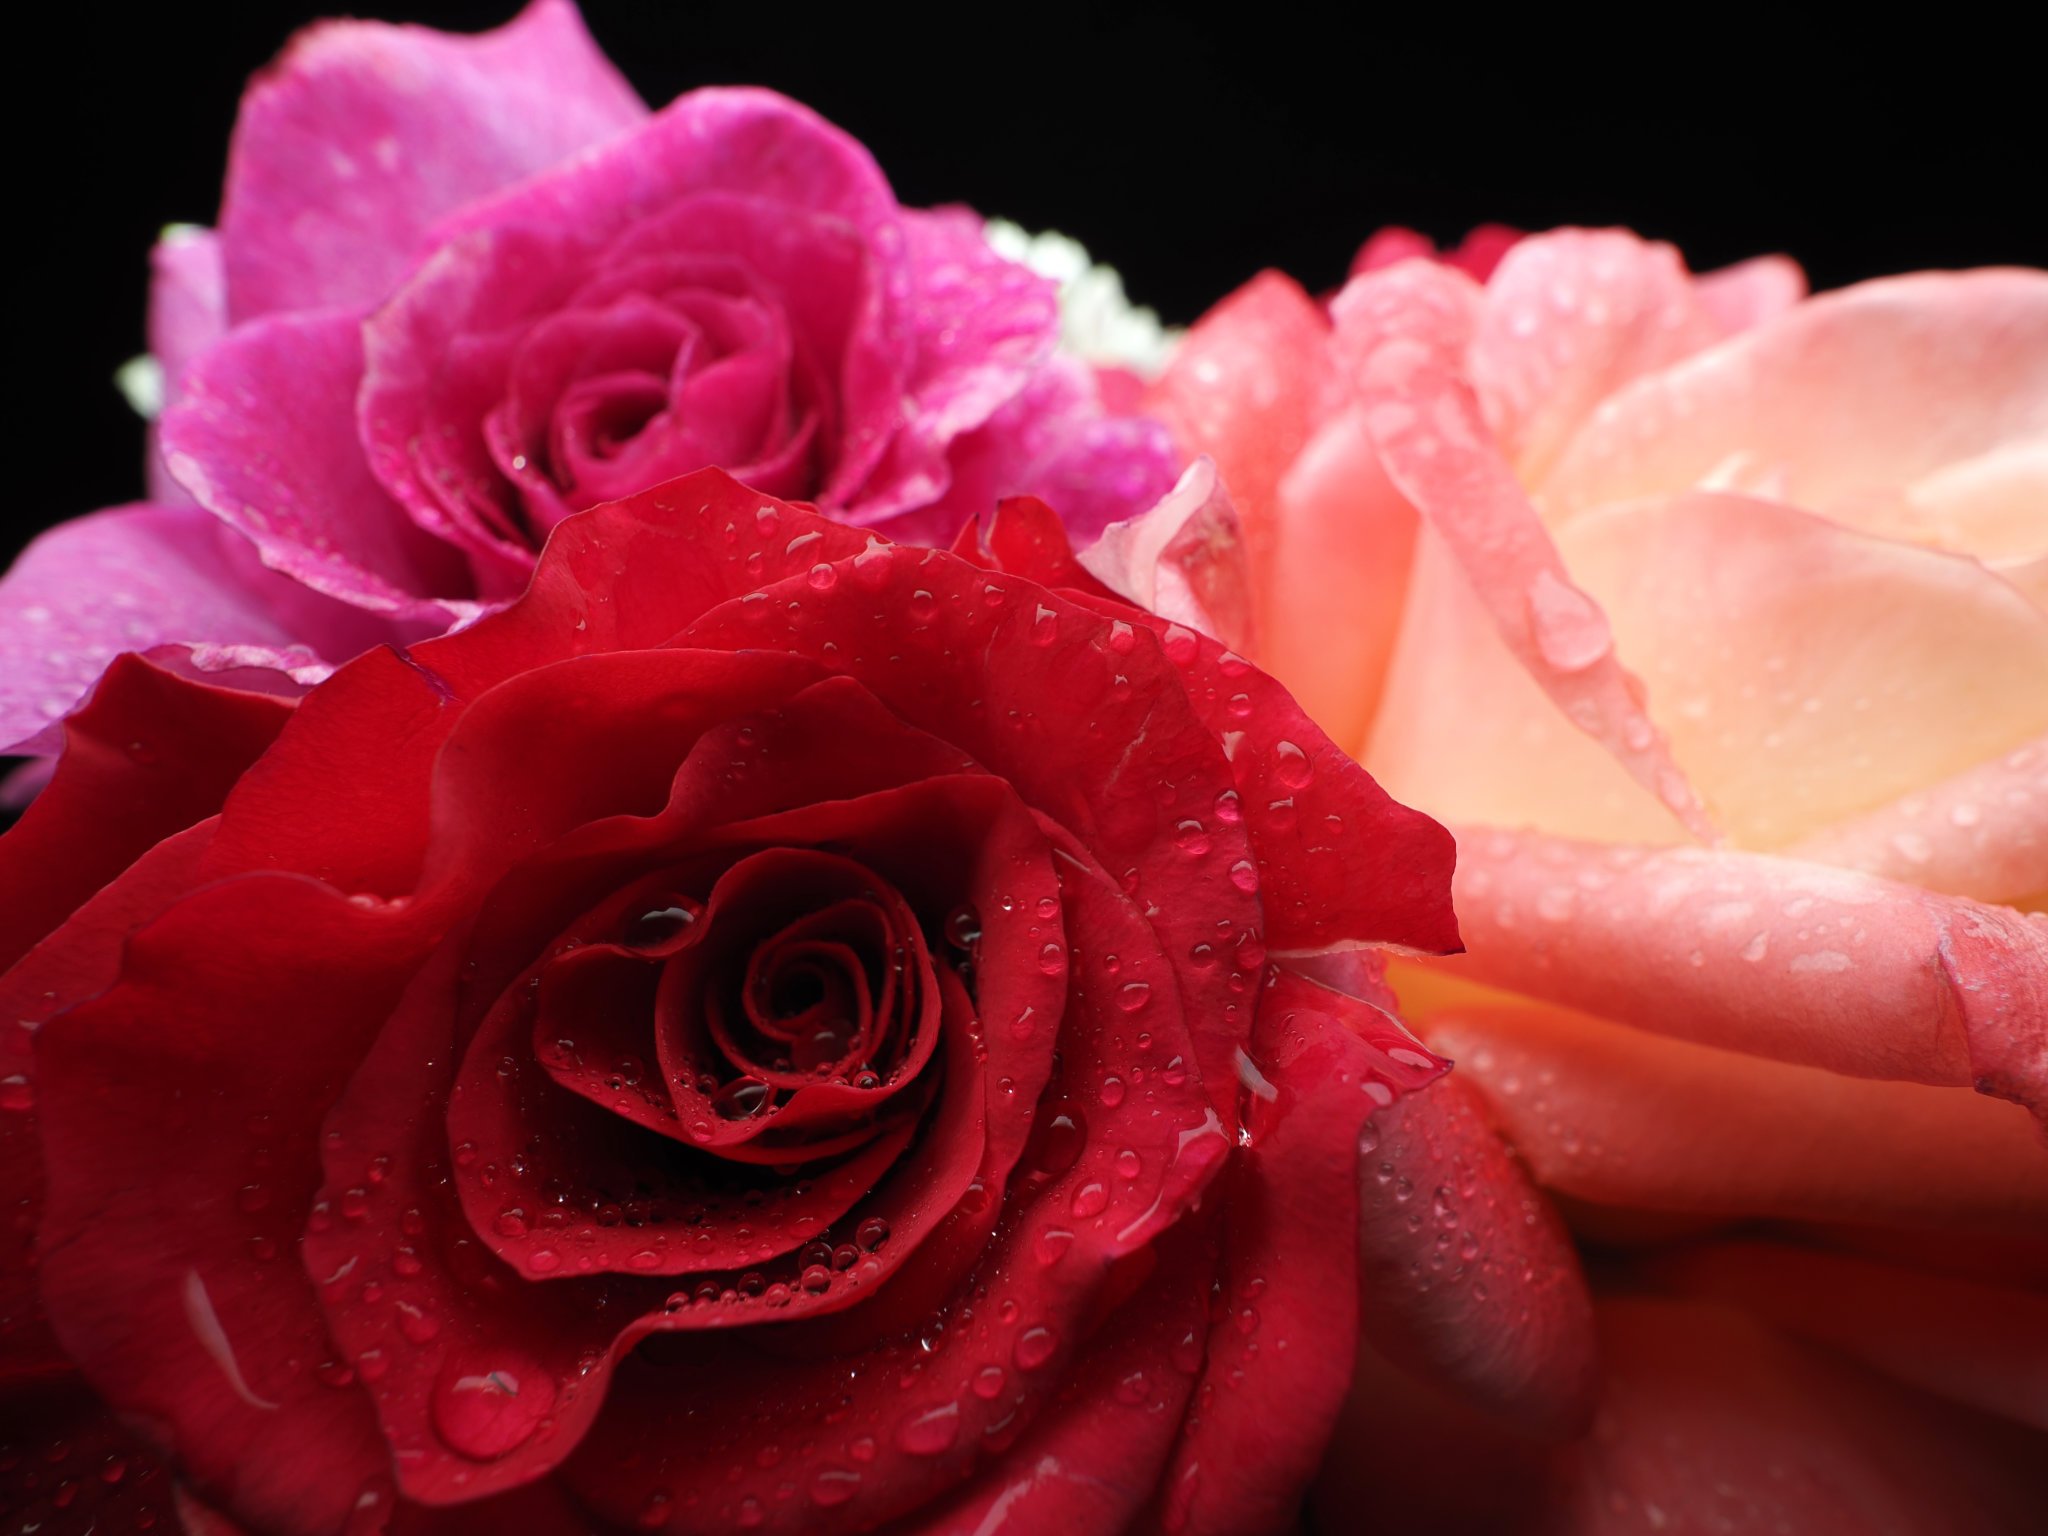
It should look something nice like this (could be improved with reflector) 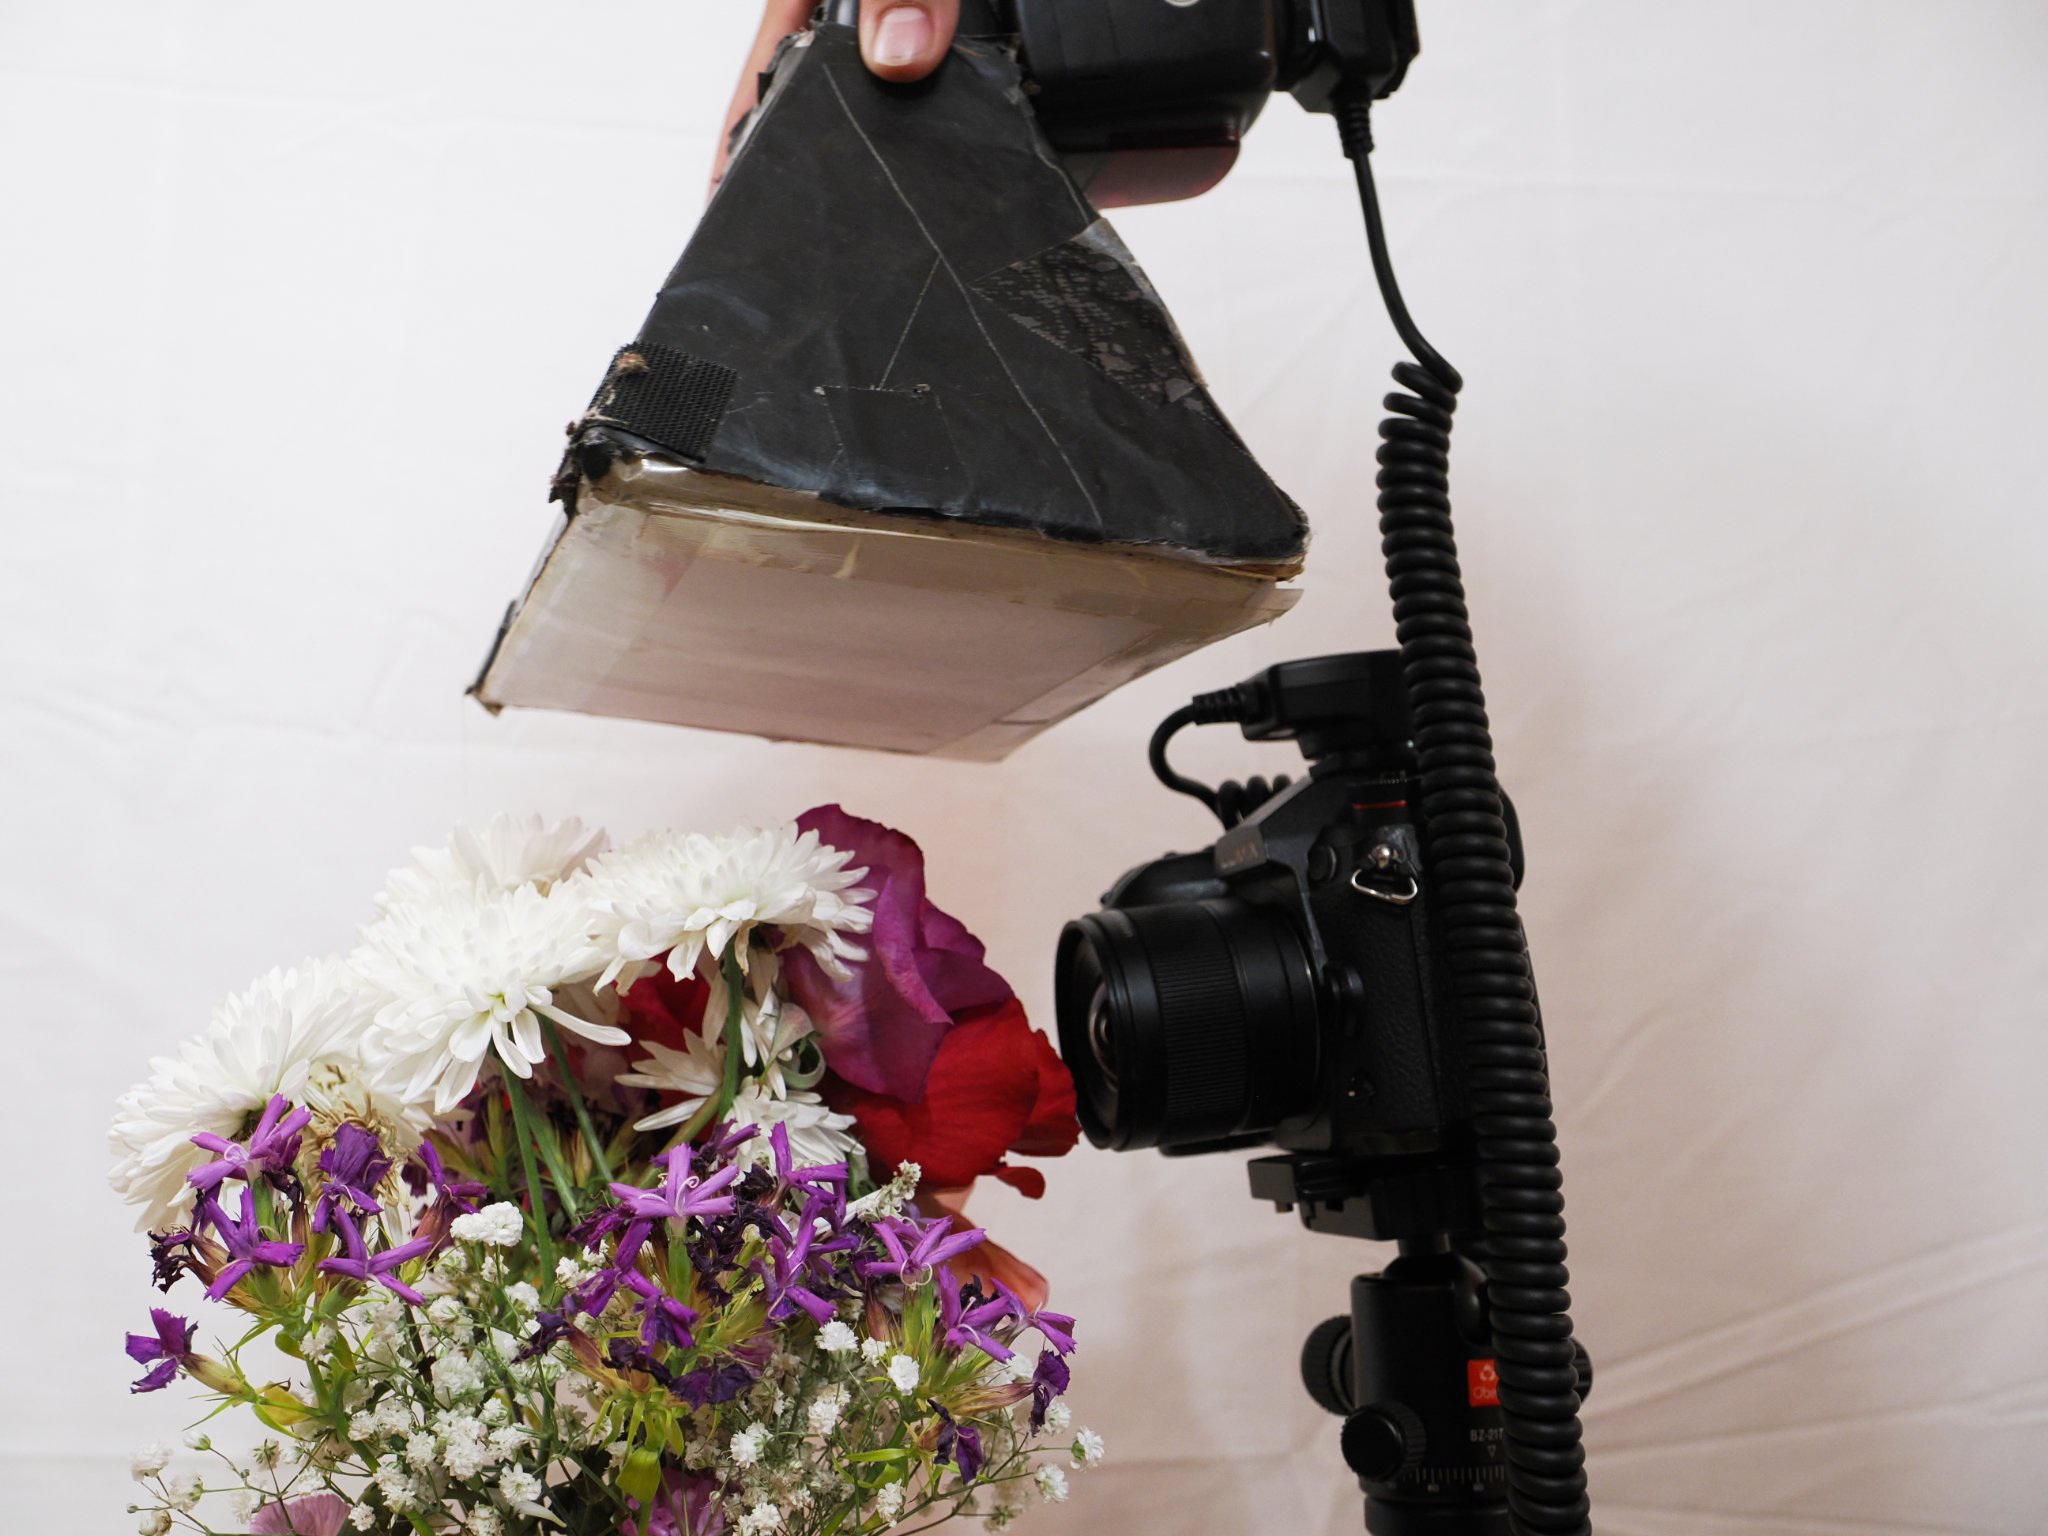
An easy mistake is to place the diffuser directly above… 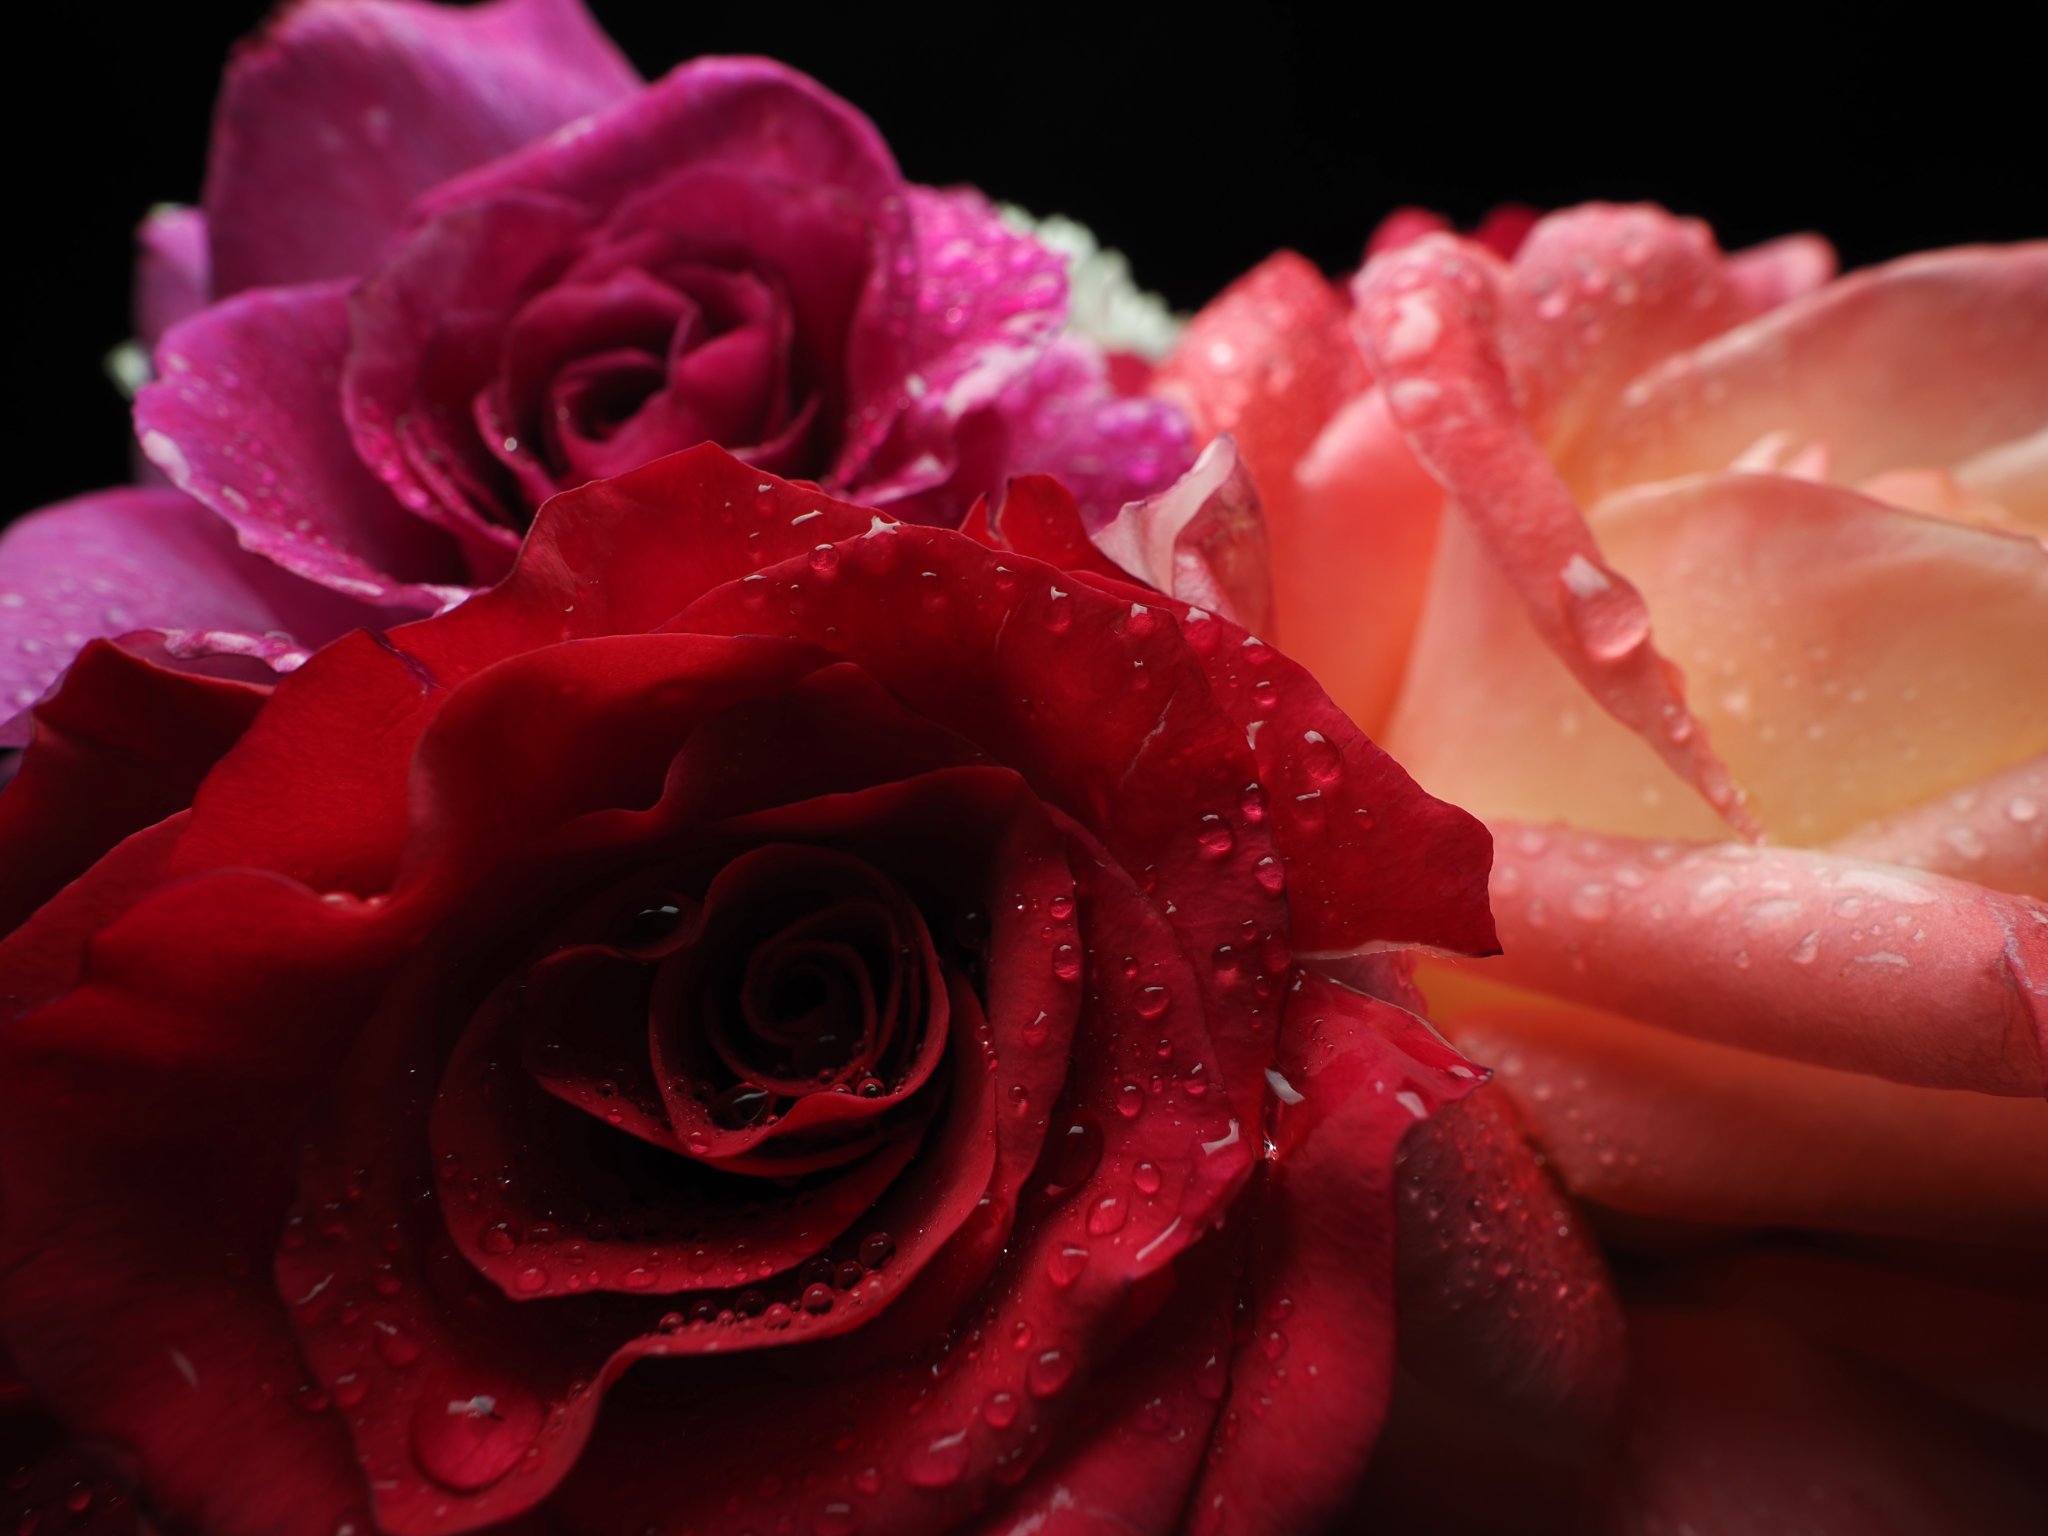
But this can cause backlighting 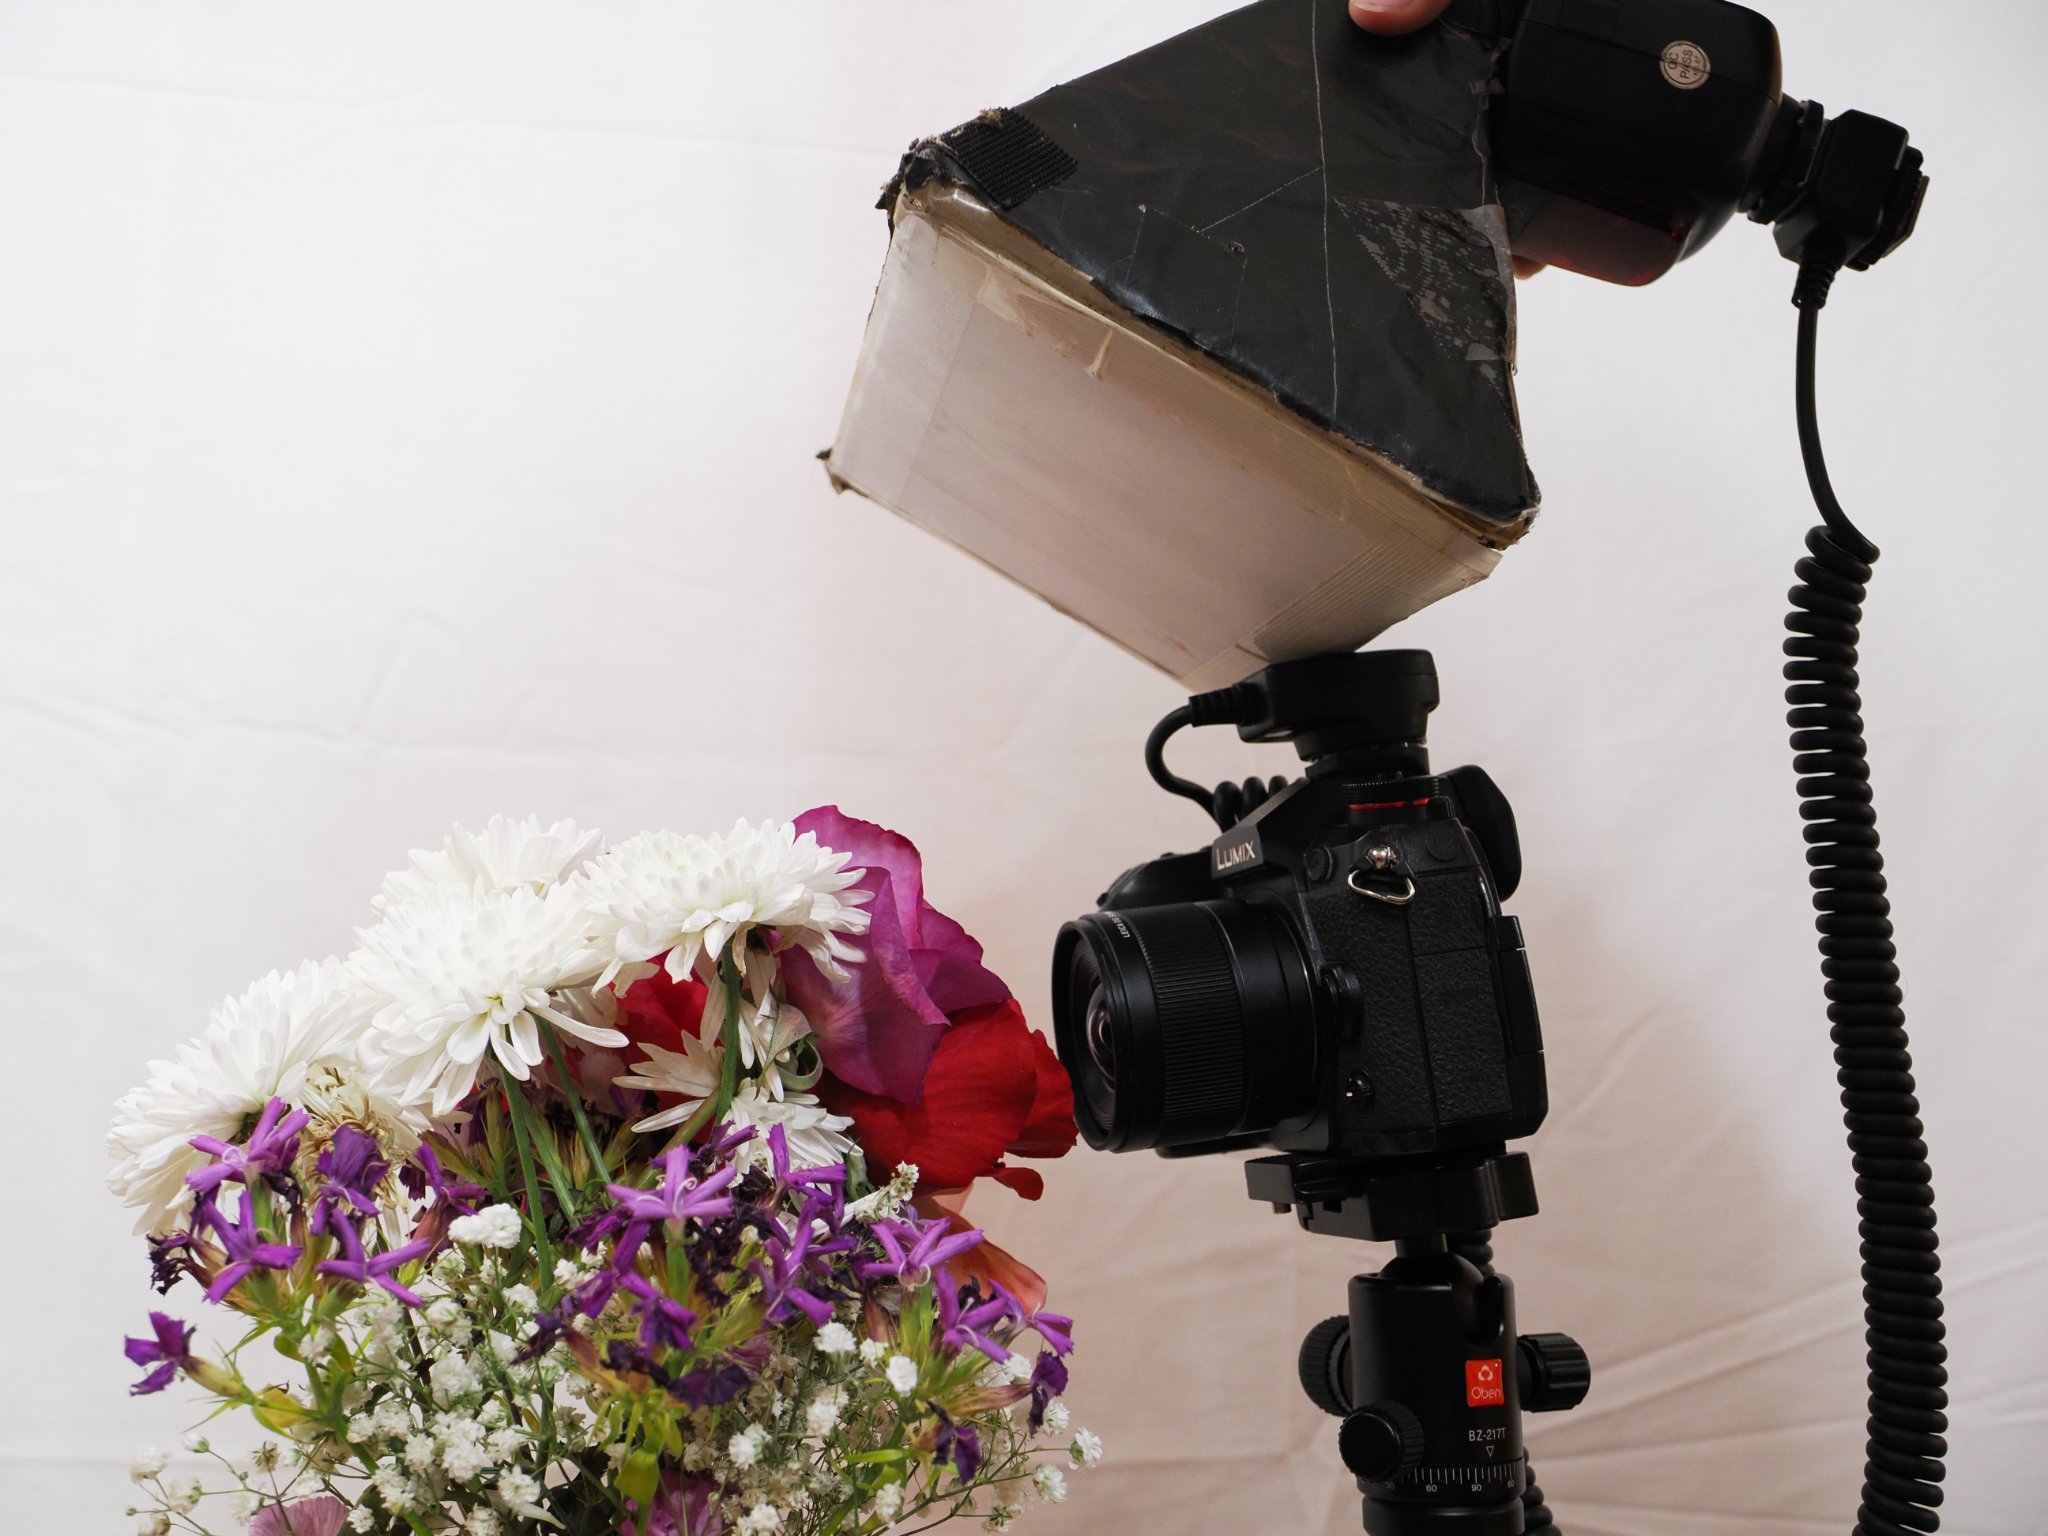
sloppy or lazy positioning of the diffuser like here when it’s set too far back… 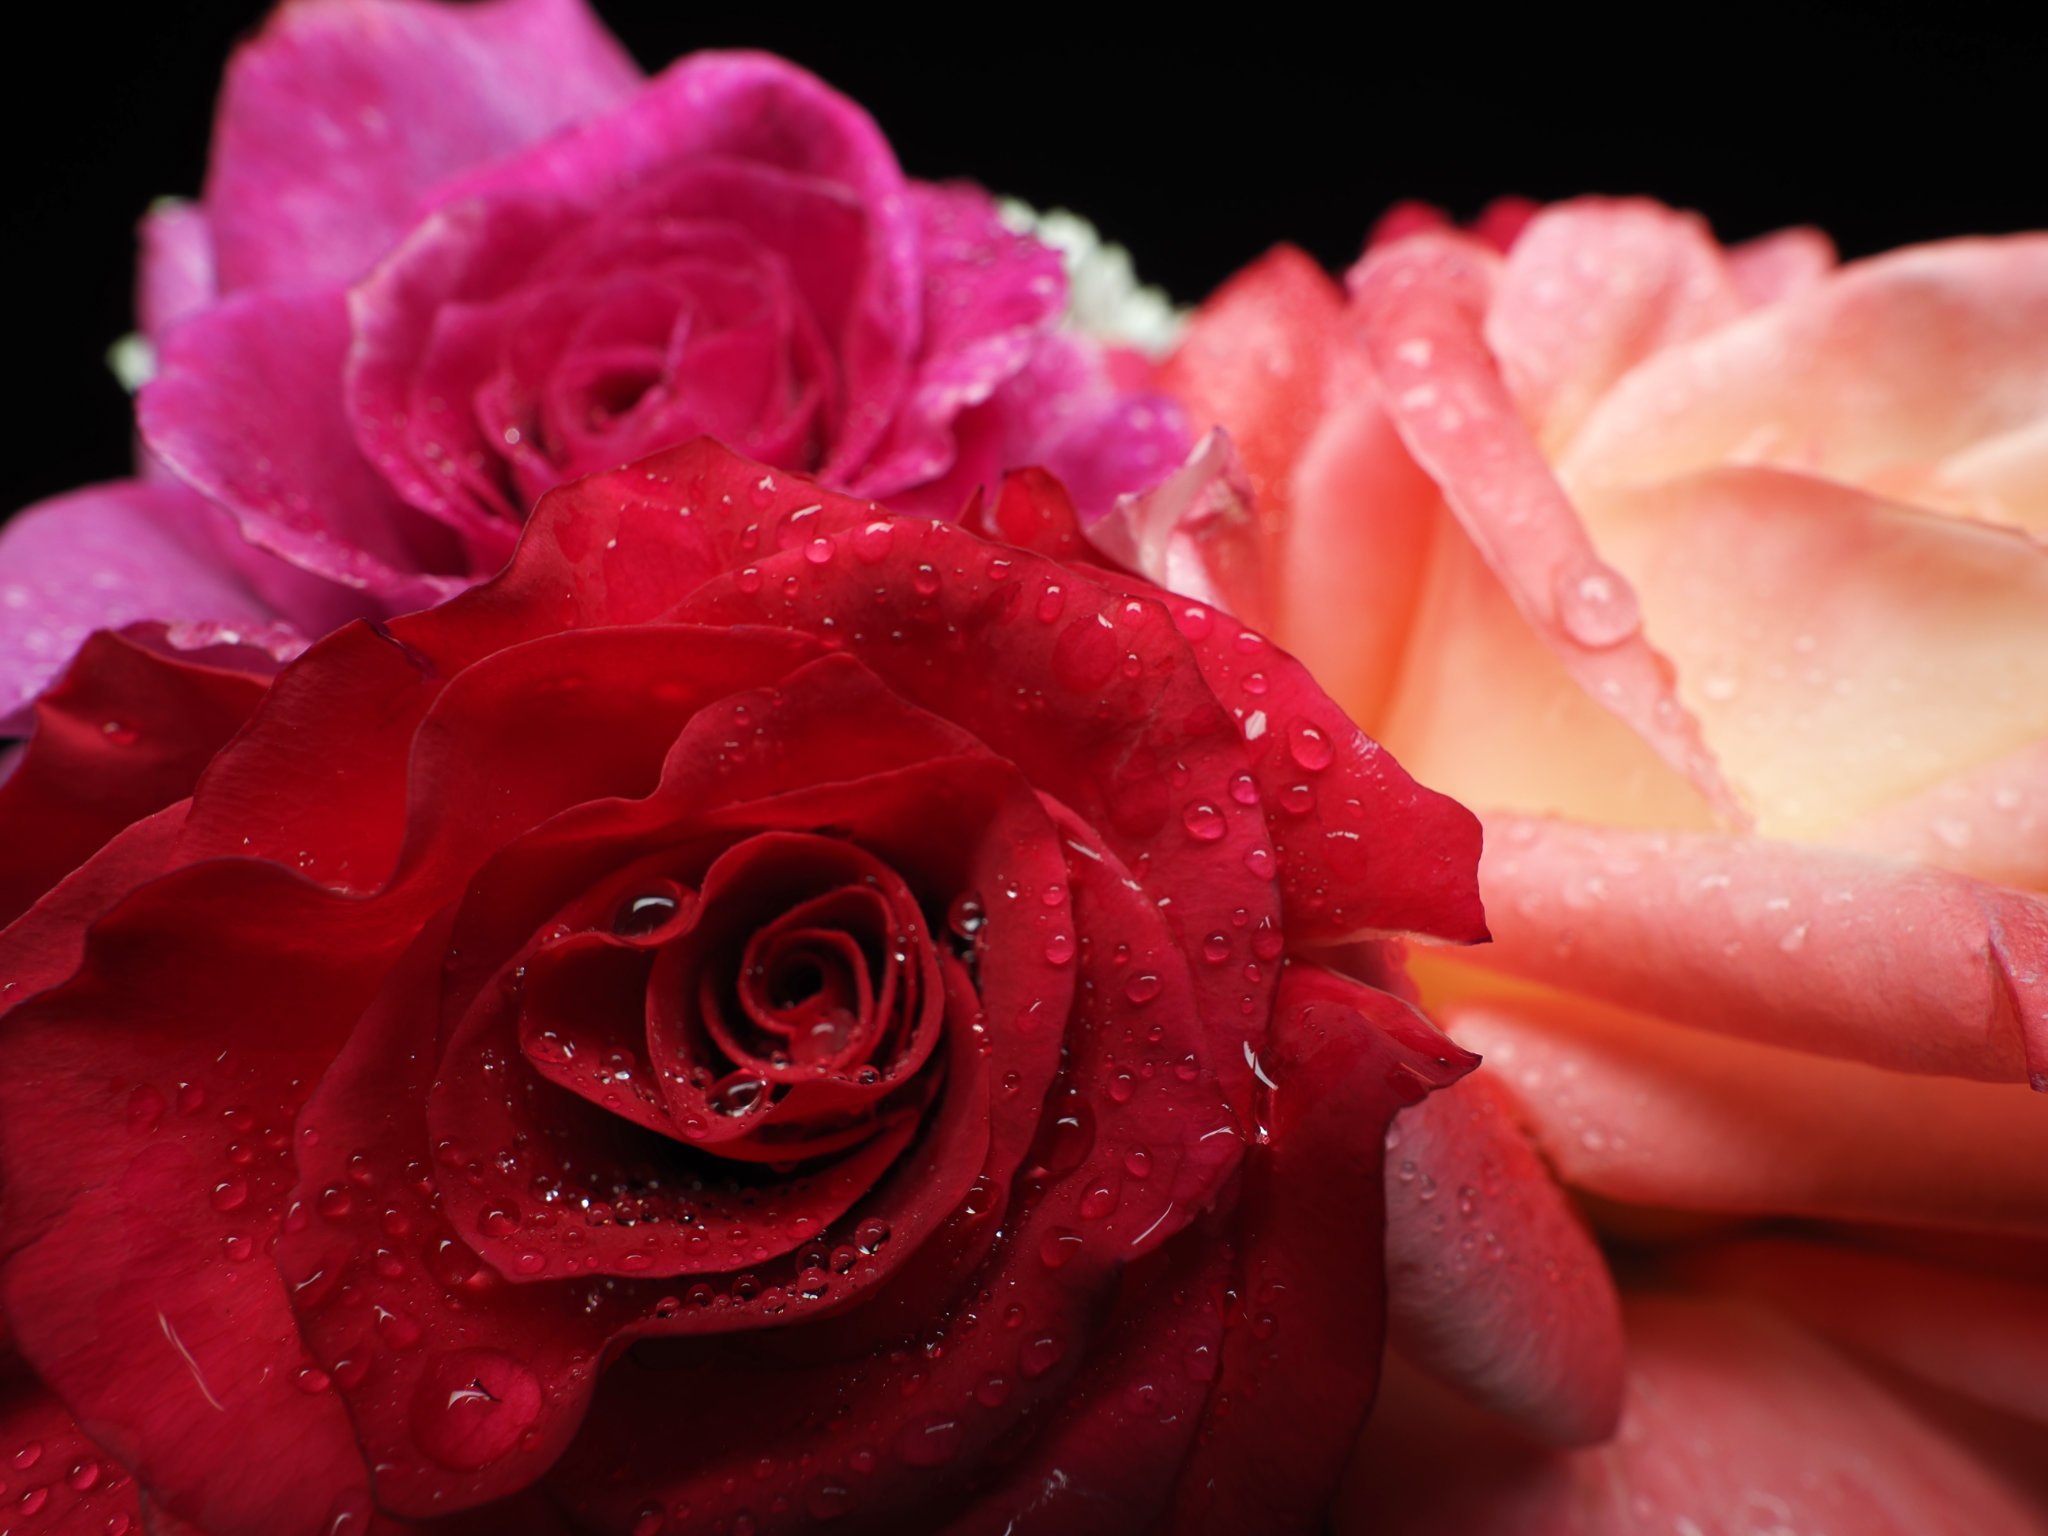
can cause some shadow in the foreground to creep in, plus the reflections can become more poignant
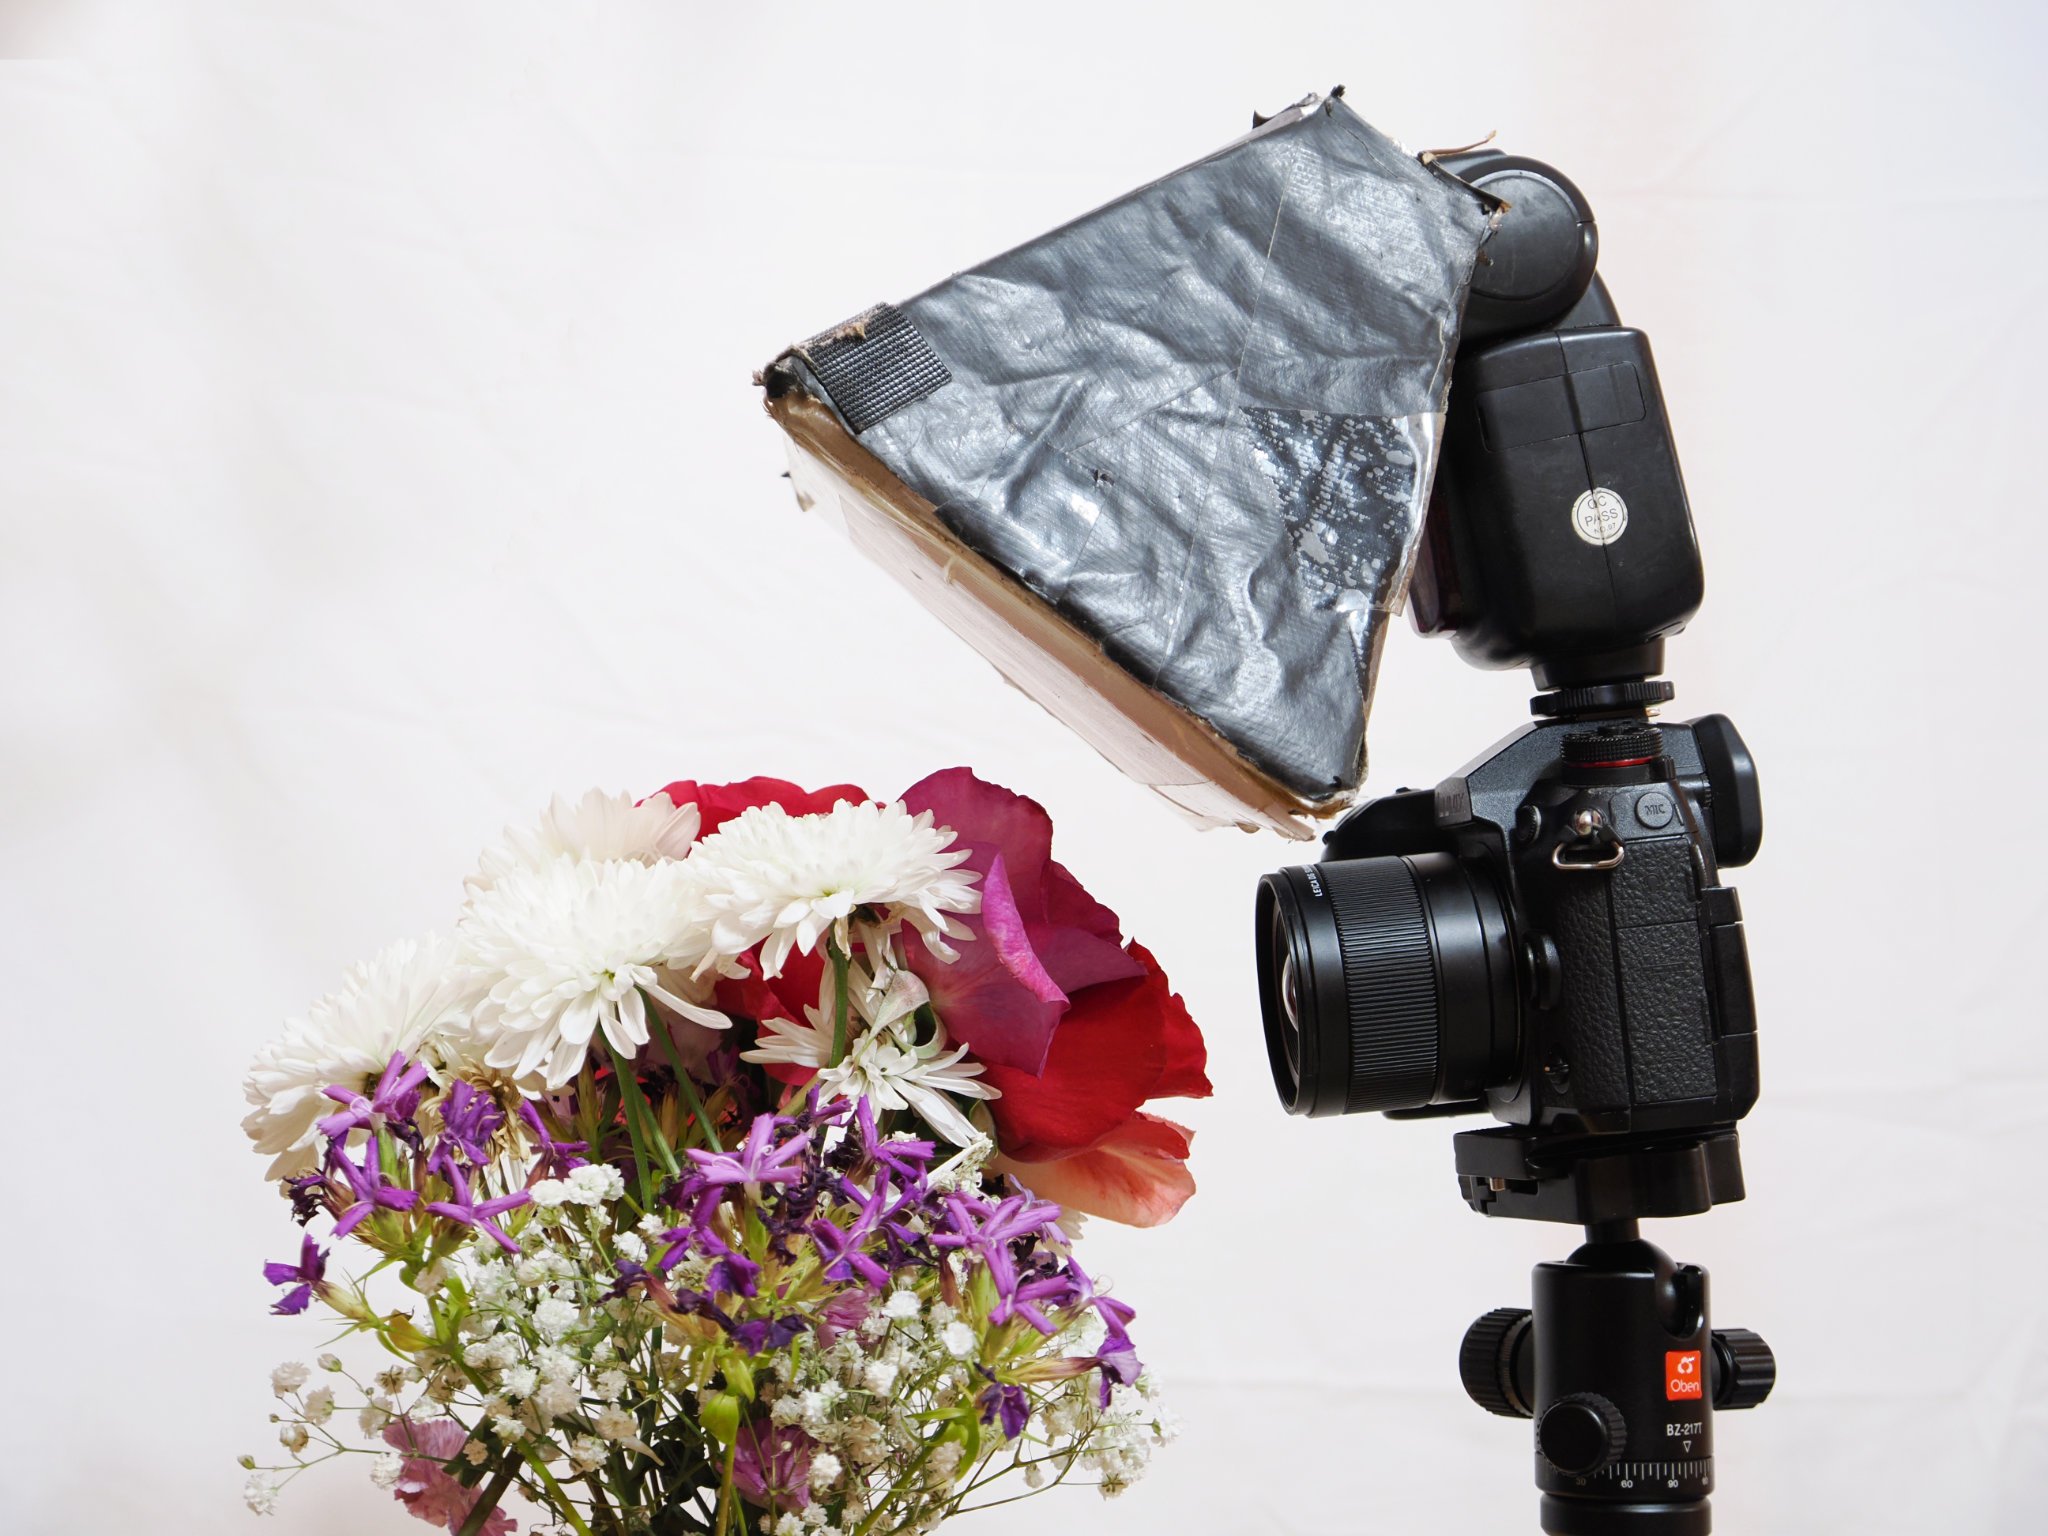
When holding a diffused flash above the subject at close range, it’s easy to accidentally cause improperly-targeted lighting. I usually press my diffuser right down onto my lens, even wraping it around the lens to ensure some light is coming from eye-level or below the subject. When I have time to set it up, I prefer using a malleable sofbox like the one shown below, since I can partially wrap it around my lens:
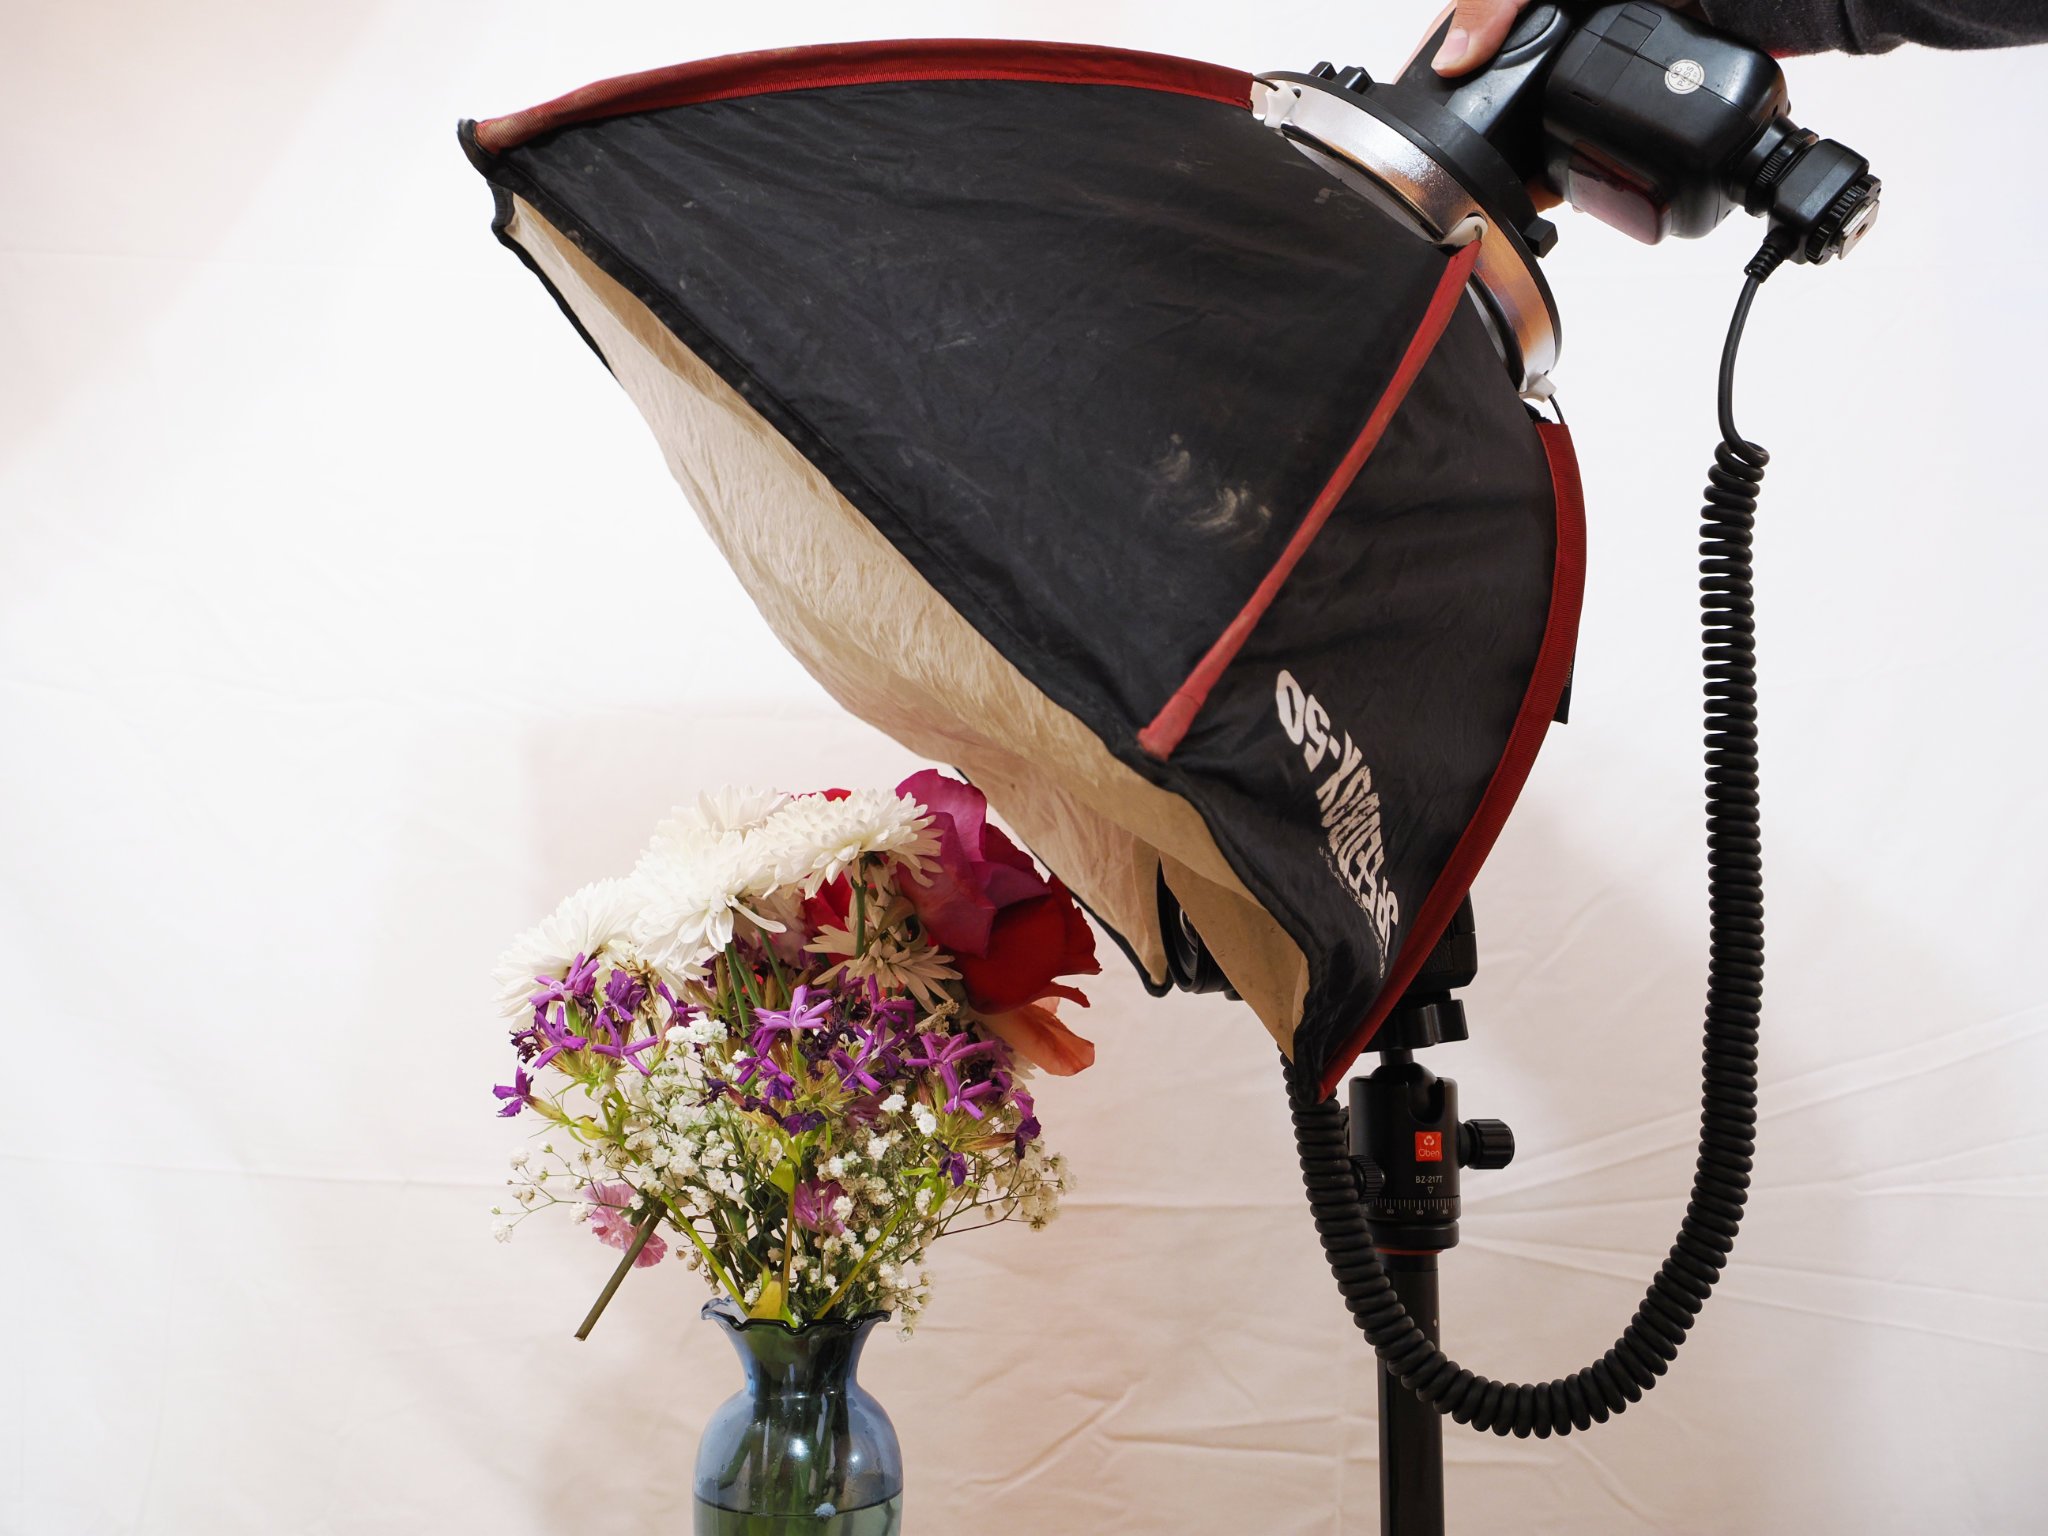
The advantage of using the flash off-camera is that it gives more flexibility, but the disadvantage is that it gives you one more thing to hold. Despite the inconvenience, I usually elect for this method of macro photography.
3. Twin Flash Setups
A twin flash setup is specifically designed for close-up photography and excels at illuminating subjects near the lens. It consists of two flash heads positioned on either side of the lens. This way, the light comes from the same level as the subject instead of directly above. Having a flash on either side of the lens also fills in the other flash’s shadows.
However, it can’t be so simple. Although a twin flash system does an excellent job removing shadows from an image, they cast horrid bright reflections if left undiffused. To achieve softer lighting, you still need to use a diffuser.

Once again, there doesn’t seem to be a commercially available diffuser that gets the job done. I recommend building a homemade shoot-through diffuser. This can be simple in design – you’re just making it so that the light does not just originate from two concentrated points.
4. Ring Flashes
A ring flash is a specialized flash that encircles the camera lens, providing direct illumination from a close distance. This technique offers excellent coverage for subjects close to the lens, effectively minimizing shadows. However, it’s worth noting that the light from a ring flash may be less diffused compared to other methods.
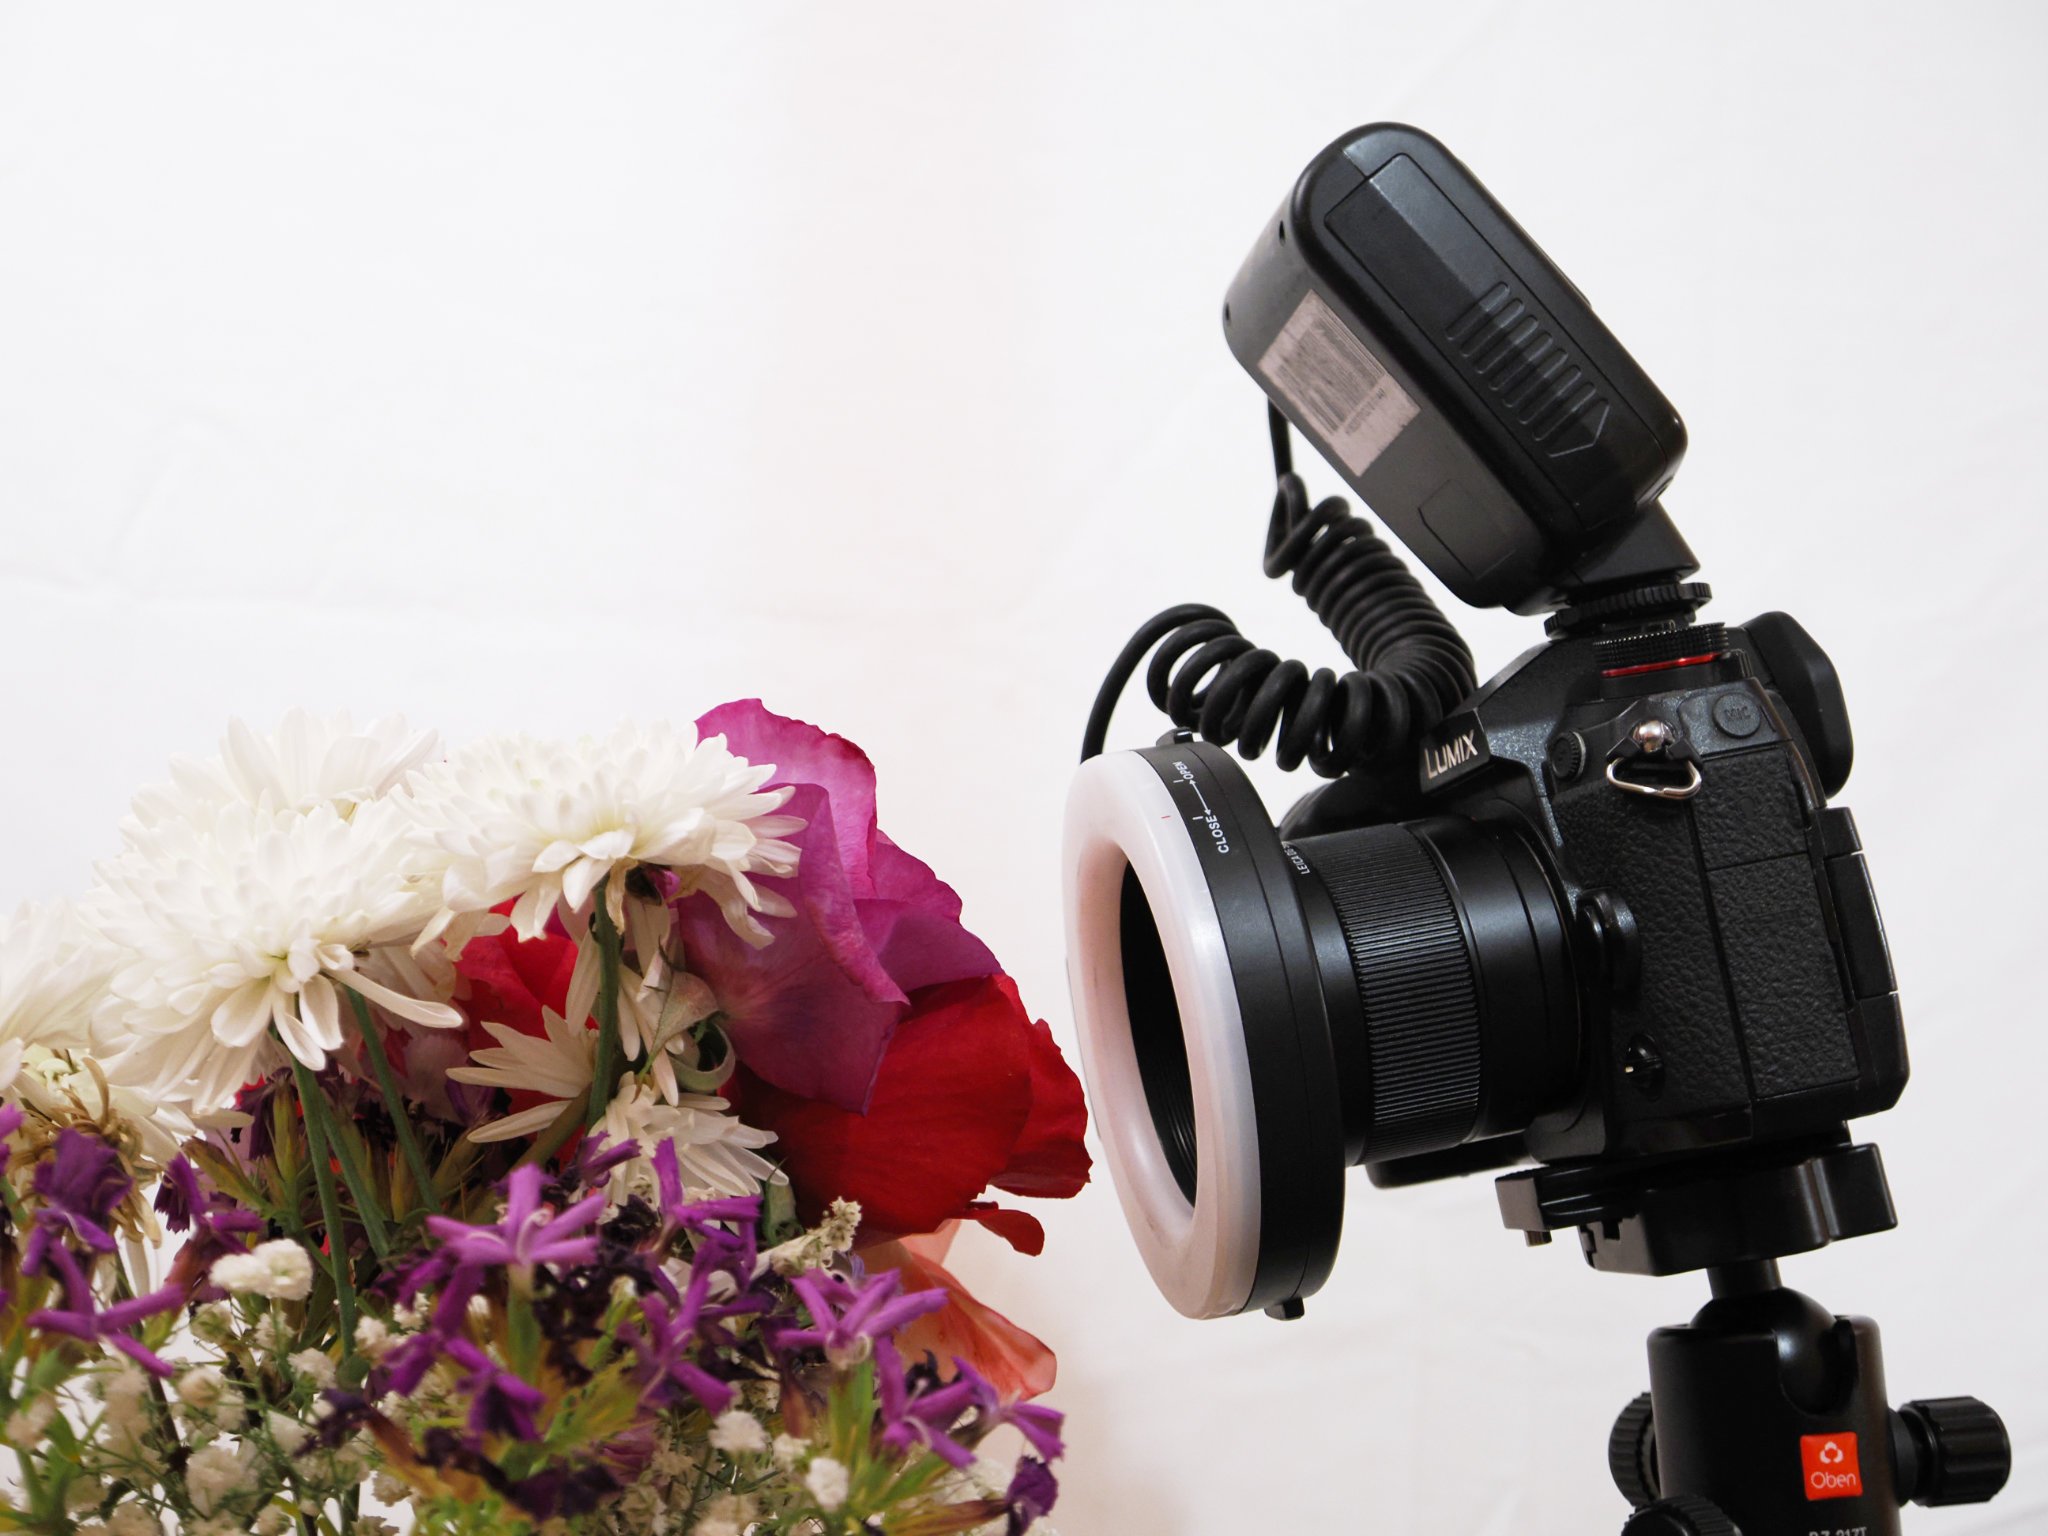
Ring flashes also tend to be extremely dim compared to normal flashes, which is not good for macro photography (since you’re at very narrow apertures). I’ve yet to see a ring flash design that incorporates a diffuser and also manages to be bright enough, so this may be a place for innovation!
Additional Tips
1. Utilize Reflectors
Even when you’re using a diffused flash, the light often is dominantly coming from above. So, the undersides of macro photography subjects may still be in shadow. It’s usually not a good look. For this reason, I always carry along a small reflector to help bounce the light from below. Almost anything reflective and white can be utilized as a reflector, and you can easily build your own.
2. Avoid Flare
Because the diffuser often extends in front of the lens, light from the flash may hit the lens directly, and this can cause terrible flare. I’ve certainly made this mistake before. Make sure that your flash and diffuser are slightly behind the front of the camera lens, or use a lens hood if you have enough space to do so.
3. Remember the Background
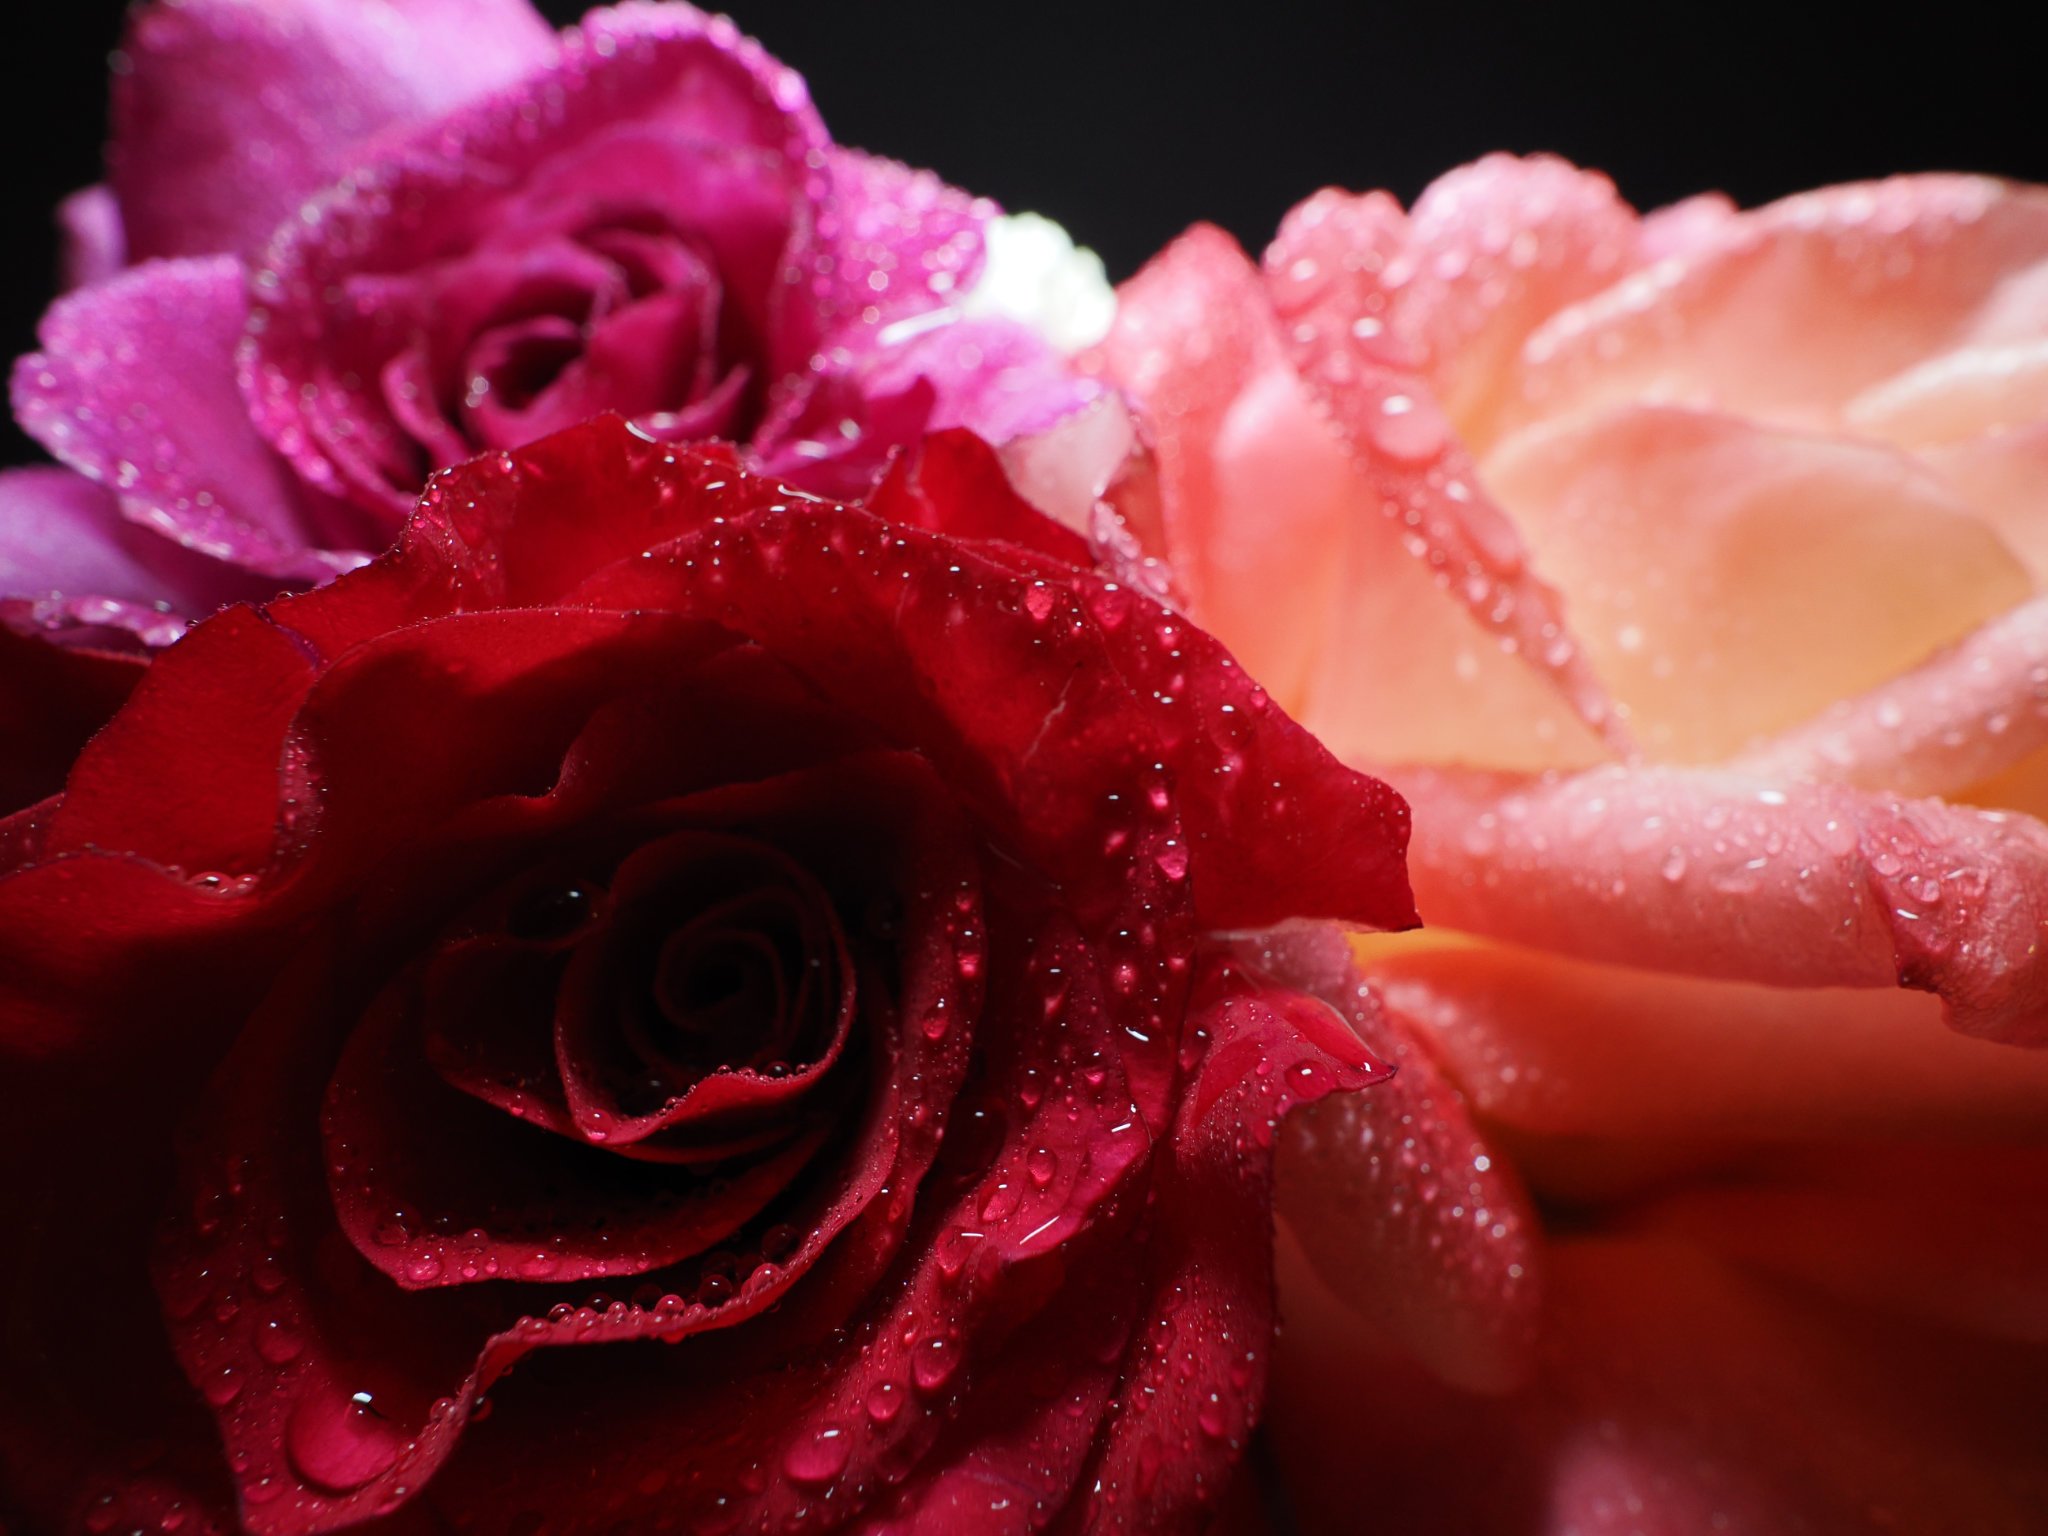
This article is all about lighting the subject in the foreground, but for a lot of close-up photography, you need to expose the background properly too. This is most easily done by shooting in manual mode. I generally recommend setting everything – shutter speed, aperture, and ISO – to make the background look right. Then, add the flash (and adjust flash output) to make the subject appear properly exposed.
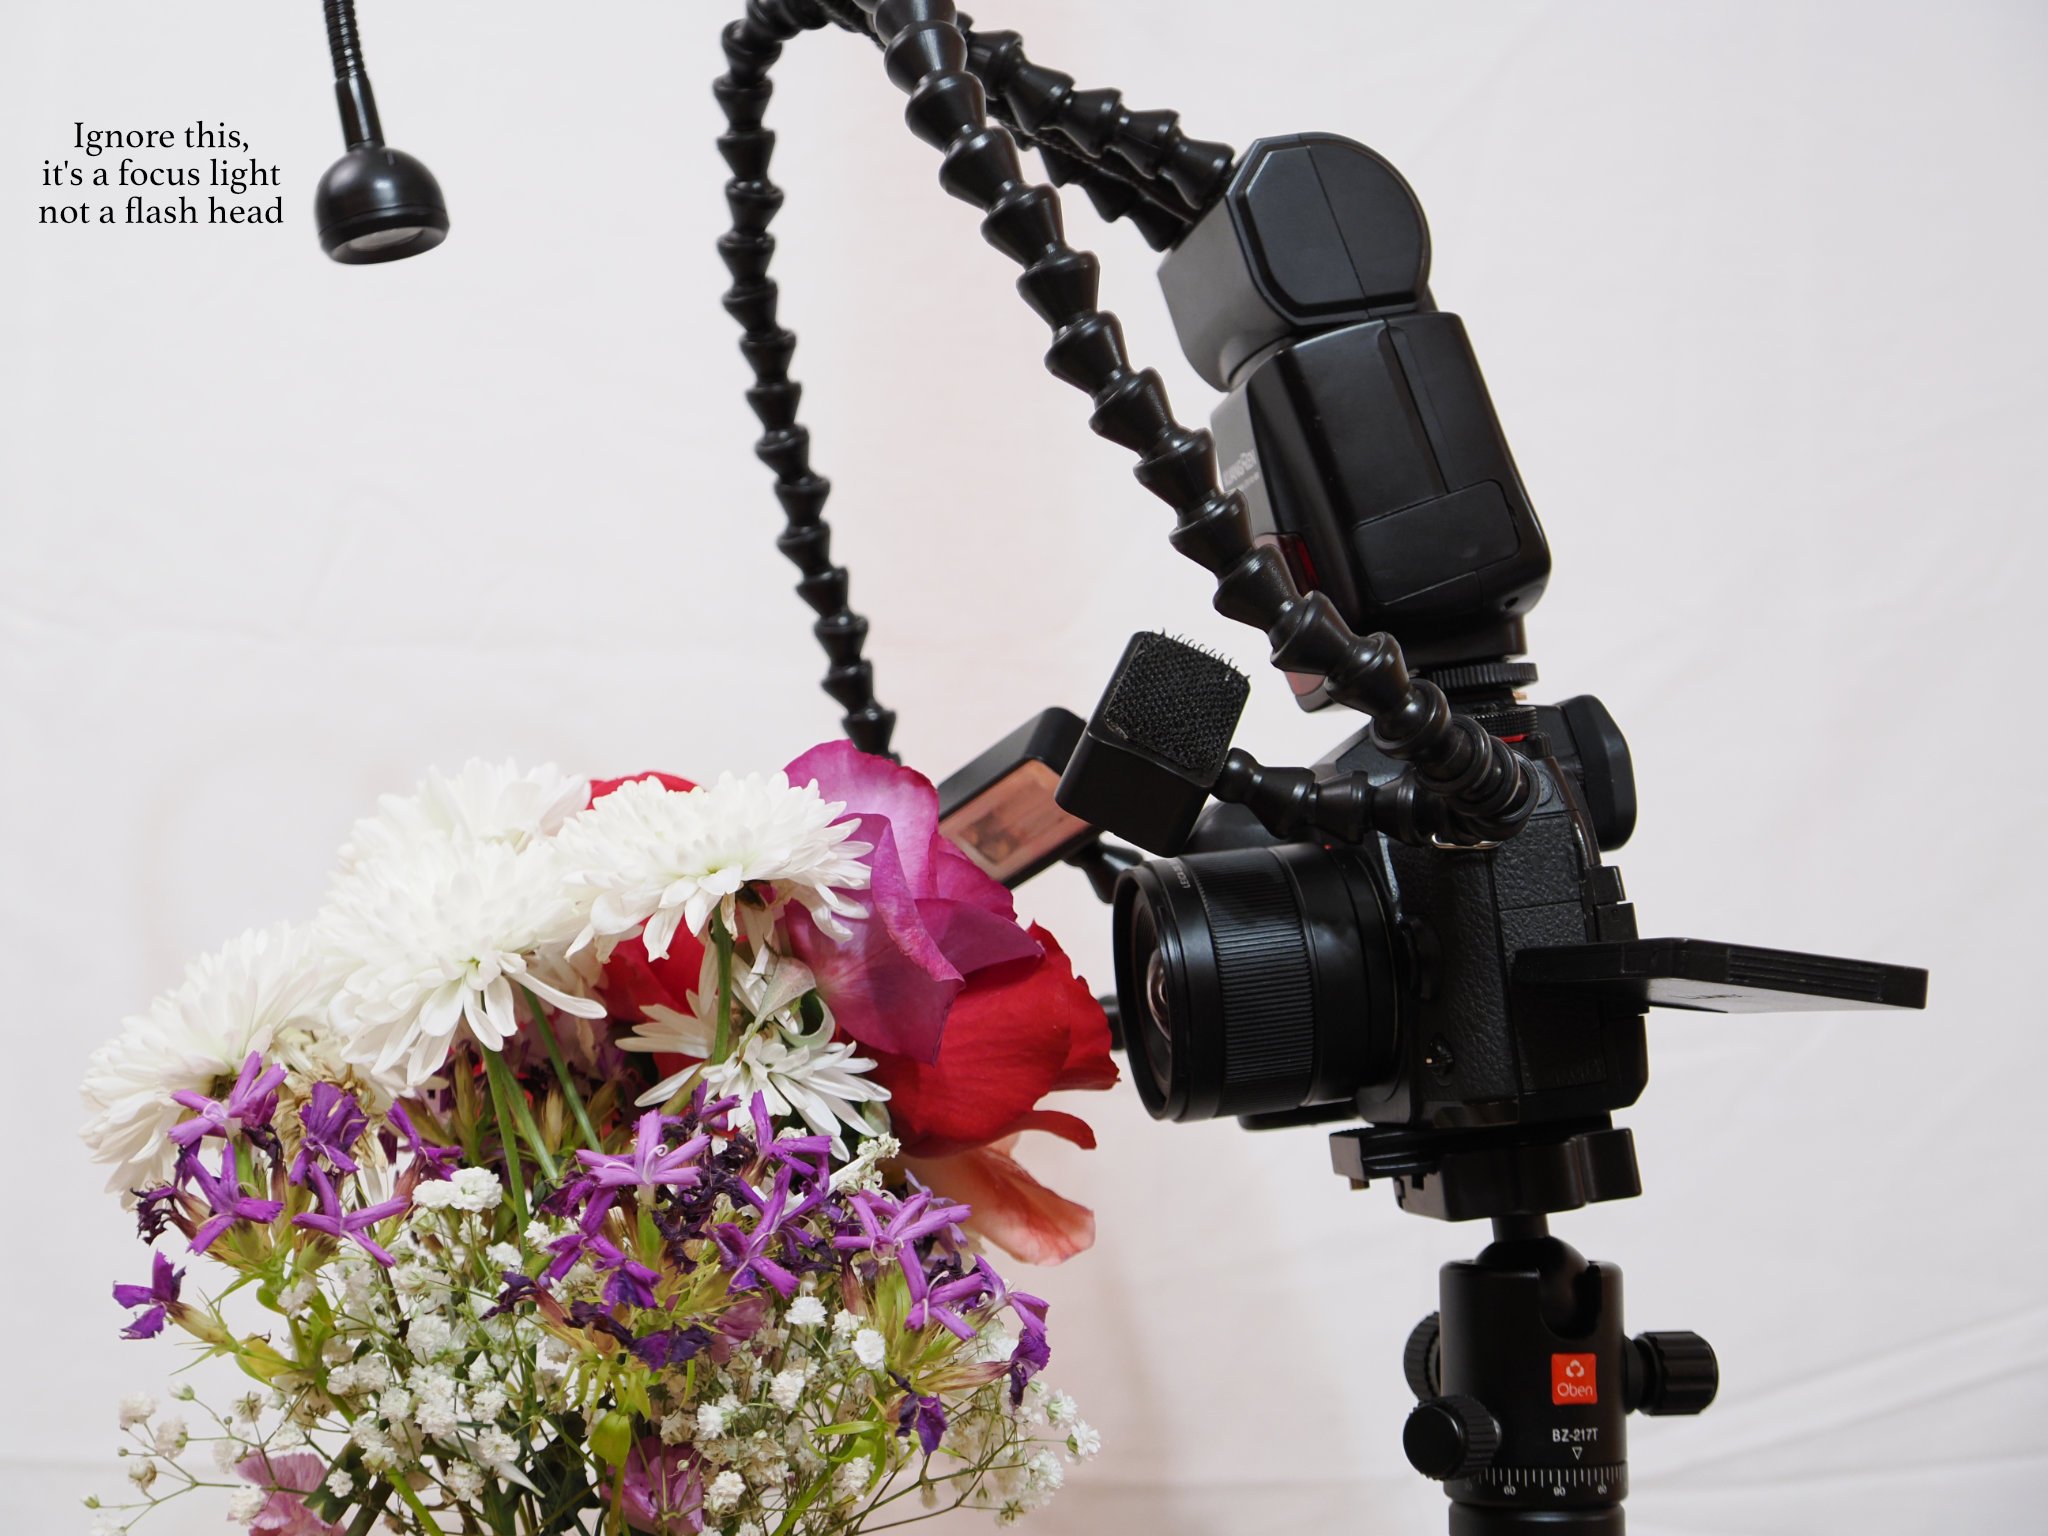
4. Use a Focus Light
Anyone doing close focus photography will inevitably run into focusing issues. Much of macro photography is done with manual focus because even the best macro lenses have a hard time focusing properly at high magnifications! But this makes focusing even trickier, especially in dark conditions.
One solution is to use a focus light. A few flashes have built-in focus lights, like the one I showed earlier. Other times, you can potentially put a small light on top of your camera or use a ring light for this purpose.
Most of the time, however, I don’t have a dedicated focus light, so I use a flashlight. I don’t want the flashlight’s light to appear in the photo, so I set it to the lowest power and sometimes even bounce it off of my own diffuser. The idea is to get enough light to focus and compose your photo, without shining on the subject obtrusively.
5. Don’t Be Afraid to Build Your Own Modifiers
This tip is perhaps most important. The perfect light modifier for macro flash photography doesn’t exist on the market. This is part of why really superb lighting in macro photography is a rare sight!
Building your own diffusers and light modifiers is a great way to get your creative juices flowing, while also personalizing the types of photos you’re planning to take. It’s not always an easy process, but it’s one of my favorite parts of photography. When you design a great diffuser yourself and take some good photos with it, that’s a great feeling! The difference between an okay photo and a superb photo may all be thanks to materials found in a recycling bin.
Conclusion
Using a flash for macro photography can be tough, but it’s very important if you want the best possible results. I hope that the techniques in this article will help. The biggest point is to diffuse your flash and make sure that light is reaching your subject from all angles. Even if that requires some DIY flash diffusers, it’s absolutely worth it.
Remember to experiment with different flash setups, especially by adjusting the angles and positions of your flash for each unique situation. Not every macro photo should have exactly the same lighting. With practice and experience, you’ll master the art of flash for close-up photography, and your photos will improve by leaps and bounds when you do! Let me know in the comments if you have any questions.
For Nikon users, the R1C1 macro flash kit is also quite nice.