When you know how to dodge and burn your photos, you’ve mastered one of the most important techniques in photography – using post-production to draw a viewer’s eye through an image. There are dozens of techniques for dodging and burning, although doing it incorrectly can lead to unnatural halos and other artifacts in an image. So, what are dodging and burning, and how can you make the most of them in photography?
Table of Contents
What Are Dodging and Burning?
Dodging and burning are two of the oldest creative post-processing techniques in photography. They originated early in the darkroom days, and they’re quite simple to understand:
- Dodging: Brightening part of a photograph
- Burning: Darkening part of a photograph
Dodging and burning are local adjustments, meaning that they target specific areas of a photo rather than adjusting the whole thing equally.
In the darkroom, you’d dodge an image by preventing some of the enlarger’s light from shining on your light-sensitive paper. For example, you could attach a piece of cardboard to the end of a thin handle, then hold it over the area where you want to block the light.
Or, to burn an area of your print in the darkroom, you would simply allow more light to shine on it. The easiest way to accomplish this is to use a large sheet of cardboard with a hole through the middle, then position it strategically over the area of the image you want to darken.
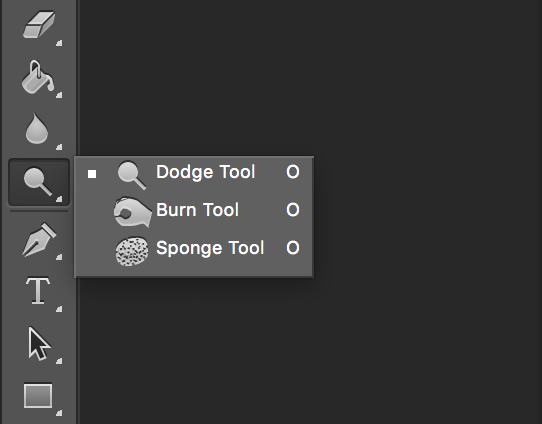
Even today, the dodge and burn tools in Photoshop look like a lollipop and an open-hand circle, respectively. They mimic the shape of the dodge and burn tools in the darkroom.
Why It’s Important to Dodge and Burn Photos
A large part of post-production is emphasizing the parts of your photo that work well – and de-emphasizing the parts that don’t. For example, if your portrait subject has beautiful eyes, you want to make sure the viewer can see them well. This is where dodging and burning are very important.
By brightening or darkening part of an image, you draw attention toward it or away from it. Photographers frequently “burn” the corners of a photo (darkening them manually or with the vignetting tool in most software) to attract more attention to the center. They’ll “dodge” other areas, like people’s faces or eyes, as well as foreground subjects in a landscape that are meant to draw a viewer’s eye.
Usually, the best dodging and burning is subtle. You don’t want your viewer to notice that part of the photo is unusually bright or dark.
Sample Images
Take a look at the examples below, and see if you can guess which objects have been dodged or burned in each one. Answers shown after all four images:
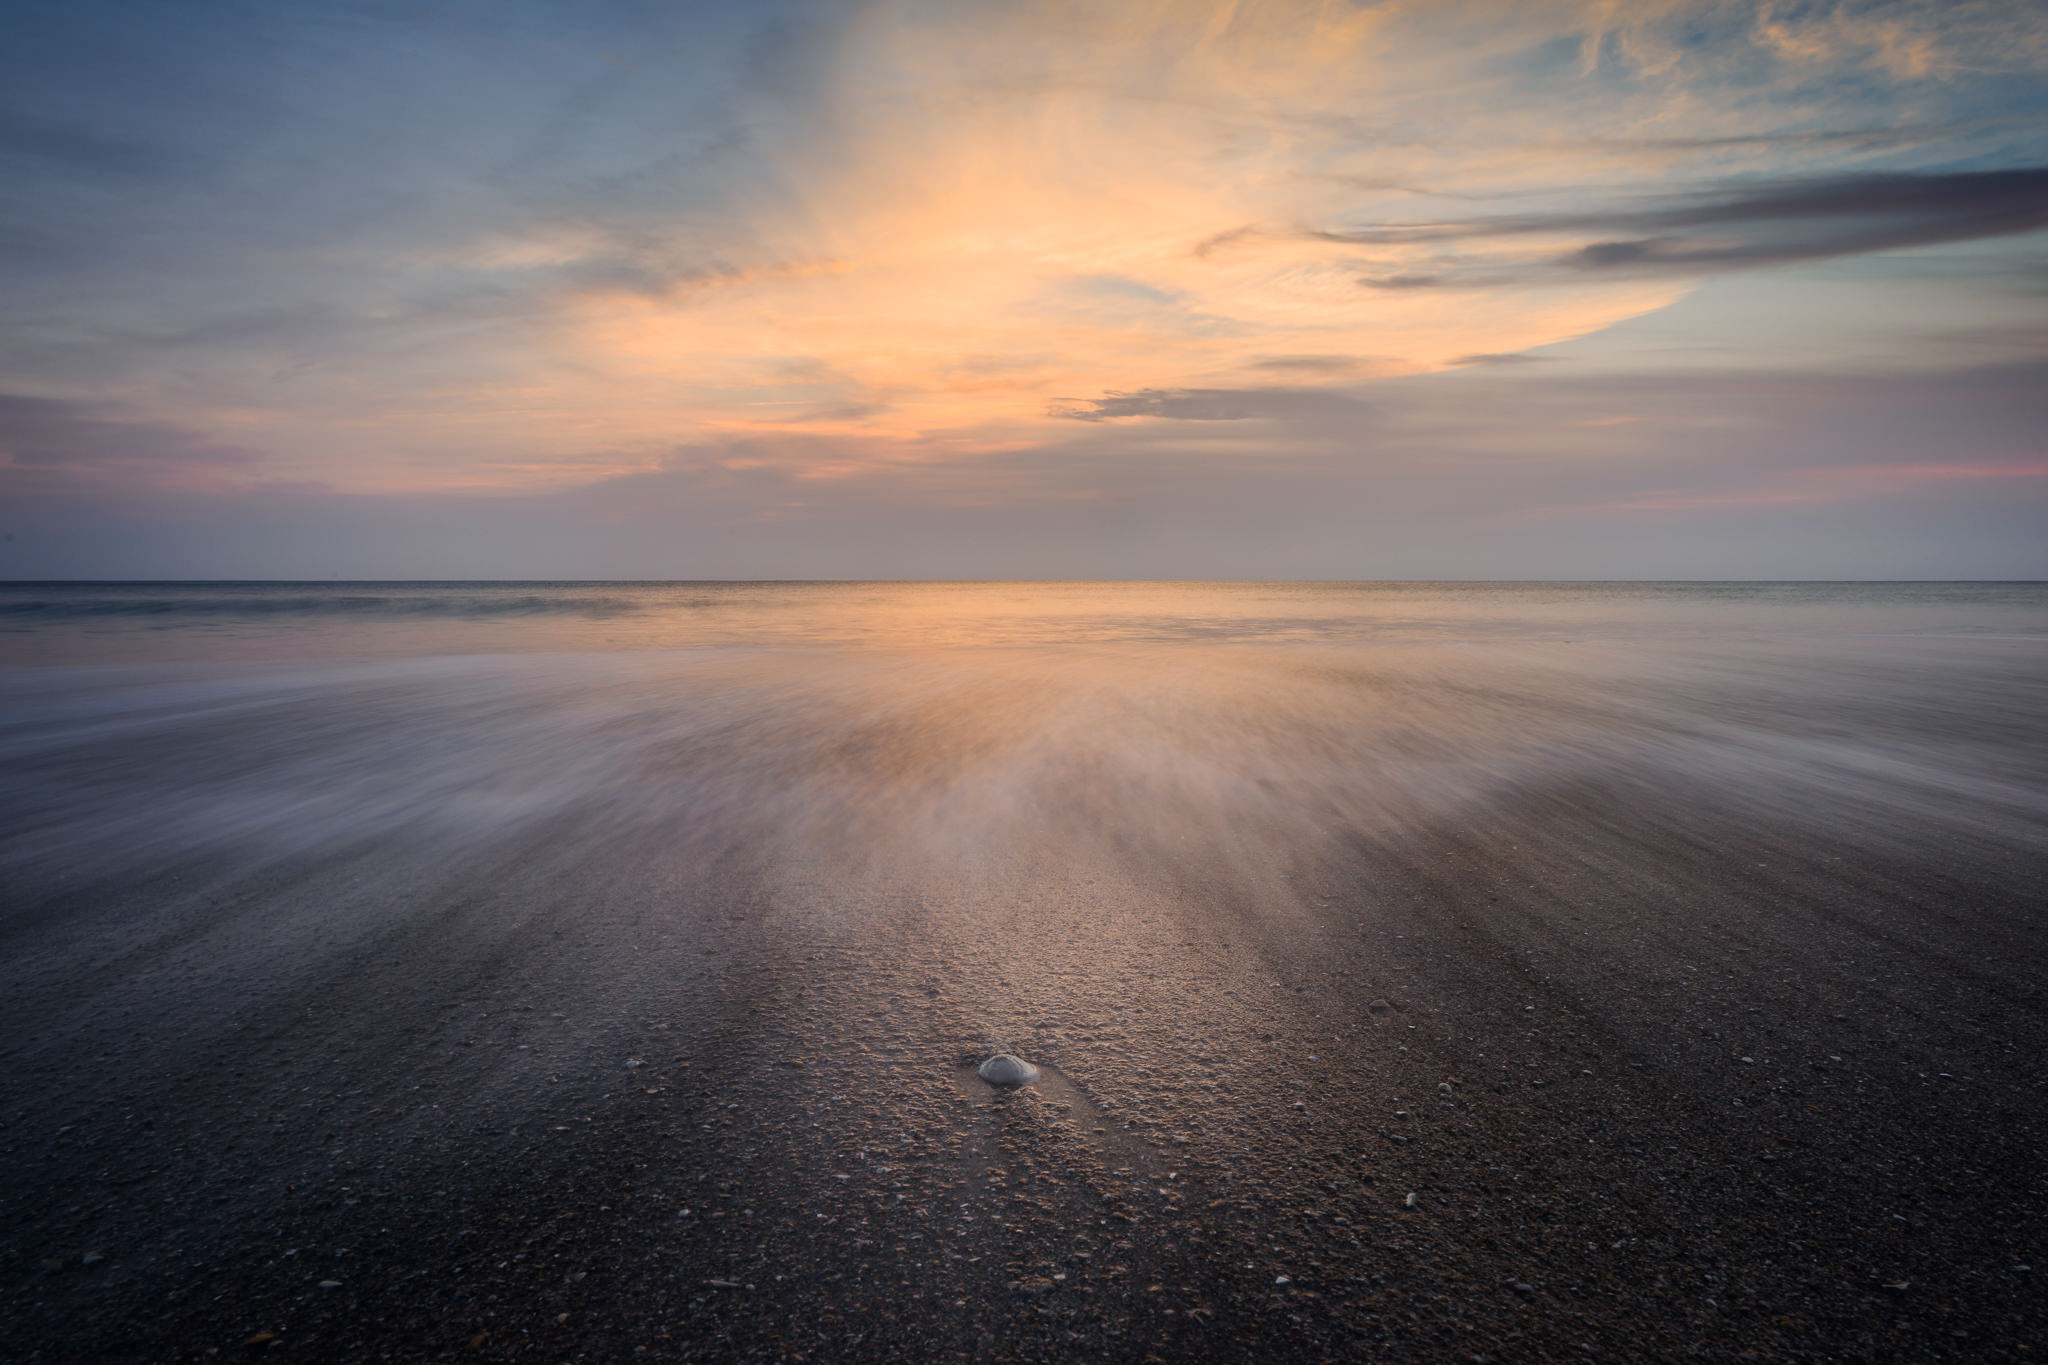


The first image above is pretty easy. There, I dodged part of the foreground near the shell, making it easier to see. I burned one of the clouds in the sky that was too bright.
In the second image, I burned various areas of the sky that had faint traces of clouds, de-emphasizing them and attracting attention to the beam of light in the center. Although you may think I dodged the cloud in the very center to emphasize it more, I actually kept it mostly the same, aside from burning a bit in the center that was too bright.
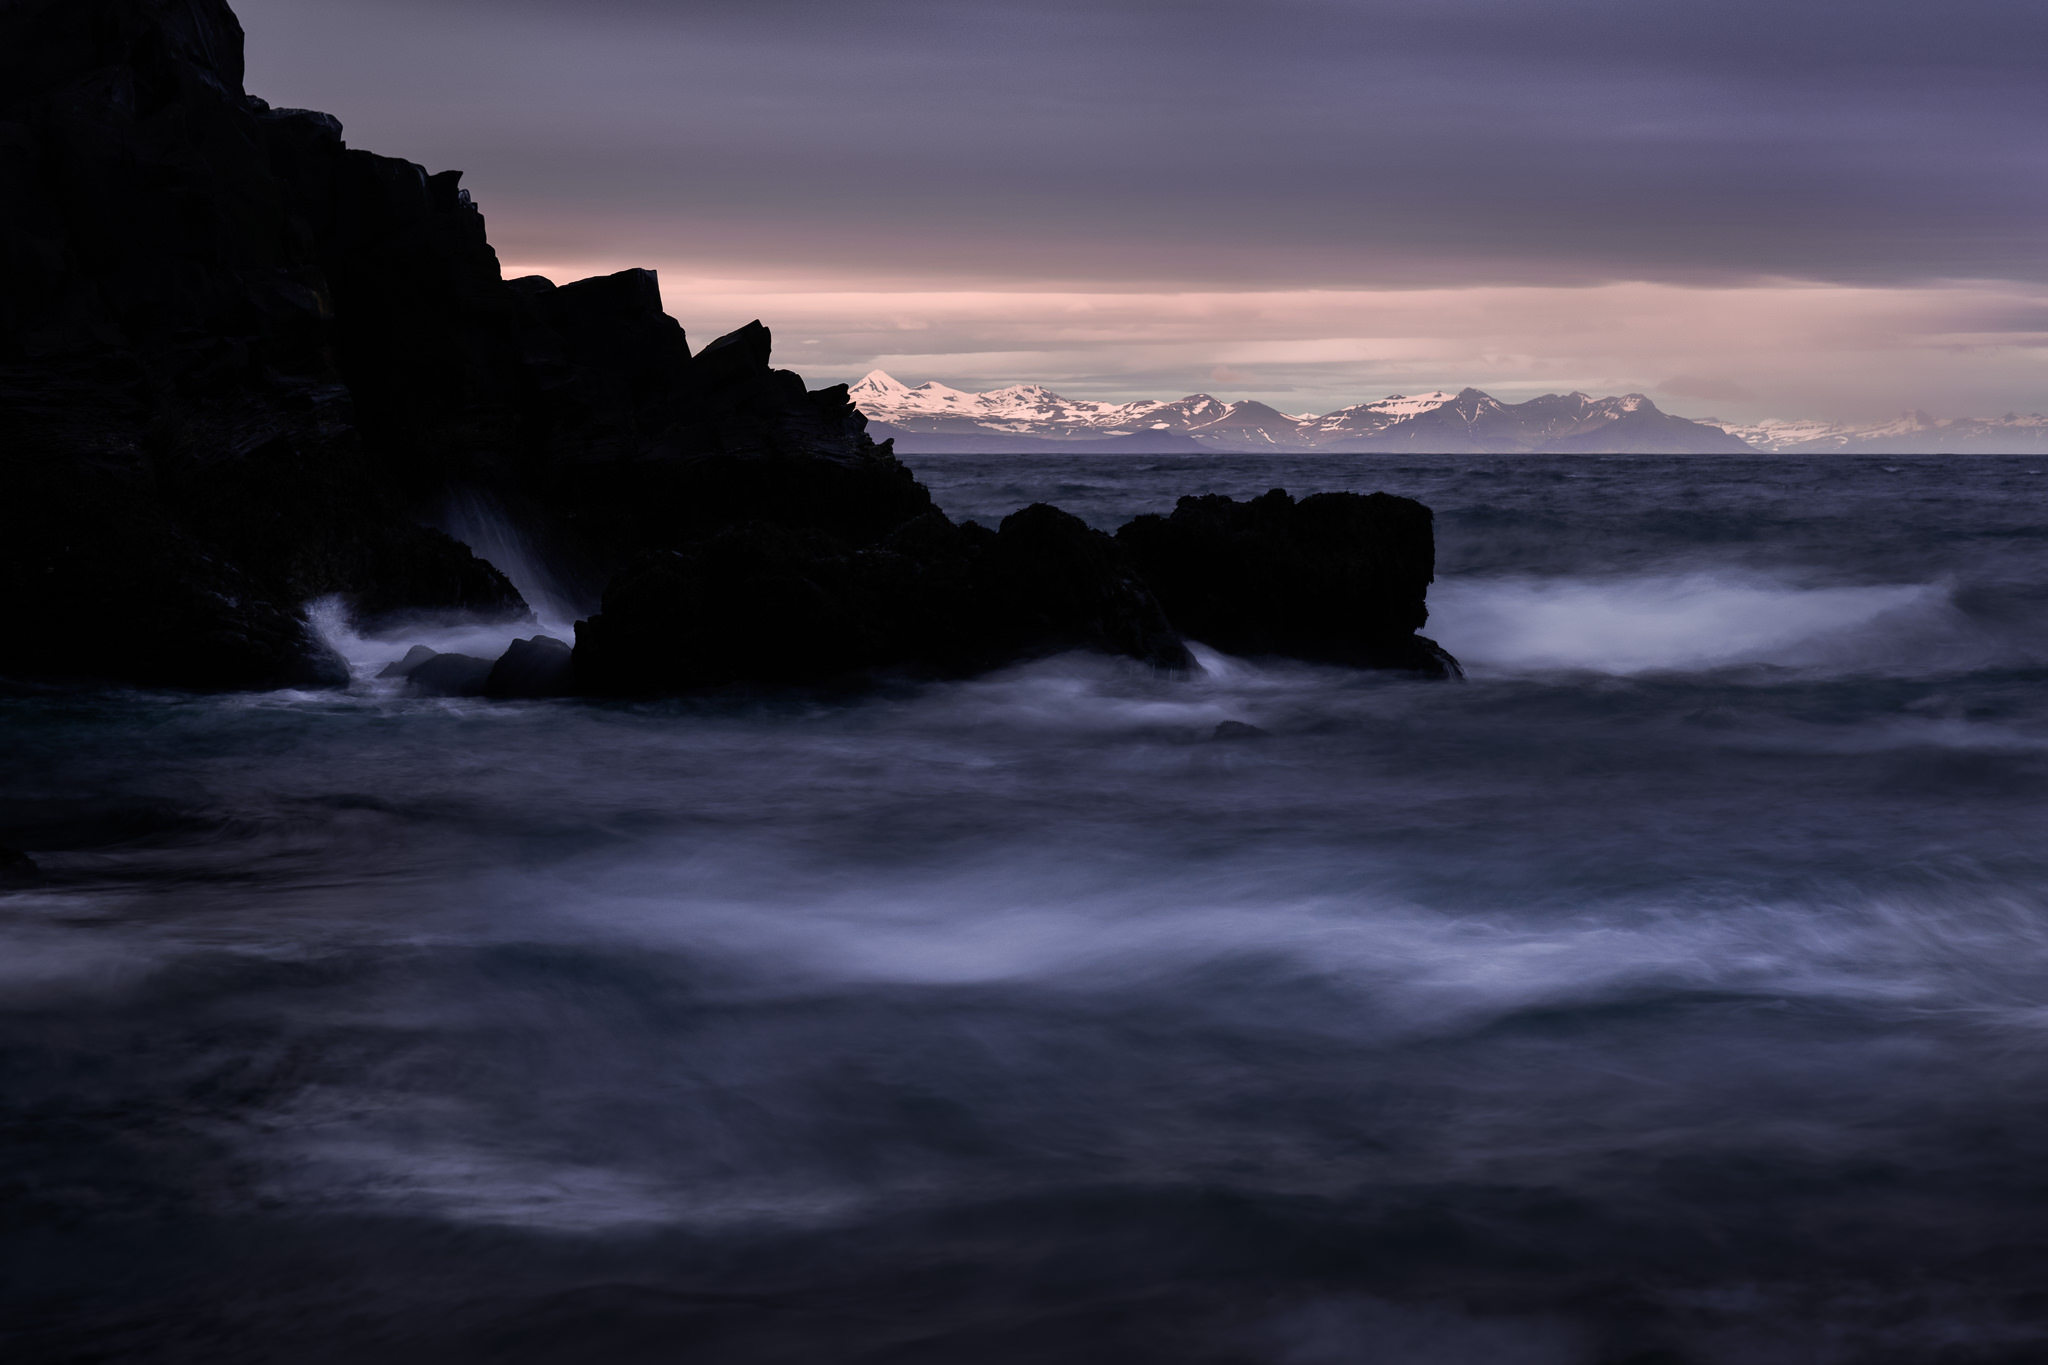
What about the third image? This one is even trickier. Notice the three layers of relatively bright waves, as well as the splash around the rock on the left. I dodged the bottom-left wave significantly. The large center wave, I didn’t touch at all. The upper-right wave, I burned quite a bit. For the splash, I dodged the left half and burned the right half.
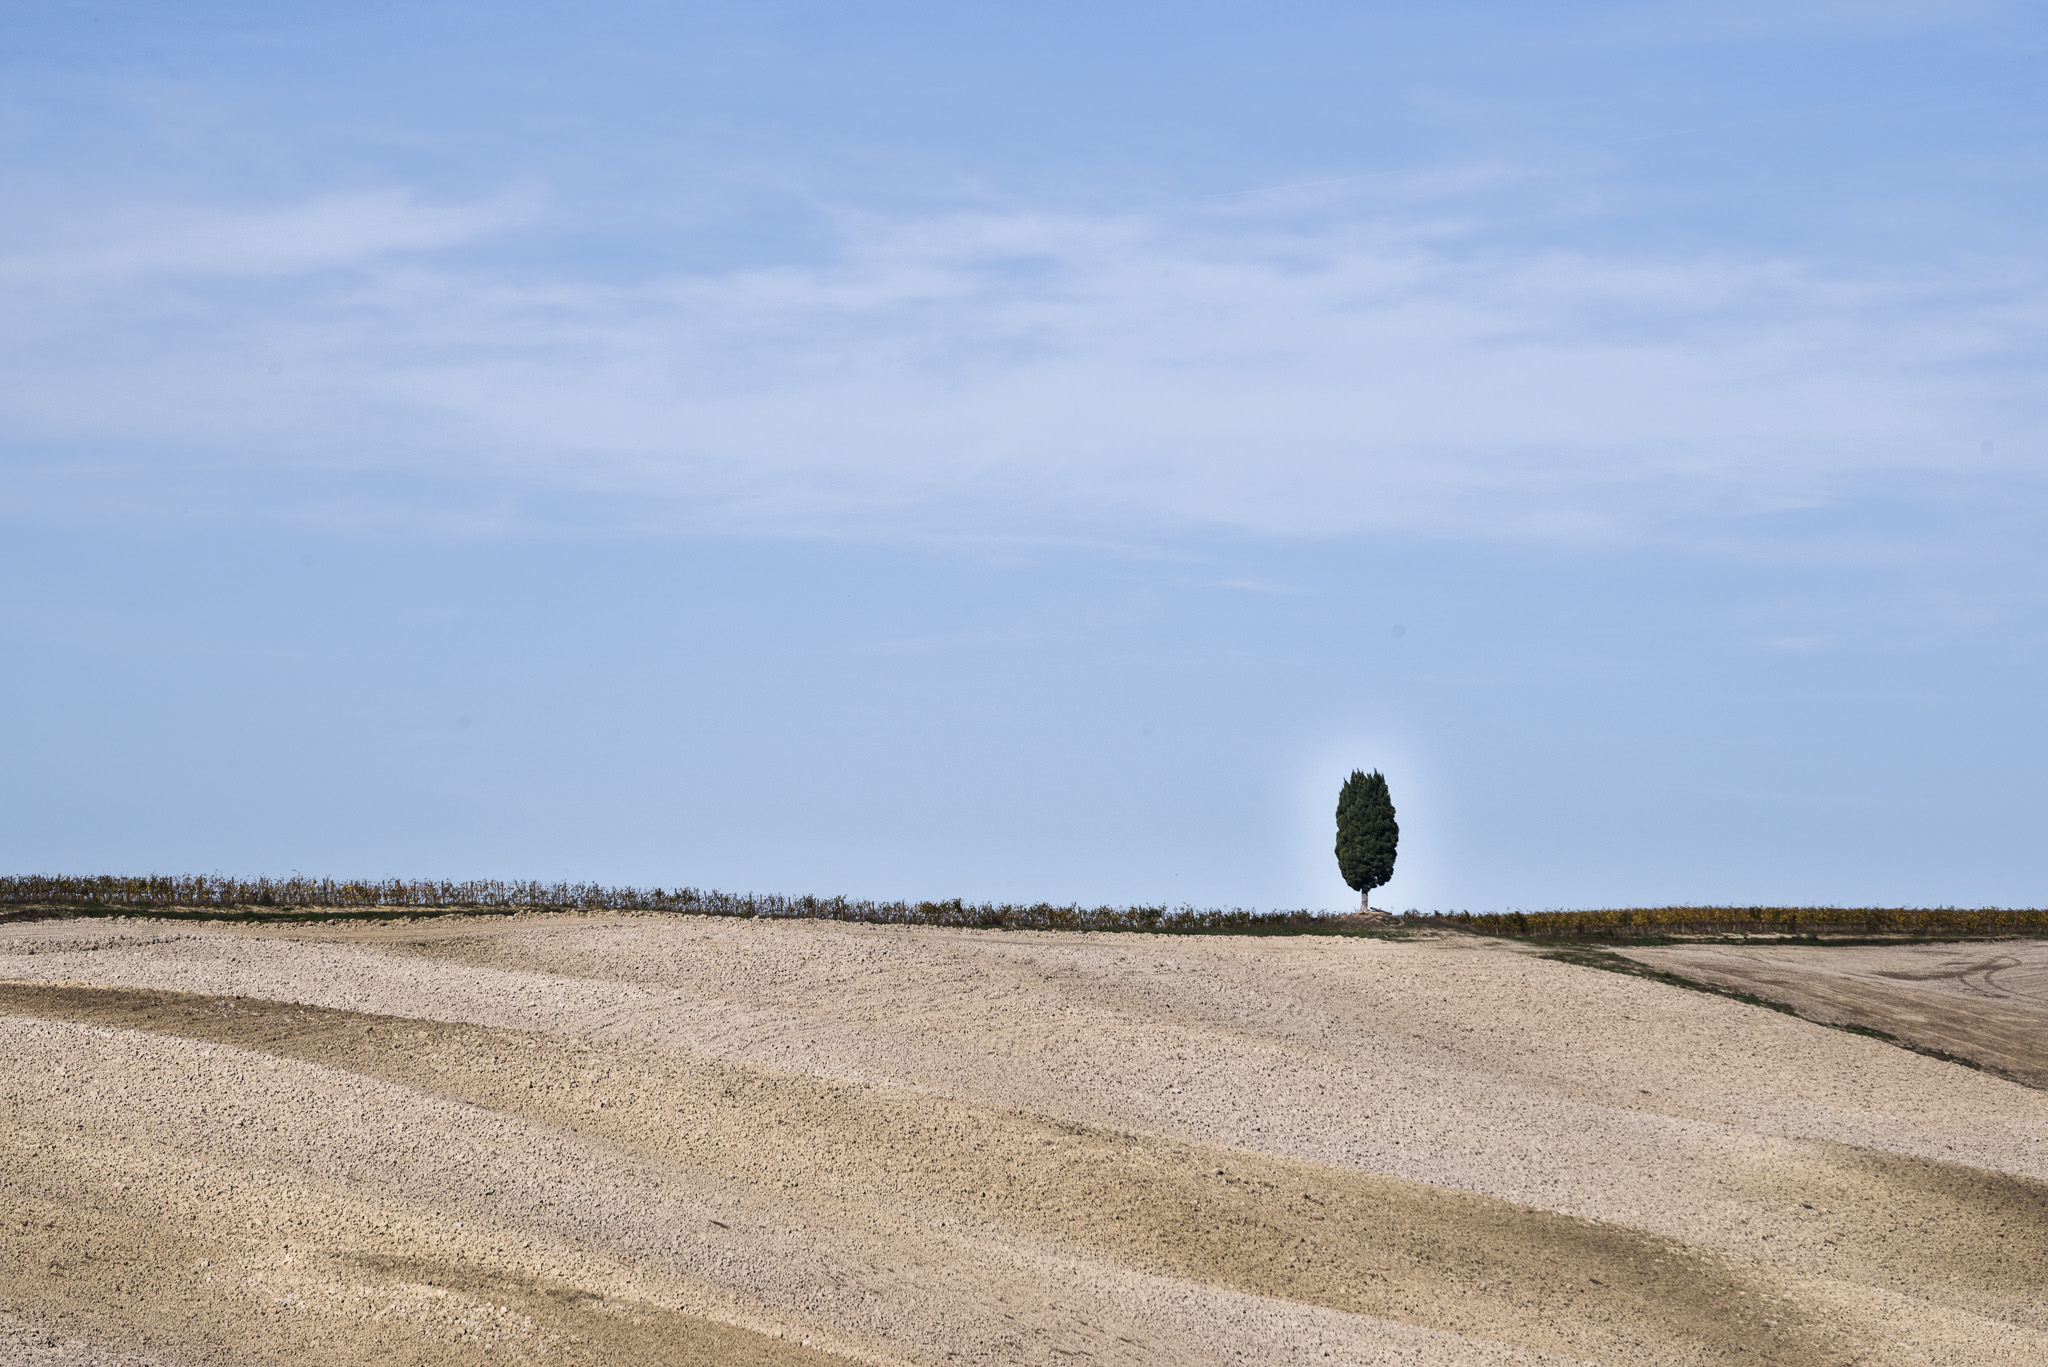
And the last image above – surely I dodged the rock? In fact, although I did do a global boost of the shadows in this image, I didn’t do any local dodging or burning to the rock itself, or anywhere else in the image.
The point here is that there is no formula you should follow for which objects to dodge and burn in a photo. Don’t always dodge faces or foregrounds; don’t always burn clouds. Instead, in a given image, ask yourself which items are too dark or too bright in the context of their surroundings. Only then should you start dodging and burning.
Avoiding Halos
One tricky aspect of dodging and burning is “coloring in the lines” – making sure that you brighten or darken the object you want, and nothing more. If you get this wrong, you might end up with bright or dark halos around the objects in a photo, and it won’t look very realistic.
So, how do you avoid halos when you dodge and burn? Even carefully drawing your mask doesn’t always work – or it can be prohibitively difficult, like perfectly selecting all the leaves on a tree against the sky. But there are a few different techniques to get around this problem.
First, if your post-production software allows it, target areas by the brightness they already have. In other words, restrict your dodging just to areas that are already in shadow, or your burning to highlight regions alone. That way, if your subject is in front of a background with different brightness, you can color outside the lines without worrying as much.
Targeting by luminance isn’t possible in all software, though. Not to worry – you still have good options to avoid halos. The best is to use more than just the obvious method of brightening a local area of an image. You don’t always have to use the “exposure” or “brightness” slider. Instead, you can use shadow adjustments, contrast, clarity, even saturation to do something similar.
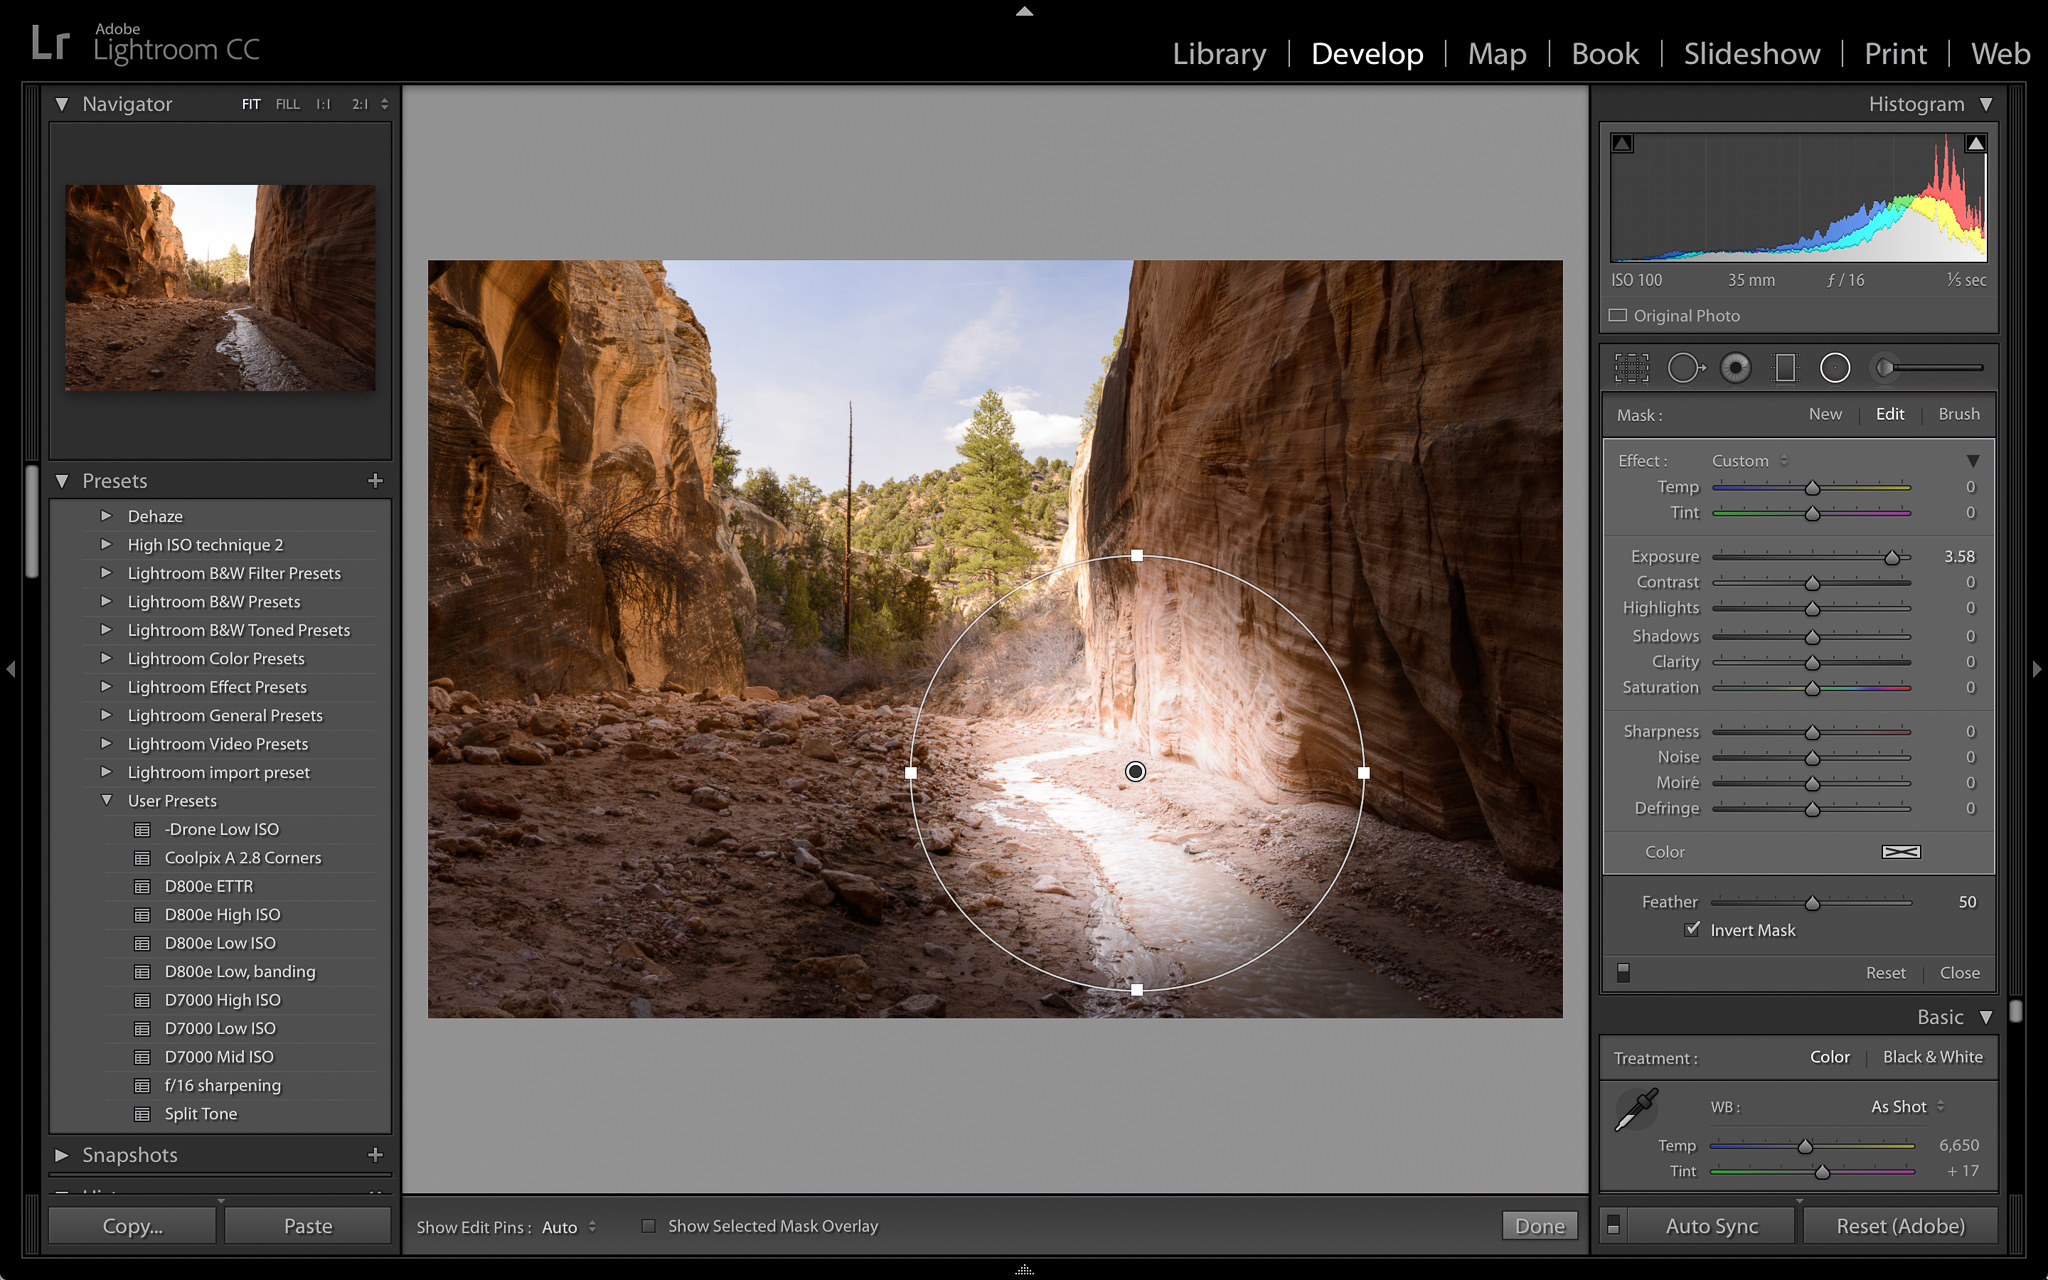
For example, say that you’re using Lightroom and you want to dodge a shadow region without creating halos around it. Although the newest versions of Lightroom have a “luminance range mask” to target specific areas, older standalone versions do not. In that case, the best way to dodge shadows is to create a small brush or gradient and simply increase the “shadows” slider. Your chances of producing an ugly halo with this method are much lower.
Recommended Dodge and Burn Methods
The best method for dodging and burning depends on the software you’re using. Different photographers also have their own preferences, particularly in complex software like Photoshop. So, although you may find the following recommendations for dodging and burning to be helpful, it’s worth experimenting to figure out your own preferred techniques as well.
Photoshop
There are dozens of ways to dodge and burn an image in Photoshop, and the specific “dodge” and “burn” tools aren’t even the best in many cases.
First, when you’re planning to dodge and burn, it’s critical that you do so on a new layer. If you dodge and burn the base layer in Photoshop, you won’t be able to adjust your changes aside from undoing them entirely.
Beyond that, though, the best practices get a bit tricky. I’m a fan of creating adjustment layers – say, curves – and masking out the areas I don’t want it to apply. That’s an easy, flexible method that doesn’t harm your base layer at all.
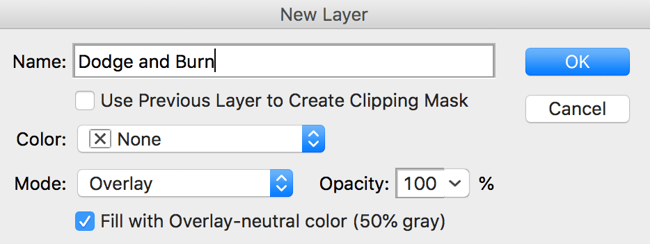
There are more complex methods as well. One popular option is to create a new layer and fill it with 50% gray, then set its blend mode to “overlay” rather than “normal.” By painting directly on this layer with a white or black brush, you brighten and darken the regions of the photo you want, respectively.
Or, if you just want to do it the rough way, duplicate the base layer and use Photoshop’s built in dodge and burn tools. If you later decide that some of your dodging and burning was a bad idea, mask out those areas to reveal the base layer below.
Lightroom
Before you get to the local dodging and burning steps in Lightroom, it’s a good idea to do as much as possible with global adjustments (edits that apply to the entire image). That’s because global adjustments are far easier to change and undo. Local adjustments quickly get out of hand as you add more and more, not to mention slowing down Lightroom’s performance.
When you do end up adding local adjustments, I recommend starting big. Do gradients (standard, then radial) before you using the brush tool. Often, a single well-placed gradient can solve the same problem as a dozen brushes.
If you’ve gone down the line and you’re using brushes, I recommend staying away from the “exposure” slider in most instances. It is the most likely to give halos, since it targets all regions of brightness fairly evenly. Instead, use “highlights,” “shadows,” “whites,” and “blacks” – and don’t stop there. One of my favorite ways to darken distracting highlights is with Lightroom’s clarity feature, which also softens up transitions around it.
If you’re still running into haloing problems, it’s time to use the new luminance range mask. But you’ll usually be able to solve your problems without it; after all, Adobe didn’t even add this feature to Lightroom until recently.
Capture One
My suggestions for Capture One are akin to my suggestions for Lightroom in many ways. Start global, and only go to local adjustments when that fails. Do gradients, linear and circular, before moving to the brush tool. And venture beyond the standard “exposure” or “brightness” slider when dodging and burning.
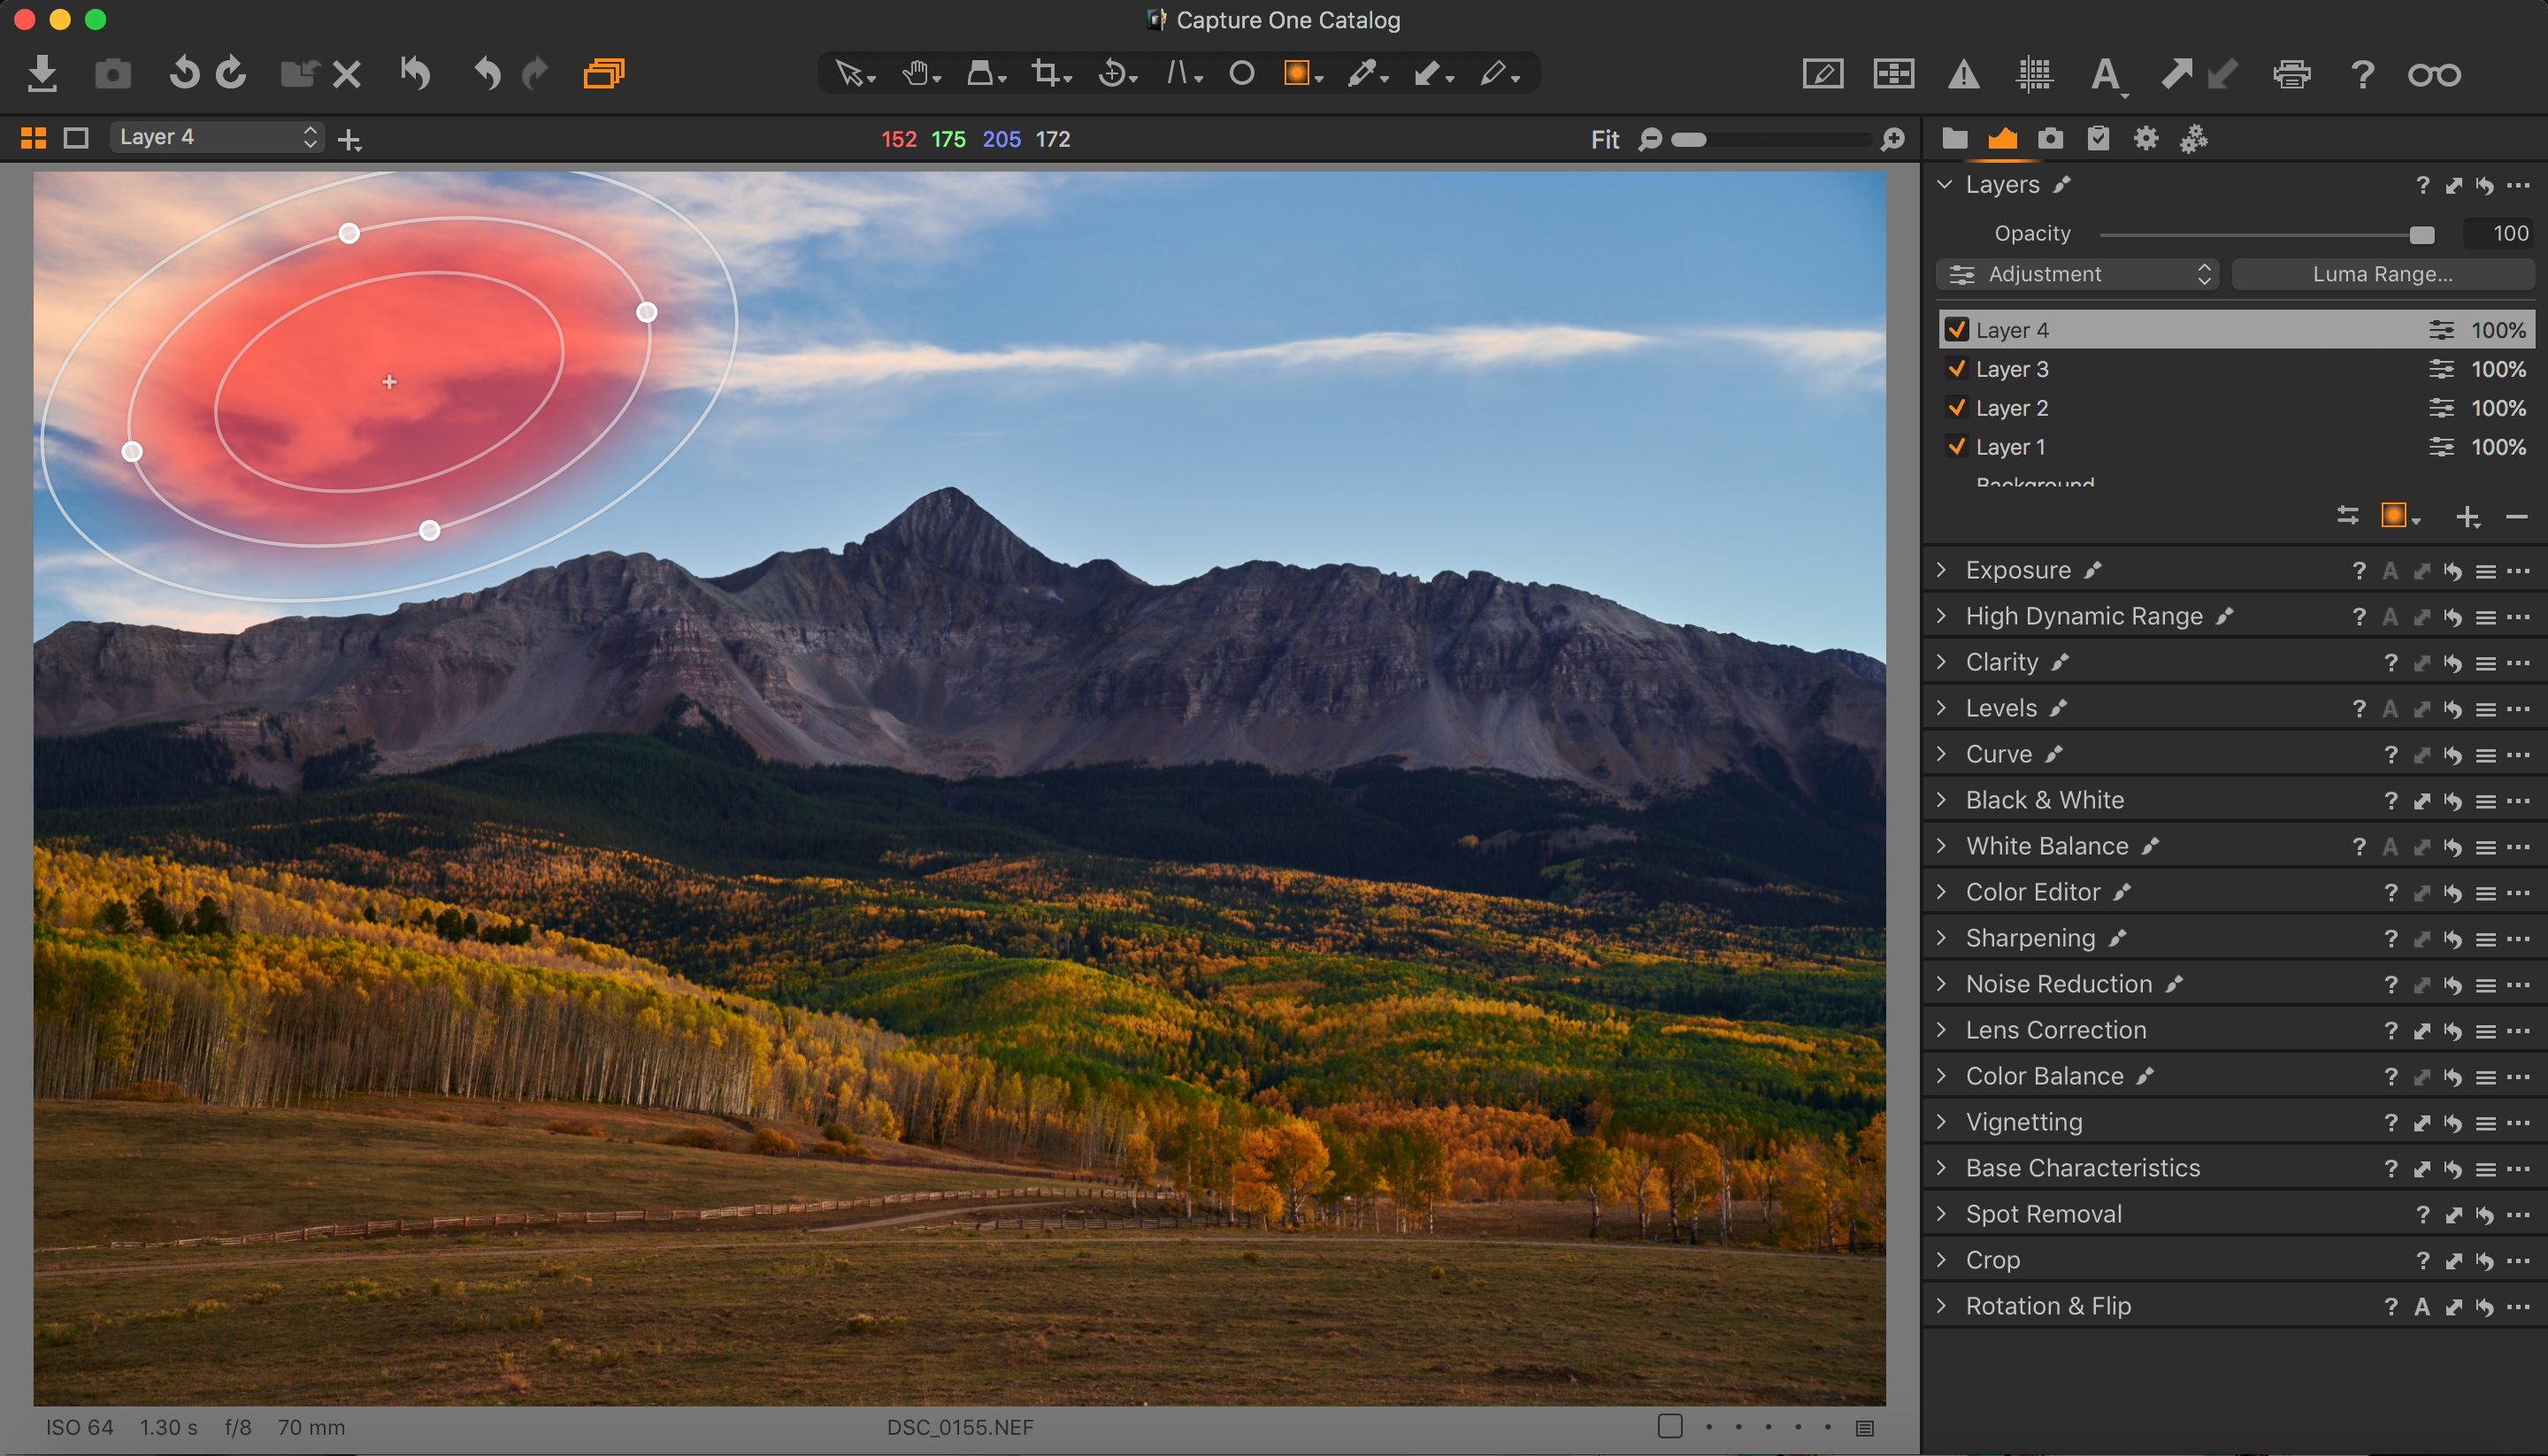
Two extra points apply in Capture One that aren’t true of Lightroom. First, local adjustments require the use of Capture One’s layer capabilities, which are quite valuable. They don’t slow down in the same way as Lightroom’s local adjustments, and their opacity can be decreased if you decide later that you don’t want your edits to be as dramatic. So, don’t shy away from layers.
Second, the refined color adjustments in Capture One mean that you can target certain areas very precisely without doing local gradients or adjustment brushes – more so than is possible in Lightroom. Use this before adding local adjustments, or use it in tandem with just one or two brushes/gradients so that you don’t need dozens of them.
Other software
The recommendations above for Lightroom and Capture One apply to most software on the market. Start global, and only do local dodging and burning when you must. Even then, don’t do too many local adjustments, and know ahead of time how you want the final image to appear. Lastly, be flexible with the type of local adjustments you do; use more sliders than just “exposure.”
Conclusion
Hopefully, the tips in this article gave you a good idea of the importance of dodging and burning. Although not every image uses these techniques, they’re some of the most valuable to have at your disposal no matter the genre of photography. Let us know below if you have any questions or comments about the best way to dodge and burn photos in various software, or anything else you have in mind!
Thank you very much for this article! Hopefully beginners in photograpy read this. This is the basic knowledgement if you want to better your photography and really understand it. I have been in photography business nearly 40 years, loved it and still loving.
There is a quite simple and effective Photoshop method used by Charles Cramer which he described on LuLa, called Tonal Selections:
1. Select a certain feathered area of the image using the Lasso tool.
2. With the selection create a new curves adjustment layer.
2. Use the curve to brighten (or darken) a certain tonal range of the selected image area while protecting the rest of the tonal range by locking them down on the curve.
See: www.luminous-landscape.com/tutor…ions.shtml
I find his Example Four showing how to brighten the backlit steam of tree trunks in the sun most impressive.
He also demonstrates this techniques in one of the videos of the “Shooting with the Masters” series on LuLa (problably Part 3).
Wow! Great article! Dodging and Burning In are very old friends of mine, however, I haven’t used them since I moved out of my parents house some 40+ years ago. I no longer have a darkroom, AND, I was unaware that Photoshop had those tools. Live and Learn…
Thanks so much for a great read.
Joe
I would never use dodge and burn tools, but rather create high and low level curves layer and invert mask then “paint” it as needed.
I’m sorry, but the word, “Mastery,” is a bit too much…
To master something means to become proficient at it. The word is used correctly in this essay. A few seconds with a dictionary would have told you so.
It always faintly annoys me that the terminology is wrong.
In the darkroom, dodging was using a bit of cardboard to reduce the light falling on an area of a print, burning was using a bit of cardboard with a hole in it to increase regional exposure. The names and to do with the technique, not the effect. In a negative to positive process, such as printing from a black and white negative, holding light back increased the brightness of a region and adding light decreased the brightness of a region. Most people doing their own printing from film only did black and white. But if you were printing to Cibachrome, you were printing from slides and this was a positive-to-positive process. Dodging was still reducing regional light and burning was still increasing regional light but they had the opposite effects. Dodging made areas darker and burning made areas lighter.
The digital world is also a positive to positive process. You are working with positive images, equivalent to slides, which you may eventually print. Dodging should mean darkening regions and burning should mean lightening them. The terminology, as well as being counter-intuitive, is just plain wrong. I suspect it goes back to the early days of Photoshop, where the designers were only familiar with black and white printing.
Murray, very interesting notes, thank you for adding this! I was familiar with dodging and burning for negatives in the darkroom, but didn’t realize that slide film was the opposite (or the same in terms of increasing/reducing regional light).
I like Viveza
Another great article Spencer.
I dodge a lot of my portrait pictures as I find it give a natural pop when it’s well done. Especially with large apertures.
Simon
Thank you, Simon! Dodging portrait photos can lead to a great look. Same with burning the background of a portrait to emphasize the subject if it’s too distracting. It’s one of the reasons why lenses with a lot of vignetting work very well for portraiture and often lead to very dramatic shots out of camera – it’s like having built-in burning.
Introducing Nikon 105 f/1.4 ;)
I’ll add that Capture One 12 has now the luma range adjustment which can be used with layers, which lets you use the normal layers much more precisely than before. I find it especially useful as for instance, there are some areas of an image (say, a not too well lit face of a person) that I want to brighten up a bit and change the temperature of along with some sharpening without though wanting to add noise to the rest of the mostly dark image. Of course you could do it even before with the layers but the chances of screwing up and ending up with some haloes or unnatural-looking elements were much higher.
As for the article, well written as usual. I certainly didn’t know about the origins of dodging and burning and while I use photoshop on a few photos I didn’t know about the “gray overlay layer” (if I can call it that), something I’ll definitely be looking into. Thanks for the read and happy holidays!
Tomáš, I’ve been using Capture One recently and like its luma range adjustment quite a bit! I especially like your idea of using it to apply selective sharpening just to highlight regions, which usually can take more aggressive settings than the shadows. So are you using Capture One exclusively, or do you also use Photoshop or Lightroom at all? I have a standalone CS6 version of Photoshop, but I’m switching away from Lightroom, and Capture One is currently leading the race.
I started using Capture One primarily because I planned on getting a Fuji camera (and Lightroom made a mess of the X-trans raw files) and have stuck with it because of habit and because I find it rather intuitive and complete as an editing program. I tried using Lightroom with a free trial but, probably because I’m used to Capture One, I didn’t find it intuitive or easy to use in the slightest and while it has some feature that are absent in C1, I don’t find them all that compelling to justify a switch and a (one more) monthly payment. I do use Photoshop on a relatively small percentage of pictures, some things are just much easier and quicker (not to mention, just impossible to do otherwise) than Capture One.
Great read, Spencer.
One thing worth noticing is, you should also consider dodging and burning with color. Create a new layer with blend mode overlay, pick a color from the area you want to d&b, lighten the picked color for dodging, darken it for burning and start to paint.
Best regards,
Jens
Good point, Jens, thanks for adding this. Especially in cases of color shifts in bright highlight regions, that method sounds like a good way to kill two birds with one stone. I suppose that’s another reason why the 50% opacity overlay method is popular among Photoshop users.