Shooting in manual mode is considered by many novice photographers to be a difficult task reserved for professionals. In this article, I’ll try to show you that the opposite is often true – shooting in manual mode doesn’t need to be hard, and it can take your wildlife photos to another level.
Every DSLR and mirrorless camera offers several ways to deal with exposure – basically, how your shutter speed, aperture, and ISO values are chosen. On one end of the spectrum is full Auto mode, while Manual mode is on the other end. But it is all just different ways to pick those same three settings. (Even those weird scene modes like “portrait,” “sport,” “fireworks,” etc., are just different flavors of Auto.)
In between are semi-automatic modes like shutter priority, aperture priority, and program mode. Semi-automatic modes see some love from professional photographers. Especially aperture priority mode. But today, I want to focus on manual mode and the potential it brings to wildlife photography.

I wrote that aperture priority, shutter priority, and program modes are semi-automatic. That is, the camera does some of the work for deciding the correct exposure, but you also have manual input. However, what some photographers don’t realize is that manual mode can be semi-automatic as well!
All you need to do is set your ISO to Auto while you’re in manual mode. Then, you have full control over the aperture and shutter speed, while the camera determines the darkness and lightness of your images by shifting the ISO. If you think it’s making your photos too dark or bright, you can dial in exposure compensation, and it will change how strongly it shifts ISO.
Personally, I use manual mode + Auto ISO about 90% of the time. It gives me full control over the two important creative tools – aperture and shutter speed. I leave the technical (and basically boring) part of the process, the ISO, to the camera’s intelligence.
Manual mode combined with Auto ISO is great wherever the lighting conditions are changing. For example, if you’re shooting in the woods, you’ll need different exposure values for a bird sitting on the ground under a thick bush than for a bird perched on a nicely lit branch a few meters away. Any semi-automatic mode (including M + Auto ISO) will take care of that easily.
The primary time where you need to avoid M + Auto ISO is when you’re shooting in very bright conditions. Then it is easy to overexpose if you’re not careful. The camera will keep lowering ISO to compensate for the bright light, but eventually it runs into base ISO and hits a wall! It cannot lower ISO any further, and so, you get photos that are too bright. You can avoid that by switching to aperture priority mode, or by pushing your shutter speed to a faster value and watching carefully for overexposure.
Then there’s the (not so) terrifying world of full manual! Even though I use M + Auto ISO most of the time, sometimes it is also a necessity to control ISO as a wildlife photographer.
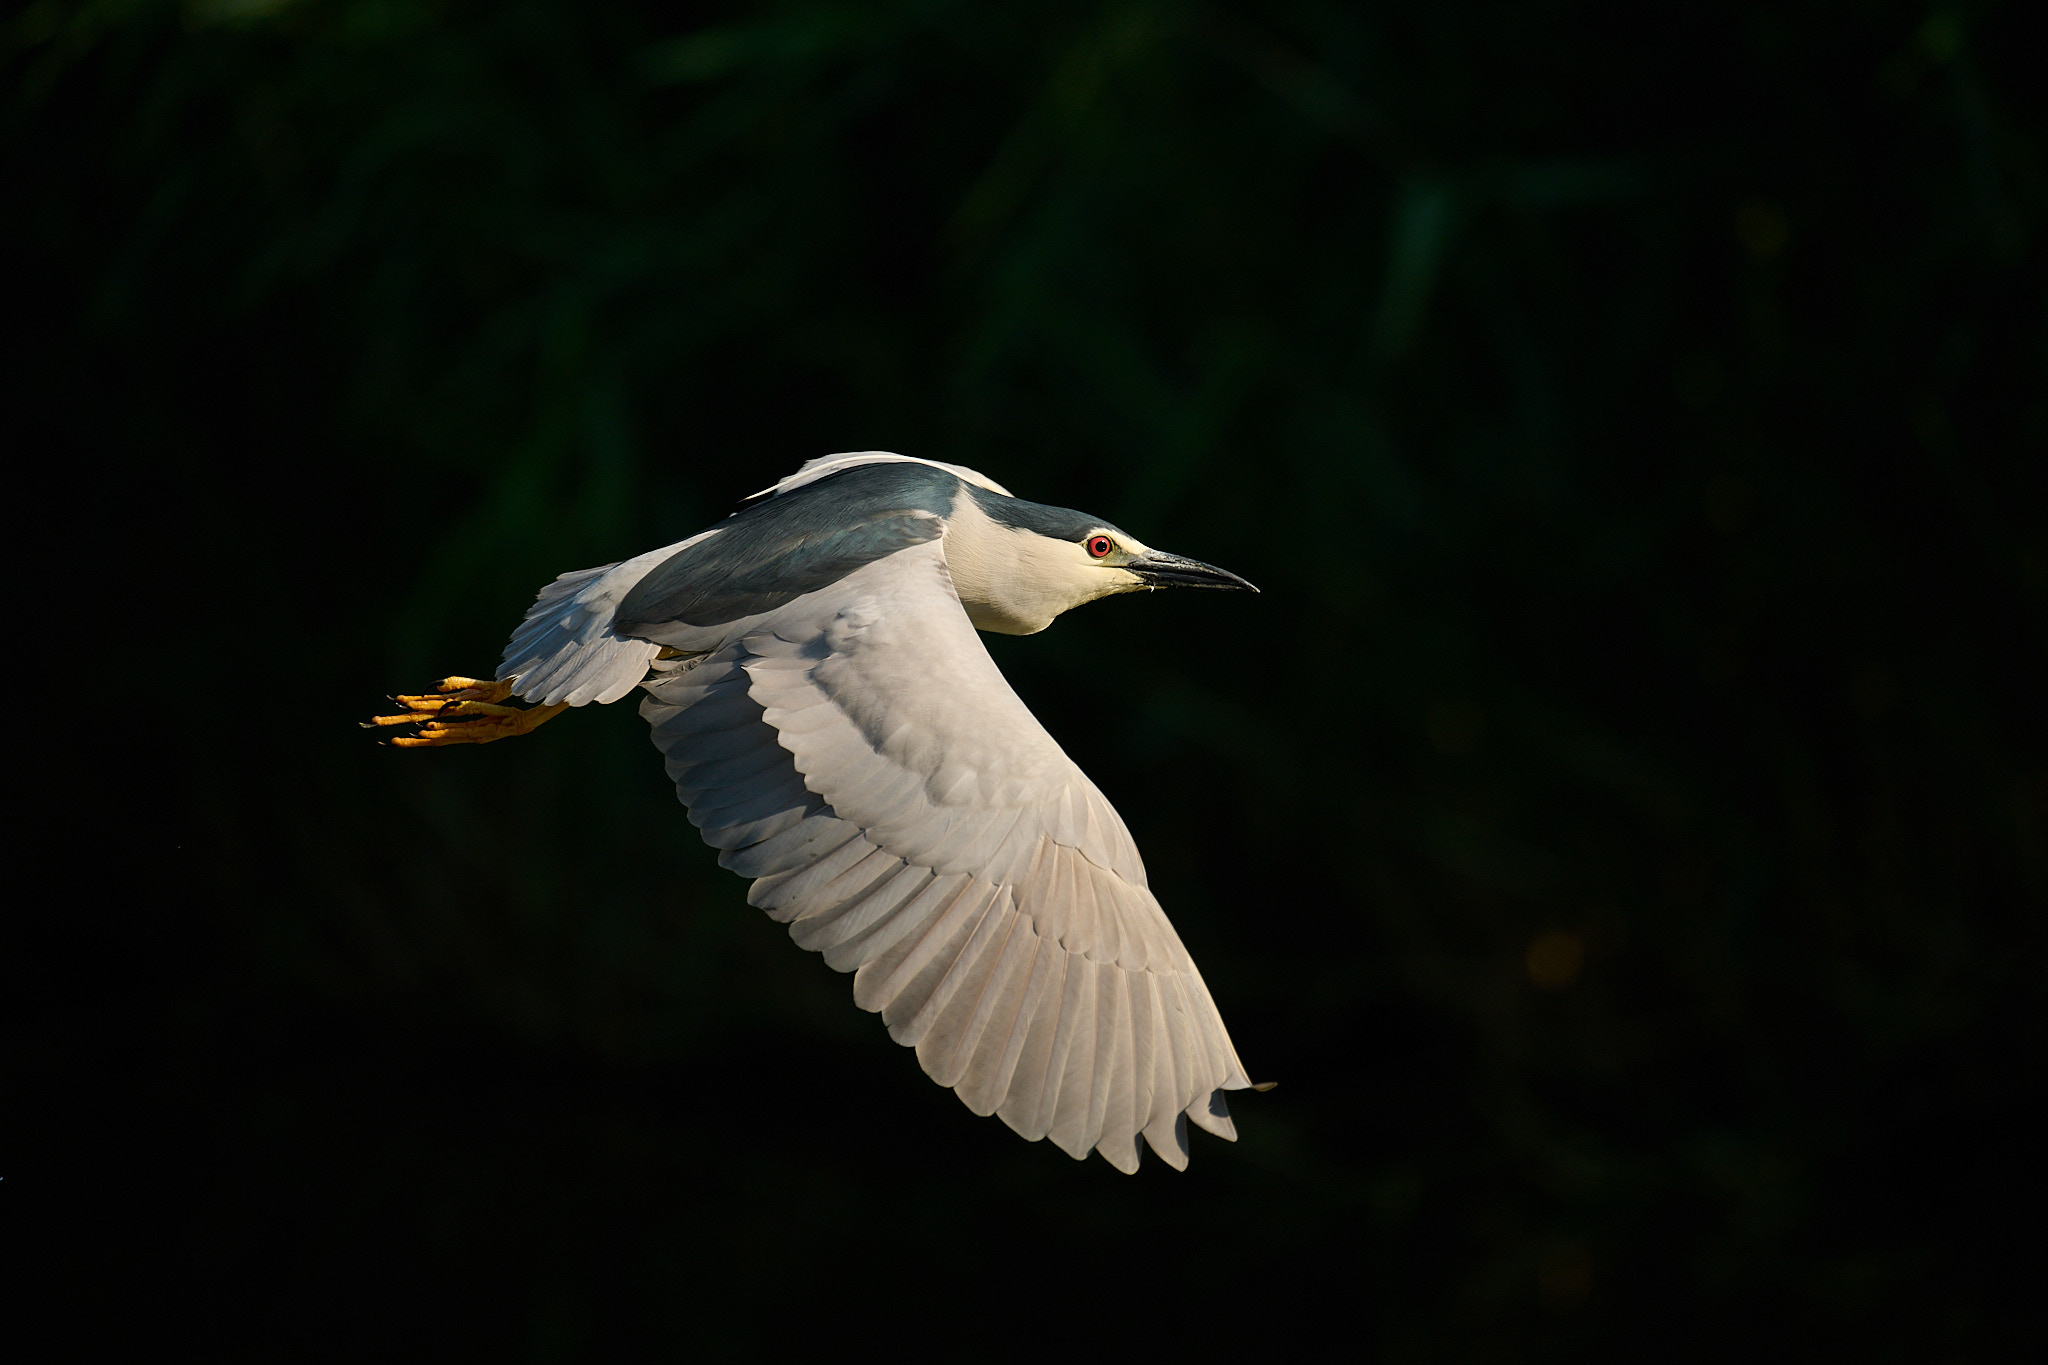
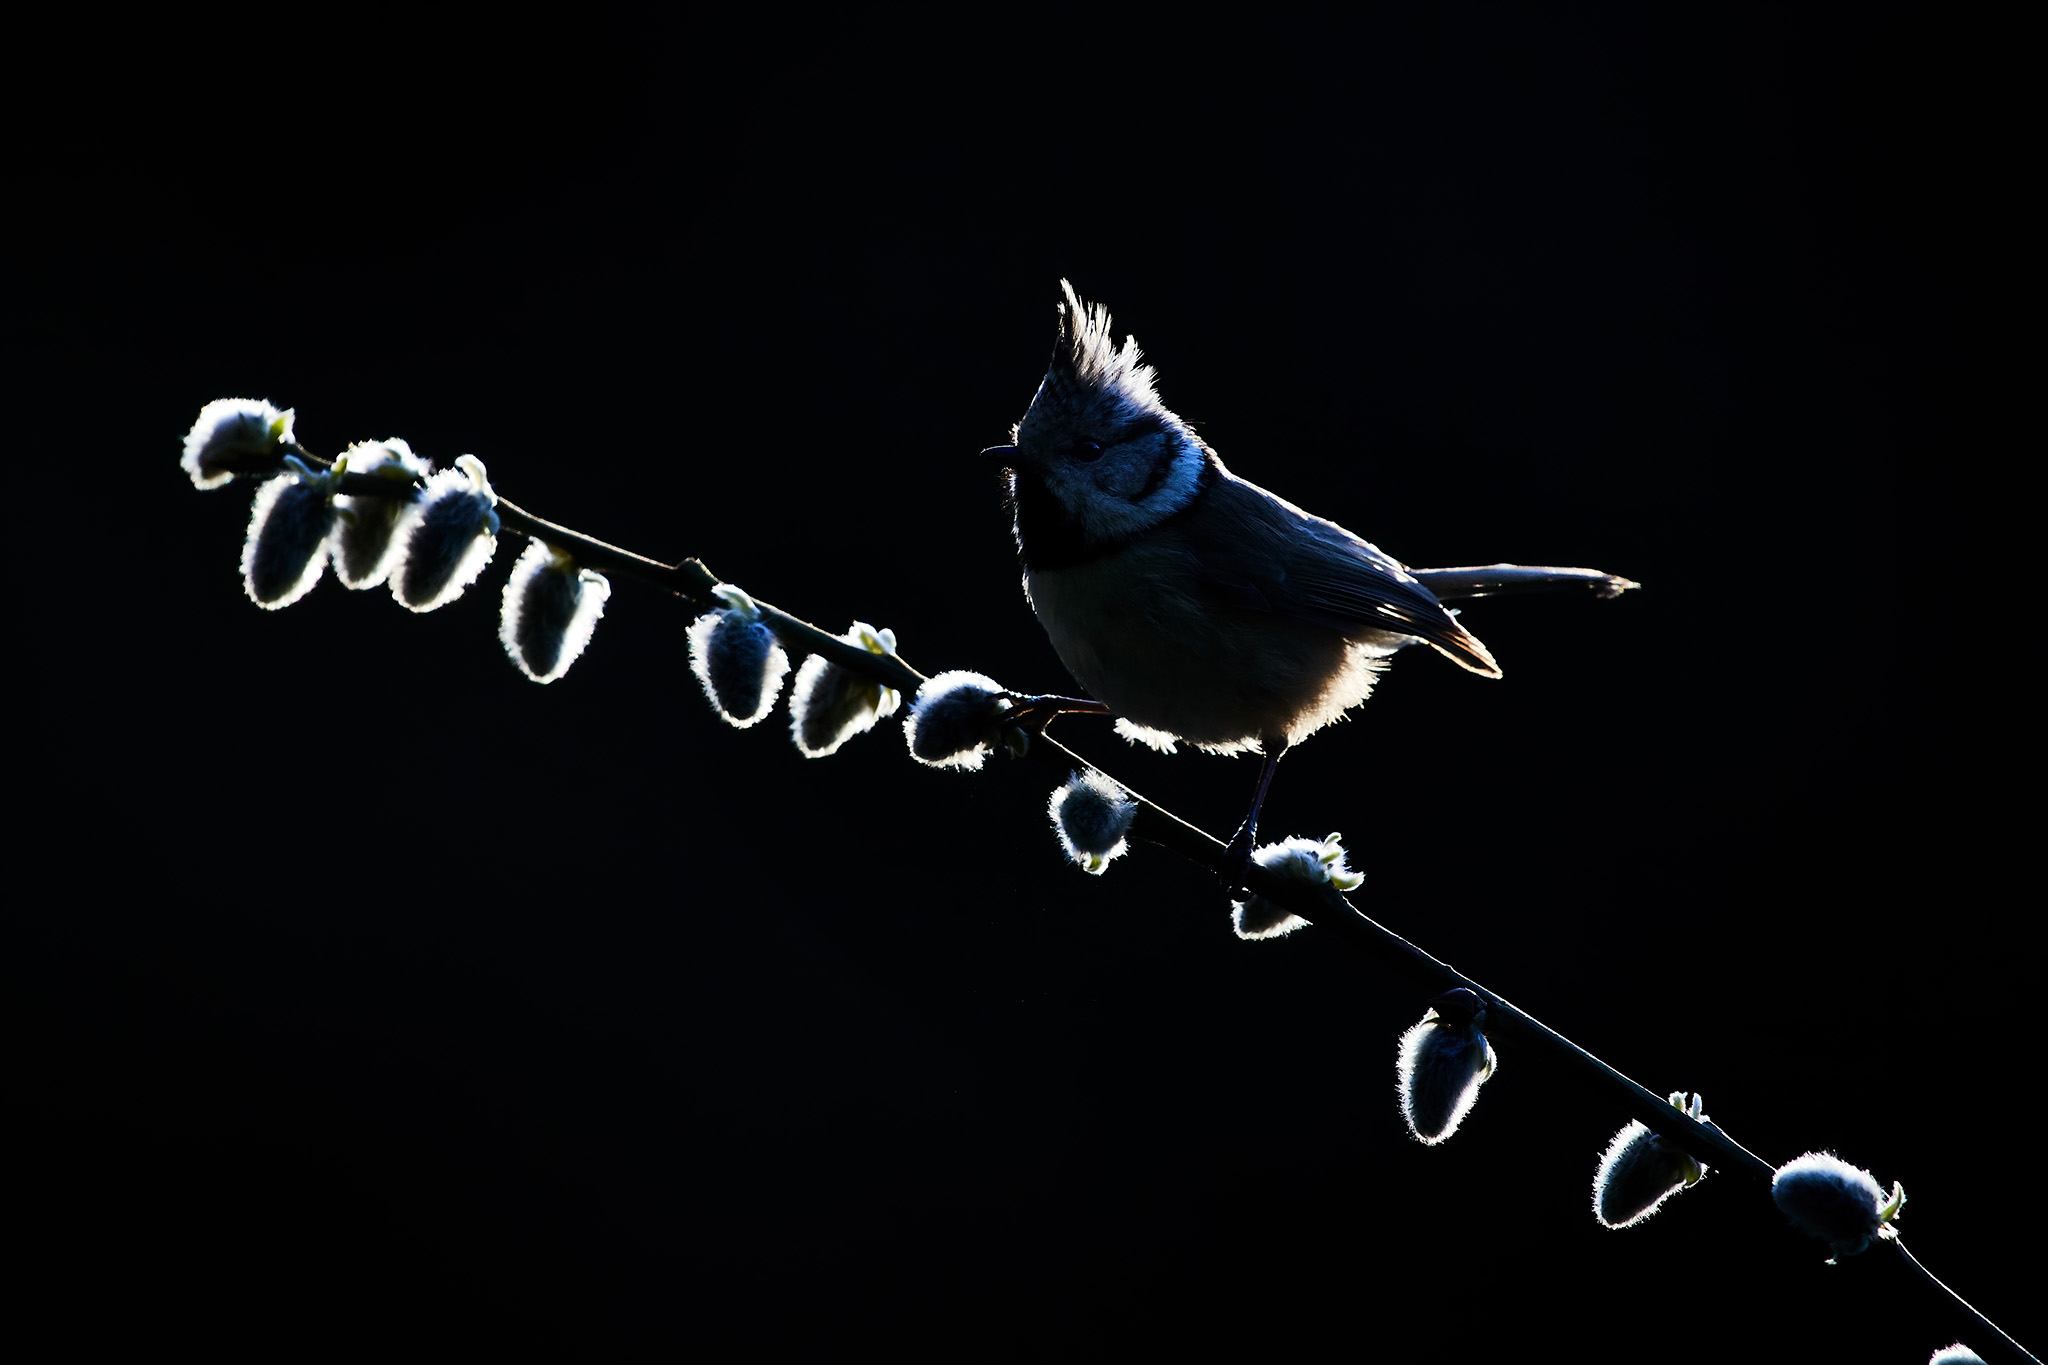
One situation is when the camera’s automatic exposure is behaving erratically. Note the photo below, which is backlit. My subject is quite dark, but that’s how I want it to be.
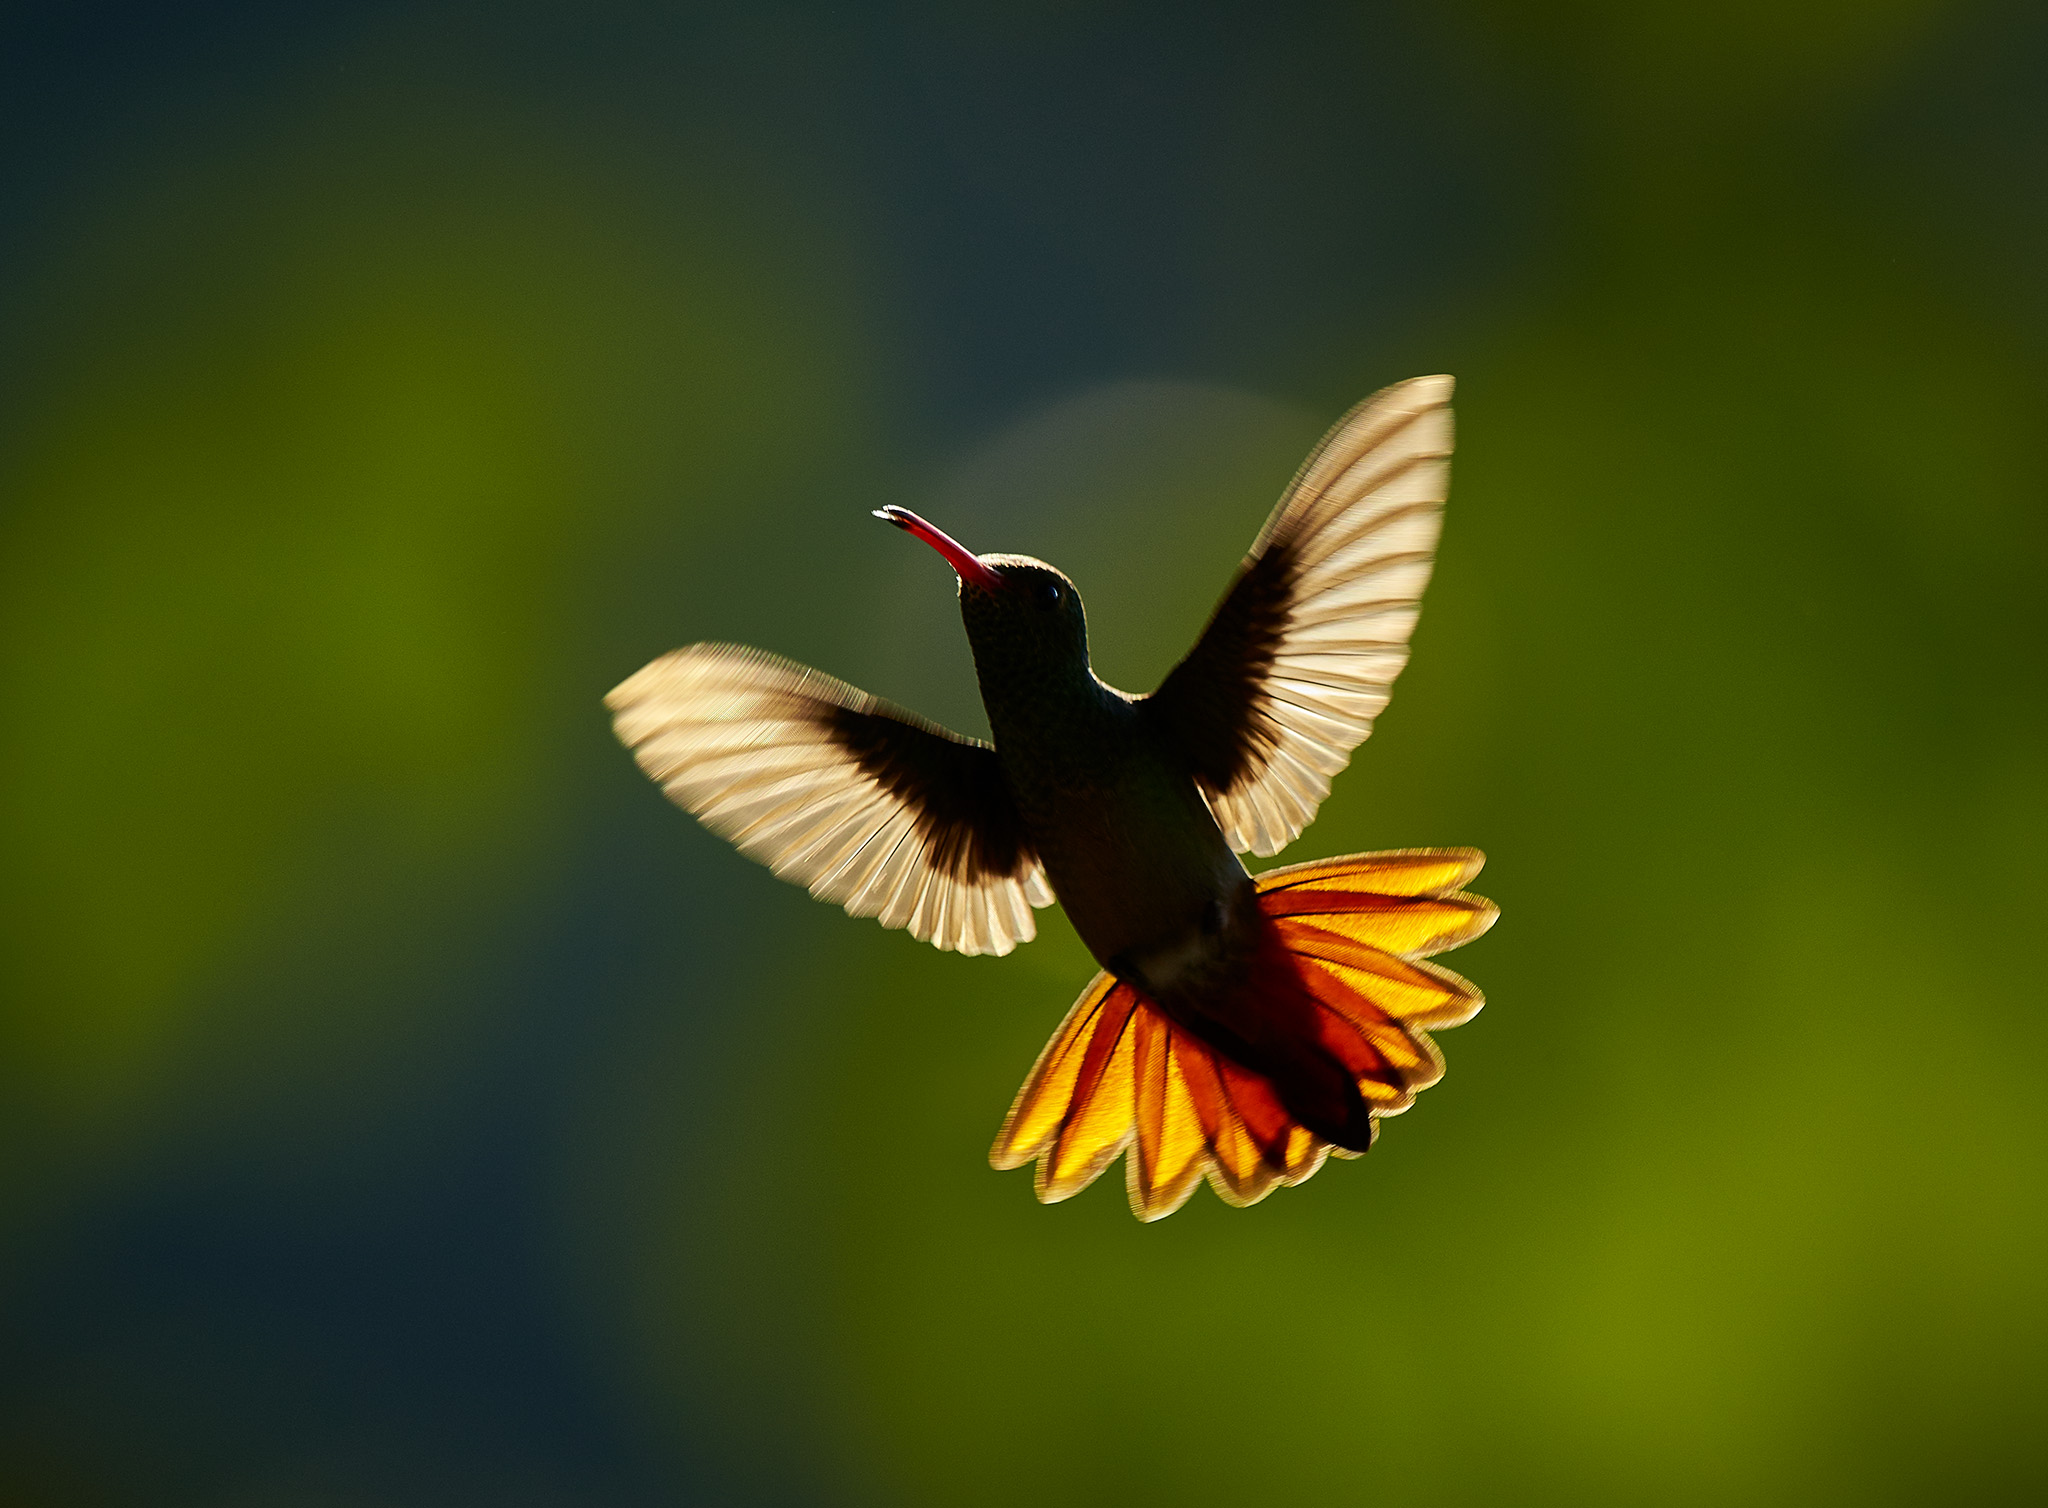
With any automatic or semi-automatic mode, the bird in the photo above would have been overexposed. The delicate highlights on the wings would have been blown out. And even though I could set exposure compensation to darken the photo, would the system react in time? This hummingbird was only in the perfect spot for a fraction of a second.
That’s why I will often use manual mode if the sunlight is consistent and I have one particular wildlife photo in mind. I can frame that photo, dial in my manual exposure (by taking test photos beforehand) and wait for my subject to go to the right place. I do not need to worry about a momentary change in the background lighting, or in my camera’s metering speed, to throw the exposure off balance.
When in doubt, the key is to expose so that none of the (important) highlights in your photo are blown out to white! This is first and foremost in my mind when exposing in manual mode. You can always brighten the shadows later, but there is no good way to bring back overexposed highlights.
Here’s an advanced tip for you when shooting RAW. I recommend setting your Image Control to the flattest possible setting, usually called Neutral or Flat. These do not affect the RAW file directly, but they will give you a more accurate preview of your raw data on the camera screen. It is easier to tell what is actually overexposed or not.
Then, of course, if you are using a flash, you should almost always been in fully manual mode with manual ISO. If anything, you can put your flash to automatic (TTL) mode. Automatic and semi-automatic camera modes just don’t play well with flash. And if you’re using a flash as a wildlife photographer, it probably means you had time to set up your photo anyway, so there is no excuse not to use manual mode.
Finally, one thing to worry about in manual mode (with manual ISO) is that the light can change without you realizing it. The untrained eye may not be able to tell if the environment changes slowly by 1-2 stops of light, but the camera certainly will. So, just be vigilant about reviewing your photos and checking for underexposure/overexposure if you’re shooting in manual mode. Especially if your ISO is also manual.
Here is my overall recommendation:
- Shoot in Manual Mode + Auto ISO as a wildlife photographer most of the time
- Pick a fast enough shutter speed for your subject. (This comes with practice, but will usually be about 1/1000 to 1/2000 second)
- Set your aperture to your tastes, taking into account the depth of field. (Often, you will probably be at the widest aperture as a wildlife photographer)
- Use exposure compensation if the camera is consistently overexposing or underexposing the scene
- Lastly, watch out for very bright scenes, because if your ISO reaches the base value, it cannot go any lower, and you will get overexposed photos if the scene gets brighter
- Shoot in Manual Mode + Manual ISO if the camera is having a hard time metering
- Use this mode for difficult subjects where the meter will fail, including:
- Backlit subjects
- Spotlit subjects
- Photos that you have time to plan, frame, and compose ahead of time
- Backgrounds with inconsistent brightness (since the subject needs to be exposed the same regardless)
- Don’t overexpose any highlights on the subject. This is much more important than the shadows!
- Periodically review your photos to make sure the light isn’t slowly changing without your knowledge
- And if you’re using a flash, definitely use this mode!
- Use this mode for difficult subjects where the meter will fail, including:
That covers it. Some wildlife photographers prefer shooting in Aperture Priority mode or even Shutter Priority mode, but I find that the process above is all it takes to get well-exposed wildlife photos every time.
I hope I’ve convinced you that full manual mode is not just for the pros, but can make life easier for every wildlife photographer. If, after reading this article, you still have any questions that I could clarify, I would be very happy if you would write them in the comments below the article!
Great Article ,but I thought you were going to use manual focus as well.BIF is tough but a fun challenge when birds are slo moving.
Thank you, Rewind. I only use manual focus when the initial focus point is significantly out of focus, either in front of or behind the subject I want to focus on. It helps the camera find the main subject. But I leave the precise work to the camera’s AF. After all, a 46-megapixel sensor won’t forgive any inaccuracies.
I fully agree with your recommendations. One benefit of shooting manual A and S with auto-ISO that you didn’t mention is that it is especially useful when the light is changing rapidly minute to minute (as with partly cloudy skies on a breezy day). I usually intentionally underexpose by 2/3 or a full stop using exposure compensation to avoid blowing highlights during sunny periods and sometimes have to increase the ISO a bit in post for the cloud-covered intervals — and I may tweak color balance as well to warm up the shady shots — but this gives full control over A (usually wide open) and S (as you say, often 1/1000 to 1/2000) and adding “exposure” in post is essentially the same as turning the ISO up a bit more (decreasing the amount of negative exposure compensation) so I don’t lose much in image quality if anything.
Thanks for your personal experience, Jim. There are other things I haven’t mentioned. One annoyance I can think of right now is related to Mode A. When you set the minimum shutter speed to Auto in the ISO sensitivity settings, the focal length of the lens is taken into account. At 500mm, the camera tries to hold 1/500s (this can be tweaked, but the principle remains). This is often fine, but more often it’s annoying. When I’m shooting in low light, I usually take my first shots at a safe shutter speed, like 1/500s, and then go down to, say, 1/30s. As soon as I expect a bird to fly away, I quickly reduce the shutter speed to 1/2000s. A mode won’t let me do that. Nor will S mode. It would judge that there is enough light at 1/30th of a second and start to increase my aperture. For this reason, I consider M mode with Auto-ISO to be the gold standard in rapidly changing light conditions. M mode with fixed ISO, on the other hand, is my preference when light conditions are more difficult but relatively stable.
Hi Libor
My Z9 and all other owned Bodies have been used in Manual Mode, I limit myself to using the AF System only, I have plenty of challenges on this as a method over the years, but this is where I am at my most stimulated.
I am very aware of the benefits of SP and AP Modes, and the improved capture rates that can be had as one of the benefits. On one occasion for an excursion, not too far in the past, I allowed a fellow photographer to set my Body up with their AP Mode and a few other settings.
Part of the stimulation for myself is the working of the Camera Body to suit my wants for Exposure and DOF.
With the above in place, the use of a Lens with a Manual Override Control Ring that is supported with Focus Peaking, has suited my photography needs as well, as when capturing certain Subjects, I now use Focus Peaking to decide where I want the main area of focus concentrated.
This is working really well for myself with invertebrates, especially those that are with wings.
What is a more recent change is that the Z9 will have a touch button setting changed to enable a Base ISO, Slow Shutter Speed, Manual Mode, Close Focus set up, to be immediately swapped out through a Touch of a Button to a pre set up BIF Setting.
Many Close Focus Subjects are almost a Still Life and the light is the only variance, these are easily worked with and repeatable once the location for capture is known.
I have been caught out a few times, where great BIF opportunities have been lost of very very Over Exposed.
Thanks for your comment John. The Nikon Z9 allows for an incredible variety of settings, whether it’s birds in flight, beetles on a stump, or fish in a stream. But the important thing is to remember to switch from fish in stream to bird in flight when, for example, a kingfisher is perched on a nearby branch. This is how I captured a Harpy Eagle taking off on the self-timer last year when I had shot a Long-tailed Potoo a few minutes earlier. The photo didn’t turn out very well…
Nice article, Libor! Manual mode is indeed nothing to be afraid of and is very useful when the camera’s metering is too erratic as you said. Regarding this point:
“The camera will keep lowering ISO to compensate for the bright light, but eventually it runs into base ISO and hits a wall!” This is why I wish camera manufacturers had the following mode: it would be exactly like manual with auto ISO, but then once base ISO is reached and the exposure is still too bright, it would automatically increase the shutter speed to compensate.
You might reply: hey, isn’t this just aperture priority mode? Well, not quite. Aperture priority mode implies that the camera chooses the required shutter speed all of the time. Instead, it’s more like aperture priority with minimum shutter speed. Of course, cameras have *that* mode, but typically you have to set the minimum shutter speed in a menu.
So, my hypothetical mode is basically aperture priority with minumum shutter speed, but where the minumum shutter speed is adjustable on the fly with the dial, just as the actual shutter speed is in manual mode.
The Nikon FA incorporated cybernetic override to help prevent over/under exposure, but this useful feature was not retained in their later film or digital bodies.
However, some Canon EOS bodies have Safety Shift:
“Safety shift: OFF – used when the camera maxes out in Aperture Priority (Av) or Shutter Priority (Tv) modes. For example, if the exposure is too bright and the camera is also maxed out at 1/8000 shutter speed, with this setting turned on the camera will stop down the aperture to balance out the exposure.”
photographylife.com/recom…6-settings
This would be great, Jason, and would actually just be a small tweak to the firmware. “When you hit the ISO wall, compensate with shutter speed. If the correct exposure can be compensated for with ISO correction, leave the shutter speed and aperture as the photographer set it.” Simple and foolproof.