Using Manual Mode with Auto ISO is very useful for fast-paced wildlife photography. In this article, I’ll explain how to set Manual Mode + Auto ISO, how it works, and why it’s so effective. Also, I’ll provide some tips on optimizing exposure and maximizing your image quality in this mode.
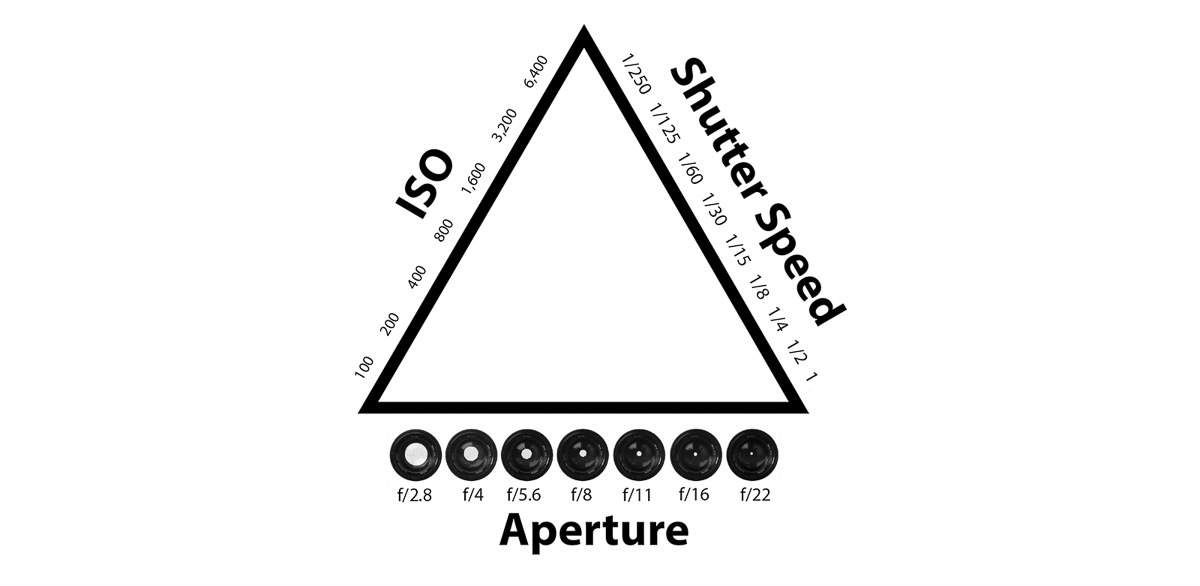
Manual Mode is one of the standard shooting modes in photography. Other examples include Aperture Priority, Shutter Priority, Program, Auto, and various scene modes depending on your camera. All of these modes are based around controlling the three main camera settings: aperture, shutter speed, and ISO. If you aren’t familiar with that, I suggest reading the linked articles to give yourself a refresher.
Generally, photographers think of Manual Mode as the right choice when you want to lock in the three major camera settings manually, leaving nothing up to the camera. But this isn’t necessarily the case. Cameras today give you the choice of setting ISO automatically even in Manual Mode.
With Manual Mode + Auto ISO, you still select your aperture and shutter speed, but the camera is left to choose your ISO. While this may be unintuitive at first, I’ve found that Manual Mode combined with Auto ISO is often the fastest way to have control over the most important settings in photography. For fast-moving wildlife photography, it is especially useful.
When Auto ISO is enabled in Manual Mode, your camera will read the ambient lighting conditions and select an ISO accordingly. However, you can fine-tune the ISO that it chooses by changing your metering mode and your exposure compensation. For example, if you set center-weighted metering and an exposure compensation of -0.7, the camera will select the ISO based upon a central region of the image and then lower it by 2/3 stop.
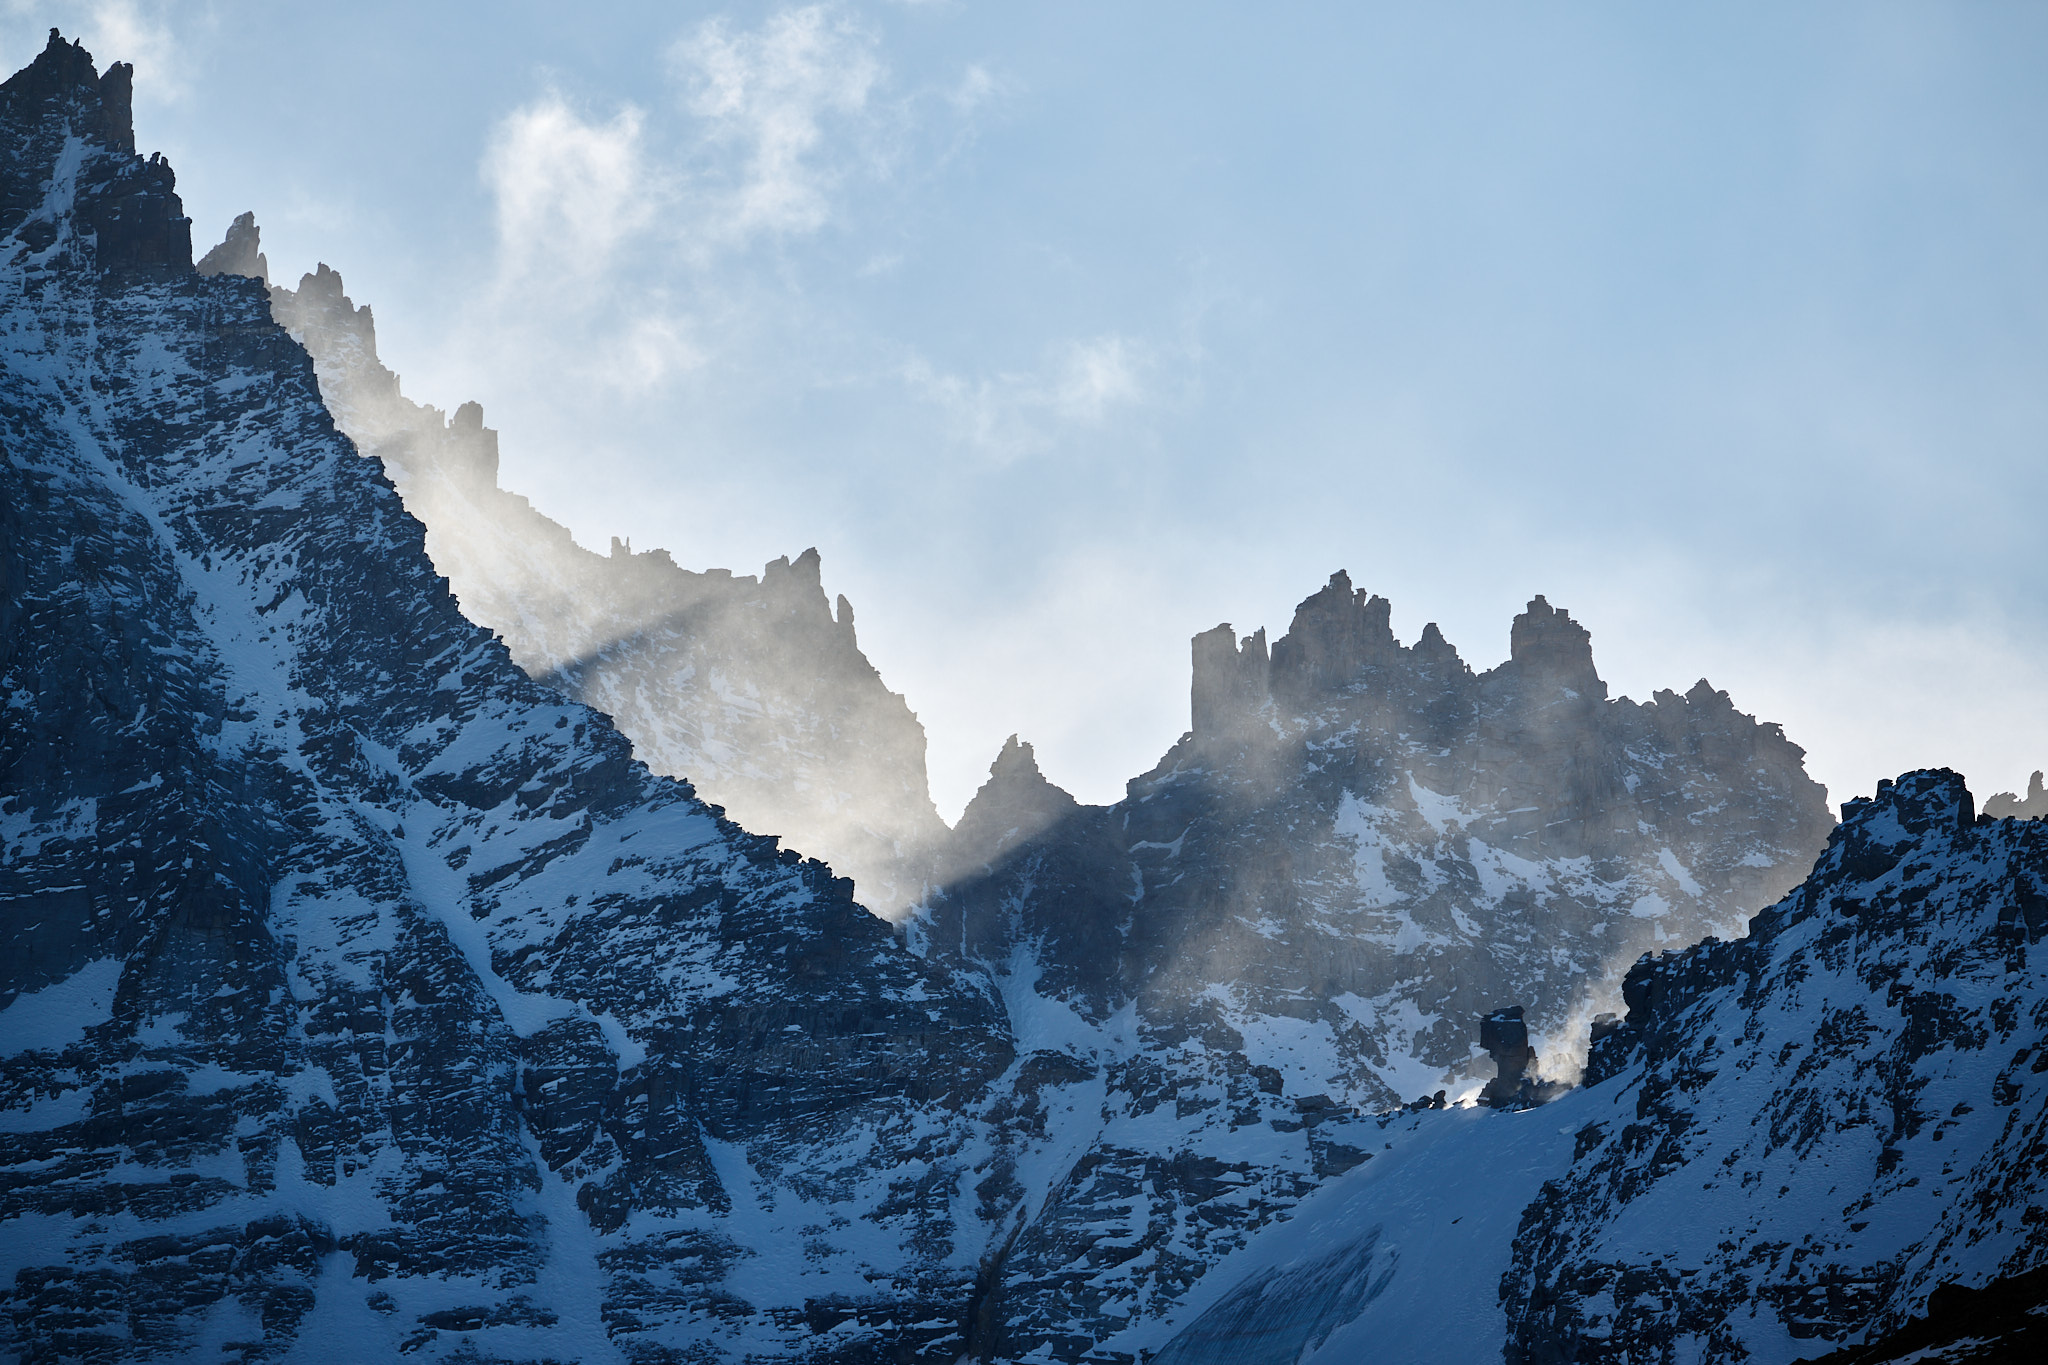
Personally, I always use Nikon’s Matrix metering mode, which analyzes the entire frame and sets exposure based on tone distribution, color, and composition. (Canon’s Evaluative mode and Sony’s Multi mode work similarly.) As for exposure compensation, it depends upon the scene. I always am prepared to raise and lower it as needed. For example, in snowy scenes with a dark subject, I usually add +2/3 stop to make sure my subject isn’t too dim. And with bright subjects against a dark background, I may lower it to as much as -1.0 stop to guard against overexposure.
The benefit of Manual Mode + Auto ISO is that you retain full control over your aperture and shutter speed. This lets you very carefully select the depth of field and how much you will freeze the motion of your subject. Meanwhile, with the camera shifting ISO in response to the light, you don’t have to worry as much about overexposure or underexposure.
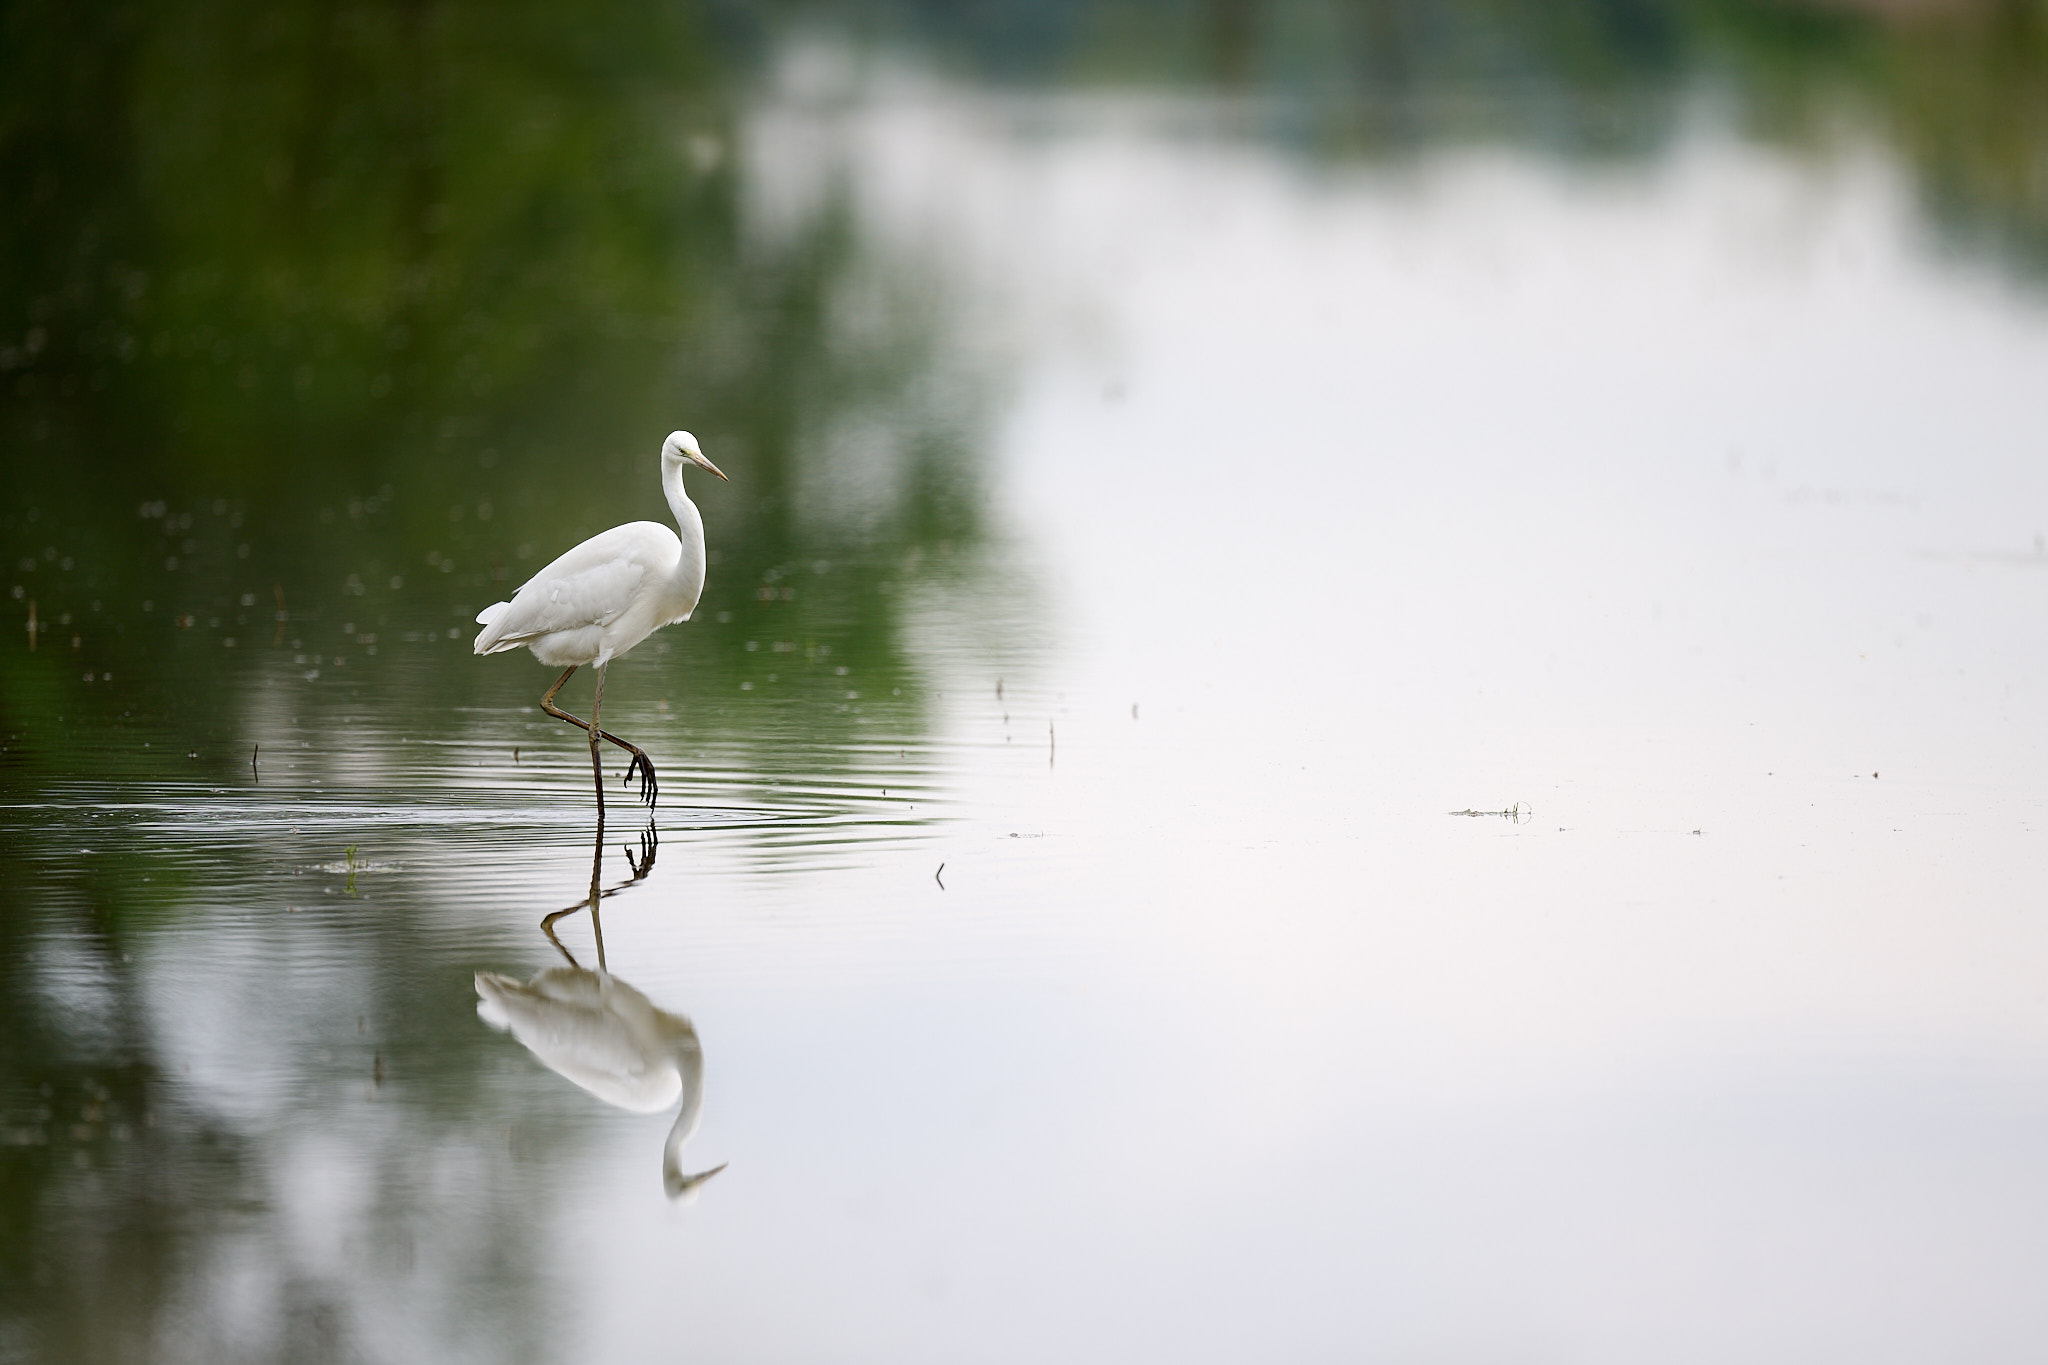
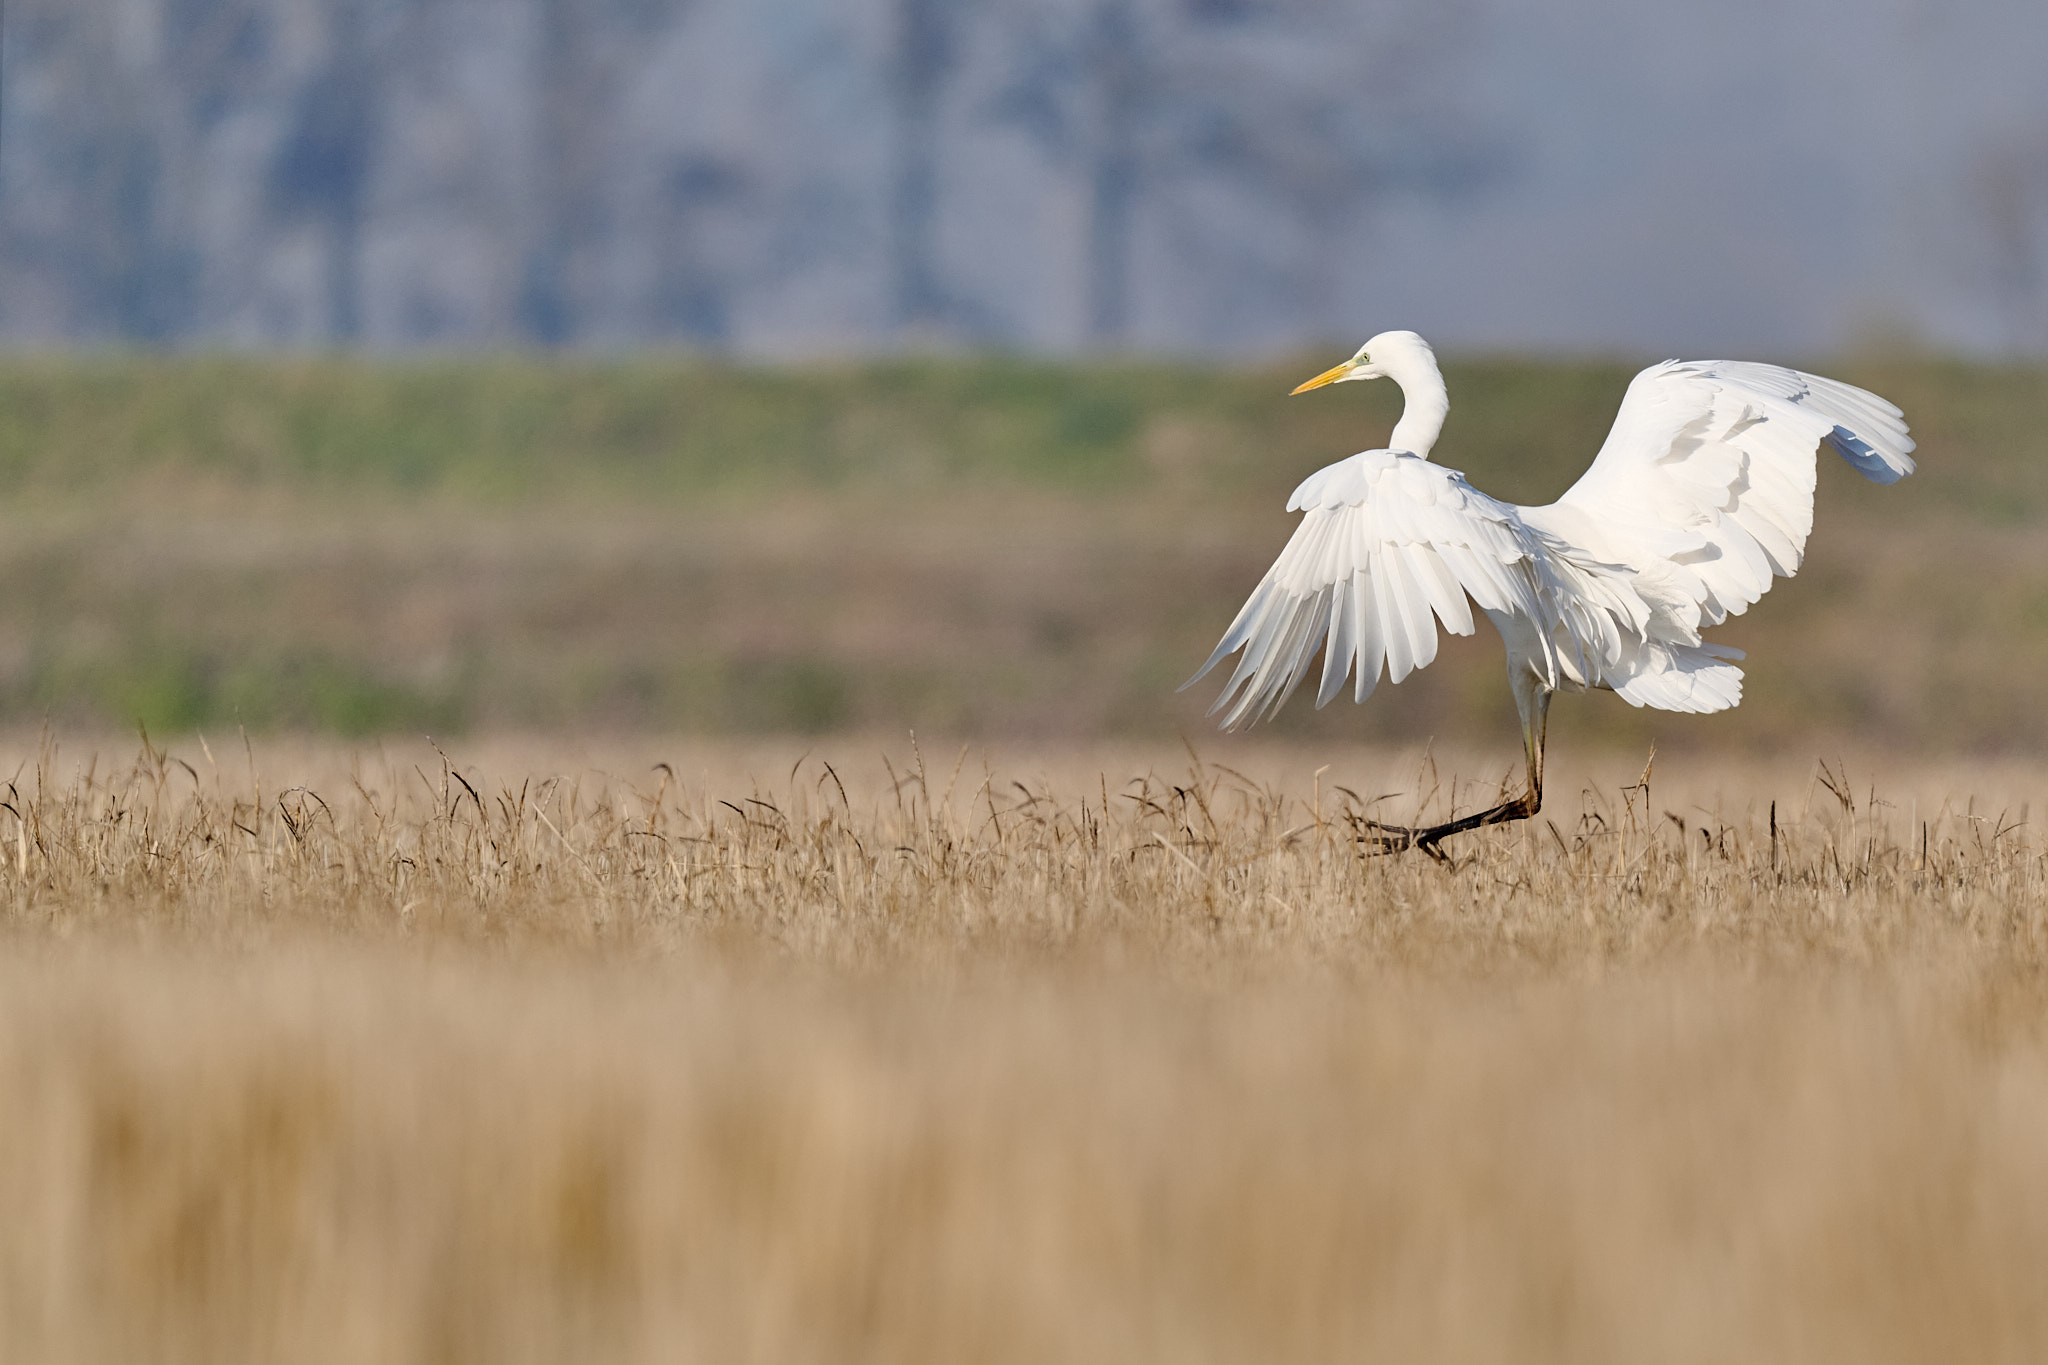
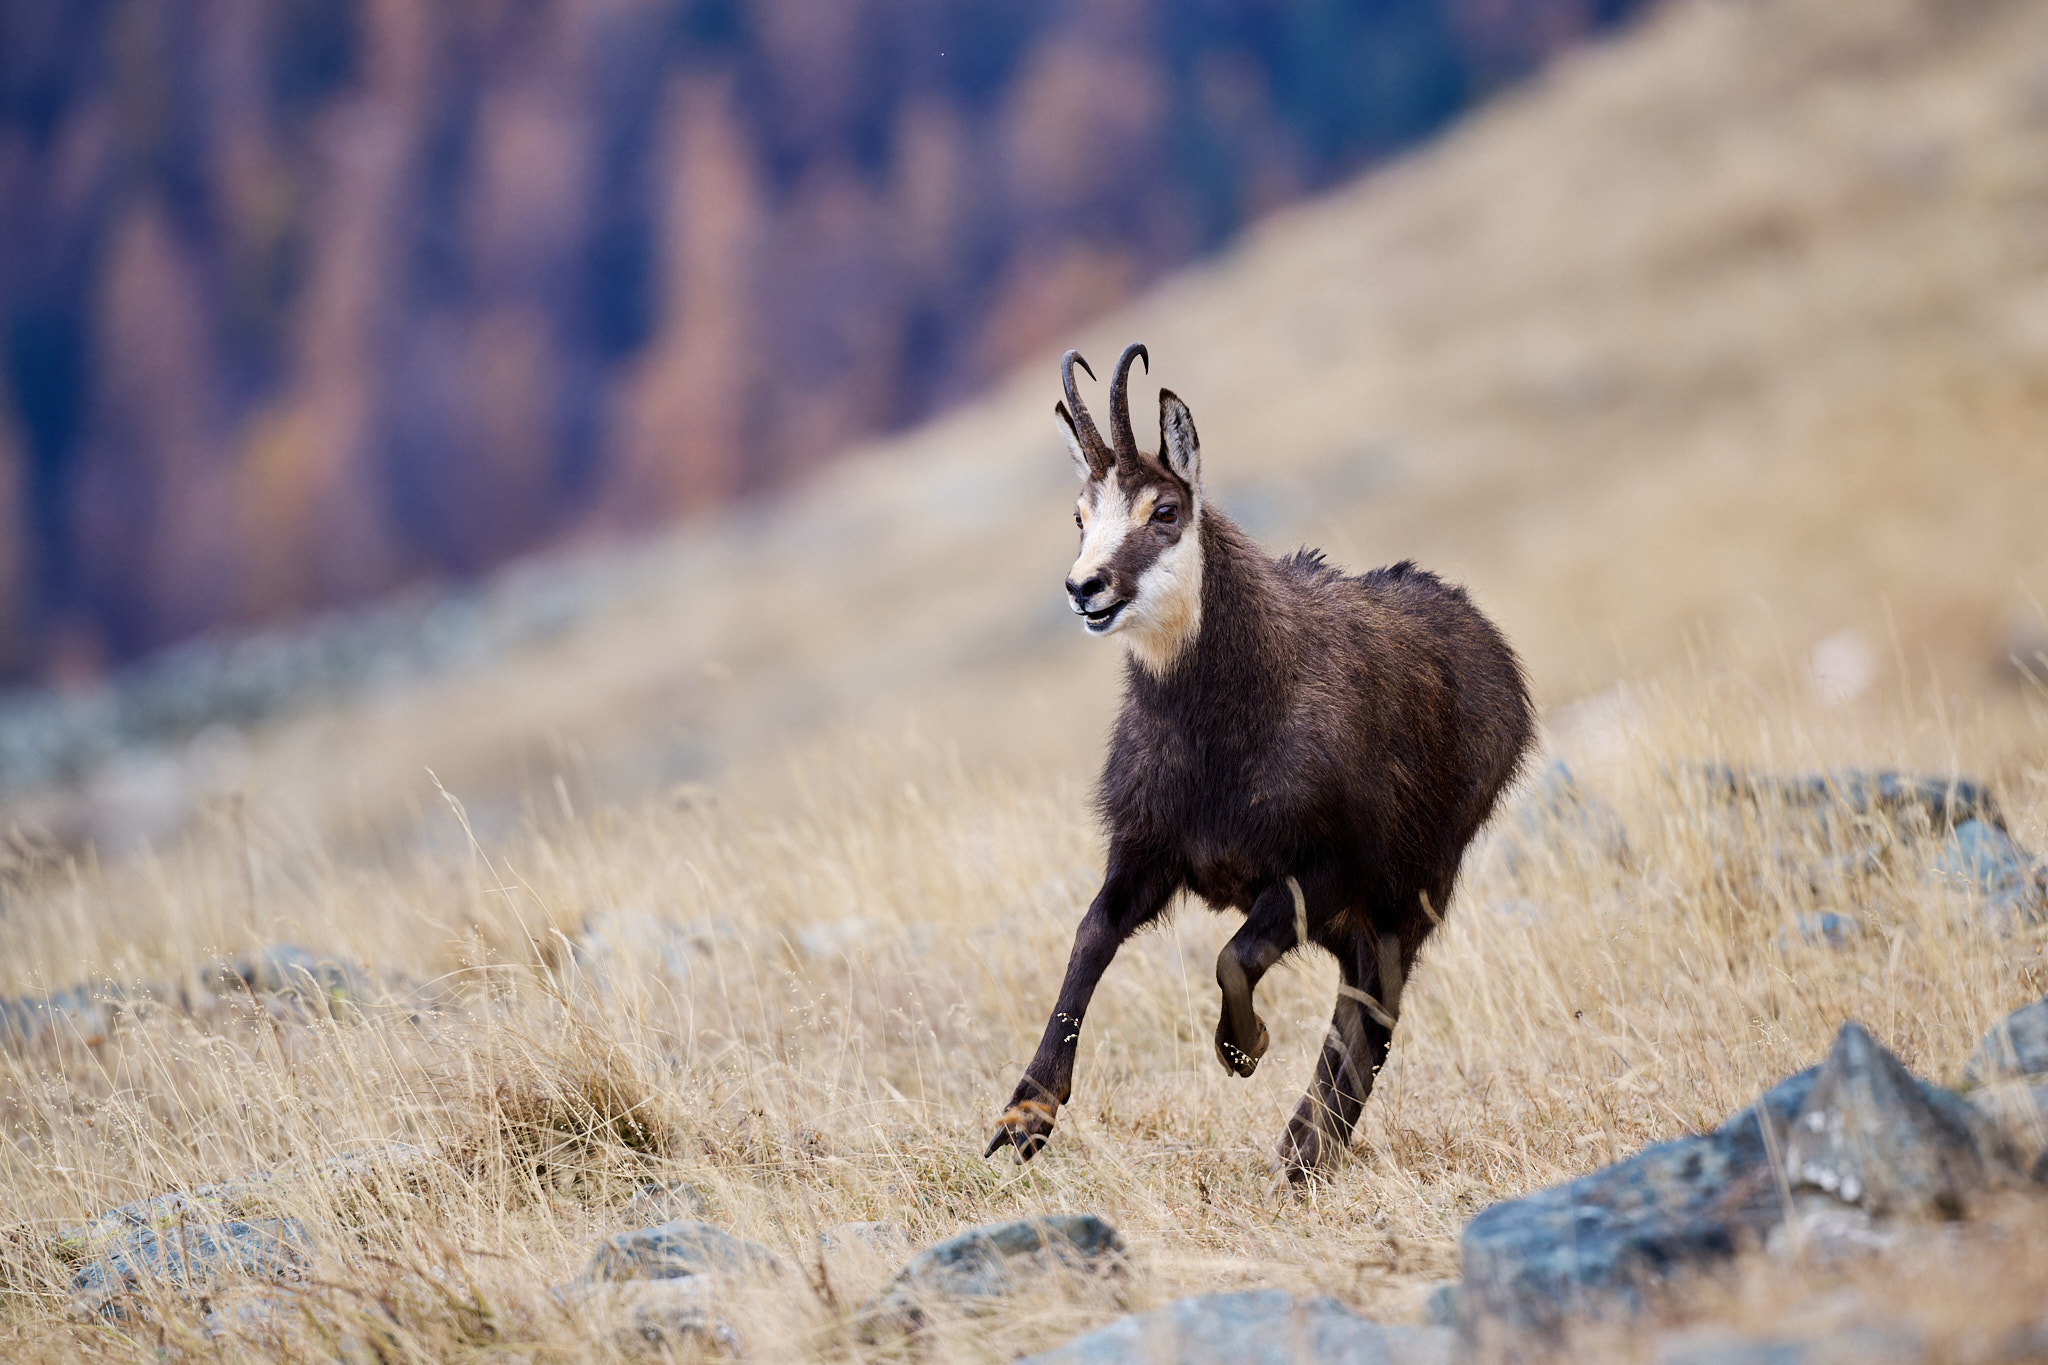
Let’s consider some real-life examples. If you’re taking photos of a stationary subject in wildlife photography, a good starting point is a shutter speed of 1/500 second. This captures enough light without risking a blurry subject, at least if you’re shooting from a tripod or monopod. Shoot at your widest aperture unless you want more depth of field, and let the ISO float. In most lighting conditions, the camera will be able to pick a low ISO like 100:
If you see that the ISO has dipped all the way to the base value (either ISO 64 or ISO 100 on most cameras), you may start to risk overexposure because the camera can’t lower ISO any more. In that case, just bump your shutter speed a little faster. For example, set it to 1/2,000 second instead of 1/500 second.
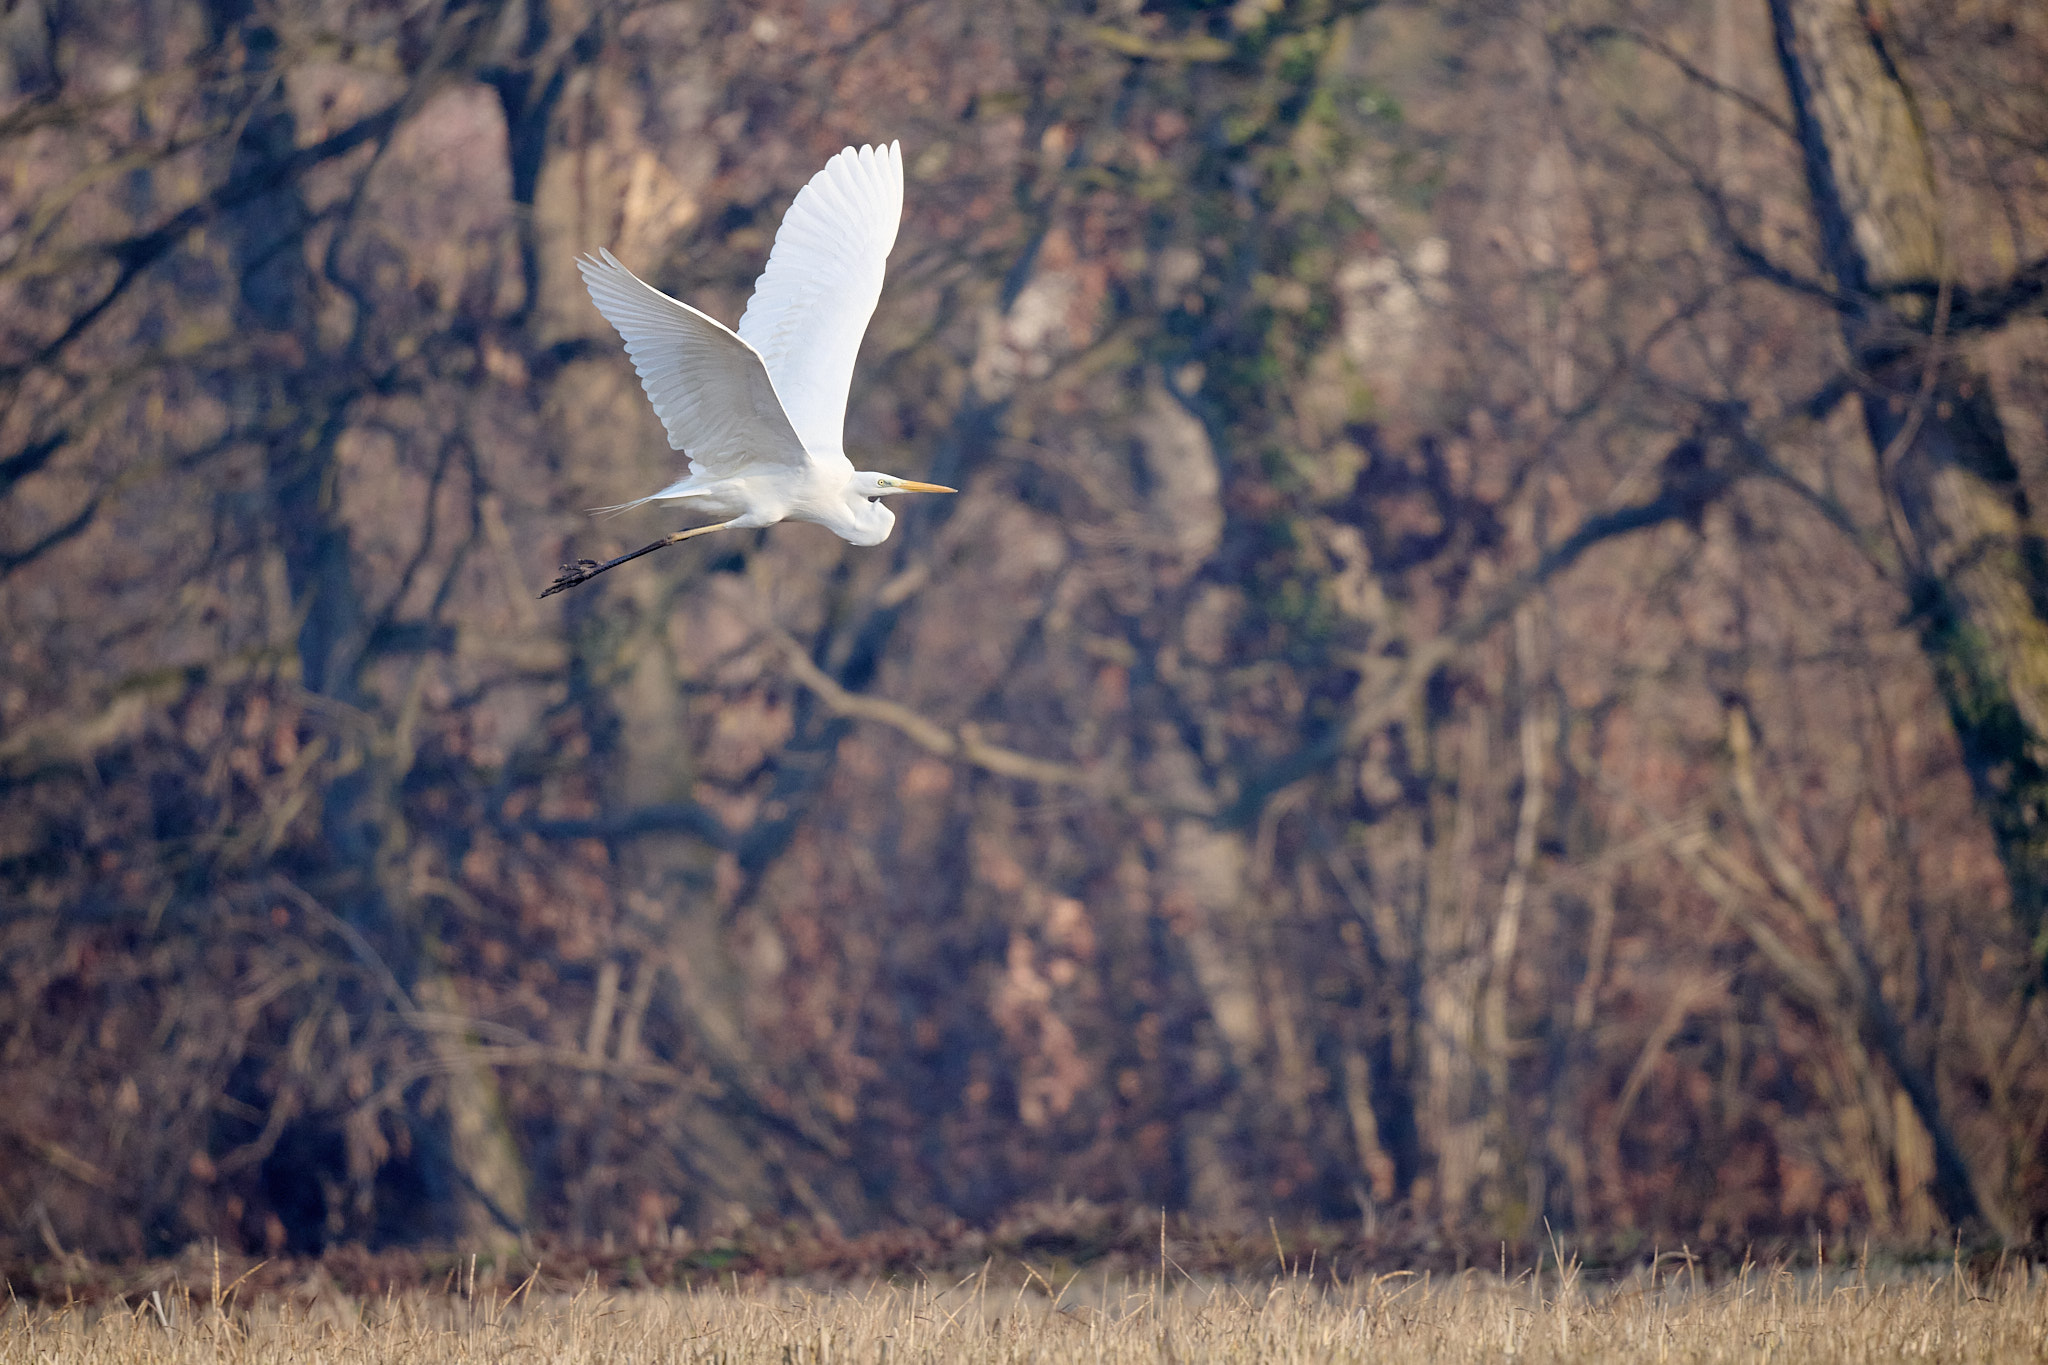
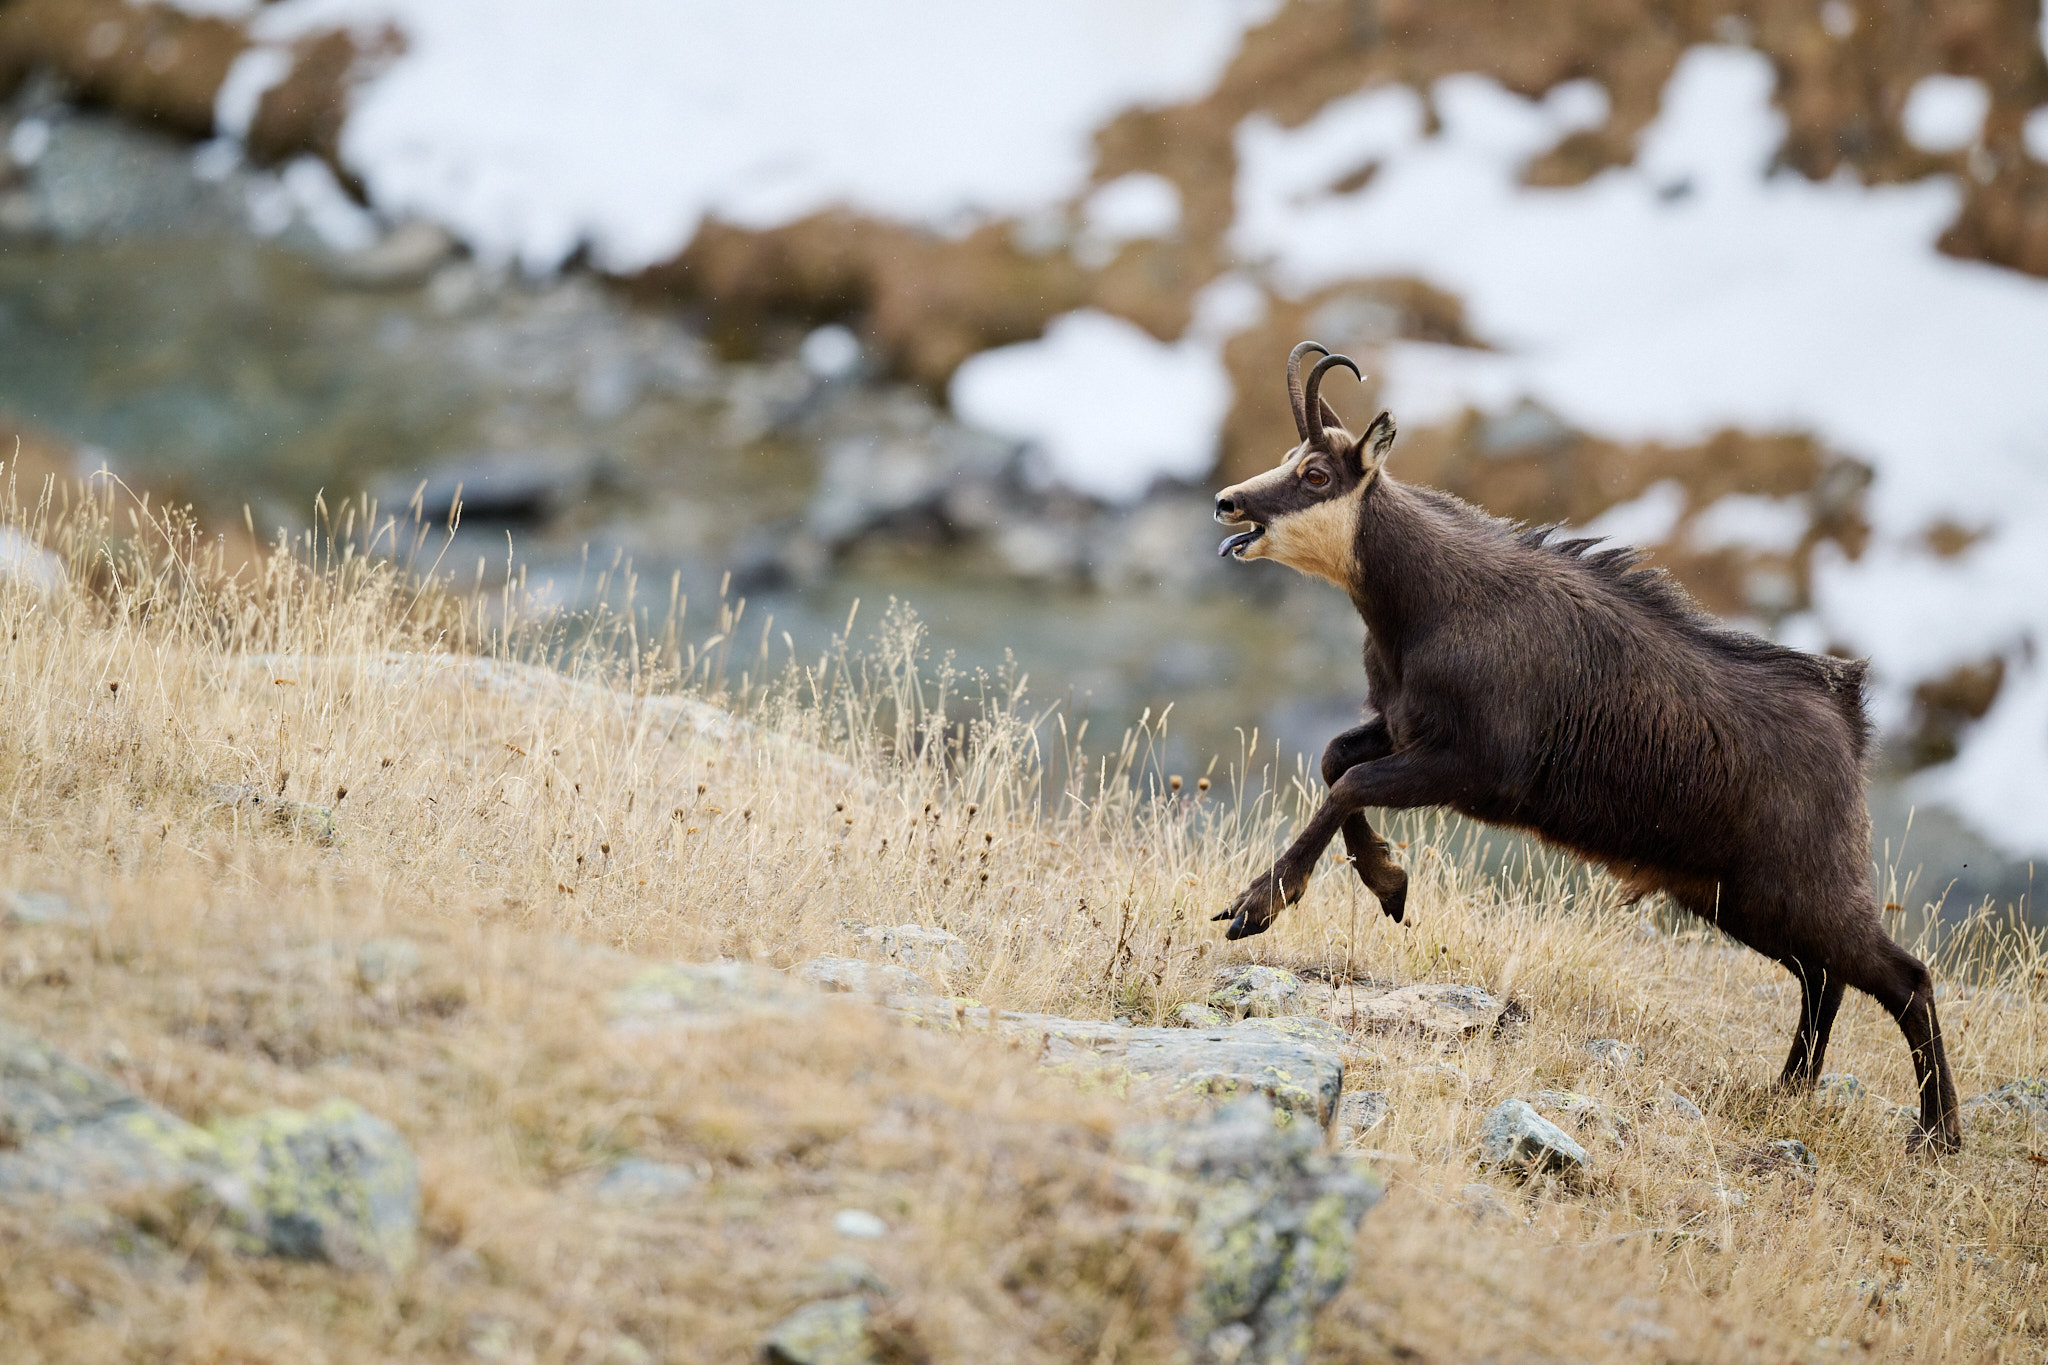
Another time that you’ll need to use a faster shutter speed is when the subject starts moving. I always try to pay attention to my subject’s behavior and think about what shutter speed I’ll need. If it’s a bird that is about to take off, I will quickly rotate the shutter speed dial six clicks (that’s two stops) to set it to 1/2,000 second and make sure I freeze the moment. With Auto ISO enabled, I trust the camera to boost my ISO accordingly.
That’s the basic introduction to Manual Mode + Auto ISO, but you can also take steps to improve your image quality even further, at least if your subject is being cooperative.
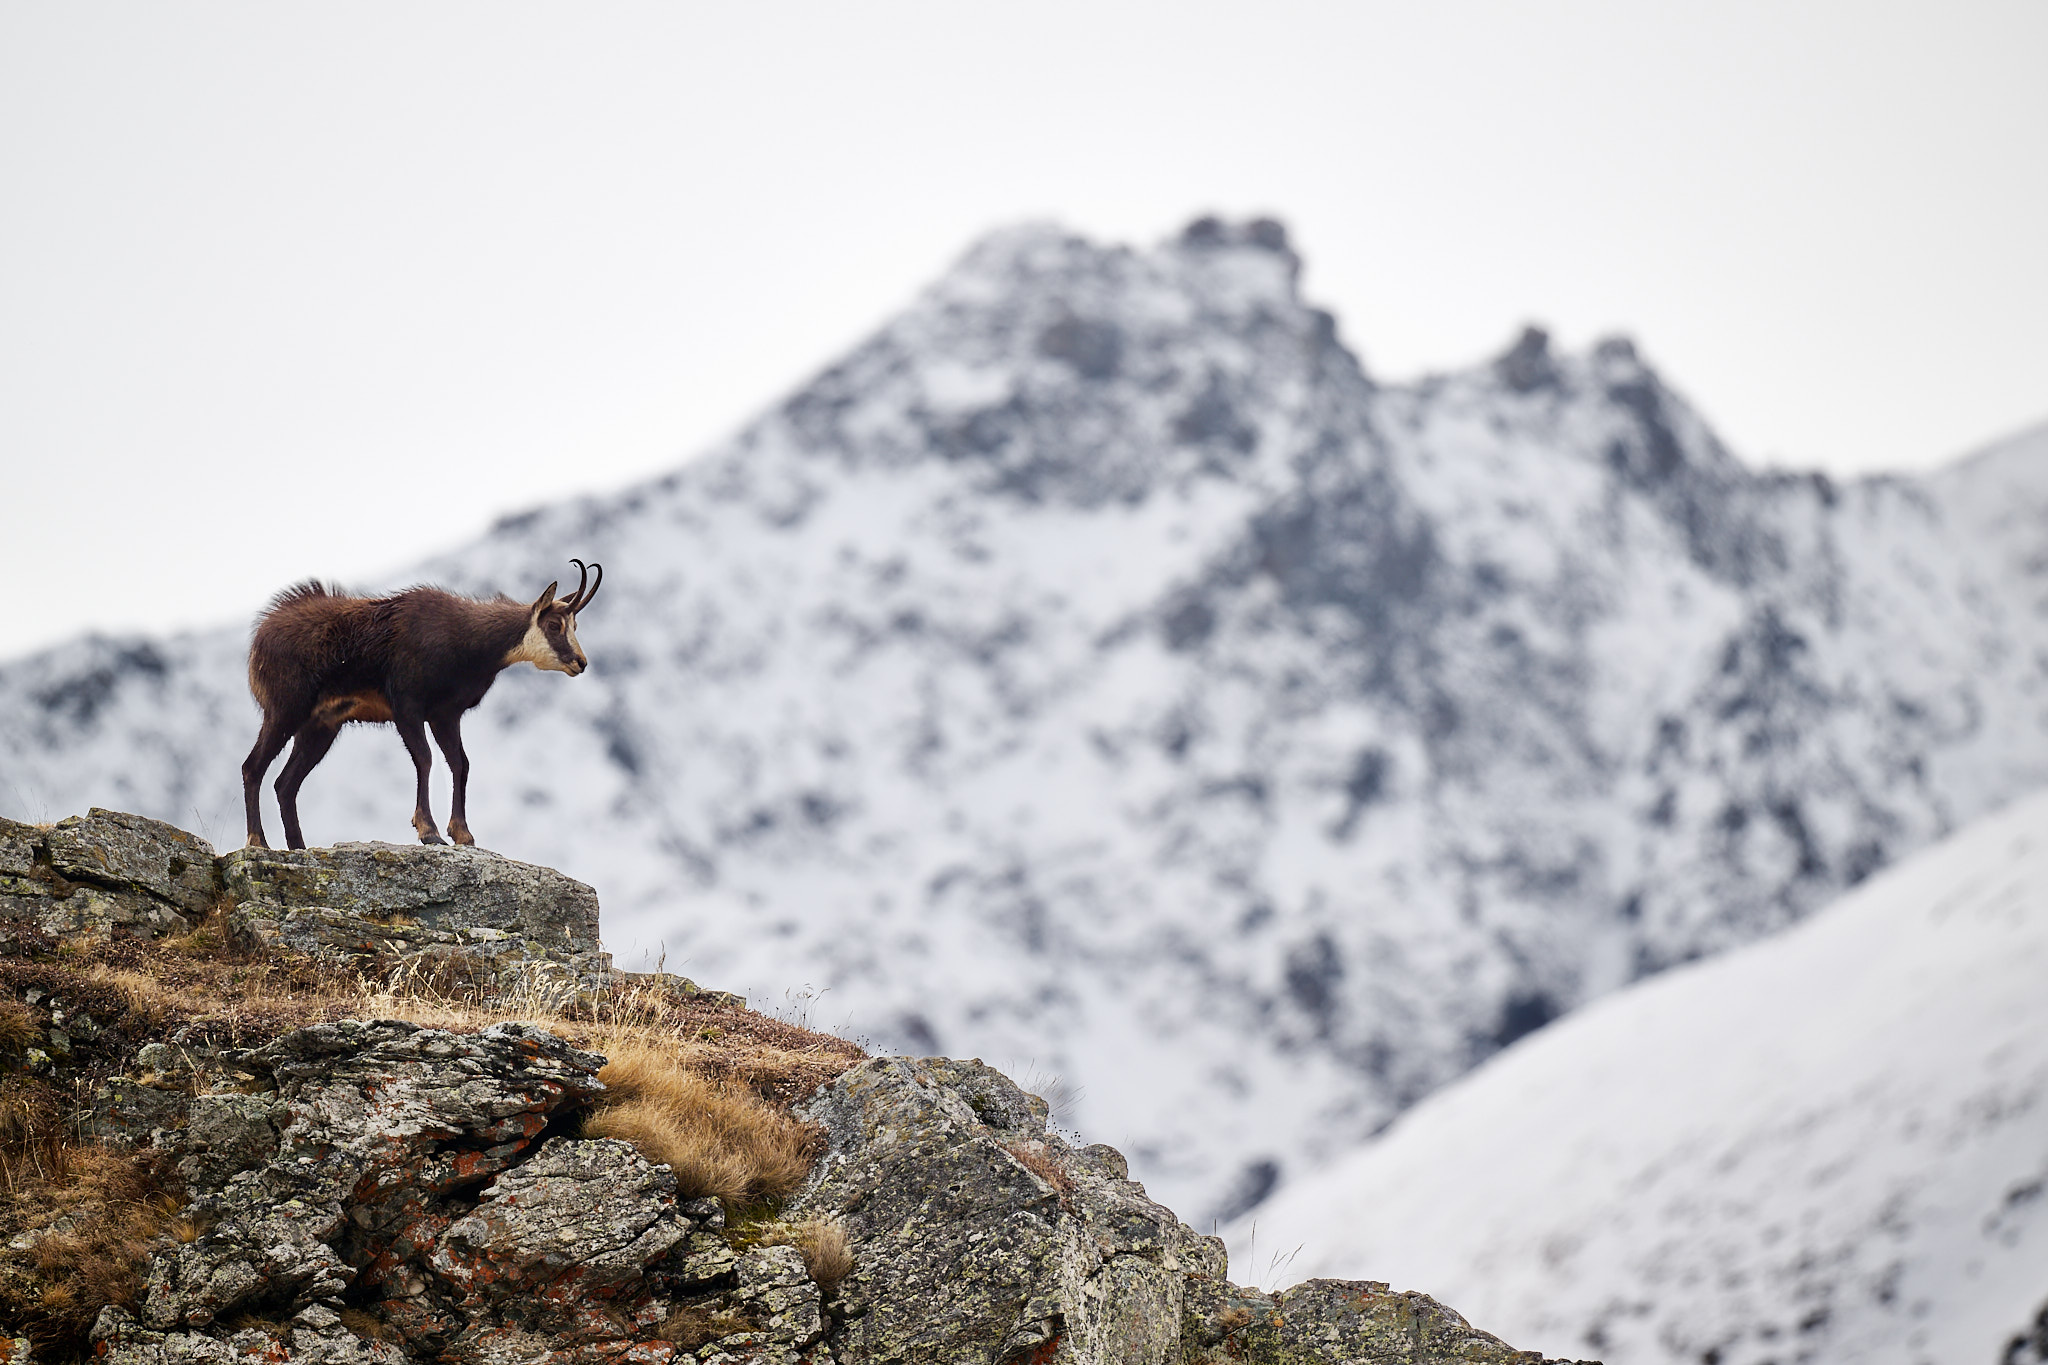
For example, how do you actually know that 1/500 is the right shutter speed for a relatively stationary subject? What if you can get away with totally sharp photos at 1/250 second, so that your camera can set a lower ISO?
This part is about trial and error, as well as practice. With enough practice, you can usually tell just looking at your subject what shutter speed you’ll need. But here’s a pro tip. In Manual Mode + Auto ISO, you can very quickly switch between different shutter speeds while maintaining the same image brightness. If you’re wondering between (say) 1/500 second versus 1/250 second, take an image of both! In fact, take a whole sequence and maybe even start a little faster – 1/800, 1/640, 1/500, 1/400, 1/320, 1/250, 1/200, 1/160, 1/125, and 1/100. With practice, you should be able to take the whole sequence in a matter of seconds.
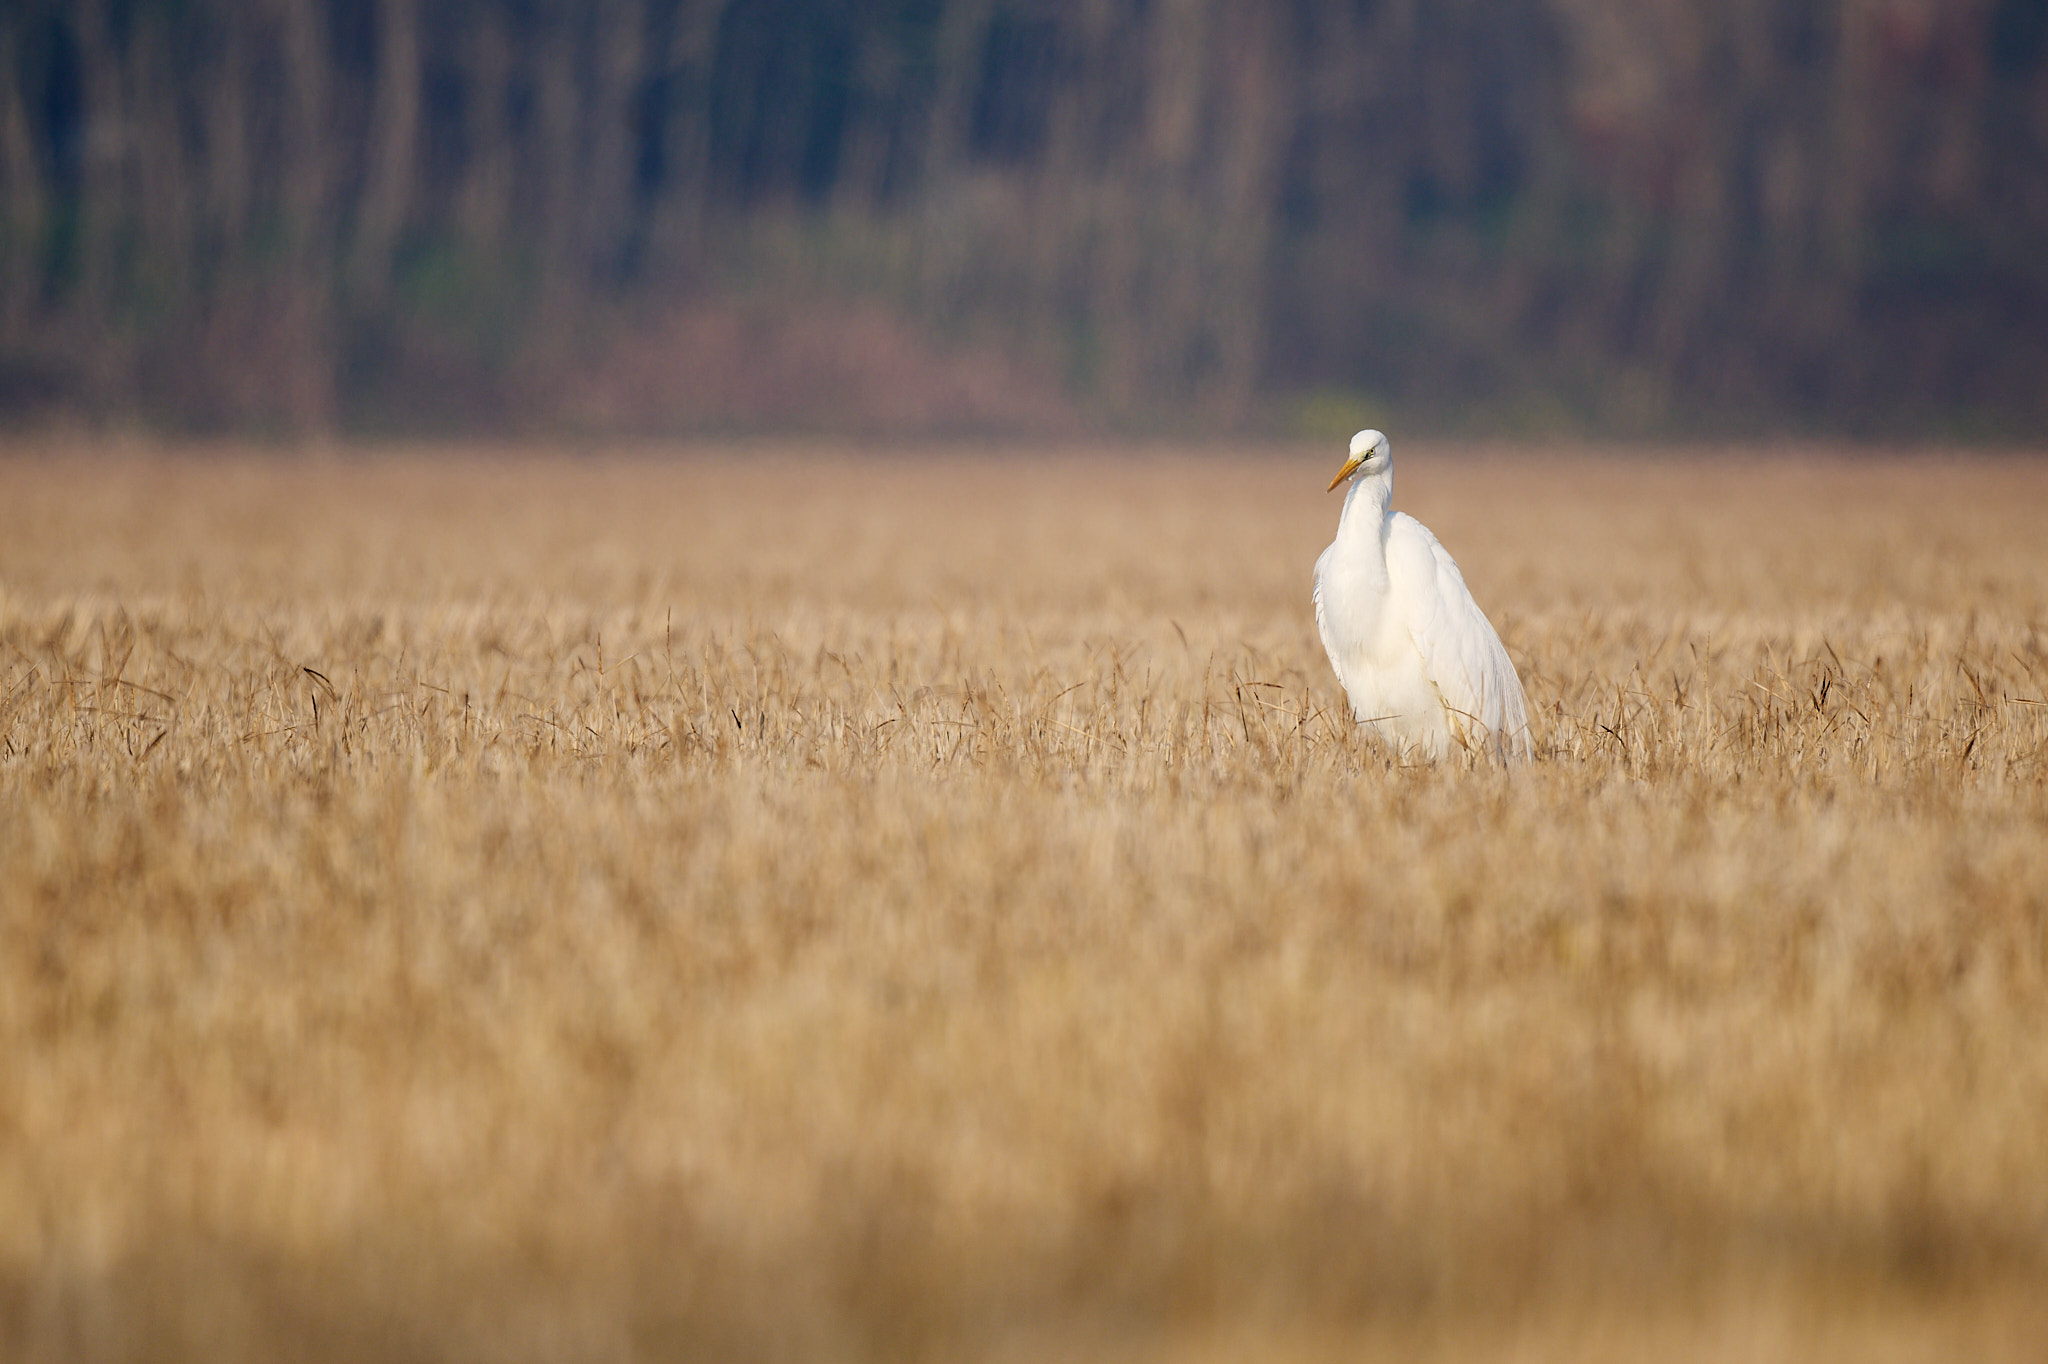
Then, start reviewing from the newest image and work your way back through the series. Set your camera to one-button magnification if available, so that you can immediately zoom in and check sharpness. This gives you the best idea of what shutter speeds are acceptable for the subject at hand. In this case, for example, 1/250 second proved to be plenty, since the subject was not moving very much:
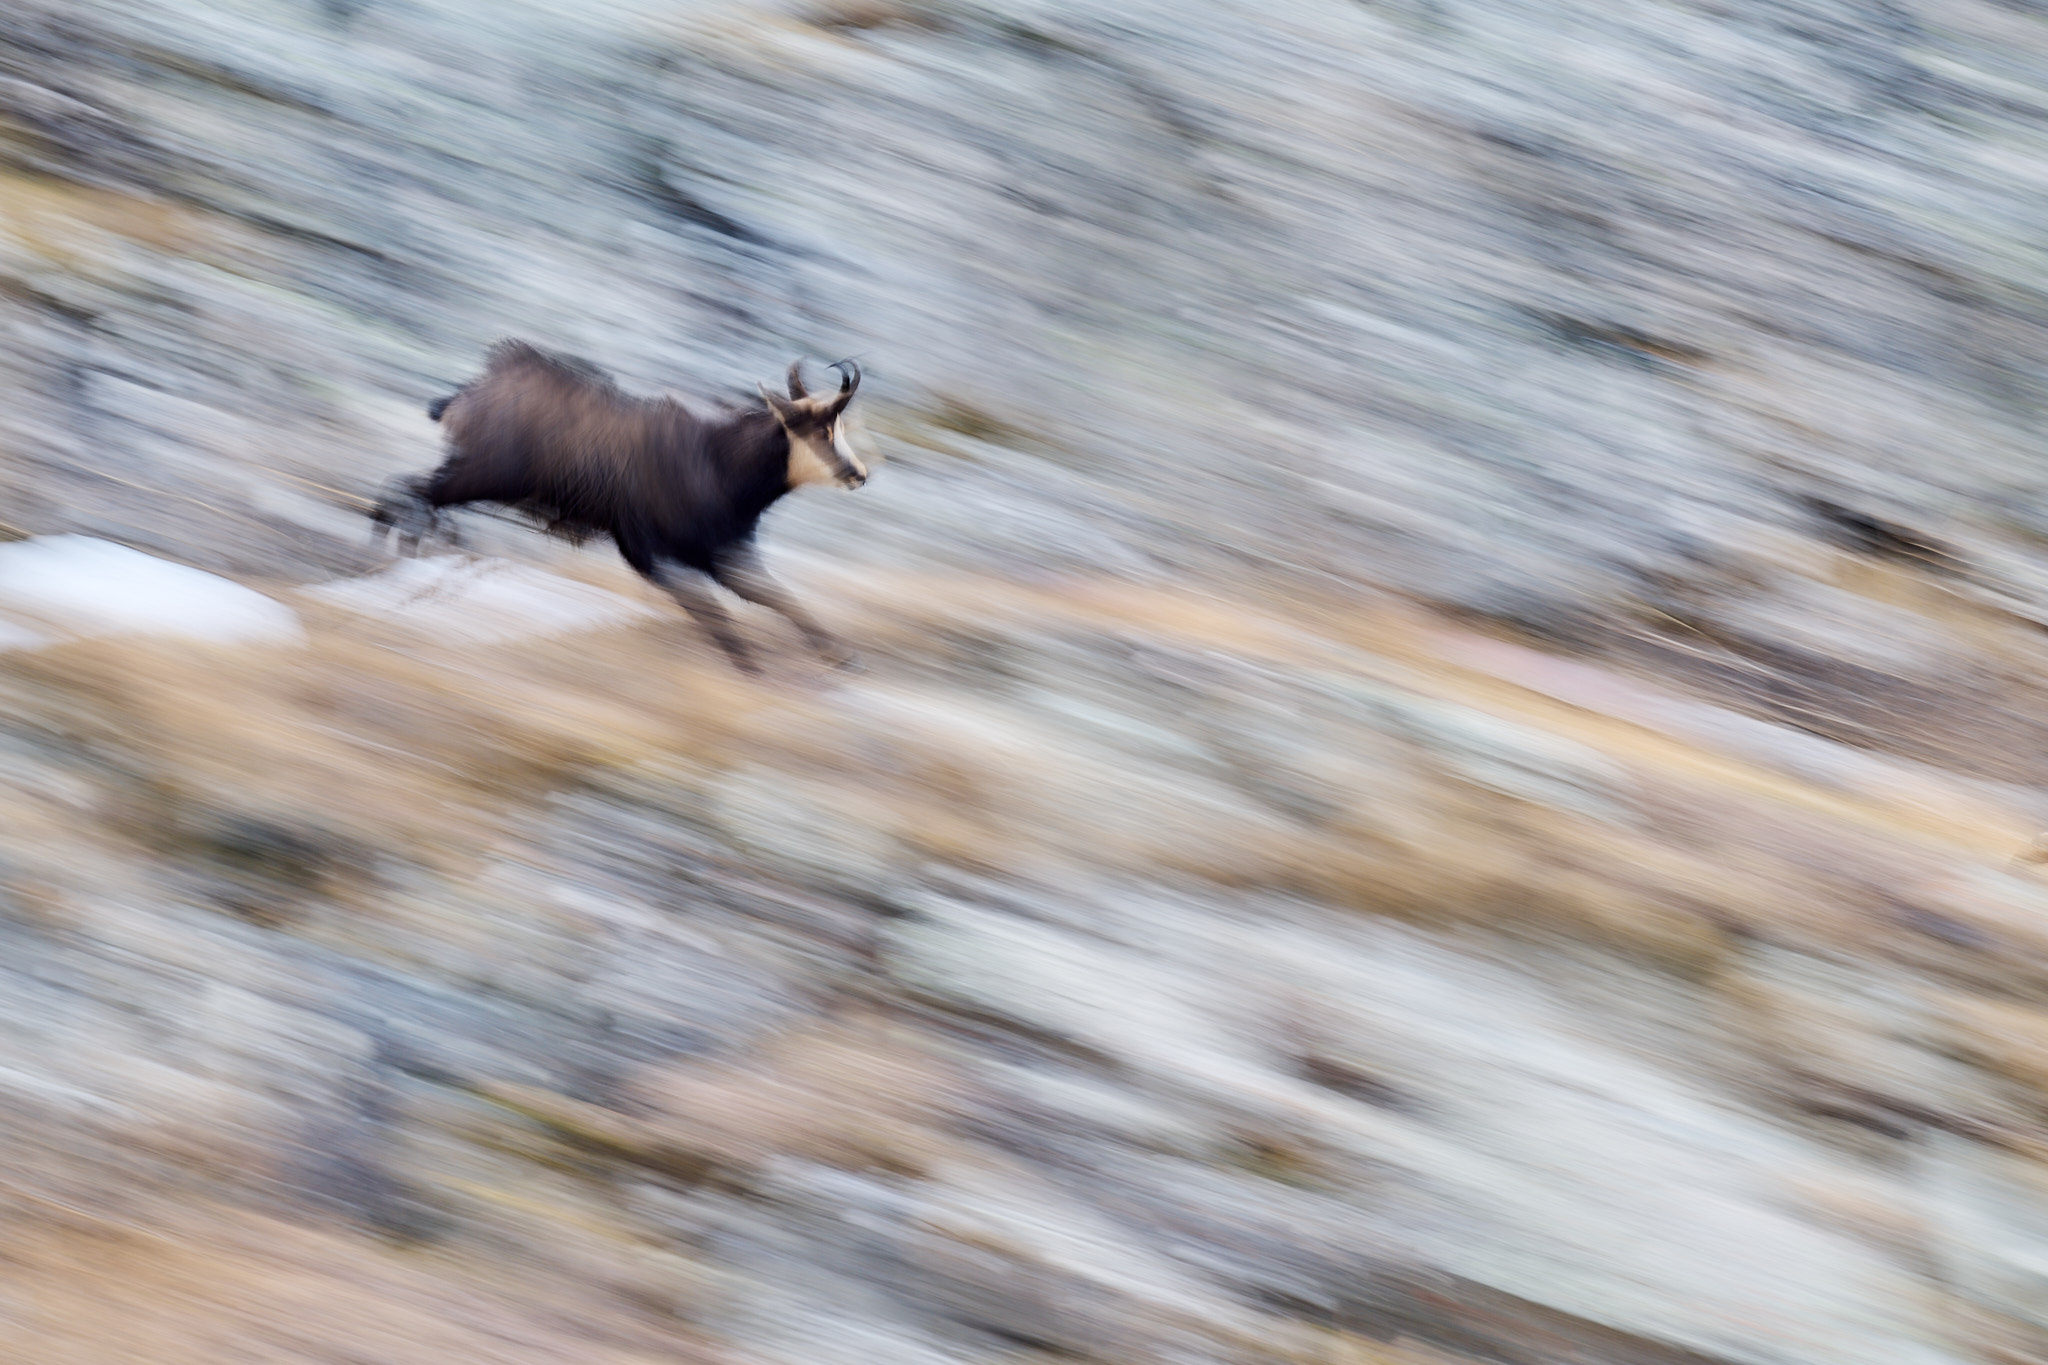
Manual Mode + Auto ISO also gives you the full flexibility to play around with motion blur however you want. I like shooting with about a 1/10 to 1/30 second shutter speed while panning with the motion of my subject, giving a sense of speed and movement to the photo. This is easy to accomplish with Manual Mode + Auto ISO. However, note that you’ll risk overexposure unless you stop down your aperture like I did here:
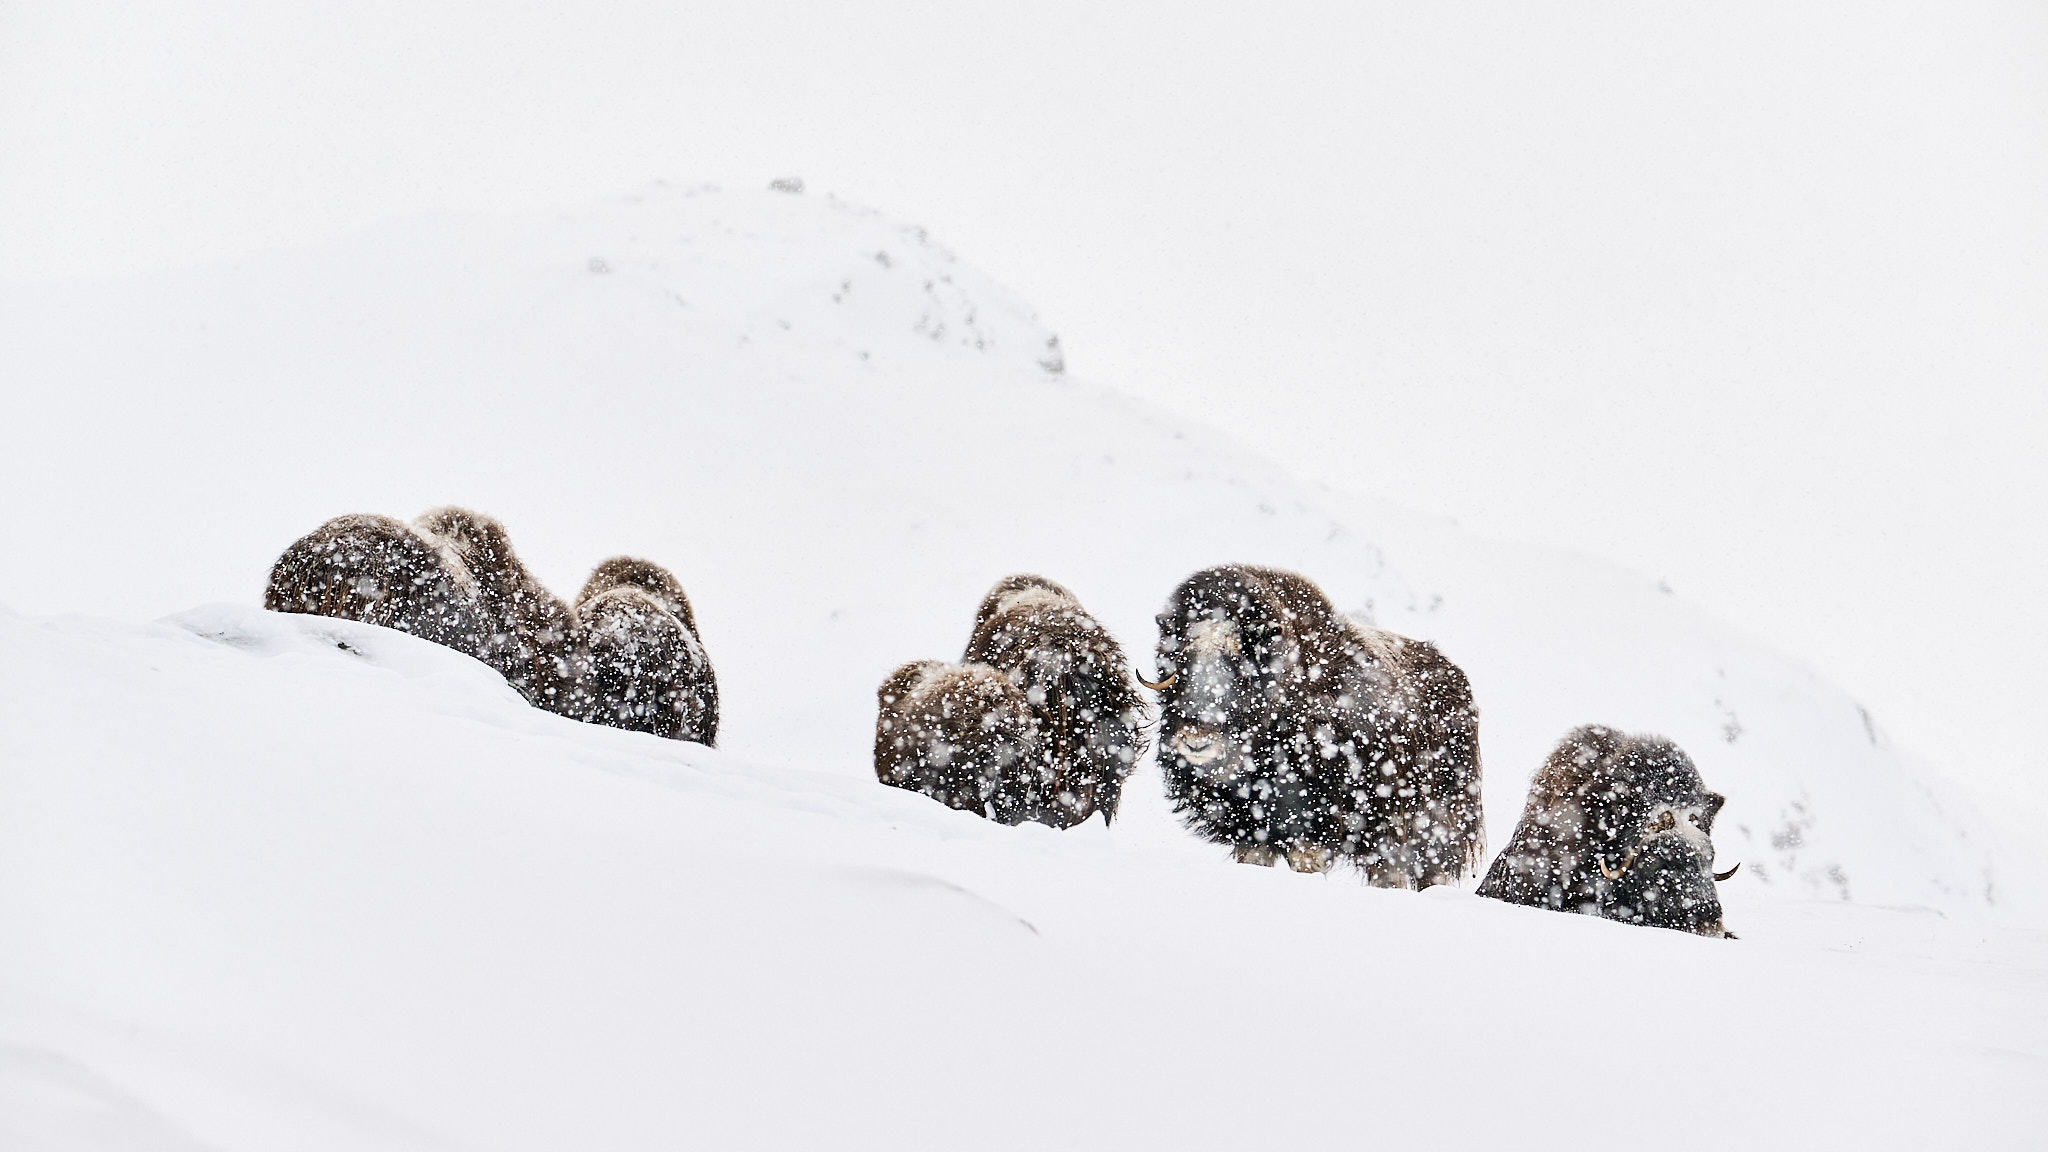
If there are cases when you want more depth of field, Manual Mode + Auto ISO also allows you that flexibility. Here, for example, I noticed that I wasn’t getting every muskox in the photo to be sharp unless I stopped down a little bit, specifically to f/8. It was a quick adjustment, and the camera compensated for it by boosting the ISO slightly.
Please keep in mind the following information: Auto ISO cannot go lower than the base ISO. As a result, you must be careful to prevent overexposure when using a combination of a long shutter speed and wide aperture. You especially need to be careful in very bright light.
In those cases, I will sometimes switch to Aperture Priority mode + base ISO instead, or I’ll select a faster shutter speed (or narrower aperture) so that overexposure no longer occurs. Still, I would like camera makers to eventually add a parameter to manage this situation and automatically increase the shutter speed. I would name this implementation “Smart Auto ISO.” (I’d like to note that you can already accomplish something similar to this in Aperture Priority mode + Auto ISO + a custom minimum shutter speed. But unfortunately, there is no quick way to change the minimum shutter speed in this mode on any camera that I know of.)
Ultimately, using Manual Mode with Auto ISO is one of the best ways to achieve a high level of control over your wildlife photos without worrying about overexposure or underexposure. Most of all, it’s very fast.
Furthermore, using Manual Mode in general can help photographers improve their skills with the three main variables of photography – shutter speed, aperture, and ISO. This can lead to better long-term results as you better understand what you’re doing as a photographer. And all of this without slowing down the process or giving you inaccurate results.
I enjoy using Manual Mode so much that I even use it when taking landscape pictures. It helps me to slow down and get in the right frame of mind for a landscape. In addition, in difficult cases like photographing the Milky Way at night or getting the perfect texture in moving water, Manual Mode is essential.
I have a final tip for you. When you’re putting the camera in your bag at the end of the day, or moving to a different scene or subject, take the time to select settings for fast-moving subjects. For example, I usually turn off any exposure compensation, set the shutter speed to 1/1,000 of a second, and set the maximum aperture of the lens. This provides me with a good starting point if I’m in a hurry the next time I pull it out of my bag.
Of course, any of the photos and situations I used as examples could have been captured using other methods, and most experienced photographers could have developed a different way of working which they are used to. However, I’m pretty confident in the speed and accuracy of Manual Mode with Auto ISO. It allows for on-the-fly changes more quickly than the alternatives, and it still gives nearly complete control over how the photo will turn out. All of that pays dividends over time!
I hope you enjoyed this article on using Manual Mode with Auto ISO for wildlife photography. If you have any questions or feedback, please feel free to let me know in the comments section below.
Thank you for a very informative and useful article on Manual mode with Auto ISO. When shooting in manual mode +auto ISO on my Nikon Z8, I notice that the Exp.Compn scale remains static even when I use the dedicated EC button & dial after having set my aperture and Shutter speed …is there something which I am not doing properly?
Great Article.
The only and fastest way to keep up with moving objects in wildlife photography and sports photography.
I want to mention that is very usefull to limit the upper iso value to get acceptable photos.
For example 6400 and not let your camera choose what ever iso want.
Hi Massimo. I totally agree with you.
This is the method I use and teach to my students.
Very fast and accurate. Not only for wildlife.
With the exposure compensation button you correct the iso in order to maintain the perfect exposure directly in the viewfinder with a mirrorless!
Ciao
Gianluca
Thank you, Massimo, very much. I’ve been trying to experiment more with Manual mode and found your lessons to be clear and understandable. I may be wrong, but your writing seems to me to be geared for many levels of photographers, not just professionals.
Thanks McCole, I think that a clear understanding of the photographer intent in setting the exposure is a corner stone of photography. It isn’t just getting the right luminosity but making artistic decisions. Manual mode helps working this way quick.
Thank you very much for the explanations, which do not hurt to review. I would like to know what metadata options do you leave in your photos or import onto them during import or before in your DSLR ?
Nothing very specific, just using standard settings both in camera and in C1
Excellent article. For wildlife photography, especially small birds, I find manual with auto-ISO to be the most practical camera mode. The lighting, when one is looking up into a tree, changes too quickly for camera adjustments. That combined with rapid movements from the subjects makes it one of the toughest types of photography. Manual with auto-ISO is as close to point and shoot as you can get when using a handheld super telephoto lens. It allows me to worry about the composition and background rather than camera settings. There isn’t time for both. For these situations a wide open aperture and shutter speed of 1/800-1/1250 will normally do the trick. Auto-ISO ensures the photo is bright enough.
One other setting I’ll often use is to set my command dial to move in full stop increments instead of 1/3 stops. When I need a faster shutter speed for a bird flying by 2 clicks of the dial will have me at 1/4000. No need to worry about exposure auto-ISO takes care of it.
Keep up the good work PL.
This is a spot on example, thank you Photofan.
I shoot most time on manual
Years ago I also prefer manual mode with AutoISO, but now I think Av Mode, Auto ISO together with a convinient setting mode for minimal shutting speed is better, usually I use U1, U2, U3 with different minimal shutting speed on Nikon cameras. I hope Nikon can customize fn button with the minimal shutting speed one day, just like sony.
something to add: the problem with manual mode with Auto ISO is in bright environment, Auto ISO can’t give you a proper setting with a “brighter” f and s setting, like F/2.0 1/60s,even ISO-100 with get a over exposured result. Av Mode with an Auto ISO won’t meet such problem, and is also more convinent to adjust exposure conpensation, especially on Nikon Cameras.
Excellent point.
I mentioned it on Libor’s article When to use Manual Mode for Wildlife Photography:
The Nikon FA incorporated cybernetic override to help prevent over/under exposure, but this useful feature was not retained in their later film or digital bodies.
However, some Canon EOS bodies have Safety Shift:
“Safety shift … used when the camera maxes out in Aperture Priority (Av) or Shutter Priority (Tv) modes. For example, if the exposure is too bright and the camera is also maxed out at 1/8000 shutter speed, with this setting turned on the camera will stop down the aperture to balance out the exposure.”
photographylife.com/recom…6-settings
That is true. Though such settings are quite rare in wildlife.
Agree 100%.
Thank you for posting this detailed article. I shoot a lot at air shows, and I use this technique for WWII-era piston engine planes, where I want to keep the shutter below about 1/250 sec in order to capture some propeller movement, otherwise it doesn’t look natural. Auto-ISO is great because the lighting can change significantly as I follow a plane across the sky. I shoot crop so I don’t like to go slower than f/11 (f/8 preferred), and as a result, I usually have a 2-stop ND filter on the lens to prevent overexposure.
Since I’ve switched to this, I honestly use it for everything unless conditions are so bad the camera can’t make a good choice (polar bears against white snow, looking at you).
Otherwise manual + auto ISO + exposure compensation works for me for portraits, landscapes, air shows, wildlife, just about anything.
I guess maybe not for astrophotography, but that’s similarly niche.
I don’t use it for tripod-based landscape photography, since I’m almost always staying at base ISO. In that case, I prefer aperture priority with manual ISO, and I use exposure compensation to shift the shutter speed as needed.
Granted, I end up using full manual a lot too, like when making a panorama, shooting with film, or doing Milky Way photography.
But for anything fast-moving, the speed of Manual + Auto ISO is extremely appealing.
All of these methods get you the same results anyway, it’s just a difference in speed. If the right settings for a particular shot are f/4, 1/500 second, ISO 400, the question is simply how to achieve those settings as quickly as possible. Semi-auto modes shouldn’t be looked down upon if they help you get those settings faster.
I’m mainly using Av+Auto-ISO for anything, but sometimes I need to switch quickly between Av and Manual modes to be able to switch between standard speed and a faster pre-fixed one for portraits of moving people (concert, dance etc…)
So, in this case, I preset both modes and use a switch button and/or lever between them (on Zf, super easy :D). Also works for sport in arenas where lights are well controlled and measure can be globally balanced from the start.
Also, on all my cameras, the main front Fn button is always set to AEL. That way, having always an AEL button under finger allows me to fix a desired light and, for instance, do panorama anytime I want to without the need to be in manual mode. I “pick” the measure at one point by clicking the AEL button (and focus with BBF on the hyperfocal or any other “desired” point) and then shoot : especially practical since mirrorless allows to have a good idea of what exposure will be.
Exceptions can be long exposures, or panning for instance, of course.
It is a very good set of settings, able to cover every situation you face!
But you have to make a lot of changes and adapt settings, I think just one mode is more straightforward. Having said that, surely you have tuned your way of working which surely is the best for you.
Well, in fact, I nearly have only one mode : Av+Iso Auto as I said, using manual only on some rare occasions. Manual alone can’t face all I want as fast as I need most of the time. I agree it could be used for wildlife, but I really find Av to be much more practical, knowing I can simply switch between standard, fast and slow presets without the need to pick a speed by myself. Panning is really exceptional in my usage.