Animals have a tendency to prefer low-light conditions, which is a big challenge in wildlife photography! It’s hard to capture a sharp, well-exposed image after sundown or in a forest, especially with a moving subject. The right settings and a better camera can help, but they only take you so far.
At the same time, your photography definitely should not be limited by the sun. With the right techniques, you can take good wildlife photos in low light, even nighttime. You may just need to apply a new approach. I’ve taken many of my favorite wildlife photos in low-light conditions – sometimes when the stars are the brightest natural light that’s left.

In this article, I’ll cover my process for low-light wildlife photography and how to take good images no matter how dark the scene has gotten. These techniques are viable regardless of the camera you’re using. I shot all of the photos in this article with a Micro Four Thirds camera that is hardly known for its low-light capabilities. Technique is more important!
Table of Contents
The Challenge
As it gets darker, you must work harder to capture properly exposed images. Aside from the natural light of the scene, the only tools at your disposal to gather more light are aperture, shutter speed, and artificial light.
If you are unable to gather enough light with those tools, you’ll be forced to raise your camera’s ISO or brighten the photo extensively in post-processing. This inevitably leads to photos with blotchy colors and unwanted noise.
For better or worse, many animals prefer low-light conditions and exhibit some of their most interesting behavior there. Image noise is practically a fact of life for many wildlife photographers.
Maybe you could improve your image quality in low light by buying a better camera, but it’s smarter to learn techniques that work for any camera. What about noise reduction software? It can work well, but even the best AI software isn’t perfect. Definitely try to provide it with the best possible file out of camera!
1. Optimize the Camera Setting Dance
Low-light wildlife photography is a stress test on your ability to set the optimal aperture, shutter speed, and ISO. Let me go through my recommendations here one-by-one (all of which are set in your camera’s manual mode).
Aperture is easy for low-light wildlife, because you will probably be using the widest aperture on your lens. (This also means removing any teleconverters if possible, since they lower the amount of light you capture.) If you have an expensive f/2.8 lens for wildlife photography, now’s the time to embrace f/2.8!
Shutter speed is the hardest and most important setting for low-light wildlife. When the light gets low, suddenly a lot of photographers forget their usual habits with shutter speed. Many wildlife photographers get greedy and try to set (relatively) slow shutter speeds like 1/100 second for fast subjects, like a bird in flight. That can give you some nice, artistic motion blur, but it definitely won’t turn out sharp!
Sometimes, I see photographers worry in the opposite direction. They’ll shoot at shutter speeds like 1/4000 second even after sunset, capturing practically no light in the process. Their photos won’t have motion blur, but they will have tons of noise, which is almost as bad.
Instead, the best shutter speed in low light is the longest one that avoids (unwanted) motion blur. That’s all! But it’s a hard shutter speed to find. It even changes from photo to photo of the same subject. For example, a bird’s wings don’t move at a constant speed while they’re flapped.
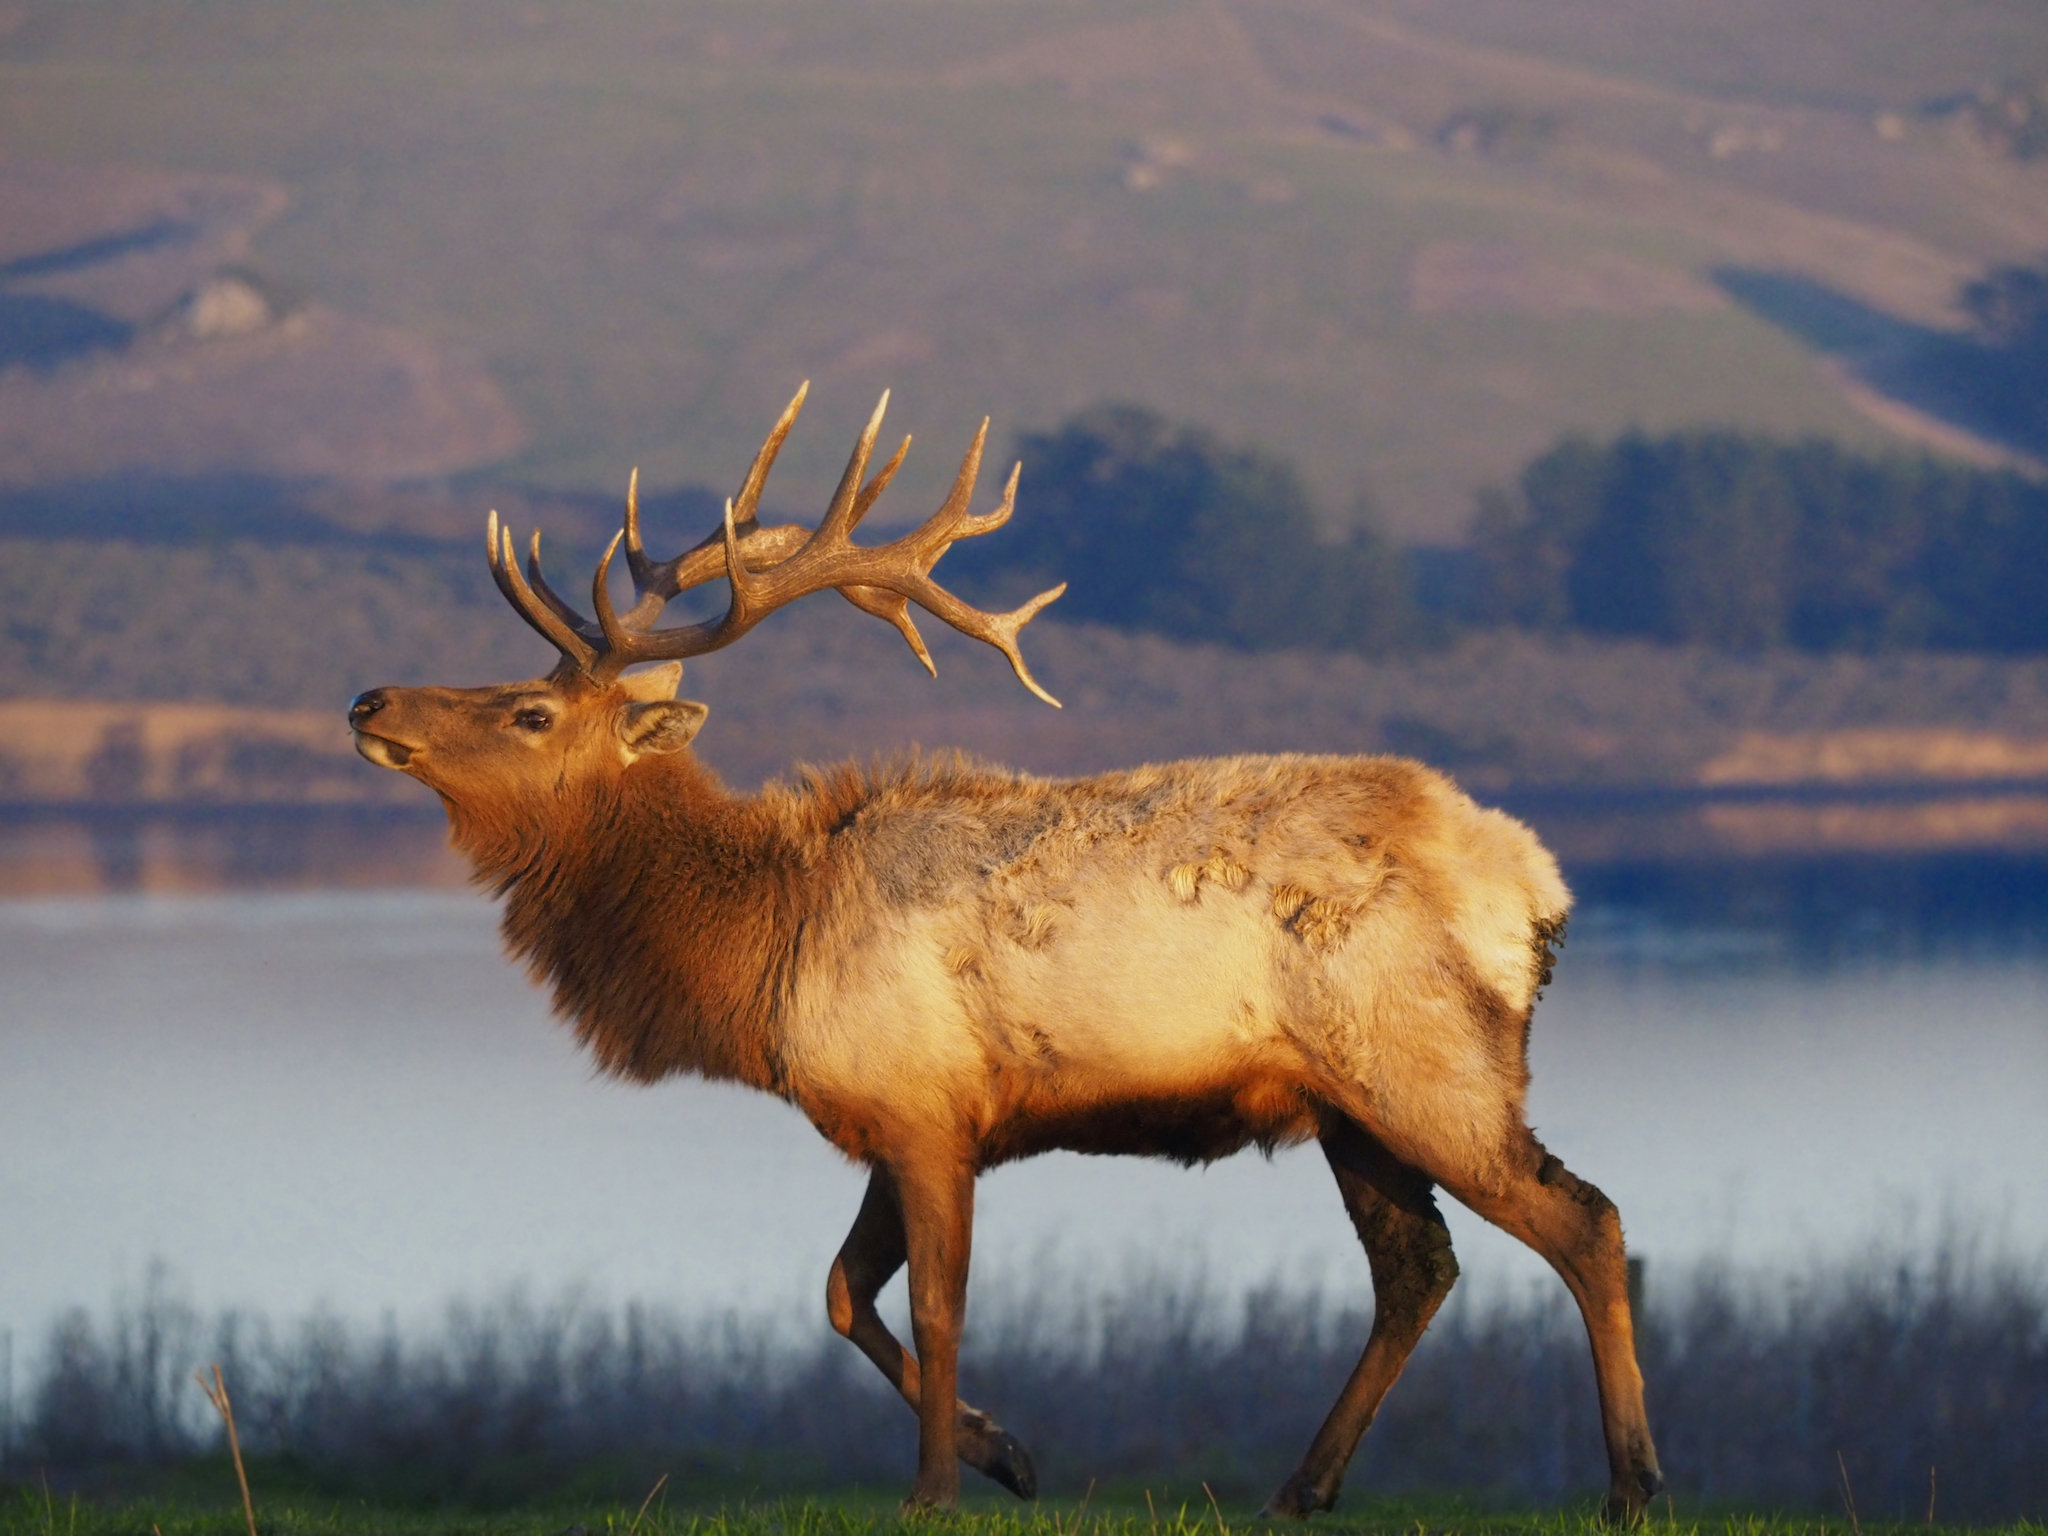
I solve this puzzle by setting faster, safer shutter speeds if I’m comfortable with my camera’s ISO. (For me, this is anything below about ISO 1600.) I steadily bump up my risk tolerance as the light dims beyond that. I want my shutter speed at ISO 1600 and lower to give me at least a 90% chance of sharp photos. At ISO 3200 and beyond, I’m happy with shutter speeds that are sharp 30-50% of the time. The example photo below explains this balance a bit more.
ISO can be left on AUTO. If you notice that the camera is overexposing or underexposing, you can use the exposure compensation button to correct the issue. The camera will correct the exposure by raising or lowering ISO.
Otherwise, I have already covered the ISO / shutter speed balance, so I don’t need to repeat it here.
Maybe all of this sounds basic, but I can’t count the number of times I see photographers use strange camera settings for low-light wildlife photography, like an f/16 aperture or a shutter speed that will give tons of motion blur. Every few minutes, take a look at your camera settings to make sure they seem right and are close to the optimal target.
2. Stay Steady
Since you’ll be shooting with a longer than ideal shutter speed in low light, it is crucial to keep your body very still. This tip may seem obvious, but I see people shooting with a shaky form all the time. Especially in the heat of the moment with wildlife photography, it is easy to get excited and forget about staying steady.
Concentrate on your breathing, posture, and feet. It’s important your whole body is still. I like to keep my elbows close to my body, my feet planted and body straight, and breathing very slow – holding my breath slightly just before taking a shot. Take advantage of objects to rest your lens, such as branches or boulders.
Of course, the ultimate tool here is a tripod. You usually can’t control the subject’s motion at the end of the day, but you can control your own! A tripod can make camera shake a non-issue. I’m also a fan of short and flexible tripods for shooting small subjects close to ground level.
For wildlife that’s standing still, you can even start to treat wildlife photography like landscape photography and use multi-second exposures. I took the photo below at three seconds, and it’s sharp because the subject didn’t move. I’ll talk more about that later.
3. Embrace the Flash
As natural light fades away, there is the option to introduce artificial light to the scene by using a flash. Flashes can only travel so far, so when photographing wildlife with a telephoto lens, a flash may not be particularly useful, even with a flash extender.
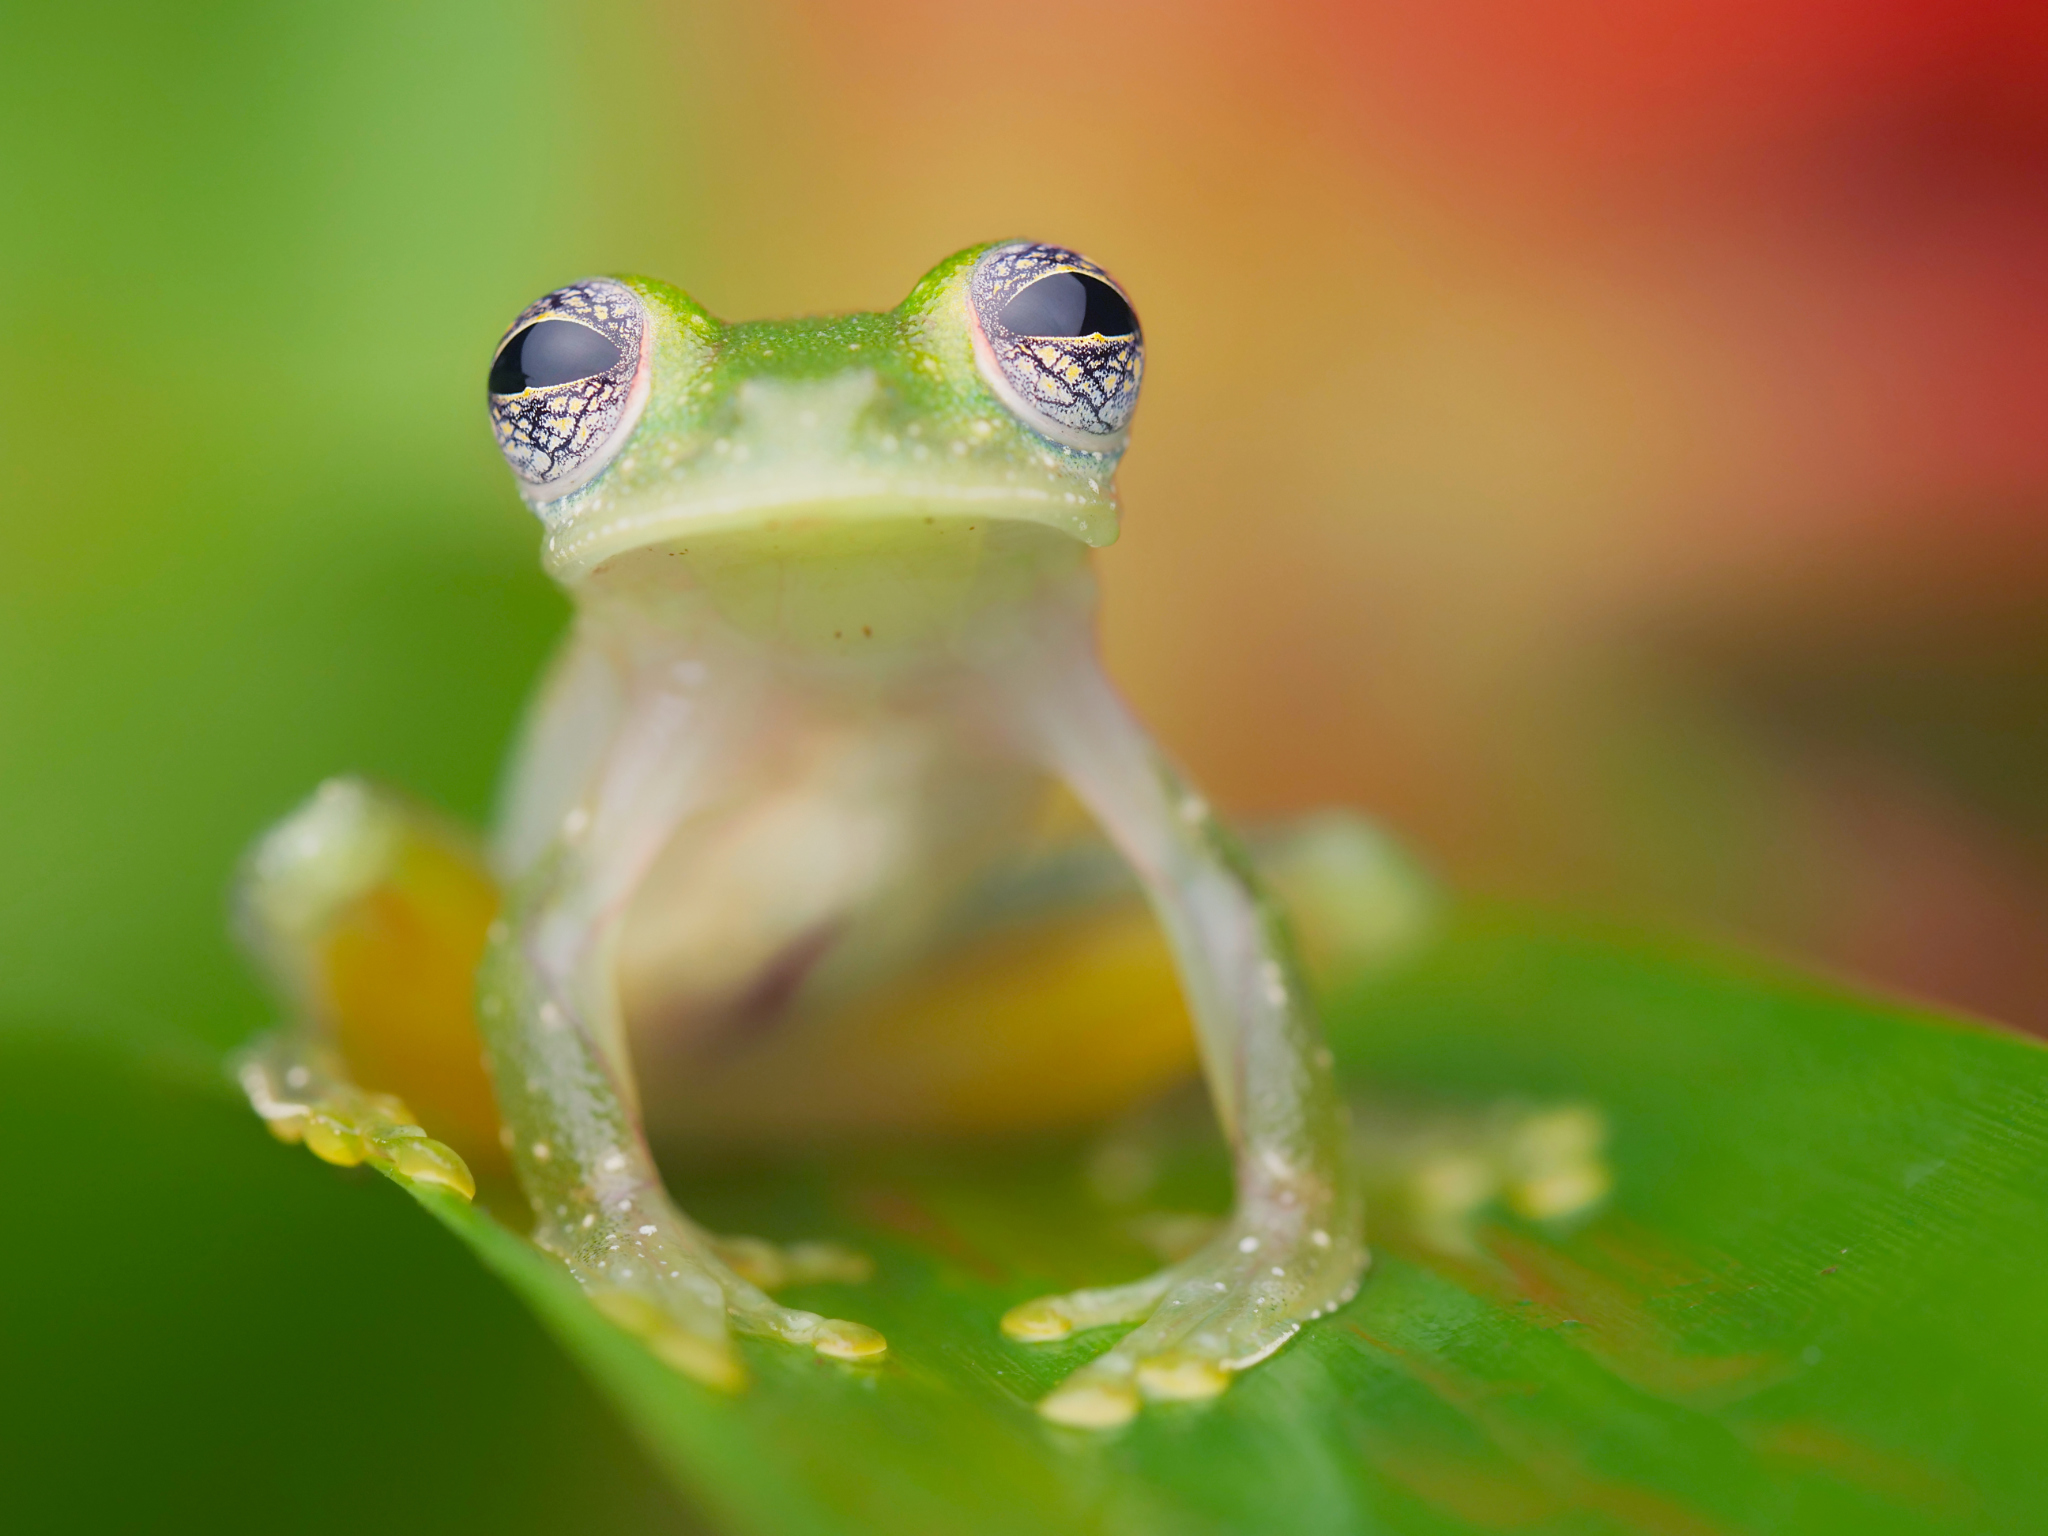
However, at a closer range, especially with small animals, flash is a must-have. It lets you photograph subjects that would otherwise be impossible in low light, or even in good light! A lot of macro wildlife photographers will use a flash even on a sunny day. (That’s a side tip for this article – the smaller your subject, the more easily you can use flash, and the easier it is to do low-light wildlife photography!)
Flashes not only brighten your photo, allowing you to use lower ISO values, but they also freeze your subject. The flash essentially acts as an exposure of its own, and the duration of the exposure is usually faster than 1/10,000 of a second.
To use flash with wildlife, I recommend not using an ordinary on-camera flash. I will often handhold my flash, but you can also use flash arms, a light stand, or even a friend to hold the flash. (You will need a method of firing the flash off-camera, though.)
The advantage of using the flash externally is that you get more control over the lighting. Specifically, you can control where the shadows are on your subject. This can give you a lot of creative freedom!
A flash is best used with a diffuser. A diffuser softens the light on the subject, minimizing bright reflections and soft shadows. Softer light usually makes it easier to see fine details in an image. Done well, it can be hard to tell that the photo was taken with a flash at all.
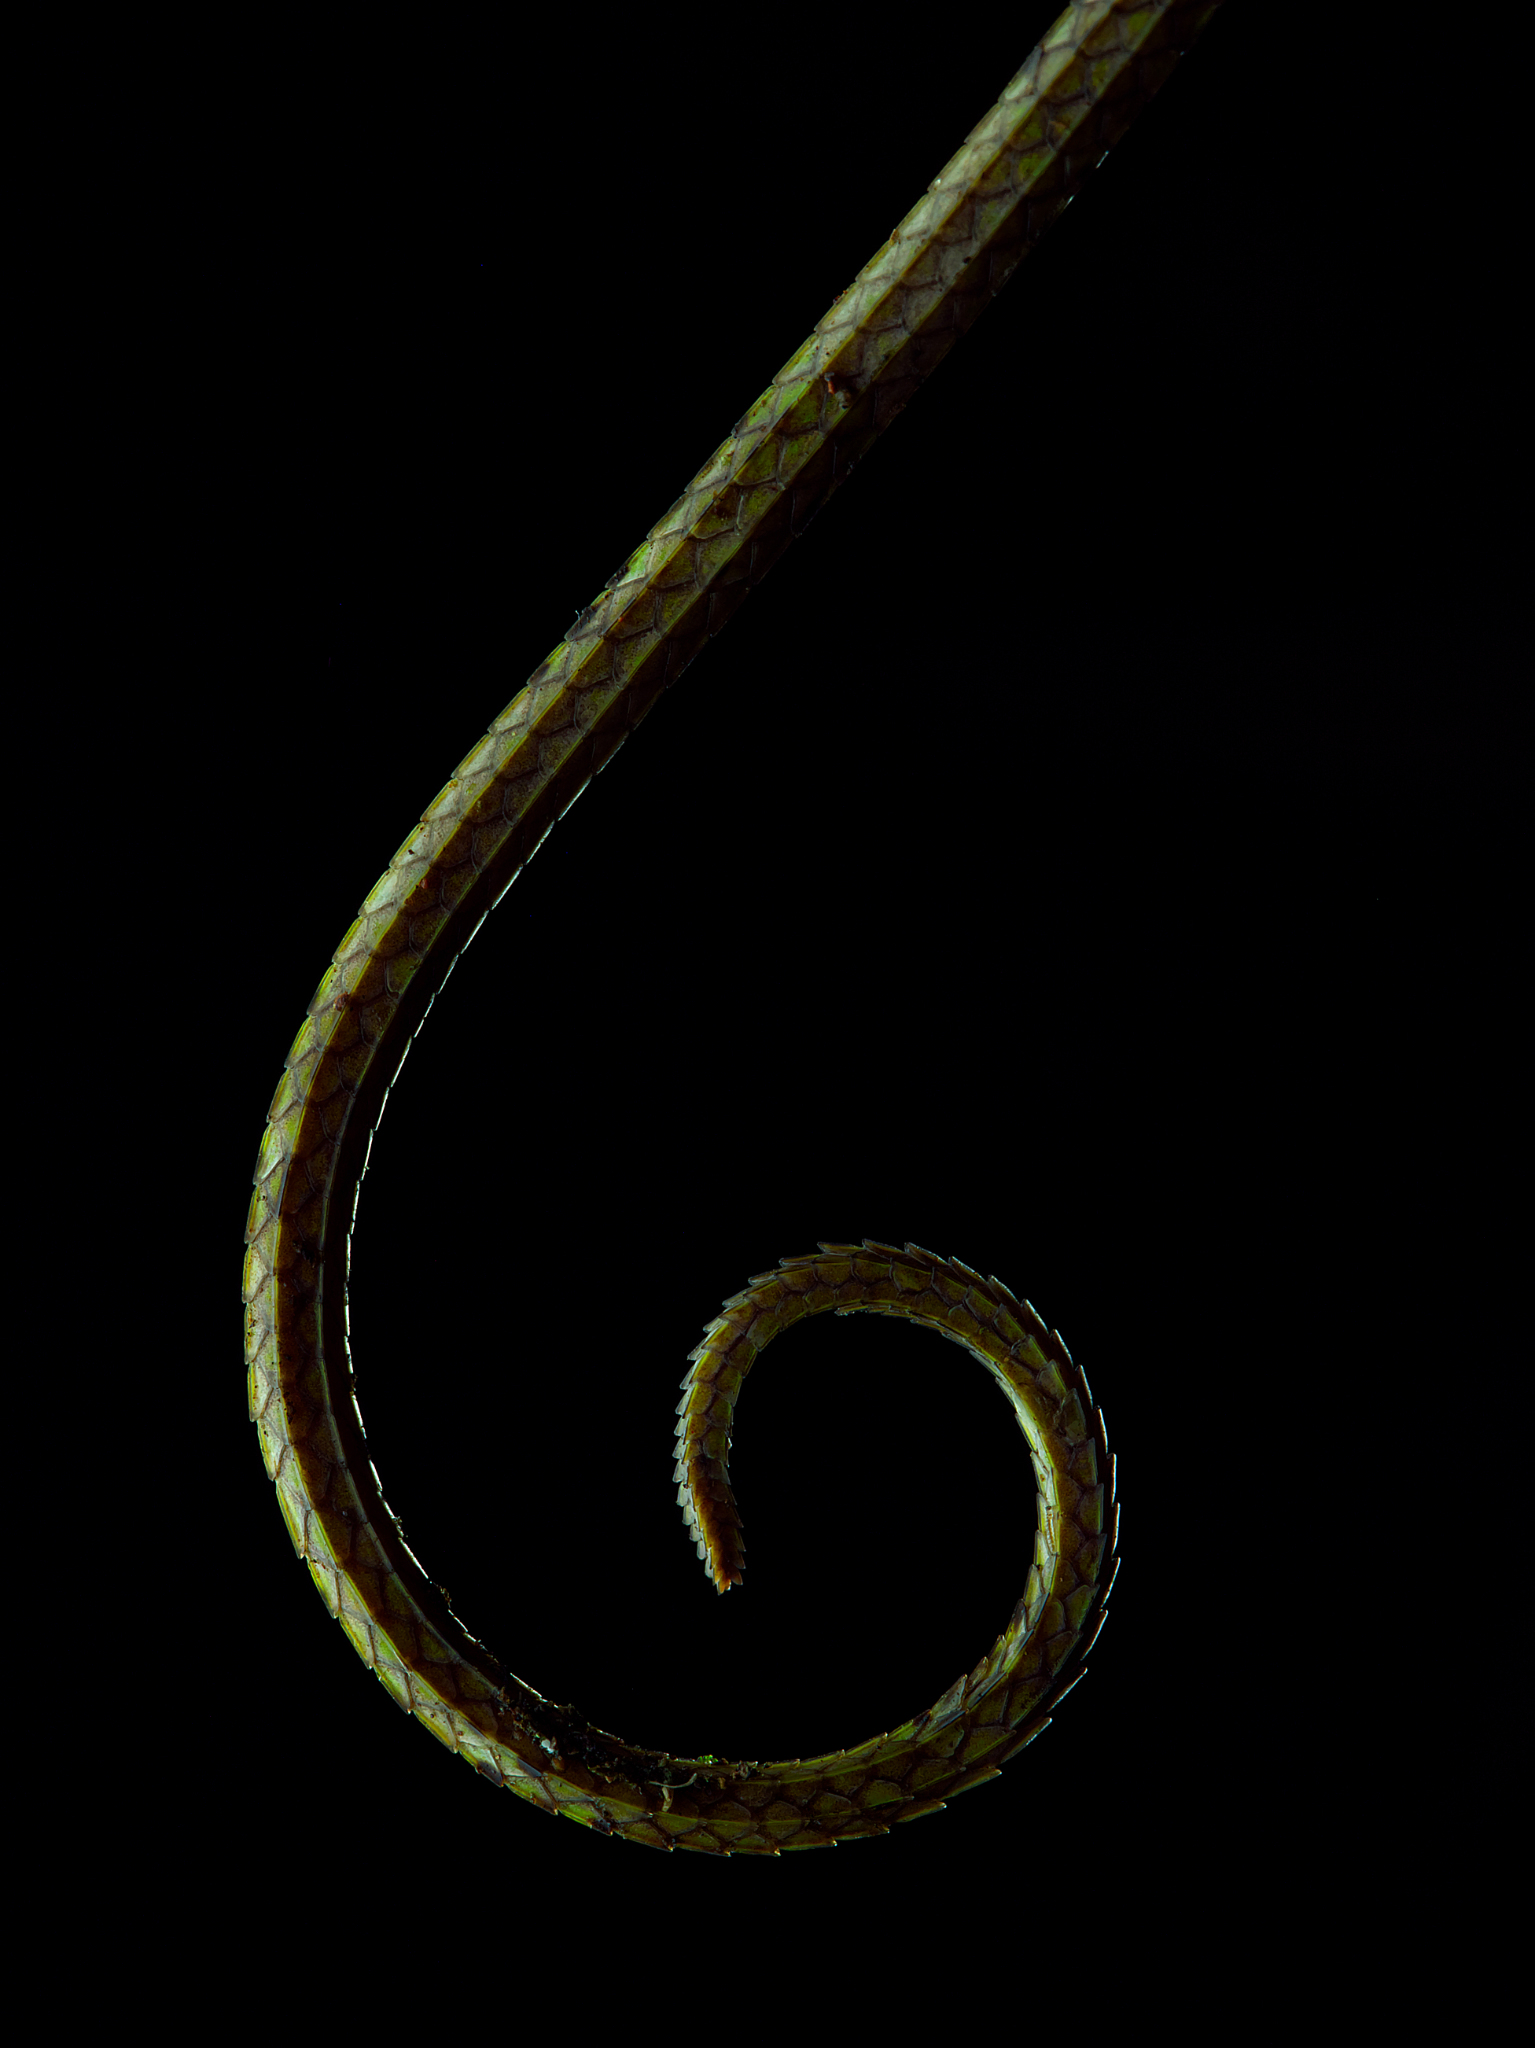
Other times, I deliberately go for the “artificial light” look by illuminating by subject and deliberately leaving the background dark. This can lead to a creative, studio-like effect despite the wildlife being outdoors.
In terms of exposure, I use manual mode and set my shutter speed, aperture, and ISO based on how I want the background to look. Then I set the flash based on how I want the subject to look. I usually adjust flash strength manually using trial and error, but you can use TTL flash (and flash exposure compensation), too.
Lastly, please keep in mind the species being photographed. Some animals are very sensitive to bright lights, especially at night. Using a flash to photograph an owl is a very different matter from using flash on a snake, for example. Don’t harm your subjects for the sake of a photo!
4. Utilize Motion Blur
Although shooting in low light is objectively more difficult, it does provide opportunities for unique shots. For example, you can capture creative photos of wildlife with deliberate motion blur.
In the photo below, for example, the blur in the splash of the water (and a bit of blur in the bird’s neck) convey a sense of motion that could be lost at blazing-fast shutter speeds:

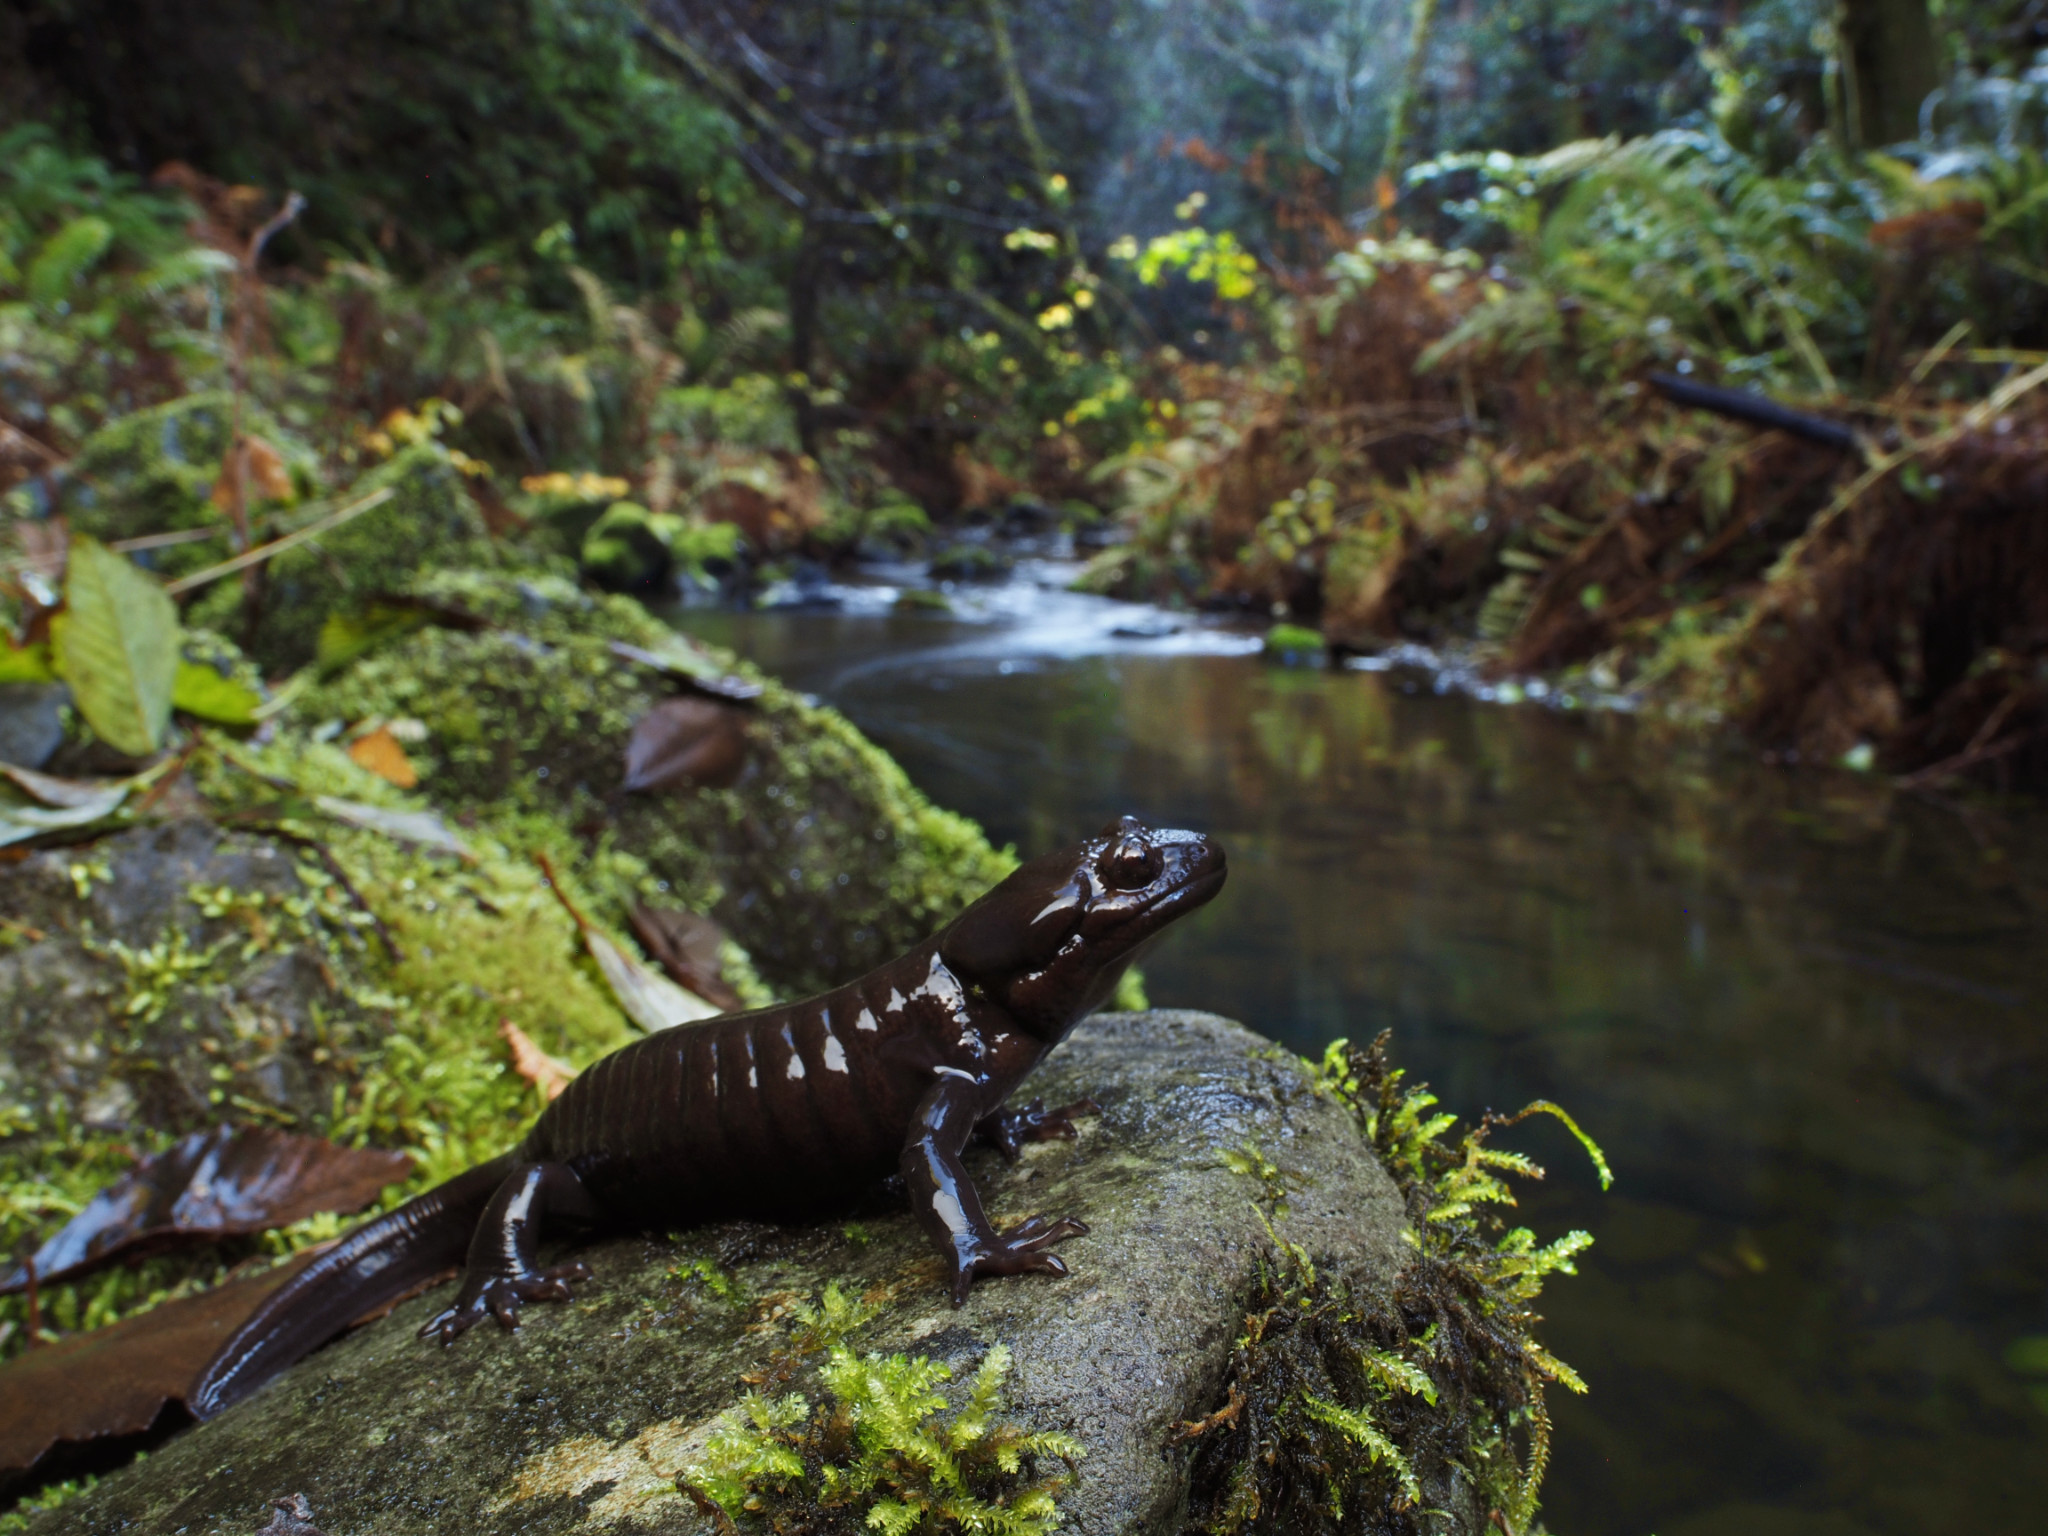
Anything that moves in a photo can be blurred – tree leaves in the wind, running water, clouds, and so on. I took the photo below at 1.6 seconds, and the creek in the background has the classic “soft” look because of it. It’s not usually a look seen in wildlife photos, but that’s what makes it unique!
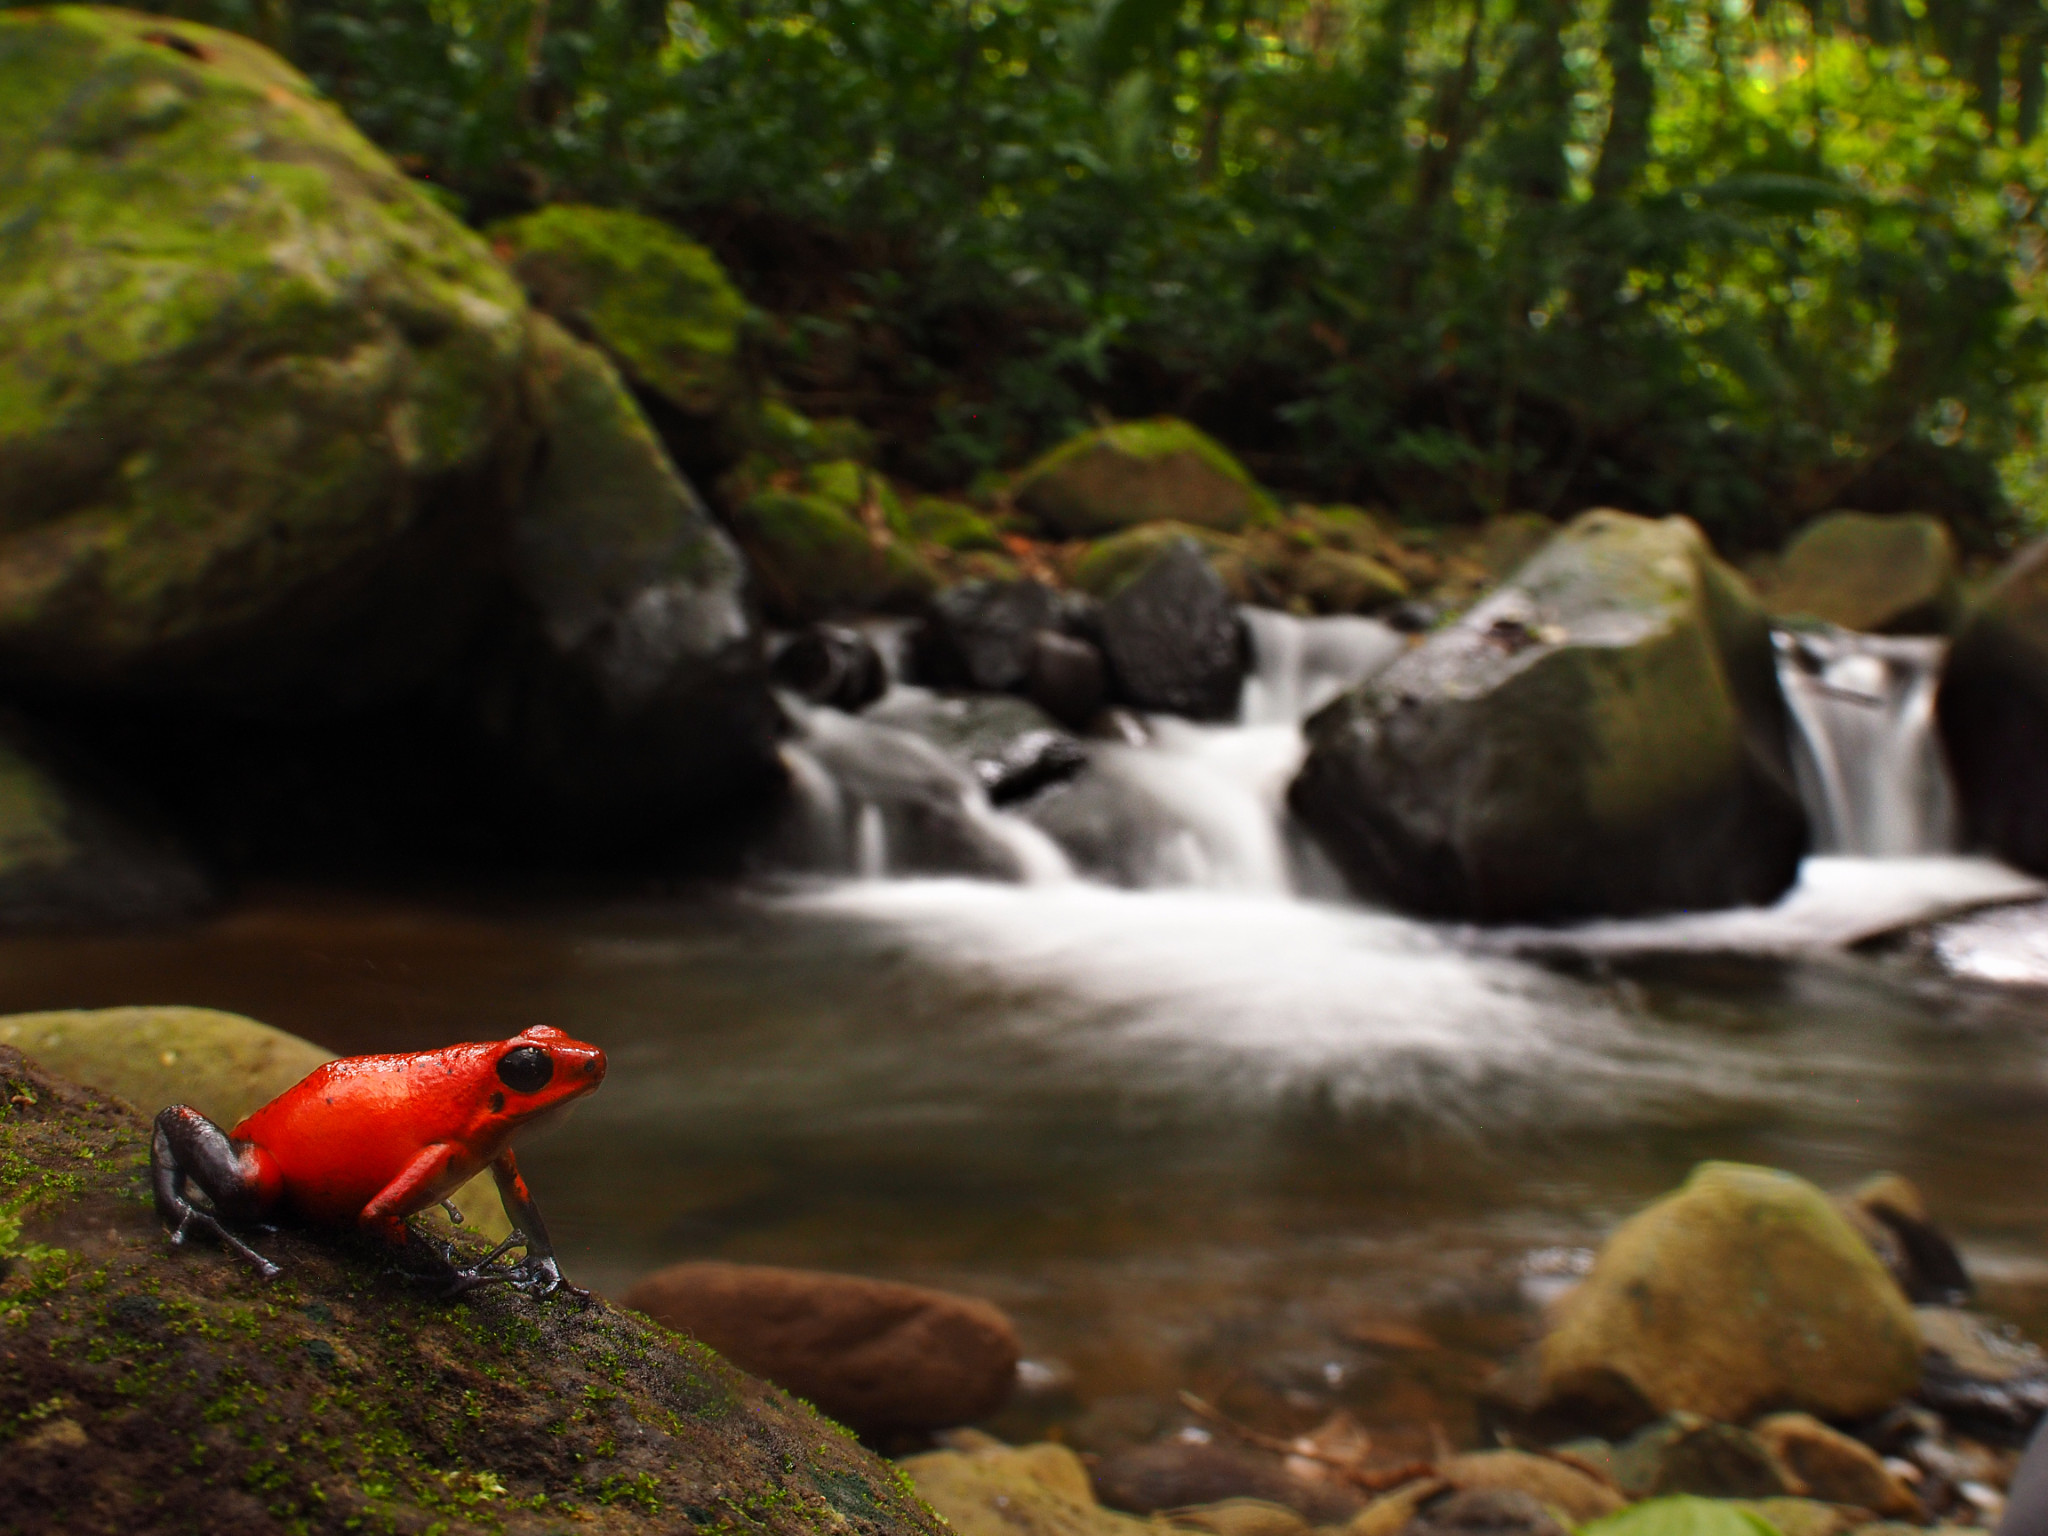
You’ll note that my ISO above was 400, too, and my aperture of f/11 keeps the background detailed. In other words, by using such a long shutter speed, I maintained much better image quality than I otherwise could! Handheld, I’d have been at something like 1/40 second, f/4, and ISO 3200. The photo would have been fairly sharp, but much noisier – and the background would have been almost completely blurred. I’m glad I embraced the long exposure instead!
5. Try Image Blending Techniques
Every now and then, the stars align for an opportunity to capture a true nighttime landscape behind wildlife. These images are particularly ambitious and sometimes require more artistic liberties in the editing process.
The biggest of these liberties is image blending. Most landscape photographers are familiar with techniques like blending panoramas, HDR, AHDR, and focus stacks. These techniques are much less common for wildlife photography, but some of them can help in particularly low light conditions.
For example, take the photo below.
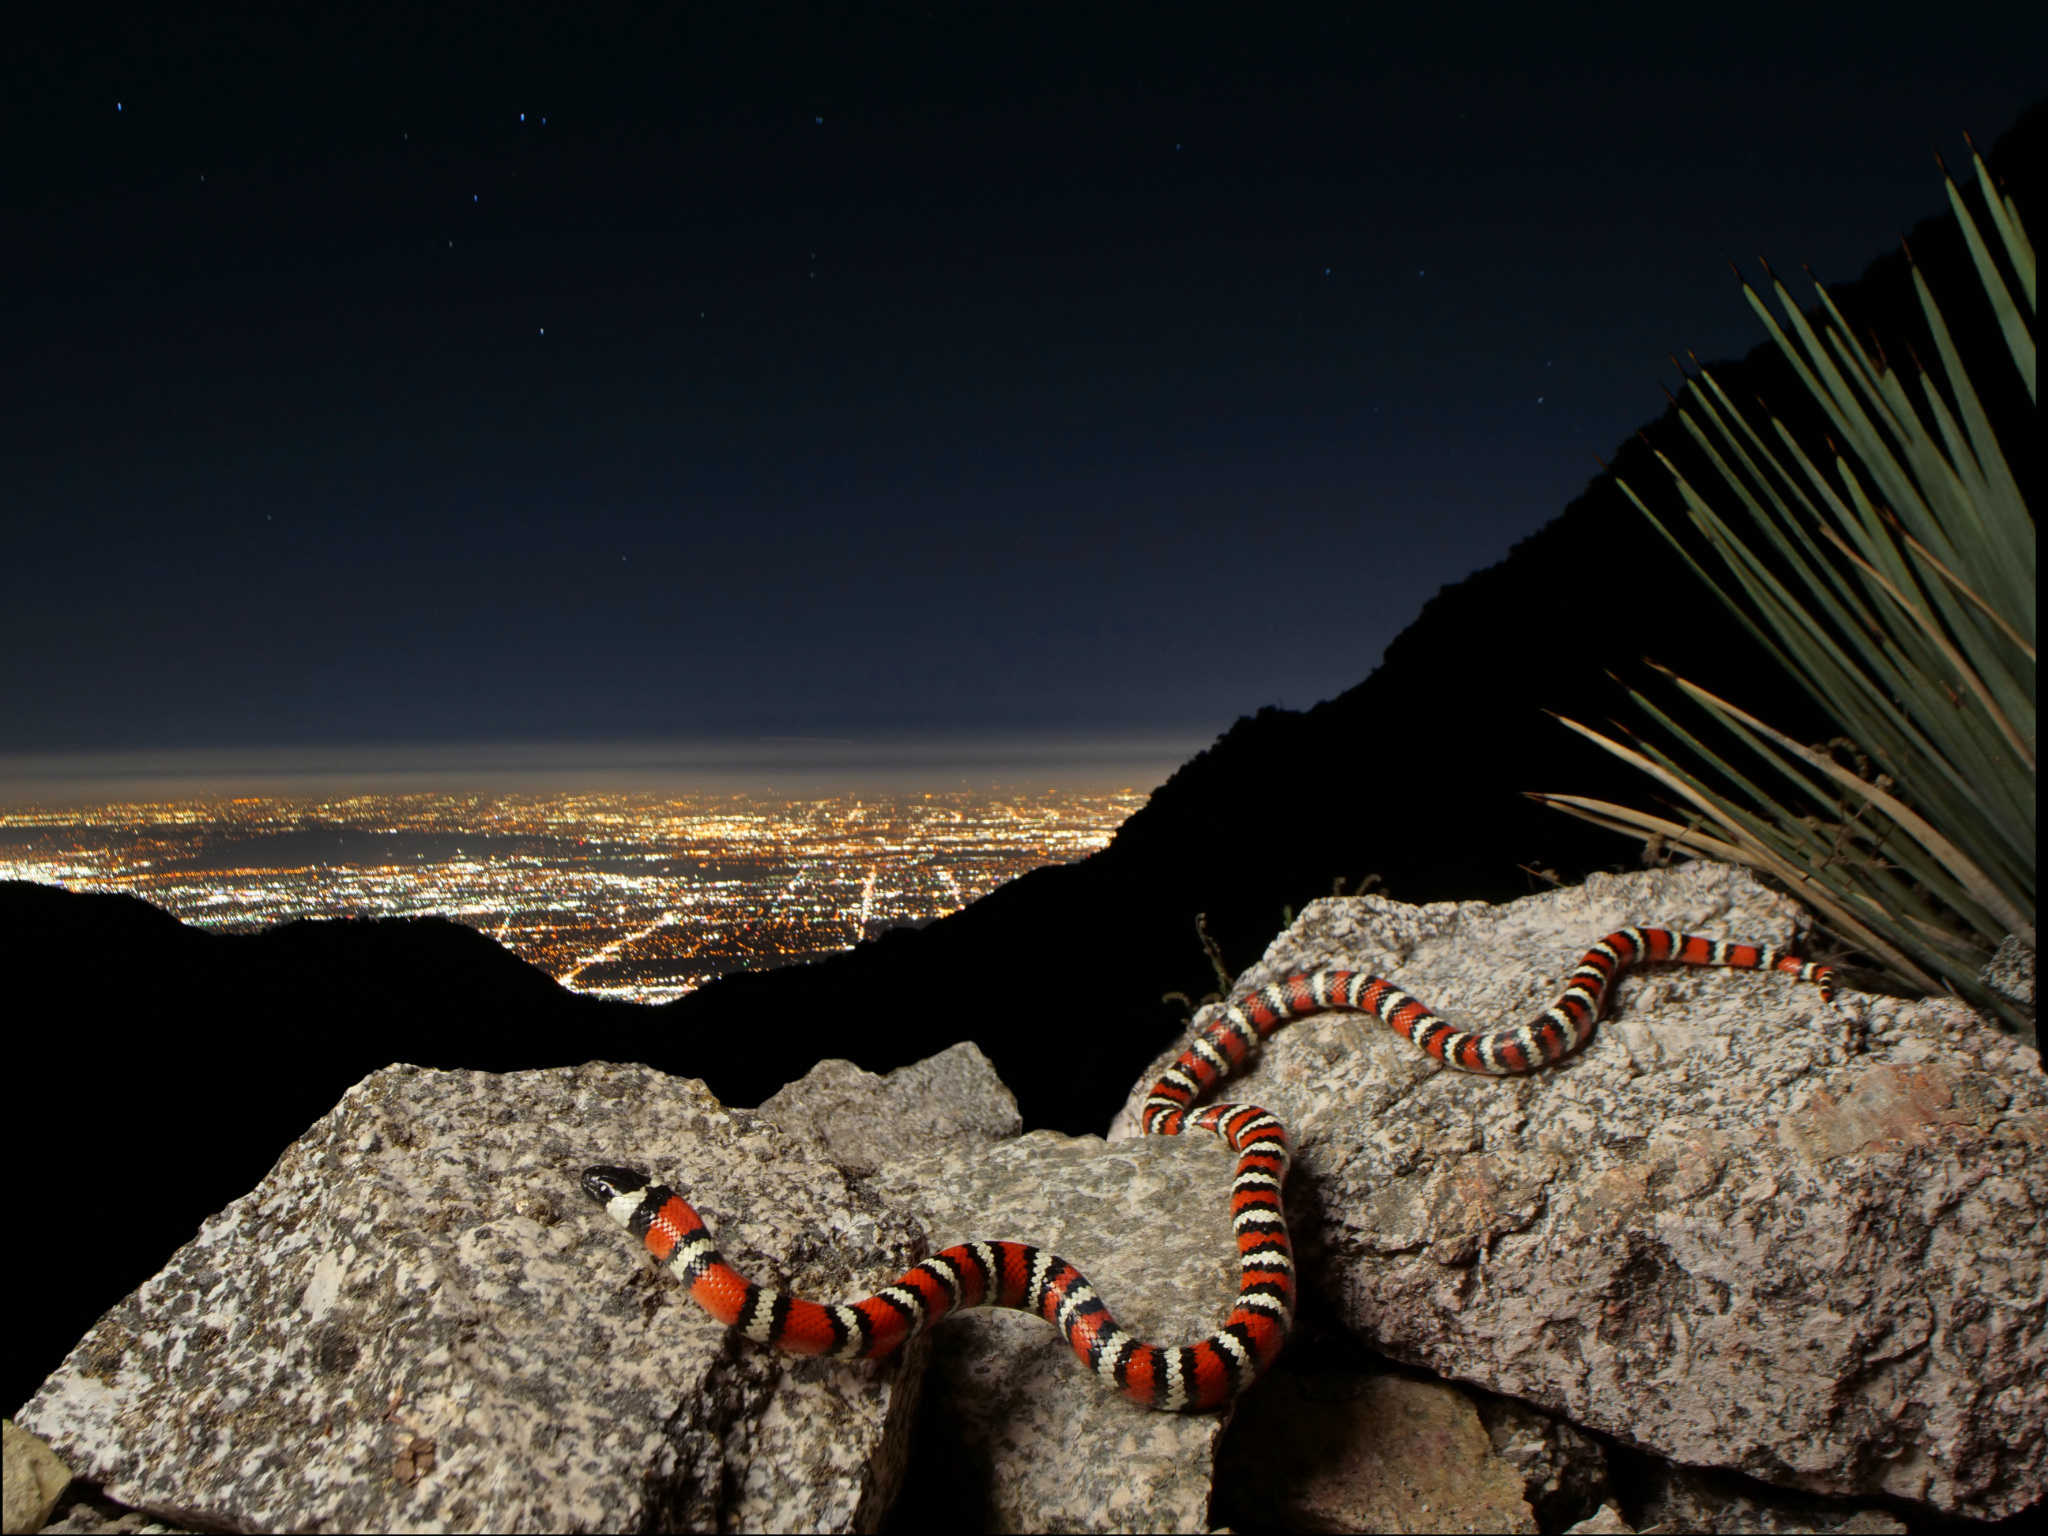
This photo is really two images blended. Yes, both images were taken at night (I know the foreground looks like it’s daytime, but it’s not!) because I used one flash exposure for the foreground, and one long exposure for the distance.
First, I composed the shot I wanted and made sure my tripod was in a steady location. Then, I took the photo of my subject with a flash, using my typical settings. Timing it right wasn’t easy, but I could actually see a bit due to the slight ambient light at the time, so it wasn’t a literal shot in the dark.
Then, while keeping the camera in the same place, I changed my settings and re-focused my lens to capture the distant city. This was a more typical nighttime exposure of several seconds.
Finally, I combined the two images together in post-processing software. It wasn’t hard because the two photos already had the same composition – just a very basic masking job.
Purists may not be a fan of image blending techniques like this – this is art at the end of the day, and you choose your own rules. But as I see it, there are some nighttime images that are literally impossible to create any other way. That’s why blending techniques don’t bother me in the same way that something like sky replacement does.
6. Practice!
Moments with wildlife are often time-limited. You may only have a few seconds to pick your settings and take the photo (if that). It can be a lot of pressure.
So, try practicing low-light photography without the added difficulty of wildlife present. Start with a waterfall in a dark forest or astrophotography, for example. Then add in some flash on the foreground to practice the flash power, diffusers, and so on.
At the very least, it’s a good exercise. But it may even yield some pleasing shots on its own!
Conclusion
Don’t let the sun or your gear dictate when you can or can’t do wildlife photography. There will always be a lens or camera that would perform better in low light than what you currently have. It’s better to embrace the techniques in this article so that you get good quality no matter the situation.
I hope these tips have been useful, and inspired you to extend your day as a wildlife photographer. There are challenges and opportunities alike in low-light photography. It’s more difficult than most wildlife photography, but it can also yield some amazing images.
Nice photos. For the image blend, wouldn’t it be simpler to expose for the city thus having long exposure and have the flash for the snake in the same long exposure?
Nicholas did say he had to refocus the lens, which makes sense given how close the snake is compared to the city .
Hi there,
There are a couple challenges with that. Given how close the snake is to the lens (only a few inches), the city lights, ridge-line, and stars would be completely out of focus. Had I used a very narrow aperture for a deep depth of field, there would be so little light, my exposure time would have been very very long. The best bet to do it in a single exposure is by changing the focus ring to infinity mid exposure, but that usually results in more motion blur and ghosting than I prefer. It’s possible though, and a skill I hope to improve!
That makes sense. Thanks for the clarification
Great photos, Nicholas! I look forward to reading the whole article. You know my fondness for wide-angle wildlife photos. What a pity that birds are far less cooperative than cold-blooded creatures in this regard.
Hi Nicholas,
As a definite beginner regarding wildlife photography (despite being an avid photographer of landscapes, etc., since the early 1970’s), your article is quite instructive. I’ll add this article to a growing list of such articles about shooting wildlife; very helpful!
And kudos for your beautiful images!
Thanks,
Mark
Thank you so much, Mark, I really appreciate that! I’m glad you found it resourceful.