Quite a few people have emailed me in the past to write about shooting cityscapes with a long exposure and I have repeatedly asserted that while it is not especially complicated, I am certainly no expert on the subject. In fact, finding the time to write an article about it was a much greater challenge!

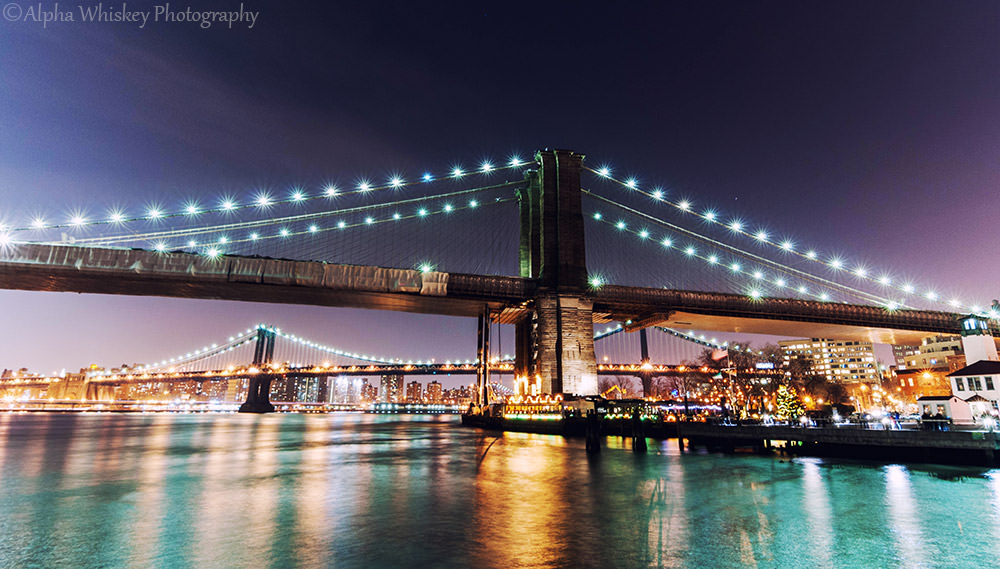
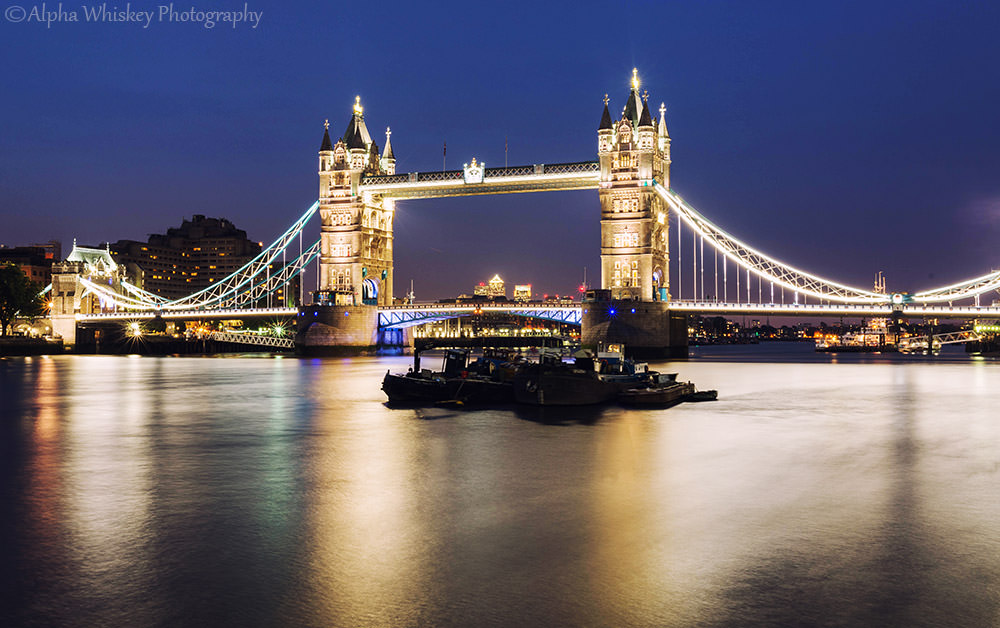
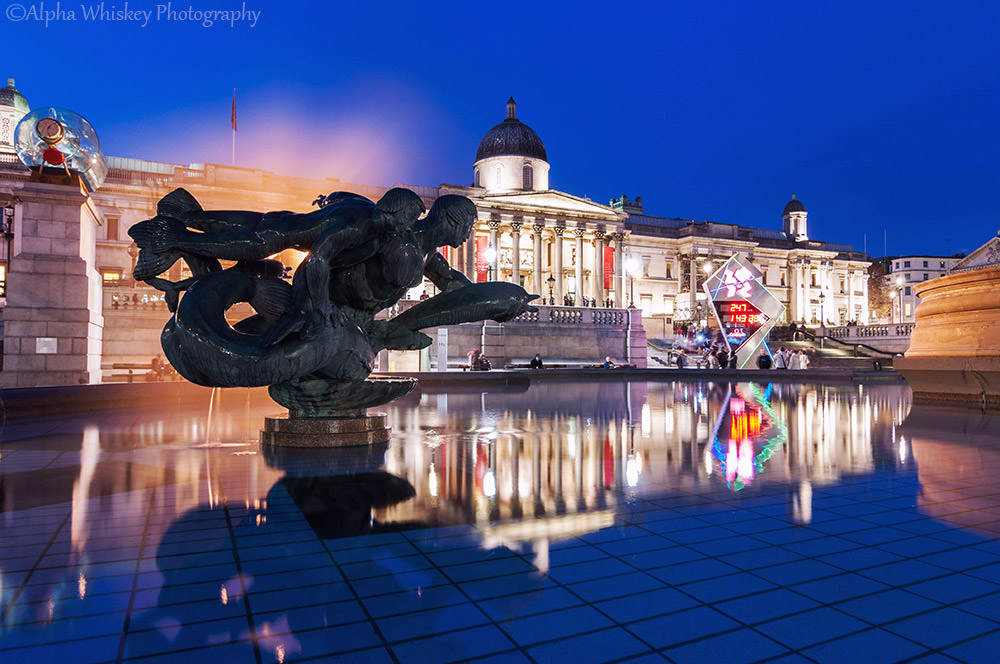
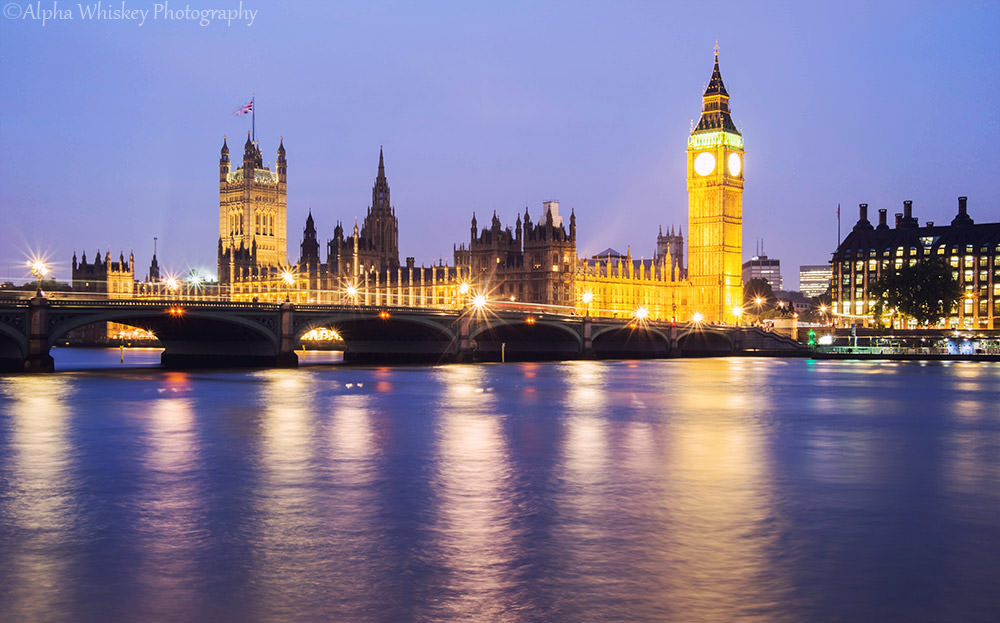
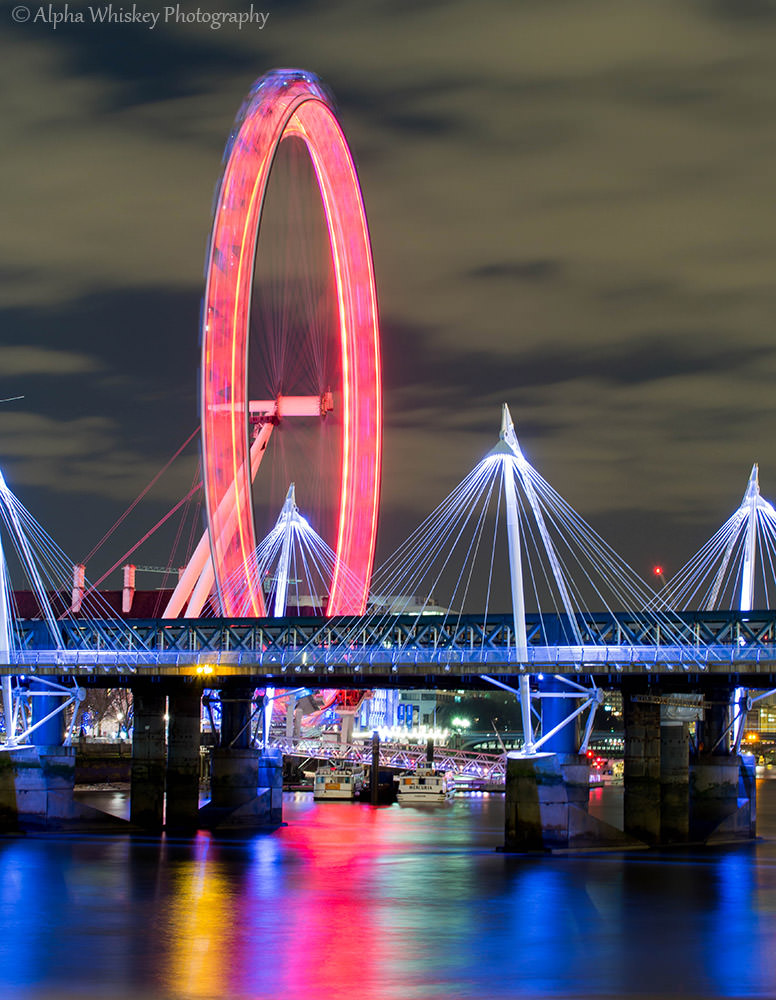
While a city can be fascinating during the day there is something magical about it when it’s all lit up in the evening. The intensity and variety of lights really jolt the metropolis into life with a profusion of vibrant colour. Many great cities are deliberately built along waterways or the coast so the possibilities of reflections are limitless. Many people are drawn and mesmerised by the sparkle and glitter of city lights and I am no exception.
I can only explain some of the settings I use and hope that they give readers an idea, if not an insight, into capturing the city at night.
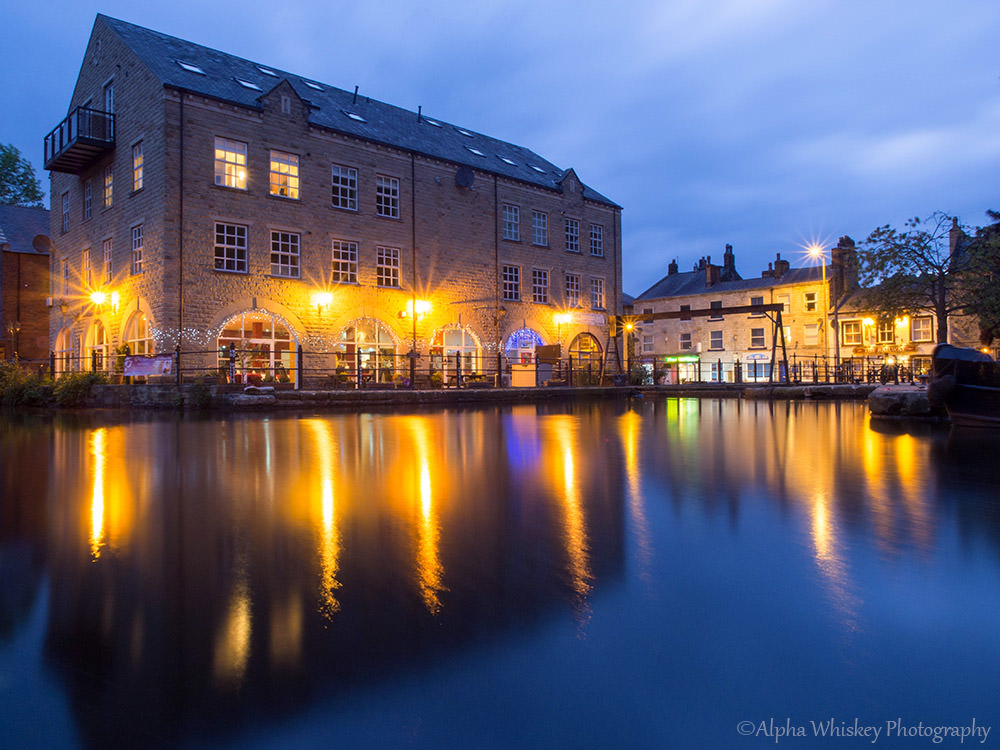
Firstly, waiting for the right light is important. You can shoot the city at any time of night but I almost always try to shoot during dusk, when the sky is a beautiful cobalt blue. This provides an excellent background to the copious red and yellow lights, allowing primary colours to contrast against each other starkly. The window of this dusk blue light is small and usually occurs around twenty to thirty minutes after sunset. After that, you can still extract some blue light (even though it may be dark to the eyes) by raising the ISO, although inevitably this increases the image noise. Using the dusk light is a better technique.
Personally, I like the reflections of light in the water (I’m a simple guy), the way they colour and reach through a surface stilled by a long exposure. I have found that to make the water still and flat, a minimum shutter speed of around eight seconds to ten seconds is necessary. Of course, a lot depends on the activity of the water. Rushing tides will take a longer exposure and calm water will require less time. A lot of it is trial and error. Longer shutter speeds can also blur moving people out of existence, making the scene look emptier. Your ability to set a long shutter speed will also depend on the amount of available light. If it is not dark enough then a long shutter speed may not be feasible yet; hence it’s important to wait for the right light. Alternatively, you can use an ND filter to cut out some light.

You can set the camera to shutter speed priority and allow it to figure out the appropriate aperture, or you can set both in manual mode. While the camera will always aim to provide a neutral exposure for the entire scene, my own preference is usually for the lights to be bright and vivid, so I set the shutter speed and aperture manually to create a slight over-exposure. The values I set are determined by the available light and by, for instance, the motion of the water. For example, I may find that a shutter speed of ten seconds is required to still the water; I’ll then adjust the aperture value so that my exposure is slightly over-exposed (perhaps +0.3). Widening the aperture will allow in more light; narrowing it will allow in less. Remember that shooting RAW will give you some latitude to recover highlights (provided they are not too over-exposed).

Using exposure compensation to brighten or darken a scene in either shutter speed or aperture priority may affect your shutter speed and aperture values, which is not necessarily what you want. I think it is better to determine the exposure oneself in manual mode using shutter speed and aperture. This way you can manipulate the shutter speed and aperture yourself to not only control the exposure but also the motion of the water and the depth of field.

You want to keep your ISO value as low as possible to minimise image noise. And remember that shutter speed, aperture and ISO are linked (the exposure triangle) so they all affect each other. It may be easier to set your camera’s ISO at its lowest value and then adjust only the shutter speed and aperture.

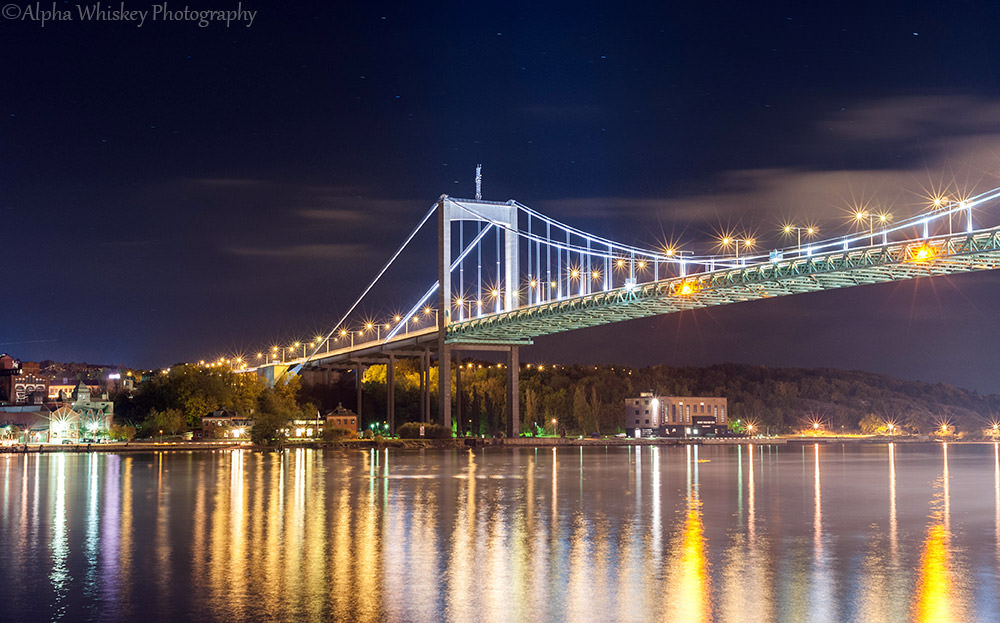
If depth of field is important to your scene, then of course narrow the aperture accordingly (or use hyperfocal distance if you’re so inclined). This will inevitably necessitate a longer shutter speed (which will happily produce more stillness to water and blur to lights). I also find that closing down the aperture (beyond around F/10) gives me more starbursts from the lights (depending on the number of aperture blades in the lens) .
Some people might advocate HDR or stacking images to provide even exposure across the whole image. If there are moving elements like water or traffic in the scene then this may be problematic. I’m personally not a fan of HDR for night scenes but I realise they may work for some photographers.
In terms of gear, with my DSLRs I used a remote trigger to start the exposure. This ensured that I didn’t inadvertently cause motion blur at the start of the exposure by pressing the shutter. If you don’t have a remote, then you can always use the timer function, set to take the exposure, say, two seconds after pressing the shutter. I don’t have a remote trigger for my Olympus E-M5. Instead I use its Anti-Shock function, which delays taking the exposure after the shutter is pressed, anything upwards from half a second.
In terms of lenses, use whatever your composition demands. I have taken long exposures using everything from 18-200mm travel zooms to 50mm primes. My choice of lenses or focal length is determined by my composition. Remember that if your lenses have image stabilisation to turn this off for the long exposure.

I don’t use any filters for night shooting, lest they create unwanted flares or distort points of light. Some people will use ND filters for super long exposures, but I have yet to be so inclined. Some might use polarising filters to accentuate reflections. Be mindful of aircraft passing overhead, whose navigation lights may cause long streaks to appear in your long exposure (these can usually be removed in post). Do make sure your lenses are clean!
I personally don’t use large tripods, primarily because I find them cumbersome to carry and not always practical in metropolitan areas. I usually use a gorillapod-style flexible tripod, which I have found invaluable in many cities for wrapping around the railings and barriers along the water’s edge. It is far more discrete, compact and allows one to easily compose in more creative positions than with a standard tripod. In London there are many places where you can simply rest your camera to take the shot, negating the use of a tripod altogether.
With the exception of compact cameras with in-built scene modes, most cameras will allow you to adjust settings manually. One useful timesaving feature on my Olympus camera is the LIVE TIME function, which reveals the developing exposure as it happens so I can stop it when I’m happy with it. Long exposures do take longer to write to the card, especially if shooting RAW, so make sure you have a memory card with a decent write speed.
That’s all I can think of for now. There are no hard and fast rules so play with different settings. Practice is always better than theory and perhaps you may find me shooting in London one evening. Feel free to join me.
Thank you so much for sharing this. I’m in love with these shots <3 I recently spent a few evenings taking night shots of the main landmarks in my city. I never thought of using a shutter speed longer than 3s… Gotta go back and try again – thanks for the inspiration! :)
Thank you. Hope you get some great shots. :)
Wonderful article, Sharif! Thank you for the great read and beautiful photos.
I could not help but notice the similarities between the featured images of our two recent posts. The locations are vastly different, of course, but our compositions are quite similar. It gives a nice, unified view to the Photography Life home page : )
~Spencer
Thank you Spencer!
Great eyes clearly see alike! :)
Regards,
Sharif.
Hello Sharif,
As always a very informative post, and amazing pictures. Cannot agree more with Pete K, truly a piece of art.
as you stated, I understand long exposure makes moving people invisible. But, how to avoid moving lights, like cars? Was it just you waiting for the right opportunity?
Thank you Sam. I don’t think I do consciously try to avoid moving lights, other than overhead aircraft. If there are vehicles in the long exposure then they can be incorporated into the composition as a light trail (e.g. the Canary Wharf shot has a train moving across the bridge, which I deliberately waited for to add extra light). Otherwise it might be a case of ensuring you are positioned away from oncoming traffic or are far enough away from the landmark that moving lights don’t really register (e.g. in the bridge shots and Prague Castle). Or, as you say, waiting for traffic to be absent :)
Regards,
Sharif.
Hello Sharif,
Thanks for the reply. Light trails have always been a challenge for me. Interesting comment about being away from landmark, never thought about it. Will give it a try. Thanks!!
Sam
Sam, Sometimes it takes a great deal of legwork to find a good position from which to capture the scene. I learnt (and still do) by seemingly endless iterations of trial and error!
This style of photography illustrates the profound difference between a photographer and an artist, perhaps more than any other style. An artist has two huge advantages over a photographer when they draw/paint a scene:
1. Artists simply don’t bother to draw/paint items in the scene that are distracting;
2. artists can draw/paint their picture from a very different 3-D perspective than which their eyes are actually capturing.
Footnotes: The perspective of a camera image (and human vision) is determined by the exact location of the lens entrance pupil(s) in 3-D object space. The perspective of an artist’s image is determined by their decision on where to position the vanishing points relative to their paper/canvas.
Pete, as someone who used to do a lot of sketching I can totally relate to what you say. And by your mention of vanishing points I’m assuming you also have a background/interest in illustration/painting too? :)
Regards,
Sharif.
Sharif, during my childhood, then later at college, I received formal training in both art and engineering & technical drawing. I wasn’t good at painting, but just happened to be really good at grasping all the technical aspects. E.g. I’m not good at art using pencils, but I know exactly how to select, sharpen, then smooth, various grades of pencils and crayons to prepare them for appropriate usage.
During my teenage years, I became highly proficient at creating abstract art on A4 sheets of paper by the dexterous usage of only a blue ballpoint pen, which seriously annoyed a few of my science teachers/lecturers! Fortunately, some of the other science teachers/lecturers actively encouraged me to ever pursue my deep fascination with the technical aspects that underpin great works of art.
Artists have so many advantages over photographers: just two of which being the ability to use acrylic and fluorescent paints that are unavailable in CMYK printing and sRGB monitor colour spaces.
Despite these huge limitations of photography compared to art, in my experience, you have produced some works of art that even a really good artist would find extremely difficult to achieve.
The real difference between art and the severe limitations of photography is all about properly understanding the physiology and psychology of human visual perception. I think that you and I have adequately mastered that understanding in our photography.
There is another very real and obvious difference between art and photography: gaining a thorough understanding of one’s intended audience/clients and the prejudices that still run rife in the various marketing outlets :-)
Very best wishes,
Pete
Very interesting background, Pete. I migrated to photography as it gave me a more instant visual gratification, as opposed to sketching something from multiple possible viewpoints. Maybe I sold out :)
Regards,
Sharif.
Sharif,
Your photos are stunning. The key to them being awesome is not just about selecting a suitable depth-of-field and shutter speed for the desired effect. In my experience with this style of photography, it is your very careful adjustment of colour rendition that gives your images such a strong punch; and clearly qualifies some of them as being exquisite works of art, rather than being (unusually good) photography.
Thank you very much Pete! Really appreciate the kind words :)
Regards,
Sharif.
Sharif,
I did not say that I didn’t like your images. In fact, I like them very much. Your choice of subject matter and your composition, as always, is excellent. You are very talented photographer. My only criticism is the exposure settings. Depth of field is really a non-issue since even a full frame 50mm lens set wide open at f/ 1.8 from a distance of 150 feet would yield a sharp image of everything from about 75 feet to about 6500 feet, and I wasn’t suggesting wide open. You are right about using a long exposure if you want to capture light trails or show water movement, but I don’t know that that was an issue in the majority of your photos, but maybe it was.
Don
Hi Don,
Your point about DOF is a fair one, but as indicated in the text I’m also using the aperture to manipulate my exposure. As I said, the exposures are exactly what I intended them to be and conform to my personal preference.
I’m sure you would agree that long exposures aren’t just about light trails and water movement. I would not have achieved the stillness of the water and subsequent reflections and blurring of the lights without a long enough exposure.
Thanks again for the comment.
Regards,
Sharif.
Hi Sharif,
You know that I like almost all of your articles and photos, but I really don’t like the exposures on your night shots. Almost all of them except London Eye are overexposed by one to two stops and the highlights are all blown. I think that if you had boosted your ISO to between 800 and 1600 and opened your aperture to f/4 or 5.6, you could have taken all of them handheld at at least 1/30. With IBIS on the Olympus and VR on the Nikons, these stationary subjects would have come out just fine. Other than that, I really liked your article, and I think that it’s a good starting point and tutorial for newbies.
Hi Don,
Thank you for your comment. Not entirely sure why I’d want to take these shots hand-held when the purpose of the long exposure is to blur the lights and still the water, and at the lowest possible ISO. A shutter speed of 1/30 obviously wouldn’t do that. Also, apertures below f/9 or F/10 wouldn’t give me the depth of field or the starburst effects from the lights. Furthermore, I stated in the article that I prefer these long exposures to err on the side of slightly over-exposed.
It is easy to take these shots hand-held at a higher ISO, but that would defeat the purpose of the long exposure and the effect I’m trying to achieve with them.
I’m sorry you don’t like the images, each to their own of course. I am very happy with them and will continue to enjoy taking long exposures in the city.
Thank you and regards,
Sharif.
Really nice photos! From your article I understand that you took these photos using EM5 but it would be great if you could add the lens you took these pictures with for learning purposes. The stars around the lights are dependent of the lens so was just wondering. Thank you for sharing your work.
Thank you Vipul.
I took some of these photos with Nikon DSLRs and some with the E-M5, using a variety of associated lenses, from the Nikkors 50mm F/1.8, 18-200mm and 35mm F/2, Tokina 11-16mm F/2.8 and Olympus 12-40mm F/2.8 and 40-150mm F/2.8. The lens that gave me the most starbursts was the Nikkor 35mm F/2 AF-D. I wrote an article about using this lens here: photographylife.com/shoot…e-on-aps-c
Hope this helps :)
Regards,
Sharif.
Thank you for your prompt reply – much appreciated! The images from 35mm F/2 AF-D with sharp starbursts look stunning and they definitely standout! Thank you for the link above – those photos look great! I was thinking about getting the newer version of 35mm F/1.8 G lens but it is expensive. I may just settle with an OM-D EM5 II if I don’t purchase a Nikon D750. For apparent reasons, I like smaller cameras that I can carry around.
(Another) great article and lovely photos, especially that one of the Louvre. I love night time photography and look forward to improving my technique with your sugguestions.
I have never heard of the Live-time function on the Olympus range, it sounds like a brilliant feature and I wish it was available on my Nikon.
I like your last paragraph, practice is definitely the key to anything and hopefully people are encouraged to get out and shoot!
Hi Mark.
LiveTime is available on all Olympus m4/3 models (as far as I’m aware) and is a great innovation of theirs. It really does save one a lot of time, rather than waiting for exposures to finish and then checking them on the LCD review.
I found a youtube video which may demonstrate it to you:
www.youtube.com/watch…dLjTxs_TQA
Thanks for reading the article and for the kind words :)
Dear Alpha Whiskey, – many thanks for your great article !
Could you kindly share what exact kind of “gorillapod-style flexible tripod” you are using also which ballhead & quick release plate you employ.
Is your tripo system sufficient to support a NIKON D750 + 6-35mm lens (combined weight around 1.65 – 1.70 kilos)
Many thanks and
Kind Regards/Nikita
Hi Nikita,
I use something similar to the ‘Joby Gorillapod’, but I simply bought a non-branded version from ebay. The quick-release plate is just the one that comes with the tripod – the head is attached to it. They make different sizes for everything from compact cameras to DSLRs. I’m not sure how secure your D750 and 16-35mm lens would be. I think that combo would be quite heavy and you’d have to be mindful of it slipping or swinging around a railing or bar. The gorilla pod I use is just the right size for my E-M5 which is quite a light camera in itself.
I found a link to the Joby DSLR one for you so you can see what it’s like and whether you think it would suit your gear. Of course generic versions are available. Hope it helps :)
Warm Regards,
Sharif.
Many thanks for your swift reply, well noted and highly appreciated !
Nikita
If this helps.. – Have used D810 with 24-70 setup on Joby Gorilla Pod Focus in closed environment, stability was good and no trouble on weight part. But need to be careful on setting the legs. Have not used it outdoors n also mine was a RRS plate…
Thank you, Nirmalraj, for your kind contribution,
Well, Nikon D750 + 16-35mm lens surely weigh substantially less than D710 with 24-70…(abt.200 grams less to be exact.) If you had no problems with the your excellent setup on Gorilla Focus, trust I should have nothing to worry about…
Thank you for this great article with these wonderful pictures. I would like to add one aspect, wich may help to create sharp pictures:
Ich you use a lens with Vibration Compensation (VR = Nikons name, or how ever it is named by other camera firms) switch off the VR. especially when shoot long exposures, the VR can cause blur.
If I have missed that part in your article, I apologize, I may have red too quickly ;-). Then forget about this post
Hi Klaus, I did mention that in the article, but thank you for reinforcing the point here :)