In the coming weeks, we are planning to review many Lightroom alternatives at Photography Life and figure out which ones are potential replacements. The first on our list is Alien Skin Exposure X3. This software, originally a film simulation plugin for Lightroom and Photoshop, has grown to a standalone software that mimics Lightroom’s post-processing and organization options in many ways. This article covers the differences and similarities between Adobe Lightroom CC Classic and Alien Skin Exposure X3, including which one you might want to choose for your own photography.
Table of Contents
1. Layout
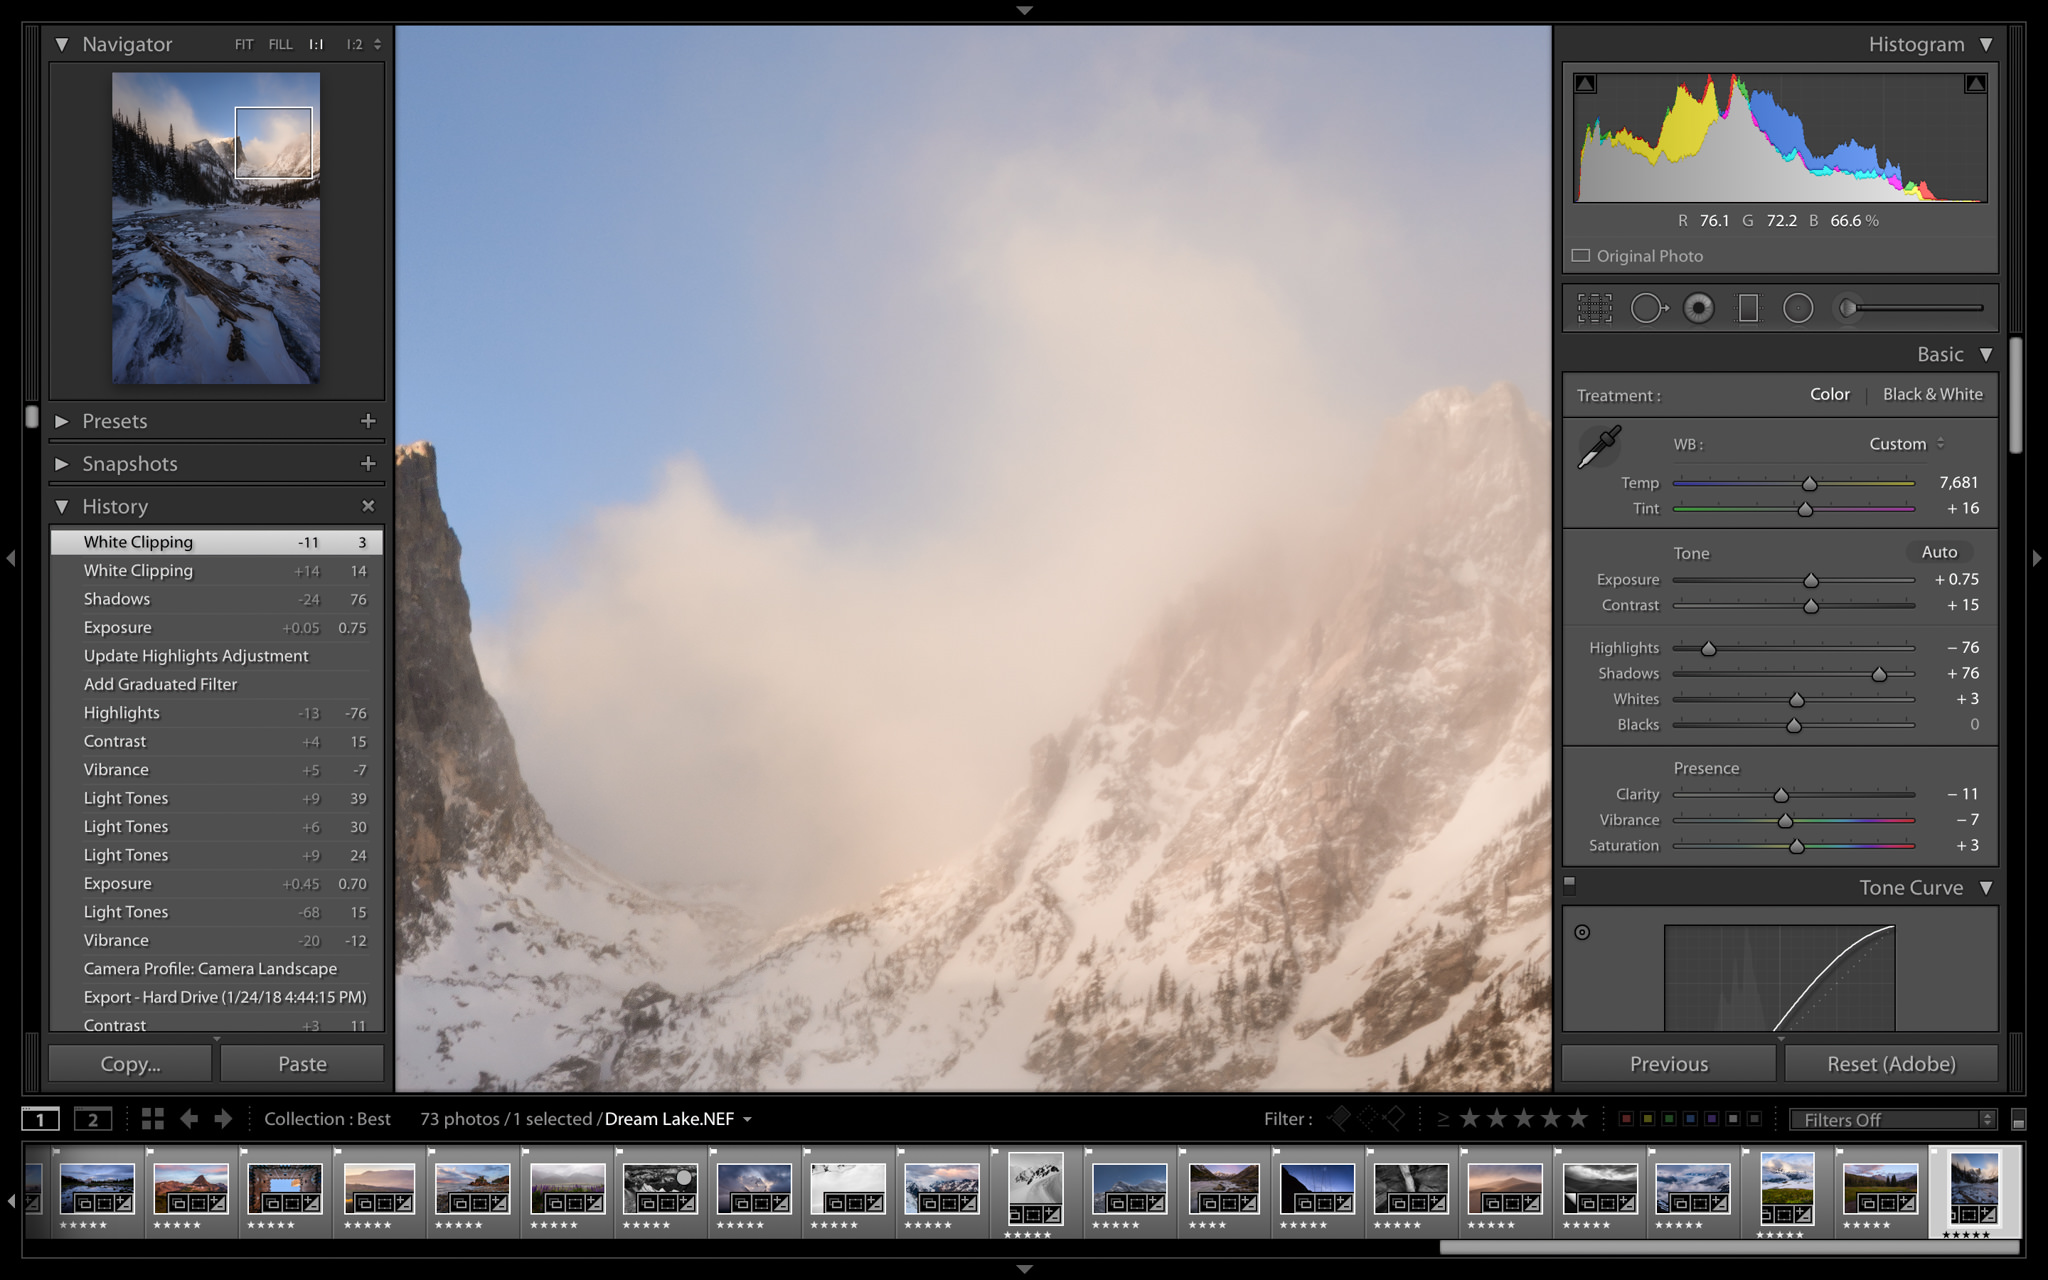
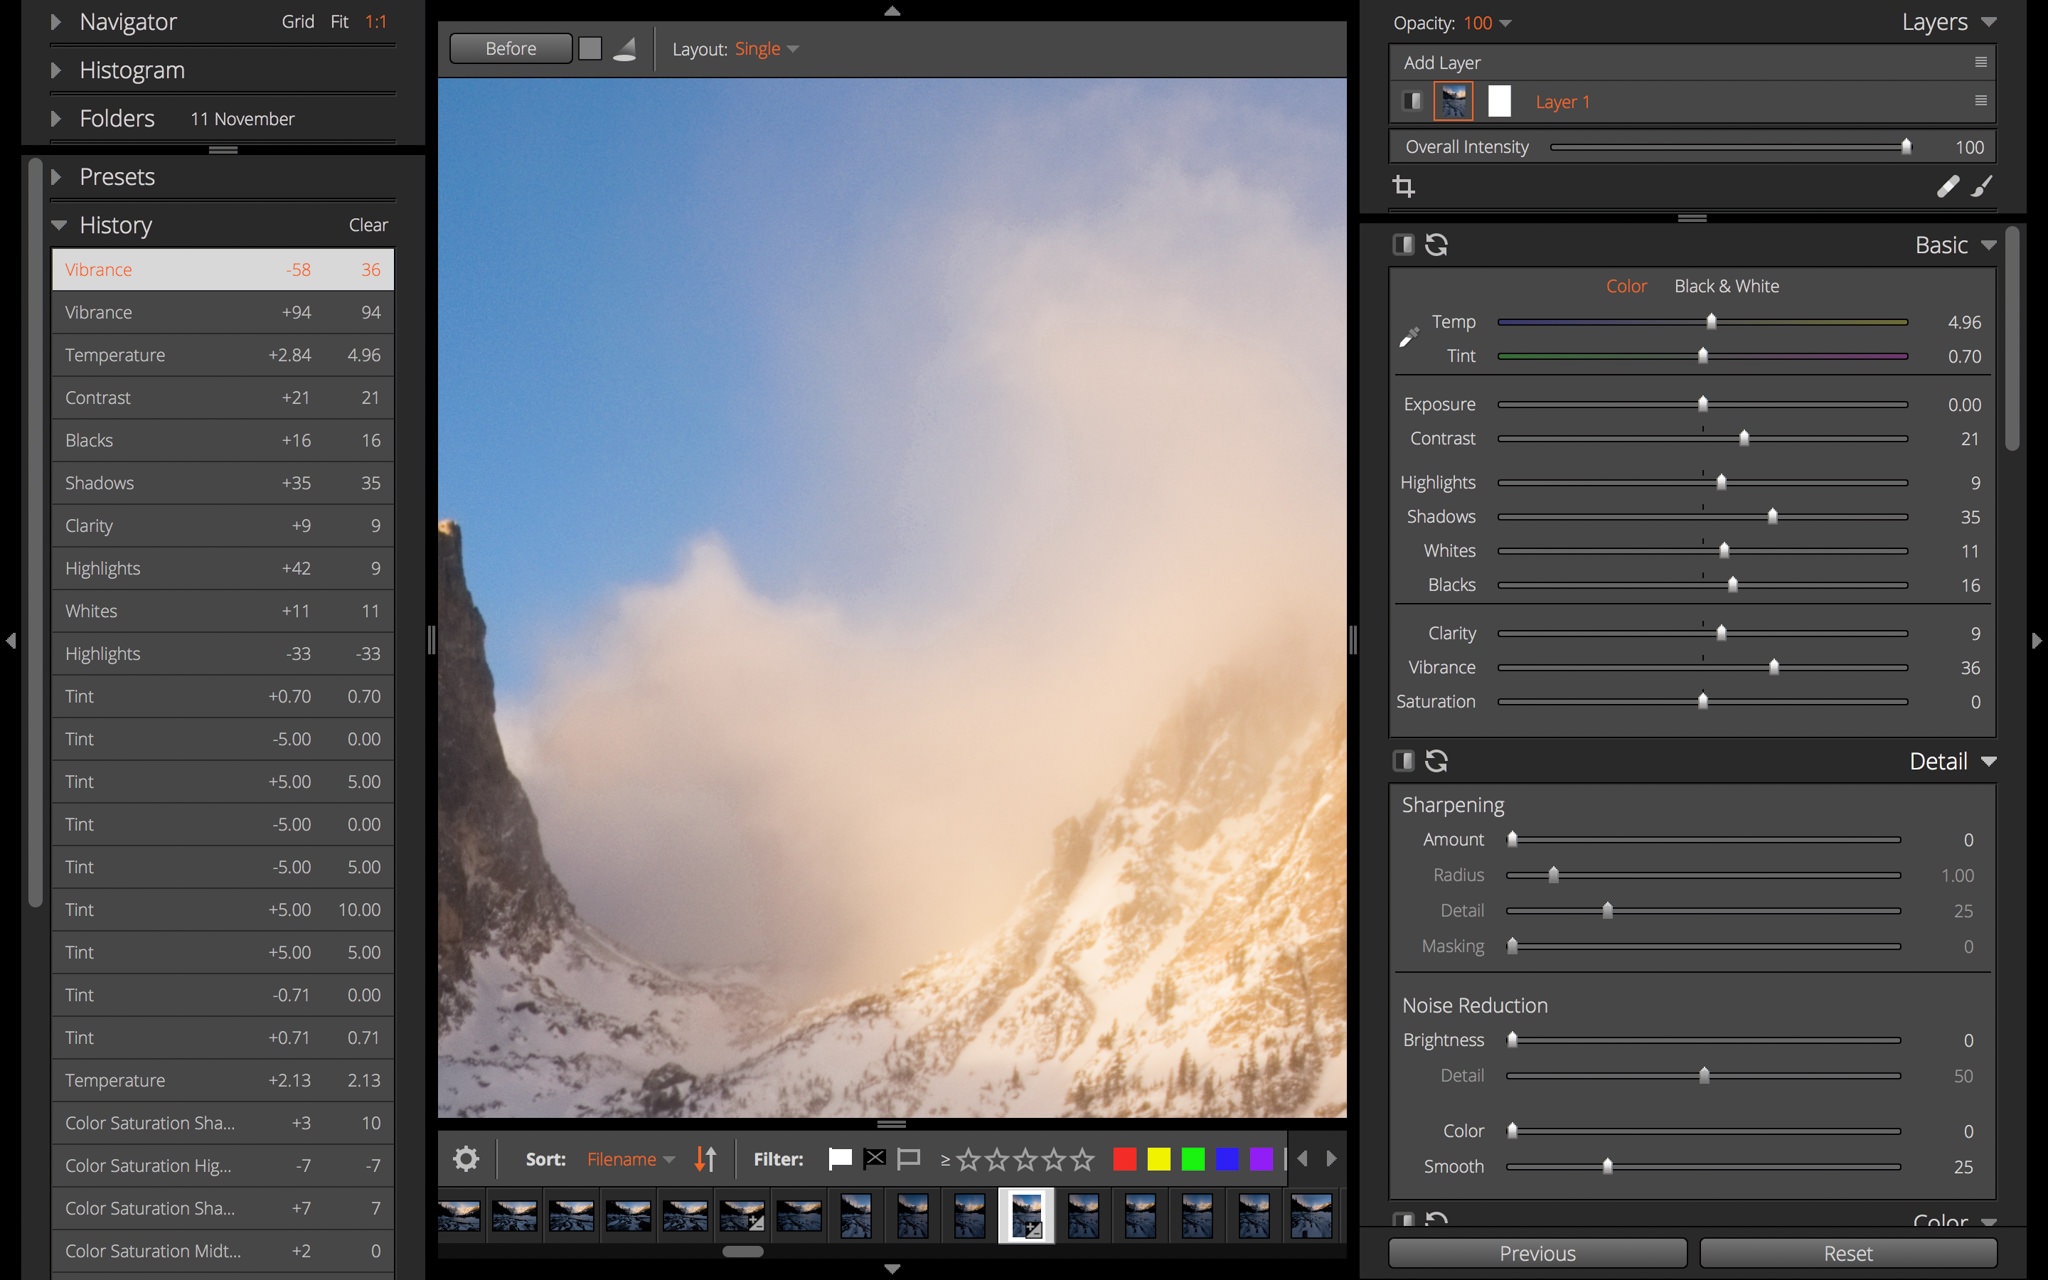
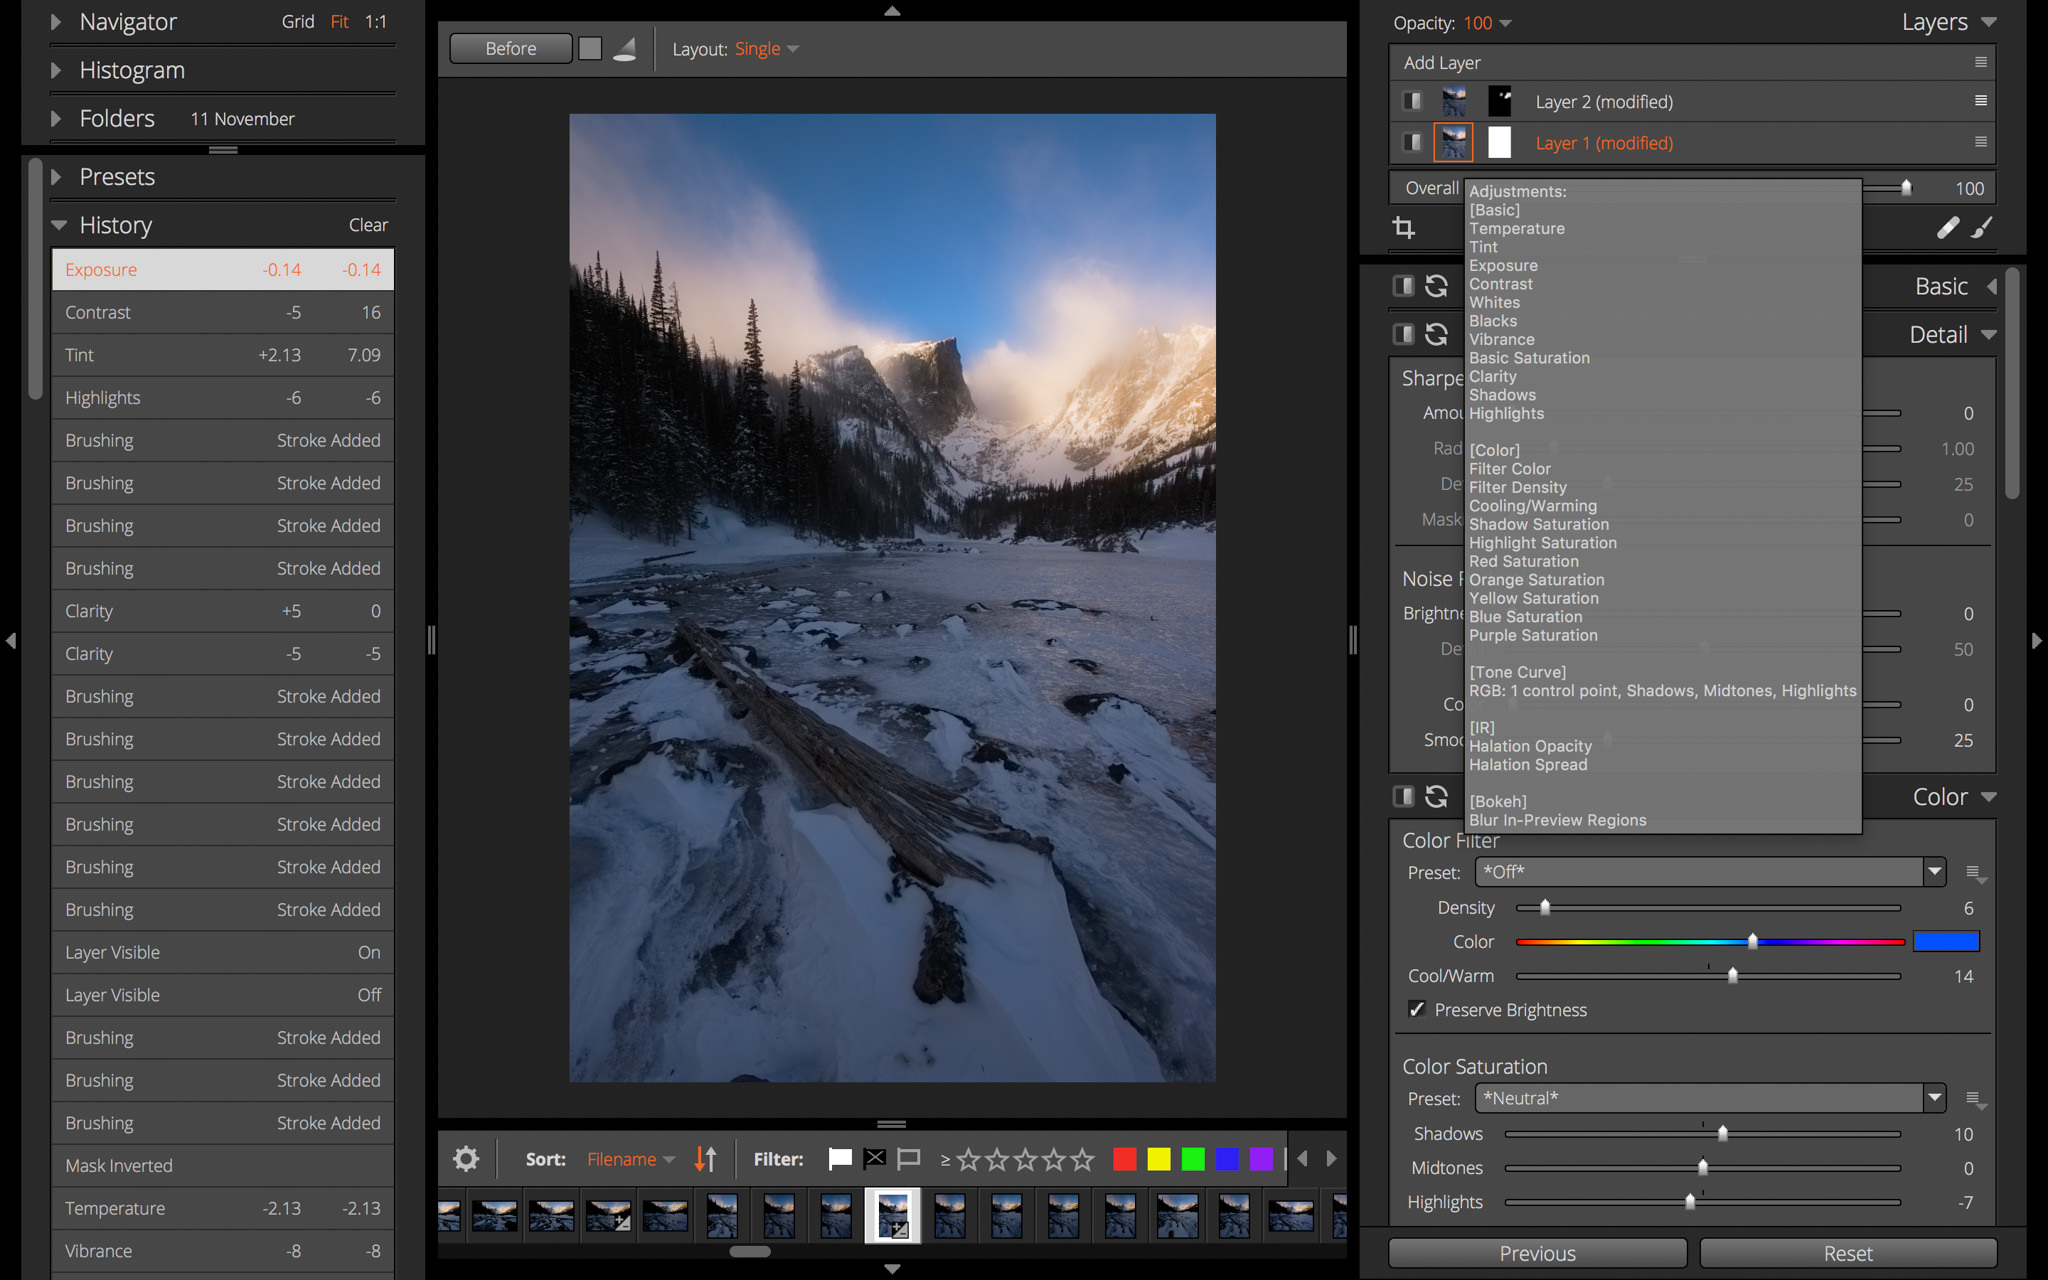
If you have used Lightroom in the past, you will be instantly familiar with the layout of Exposure X3. They are very, very similar. Personally, even after using Exposure X3 for a while, I kept trying to use my Lightroom keyboard shortcuts due to the similarities between them. Here are the editing screens of the two, for example:
However, there are some differences as well. While Lightroom has a separate Library and Develop module (for organizing and editing photos, respectively), Exposure X3 lets you perform every function at any point. Even when you’re looking at a thumbnail grid, you can edit photos without a problem.
In my mind, neither software’s layout is necessarily better. They’re quite similar, and both are easy to understand without too much effort.
2. Sidecar File vs Catalog System
A major difference between these two programs is that Lightroom is a catalog software, while Exposure is not. Everything you do to every single photo in Lightroom is stored within a single, centralized catalog file, which contains a huge range of information. If you delete your catalog file, all your edits and organization for every photo will disappear.
With Exposure, on the other hand, all your edits and organization tags are stored in their own sidecar file, added to a folder on your hard drive (within the photo’s original folder). So, if you’ve edited 1000 photos in Exposure X3, you’ll have 1000 sidecar files. Each of them is very small; 30 kilobytes is about the most I’ve seen.
With both software packages, the benefit is that you’re never doing any “destructive editing,” like cropping a photo in a way that is impossible to un-crop in the future. Everything in Lightroom and Exposure X3 can be undone since the changes aren’t embedded in your photos themselves.
In Lightroom, because it is catalog software, you need to select individual photos or folders to import them and start the organization/editing process. With Exposure, all of your folders and images are immediately editable within the software, no additional steps required. It can get tripped up by external drives, but you can add them manually by clicking an option called “Add a Bookmark.”
So, between sidecar and catalog files, which system is better? Everyone’s opinions will differ. If you’re familiar with catalog software’s advanced options, including usage with multiple computers, that’s probably the route you would prefer. However, the sidecar system still works well, and I suspect that most people looking for post-processing software (including many advanced photographers) will prefer it, simply because it’s easier to understand, and you don’t need to import photos manually to start editing them.
3. Organization Options
Organization is a very personal thing. How do you find your images as quickly as possible? Personally, I primarily organize my photos by “collections,” meaning that I add images to several different groups without actually duplicating them on my hard drive. However, other photographers, including Nasim, prefer to organize their images via folders on a hard drive, then tag the photos in a way that is easy to locate in their software by sorting for specific information.
The good news is that both Exposure and Lightroom allow collections, which means that photographers like me will be happy with either program. Both software packages also allow things like virtual copies and star/flag ratings, which is important for any good organizational software.
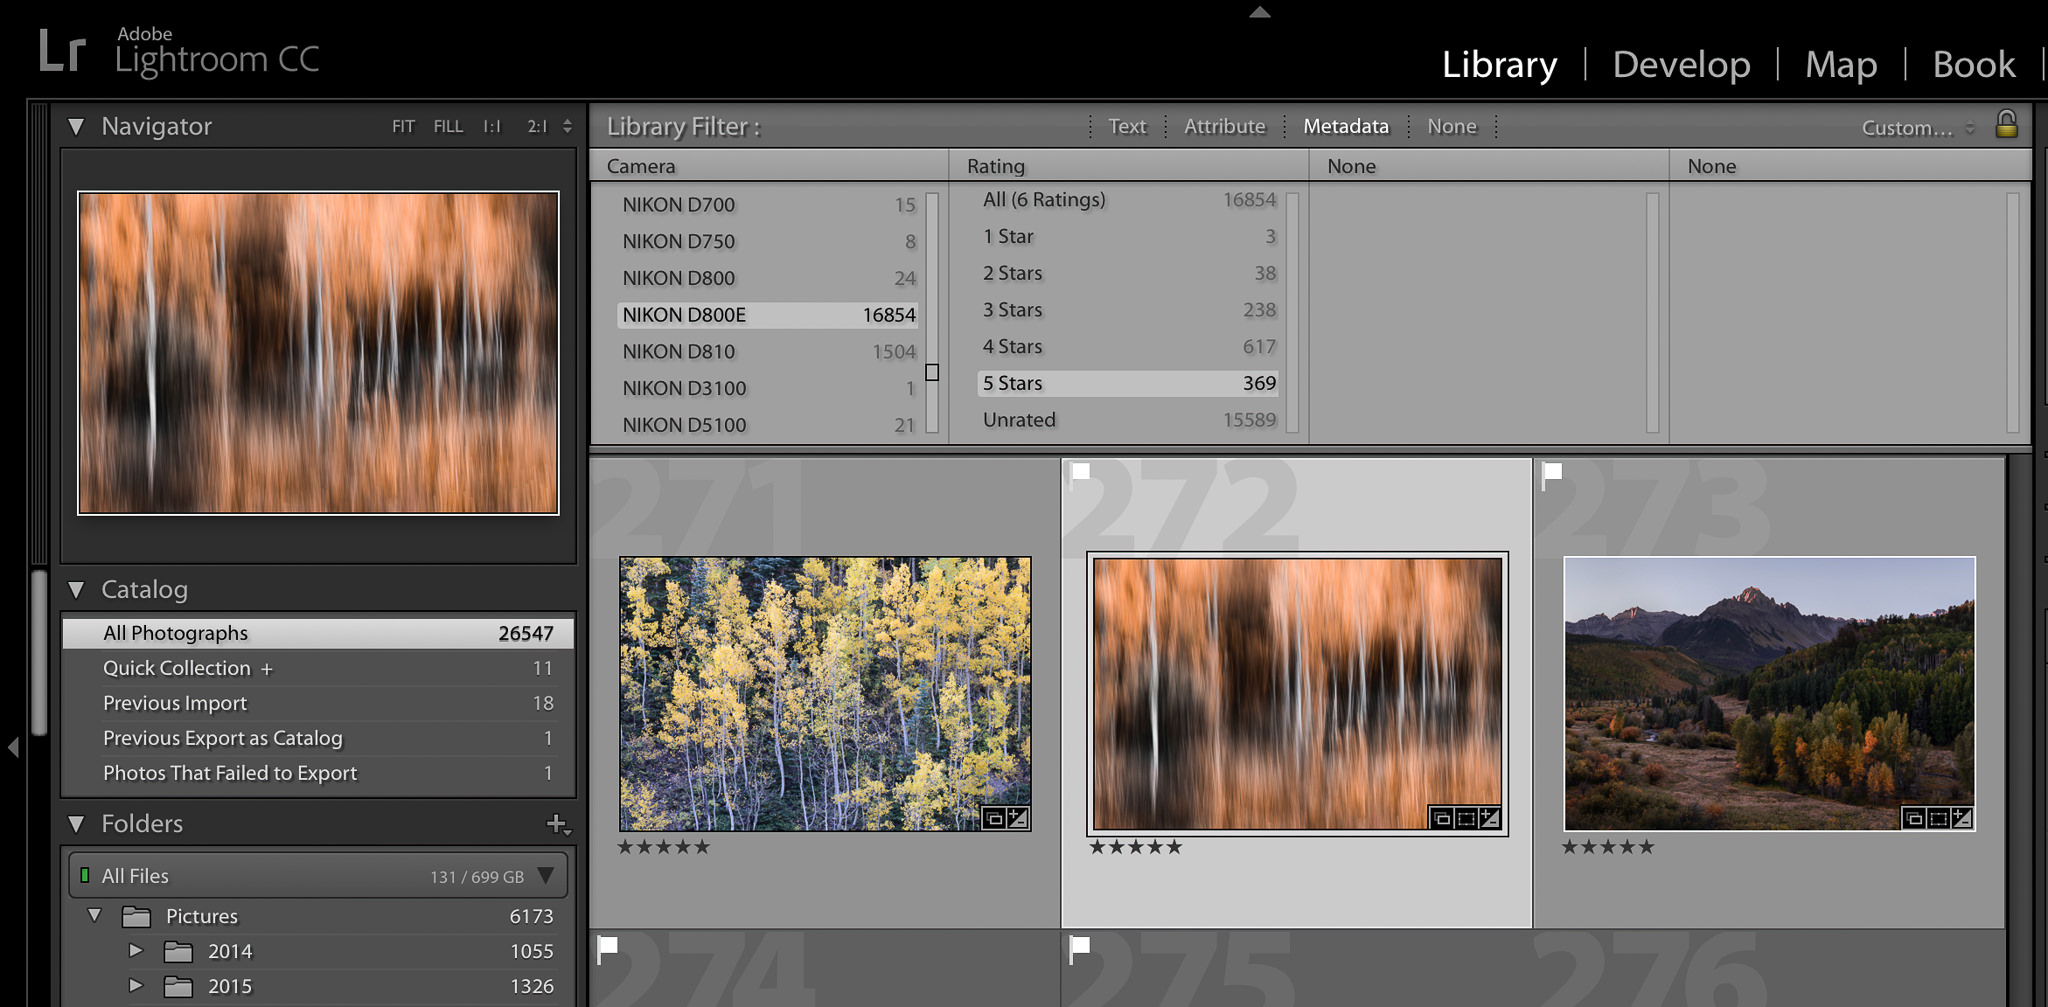
However, although Exposure does let you sort by various image characteristics (such as stars, flags, keywords, and EXIF data), it doesn’t have quite the level of organizational capabilities that Lightroom does. Specifically, Lightroom’s filter bar lets you sort a large number of images by multiple layers of information. You can filter by D810 > 24-70mm lens > vertical image > 4+ stars, making it easy to find an image when you only know some of its basic characteristics. Alien Skin Exposure doesn’t let you sort at such a granular level. For photographers who rely on sorting tools to find their images quickly, especially if you have a huge volume of images, Lightroom comes out ahead.
4. Importing Lightroom Data to Alien Skin Exposure?
A few people will wonder about this, so I’ll just add it here: You can’t import your catalog file from Lightroom into Exposure. You also can’t import anything from Exposure to Lightroom. However, it is worth mentioning that you can embed organizational information like color labels and star ratings into sidecar files in both Lightroom and Exposure, which the other software can read. Alien Skin can import things like rating, color label, keywords, and crops, but only if you save XMP sidecar files in Lightroom (by pressing control+s or command+s).
5. Image Quality – Colors
Photographers care about image quality. If your RAW converter harms your photos, that’s a big deal. Sometimes, this comes in the form of color differences that favor one software package over another, which strongly matters for certain photographers.
For example, product and fashion photographers frequently need the color in the final image to match the real-life item as much as possible. They’ll go to significant lengths to import custom color profiles for this reason, which is one benefit of Lightroom; Alien Skin doesn’t include this ability as a part of Exposure.
Personally, though, I’m not a product photographer, and I don’t need the colors in my images to match real-world color swatches. I’m much more concerned with the ability to create the color I want as seamlessly as possible.
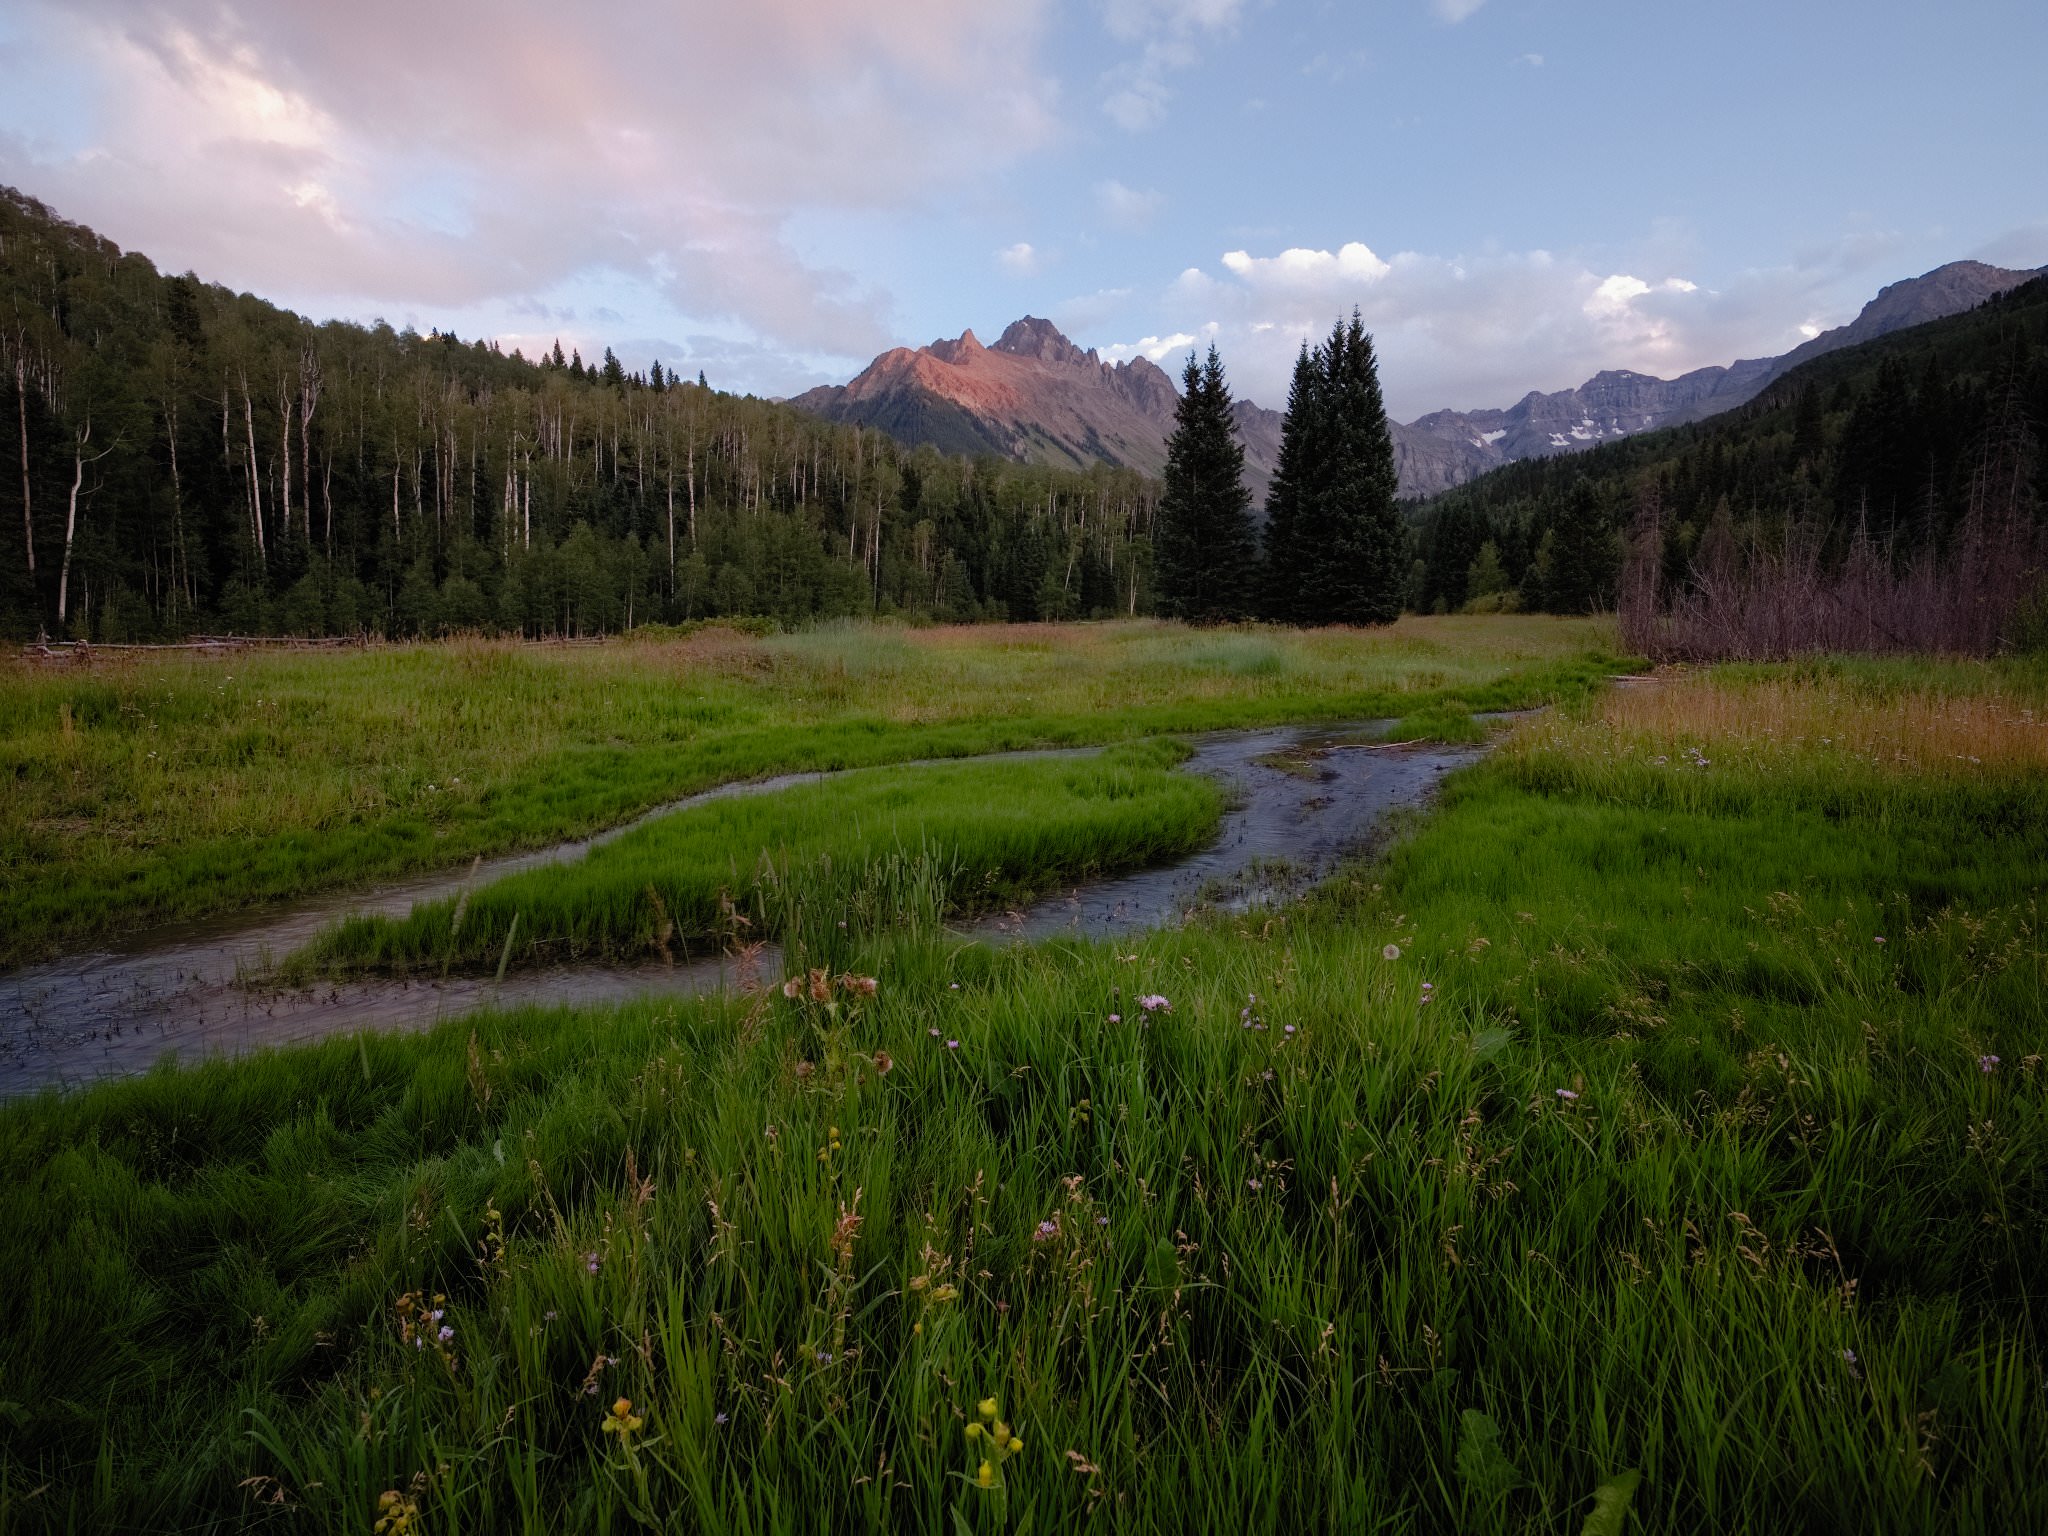
To figure out which one wins in this regard, I ran an experiment on a relatively difficult image to edit, which I opened in both software packages. My goal was to create the best possible result in both, paying attention to any editing difficulties along the way. On top of that, I wanted the final images from the two software packages to look identical, or as similar as possible.
Take a look below to see what you think, but I’m happy to confirm that both software packages made it possible to reach the image in my mind’s eye. However, there are still some differences in the images below (clearest if you click on them and alternate from left to right). First, Lightroom automatically applies lens corrections to certain Fuji lenses, which is impossible to remove, while Alien Skin doesn’t have any corrections available for the Fuji GFX lenses. On top of that, although the colors looked almost identical between the two images while I was editing them, the exported photo from Alien Skin changed colors slightly from its appearance in the workspace, turning a hair more aqua in color (most likely due to its attempt to convert to the sRGB color space). Given more time, it would be possible to create a much more similar appearance. With those caveats, here is the comparison:
GFX 50S + GF23mmF4 R LM WR @ 23mm, ISO 100, 12/1, f/16.0

Lastly, there is also the issue of “default color,” which is how the software renders colors out of camera. However, this depends greatly upon your import settings (such as Camera Profile in Lightroom), and there are too many variables for me to make any general statements about this.
6. Image Quality – Other
Aside from color, there are some other aspects of image quality that also matter. For example, many software companies famously have had difficulties rendering crisp details in busy, green foliage for photos taken with Fuji X-Trans sensors. They’ve improved over the years, but — between Lightroom and Alien Skin — which one is better in this regard?
It turns out that Alien Skin wins by quite a bit in this regard. Take a look at the comparison below, both of which are heavy crops, with Lightroom on the left and Exposure on the right:
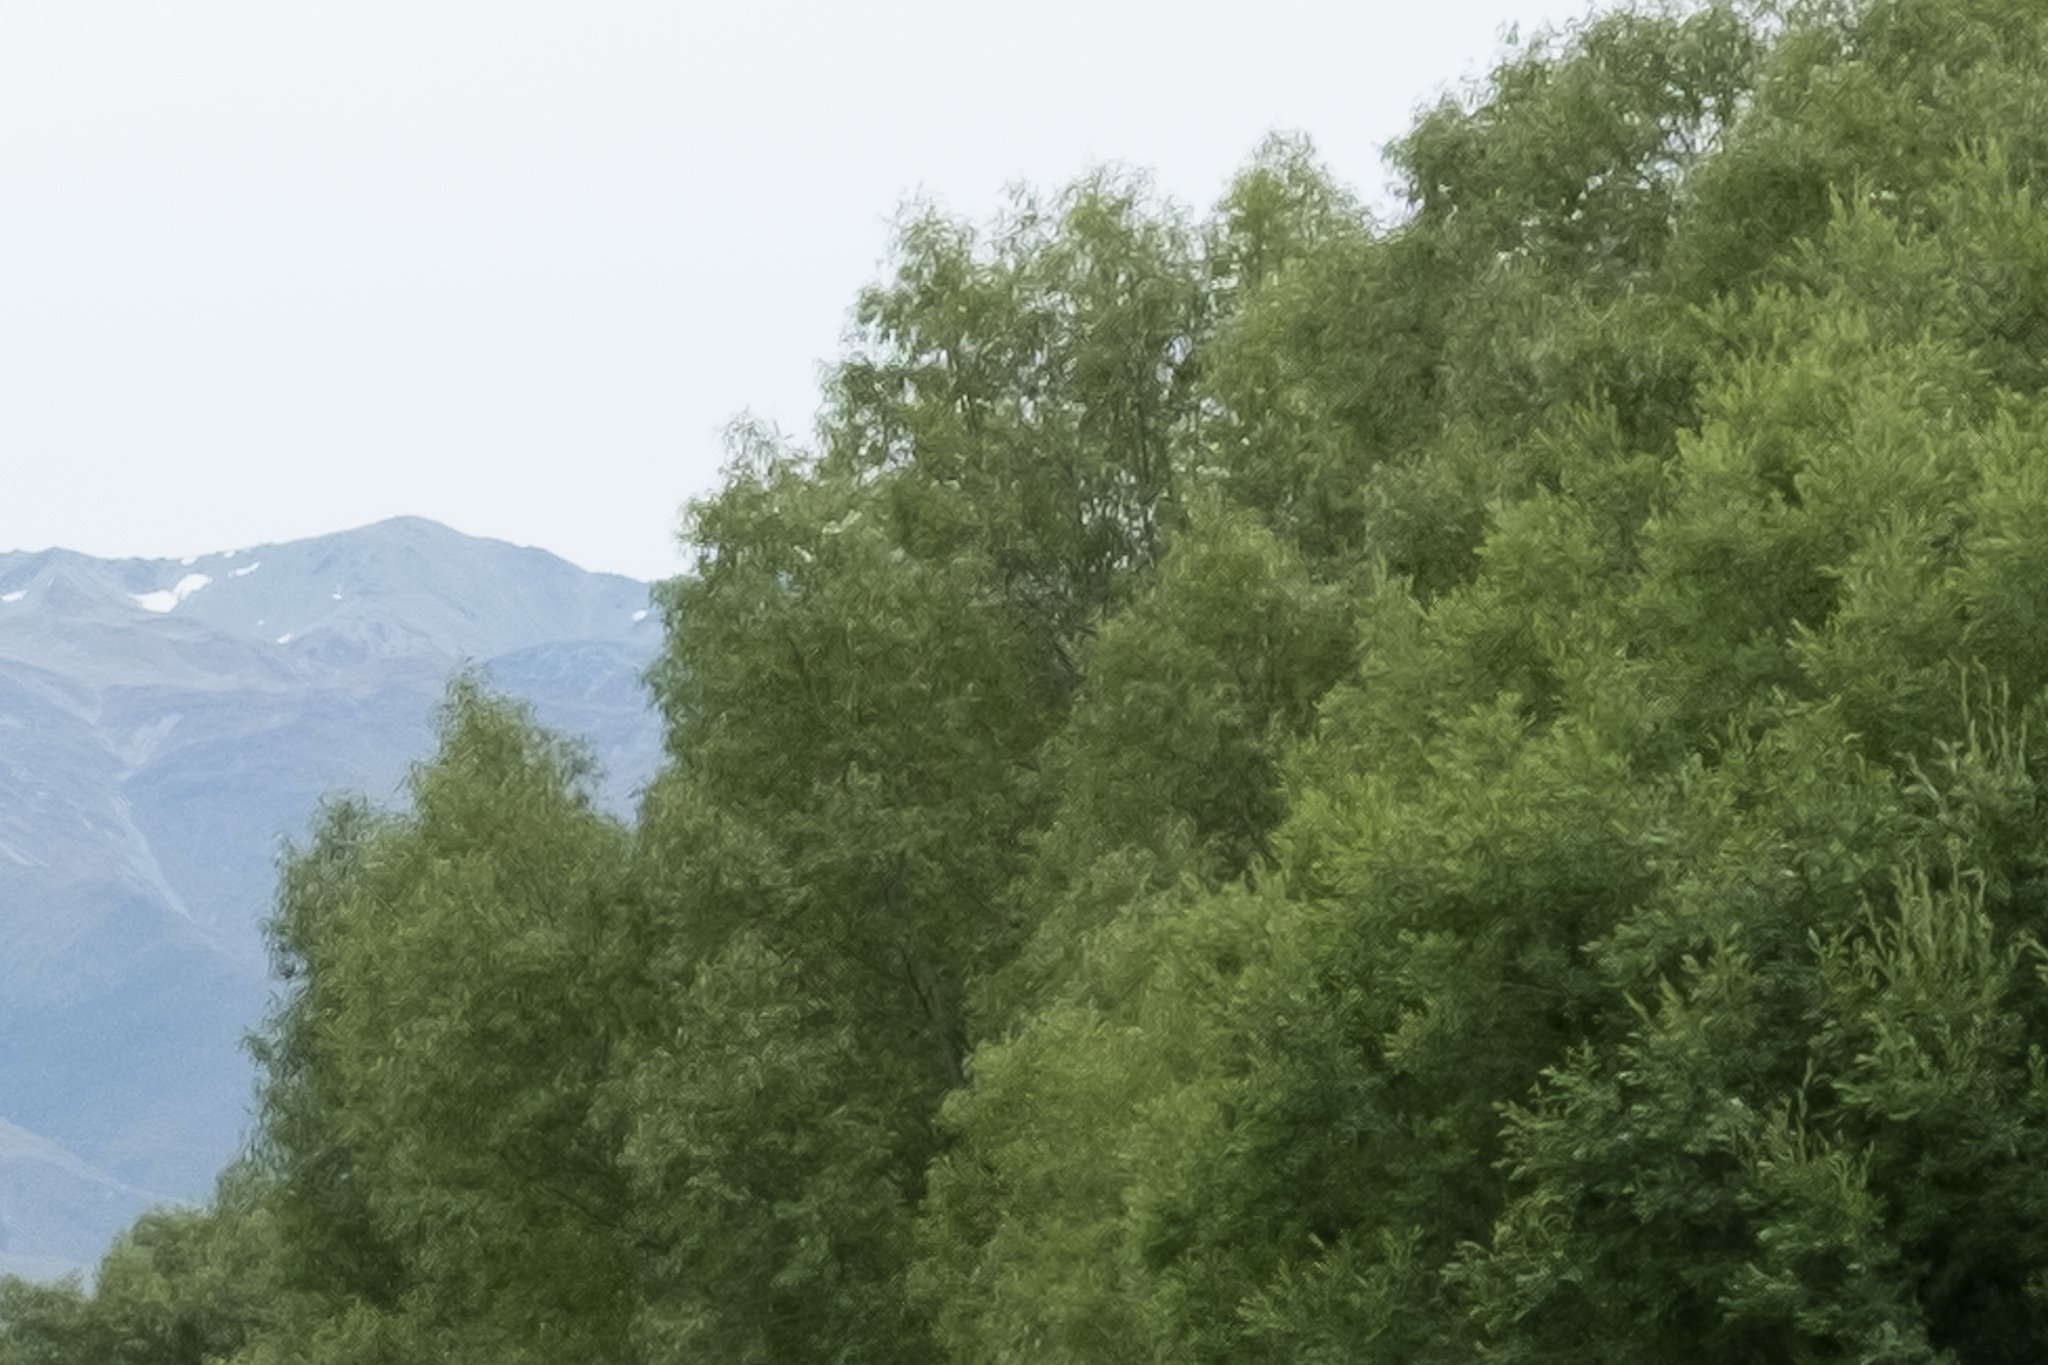
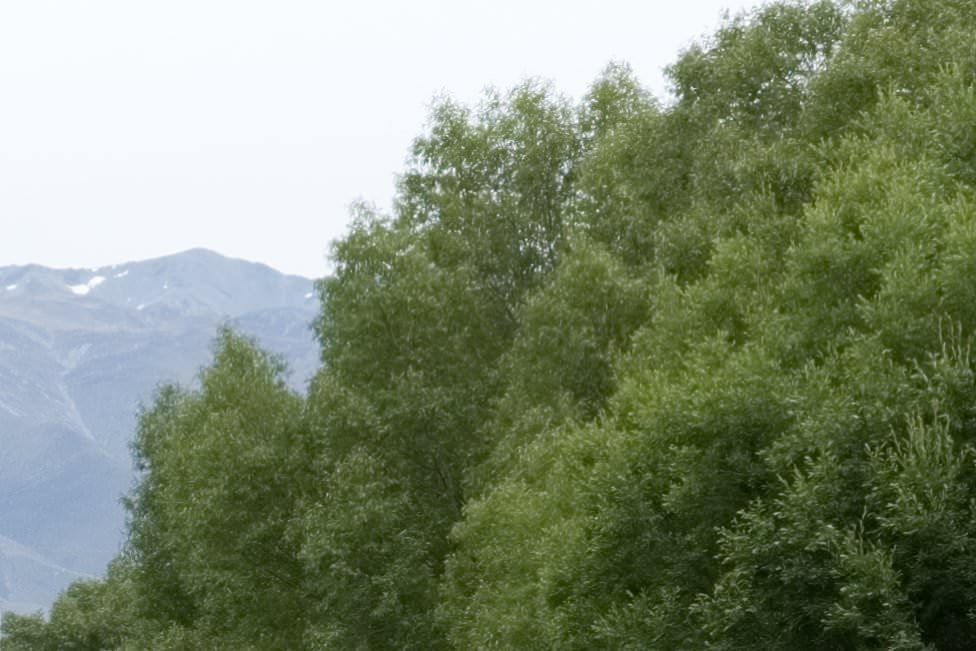
As you can see, the Lightroom image has a very “painterly” look to some of the fine details in the trees, obscuring how the leaves actually should appear. This isn’t because Alien Skin has more sharpening applied, either. As you can see from the mountains in the distance, the two images are very similar in sharpening amount, with the Lightroom photo potentially having even additional sharpening applied.
However, not everyone has a Fuji X-Trans camera, and there are other image quality differences that will matter regardless of what equipment you use. For example, what about sharpening and noise reduction? Both products work fine here, although not as good as dedicated software like Topaz Denoise. Between the two, Exposure offers more ability to apply local sharpening and noise reduction adjustments, so it wins out.
Another difference in image quality is a curious one, since it’s something that Lightroom users might not tend to think about: hot pixel removal. One of the excellent aspects of Lightroom is that it automatically filters out hot pixels behind the scenes, so you never even see them at all. Alien Skin Exposure doesn’t do this. So, you’ll likely end up with dozens of bright, tiny specks scattered across your photo, and there’s nothing you can do about it, unless you’re willing to clean them all up manually. This is a big deal for pixel peepers, but it doesn’t matter if you’re only working on smaller exported images or prints. Still, this is a win for Adobe.
7. Post-Processing Options
Before anything else, I’ll mention the two biggest strengths of Alien Skin Exposure that Lightroom does not offer: excellent film presets, and seamless (fast) layering capabilities.
The first is something that a lot of photographers will find useful — and, indeed, was Exposure’s reason to exist in the first place. It has excellent film presets that range from realistic to insane, including several that are quite beautiful. Even as a landscape photographer who hates giving up control to presets, I thoroughly enjoyed the look and feel of these options. I’m sure that many wedding and portrait photographers, among others, will like them even more.

As for layers, this is something Lightroom desperately needs, and Alien Skin’s implementation of them is very good. You can make every edit within Exposure to as many layers as you want, and you can mask out the bits you don’t want. On top of that, it’s fast. As far as I’ve been able to tell, it is barely slower than editing without any added layers at all.
So, if you’d like to add selective sharpening to the eyes of your subject, while also increasing the saturation of just the green colors, you can do that. Lightroom’s brush tool simply doesn’t compare in this regard, especially when you factor in the speed differences. I would hope that future versions of Alien Skin also add in different blending options and modes, including things like luminosity masks, although it’s already a big step ahead of Lightroom.
However, not everything favors Exposure. Lightroom has a few valuable features which Exposure simply lacks: automatic vignetting profile correction, hue and lightness adjustments to individual colors, perspective control options, and, perhaps most important of all, chromatic aberration correction. The only way to fix chromatic aberration in Exposure is to create a new layer, magnify the image, and selectively paint over the offending regions with desaturation. This isn’t a particularly fast or precise process.
Lightroom also has the ability to blend HDR and panoramas within the software — to small DNG files rather than large TIFFs, no less. If Alien Skin releases an update to Exposure X3 that has HDR, panorama, and perhaps even focus stacking abilities, it would be a big deal, but for now it is clearly behind in that sense.
In Exposure’s favor, it adds the ability to increase or decrease saturation independently in the shadows, highlights, and midtones. Combined with the layer capabilities, this allows for adjustments that would be very difficult to make in Lightroom.
However, Lightroom users may find that Exposure’s sliders — especially things like shadow recovery and vibrance — do not work quite as well as the comparable sliders in Lightroom. For example, the vibrance slider in Exposure is prone to adding banding in areas of nearly uniform colors.
Ultimately, it is my feeling that Lightroom still wins out as a whole in terms of the available edits. Although I could produce comparable images in both, Lightroom’s little details, such as chromatic aberration correction, are hard to live without.
8. Export Options
When exporting your photos, you’ll find that Lightroom offers some additional options that can be useful. For example, you can’t upsize photos within Exposure, and you also can’t apply separate sharpening upon export.
Instead, Exposure exports the photo and resizes it without any sharpening, then applies your already-chosen sharpness settings to the exported image. This can result in over-sharpening if your exported image is relatively small and you aren’t careful.
Other than that, there’s not a huge difference between the export dialogs. You can apply watermarks in both, export as different file types and qualities, and rename the file as necessary. Although Lightroom’s export options are a bit more advanced, Exposure is certainly good enough for typical needs.

9. Speed and Performance
Alien Skin and Lightroom are each fast at certain tasks, but quite slow at others. As far as exporting photos, Lightroom wins out by a slim margin; I exported the same 100 photos as 85% 2048-pixel JPEGs onto my hard drive. Lightroom took 114 seconds, and Alien Skin took 139 seconds with my particular computer. That difference isn’t enough for me to worry about.
As discussed above, Alien Skin is also much faster when dealing with layers than Lightroom is with local adjustments. If you find yourself routinely applying dozens of brushes and gradients in Lightroom’s develop module, you’ll certainly be familiar with how slow the software can be. Alien Skin is much quicker in that regard.
However, Alien Skin is slow in another area that potentially negates its fast layering performance: previewing photos at 100% magnification. Unlike Lightroom, which – although it’s also slow to preview at 1:1 – can save a rendered preview, Alien Skin Exposure simply cannot. So, each time you zoom in, it needs to re-render parts of the image. I often found myself zooming in between different parts of a photograph that I had already examined, only to wait another 5-10 seconds before the preview became sharp. The good news is that this setup saves quite a bit of storage space – Lightroom’s 1:1 previews aren’t small files at all. However, if speed is a greater priority for you than space, Lightroom wins as far as rendering images quickly.

10. Price
Alien Skin Exposure costs $149, or $99 if you’re upgrading from an older version. Lightroom Classic is only available as a subscription software, sold for $10 per month (which also includes Photoshop). You can also get a free 30-day trial of Alien Skin if you’d like to try it out first.
If you don’t mind subscription software, it’s hard to say which is a better price. Alien Skin is certainly more expensive up front, but the long-term cost will be higher with Lightroom. However, the added benefit of Photoshop should not be overlooked.
Personally, though, Lightroom isn’t an option for me anymore. The subscription model is a deal-breaker since it ties you to the software regardless of where Adobe takes it, and it means that you will keep paying their price indefinitely. That’s the whole reason why many photographers are looking for Lightroom alternatives in the first place.
11. Conclusion
As a potential alternative to Lightroom, Alien Skin Exposure can seem like a promising possibility. Its sidecar organization structure acts much like a catalog system while being easier to understand for many photographers. For Fuji X-Trans users, it offers noticeably higher image quality in regions of busy foliage. On top of that, the Lightroom-like layout will be highly familiar and easy to master in a short period of time for people looking to make the switch.
However, Exposure X3 does fall short of Lightroom’s performance in some important ways. Most glaringly, it doesn’t have many of the “small essentials” that make Lightroom a comprehensive, professional-grade software. It’s missing chromatic aberration correction, vignetting profiles, automatic hot pixel removal, and perspective control correction. Lightroom also provides many advanced options that Exposure X3 simply doesn’t offer, such as panoramas, HDRs, hue and luminance adjustments, soft proofing, and custom color profiles, as well as a vast network of plugins (including Alien Skin’s own options) and a much larger number of how-to tutorials online.
So, is Exposure a good investment? Alien Skin has stated publicly that they are planning to address some of Exposure’s most important shortcomings in an update, such as chromatic aberration correction. And, for some people, the things Alien Skin Exposure lacks aren’t as important for their photography, while elements like film simulations and fast layer adjustments could carry more weight. Personally, I am waiting for an update that fixes some of Exposure’s missing elements, and until then, I’m not planning to use it as a full replacement for Lightroom. However, as a Photoshop or Lightroom plugin, it certainly works quite well.
We’re still testing several other Lightroom alternatives at Photography Life, and hopefully, a few will make the cut as a complete replacement. I really wanted Exposure to be among that group, and it may already be there for some people. But until Alien Skin releases their next update, Lightroom still stands as a more comprehensive and fully-featured software package, and one that I suspect many people will prefer – if you don’t mind the subscription model, that is.
Hello Spencer,
thank you for the great review.
Right now a new Exposure 5 edition is out which seems to correct some of the shortcomings, such as lens corrections.
Will you run an update comparison with LR?
Thanks for this review – just what I was looking for!
Without having read ALL of the comments, you have missed a number of Lightroom features that are essential for many professional photographers. For me, printing is a major one. Although AS just released their update of Exposure 3 which includes a print option, it is laughable. LR offers a truly professional print option, with ICC support and the ability to save presets for each paper/printer combination that you use. Sadly, Exposure 3 offers a basic dialogue that doesn’t even remember the settings from the previous print job, let alone support ICC colour controls. In fact, printing is one of the major reasons I started to use LR back in version 1.
The web module is another feature that I find useful in LR. None in Exposure 3. In fact, the ability to publish to multiple platforms from within LR makes it an essential tool in that regard as well. So much of my delivery workflow starts and ends in LR, that AS has a long way to go before they can replicate what Adobe has in LR.
I take issue with your comments about Exposure 3 coming out ahead of LR when comparing LR’s targeted adjustments (brush and blend) and layers in Exposure 3. I find that I can easily achieve all of the edits and then some in LR without layers and I am not killed by the incredibly slow rendering of Exposure 3 when zooming in on the image. Like you, I change views as I work and the delay in E3 is maddening. I can not imagine using it for a job where I need to process hundreds of images.
I am totally with you in that I would rather not pay a subscription to Adobe to rent their software. I do want Exposure 3 to be good enough for me to consider it as my LR replacement. As I have purchased the software, I am putting my money on Alien Skin to make that happen. So far, it hasn’t happened. Sadly.
Great response, Spencer.
I have a little more faith in Adobe, only because if they scare away their customers, what’s left for them? But of course I do understand that priorities and concern triggers are very individual.
Certainly I remember their promise to keep Lightroom as a standalone software. So I will keep your reasoning in the back of my mind and watch Adobe’s development in software closely. Even if I dig myself deeper in their environment for now, concerning the edit history for future images.
Hi Spencer,
I couldn’t find this question in the comments, so I will ask: Exposure gets a major update each year. The update price is 99$. As it is (or at least was) comparably immature in comparison to Lightroom, an Exposure user had to go for all these updates, because these updates indeed included a lot of features and progress. So that leaves 120$ per year for Lightroom + Lightroom web + Photoshop + Lightroom mobile + 20GB cloud space versus 99$ for – well – Exposure and nothing else. Is that an even balance?
Disclosure: as long-time Lightroom user I have also been using Exposure since version 5, when its purpose was a Lightroom plugin for film simulations. I have gratefully paid for the updates and still like it very much for some procedures, where I take images from Lightroom to Exposure and back. So I have a lot of love for Lightroom and Exposure. ;-)
Thanks for the comparison, great read!
Andy
Thank you, Andy!
My question back to you: Are you confident that Adobe will continue offering their bundle – which is indeed an excellent package for a very reasonable cost – at that price, or even a reasonable price, going several years in the future? And are you confident that they will never make permanent changes to Lightroom or Photoshop that make it useless for your purpose – such as switching to a cloud-only system, where you must store all your images on Adobe’s servers?
I’m not. And you can’t just quit whenever you want, either – the longer you stick with Adobe, the more organization and edit history of your future images depends upon their ecosystem, and the harder it becomes to leave. Until I find a replacement, I’m still using Lightroom 6 for that reason; being a standalone software, it doesn’t matter where I put my money in the future. I’ll always have access to the work I’ve done, including the edit history for all my images.
So, I’m switching, even though I enjoy using Lightroom, and the $10/month price is an excellent deal. Unfortunate that this is the way it is!
Fuji shooter. I’ve tried lots of LR alternatives and only recently splashed out on ON1. But I keep going back to LR as it suits my workflow. I don’t really mind the subscription model although the lack of a working exit option annoys the bejaysus out of me. The speed (ahem) has been a bigger and bigger issue for me and the cloud stuff just doesn’t apply to me. I use my own cloud and don’t like storing my stuff on somebody else’s discs.
So now I tried X3. I love it when a company trusts you enough to give you a fully functional trial. Anyway – FOR THE FUJI CAMERAS – this has blown me away. The image quality is instantly better than LR (and, I think, ON1). The speed is lovely and user-interface just works for my.
Love it! Bought it after three days. Revisiting lots of my older shots and having fun.
Great job you Aliens ;-) and thanks Spencer for alerting us to this.
Good to know. Cheers
Hmmm. Less happy now :-( I downloaded the update and now the program crashes every time I load it. It is totally non-functional. So it’s gone from (near) perfect to totally useless. Not happy
Okay – I take it all back! AS have gone out of their way to resolve my issue. Even though it took 2 releases (I am currently on 3.5.2) and a fair bit of back-and-forth debug the guys got it sorted. A1++++ for customer service.
Now I still pay Adobe, I have bought ON1 and Corel Paintshop Pro and numerous others. Until AS, none could lure me away from the deceptive simplicity of LR (PS included). But not any more. I really really haven’t used LR since getting X3. I am that happy with it!
Super work guys
Hey folks. I work with Alien Skin and wanted to mention that we offer a free, fully-functional 30-day trial. So if you’re curious about Exposure, you can try it for a month to see if it’s the tool for you.
www.alienskin.com/exposure-trial/
Hi thanks for this! Will you also be looking to review Darktable for Windows?
Also as a side note, I don’t understand the hate some commenters have for brands other than Canon, Nikon, Sony. Other companies make amazing cameras too! Fuji, Olympus, Pentax, Panasonic, Leica.. to name a few. And that’s not even including the larger sensor formats!
This site is called “Photography” Life. Not Canon Life, Nikon Life, or Sony Life. Everyone photographer needs some help sometime, regardless of their camera system, budget or capability.
Good article Spencer, and it could not have been more timely for me. I too am done with the subscription model for Adobe CC and looking for alternatives to Lightroom, since I do 99% of my editing in LR. So far, I have tried a bunch of options – both free and paid (trial versions) – like Affinity Photo, Luminar, Rawtherapee, darktable etc.
Still have not come to a conclusion. Waiting for further comparisons. Thanks a lot again.
If you are going to compare it to Affinity , please test it with the latest beta , which has made massive improvement with highlight/shadow recovery.
forum.affinity.serif.com/index…n-windows/