In Lightroom, image information, such as Metadata, can be overlaid on a photograph in some Modules. It helps you find out information you might need at a glance, such as aperture and shutter speed at which that particular photograph was taken. Such information can be overlaid in Grid and Loupe View modes in Library Module, and Loupe View mode in Develop Module. In this article, I will discuss the Grid View options, which are available in Library Module only. Loupe View mode, which is available in Library and Develop Modules, will be discussed in detail in a follow-up article.
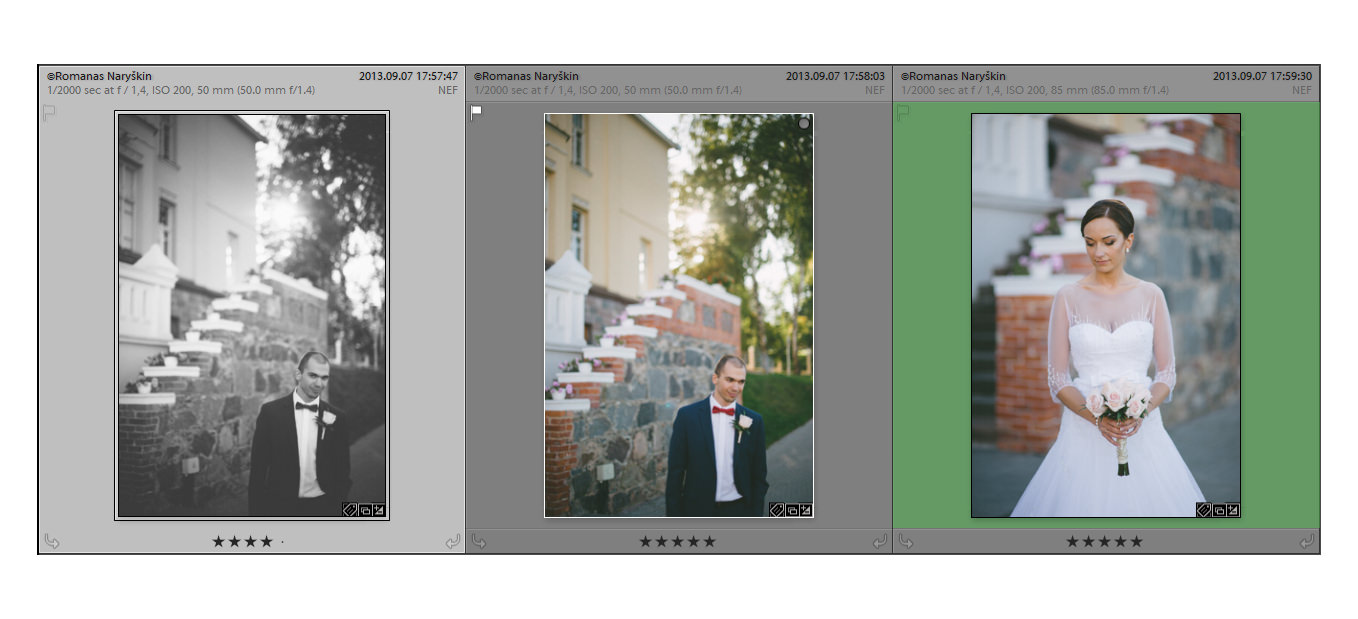
Table of Contents
Lightroom Grid View Information Overlay
In Grid View mode, the additional information display modes are called Grid Extras. The Grid Extras are further split into Cell Extras, as there are two types of Cells – Compact Cells and Expanded Cells. You can set different information for both types of Cells and toggle between them by hitting “J” key while in Grid View mode. Doing so will toggle between bare Cells that show no Grid Extras at all except for Color Label; Compact Cells that show Flags, Star Ratings, Quick Collection Markers, Thumbnail Badges that show whether that particular file was edited, and an additional piece of information of your choosing; and, finally, Expanded Cells that show more additional information that you can specify, such as file dimensions, date the photograph was taken on and so on.
A side note: a Cell is the area that surrounds and contains image thumbnail along with additional information in Grid View mode, but is not the thumbnail itself.
Compact Cell Extras and Expanded Cell Extras can be customized in Library View Options dialogue. To open the dialogue, either hit “Ctrl + J” on your keyboard, go to “View->View Options…” or choose “View Options…” by right-clicking on a photograph in Library Module. Then, choose Grid View tab at the top of the dialogue. The Grid View tab will be engaged automatically if that is the View Mode you’ve selected prior to opening the Library View Options dialogue. You will be presented with the following settings window:
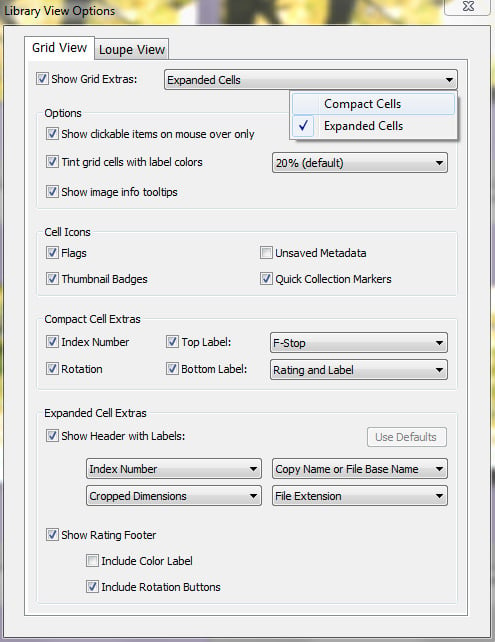
Immediately we notice just how many settings there are. Let’s start of by making sure the first checkbox is marked.
- Show Grid Extras – select this checkbox to enable the display of additional information on Cells. Deselecting the checkbox will display bare Cells with no information except for Color Label, and will grey out all but two settings in the Library View Options dialogue so they can not be adjusted.
- The Compact/Expanded Cells drop-down menu – selecting either Compact Cells or Expanded Cells will allow you to preview any changes you make as soon as you make them. However, settings for both Cell types are available at all times in the Library View Options dialogue as long as the Show Grid Extras checkbox is marked, so you do not need to switch between them to adjust them separately. Small details like that, they matter. :)
1) The Options Section of Library View Options Dialogue
Once “Show Grid Extras” is checked, the rest of the options can be adjusted. The following settings are part of the Options section:
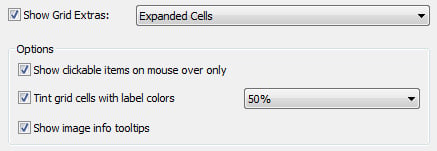
- Show clickable items on mouse over only – choose whether you’d like to see some of the adjustments accessible directly on the Cells themselves to be either displayed constantly, or when you move your mouse cursor on top of that specific Cell only. These adjustments include image rotation, Star Ratings, Flags and Quick Collection Markers.
- Tint grid cells with label colors – whenever you add a Color Label to a specific photograph, its entire Cell (not the thumbnail itself, but the area which surrounds the thumbnail) is tinted with that particular color so that you can see which Color Label is assigned at a glance. This drop-down menu allows you to specify the transparency of the tint – in other words, the higher the percentage, the more vivid the color-labeled Cell will be. The default value is 20%, but I find the maximum 50% setting to work very well, too.
- Show image info tooltips – if this checkbox is marked, information tooltip will appear as you hover your mouse cursor over the image thumbnail in Grid View mode. Do note the tooltip will not appear if you hover your mouse over the Cell rather than image thumbnail. The tooltip includes file name and basic exposure information (shutter speed, aperture, focal length, ISO setting).
2) The Cell Icons Section
Next up is the Cell Icons section:
- Flags – Lightroom has two flags you can put on each photograph. One of them is called Pick and is assigned by hitting the “P” key, the other one is called Reject and is assigned by hitting the “X” key. In total, this can give you three choices for an image. You can either “pick” it, “reject” it or leave it without a flag. Use this checkbox to specify whether Flag status should be displayed in the Cell.
- Thumbnail Badges – turn on or off the display of Thumbnail Badges. What are they? Well, Thumbnail Badges are the tiny icons displayed at the bottom right corner of the image thumbnail and they show, at a glance, whether that particular photograph has been edited in Develop Module, whether it is part of Quick Collection, if it has been Cropped, if it is part of a Stack or a set of Virtual Copies, etc.
- Unsaved Metadata – usually, Lightroom saves all the Metadata changes and post-processing settings in its Catalog (because the original RAW file can not be modified), but you can also save them on a separate, accompanying *.xmp file. Each image file requires its own *.xmp file to hold information about all the post-processing that you’ve done to that image and additional Metadata that you’ve entered. To find out more about Metadata, read our “What is Metadata in Photography?” article, and if you want to learn in detail how Lightroom stores information about changes made to each image, read our “Lightroom Catalogs Explained” article. Marking this checkbox will show you which image files have *.xmp files accompanying them with the latest changes described in them. If a particular image file does not have an *.xmp file, an icon will appear at the top right corner of the Cell. Clicking on that icon will bring up a dialogue prompting you to store post-processing and Metadata information for that image in an accompanying *.xmp file.
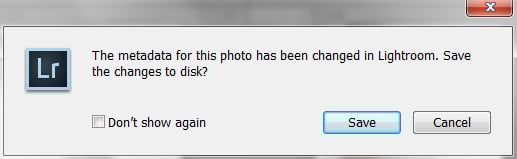
Because I choose not to save information using *.xmp files and trust Lightroom’s Catalogs, I have this particular checkbox unmarked (since basically none of my image files have *.xmp files to go with them and so all of them would have the icon at the top right corner of the Cell).
- Quick Collection Markers – if a particular photograph has been added to Quick Collection (hit “B” to do so), a grey dot will appear at the top right corner of the image thumbnail as an indicator. It is called the Quick Collection Marker. Toggle this checkbox to either hide or show the Marker.
3) Compact Cell Extras
The following section is called Compact Cell Extras and allows you to specify which information is displayed on Compact Cells:

- Index Number – hide or show the photograph’s sequence number within that specific location (for example, a particular Collection, Collection Set or the whole Catalog).
- Rotation – hide or show image rotation controls. If the checkbox is marked, rotation controls will be displayed depending on how you set the “Show clickable items on mouse over only” checkbox (see above).
- Top Label – choose what sort of information you want to be displayed above the image thumbnail. There are a bunch of choices, but only one can be selected at a time. Click on the drop-down menu to choose from Megapixels, Caption, File Name, Aperture, ISO or Shutter settings, Copyright or Capture Date, among other things.
- Bottom Label – choose the second bit of information to be displayed right below the image thumbnail. The drop-down menu contains the same information for you to choose from as with the Top Label.
4) Expanded Cell Extras
The last section is there for you to specify Expanded Cell Extras:
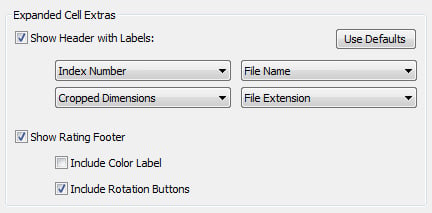
- Show Header with Labels – the Header in Expanded Cell mode allows you to specify up to four types of information to be overlaid (Compact Cell mode had just one such slot). Each drop-down menu contains the same list of Metadata information as with Compact Cell mode, so more or less anything you will ever need. If the “Show Header with Labels” checkbox remains unmarked, the whole Header is hidden along with any Metadata information.
- Show Rating Footer – the footer contains Star Rating, image rotation tools and a separate Color Label icon, which I find unnecessary given that the whole Cell is tinted with the selected color. You can hide rotation tools by unchecking the corresponding checkbox, the same goes for Color Label icons. There is no way to hide the Star Rating unless the whole “Show Rating Footer” checkbox is unmarked, in which case the whole Footer is hidden along with rotation tools and Color Label icon.
Summary
That is all there is to know about Grid View options! As you can see, there’s quite a lot of information that can be overlaid in Grid View, but once you get the hang of it – and, hopefully, this tutorial has helped you to do just that – everything is quite simple to set up according to your needs. Next up – Library and Develop Module Loupe View options.
Thank you! “J” key solved it all for me. I must’ve bumped that key at some point.
Yet another very useful article! This is great and now I have these settings applied to my Lr5!
Guys!
Its Impossible to reach you in any way!
1. I have tried to contact you via the “contact us” form. I filled all the fields and when you submit the email- you get a blank page without any confirmation that the message had been sent.
2. Your Pre-Order of the Sensor gel-stick is bugged. Filled out all the available fields-and it says “invalid shipping method” [there’s no shipping method option in there even.
I tried to contact and pre-order from different computers. Different browsers. Therefore, there’s a problem with your website’s end. Not ours. Tried to contact you even via Facebook. No reply.
Hopefully this comment could be posted so you’ll contact me.
What does a man need to do to get a gel stick here? :]
Thank you.
Elad, I just read you message on Facebook. I will let Nasim know about your problem, he will get back to you :) Sorry for all the trouble you had to go through!
Thank you so much for your kind concern!
Sorry about replying here, but I had to contact you somehow.
Cheers! :]
Elad,
Not sure why you are having problems with the contact form. Just tried it out and it worked fine.
As for the shipping not working, which country are you trying to set up the order for? We are only shipping to select countries at the moment, mostly Europe and some Asian countries.
Elad, just noticed that you were trying to get shipment to Israel – it was not enabled before. Now you should be able to order, I included Israel to accepted countries list.
Nasim. Thank you so much for getting back to me on that issue :]
I’ve just placed my order for the Gel-Stick.