Today Adobe announced a bunch of important updates to its ecosystem, with Lightroom Classic CC, Lightroom CC and mobile versions of apps receiving some new features. For example, the desktop version of Lightroom CC finally received the ability to stitch HDRs, panoramas, and HDR panoramas, while Lightroom Classic CC now has better tethering support for Nikon cameras (you can read about these changes in Adobe’s announcement post). However, the most exciting new feature any Creative Cloud subscriber can now access is called “Enhance Details”, which uses machine learning and computational photography to enhance the level of detail in images. This feature is accessible through Adobe Camera RAW, Lightroom Classic CC and Lightroom CC for both Mac and PC platforms. What’s so exciting about it? Well, it brings new levels of detail to images we have never seen before and these details can be applied to all existing RAW images. In fact, as I went through this feature in Lightroom, I discovered that this feature not only enhances sharpness in images, but also adds details that have never been there before in the first place. This essentially makes “Enhance Details” a very powerful tool. Let’s take a look at a few sample images to see exactly what happens.
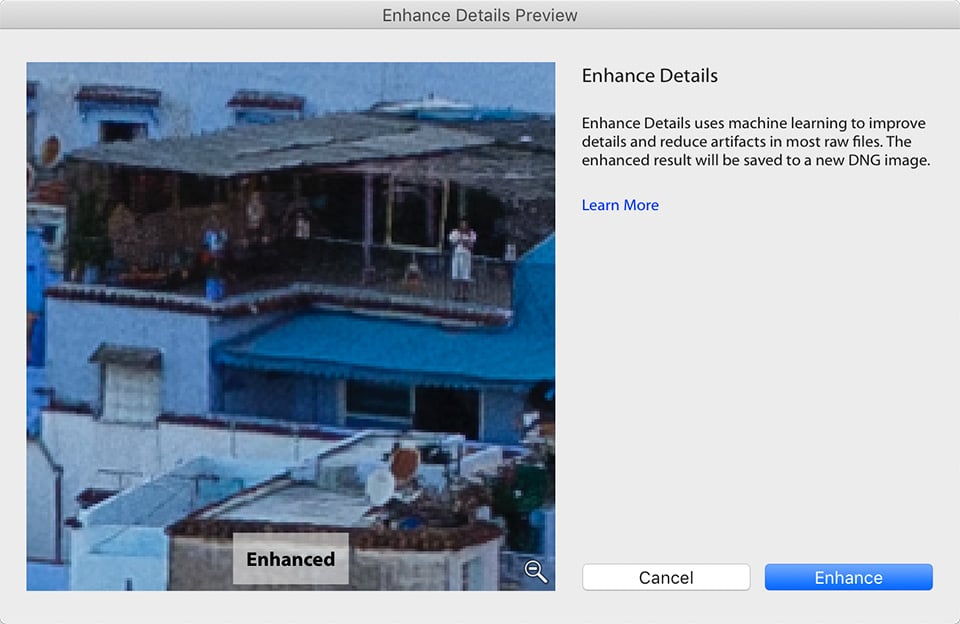
When you open up Lightroom CC, Lightroom Classic CC or ACR, you can right-click on a photo and there is now a new option titled “Enhance Details” (o be able to use this feature, you must use a RAW image – it cannot work with previously merged HDR, Panorama or pixel-shifted RAW images). Once you do that, a new window will pop-up titled “Enhance Details Preview”, from which you can see the enhancement potential of an image:
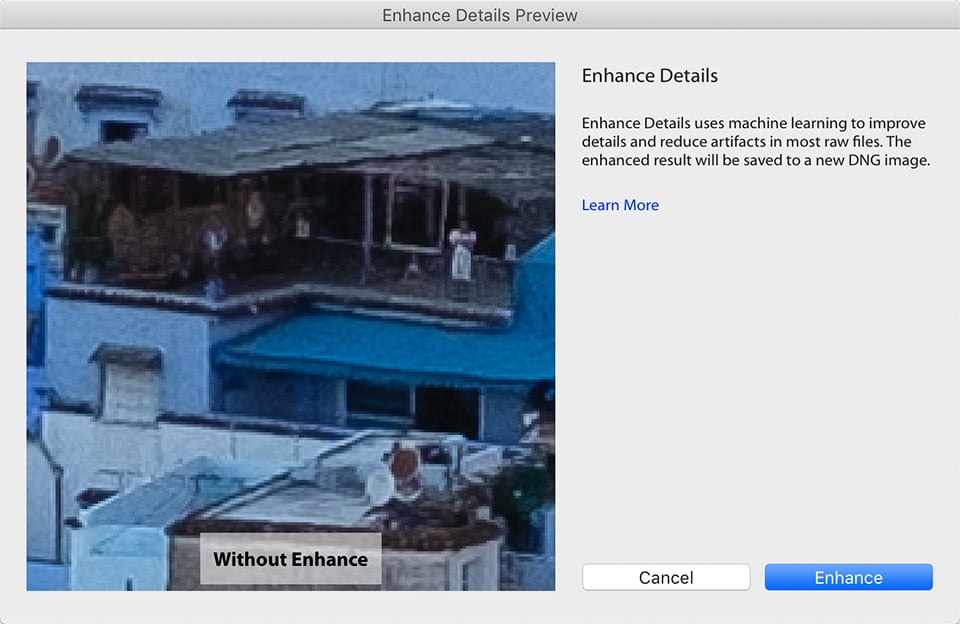
Clicking inside the preview (which can be moved around by scrolling) reveals what the image looks like without the enhancement tool, as shown below:
If the differences between the two aren’t evident right away, take a look at the below before / after, which shows what this tool does in terms of bringing out details that weren’t there in the first place:

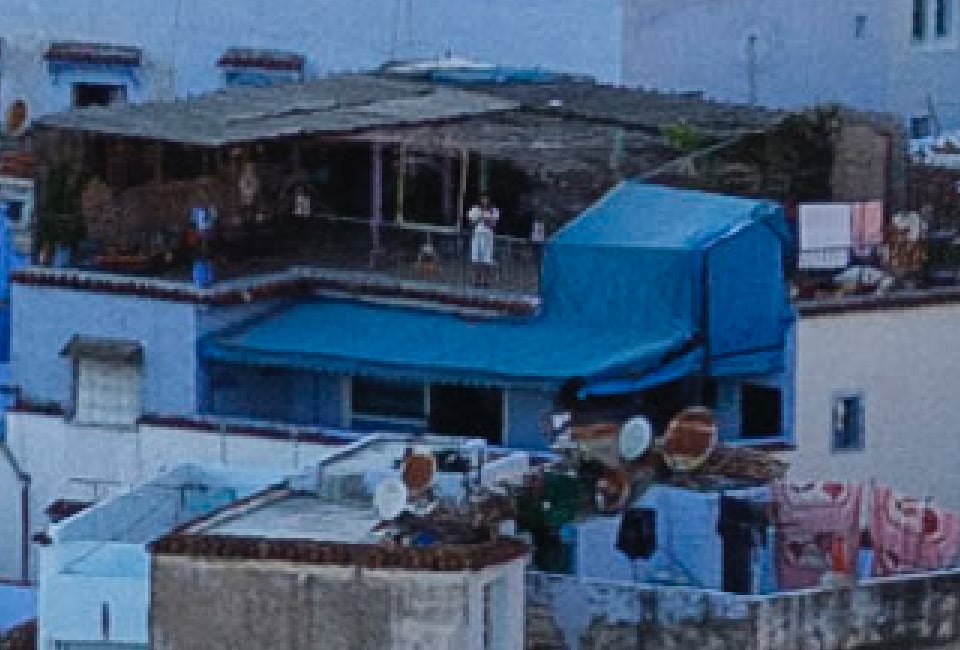
You are looking at a RAW image from the Fuji X-H1 at 3:1 zoom ratio, so things are zoomed in much more than they should be. However, pay attention to what happens in the “after” image – it has so much more detail in comparison. First of all, there are now colors on subjects that were either not there before, or were very weak. Take a look at the blue column on the left side, which barely stood out in the original RAW file. Also pay attention to all the details and colors in hung clothes and satellite dishes on the rooftop. These changes are very subtle, but they do result in a lot more detail than I started with.
Once you click the “Enhance” button, depending on the size and the resolution of the image, it might take anywhere from several seconds to several minutes. For the above image, it took rightly 20 seconds on an iMac Pro, so your mileage might vary. Once the image enhancement process is complete, if you use Lightroom, you will end up with another image in your catalog, as seen below:
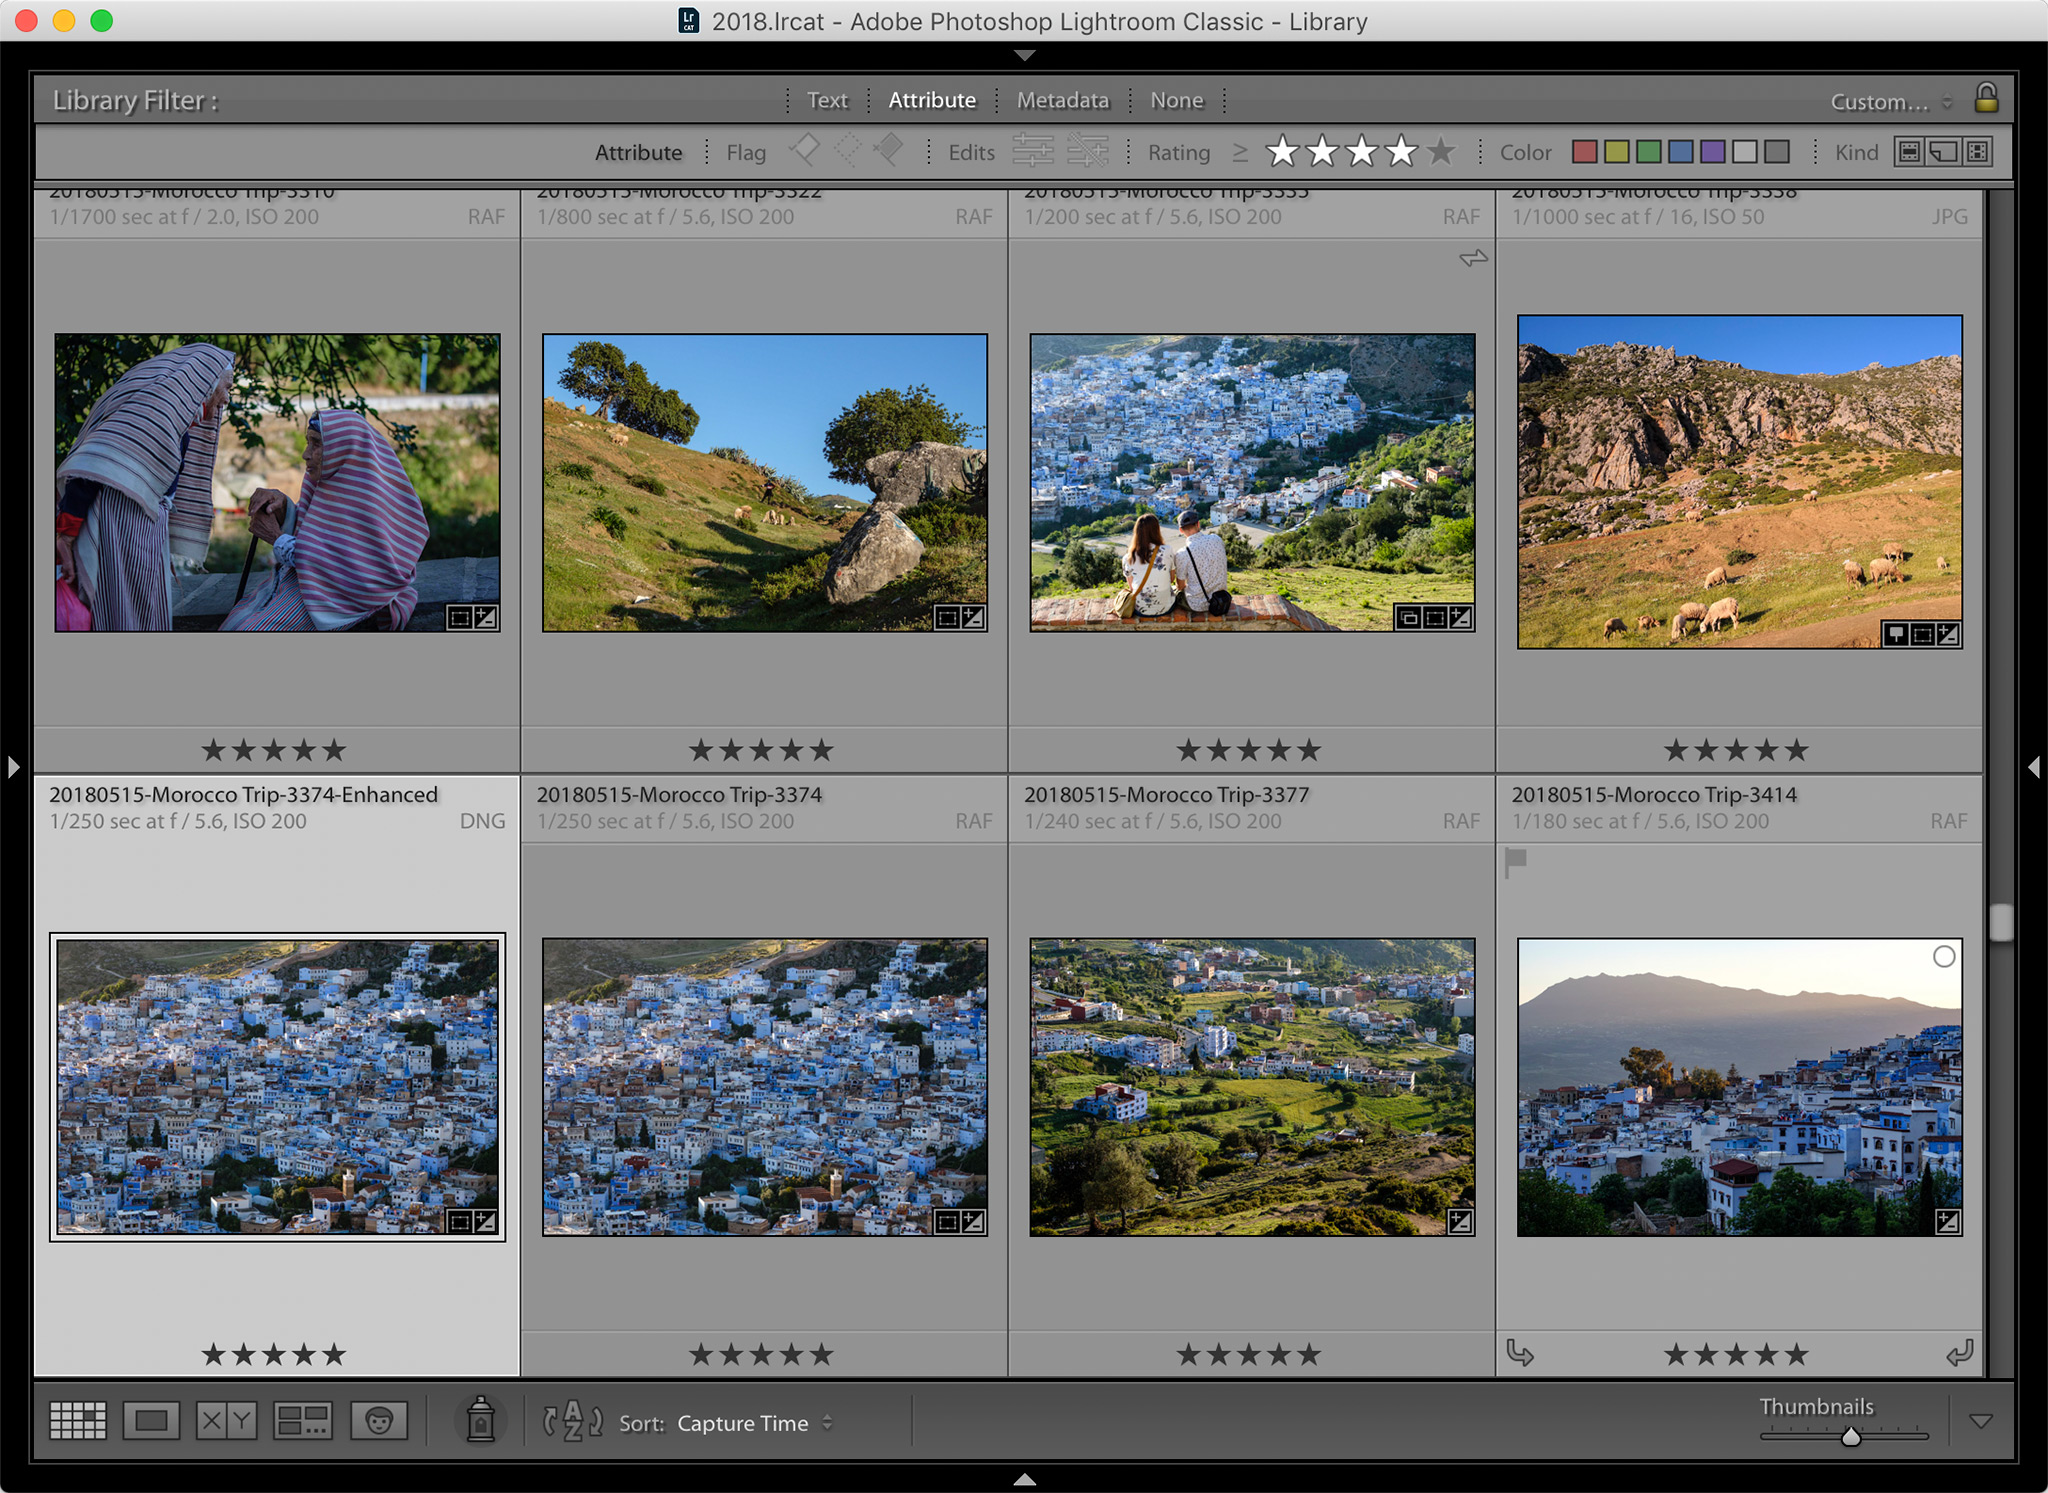
The image will be named just like the original image, with the word “Enhanced” added at the end of it. It is important to point out that the new image is of DNG format, so you can continue to edit it like a normal RAW file. However, you cannot add additional detail to it using the same tool. Also, since there are more details now in the image, you can expect the tool to yield much larger image sizes. The image above started out at just 25.3 MB (Lossless Compressed RAW), but the resulting DNG file took 120 MB of space, which is almost 4x the size! Lastly, it seems like the tool is in more of a “beta” state. When I tried to load Nikon Z7 files into it, Lightroom crashed on more than one occasion.
Let’s take a look at another image, this time from the Nikon Z7. Here is the before and after, but this time directly from Lightroom’s comparison tool (open the image in a separate window to see the full size):

Here, we can’t really see much enhancement to the image. I looked through the whole file at 3:1 zoom and I just couldn’t see much improvement to the image. I went from a 61 MB file to a 206 MB DNG practically without any noticeable difference. There were a few areas where the tool added just a tad more detail (such as in power lines and the edges of the buildings), but I didn’t see nearly as much of an improvement as on images from Fuji RAW files. My suspicion is that the Nikon Z7 with the Nikon Z 24-70mm f/4 S combo has such an insane amount of detail, that the machine learning process just can’t add more. From my experiments so far, it looks like the tool works best on slightly defocused subjects, or perhaps images taken at diffraction-limited apertures. So once again, depending on what photo you are feeding into the tool, your mileage might vary.
Overall, the new Enhance Details tool looks great. If Adobe can figure out the bugs and make it rock solid, this might be the tool to use for a select number of images – especially those that you want to print in as much detail as possible. I would definitely recommend it to any Fuji X-series shooter – it seems to make a very noticeable difference in images.
On another note, Lightroom Classic CC is slower than ever. I really wish Adobe found a way to fix all the slow-down issues rather than stacking more features on top of it. I guess the future is with Lightroom CC now, since that’s the software that has been rewritten from scratch…
I use Topaz Gigapixel AI as an add-on to LR, and have been satisfied with the results. How does Enhance differ from the Topaz software?
From my testing on the X-Pro2 it seems as if the enhance feature is demosaicing the file in such a way that allows a less aggressive form of color noise reduction, producing greater variance in color and perceived detail. I don’t like the effect because I perceive the extra detail as false detail / color noise.
Nasim,
Do you have any recommendations as to when in the workflow Enhance Details should be applied, specifically before or after Capture Sharpening, before or after Creative Sharpening, before or after Noise Reduction? Or perhaps sharpening and/or NR may not even be needed with Enhance Details.
enhanced detail feature will not work it says I need to install october 2018 update. From what I have read about the benefit of this function even on Fuji files I won’t bother until Adobe fix the issues.
And, Lightroom Help with the Black enhancement is no help at all. I tell them its only creating black files on Nikon and Sony raws, and they ask me for the suffix. I tell them its .NEF and .ARW. Then they refer me to their Help article with what works in this module and what doesn’t. Quote from the article.
“This feature applies to raw mosaic files from cameras with Bayer sensors (Canon, Nikon, Sony, and others) and Fujifilm X-Trans sensors.”
Yes, I knew that from reading this review. I say this is not helping with a solution. They thank me for this information.
What a waste of time – go back to the same solution.
By the way, I am not finding that Lightroom Classic CC is slowing down – quite the opposite. And for some reason, with the current build, sending files from LIghtroom to DxO Photolab (Prime Noise Reduction) comes back quicker into Lightroom Classic CC than before. DxO Prime operating on raw files leaves other NR for dead. Files come back into Lightroom as Tiff, or DNG, your choice.
I’ve also had great hopes for the “Enhance Details” feature and been awaiting it quite impatiently. Imagine my frustration when I’ve finally updated my Adobe software yesterday (both Photoshop and Lightroom Classic CC) only to find that “Enhance Details” had a very nasty surprise waiting for me. Yes, it enhances the details allright doing a great job indeed – and saves the results in a *.dng file etc.etc. But the resulting DNG file always has from 1 to 4 most ugly coloured squares placed on the image in a random order. Some coloured squares are semi-transparent, some have more solid colour, – but the image is completely spoiled and to make any use of it, I have to re-open it once again in Capture 1 or Iridient X-Transformer, which means one more additional operation and makes the whole process quite cumbersome and inconvenient.
Sofar I’ve discovered only one small thread on the Internet discussing this phenomenon :
feedback.photoshop.com/photo…ut-squares
– and seems nobody was able to come up with solution to the problem.
The phenomenon happens both in Lightroom Classic CC 8.2 and in Photoshop 20.03.
The most disappointing thing, at least for me, is that all this only affects the Fuji’s RAF files, – while the raw files of other brands seem to be not affected.
Have anyone encountered this in their own workflow ? Thanks advising/suggesting what can be done.
I am quite unhappy with Adobe’s handling of Fuji RAFs in general – and from the very beginning.
When processing RAF files from my X-T3 the Lightroom adds disgusting worm-like artifacts to the image (visible already at 100 pct image size), what’s worse, – in the process it can make the people’s faces ugly by these “worms” as well. No such things are happening to raw files from Canon, Nikon or Sony cameras. On the other hand, no such artifacts appear when RAFs are processed with Capture One. (The latter’s interface/ergonomics are, however, not suitable for me, – also why on Earth must I ruin my usual workflow because of Adobe’s being unable to treat the RAF files properly ?)
I updated my Windows to 1809. Then the tool became available to me. I ran the tool several times on Nikon D850 RAW files. All I get is a completely black output. Any help would be appreciated. Thanks
Hi Nasim,
I am running LR Classic on an older iMac and the Enhance process seems to be working ok, with both Nikon RAW files from a D800 and Sony RAWfiles from an A7r2.
However after the process has occurred, I can see no noticeable improvement in the DNG file and the file size remains the same.
I assume nothing is happening during the Enhance process.
Has anyone else noticed this happening?
Regards, John Taylor
Adobe can go kick rocks. DXO PhotoLab Elite and Affinity photo do everything I need for my PP work.
As much as they say it has nothing to do with the XTrans file issues in LR, I can’t help but think it is simply a work-around to correct how poorly Fuji .RAF files are handled by Camera Raw. Yes there is a VERY insignificant change to color and sharpening with the Bayer sensor files, but the change with an XTrans file is major! The current marketing allows for a work-around to the XTrans issue without admitting Iridient produced a solution (xTransformer) years ago and Adobe just now recognized how many Fuji shooters have moved on to Capture One.