When editing a photograph in Lightroom, it is often useful to compare what the image looked like when you started out (the “Before”), to the changes you have made so far (the “After”). This way, you can keep track of your edits and understand how the different sliders and check marks within Lightroom affect your image. Thankfully, Adobe made it easy to switch between the Before and After screens and provided a number of different ways to view both vertical and horizontal images in a single window. Let’s take a look at this great feature in detail.
First of all, it is important to point out that the Before and After feature is only available to use in the Develop module. Therefore, you will need to select an image you want to edit, then get into the Develop module by pressing the “D” button on your keyboard (or clicking the “Develop” link on the top module selection area) in order to be able to use the “Before / After” feature in Lightroom. Second, the “Before / After” feature will show all adjustments to the image from every sub-module within the Develop module, except for the “Crop & Straighten” tool. This makes sense, since it would not be a good idea to compare images that do not have the same level of cropping or straightening. Third, it is possible to swap the “Before” state with any of the steps in the “History” panel, as explained below. And lastly, the “Before / After” feature is only meant to be used temporarily as a visual guide – it does not impact images that you have already edited in any way, and if you export an image in its “Before” state, you will still end up exporting the edited image instead.
We will get started by looking at the “Before and After” of the following image in Lightroom:
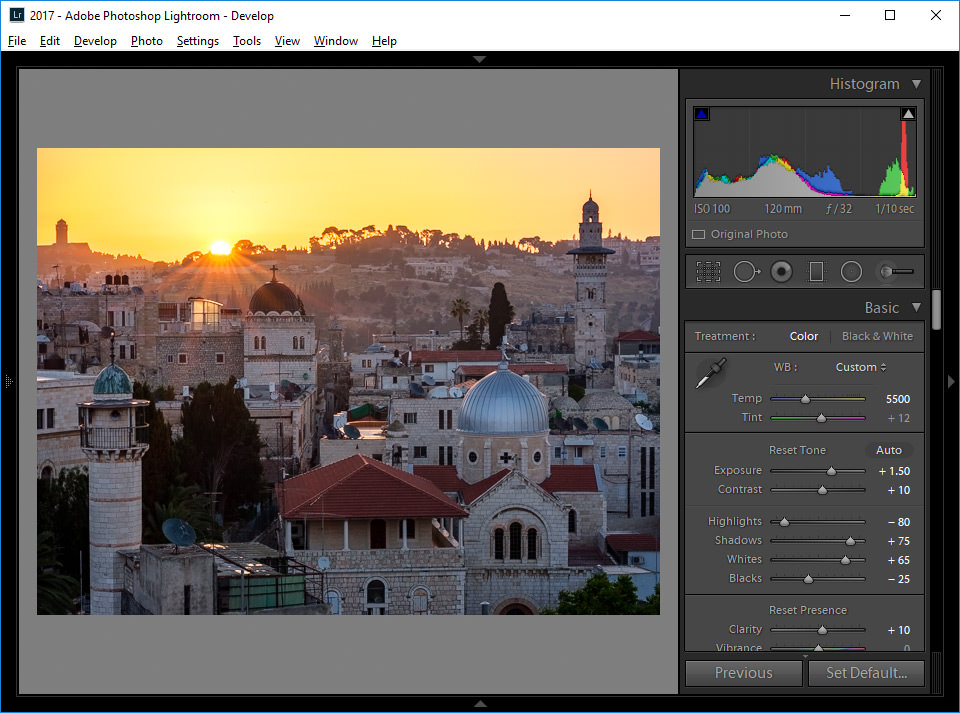
Table of Contents
Before Only
When editing images, I often like looking at the full image and comparing my changes to the original. This simple feature is called “Before Only” and it is something you can access very quickly by pressing the “\” button on your keyboard. You can also access the same feature by visiting “View -> Before / After -> Before Only”, but trust me, it is so much quicker to do it with the “\” keyboard shortcut (yes, you should definitely memorize this one!) As soon as you press the shortcut, the image will switch to its original state and you will see the word “Before” on the top right side of the image area:
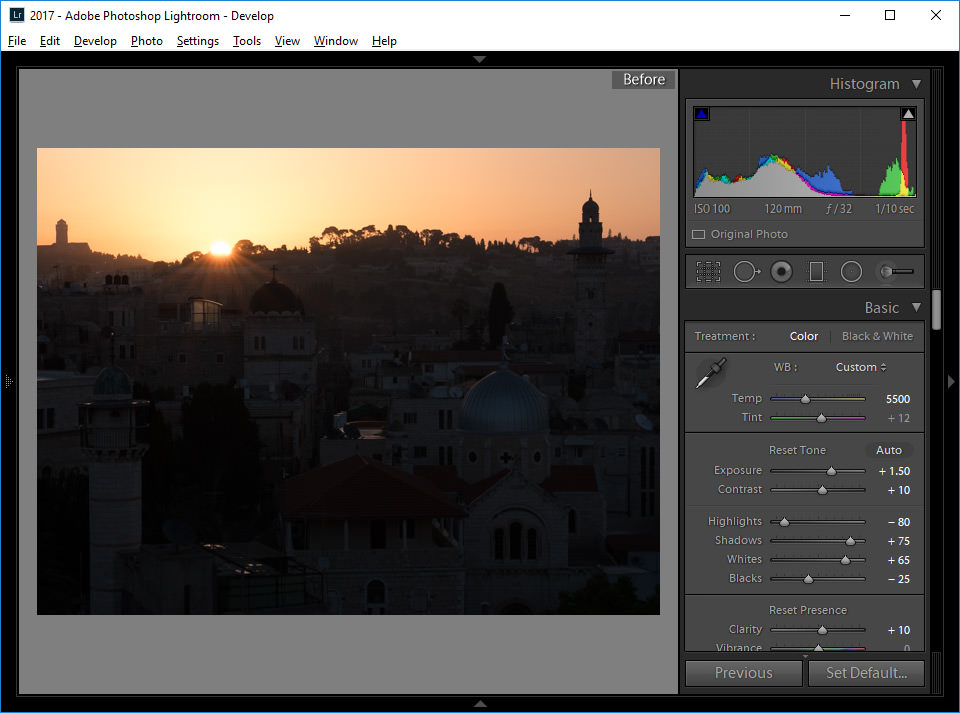
As you can see, the image looks completely different – those exposure, contrast, highlights, shadows, whites and blacks sliders, along with all other adjustments in Lightroom made a huge difference in the way the image appears now compared to what it used to be in its original RAW state.
I personally like the “Before Only” mode primarily because I get to see the whole image. However, there are cases where it is useful to see the “Before and After” side by side.
Left / Right
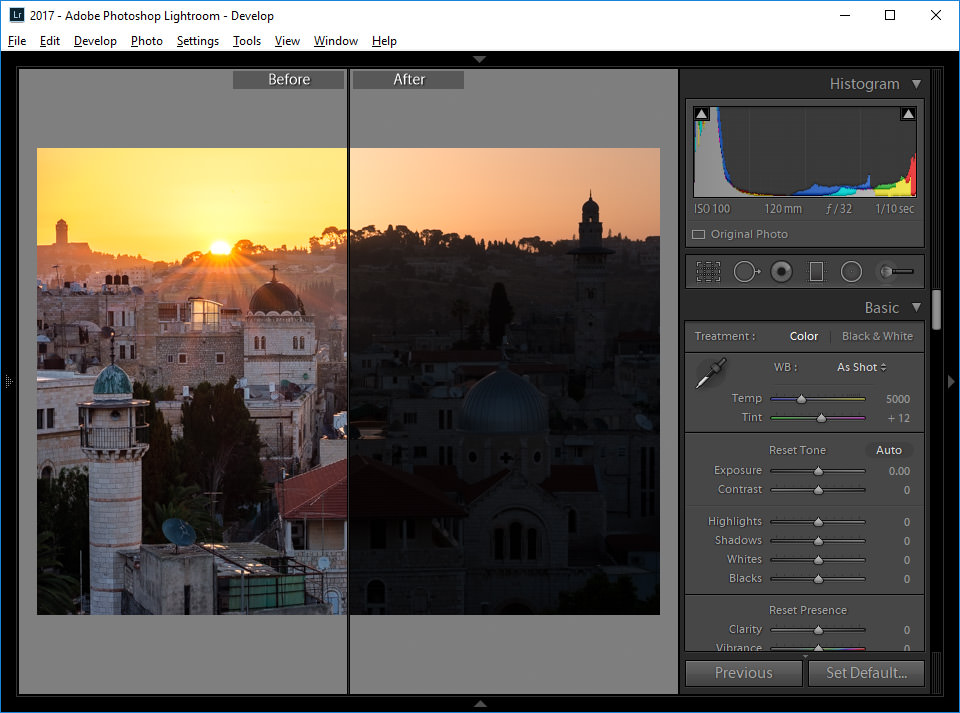
If you want to see the “Before and After” side by side, you have a couple of great options. The first one is “Left / Right”, which shows the “Before” image on the left, and the “After” image on the right side of the screen, as shown below:
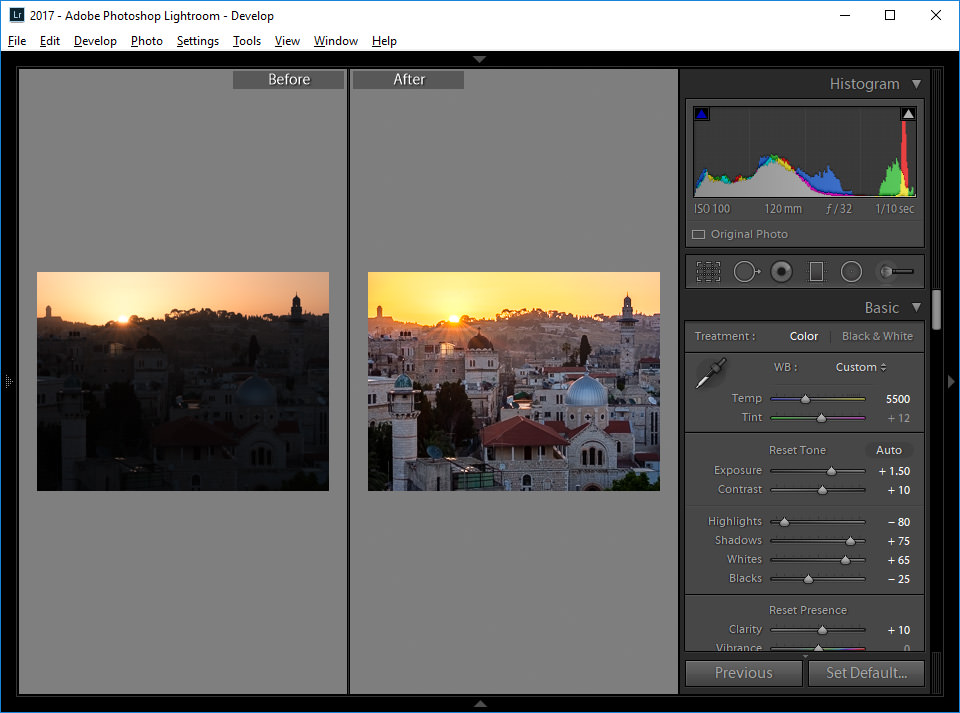
To jump to this view, simply press the “Y” key on your keyboard or navigate to “View -> Before / After -> Left / Right” (pressing the “Y” button again will get you back to the edited image). While this can be a very useful way to see images, the biggest issue with this particular option is that it splits the screen into two small vertical areas, making horizontal images appear too small and creating a lot of empty space on the top and bottom sides of the screen. That’s because “Left / Right” is made primarily for viewing vertical images! Let’s take a look at the same thing but this time change to a vertical image:

As you can see, “Left / Right” looks far better when a vertical image is used. You can see more of the image and there is far less wasted space in this view.
However, this does not mean that “Left / Right” should only be used with verticals – there is another option that can make side-by-side comparisons of horizontal images pretty useful. It is called “Split Screen”.
Split Screen
If we jump back to the same horizontal image we used earlier, then open up the “Left / Right” comparison again, then press “SHIFT + Y” on the keyboard or navigate to “View -> Before / After -> Split Screen”, we will see that the image is now divided into two equal halves – the left side is showing the “Before” and the right side is showing the “After”:
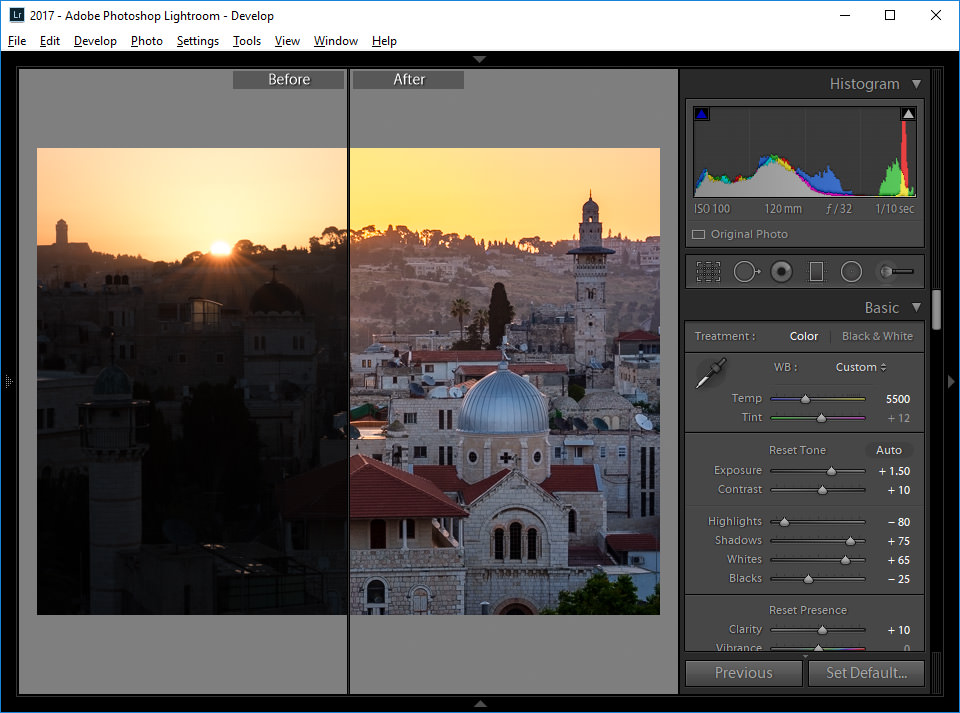
This can be a great way to see changes to the image without seeing two separate images, as half of the image is split showing the Before and After.
But what if there is something very important on the left side of the screen that you want to see as “After”? Don’t worry, there is a quick way to fix that! All you have to do is press the crazy “CTRL + ALT + SHIFT + UP” (“CMD + OPTION + SHIFT + UP” on Mac) key combination (or visit “Settings -> Swap Before and After Settings”) and the two will be swapped:
Keep in mind though, you are actually physically reversing your image settings! As you can see on the right side of the image, all the sliders have been reset back to their defaults. If I were to export the image in this state, it would export it as the original RAW file without any of my edits. So if you ever do swap the “Before and After”, don’t forget to change it right back by using the same keyboard combination, or you will end up with the unedited image.
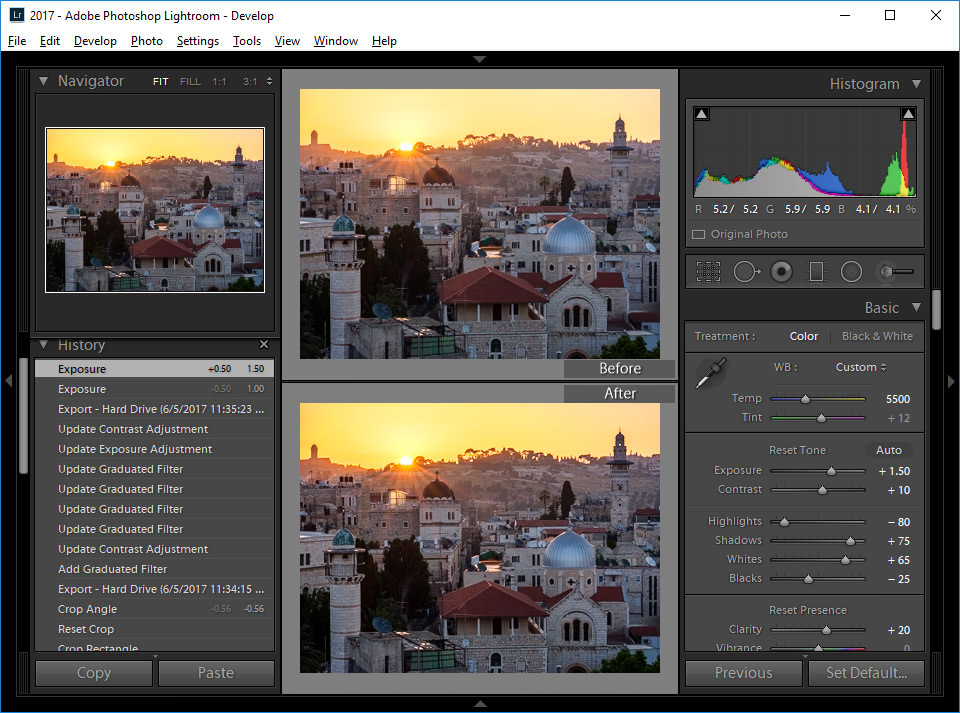
Top / Bottom
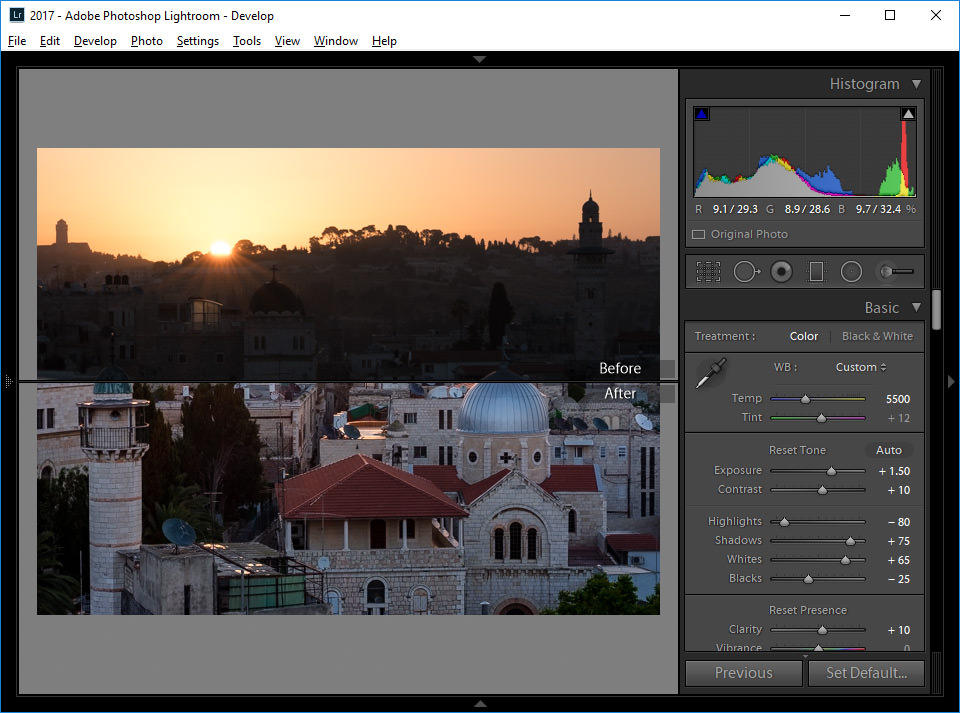
The last option is to be able to see images side by side, from top to bottom. Before we go there, press “SHIFT + Y” to disable Split Screen first, then press the “ALT + Y” (“OPTION + Y” on Mac) or visit “View -> Before / After -> Top / Bottom” to enable the “Top / Bottom” view:
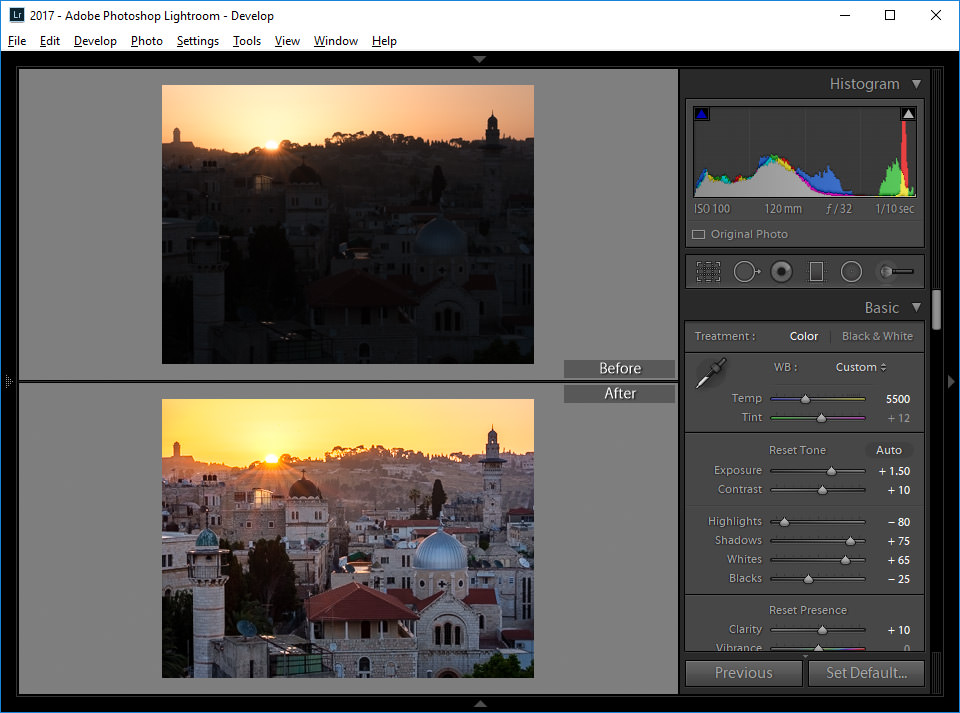
As you can see, this particular “Before and After” view is more useful for horizontals than verticals. If you remember the “Y” and “ALT (OPTION on Mac) + Y” keyboard shortcuts, you will be able to easily swap between “Left / Right” and “Top / Bottom” screens depending on whether you are working on a vertical or a horizontal image. And you guessed it – if you press “SHIFT + Y” to enable Split Screen, the same behavior of splitting the image, but this time horizontally, will apply:
That’s a lot of ways to see the “Before and After”!
Changing the “Before” State
The cool thing about this, or any other screen that shows the “Before” state, is that you can apply any step in the History panel to it. This way, if you want to compare your “After” edits to perhaps some change that you have made in the middle, you can do that without having to always look at the “Import” state. The way you change the “Before” state is by expanding the left panel, navigating to a particular step in the “History” panel, then dragging and dropping that state to the “Before” area of the screen:
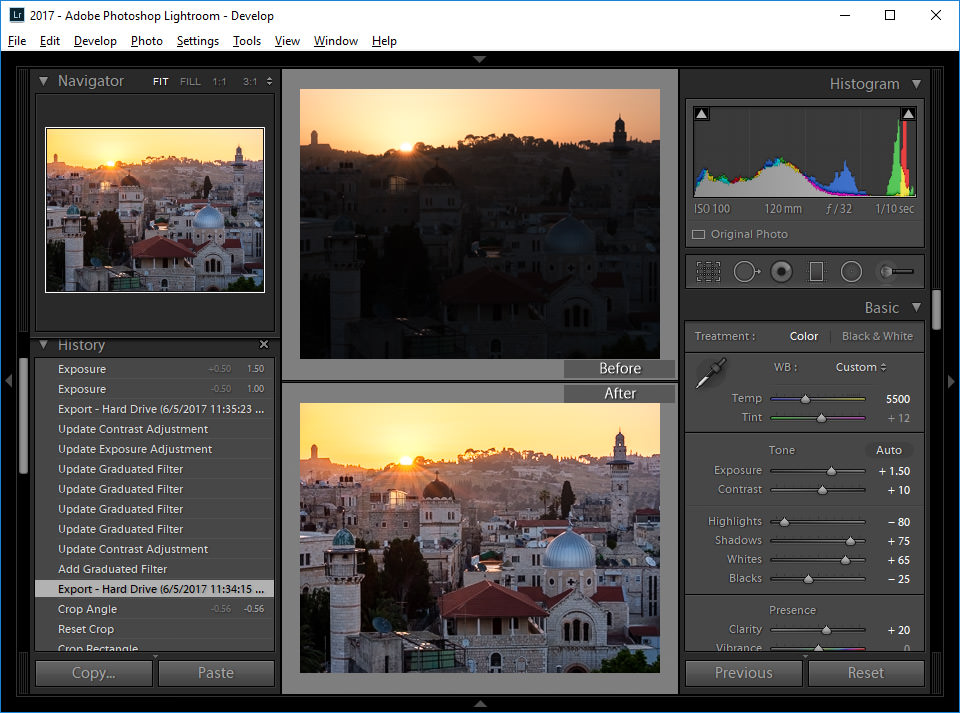
After that, the “Before” state will change to the step I dragged into it:
That’s all there is to it!
As you can see, the “Before and After” feature of Lightroom is quite powerful. Don’t forget to take advantage of this useful tool while editing, as it could save you some frustration when comparing your edits. If you have any feedback or questions, please let me know in the comments section below!
As this site is really technically punctual, I would ask whether anyone has the issue of before preview being altered.
I noticed that on several occasions, and finally I tried to go back to step zero, before anything is edited, and than, when turning to b/a preview, I can clearly see that before is actually different, and there is no way to reconstruct that exact view. Altering before and after beings funny results: both previews remain unchanged, i.e. what was once after looks as before, and what was before looks as after, though reversing should.change look of previews.
My only conclusion is that before and after previews have different engines, and that’s simply wrong.
Is there any to export before and after in a single image?
Thank you, Nasim! This is real magic, can’t wait to try it. Only Lightroom tool can do this? On one forum I’ve seen the tool letsenhance.io/ – AI, neural networks and other super smart stuff, interesting to try.
Great article, Nasim. It reminded me of the one of the (usually forgotten) little jewels that LR features. Especially useful the tip about changing the Before state. Thank you!
I also use a Photolemur plugin for Lightroom: photolemur.com/windows
Dear Nasim
It seems that Adobe is finally trying to resolve the annoying Lightroom speed issues:
theblog.adobe.com/on-li…rformance/
In Photoshop Elements there an Enhance drop down with Auto Smart Tone being the first choice. The program then offers four possible options. How is LIghtroom a better option?
First of thank you very much for the article Nasim ! Could somebody please explain me why the ” \ ” never ever worked for me .. I’ve been using lightroom for over 3 years now .. And with both my computer. Desktop pc and surface 4 it never worked. I’ve been dying to be able to see a real before and after in lightroom instead I am still stuck with the “left / right” . I tried changing my keyboards options to english US and different others.. Since i’m french canadian …never worked. Why wouldnt it work for me ?
Hi Andre,
I have the same problem as I live in Spain and have a Spanish keyboard connected to my computer. It affects PS as well so that the keyboard short cuts suggested in presumable USA web sites, don’t work on mine.
The way around it is to find where the symbol lies on your own computer. For example, to view before/after on mine, I need to press Alt + the key to the left of number 1, where the \ stroke lies.
Using the square brackets in PS to adjust the brush parameters just doesn’t seem to work on my Mac here, but I have found out that by holding down together Shift + Ctrl + Alt and at the same time hold clicking and moving my mouse from side to side and up and down, I am able to adjust the brush diameter and hardness very easily.
I hope this will be of help.
Thank you very much Bernard i’ll try to find the shortcut !
Very good professor. You make it seem simple as any good professor does.
Thank you for that.
Excellent article Nasim! A question: I frequently see ‘snapshots’ of before/afters in articles/blogs. Is this dones by taking a snippet of the LR window? Thanks!