Sunset photography is wildly popular, and for good reason. The unique quality of light at the end of the day can give landscape photos an emotional impact that’s difficult to capture any other way. Below, I’ll dive into my favorite tips for sunset photography for both beginners and advanced photographers.
Table of Contents
1. Expose to Keep Details in the Highlights
The first tip I’ll emphasize is how important it is to preserve highlight detail when photographing sunsets. Often, there’s a huge range of tones between the highlights and shadows at sunset, particularly if the sun is in your frame. It can be difficult to know how to expose your photo, and the camera’s meter may not be any help at all. (They sometimes suggest wildly dark or bright exposures in tricky light like this.)
My recommendation is to watch the brightest highlights in your photo and make sure they don’t turn completely white. The only exception is if the sun itself is in your frame, at which point it’s all right if the central area of the sun blows out – though try to prevent the area around it from doing so.
The reason for this recommendation is that blown-out highlights are almost impossible to recover if you’re shooting with a digital system, whereas seemingly pitch-black shadows almost always have some usable dynamic range left.
This may require some negative exposure compensation, as well as reviewing your photos in the field and checking their blinkies or histogram for overexposure. It may also entail switching to manual mode if the meter is behaving erratically in aperture-priority.
2. Keep an Eye on Your UV Filter
If you’re using a UV filter on your lens (AKA a clear filter, haze filter, or protective filter), you’ll need to remain cautious about getting any excess flare in your sunset photos. When the sun is in or near your frame, UV filters often add some reflections that make their way into your photo. This can be anything from an obvious “blob” of flare to a more subtle reduction in contrast across the image.
While this is unlikely to happen with higher-end UV filters, the reality is that many photographers are shooting with lower-end UV filters even if they don’t realize it. I’m not a fan of this type of filter for my own photography, but if you like UVs, I won’t tell you to throw them away. However, you may need to remember to remove them at sunset, or you risk getting more flare in your shots.
3. Get a “Sunstar” Effect with a Narrow Aperture
One of my favorite effects in landscape photography is when the sun is a sharp, multi-pointed star that draws attention and just looks cool. I’m referring to something like this:
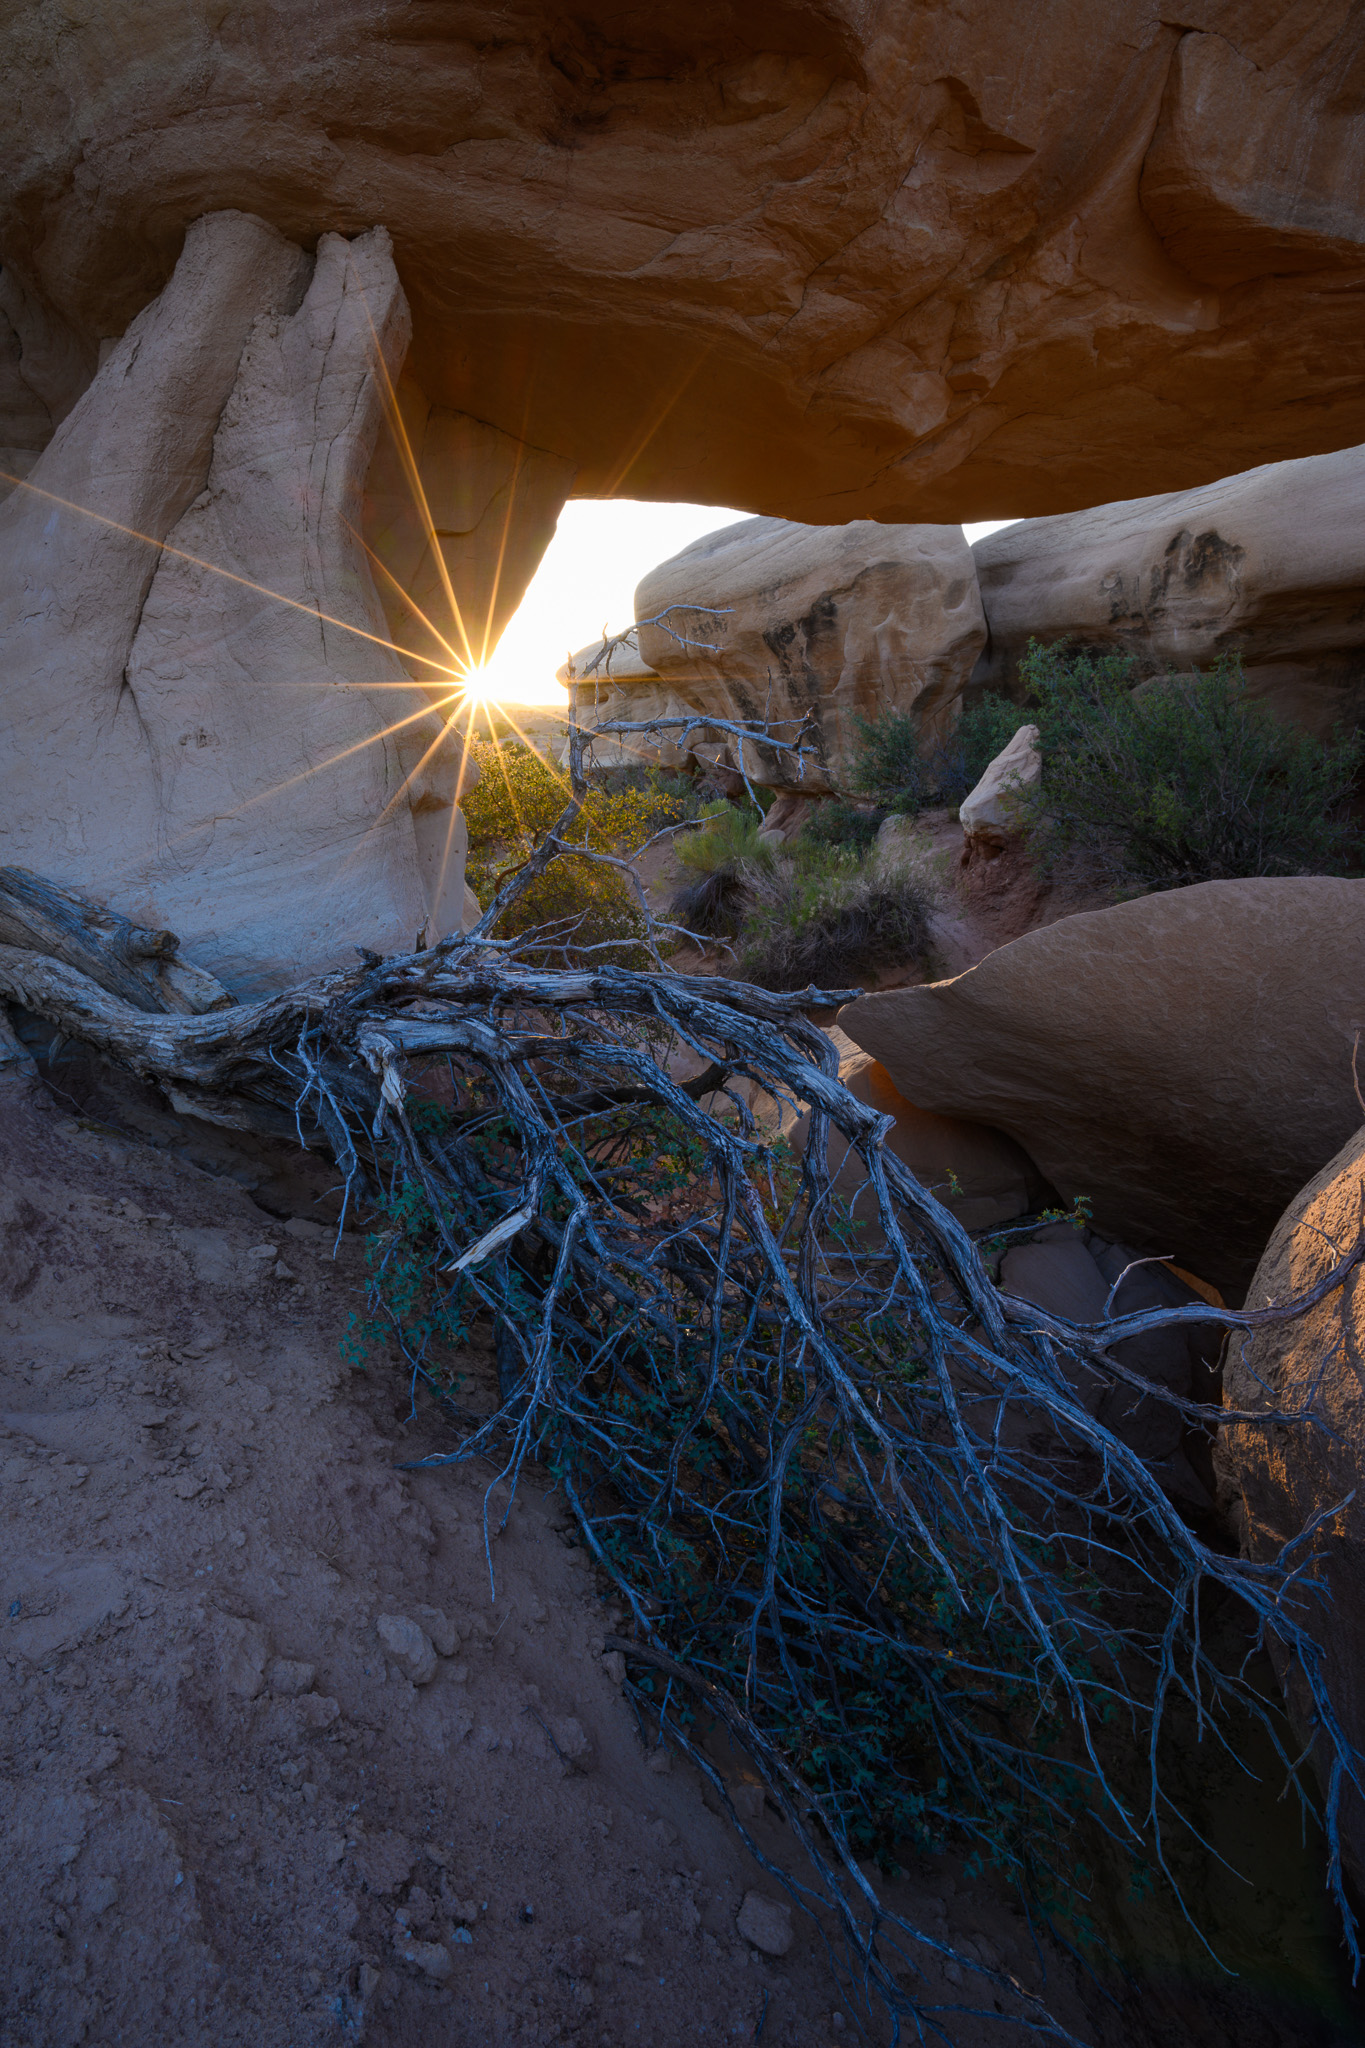
While that may seem like a Photoshop effect, it’s not. Instead, that effect (known as a “sunstar,” “starburst,” or “sunburst”) is due to the way a bright point of light interacts with the aperture blades in your lens. Not all lenses have such a dramatic sunstar effect, but you can get at least some effect on most lenses out there.
The key is that your source of light needs to be as small and bright as possible. In the case of sunset photography, that means waiting until the sun dips partly below the horizon, or is otherwise partway blocked by an object in your composition. Then, use a narrow aperture on your lens: f/11 at least, and ideally f/16 or even f/22. Yes, these apertures have less sharpness due to diffraction, but they also have a more defined sunstar – so you need to balance that tradeoff. I tend to use f/16 when I need a sunstar like that.
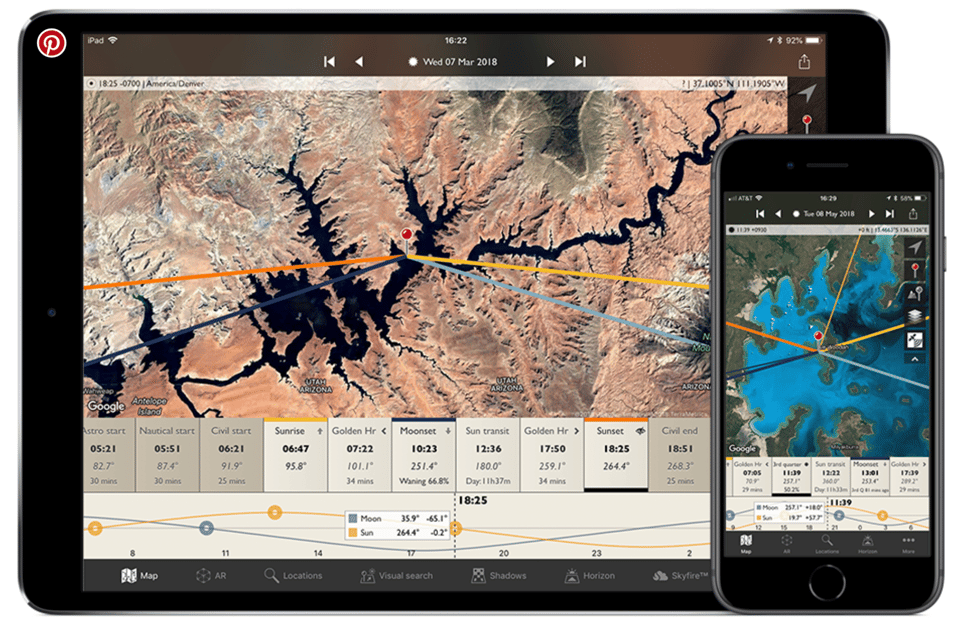
4. Pre-Visualize Using Apps
We photographers these days have it so easy! Rather than consulting topo maps and compass directions to figure out where the sun is going to be, we can pre-visualize any sunset using dedicated apps.
Some of these are augmented reality (AR) apps that trace the path of the sun through the landscape in front of you, using your phone’s camera. Others are desktop apps that you can consult ahead of time to see a rendered view of a landscape with topological data and the sun’s path at any time of year.
Both types are excellent tools to help you figure out a good sunset spot, or even go so far as to plan out your composition ahead of time if you’re that type of photographer. It may not matter much if it’s a location you’re familiar with (see the next tip below) but if you have limited time or are traveling, apps like this make things a lot easier.
We aren’t affiliated with any apps here at Photography Life, but two that I like for my personal photography are The Photographer’s Ephemeris and Photopills. There are many similar tools available and I encourage you to try some out to find one that works well for you. Most of them have features that look something like this:
5. Return to the Same Location
As nice as it can be to scout places ahead of time with modern technology, nothing beats visiting a landscape in person. Because sunsets are cyclical in nature, you can revisit the same location multiple times – even with a similar composition – and wait for an evening when the sunset is the best.
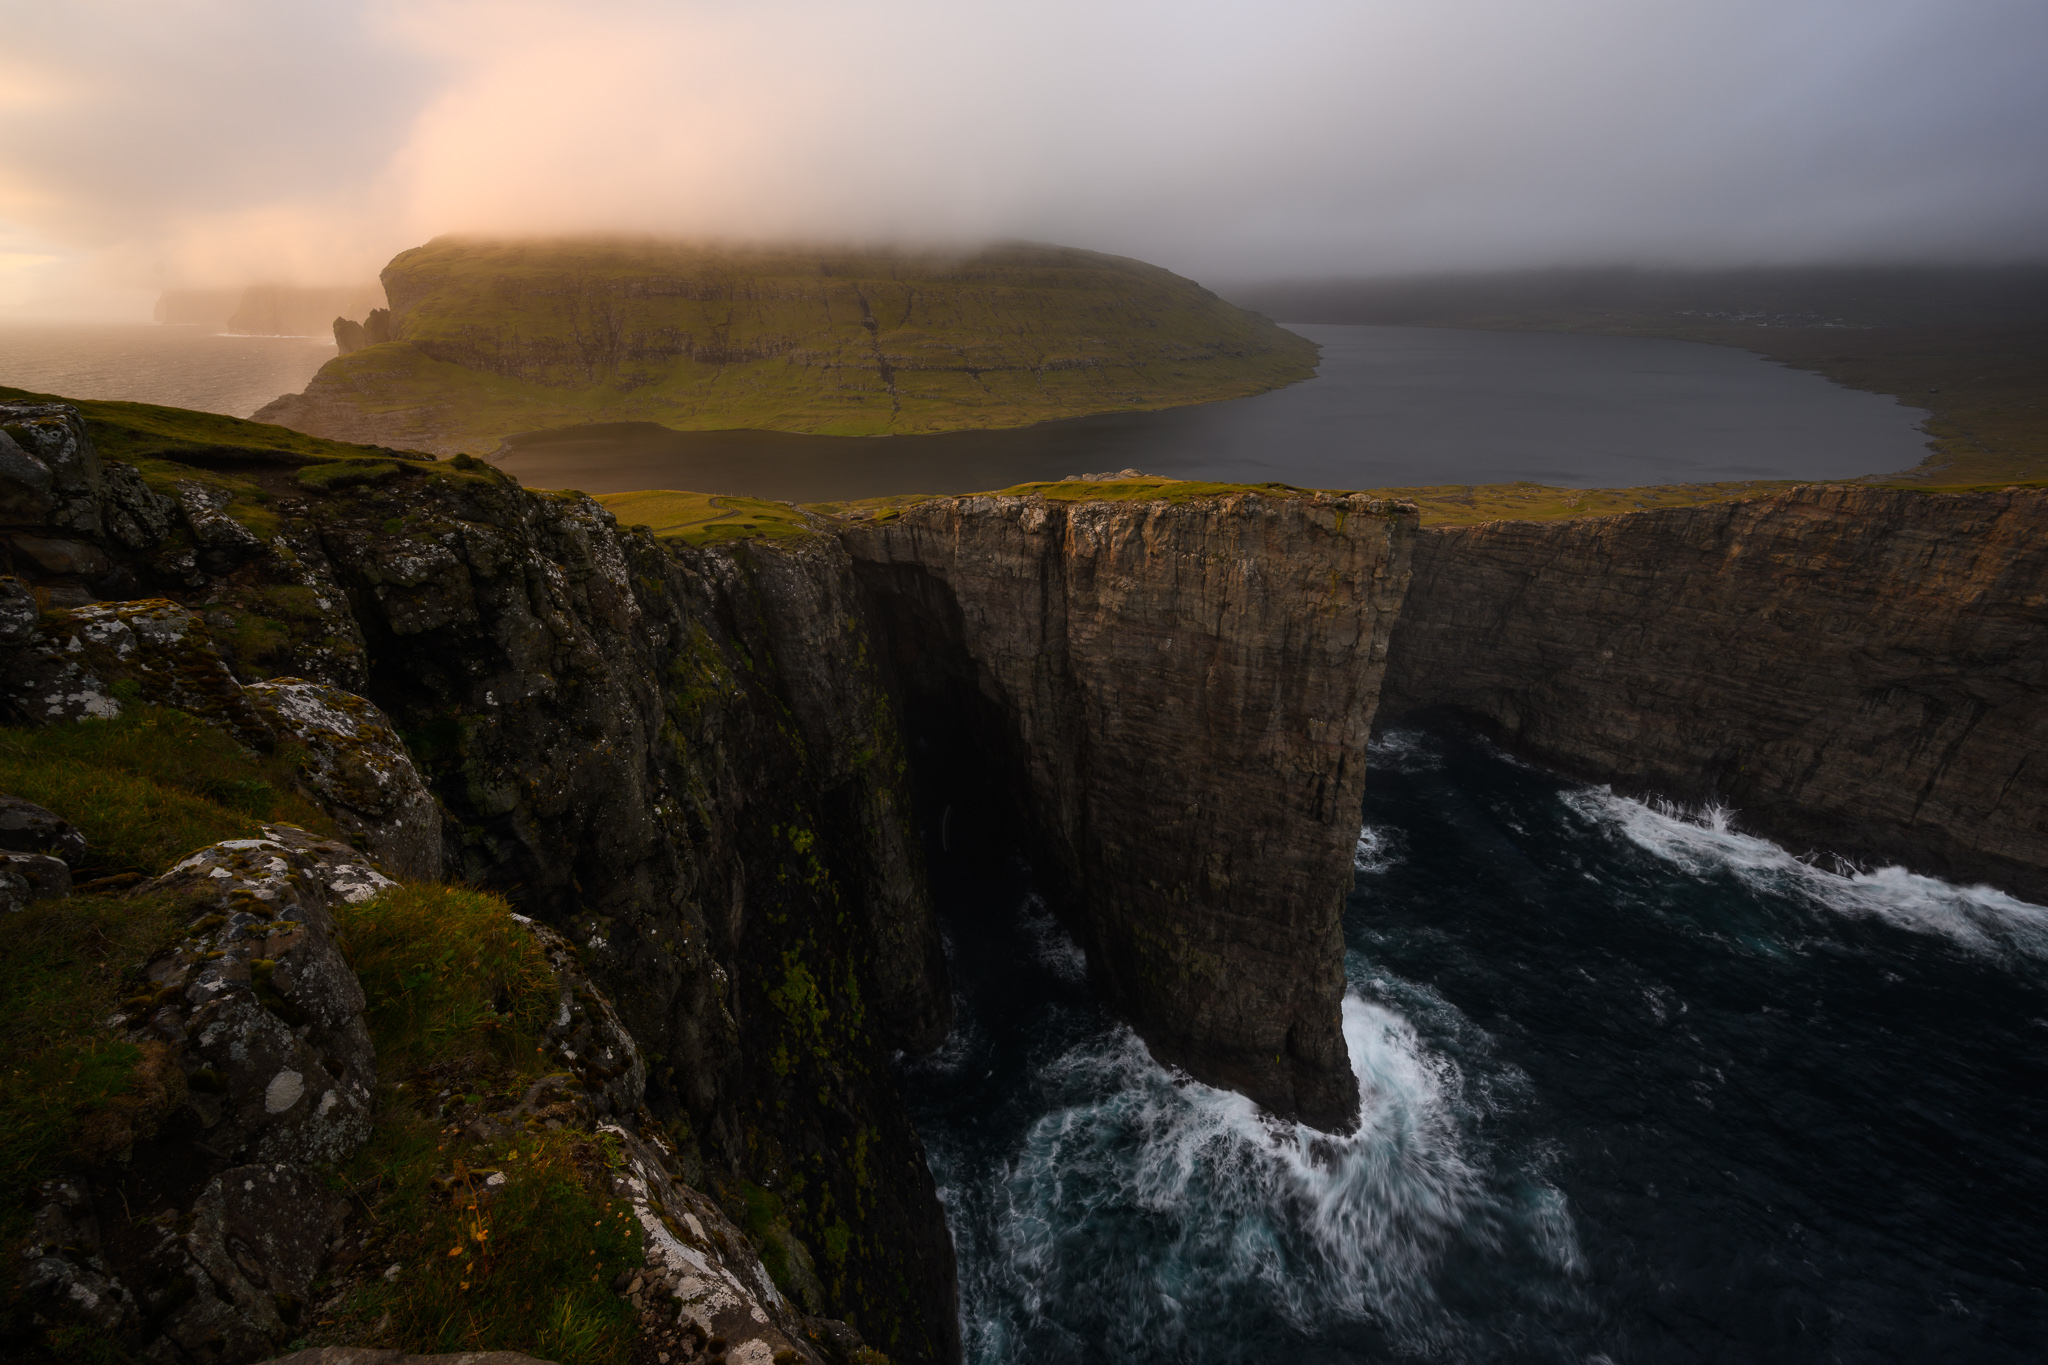
That’s what I did on a trip to the Faroe Islands a couple years ago. It was rainy during almost the entire trip, and a lot of my planned sunset photoshoots turned into impromptu “blue hour” photoshoots because the sunset itself was so dreary.
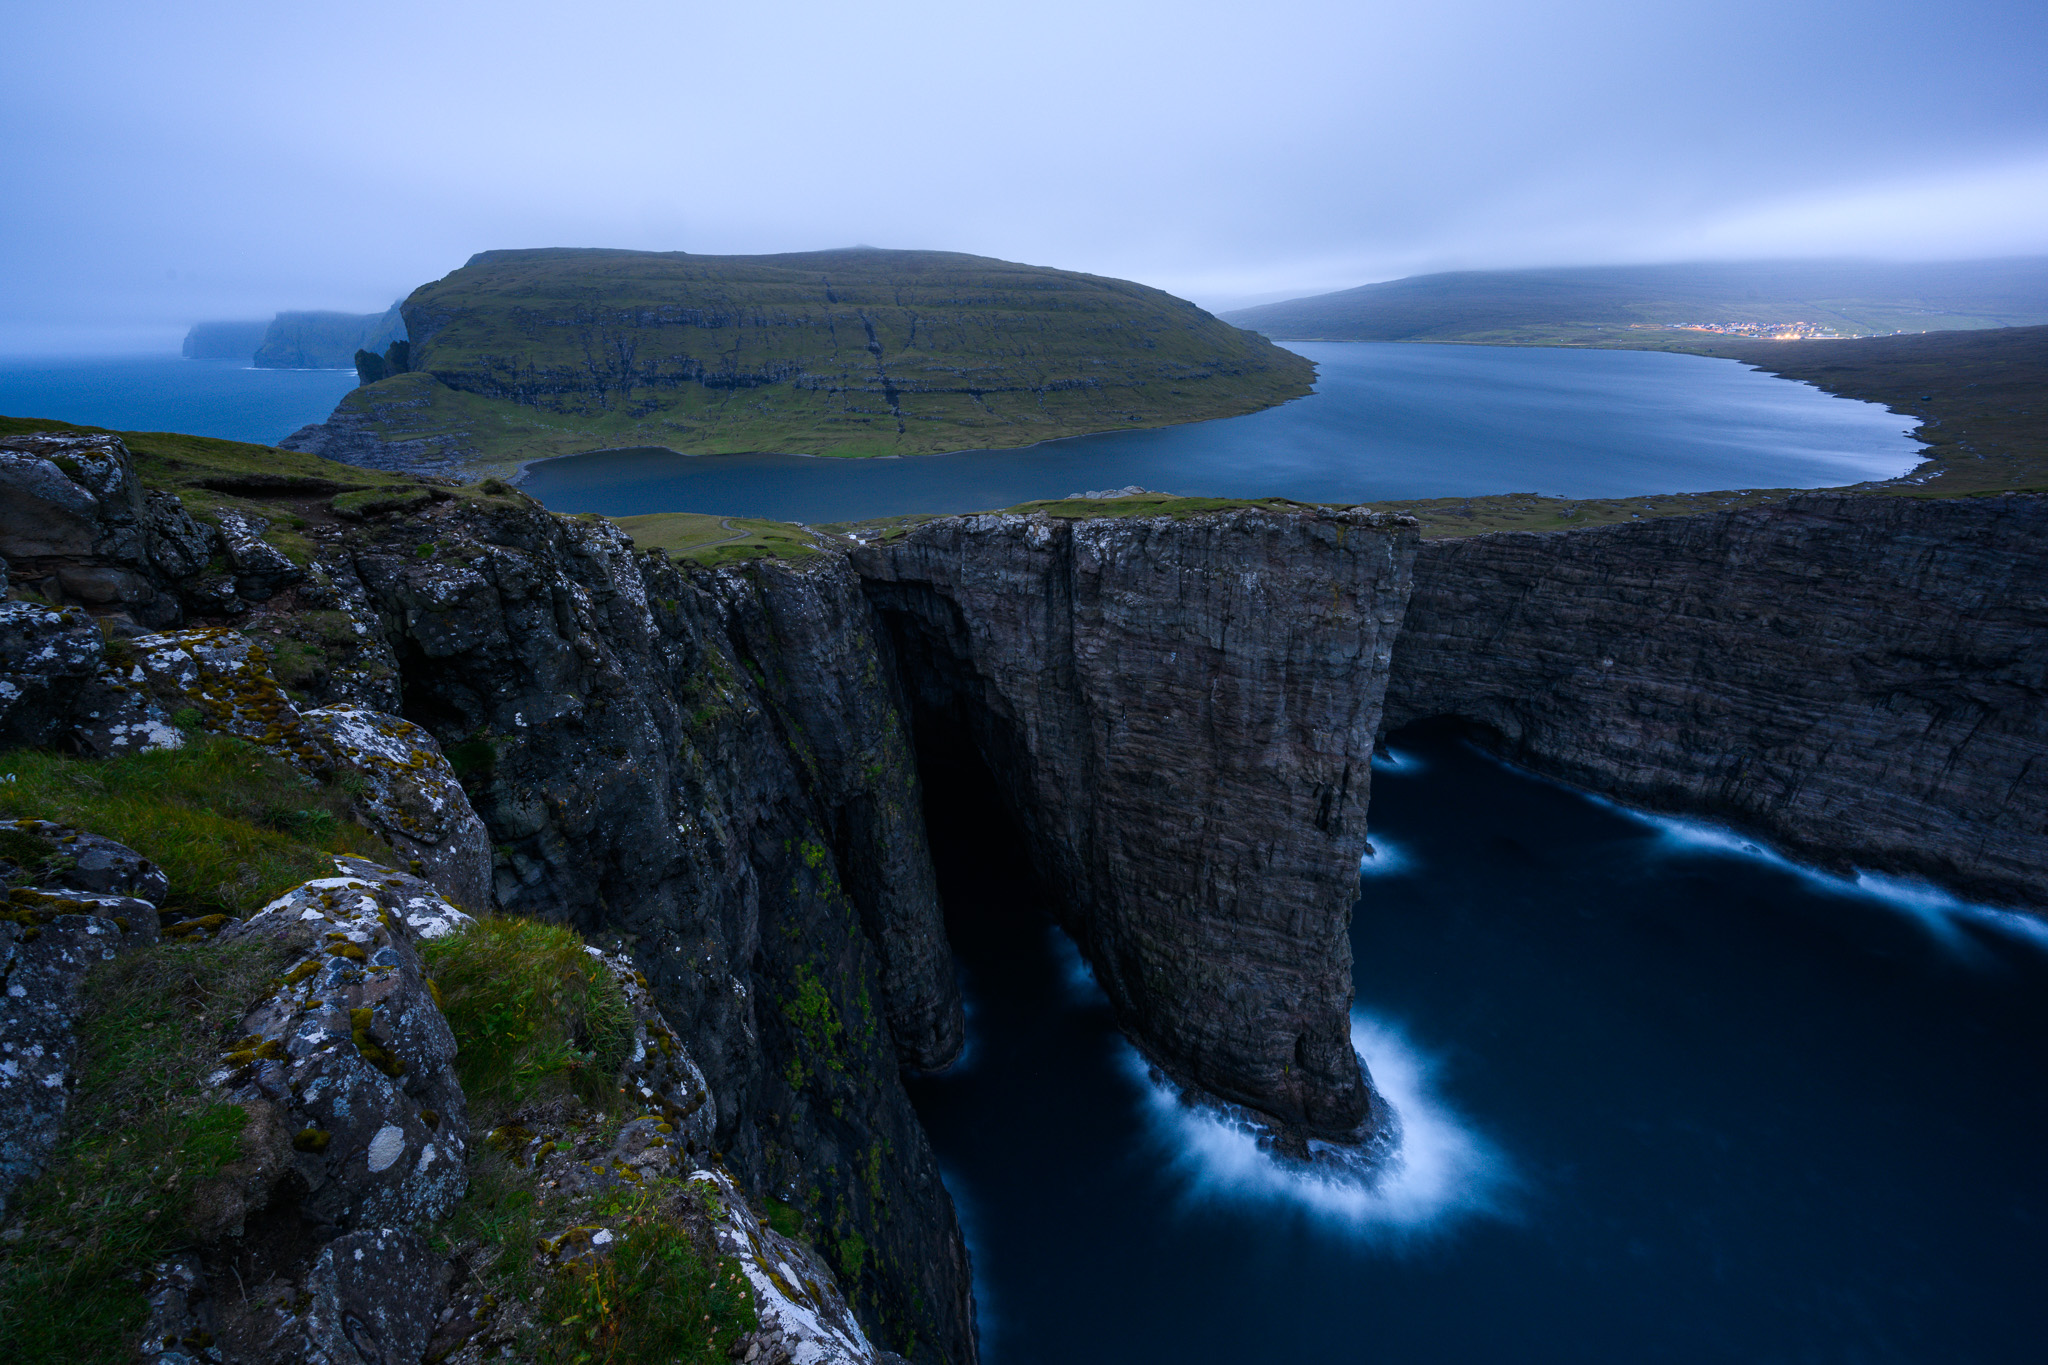
I like the composition above and don’t hate the moody blue lighting, but I felt that a golden sunset would look better and kept thinking about this shot throughout the trip. On the day before I returned home, the sky seemed to have some sunset potential, so I had to make a decision about which location to go. I decided to re-visit this spot and try to capture the image I had in mind the first time. I think the shot that resulted is an improvement:
The more times you visit a particular location for sunset, the better conditions you’ll see and hopefully the better photos you’ll take. Familiarity with a location goes a long way in landscape photography, even if you’re not trying to copy your old compositions but merely getting a sense of how the light interacts with the land.
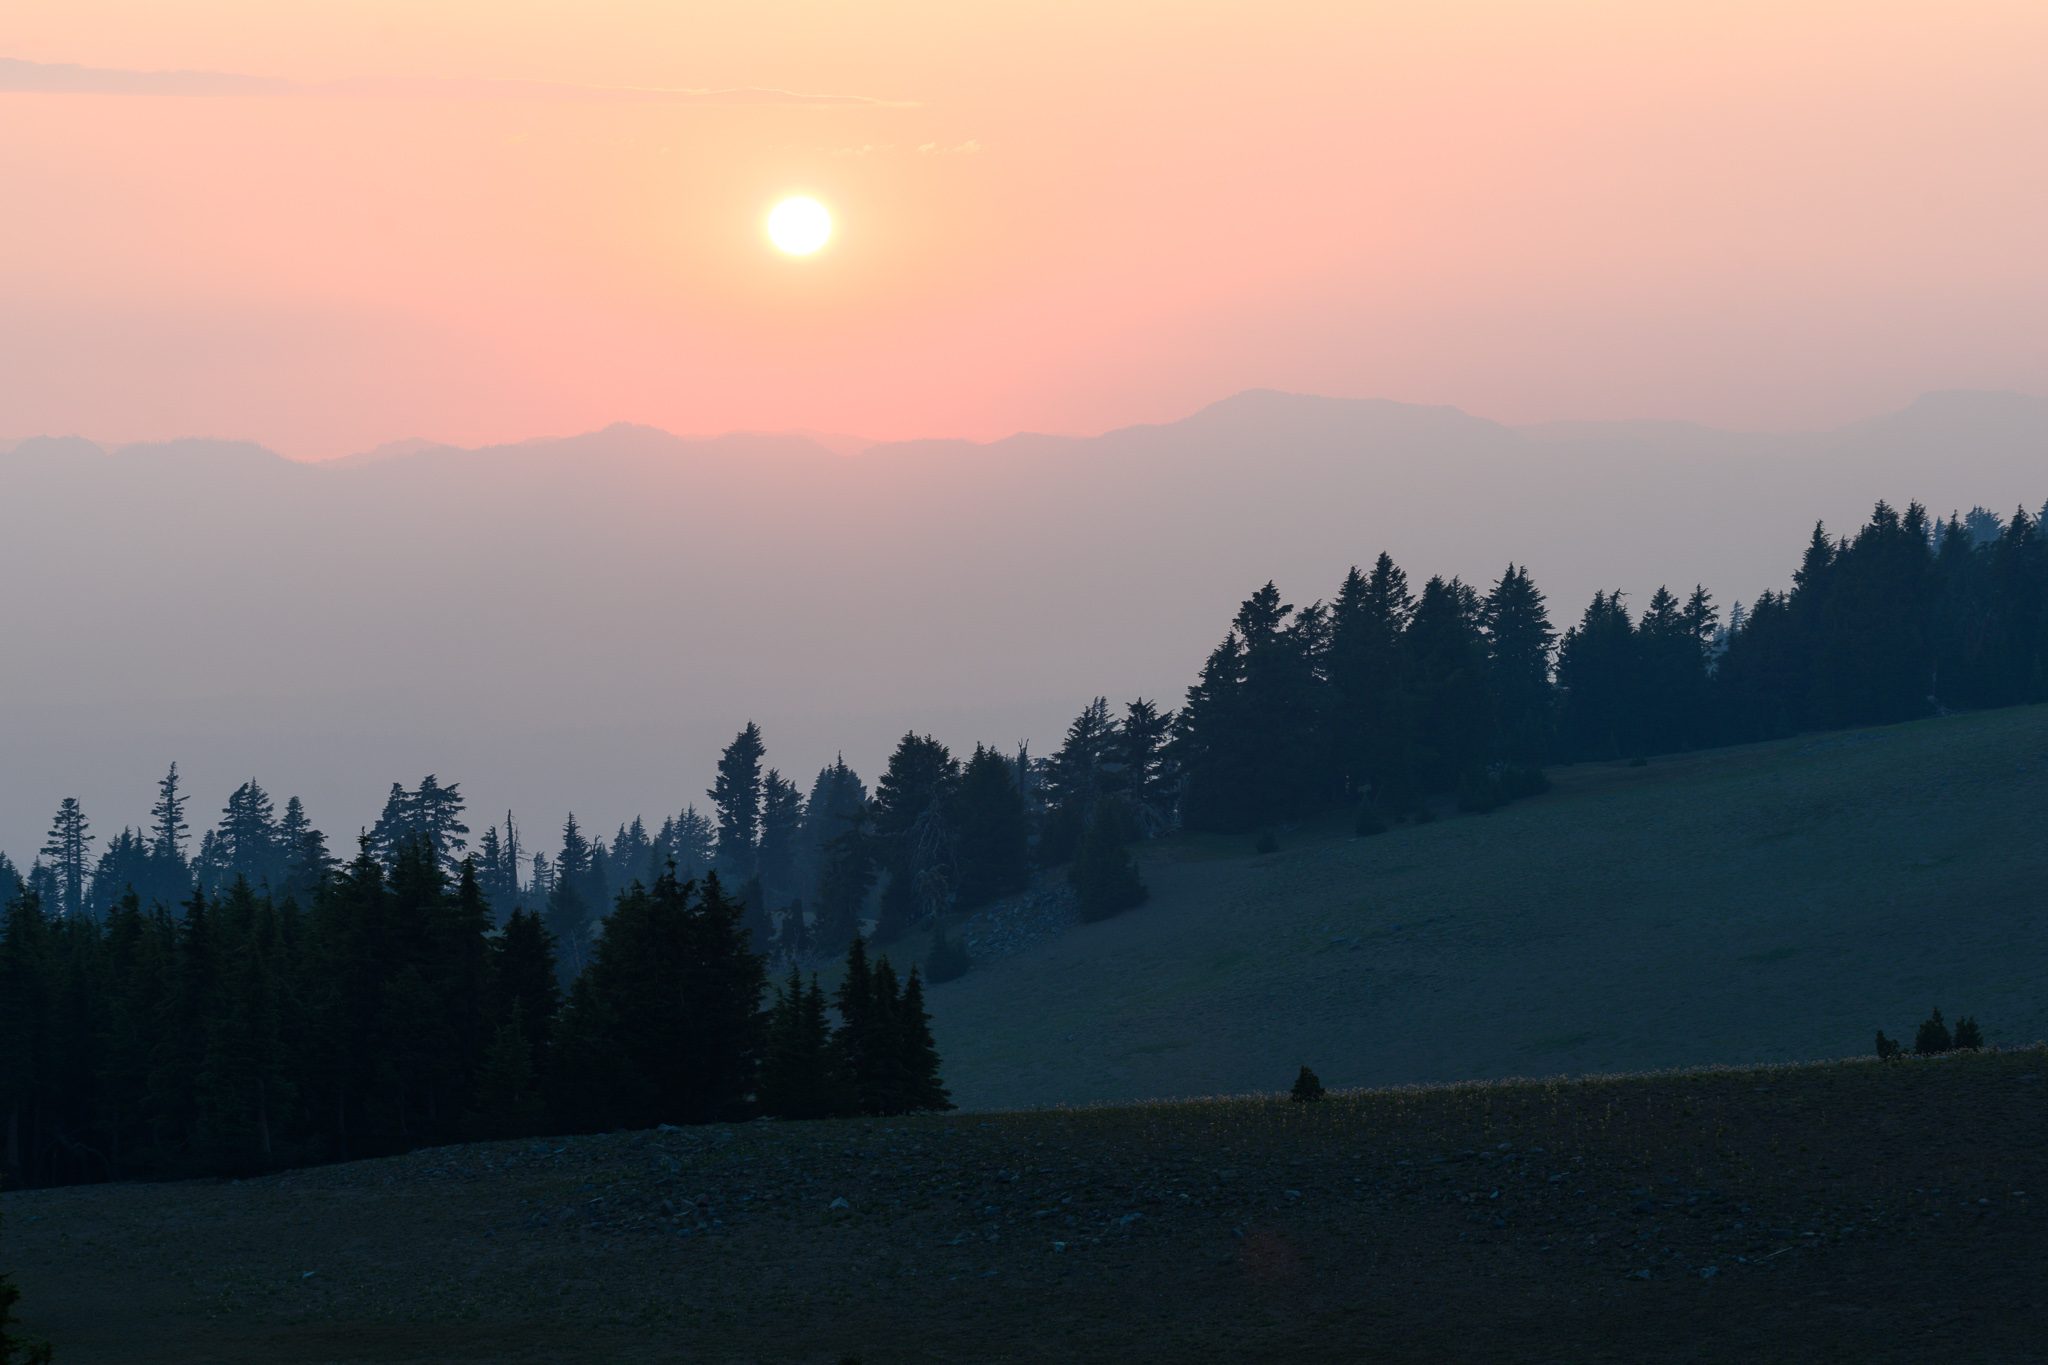
6. Get There Early
It’s easy to fall into the trap of thinking that “golden hour” lasts about an hour or so. The truth is that you can get sunset-eque lighting even a few hours before sunset, depending on the location and the conditions when you’re taking pictures.
I recently did some photography at a mountain lake in Colorado, and I showed up a couple hours before sunset just to soak in the atmosphere. When I arrived, the light was already amazing, with great colors in the sky and landscape.
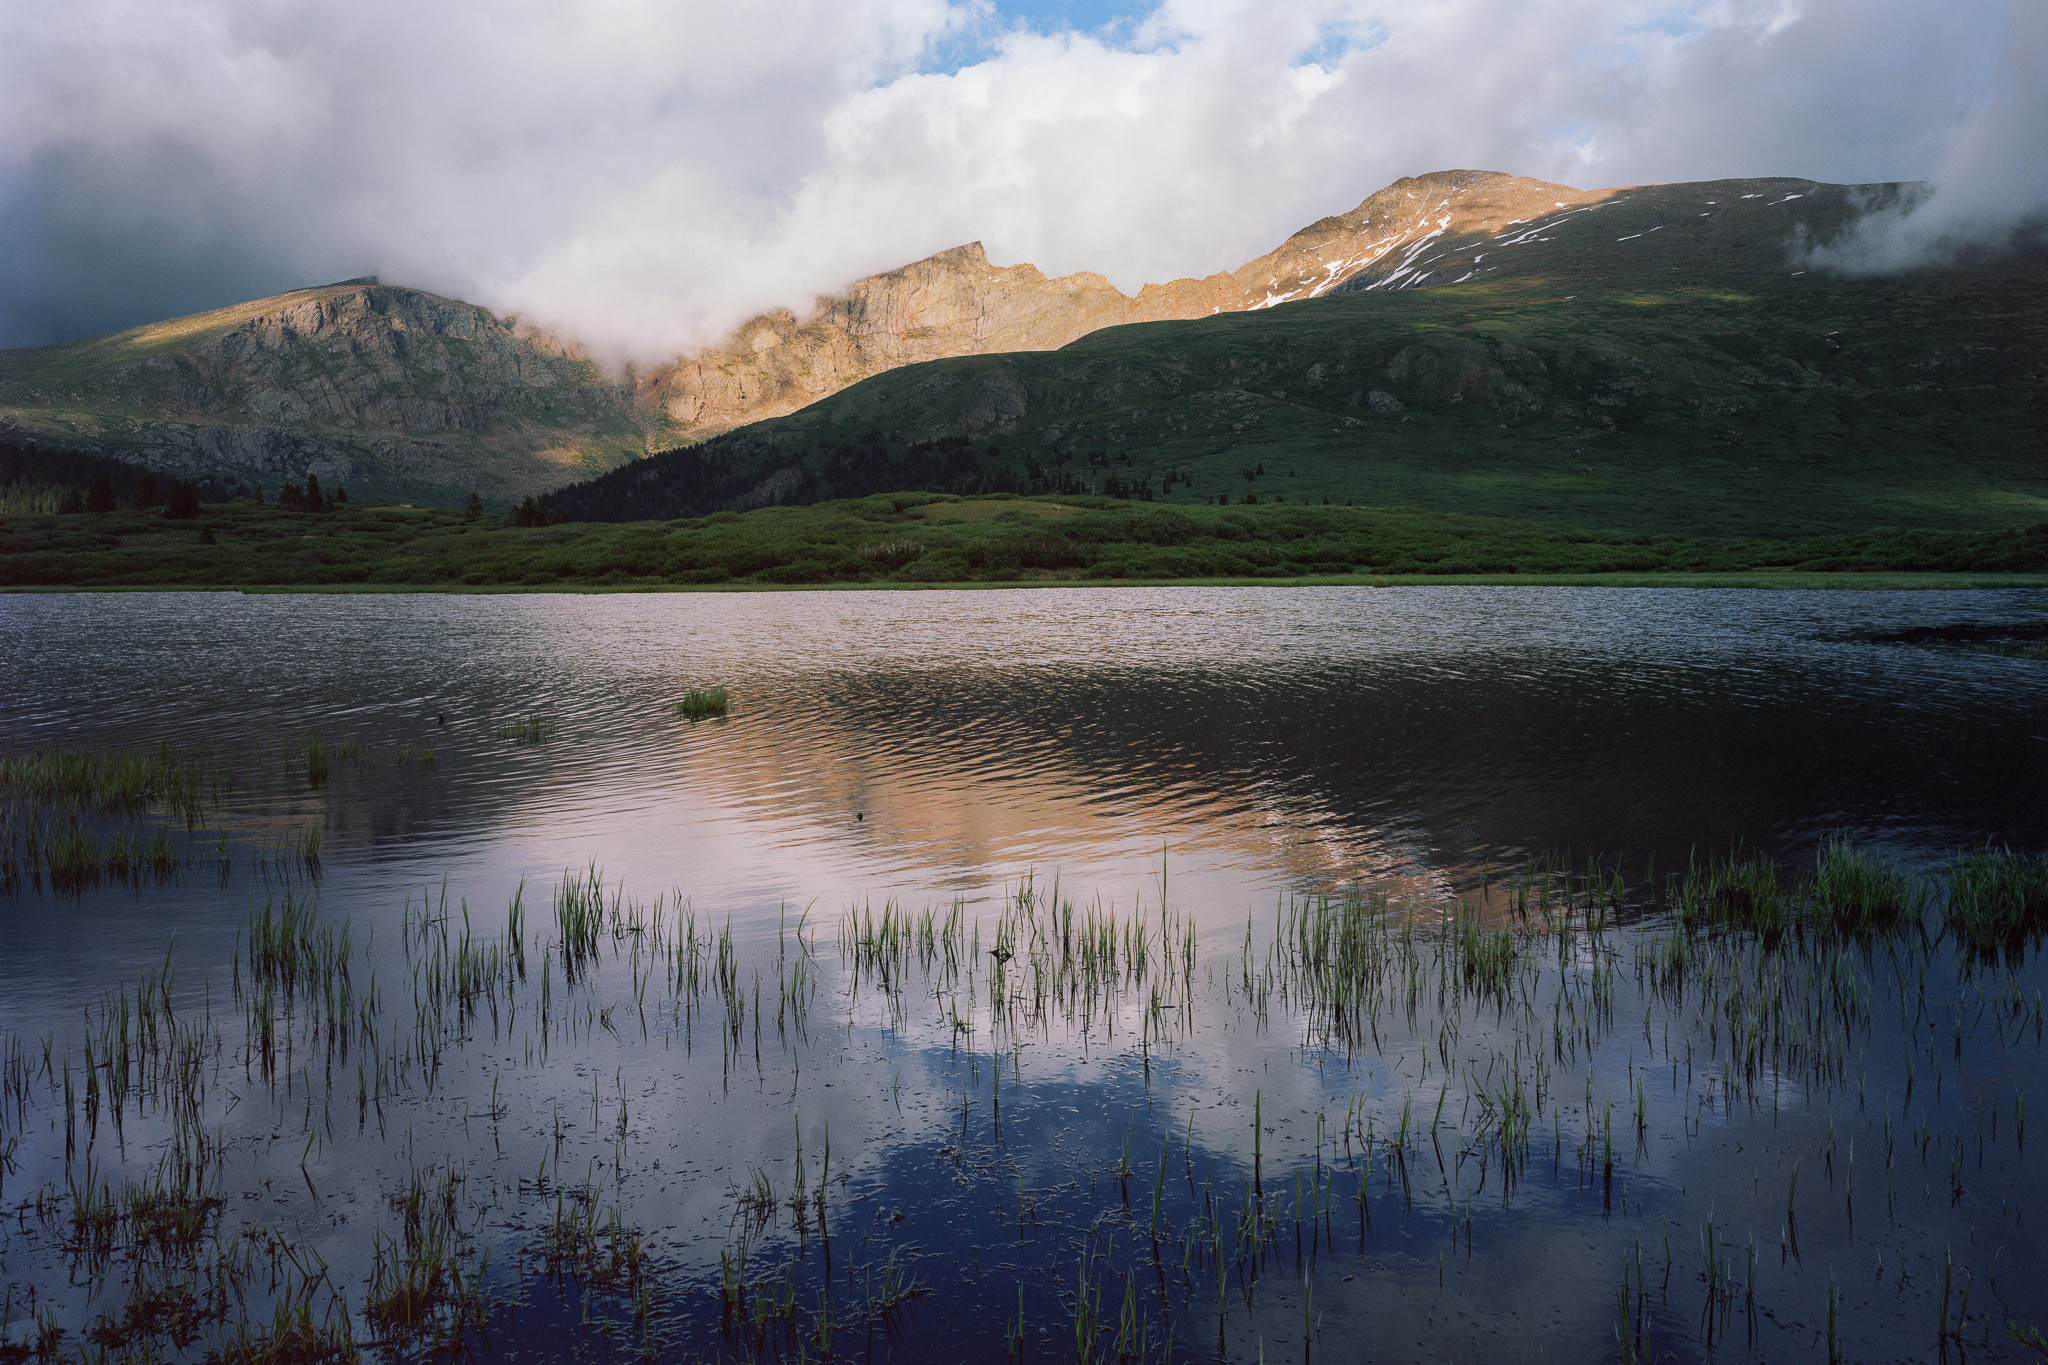
Soon after, a cloud covered the mountain in front of me, and another cloud covered the sun to my back. The photo above is the best “sunset” light I saw that evening, and I was very glad to be there in time to see it.
That’s why I recommend showing up early to any potential location if you can. Even if the best light does end up happening right at sunset, you’ll still give yourself more time to set up, test some compositions, and enjoy watching the light change.
7. Wait a Bit Late
Maybe my real tip is just to spend all day outside :)
In all seriousness, it’s not just arriving early that I recommend, but also staying a bit late. We’ve written before on Photography Life about the second sunset and how many photographers leave way too soon after the sun dips below the horizon.
Often, there will be colors both in the sky and landscape that our eyes have a hard time picking up, but the camera can capture beautifully. Other times, a sunset that seemed boring may suddenly turn amazing ten, fifteen, or even thirty minutes after you think the curtain closed.

It can be difficult to tell which evenings will have a beautiful “second sunset” and which will not, which is why I recommend staying out a bit longer than conventional wisdom would suggest.
8. Be Prepared for a Break in the Clouds
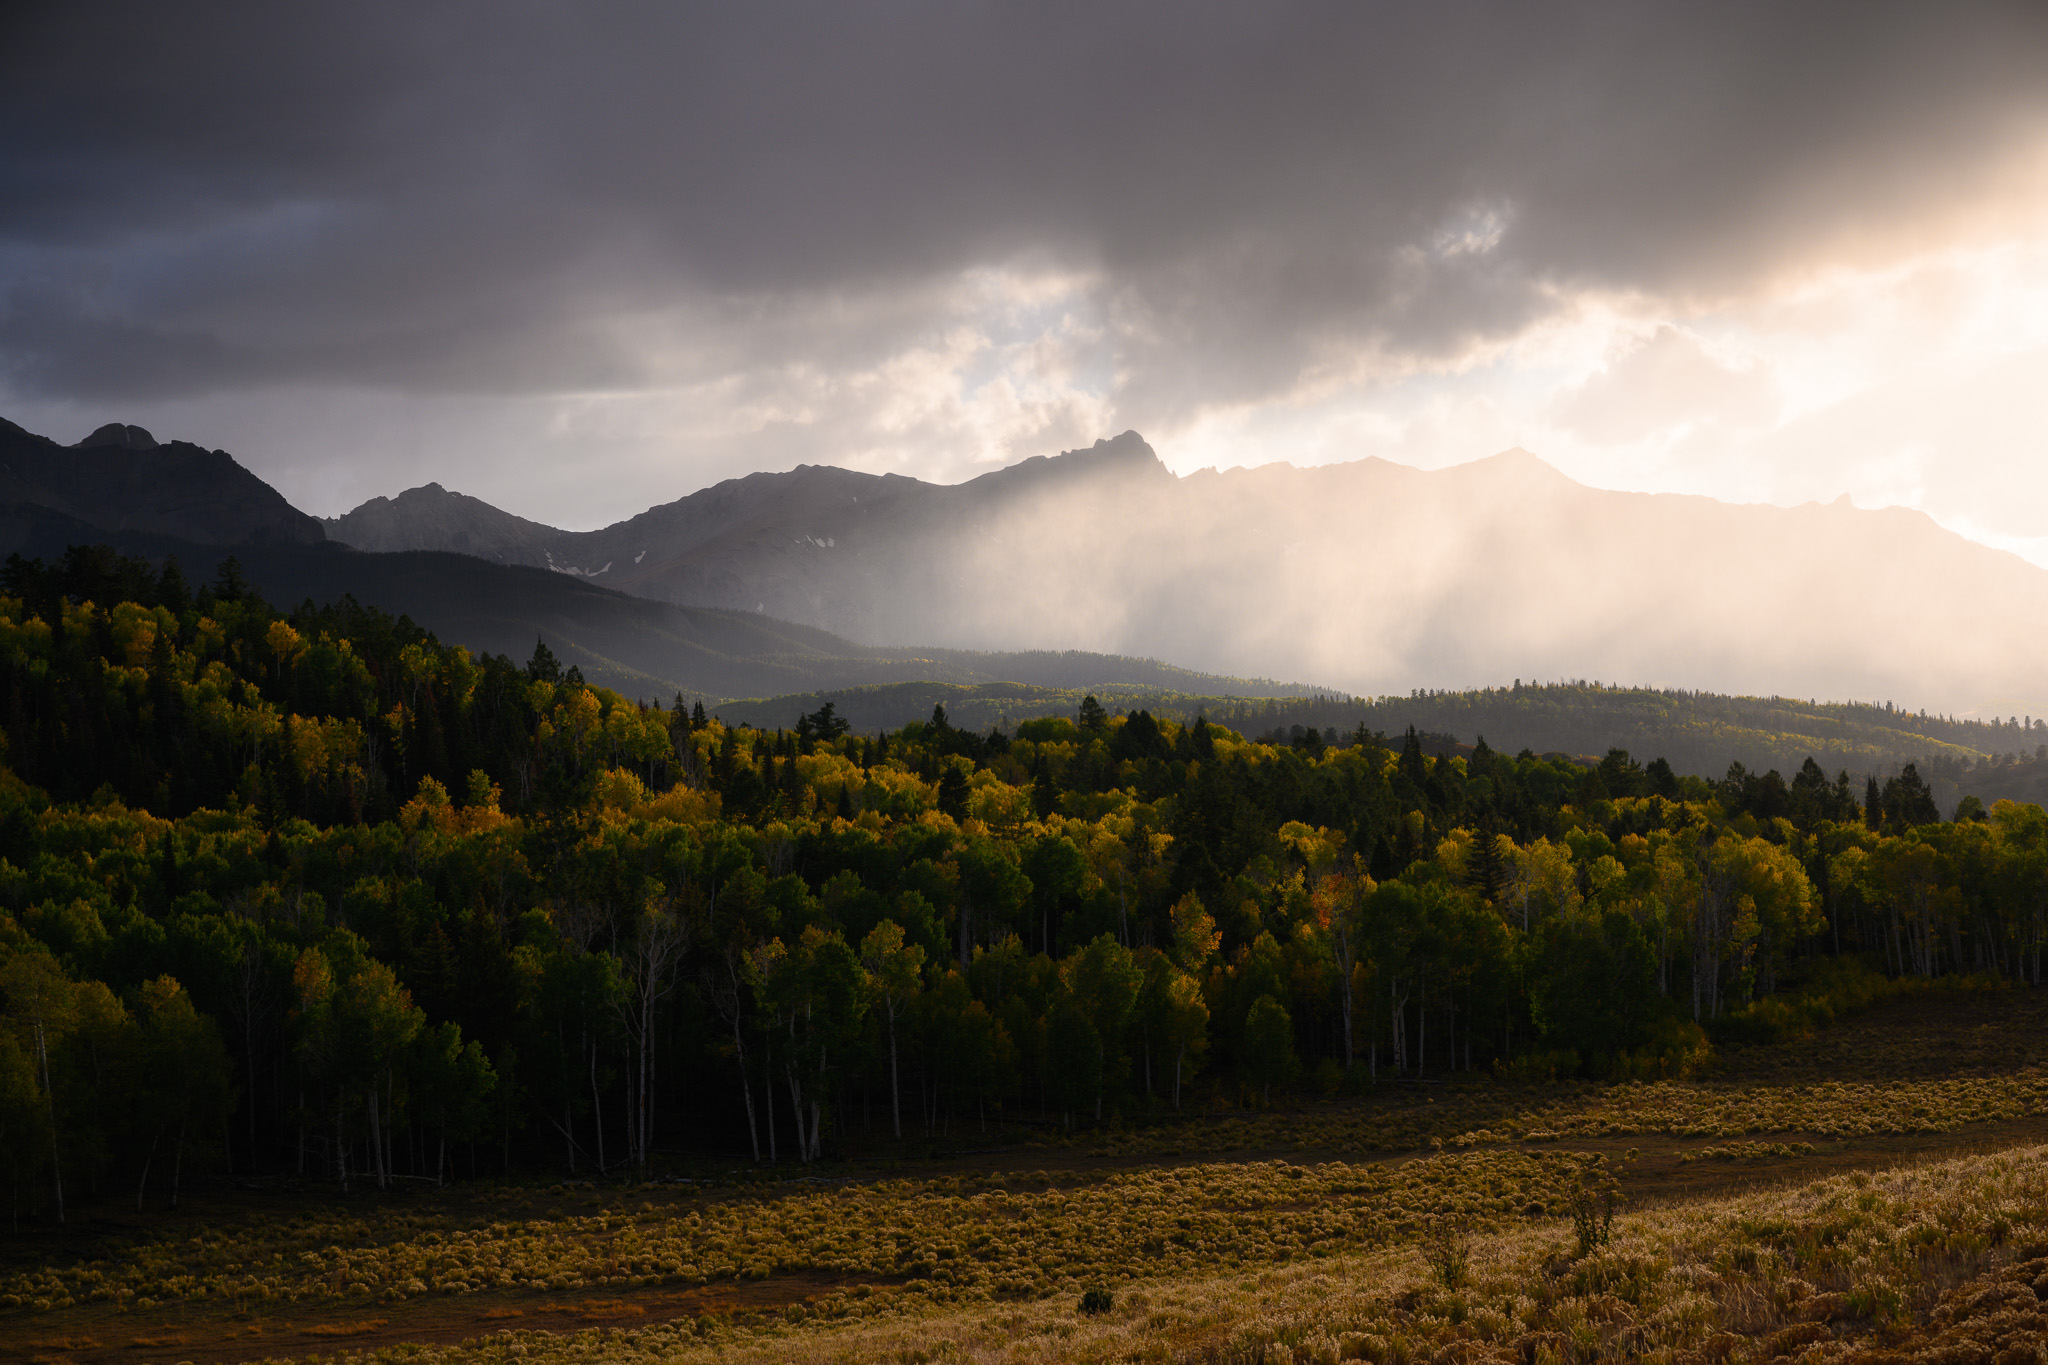
Until the sun is actually below the horizon, there is always a chance for it to shine through a break in the clouds. I’ve seen the dullest sunsets turn into a brilliant light show in an instant, and often vanish just as quickly.
That’s why I recommend setting up your camera and keeping it ready to take a photo at a moment’s notice, even if all indications are that it will be a colorless sunset. It’s impossible to know for sure.
In fact, many of the all-time best sunsets I’ve seen have been during seemingly overcast gray skies. In cases like that, it only takes a small break in the clouds for the entire sky to light up with color, or a brilliant beam of light to spotlight your subject. So, never count out a sunset.
9. Decide Between Sunset and Sunrise (or Both)
Just because sunset and sunrise involve golden light doesn’t mean they’re equivalent for photography. At a given landscape, sunset and sunrise almost always look markedly different.
The biggest reason is a simple change in the direction of light. For example, take Yosemite National Park’s famous Half Dome. From the most famous vantage points like Tunnel View and Glacier Point, the sun is almost directly behind Half Dome at sunrise. At sunset, it’s in the opposite direction, illuminating the rock face just before dipping below the horizon.
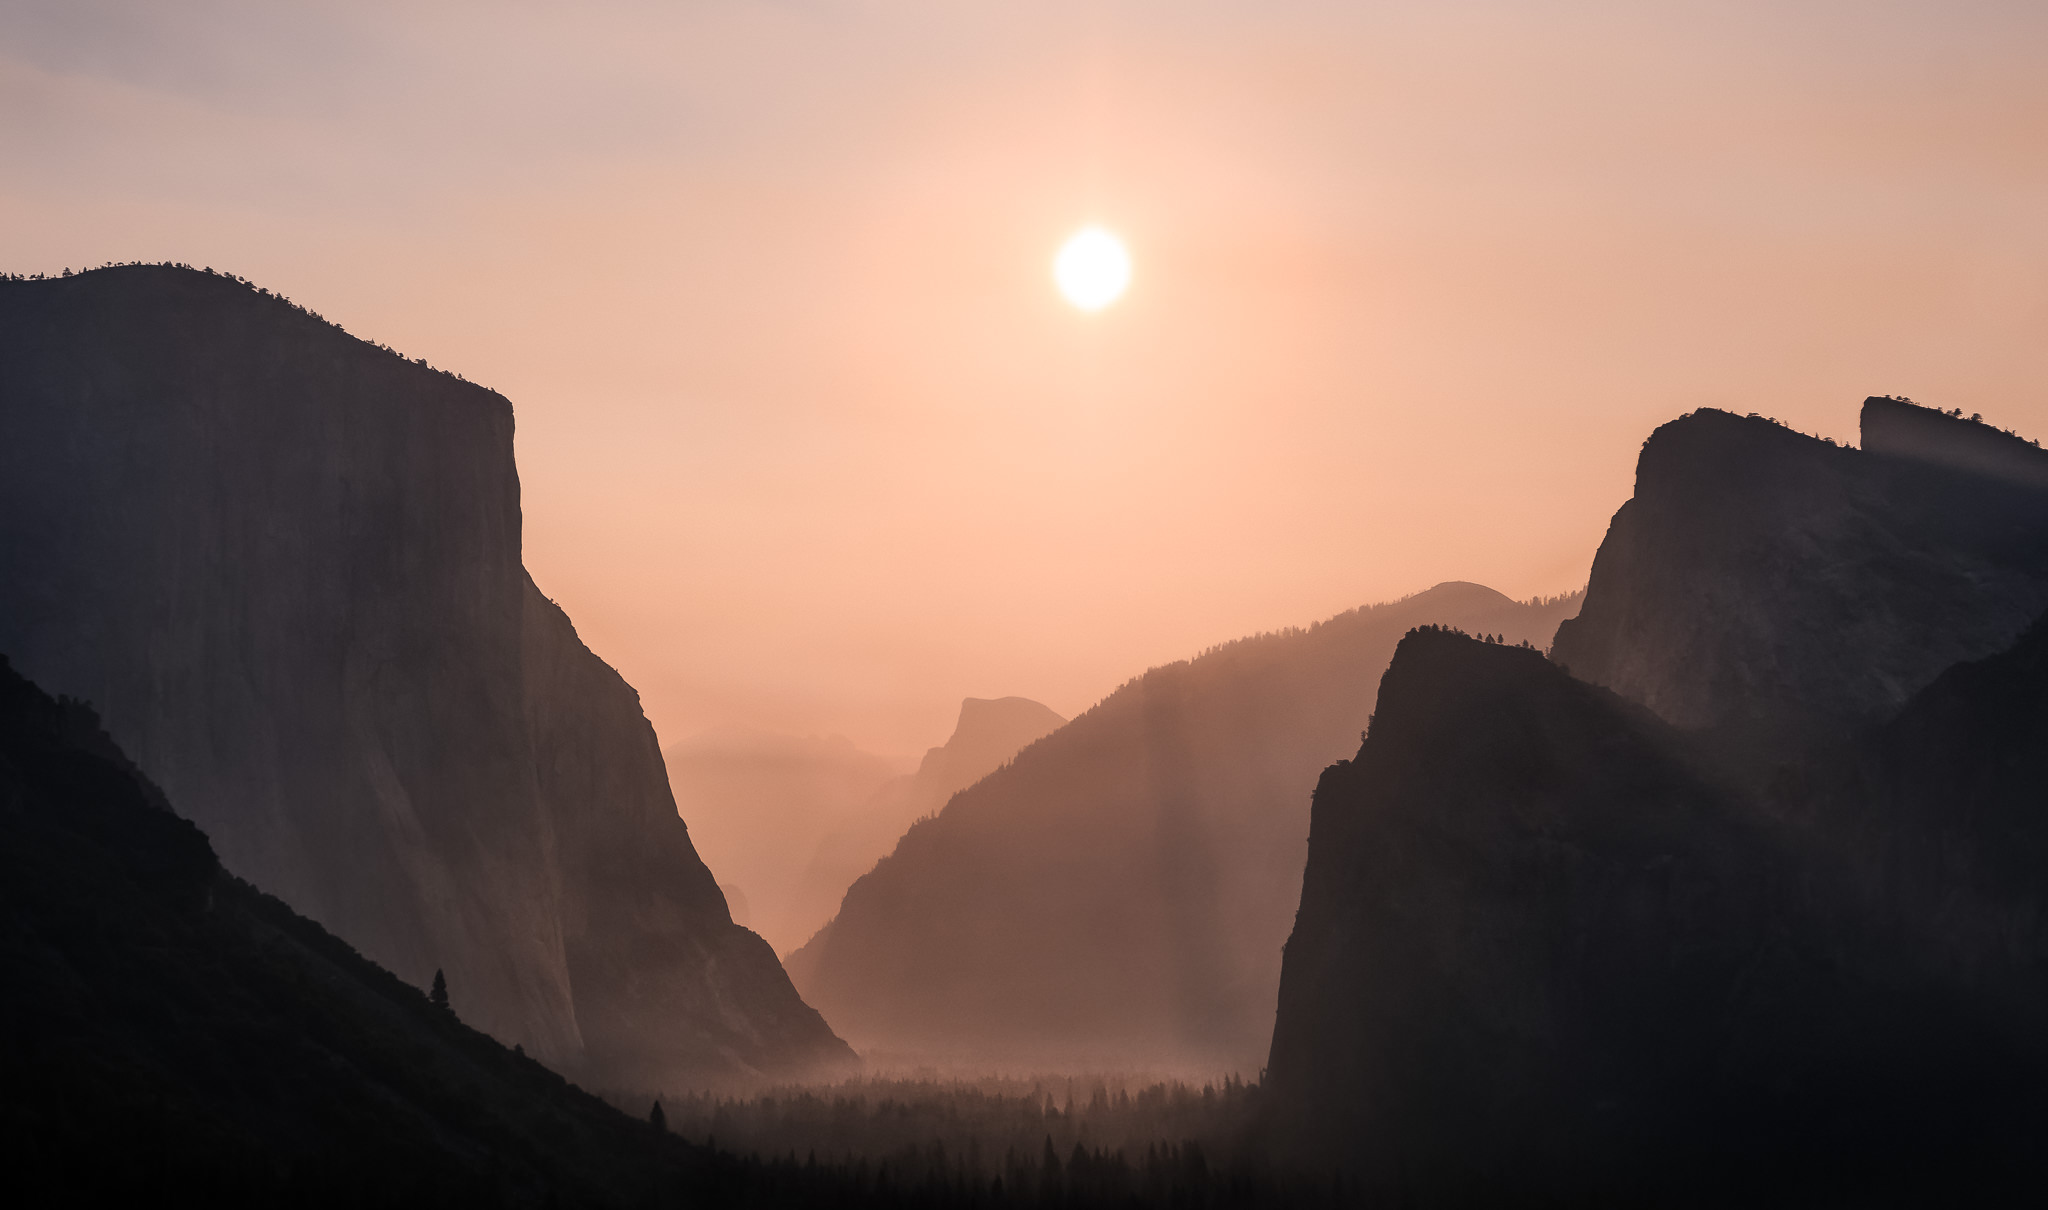
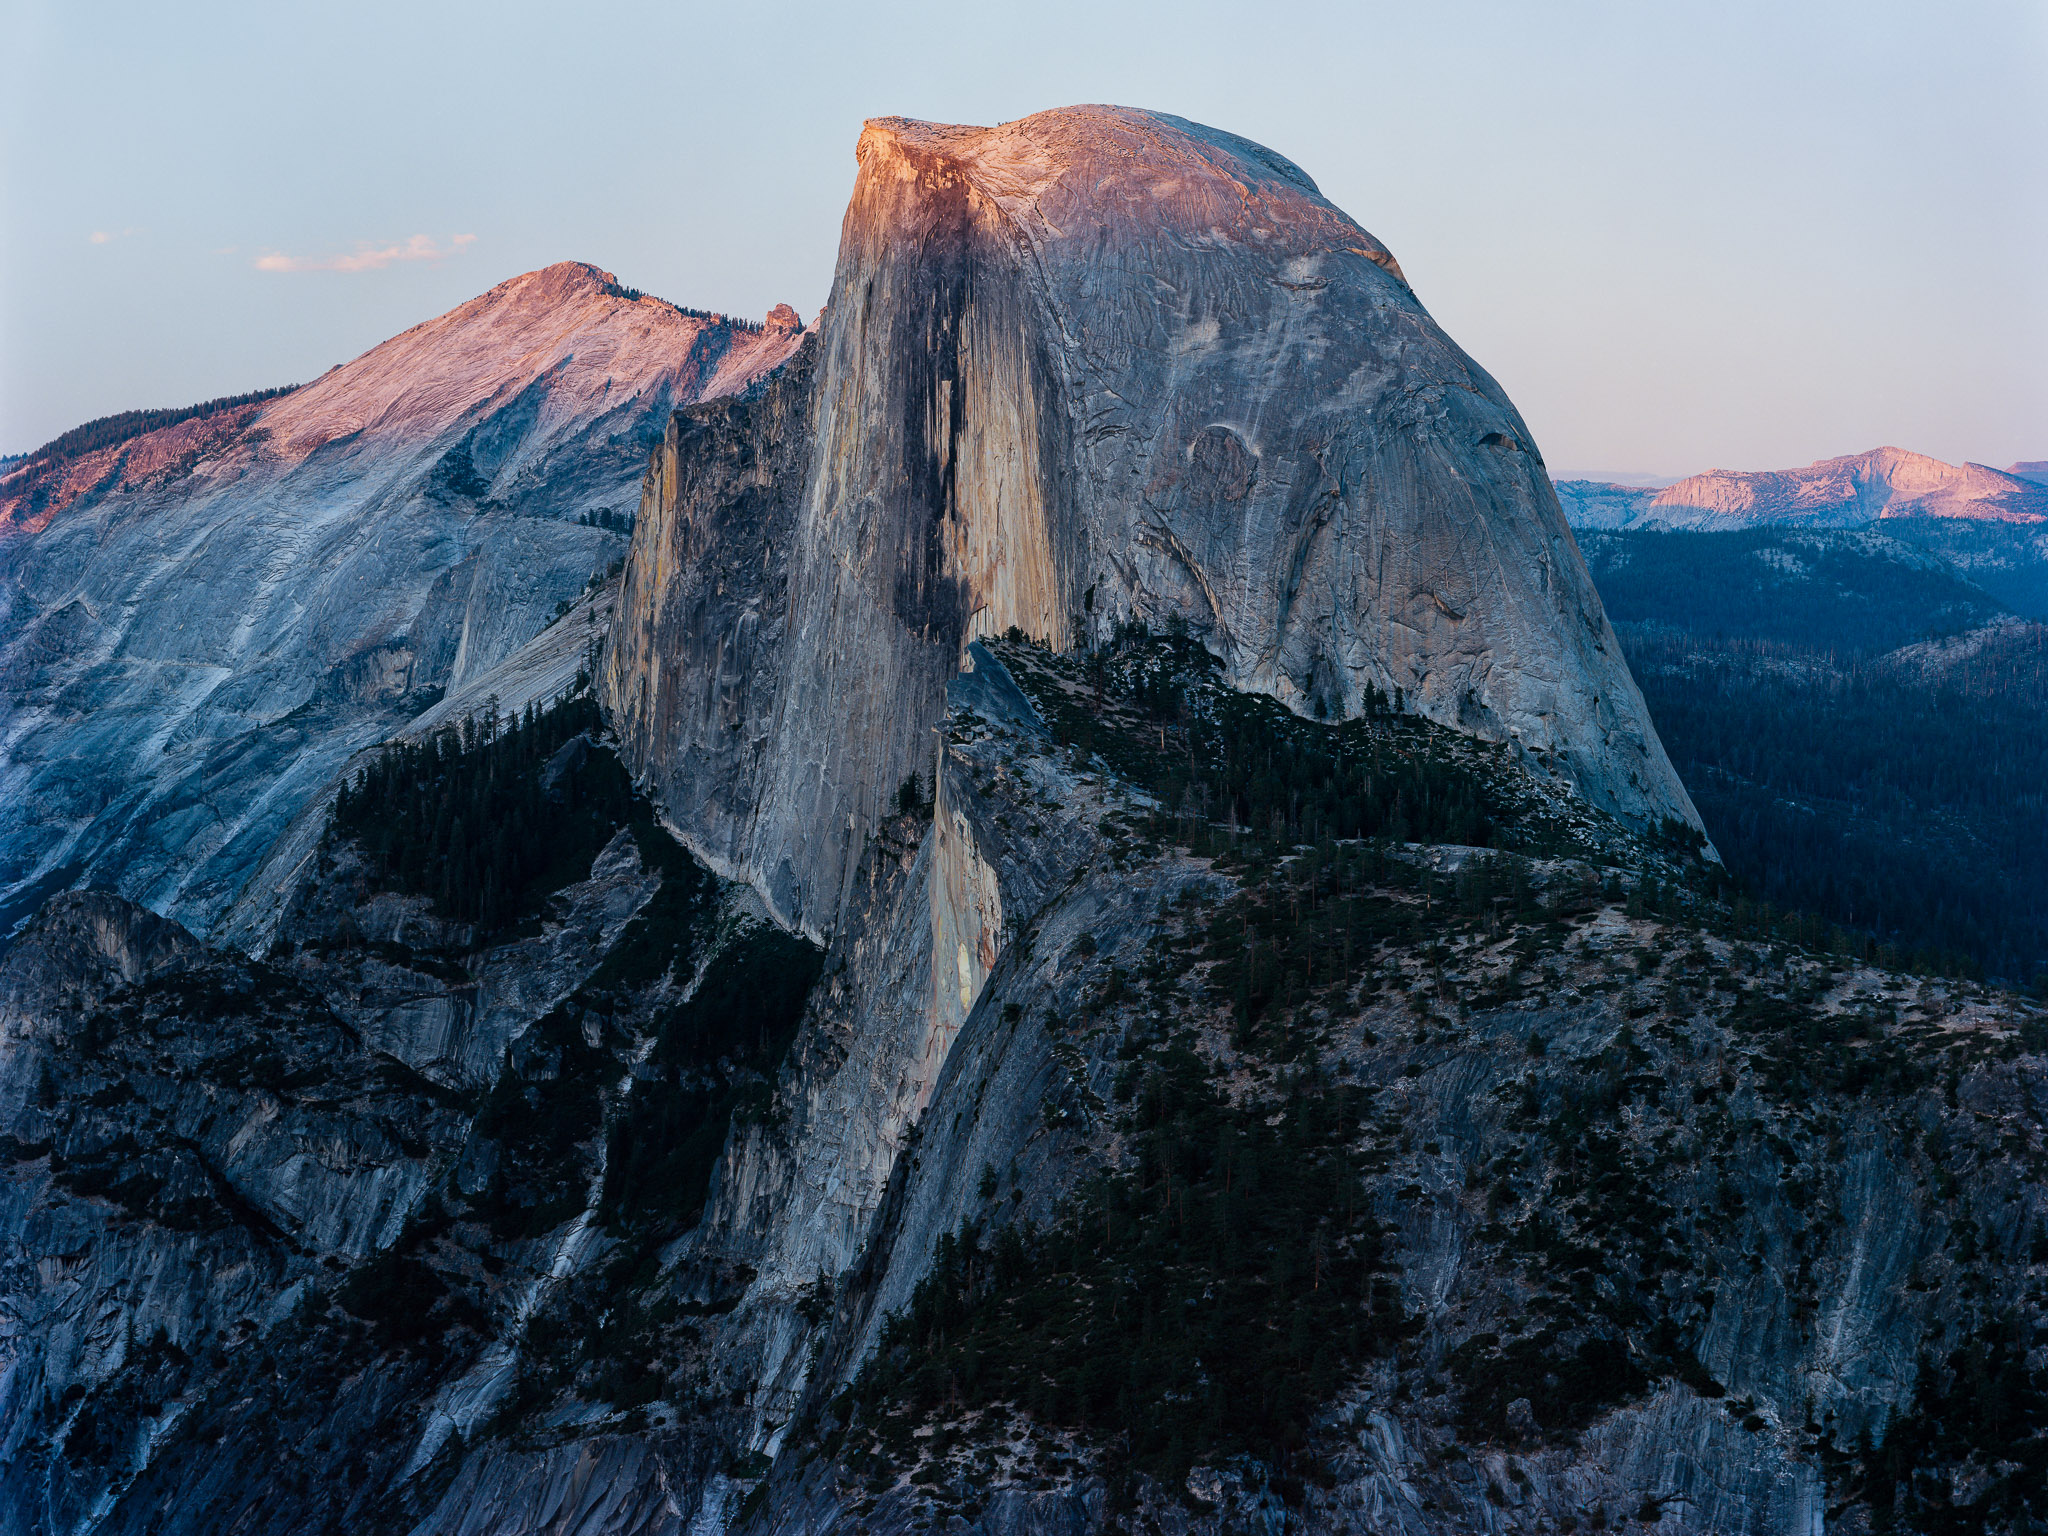
Neither of these lighting situations is better for photography than the other, but they both convey very different moods.
Almost every landscape has similar considerations. If you’re near a coastline, you’re more likely to get a hazy, pastel photo when the sun is in the same direction as the ocean, since it will be filtering through the salty and humid sea air. If you’re in an area with a lot of pollution or smog, sunset will generally be more vivid than sunrise since it follows the day’s activity.
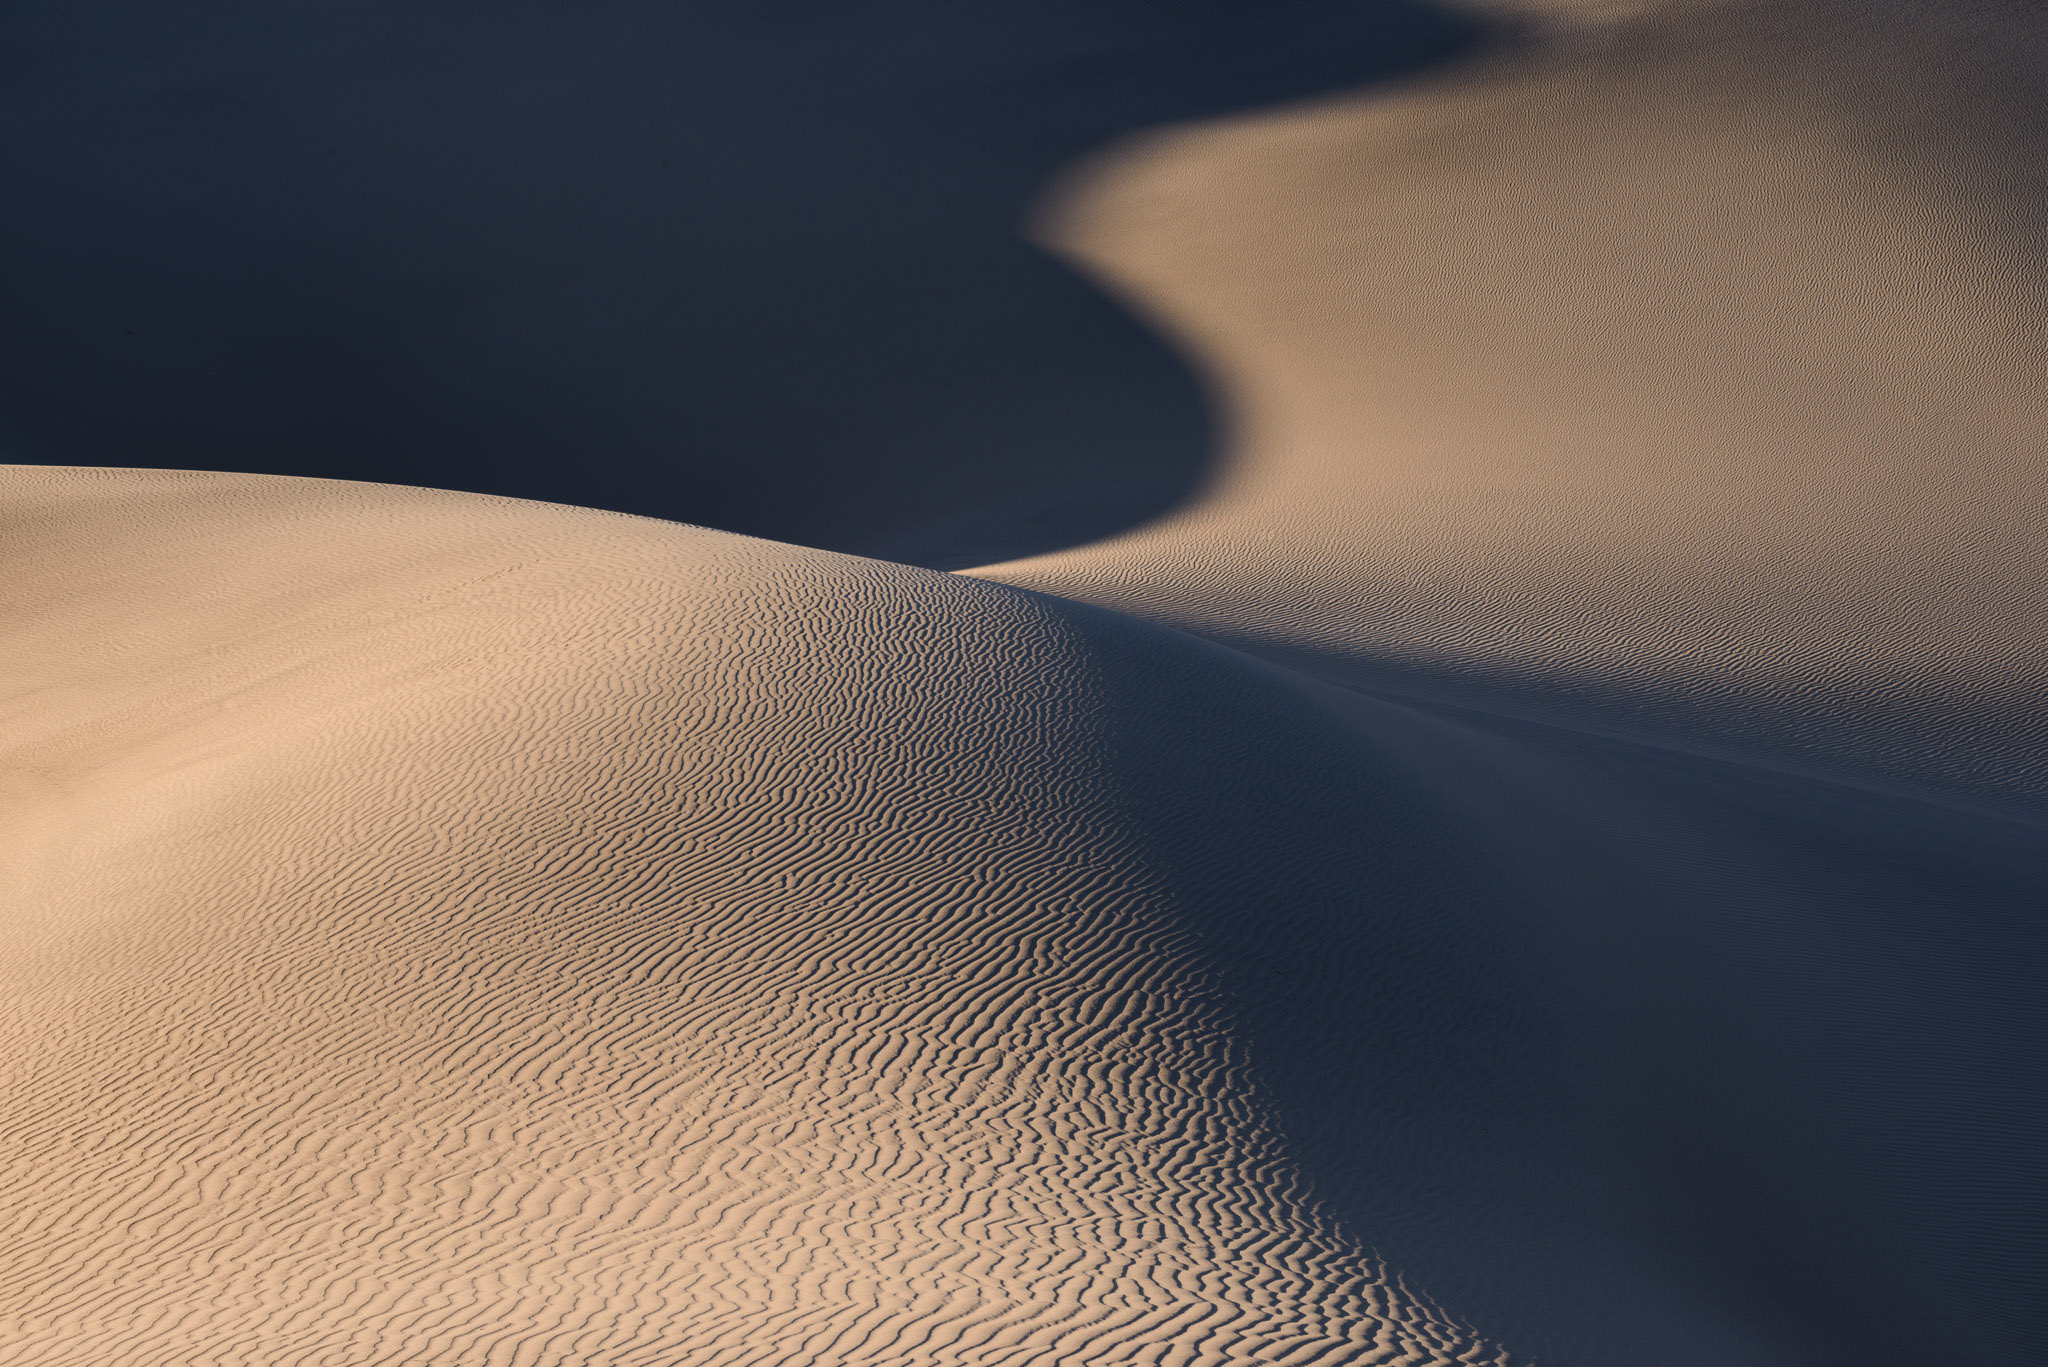
Sometimes, both sunrise and sunset can work equally well for the subject you’re photographing. If you want to do abstract, close-up landscapes of sand dunes with sidelighting, you can probably find something good regardless of which end of the day you’re at.
But in many cases, there’s a big difference between the two. Factors like fog, dust, and pollution can be more frequent at one than the other. Even ignoring those considerations, the mere change in the direction of light is enough to give many subjects a vastly different mood.
So, even though I wrote this article about sunset rather than sunrise, be sure to ask yourself if sunset is really right for your subject in the first place. Almost all of these tips apply regardless of which “golden hour” you’re in. If you don’t mind waking up early, you may find the dawn light to be a better complement to your subject than sunset light – or, you may find that sunrise doesn’t look right at all, and you were right to sleep in!
That’s why the real key is to do some research and practice ahead of time, preferably by visiting the location in person to get a feel for its characteristics. In fact, that’s one of the best ways to take better pictures of any subject, not just sunrises.
Hi Spenser,
I very rarely comment but I read your posts and watch your videos frequently, and always gain a better understanding of photography. Thank you for sharing your perspective so effectively. Your photographs are inspirational.
Very kind of you to say, thank you Richard. I’m happy to hear you found them to be useful!
Hello Spencer
Again a very good post, with valuable tips. I would have liked to know more about how it is possible to image the sun as blood red as you perceive it by eye. However, due to the light intensity, it is always just bright in the pictures….
Meter for the sun in one picture and combine exposures is one way to go. Or if using high DR capable camera just underexpose and lift the shadows in PP.
Thank you, Michael. I find that it’s difficult to capture such a red color in the sun except in rare circumstances. If there’s a lot of smoke, humidity, or pollution in the air, you may have a chance. It helps to take pictures as close to sunset as possible and to use a longer lens to make the sun larger.
Hi Spencer, I rarely comment but frequently read and I just wanted to say you have been killing it with the articles as of late. I wanted to commend you for your incredible effort in pumping out these high quality articles. I appreciate it!
Very kind of you to say, thanks Charlie. I’ll always try to make Photography Life an even better site.
Another one is that when capturing sun stars, it sometimes helps to block out the sun in one exposure (using a finger or the lens cap) to avoid flare and then merge the foreground from that flare-free exposure with the “unblocked” exposure that has the sun star.
Great tip! That’s the best way to deal with difficult flare issues.
Good advice, I would like to add bracketing as invaluable tool for both landscape photo and especially for difficult lightning conditions as sunsets often can be. It’s a great tool and often overlooked.
To add to the above, HDR is a wonderful tool. It can tame the most contrasty light, such as at sunset or sunrise.
Thanks Redman, that’s a good tip. And a bonus is that you can make an HDR out of your bracketed frames if the contrast turned out to be too high!