In this tutorial, I will show you how to transform boring landscape pictures to vibrant and beautiful images in Lightroom in quick and easy steps. I will show you the real benefits of using the RAW image format and just some of the possibilities it gives you to non-destructively enhance your photographs without ever leaving Lightroom. I personally use this technique for post-processing my landscape photography all the time and I hope you find it useful.
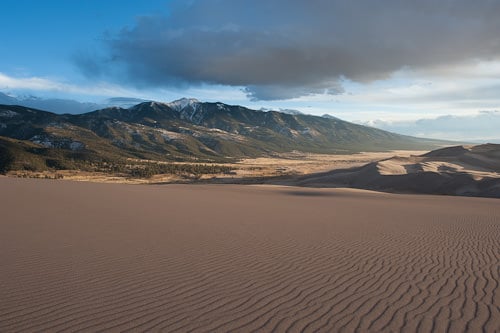
Read on if you want to be able to take an image like this (original, as came out of the camera):
and transform it to an image like this:

Table of Contents
1) Shoot RAW, post-process RAW
If you are still shooting JPEG and you are not sure why you should be shooting RAW, check out my “RAW vs JPEG” article. This tutorial will only work on RAW images, so make sure that you are picking a RAW file before attempting to follow the steps. Lightroom will not let you change white balance or color profiles on JPEG images and although you can tweak some things like color temperature and tint, I still do not recommend messing with those. If you want the best image quality and the most options for post-processing, you should be shooting RAW.
2) Fix White Balance
Although I trust my camera’s “Auto White Balance” most of the time, the camera in some cases does not correctly choose the right white balance for me (which is normal in tough lighting conditions). In the above example, the white balance was way off, because the scene looked more yellow compared to what my camera captured during the sunset. Let’s try changing the white balance to “Daylight” and see what happens:
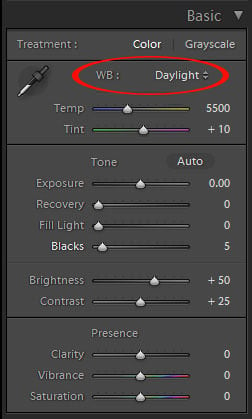
Here is the change:
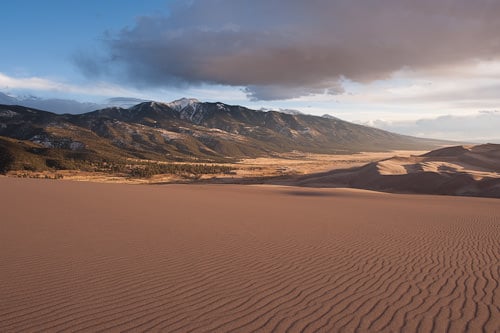
Much better! Let’s play with camera calibration now.
3) Adjust Camera Calibration
If you are getting frustrated with Lightroom, because the image you load from your camera looks different than the image you saw on your camera’s LCD, then you should definitely check out the “Camera Calibration” menu option in the Develop module of Lightroom. Camera calibration profiles were introduced to both Lightroom and Photoshop by Adobe in order to be able to produce more realistic colors while reading and displaying RAW images. These profiles also try to mimic your camera’s profiles such as “Standard” or “Vivid” and generally do a pretty good job in matching the colors, shadows, and RGB saturation levels. When you originally import RAW images into Lightroom, they get converted to the standard “Adobe Standard” camera profile, which looks rather pale, especially on Nikon RAW images. For landscape photography, I find that the best color profiles are either “Camera Standard” or “Camera Vivid”, depending on vivid I want the image to be (if you have a Canon DSLR, you might not have a “Vivid” color profile).
Here is how you can change the camera calibration:
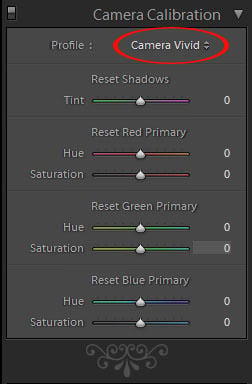
And here is how my image looks like after I changed the color profile to “Camera Vivid”:
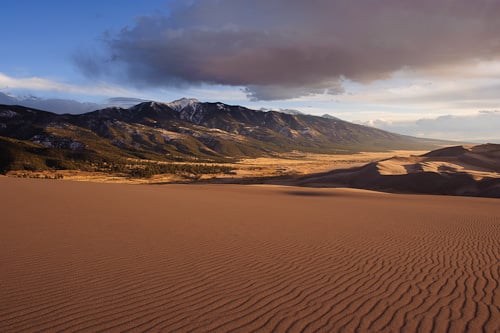
Wow, what a difference! Everything looks so much more colorful and truly vivid!
4) Make that sky bluer!
Although changing camera profile to vivid already added some blue to the sky, in some cases it is still not enough to make it look truly blue. Let’s add some blue to the sky by saturating the blue color:
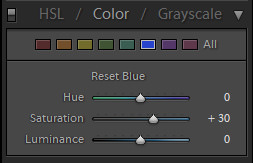
You have to keep in mind that if you have other blue objects in your scene, you might saturate them too, so be careful. Let’s take a look at how our image now looks:
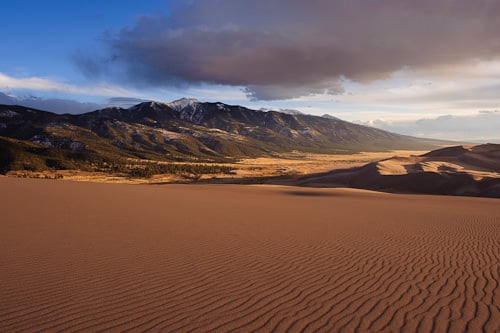
Nice – more blue in the sky against some yellow sand are mixing well together in one picture!
5) Play with Tone and Presence
The final touch is to play with Tone and Presence settings under “Basic” tab. Changing the color profile to “Vivid” can sometimes blacken the darker parts of the image. Adding some fill light (around 10-15) can help to bring out some details from those areas. You can also try reducing “Blacks” to brighten up the shadow areas. I typically leave “Brightness” and “Constrast” the same, but in some cases I might increase the contrast to 35-40. “Clarity” is a cool setting that I typically leave at around 50 and I try to not go higher than 10 in “Saturation”. But each picture is different and you will have to adjust the settings on each picture individually and see what looks the best. Here is what I ended up with for this particular image:
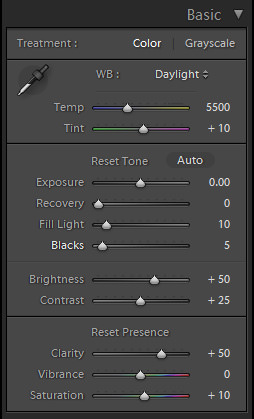
Let’s see how the final image looks now:
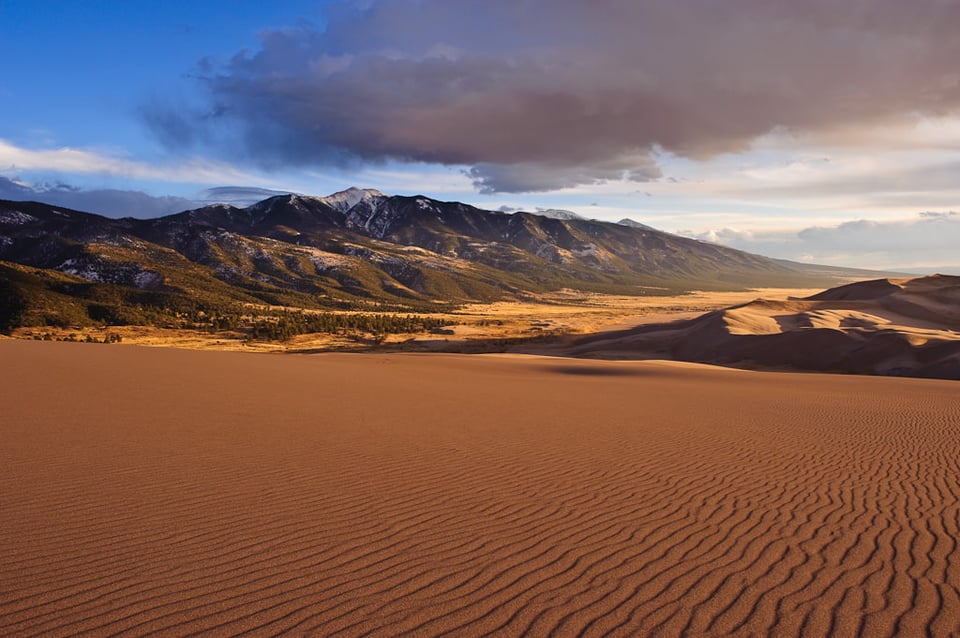
Let’s compare that to the original image:

The difference is night and day… If you feel like the image is over-saturated, simply decrease the saturation level under “Basic” to a lower number and you should be good to go :)
Let me know if you have any questions in the comments section below.
Hi, Nazim. For many years I enjoyed your website. THANK YOU ! Great tutorials , advices, learned a lot. I need your help with adobe light room 6. It just stopped working, I can open it but when I m trying any menus, it gives me a message : the program is not responding. Cannot contact adobe help line, waited for 45 minutes, no one answered my call. Please help, you are an expert and your advice will be greatly appreciated.
Thank you for your time and information. Bless you!
I am new to post processing in Lightroom and was wondering whether you have the sample images (RAW) to follow your tutorials.
Thanks
good!
On my previous post, I start with “Concerning the set on the camera”, but I meant “Concerning the Scene Capture Type set on the camera”.
Sorry about that.
Carlos
Concerning the set on the camera, Lightroom doesn’t show this setting on the EXIF on Library module » Metadata panel » EXIF dropdown menu.
So you won’t be able to know which scene capture type mode you used on the camera UNLESS you have Bridge, on Camera Data (Exif) panel or any other program that shows it.
Carlos
Hi.
SUBJECT: in-camera Scene Capture Type vs. Profile in Lightroom’s Camera Calibration panel.
As I think you all know, shooting in Neutral or Standard modes usually results in having more Dynamic Range detail stored in the raw values, mainly in the dark areas of the image.
Having said this, I have the following challenges: :)
1 – If we set the camera’s Scene Capture Type to -say- Standard, this means that the raw values stored will be different from -say- Vivid?
2 – If we shoot in “Standard” mode, SHOULD we set the Profile to “Standard” in Lightroom’s Camera Calibration panel and start editing from that?
3 – If there is no relation between the Scene Capture Type of the camera and Lightroom’s Profile in Camera Calibration panel, AND since we can change White Balance in several ways (via Basic panel and/or via HSL panel), why should we care about the Profile in Camera Calibration panel in the first place? And, if we SHOULD care about this (because of the different Dynamic Range values stored), so shouldn’t we edit on the same profile for the same reason?
4 – Unless we shoot with a X-Rite’s color calibration passport (and do all the other adjustments accordingly), I don’t see any advantage to even look at or change anything in the Camera Calibration panel in Lightroom.
Honestly, for what I’ve been reading for the past weeks, my conclusion is IF YOU DON’T SHOOT WITH A COLOR CALIBRATION TARGET it’s easier to ignore the Profile in the Camera Calibration panel and change the WB in the Basic/HSL panels accordingly BUT always (!) shoot in Neutral mode to get more Dynamic Range.
Or am I missing something here?
Carlos
I really like the way you start and conclude your thoughts. Thank you so much for this information. keep posting such good stuff
How about the HDR/DRi tutorial?