When you’re out taking nighttime landscape photos — Milky Way photography, or photos of the Aurora Borealis — one of the most difficult tasks is to compose your photos exactly how you want. The reason? It’s simply too dark to see anything. Looking through the viewfinder on a DSLR, it can be tough to make out any of the scene’s important features. Live view might be even worse, often showing absolutely no detail at all. The most common solution is to guess at your composition, wait 20 or 30 seconds for the exposure to finish, and adjust afterwards via trial and error. It’s a slow process — but there’s another method. This is one of the few times when the best option is to use your camera’s highest ISO.
1) Use That Crazy ISO Value
Finally, there’s a good reason to set ISO 409,600!
The idea here is to shrink your waiting time as much as possible. When you use an ultra-high ISO value, you can take photos with a much quicker shutter speed, saving you lots of time in the field. The final photo isn’t meant to be published; instead, it’s something you should use as a compositional aid.
Without this technique, your typical settings for the stars or Milky Way may look something like this:
- f/2.8, 30 seconds, ISO 1600
Those settings will provide a photo that’s bright enough to use as a compositional aid. However, it will take 30 seconds of waiting to get there (and 60 seconds if you’re using long exposure noise reduction). Instead, try something like this:
- f/2.8, 2 seconds, ISO 25,600
You’ll have a photo that’s just as bright, and it takes 1/15th the time to capture. The downside? Your image quality will be horrible — but that doesn’t matter. You’re not actually going to use this photo or publish it. The photo only exists as a way for you to “see in the dark,” and narrow down your final composition more quickly.
Personally, for night photography, it often takes a handful of test photos before I find the exact composition I want. If you’re the same way, this technique can save a huge amount of time in the field, especially over the course of an entire night. Other than guessing the proper composition on your first try, this is the quickest way to capture the nighttime photo you want.
Check out the comparison below, starting with a test photo at ISO 12,800, and then my final composition at ISO 3200:

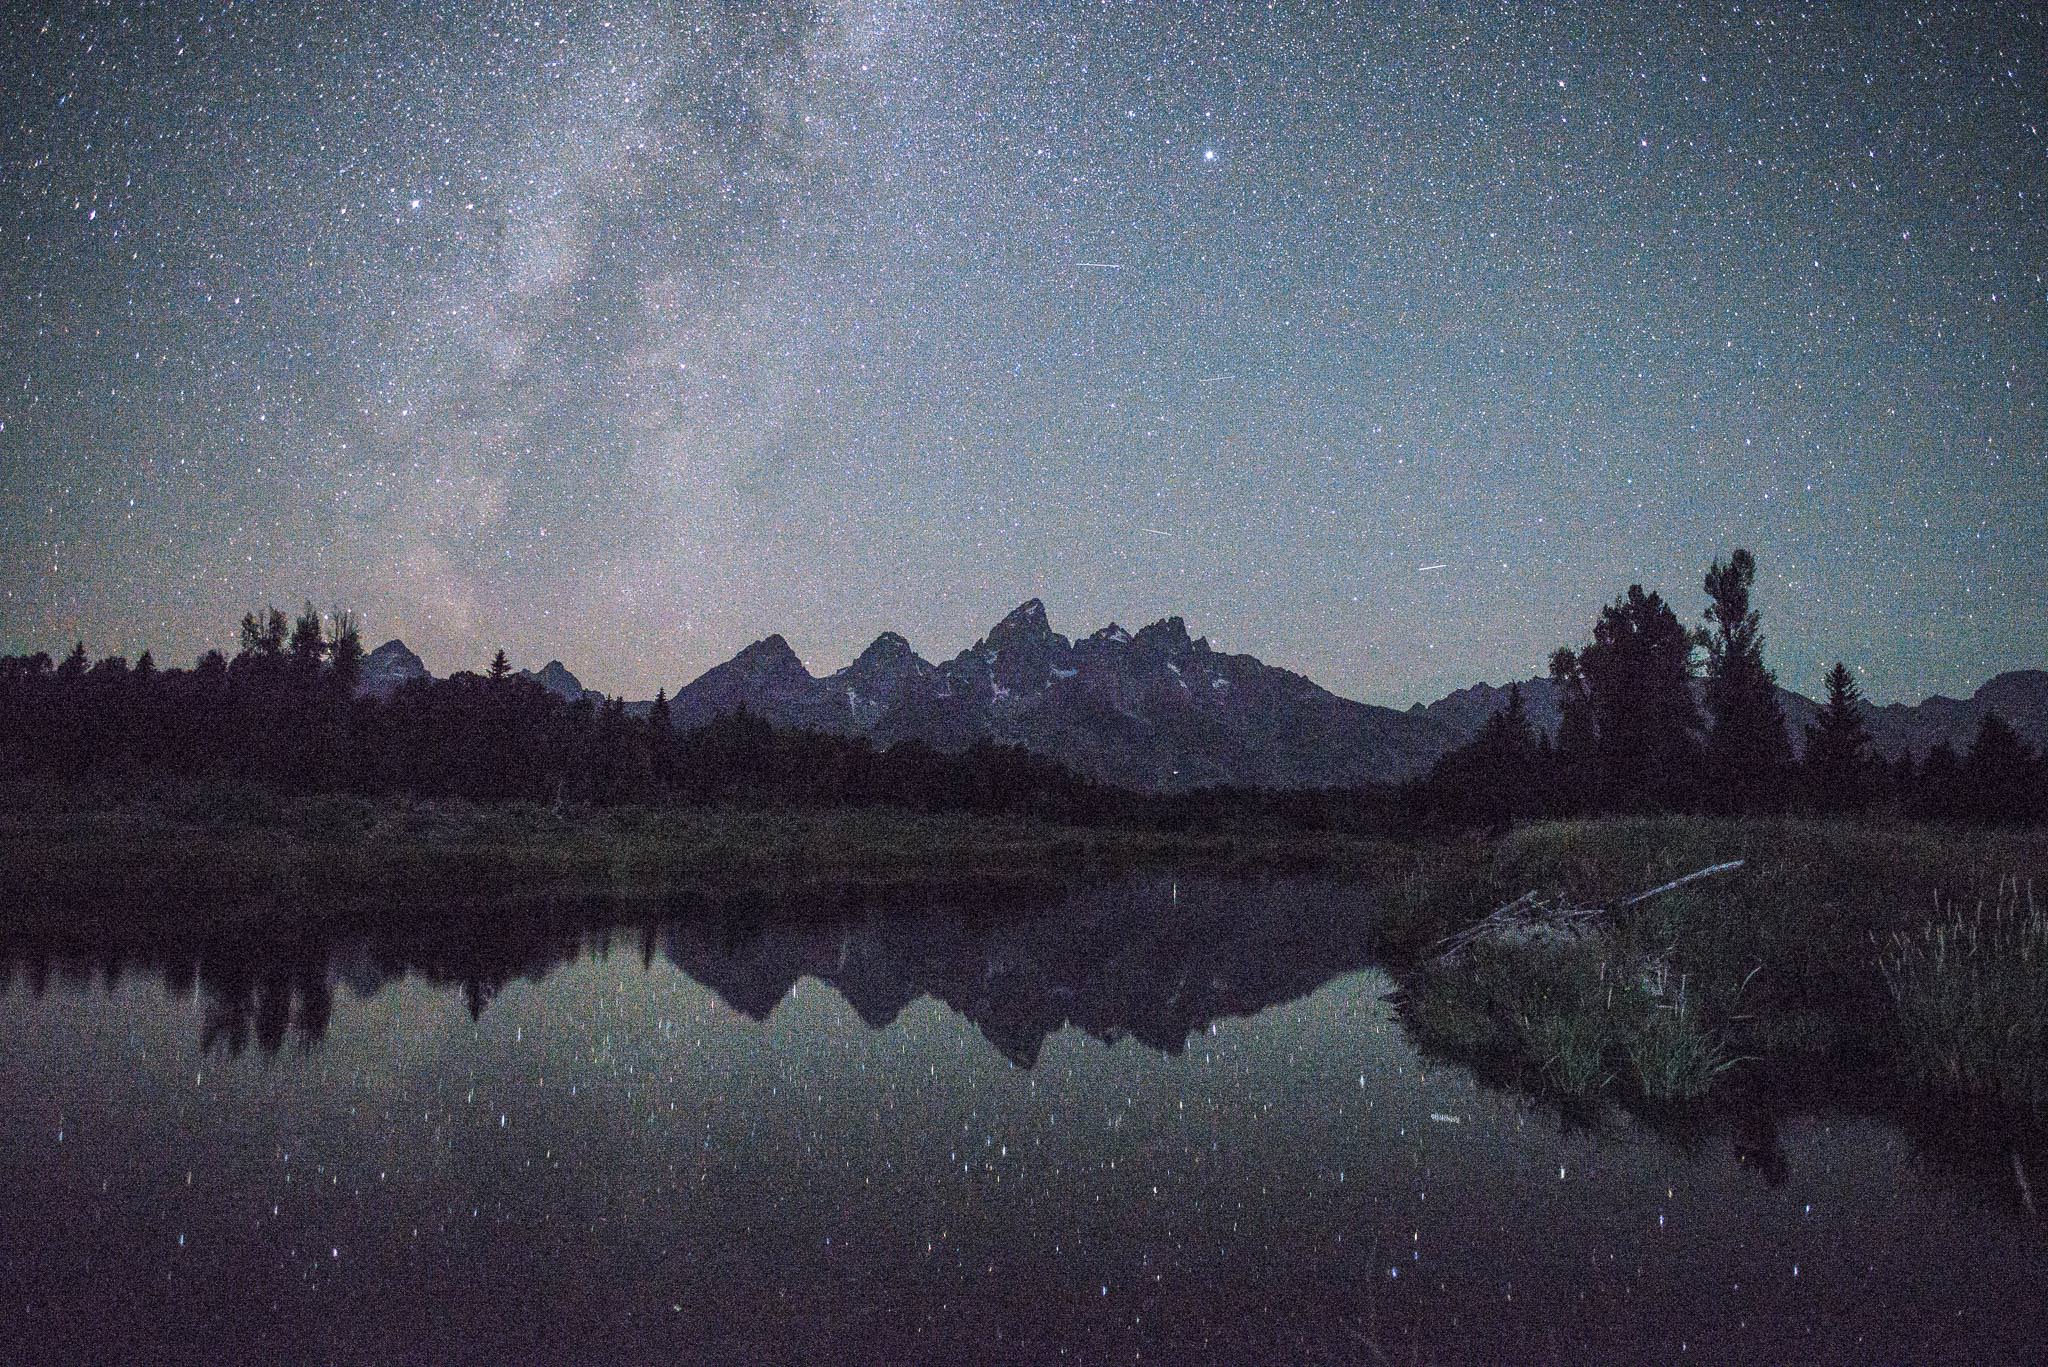
Here’s a super-high-ISO test photo, not to be published. Some cameras certainly go beyond ISO 12,800, too; this is just the tip of the iceberg. But, even here, it cut my exposure time to just 6 seconds, which isn’t a very long wait.

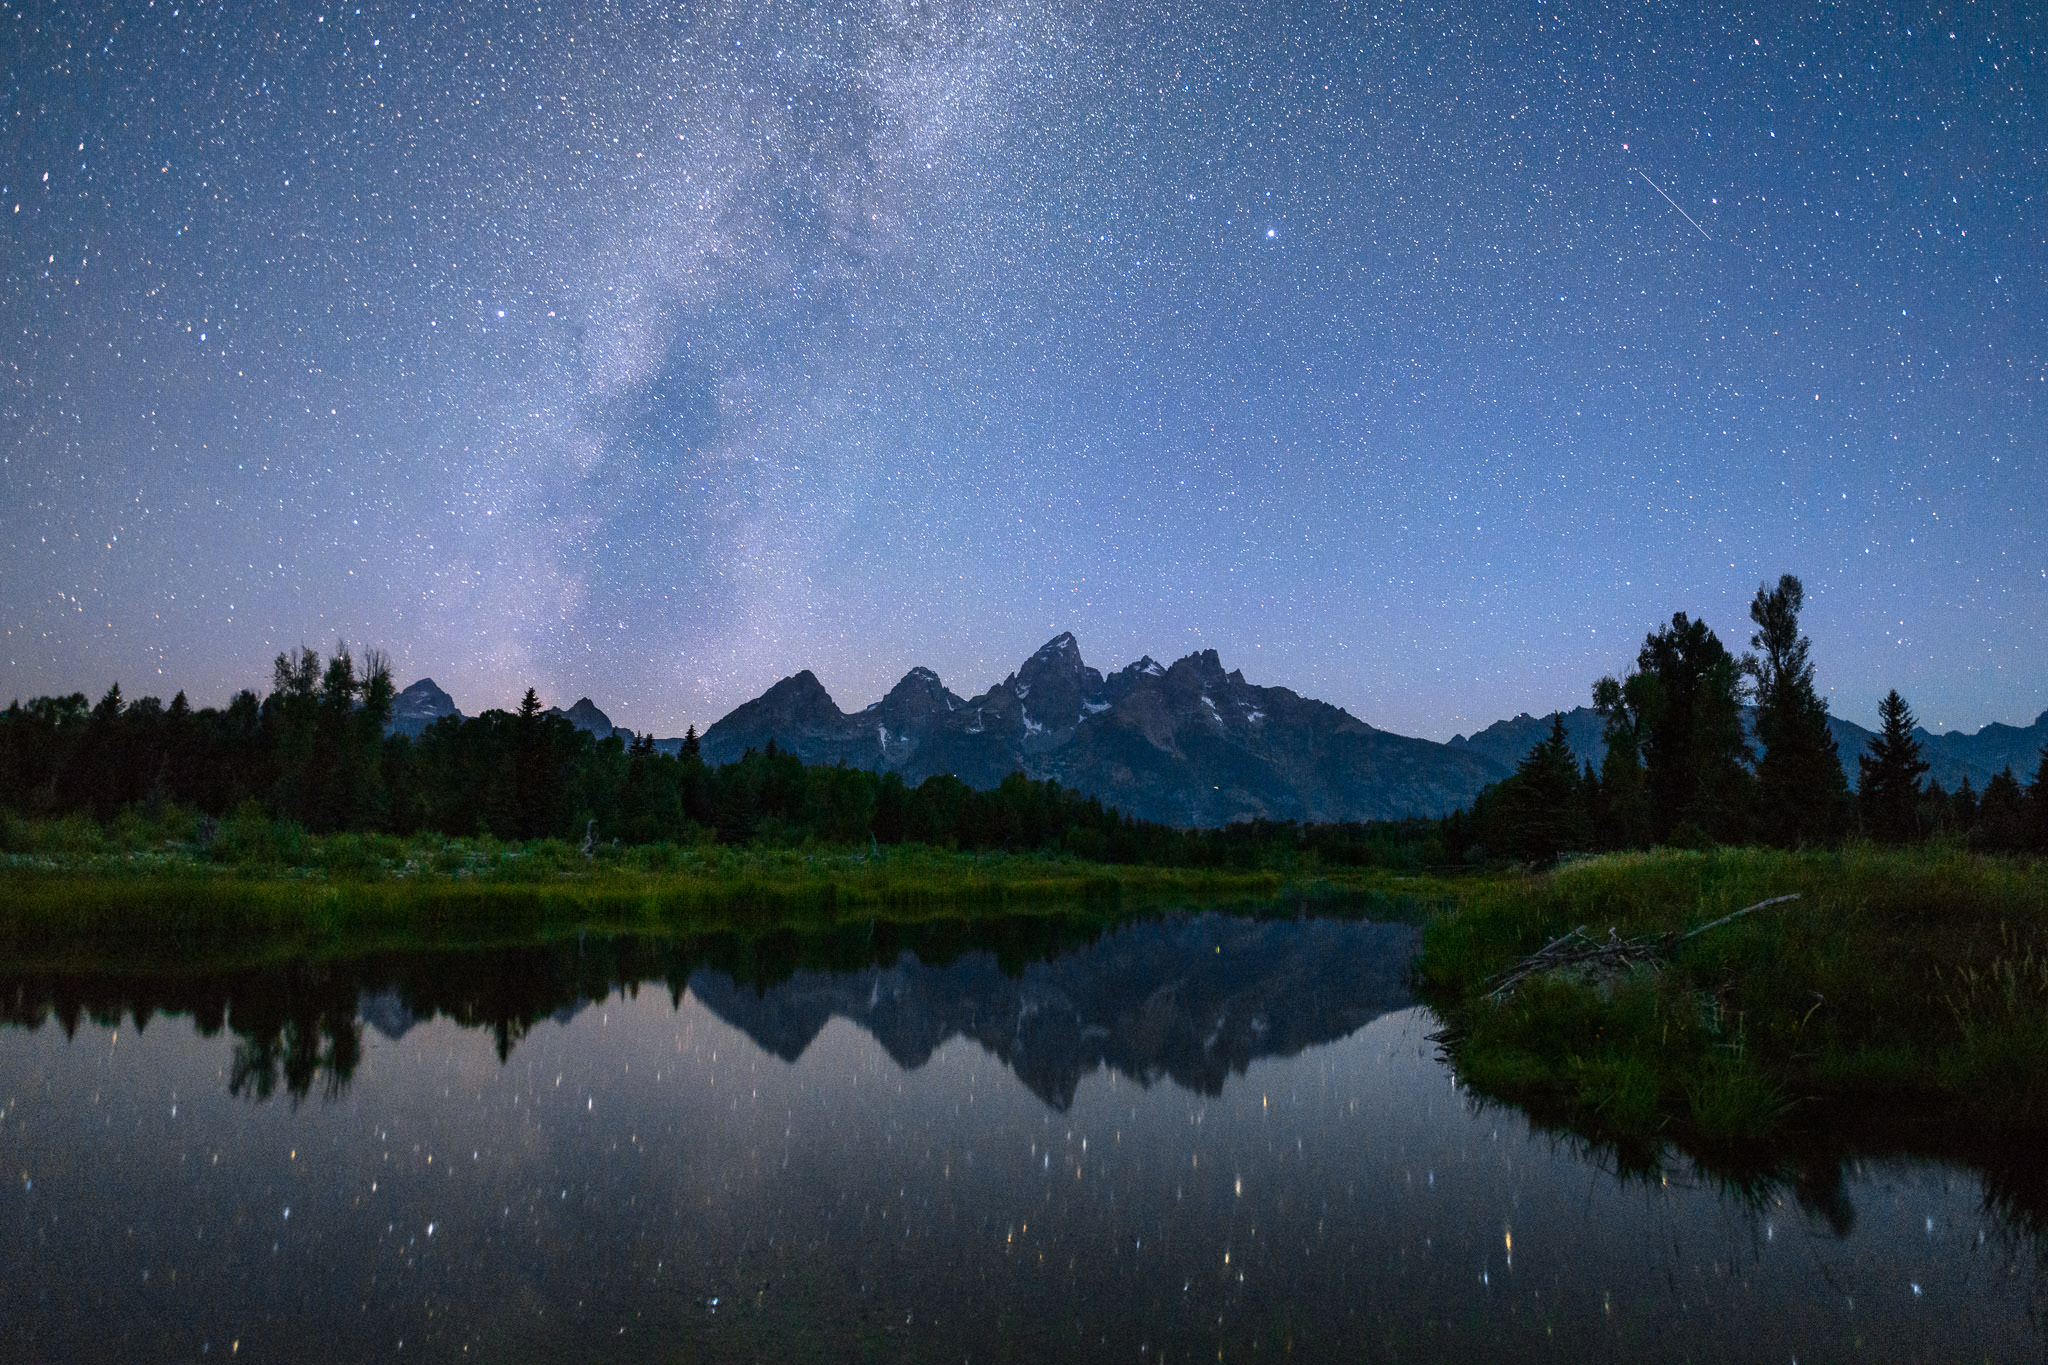
The final photo, with an improved composition (shifted slightly up and to the left). Taken at a lower ISO and a longer exposure to provide better image quality.
There is still a component of trial and error, which is unavoidable. But, on a dark night, when you can’t even see the scene with your own eyes, this is a much quicker way to capture the right composition. It completely eliminates 20- to 30-second delays in the field.
And, of course, you should feel free to delete the ultra-high ISO photo when you’re back from the field. It’s not something you’re likely to need, unless you’re writing an article about this technique :)
2) Conclusion
I know this is a quick tip, and you might already be using it in the field. Still, if not, it has the potential to make a significant difference in your nighttime landscape work. Although I only started using the ultra-high-ISO technique a couple years ago, it’s quickly become one of the main steps in my night photography workflow. My hope is that you will find it equally useful.
Thats a good tip and so obvious (once some points it out to you!)
Yes, it’s the sort of thing I felt like I should have known sooner! I’m sure that a number of photographers have been using this tip already, but it’s not widespread enough that I’ve read about it before. So, it seemed like it was worth a quick article.
I agree! Once someone points it out. That was a great tip. I can’t wait to use it.
Yes, it’s often the most obvious of things that isn’t.
Great tip !
John M
Awesome, AWESOME article Spencer! Going to put your suggestions to immediate use on my upcoming trip.
Thank you, Joe, and best of luck with photography on your trip!
there is nothing new in this… that method all photographers use it for two reason: 1- to save time in composing the shot 2- to calculate the proper exposure time.
Yes, I’m sure that plenty of people use this method already. Hard to know exact numbers, but if it’s news for at least some photographers, I am still glad that I wrote the article :)
I’m really glad you did Spencer…learned something new even if it maybe or seem obvious. Sometimes looking through the forest to see the trees…..
Karim, thanks so very much for repeating what Spencer wrote in his article. Without your completely necessary comment I would have been lost. I am a photographer and I would never have known I already use this method if you hadn’t pointed it out. Thanks, Spencer…great tip.
I’ve got d800e. I’m using max iso 200. Why? Cos iso 1600 burns out all stars. Stars becoming even 2-5 times bigger then they are in real. With iso 200 I do push from shadows in PS Result: little (very little) more noise in shadows, in highlights sharp as nidle stars.
Vil, it is a tricky issue, but I’ve also begun to do something similar with my D800e in certain cases. There definitely is a bit of a noise penalty with this method; the D800e isn’t totally ISO invariant until ISO 1600 (photographylife.com/iso-i…-explained for readers who are curious). But if you are losing some colors/detail in the stars at such high ISOs, it could be worth the trade-off. The D800e is still close to ISO invariant at such low ISOs. Thanks for adding this!
Thanks for the tip, just starting to learn how to shoot the night sky, might be an obvious tip for pros but not for beginners ..i certainly didn’t think of i ..going to try it!
Claire, glad you liked the tip! I hope it helps next time you’re out photographing the night sky.
Very helpful, so obvious I never thought about it.
Yes, it is almost too obvious! I’m glad I wasn’t the only one who took some time to figure it out.
Just curious, why don’t you use lower ISO and increase your exposure time? I assume you don’t have a remote shutter release button to use Bulb mode. BTW I truly understand the reason to use the highest ISO that the camera is capable of – “reducing the waiting game”. Anyway thanks for the tips, how come I never thought of it before.
Remi, are you referring to the final exposure (rather than the high ISO test photo) when you mention using Bulb mode? I do have a remote shutter release, but it doesn’t really help in cases like this. Specifically, if you want to capture sharp stars, the longest exposure you can use tends to be in the range of 15-30 seconds (depending upon your focal length), simply because the stars are moving across the sky. But I am glad that you enjoyed the tip, and I hope you find it useful in the future!
Spencer, I was referring to the final exposure. Thanks for the explanation. I know now why you capture it at 20 seconds. It’s due to the movement of stars across the sky. Another tip for me. Cheers.
It is really so much more advanced with Olympus long exposure modes as Live Time or Live Composite – you watch the image building on the LCD and you stop the exposure when you judge it is exposed enough – there’s no guess work at all.
Good description of how they work at this link: camerajabber.com/how-t…site-mode/
I’ve seen that Live Composite mode before. It is quite cool. However, in this case, I’m not sure if it helps you compose images much more quickly than the typical method of waiting 20-30 seconds per shot, since you still need to wait a while before the exposure is bright enough to see any details. Also, I would hesitate to use the rear LCD to judge exposure, just because it’s so easy easy to fool our eyes when it’s that dark. Does it have a live histogram as well? I can’t recall one way or another.
Either way, I am glad it’s been a useful feature for you, and I certainly don’t mean to dismiss its value. It’s an interesting option that I hope other manufacturers will add to their cameras in the future.
Great tip Spencer. It would also be very interesting to see colour histograms to find out if there is any level of reciprocity failure in these modern sensors.
Are you referring to the color histograms of the two images in this article, or in general? The images presented above have been edited, which skews the results. However, even the RAW photos don’t work as a way to measure reciprocity failure: I took the final photo about 15 minutes after the high-ISO image, which was enough to make the sky (and histogram) much brighter. As far as I know, reciprocity failure isn’t relevant in digital photography, although I haven’t tested it to ensure that there is absolutely zero such effect.
(For readers who are interested, reciprocity failure essentially means that long exposures turn out darker than they “should” when you’re using film. Longer explanation: www.geofflawrence.com/recip…ilure.html
Great tip, or a good reminder for the ones already using it. Night photography can be really daunting at first, this kind of advice can really help getting over the technical difficulties and starting to enjoy this rewarding style of photography!
Thank you, Michaël! Night photography definitely has more challenges than most genres, but it is quite rewarding when you succeed.
Tonight was to have been my second practice at astrophotography and, at 2:30 am, I’m glad to say that my initial annoyance that the sky has clouded over since 10:00 pm has been superseded by happiness that I came across your article while browsing and enjoying a mug of hot tea. Thanks for a great tip. So, next time….
I am quite happy to hear it! Even if clouds rolled in, a night of tea and reading about photography sounds worthwhile to me. The good news about astrophotography is that the night sky is always there, waiting to be photographed again in the future. Best of luck when you do!
Good short piece. It is the way to go. When I started night photography I wasted a few hours before I worked it out as a method. Bumping up the ISO a bit combined with live view and 10x magnification can also help with focusing as well.
Thank you, Mark, I’m glad you liked the article! High ISO + 10x magnification is a useful method for focusing at night, especially with newer cameras. My D800e’s live view is barely good enough to use this method, although it doesn’t always work perfectly. That’s yet another reason to carry a flashlight (or get the D850)!
I do the same for the night vision A7S but found One advantage of the Sony A7RM2 (own), A7SM2 and the New A7RM3 is a function called “Bright Monitoring” works only in Manual Focus and not all owners know about it. What it does is when doing night shots in the dark (not city so much) is the Camera LCD gets brighter like using a f/1.5 lens. Now if not used (say Aperture mode) you get a shot with a setting with a different lower ISO and shutter speed but with Bright Monitoring on you get to see everything even far away pertty bright and clear and adjust an ISO for a 30 sec shot more like 3200 or 6400 and the results upon review are about the same but brighter even. It even turns itself off if the scene is too bright to save the sensor (best guess). It even works with IS turned on, for those no tripod moments. You know it is on when you move the camera and it blurs for a moment till stopped. It also turns off when manual focusing on stars or pressing the review button but easy to turn back on with a selected button.
www.mitzenmacher.net/blog/?p=1751
I take shots both ways just to see what can be recovered in post, mainly same results but less noise in shadows with bright monitoring the reason is the sensors dynamic range you just get so much from it. But not the real point, the point is when out in the dark and you have focus for stars locked and taped in you press the button and the land and foreground can be seen better than with your eyes even with a flashlight, so no more need to light up a flashlight and get yelled at by others!!!
Great for cave shots even if lit, framing is first key. But astro Milky Way shots will never be the same it is like having the moon out and and your final image will appear the same, I have no idea how it is done but thought you might like to know if you have one of these great cameras (lower in price now and never cheep by any means). Not a pro just like to play, yes it was dark and a rattlesnake went by in front of the bushes before I shot this, I saw it on the camera LCD screen.
www.edgenauxsphotography.org/Photo…-796LLnL/A
Lastly what disappearing stars!!!!
That is a very interesting feature I had not heard about! Thanks for adding. It certainly sounds like a good option for people with the cameras you mentioned.
Great photo, too! Is it a focus stack, or just a wide enough angle and a small enough aperture that the foreground is so sharp?
Thanks, Spencer. This is a good tip that I have used often at night. Along the same lines with night photography it is easy to be misguided by the apparent brightness of the image as your eyes are adjusted to the darkness. The next morning or when your review the image on your monitor I’ve been disappointed by the exposure so to compensate I try and remember to set my LCD brightness down to its minimum setting. Then when I look at the image while shooting it more closely matches what I see back on my PC.
Hi all. Contrary to the tips above I have experienced live view in my D750 works with success in dark conditions. I do not know if other models have lower capability in that, but in D750 it just works excellently.
Appreciate the suggestion Spencer.
Very useful, especially when it really cold out there.
Amar
Composition is one thing, exposure is another and the same sort of process gives a quick guide to long exposures. For example, suppose you find an exposure of 3 seconds, f5.6 at 6400ISO is correct. 6400ISO is 6 stops from 100ISO and 1 second is 6 stops from 1 minute. So your starting point for a long exposure is 3 minutes, f5.6 at 100ISO.
Hi Spencer, a very good tip indeed, thank you! I don’t take night landscapes for the very reason it takes so long, it never occurred to me to ramp up the ISO to compose, then switch it back for the money shot. This may actually get me out to do a bit of night time work.
Thanks again.
I am surprised that no one has mentioned what I have been doing….very simple. I get to my site before dark and compose the photo while I still have some day light. Sure it takes a lot more time and planning, but I am prepared for the long haul with a cooler full of drinks, granola bars, and a good book.
What a great tip. Must try that asap!
Great tips!! Alternatively, you can compose the scene at dusk and , if it is safe, leave the tripod there. Later come back, mount the camera and shoot. You may still have to do some trial and error.
Great tip, thanks! Haven’t thought about pumping up the ISO for previews before. :)
Thank a lot for your photography advice. i´m really into photography. I´m a bigginer. Afew months ago I started with my Nikon D3300. Although i make a lot of mistakes , i continue taking pictures.
That’s a great tip. Simple but effective. Can’t wait to try it out. Thanks!
When I‘m out doing astrophotography with the D750 I always have ISO 50.000 and 1s with no MirrorDelay on U1, and ISO 6400, 15s, 3s Mirrordelay on U2. Saves a ton of time ?
Fantastic tip, Spencer! I’m usually on site before sunrise when there is little light. I hate waiting for that long exposure just to find that my composition is askew. Now I can bump up my Nikon D810 ISO to 12,800, take a quick shot, analyze the compo, readjust, and try again. Your tip is going to save me all kinds of time!
Nice tip to make things easier…Thanks.
I have a question about landscape photography in general, and astro in particular about using a wide angle lense for the ease and quickness of composition.
Two lenses, say ‘tamron 15-30’ and ‘nikon 20mm prime’ are both for wide angle purposes. Wouldn’t tamron 15-30 be a bit easier and faster to compose than the 20mm prime, as tamron allows a bit of zoom? Which of the two is a better choice for daylight landscape and night astro photography?
Great tip. Thanks for the article.
But wondering, for wide angle landscapes (daylight or even astro), isn’t wide angle zoom more easy for composition than wide angle prime?
Say if you have 20mm prime vs 15-30mm wide angle lense, isn’t the 15-30mm wide angle more easier to compose the frame because of it’s zooming abilities? If you have to buy one lense, which one would you buy– wide angle zoom or wide angle prime? I see you used prime lens for these pictures, but I think wide angle zoom makes it more sense over prime in landscape/astro. Am I missing something in terms of quality of shots?
You aren’t missing anything — zooms are frequently ideal for nighttime photography. Personally, although I did take this photo with the 20mm f/1.8, my current go-to lens for nighttime photography is the Nikon 14-24mm f/2.8. The only downside is that these lenses don’t tend to have as wide of an aperture, which does decrease the light you can capture, and the overall image quality somewhat. But if you have an f/2.8 zoom, it isn’t a major concern.
Thanks. Mostly I was using 24-120 zoom for landscape/nighttime, and came across your article.
I was thinking of getting some wide angle lense for landscape/astro/architecture. I was set on either tamron 15-30mm/2.8 or nikon 20mm/1.8. Leaning towards tamron after your comment, but your prime lense shots also look fantastic. Need to finalize, now that PL has provided some apt links for enablement. :)