To get better as a landscape photographer, I find it very helpful to look back on my photos and evaluate the mistakes I’ve made. Many of these mistakes are things that I see other landscape photographers do wrong, too – from technical errors to creative pitfalls. Today, I’ve compiled five such mistakes and explained how to fix them as a landscape photographer.
1. Not Stopping Down Enough
Most photographers are aware that you’ll introduce high levels of diffraction if your aperture is too small. Our lens tests confirm this, with small apertures like f/11 and f/16 usually scoring worse than moderate apertures like f/4 and f/5.6.
However, many landscape photographers internalize this fact way too strongly. Generally speaking, insufficient depth of field is a much larger cause of blur in your landscape photos compared to diffraction, especially in the nearest foreground.
When I see blurry corners in the foreground of a landscape photo, my gut reaction is that the photo was taken at f/5.6 or f/8. Nine times out of ten, that’s the cause – it’s not a lack of sharpness from the lens, even though a lot of photographers take it as a sign they need to spend more money on a fancy prime or expensive zoom.
Sure, f/5.6 and f/8 usually measure better in the lab. However, by the nature of lab tests, they’re done on a flat, perfectly-focused test chart. In the real world, most scenes have enough dimension to require much narrower apertures if you want both the foreground and background to be as sharp as possible.
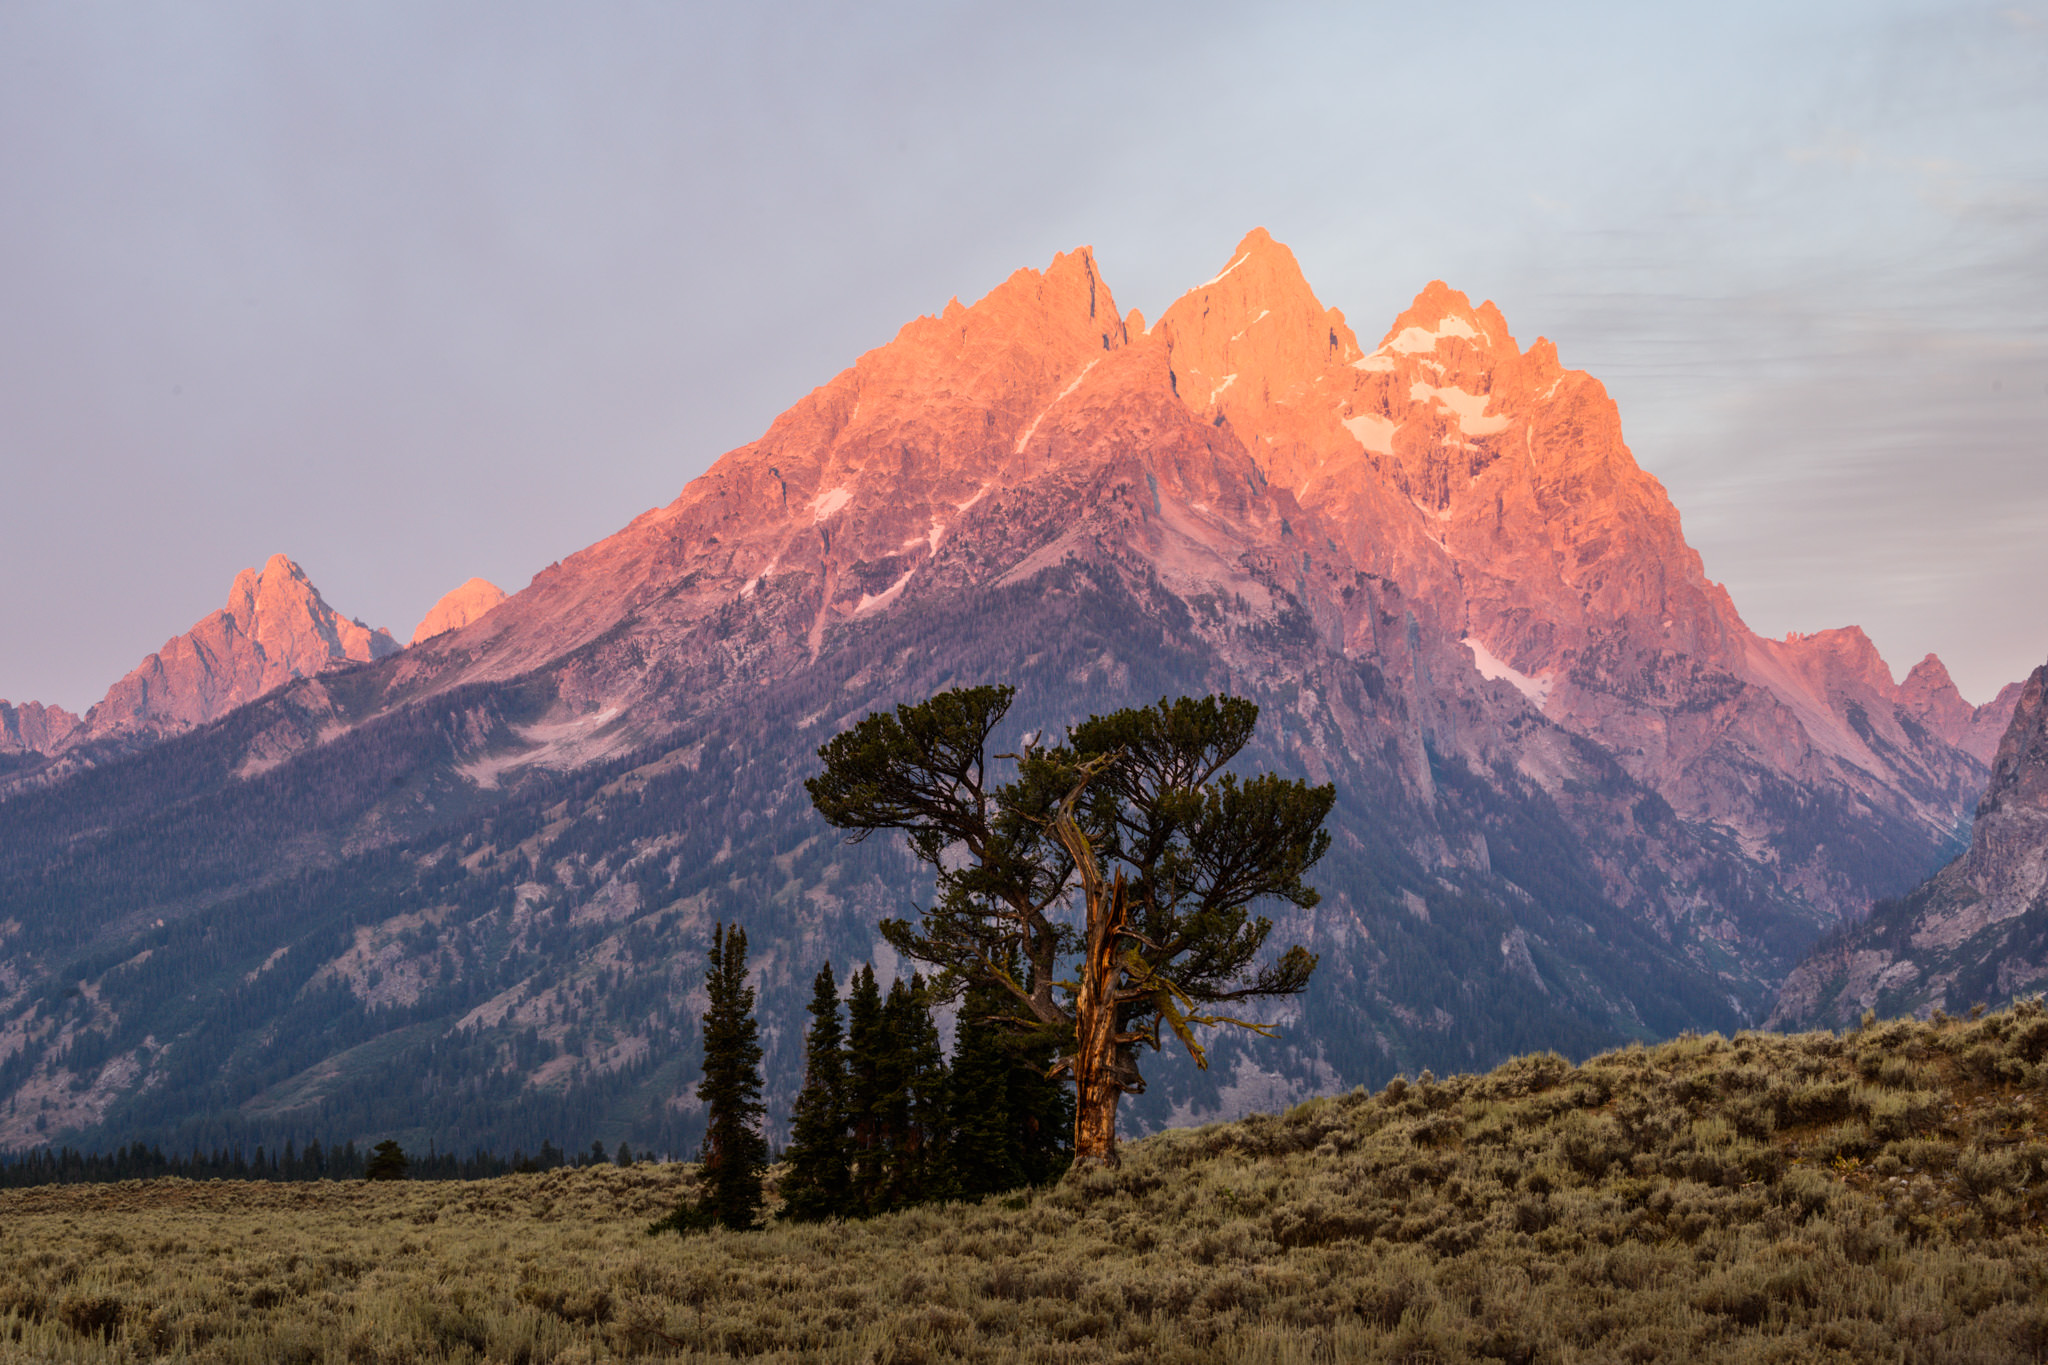
What does this mean in practical terms? Personally, I only shoot at the theoretically “sharpest” aperture like f/4 or f/5.6 if I’m focus stacking (which I rarely do) or if I’m at an overlook where everything is near infinity focus. I consider f/11 to be a better default aperture for most landscape photos, and f/16 is ideal nearly as often. Even f/8 is too wide much of the time.
I’ll have more to say about this in an upcoming article, including extensive crops if you’re the skeptical type. But for now, just know that if you want sharper landscape photos, you might need to stop down more than expected. Don’t be too afraid of diffraction when the bigger culprit is usually depth of field.


2. Thinking That Everything Needs to Be in Focus
Ah, this is a bit awkward after the previous tip, isn’t it?
While it’s true that f/16 is useful more often than expected, it’s also true that a lot of landscape photographers don’t embrace the power of subject isolation. Wide apertures (and other techniques to get a shallow depth of field) are a valuable tool in a landscape photographer’s arsenal. A lot of landscape photos, especially intimate landscapes, really benefit from the shallow-focus look.


There’s also something to be said for landscape photos where depth of field is only subtly shallow, in a way that you may not notice in a small image online but will be apparent in a larger print.
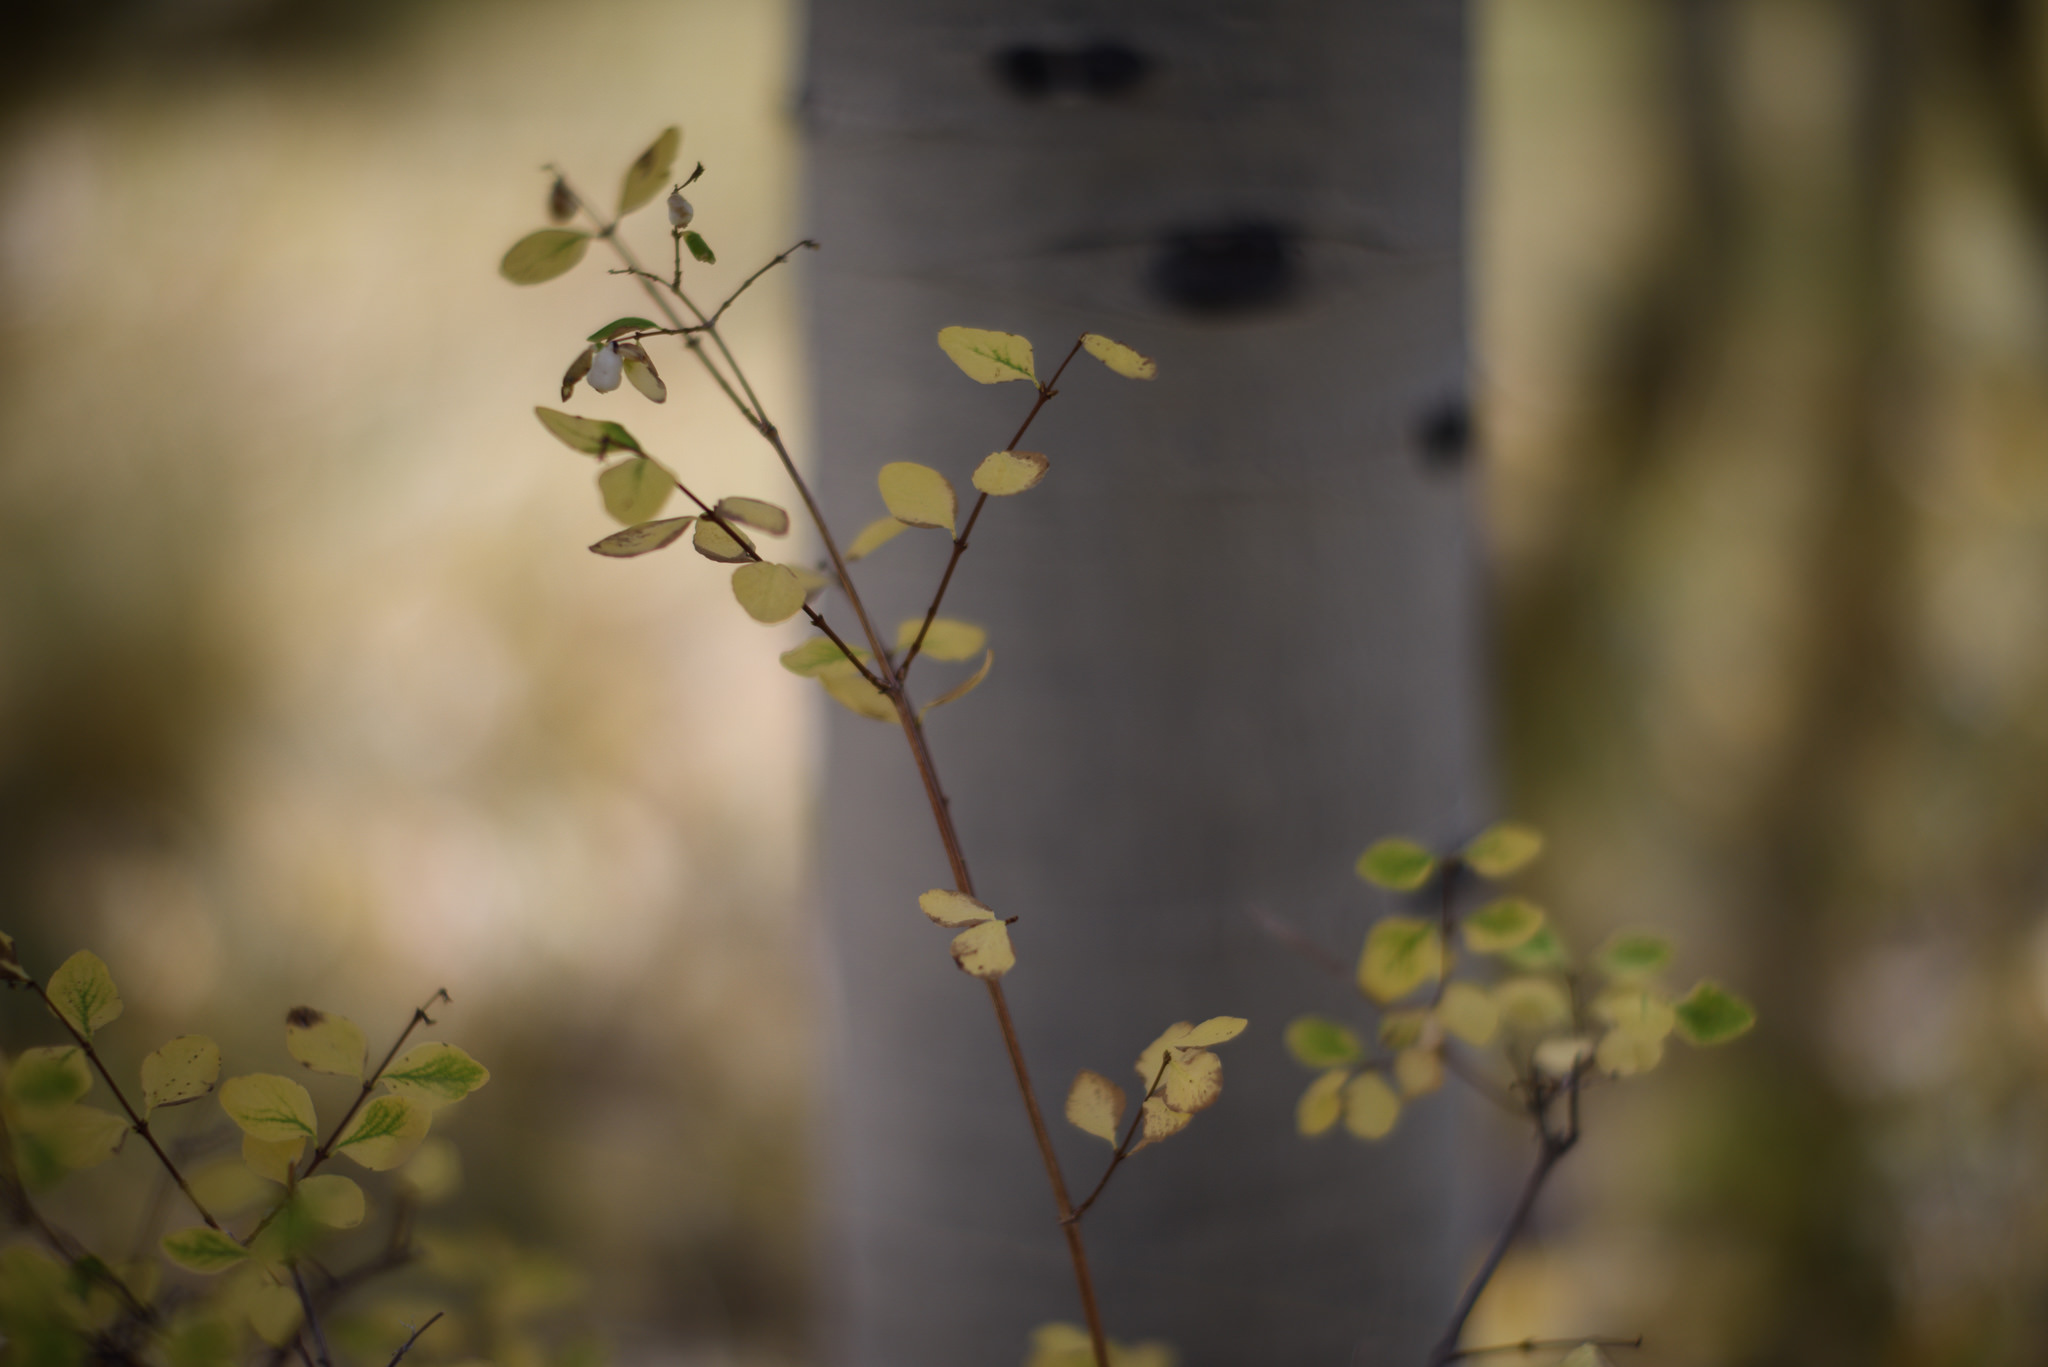
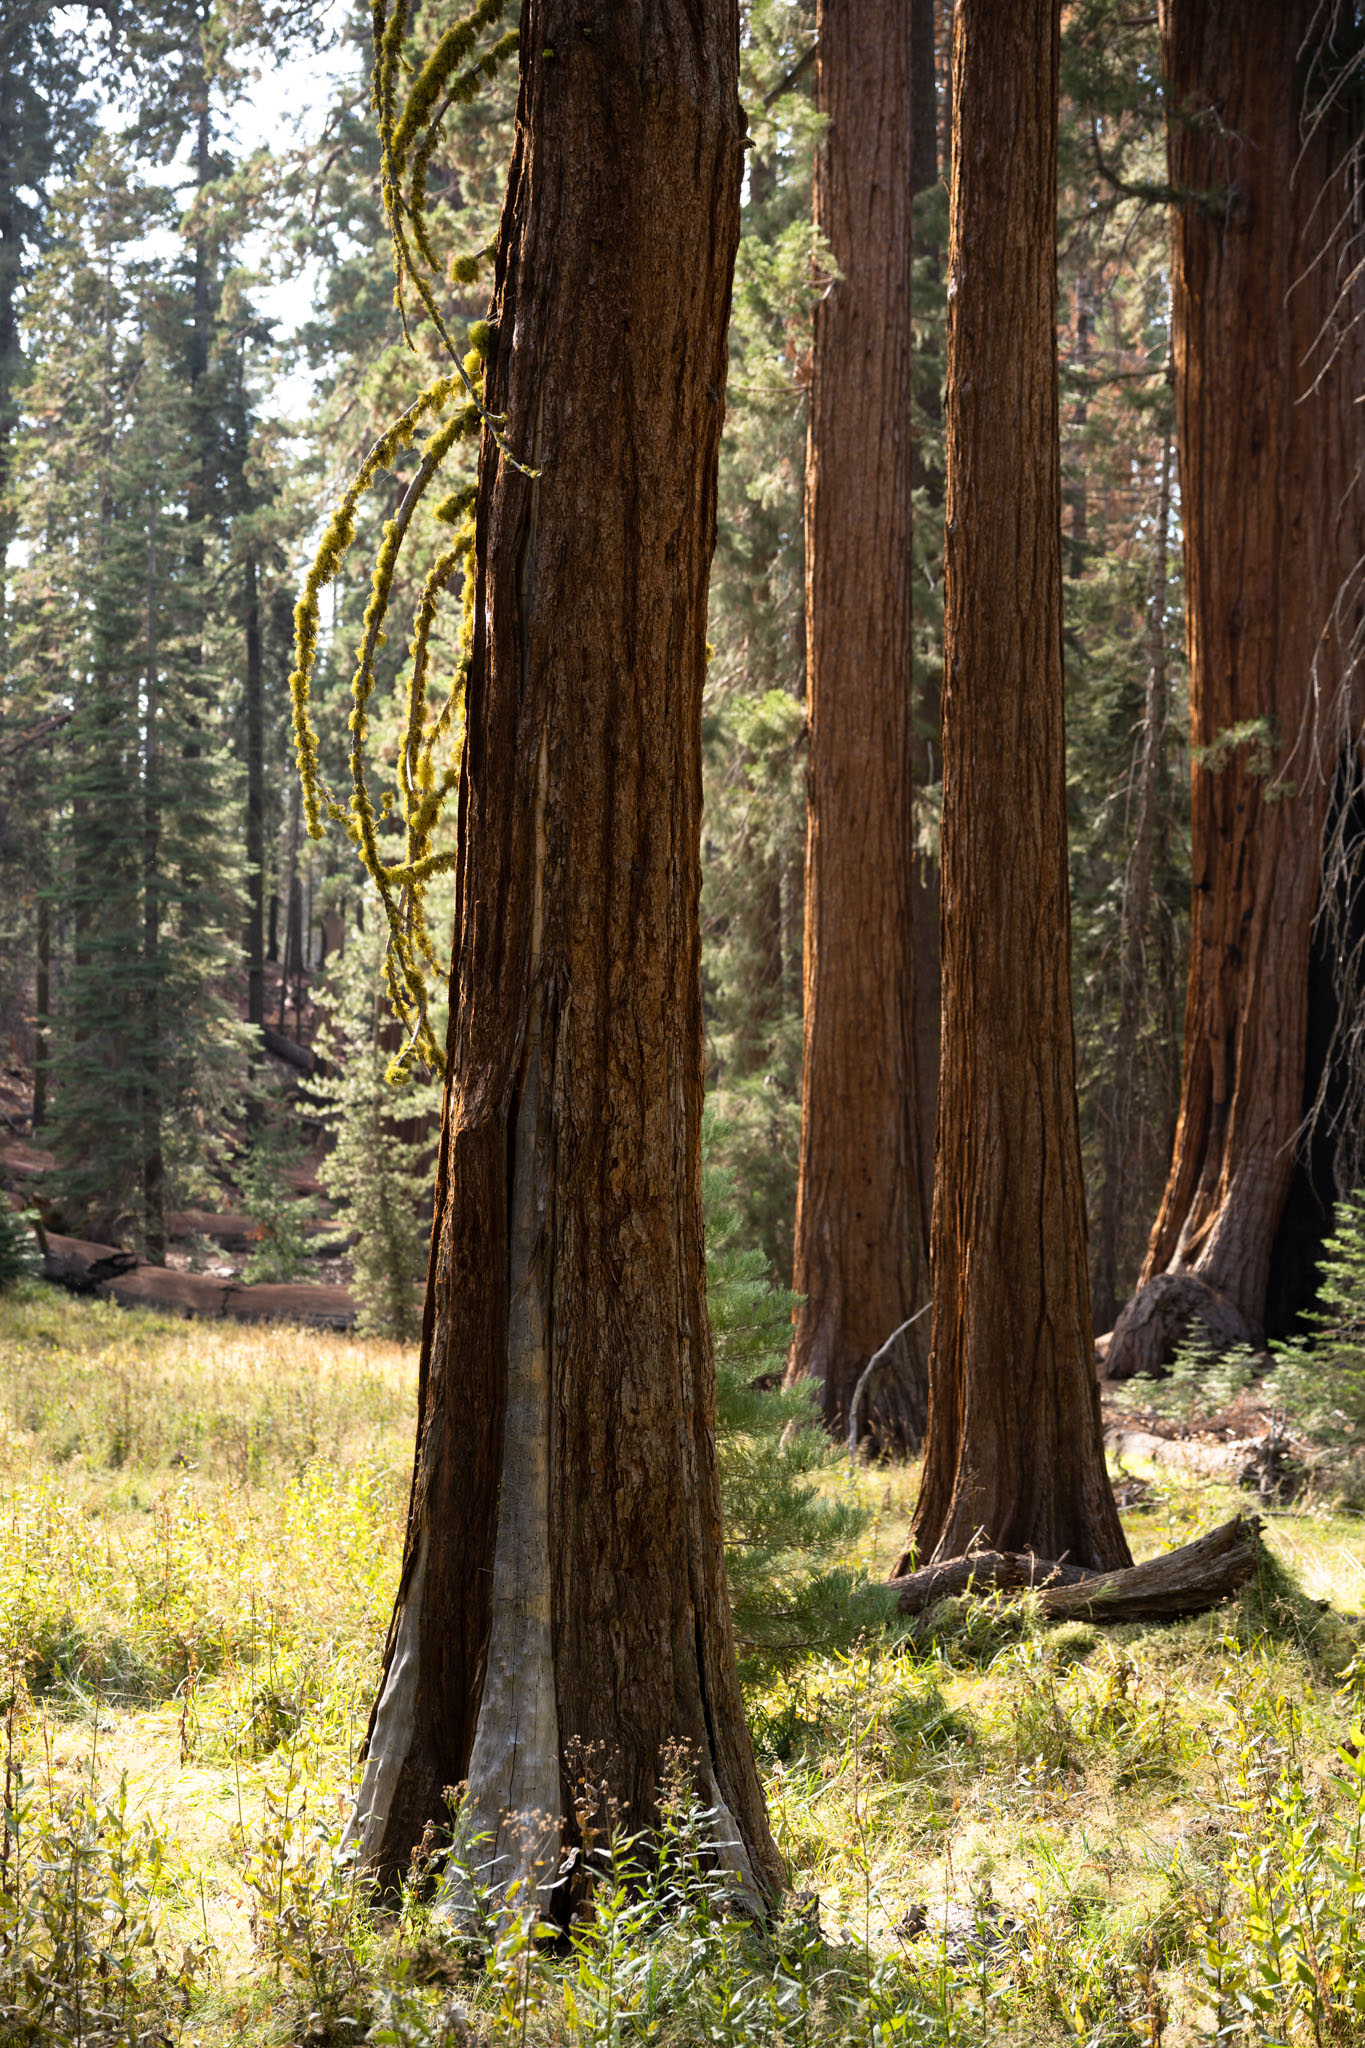
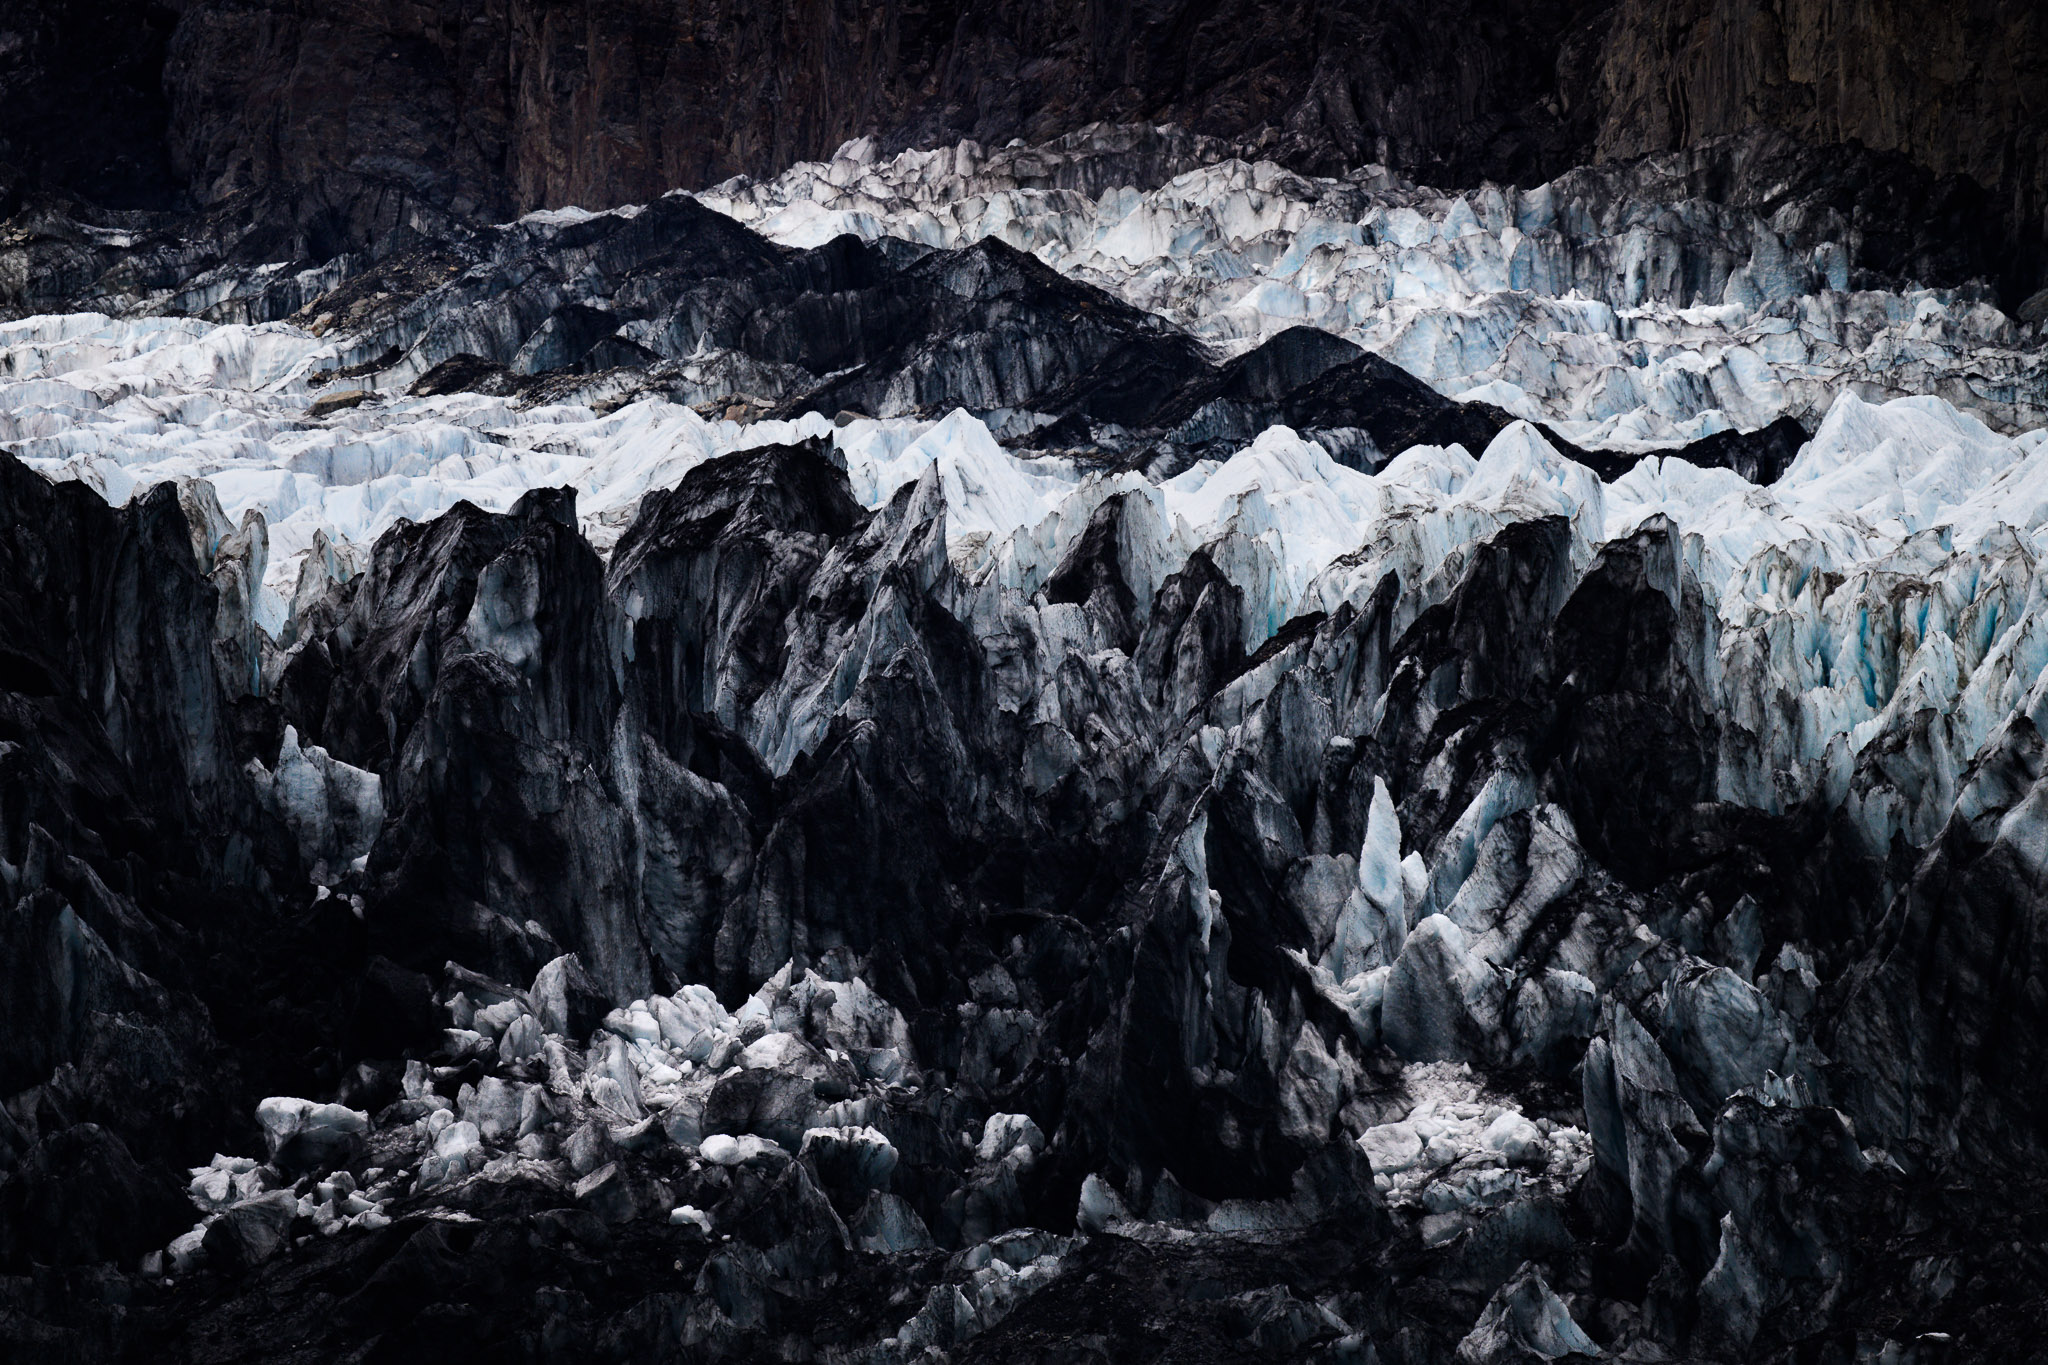
Take a look at the photo below. At first glance, everything from front to back may seem to be sharply focused. But with a second look, especially on a big monitor, you may be able to tell that the foreground and background are slightly out of focus in a way that adds to the dark, painterly look of the image.
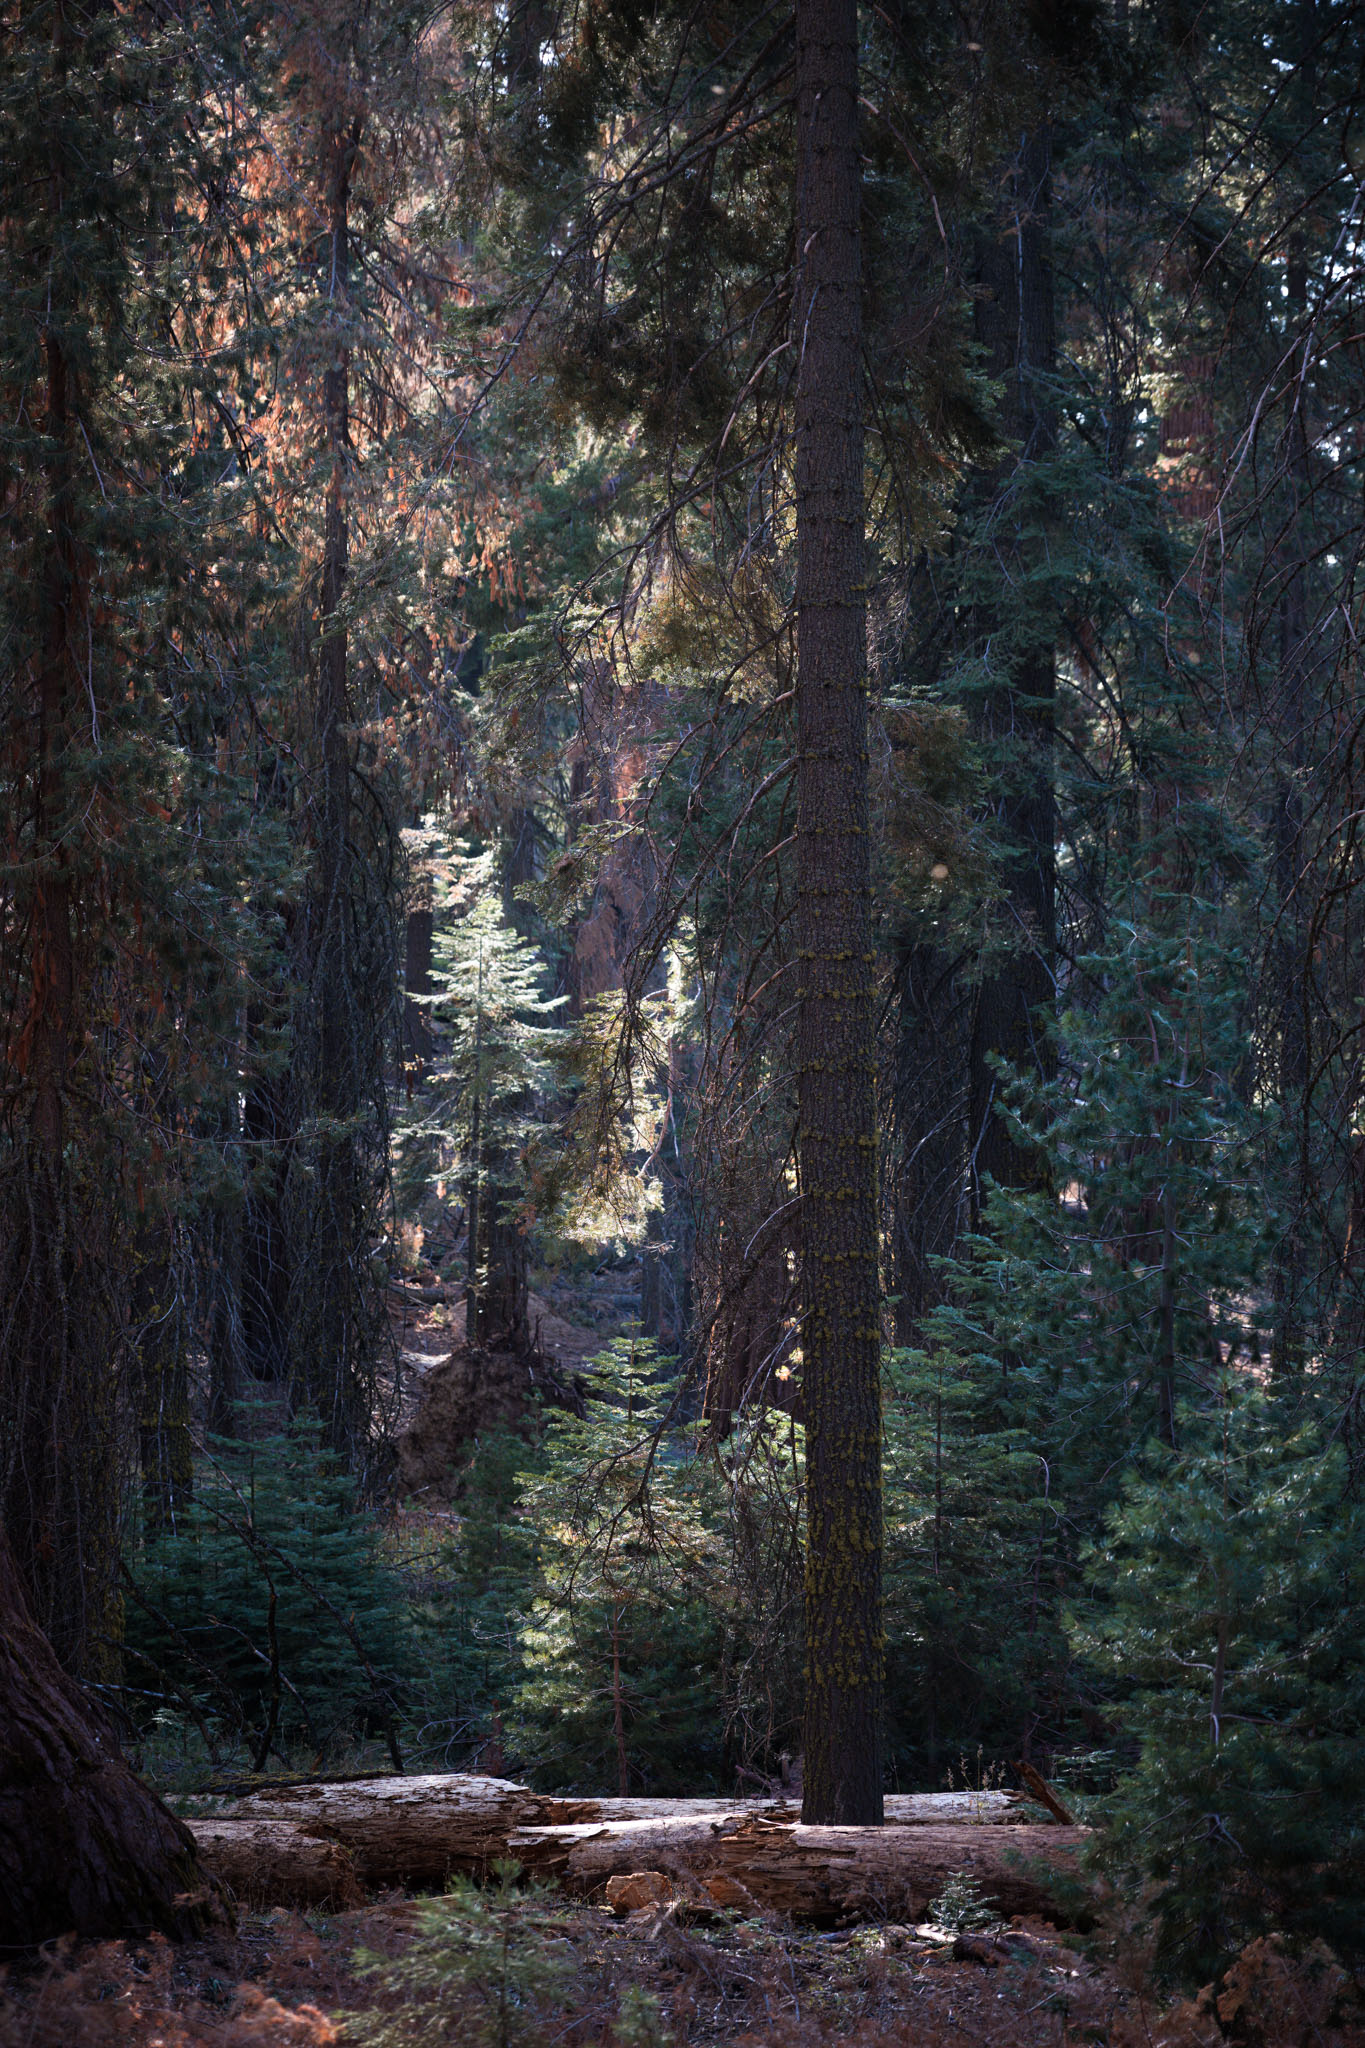
My first reaction when I found that scene wasn’t to shoot it at f/4. Instead, I was conditioned to shoot it at narrow apertures, like most landscape photographers are. However, my early photos of this scene didn’t look right with a high depth of field. The sharp background distracted from the subject and took away some of the photo’s surreal quality; it looked better with just a bit of blur.
Take this as a reminder not to use any given technique thoughtlessly – even obvious techniques, like using a narrow aperture for landscape photography. “That’s just how it’s done” may give you the right results most of the time, but they can also hold back your creativity. Every photo should be captured for itself.
3. Post-Processing in a Destructive Manner
There are a lot of post-processing mistakes I see as a landscape photographer – enough that I could write an article just like this one full of examples. However, most of these post-processing mistakes aren’t fatal, since you can always correct them down the line. For example, did you over-saturate or over-sharpen a lot of your photos as a beginner? No harm done; just go back to those photos later and drop the sliders down to respectable values.
By definition, however, one mistake isn’t correctable: baking edits permanently into your photos. Most commonly, I see this with photographers editing a JPEG or TIFF file in software such as Photoshop, then clicking “Save” rather than “Save As.” This is called destructive editing. I hope that you really like that edit, because if you haven’t saved a backup copy of the original image, now you’re stuck with this one.
In some software, it’s impossible to edit photos destructively, such as Lightroom and Capture One. With catalog-type software like that, no edits are ever baked into the file. But if you use destructive or semi-destructive software like Photoshop, make sure that your post-processing routine keeps the original files intact somewhere for later reference. (Or, rather, for later rescue.)
By the same token, this is why I’m wary of shooting in-camera JPEGs rather than raw files – especially in-camera JPEGs with high contrast, sharpening, or saturation, since undoing it can be a nightmare.
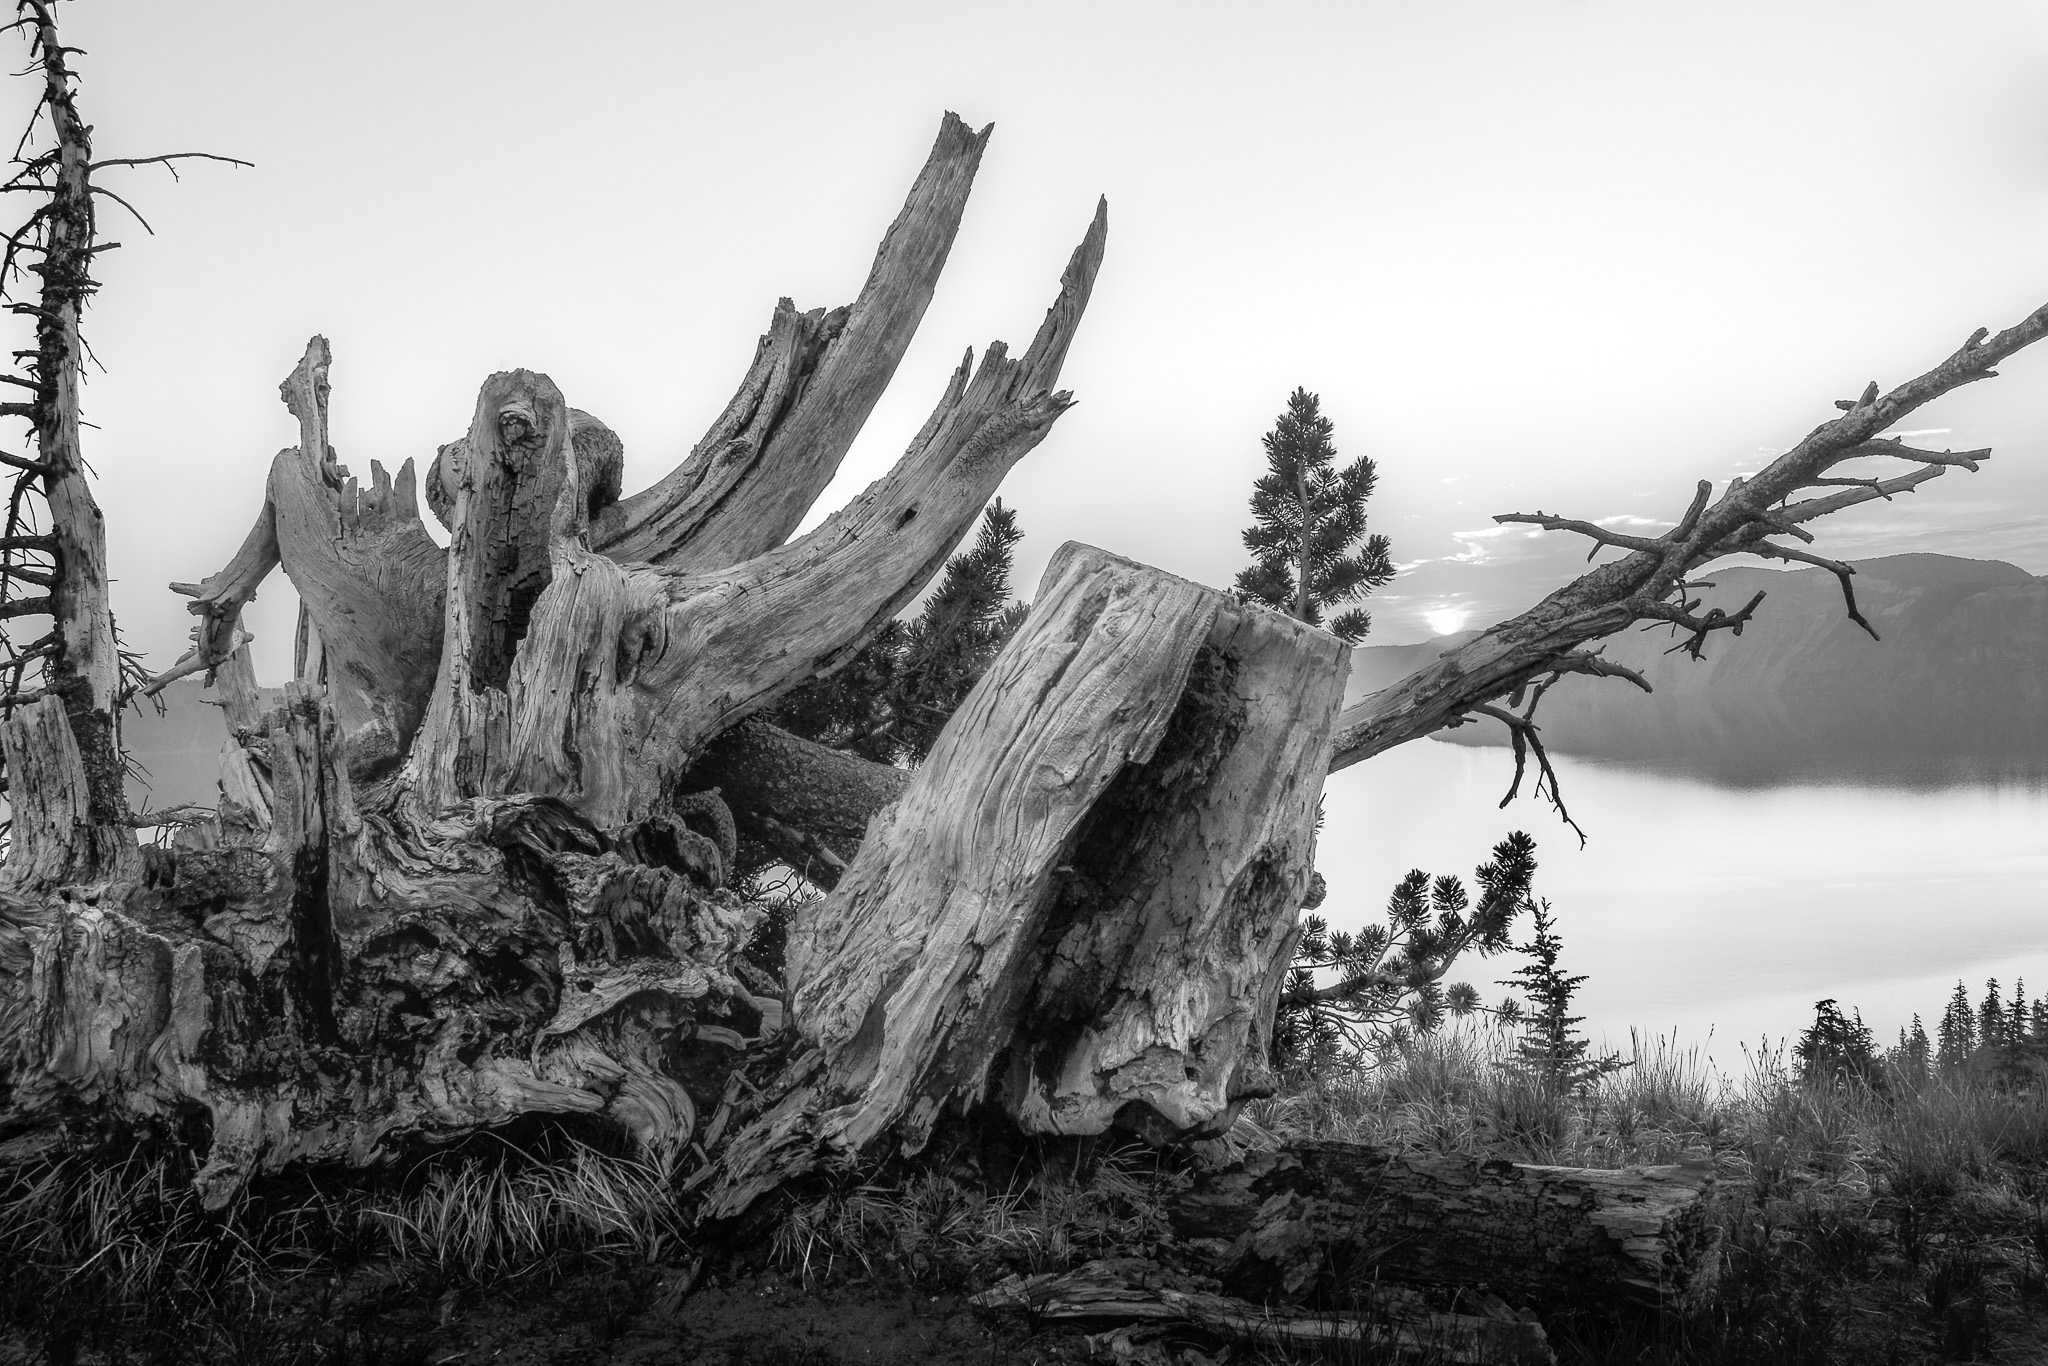
NIKON D5100 + 18-55mm f/3.5-5.6 @ 18mm, ISO 100, 1/10, f/16.0
4. Not Thinking About Composition
This isn’t just a landscape photography problem, but usually, you’ll have enough time to compose your landscape photos that there’s no excuse. Don’t compose them thoughtlessly!
Thoughtless composition includes following pre-determined “rules” like the rule of thirds or the golden ratio. These don’t lead to better compositions – they lead to you taking the same composition every time, even when the subject demands something different. It’s better to consider things like simplicity, breathing space, balance, and unifying your emotional message, then compose every photo for its own merits. If any of those concepts sounds unfamiliar to you, do yourself a favor and read the article that I linked to for a refresher.
Here’s a demonstration that I like to show whenever this topic comes up. Which of the two following photos is more effective to you?

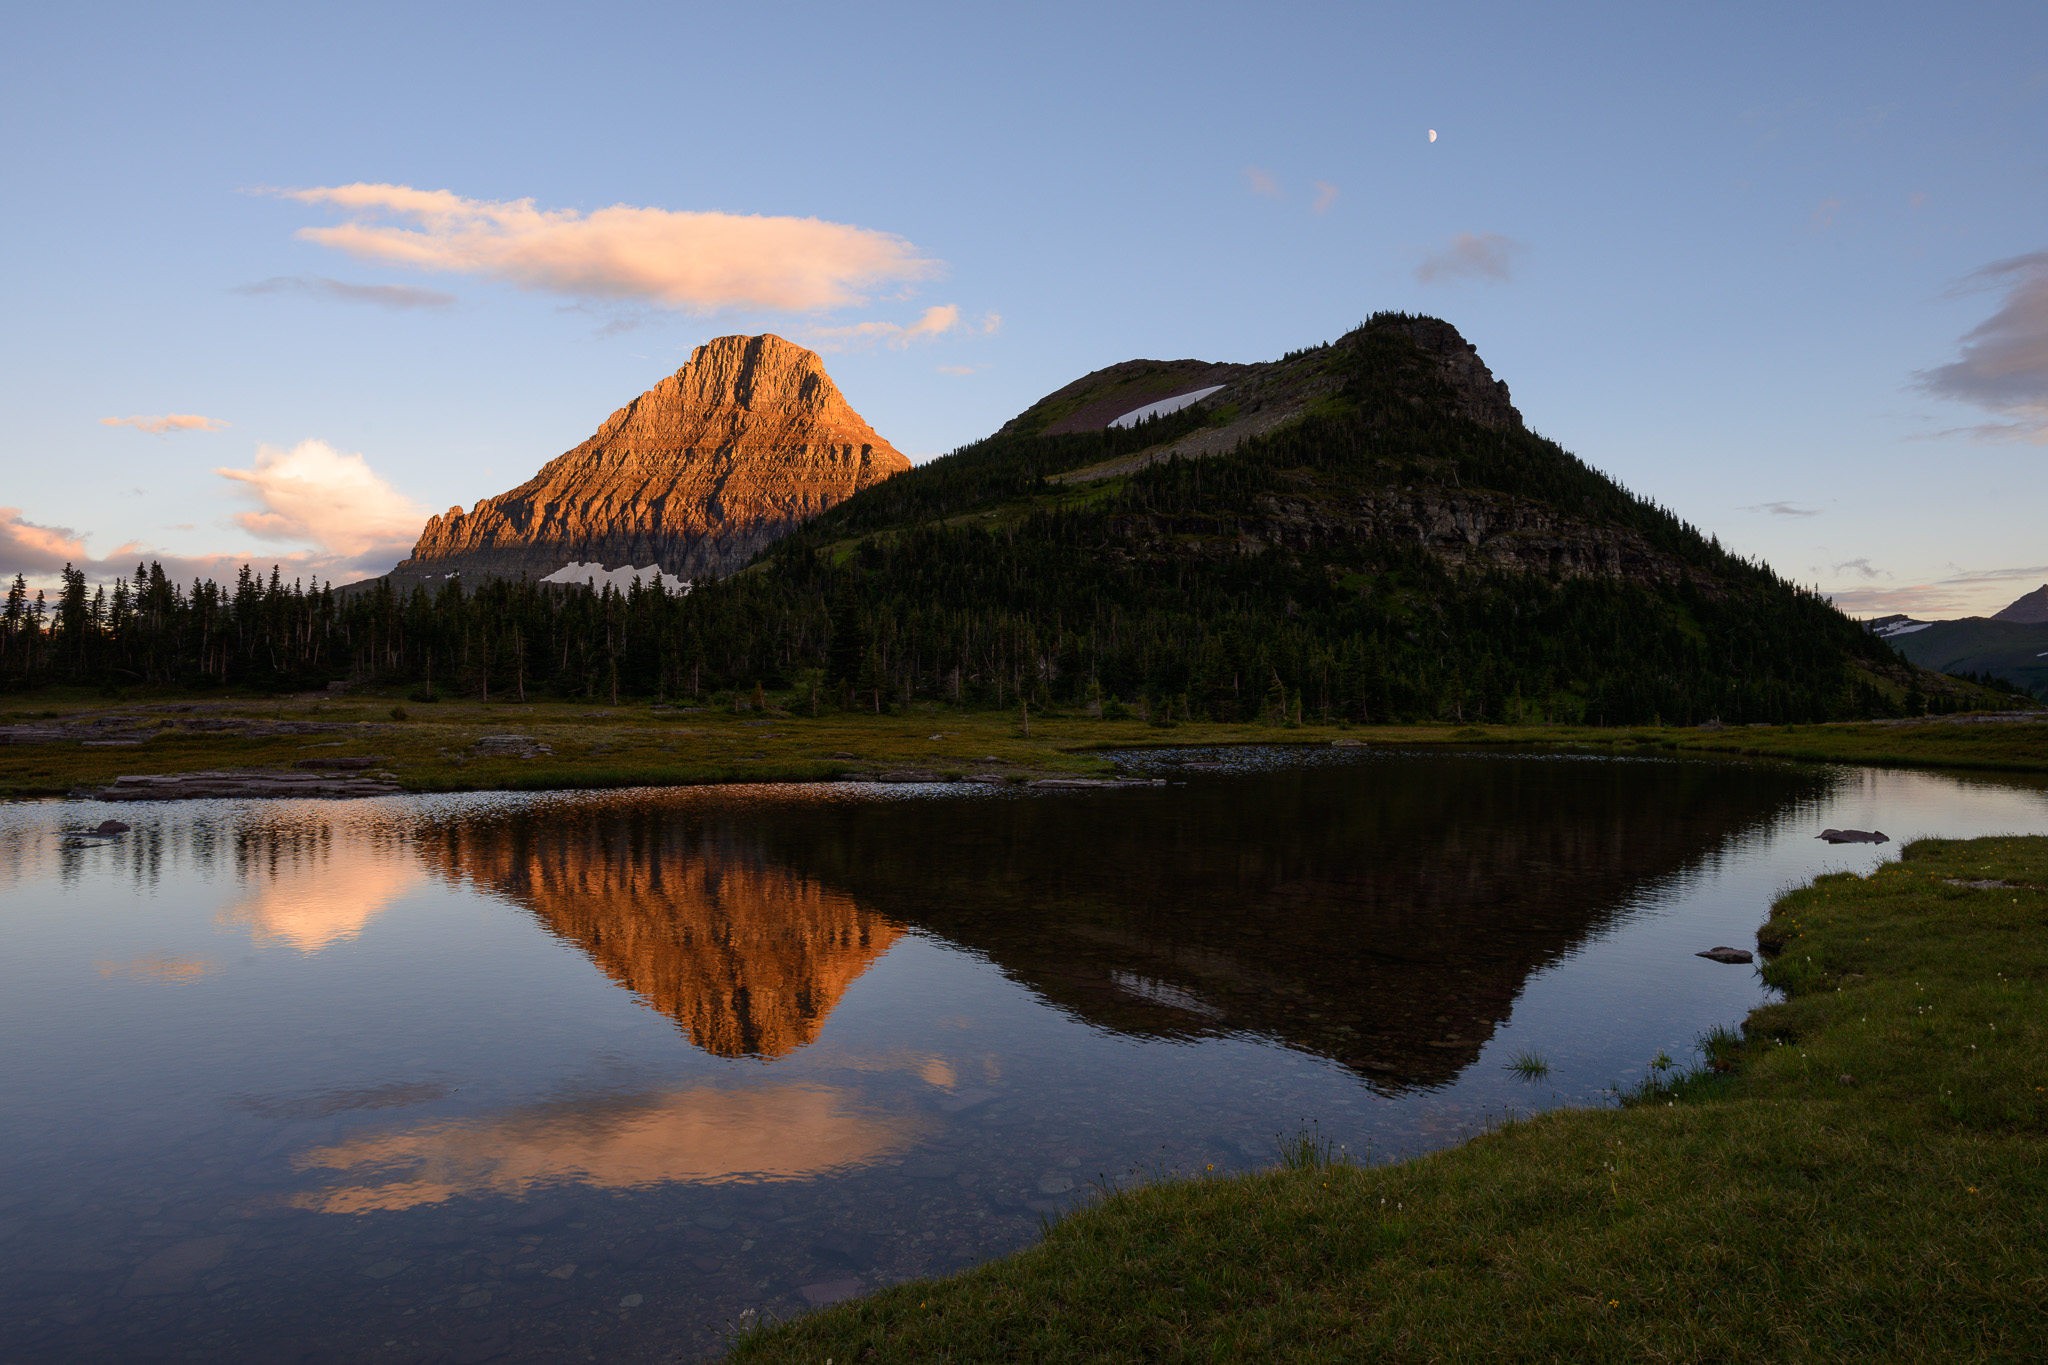
It’s the same landscape both times. However, the first photo is more of a snapshot to me, while the second photo has a thoughtful composition.
What makes the second photo a better image? It’s better balanced, for starters. It also gives the moon room to breathe at the top of the frame, and it doesn’t block the mountain’s reflection (an important secondary subject) with a bunch of distractions in the foreground. Speaking of distractions, there are fewer of them – it’s a simpler and more effective photo. Finally, the light is better with the sun shining on the mountain, but that’s actually a minor point compared to the rest of the improvements.
I’ve shown those two photos to a lot of photographers with fewer than 5% preferring the first image. However, even if you like the first image more (maybe because you prefer the more complex foreground), ask yourself how the composition could still be improved. The moon at the top of the first image is nearly cut out of the top of the frame, and the photo is very awkwardly balanced, leaning heavily to the left. A more thoughtful composition would have improved upon these two elements at least, even if I were to keep a busier foreground.
In short, good compositions rarely happen by accident. They usually take effort and thought. Composition is also one of the most fun parts of photography, so don’t leave it up to chance! You can usually tell just by looking at a photo whether the photographer thought about composition or not. Aim for deliberate compositions, and you’ll almost always see your work improve.
5. Only Using the “Expected” Focal Lengths
It used to be that ultra-wide lenses were considered the end-all, be-all of landscape photography lenses. Thankfully, this mistaken idea is something I see less often these days – perhaps because of all the YouTube channels sharing the secret information that telephoto lenses are great for landscape photography.

Give me a 70-200mm for landscape photography over a 14-24mm lens almost any day. The 14-24mm works great when you’re at a picture-perfect landscape, but the 70-200mm works great almost anywhere.
Telephoto lenses allow you to pick out abstract details or focus on the most interesting part of an otherwise dull scene. My mantra as a photographer is to exclude anything from your composition that takes away from the photo – and that’s a lot easier when you’re working with a long lens.
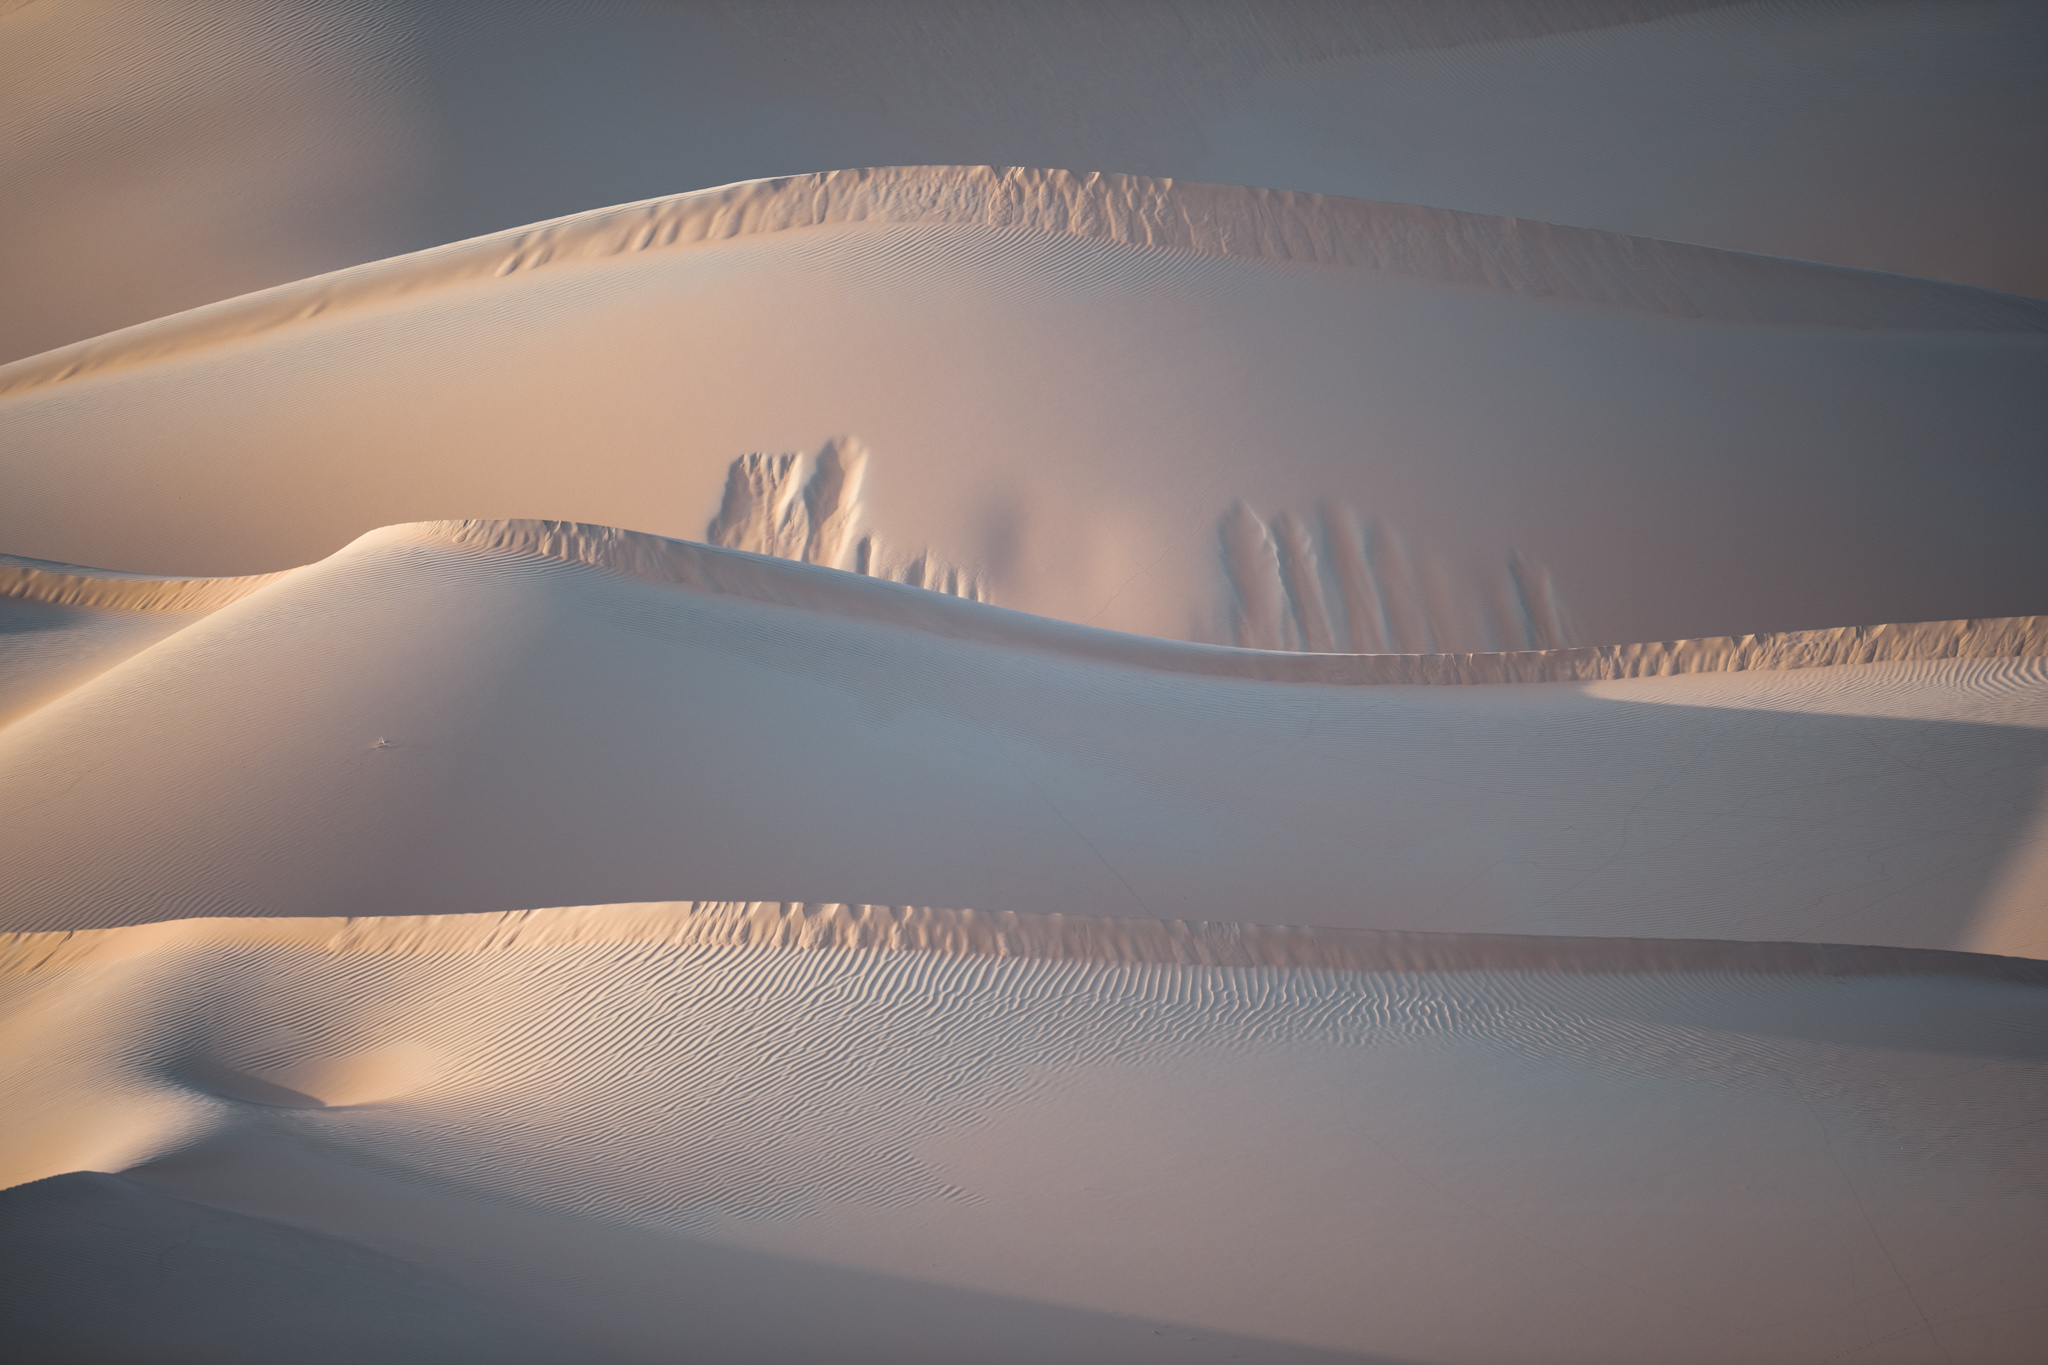
For one of my favorite landscape photos this year, shown below, I used an 800mm lens. That’s way beyond the norm for landscape photography – to the point that if you’re using an 800mm lens, it can be hard to remember that landscapes still exist at all. But for distant scenes or elaborate abstracts, why not? Don’t avoid a focal length just because it’s not typically used for landscapes – and this goes for other genres of photography, for that matter. Some of my favorite wildlife, portrait, and architectural photos were all taken at unconventional focal lengths.
That’s the real key, and it underpins many of the points in today’s article: Don’t take photos in a thoughtless manner. Your compositions – even your entire creative process – should vary based upon what you want each photo to say. Listen to the landscape, and make your various decisions in response to it. If you do that, you’ll avoid many of the creative mistakes that you could have regretted later.
Well written article, not the usual content with very little actual value. This is different and drives the point home with very good example photos. Thanks!
I read and like Your posts very much.
A little remark about You saying “I never use more than a 105mm of focal length”
Well, something has happened….:-)
I don’t know that it was me who said that about 105mm! I’ve always loved longer lenses for landscape photography and mainly used a 70-200mm in the past. That said, my only lens at one point was a 105mm macro lens, and I used it exclusively for about a year – maybe that’s what you were thinking of.
Hi Spencer – Excactly! With that in mind I think that the new Z 105mm would be a great lens for almost everything.
Some of my best landscape work has been taken with my S-series 105mm macro lens.
#3 and 4 just hit home. I use Photoworks but always keep originals untouched. Sometimes it’s interesting to review your old works and just edit them differently, that’s how you find a better fit, too.
I’m still working on my composition skills because it’s almost as if I’m not seeing the composition when I’m on location. I just hope that practice makes perfect, as I’ve started to notice some mistakes and try to avoid them.
Regarding Point 1: Not stopping down enough
Grab a copy of any issue of Arizona Highways and look at the photographs and the exposure settings. You will see that many of these are shot at f/11, f/16, and even f/22.
Our fear of diffraction has limited our photography.
Agreed. Wider/moderate apertures are great at overlooks where everything is at infinity focus, and they’re great at test charts. But I would much rather be at f/11 or f/16 for most real-world landscapes. (For my large format photos, I’m often at f/64 to f/128 – and that took a lot of mental effort to accept!)
Another thoughtful article, thanks Spencer.
In your point #1 you mention a number of Aperture settings – – I assume we should adjust these (presuming you’re referring to full-frame sensor F-stops) to equivalents for crop-sensors, such as APS-C and Micro 4/3, etc … Right ?
John – TKA
Yes, you’d get a similar image and diffraction by dividing those numbers (as well as the focal length) by the crop factor. So, 12mm f/8 on Micro Four Thirds has the same diffraction, depth of field, and field of view as 24mm f/16 on Full Frame, for example.
Another useful and thoughtful article Spencer. For those of us who don’t live in, near or are able to easily visit “grand landscape” areas, tip #5 is especially important. With no mountains, vistas and seascapes to photograph, a telephoto lens (my 100-400mm is my favorite lens) allows the photographer to isolate subjects and/or create intimate landscapes without including undesirable man-made objects (McMansions, highways, power lines, etc). Keep those great articles coming!
Thank you, William! That’s why I got into macro photography before landscape photography in the first place. I lived somewhere with a lot of bugs and not a lot of grand landscapes! Both telephotos and macro lenses let you pick out smaller and more interesting elements even when the wider scene won’t make a good photo. That’s a big part of why I like them.
Superb article, Spencer. I especially liked your comment about not using guidelines thoughtlessly.
I discovered something similar about depth of field doing focus stacking with a subject, a tree with interesting bark, that was 10 feet away. I had thought depth of field didnt matter with focus stackgin and to avoid diffrarction, I was shooting at f5.6 with a 105mm macro lens. I kept getting blury edges along the edges of the trunk and branches. Changing the aperture to f22 eliminated the problem.
I’ll be sharing this article with my students.
Even with focus stacking, I’ll often be using f/8 or f/11 just to give myself more room for error. Depending on how close the foreground is (and how long of a telephoto you’re using), the depth of field might be paper-thin at f/4 or f/5.6. A lot can go wrong when blending a focus stack, and shooting them at narrower apertures isn’t a bad idea.
I don’t do much landscape nowadays (even relative to my own past, I mean), but I enjoyed this article very much. The Tamron @ 114 picture is superb, as I say that even if I don’t like “fake” B&W – but in this case, it’s spot on.
Thanks, Iustin! Sometimes black and white is just what the subject needs. It’s not always easy to say why. I’m glad you like how it turned out in that photo.
Great points made about thoughtful selection of an f stop to get a desirable DOF. I can’t also emphasize becoming a good friend with a DOF smartphone application like “Simple DoF”, particularly to find the Hyper Focal Distance, and to determine exactly which aperture will give that wide, or narrow, DOF desired.
Double checking with a depth of field app isn’t a bad idea if you have enough time, although keep in mind that most hyperfocal distance charts are pretty bad. They don’t include diffraction in their calculations, and they aren’t calibrated to show you the sharpest possible result – just “acceptably sharp” focus where the out-of-focus blur (circle of confusion) is 30 microns in size. So, use hyperfocal distance charts as a guideline, or use apps like OptimumCS or TrueDoF Pro that fix these issues.
Thank you very much. There is so much food for thought here. I never even considered using a shallow depth of field in a landscape photo, but that shot of yours is so so effective. I guess one needs to be careful of not losing definition in a mess of bokeh though. In my mind the rule of thirds had been standard I live or die by and has ruined many of my shots that would have otherwise survived had the curse not been so all prevailing.
Regarding the shallow focus landscapes, I think it’s up to the photo at hand. There are probably some good landscape photos waiting to be taken even at f/0.95.
As for the rule of thirds, the less you worry about it, the better. Neither actively use it nor actively avoid it. Instead, pay more attention to things like balance, breathing space, positive/negative space, and distractions. Eventually you’ll find yourself not even thinking about the rule of thirds at all, which is ideal.