Nowadays, it is not unusual to hear about photographers being asked by their clients to do video work for them. For many photographers adding video to their list of services can be a bit intimidating, especially when it could entail making some investments in video-related gear. While it is certainly possible to spend many thousands of dollars on additional gear, most people wouldn’t want to put that much money at risk when first venturing into this area. If you choose gear wisely you can keep your investment at a modest level while adding a significant amount of production value for your clients.
If you own a DSLR or mirrorless interchangeable lens camera (ILC), it most likely has quite good video capability. The first step for most people is to purchase a fluid video head and a stronger tripod. This allows a photographer to do smooth pans and tilts when shooting video with their DSLR or ILC. When selecting a fluid video head or upgrading your tripod it is critical to assess how much weight it will need to support when operating the heaviest gear you are planning to utilize. This includes tripod heads, microphones and other attachments. Since some video gear such as camera sliders will extend well past the base of the fluid video head it is important to allow for the effects of additional torque. Be prepared to spend a couple of hundred dollars on a decent fluid video head.
To add a lot more production value for your clients you can consider investing in some gear that facilitates camera movement while shooting video. Here are some of the most commonly used video-related gear that you could consider.

Table of Contents
1) Camera Slider
These come in various sizes and can range in price from a hundred dollars to several thousand depending on features and construction. Basically a slider enables you to mount your camera onto a sliding plate on the slider with some kind of tripod head. You can then move your camera along the track or rail as you are filming video. This is most often done manually, but many sliders can be equipped with cranks or can be controlled with motors. Camera sliders are often used in a self-standing manner, or can be mounted on a tripod or between light stands. Camera movement can add a lot of drama and interest to your video productions and camera sliders are one of the most commonly used pieces of gear to accomplish this.
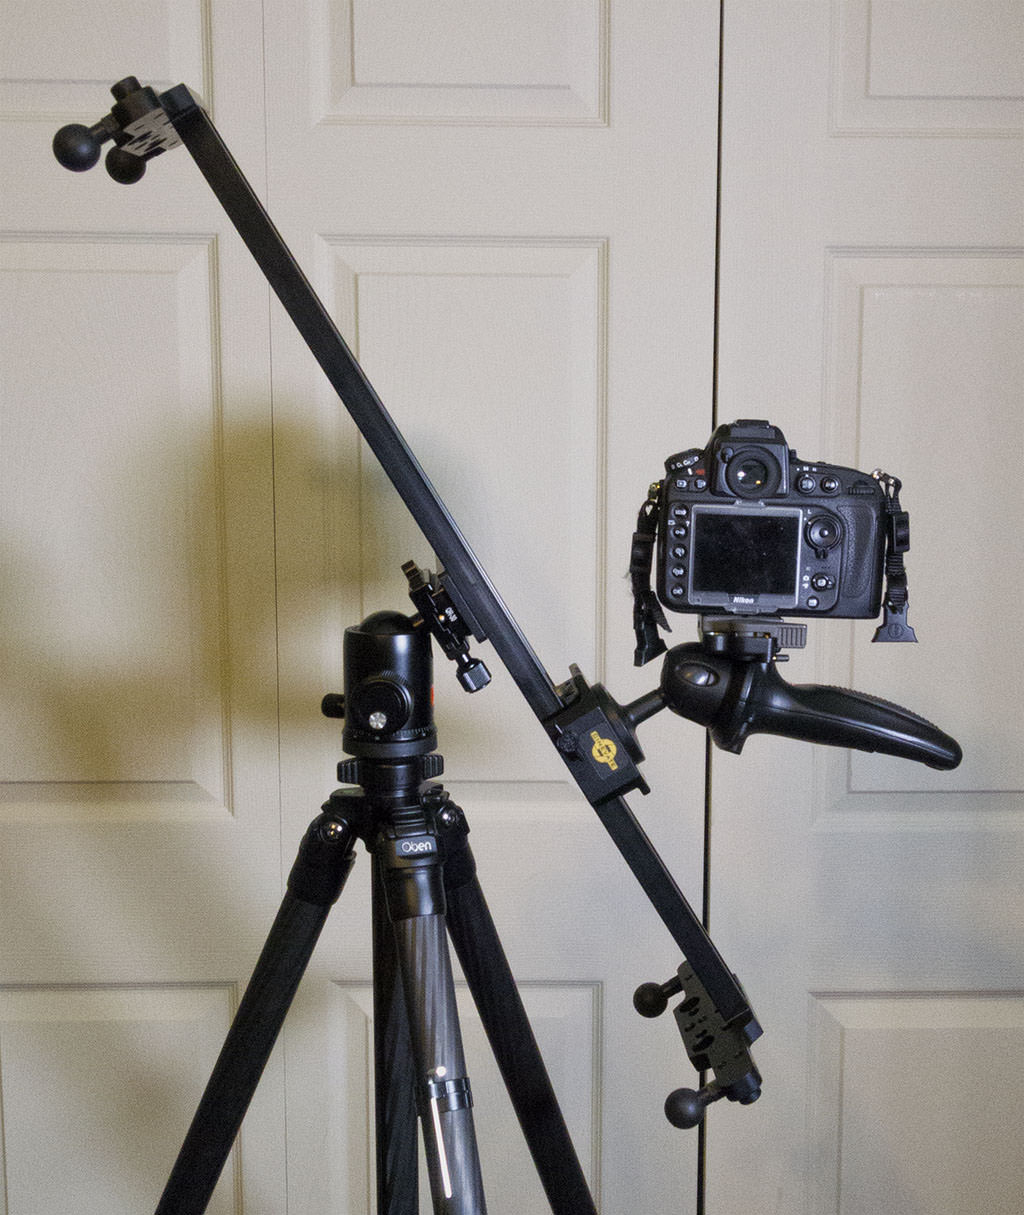
When sufficiently strong tripod heads and tripods are used it is possible to adjust the angle of your camera slider to film video at unusual angles which can add interest to your productions.
When considering a slider the most important things are the smoothness of the camera movement and the distance that the camera can travel along the slider. The slider that I’ve been using is fairly light and compact, providing me with 26-inches of camera travel. I chose it because it provides smooth camera movement through its use of ball bearings. Since all of my video work is for industrial clients I typically do not face situations where I need really long camera movements so the 26-inch length is sufficient for my needs. Using a shorter length camera slider also makes it easier to pack into a suitcase when travelling on assignment for clients rather than having to rent gear on-site.
2) Skater Dolly
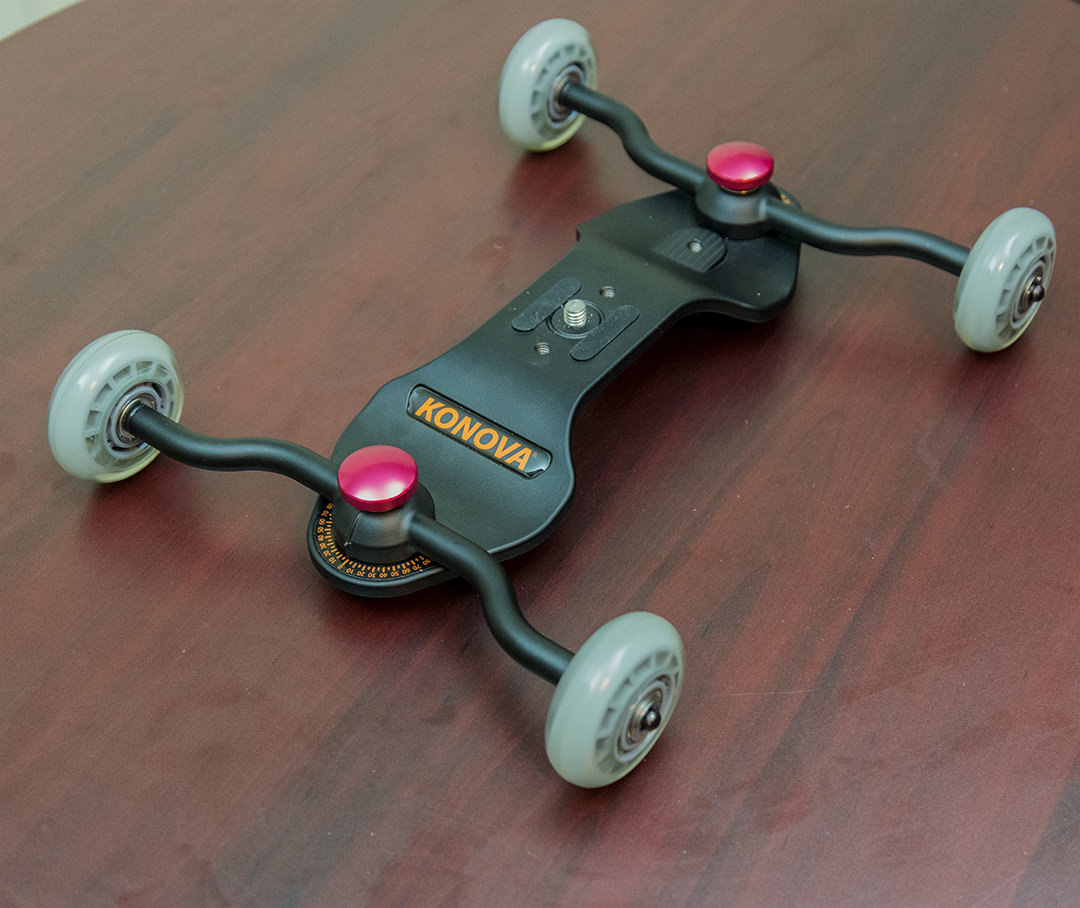
Think of a skater dolly as a small skateboard that has been adapted to carry a camera on it. The front and rear axles are typically adjustable so you can change the angle of travel of the skater dolly. These are often used on tables, countertops and other smooth surfaces. The advantage of a skater dolly is that you can capture video footage as the dolly is moving in a circular or curved motion. I’ve used mine to shoot around the end of a safety shoe, around the base of an industrial machine, around the corner of a countertop, and up the centre of a boardroom table during a meeting. Rather than invest in a larger camera slider I’ve used my skater dolly with a length of shelving to capture longer camera movements. A skater dolly is quite affordable and can be purchased from $50 to $150 depending on size and weight rating. Look for smooth operating wheels and solid, simple adjustment capability.
3) Camera Jib
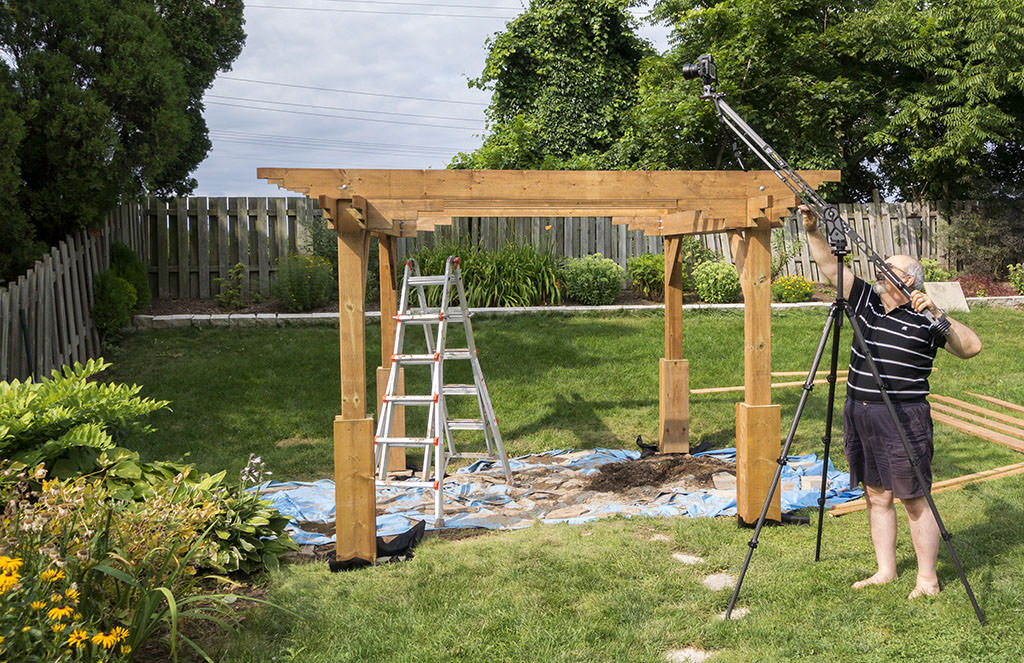
Sometimes you may want a more free-flowing type of camera movement in your production. Camera jibs allow for almost unrestricted camera movement as you can combine both vertical and horizontal movements simultaneously. Again, there are a wide range of designs that you can consider. The most important factors when selecting a jib are the weight rating of the jib, the amount of travel distance you need, and the size/weight of the jib. Some jibs are quite large and complex, requiring two people or more for set up. Others are small and light and very easy for one person to set up and operate. Often jib shots are used to ‘set the stage’ for a segment of the video. For example, you may want your camera to start filming almost at ground level, then rise up and over a fence or other obstruction, then do a high level panning motion to capture a wide view of the entire scene. All of those individual motions can be combined into one long, fluid motion when a jib is used. It is critical to get a jib that provides sufficient stability for the weight of your camera gear as nothing ruins a video clip quicker than camera shake. Jibs range in price from several hundred dollars into the thousands.
4) Camera Stabilizer
Mounting your camera on a stabilizer allows you to capture smooth looking video while walking, going up and down stairs etc. These can range from quite small, hand-held units to those that need to be mounted onto a vest. Cheap stabilizers can be found for less than $100 and in my view are not worth buying. Better quality stabilizers will run several hundred dollars and adding a vest can put the gear into four figures. Learning to use a camera stabilizer can take some time and practice but the camera movements that are made possible can take your productions into a completely different realm. Getting your camera gear to properly balance on a camera stabilizer can be a feat unto itself, requiring quite a lot of patience. It is not uncommon for the first attempt at getting a camera to balance on a stabilizer to take an hour or more. It is important to remember when using zoom lenses with a stabilizer that if you change the focal length of a zoom lens you will need to rebalance your camera on the stabilizer. Most folks typically use wide angle prime lenses on a stabilizer. It should also be noted that using a camera stabilizer for any length of time can be quite physically demanding.
5) Follow Focus
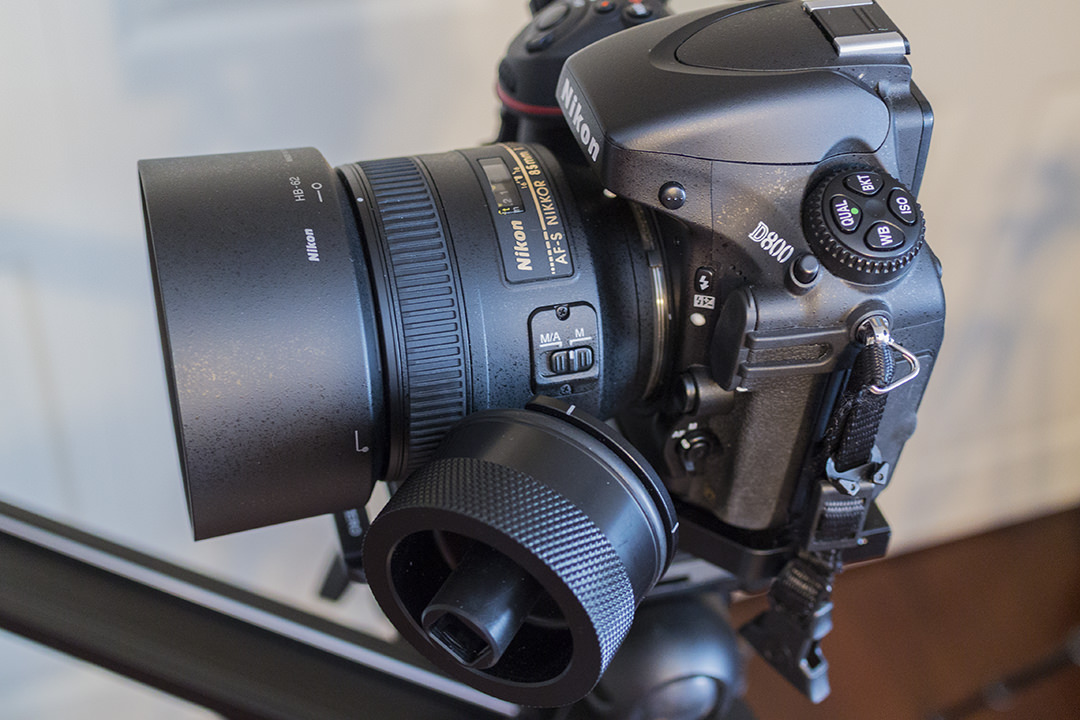
Since video is typically shot using manual settings and manual focus, you may also want to consider a follow focus unit. There are a wide variety from which to choose. Most utilize gear rings that attach to your lens on the focusing ring and/or the zoom ring. This gear ring then meshes with the gear on the follow focus unit and allows you to adjust focus and/or lens focal length without touching your lens directly. This reduces the risk of camera shake. Cranks and whips can also be attached to most follow focus units further distancing your hand from the lens adjustment and thus further reducing the risk of camera shake. Some newer designs feature motorized adjustments. When I was shooting video with my D800 I chose a friction-type follow focus as I found the small size and light weight best suited my needs. On a separate note, if you are shooting video with a Nikon D600 or D800 my iDC follow focus is now surplus to my needs and available for purchase at a modest price. I have base plates for both cameras.
Pulling focus (i.e. bringing a subject into focus during the video clip) or doing rack focusing (i.e. changing the focus between different subjects in the scene while recording) are two very common techniques done with a follow focus unit. With technological advancements in DSLRs and ILCs, some newer cameras allow for similar effects to be done using the touch screen on the back of the camera, although the smoothness and speed of these in-camera focusing transitions are sometimes lacking.
This short article has highlighted some of the more commonly used video-related equipment. There is, of course, a lot more video-related gear available. As with most things associated with photography and video it really pays to do your homework before buying this type of gear. Testing it out with your specific camera gear is highly recommended.
It is always a pleasure to be back here at Photography Life with all of you terrific readers! I’ll do my best to have another article or two before year-end if at all possible given my schedule.
Article and all images Copyright Thomas Stirr. All rights reserved. No use, duplication of any kind, or adaptation is allowed without written consent.
Hi Thomas
Nice article. Can you list the specific brand name and type of each piece of video equipment you mentioned?
Regards
Glen
Hi Glen,
I’m glad you enjoyed the article! Here is a list of 5 specific pieces of gear that I own/use. I’ve obviously been very happy with my gear selections as I have not changed any of them since their purchase, but please keep in mind that by listing them I am in no way giving them a blanket recommendation for all users. It is important that folks select gear that meets their specific needs.
Follow focus: iDC System Zero complete with standard and XL plates, two adjustment friction-type wheels and base plates for Nikon D600 and D800. (NOTE: this gear is currently for sale as I sold my D800 and all FX lenses back in July and I no longer own/use any DSLR gear).
Fluid video head: Manfrotto 502AH
Slider: Cinevate 26″ Atlas FLT
Stabilizer: CMR Blackbird Camera Stabilizer Kit
Skater Dolly: Konova KSD-2000
Jib: Kessler Crane Pocket Jib Traveler
Tom
“Fine Art Printing for Photographers”, by Uwe Steinmueller and Juergen Gulbins is the eBook of the week sale for $9.99 at rockynook.com/ebook…-the-week/ until November 22, 2015.
I hope you will write about video technique with DSLRs for novice videographers. I’ve had a D800 since they were released, and never shot a video. My video experience is limited to camcorders when my children were born and raised in the previous century! I suspect I have lots of company. Please help.
Nasim: Another topic which your excellent website (and most others) totally neglects is printing with ink jet printers. In your efforts to offer broadbased, wide ranging articles to photographers, printing often gets neglected. I cannot even find an up to date book on the topic. (Any suggestions?) I barely know the difference between a baryta and a Barolo. Please consider a series of printing articles!
Regarding printing, a book I found useful although a bit dry was, “Fine Art Printing for Photographers”, by Uwe Steinmueller and Juergen Gulbins
Hi Anthony,
You may find this earlier article that I wrote of interest: photographylife.com/how-t…oot-videos
Tom