If you took workshops and coursework on photography, chances are you’ve heard every mentor talk about understanding composition and learning to crop within the camera. Doing so will yield greatly composed photos and will limit your time in post production. But from time to time, you will come back with badly cropped photos which might have distracting elements in the background and the composition may not look spot on. If you are photographing portraits, even the slightest distraction may draw the viewer’s attention to something else than what you originally intended the viewer to concentrate on. At times like these, instead of deleting the photo, I want to give it another chance. Memories are precious and I do not mind cropping the photo to preserve what is important. Cropping images in post production will give you another chance to re-frame your shots and there are a number of different ways you can do this to achieve desirable results.

Before venturing into the cropping universe, it is good to keep the following points in mind:
- Cropping is not permanent and you can always go back to the original frame, as long as you use a non-destructive editor such as Lightroom. Photoshop Camera RAW also will not alter the original RAW file, since it behaves just like Lightroom. If you use Photoshop for cropping and you use non-RAW file formats such as JPEG and TIFF, make sure to preserve the original image before saving the cropped image. Personally, I prefer using Lightroom for my cropping needs, even when I need to work on an image in Photoshop.
- If your aim is to get these photos printed later on, the proportions or “aspect ratio” of your crop should be compliant with print sizes. Labs often prefer to work with standard print sizes, which might make cropping a little restrictive (more on this at the end).
- Avoid over-cropping photos to small areas of the image, as it will decrease resolution significantly. If you crop too much, it will also magnify all problems with the image. For example, if you had a little bit of blur on your subject, that blur will get magnified more after cropping is applied. Remember, if the resolution of the image is too low, you will no longer have the advantage of down-sampling.
- If you want to apply cropping aggressively, it is best to start with an image that is sharp at 100% view. If the image is noise-free and very sharp, you could crop it to pixel level without worrying about potentially decreasing the quality of the final image.
Table of Contents
1) Converting horizontals to verticals and vice versa
The most basic cropping option is to convert a horizontal image to a vertical and vice versa. This type of cropping is extremely easy to perform, since you just grab the cropping tool and drag a rectangle inside the image that is opposite to the original image’s layout (might be best to preserve the original aspect ratio). Both Lightroom and Photoshop provide cropping tools to easily accomplish this.
Here is an example of an image that was shot vertically:
And here is what I was able to do after applying a horizontal crop:
2) Showing a different perspective
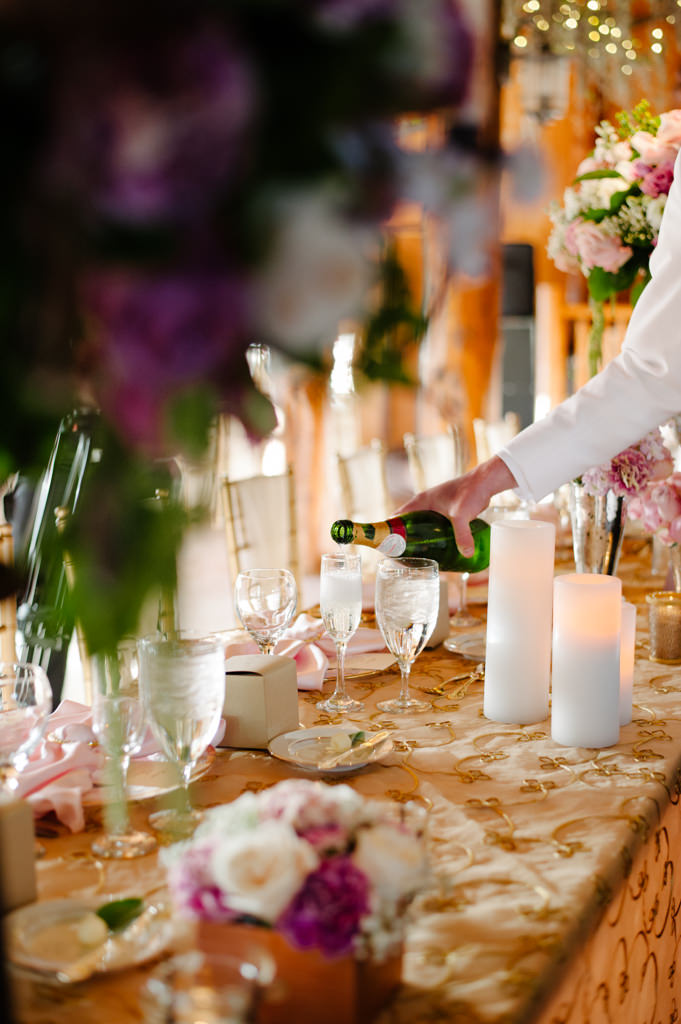
Sometimes when I have images that are multiples, instead of deleting duplicates that I may never use, I opt to crop the photo tightly to show a different frame (you can do this with a single image as well, by creating a virtual copy). This helps me to broaden the storyline by adding an additional detail shot. You can use the same method when photographing bigger groups.
Before cropping:
After cropping: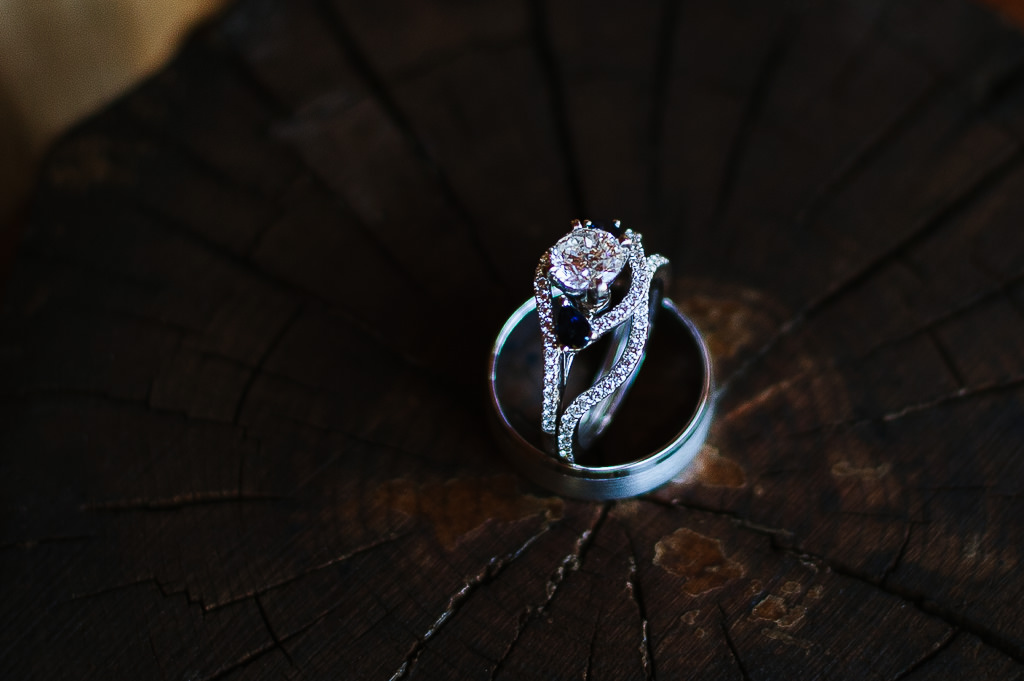
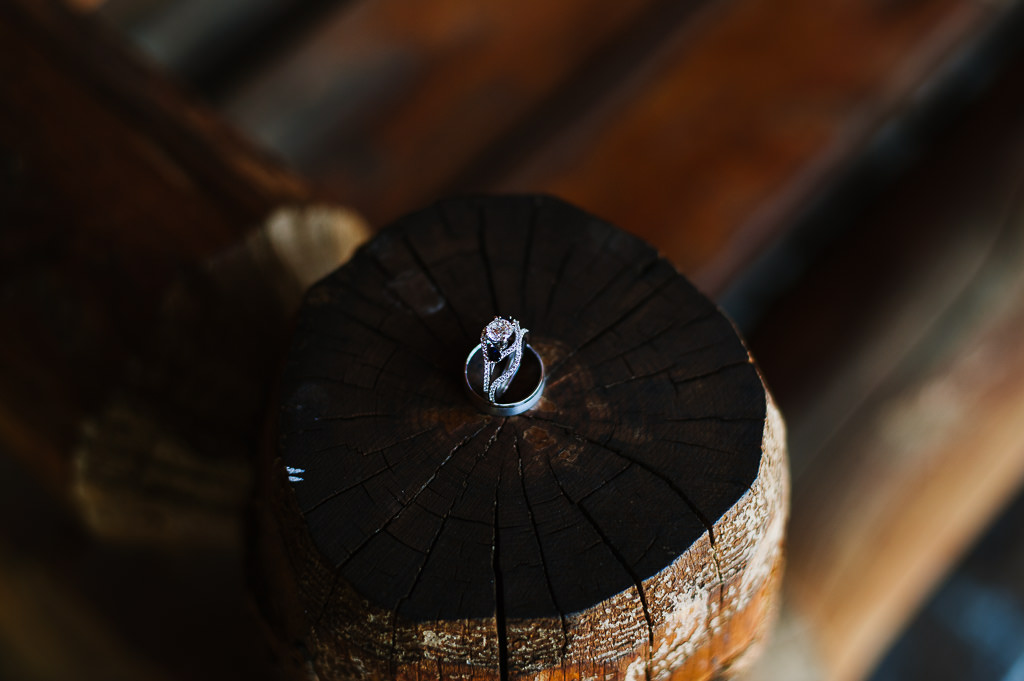
3) Cropping for a close up and rule of thirds
While learning how to compose well in camera will come with experience, at times I come back with photos with its main subject right in the middle of the frame. This can happen when I have my camera in AF-C mode, with autofocus set on the shutter release button and there is no quick way for me to switch to focusing and recomposing. Since cameras focus best with their center focus points (especially in indoor low-light environments), having my subject close to the center of the frame is a safer bet. This is true especially while photographing small details. In such instances, I crop the photo to make it pleasing to the eye of the viewer and closing up on what is important.
Here is what I captured with the camera:
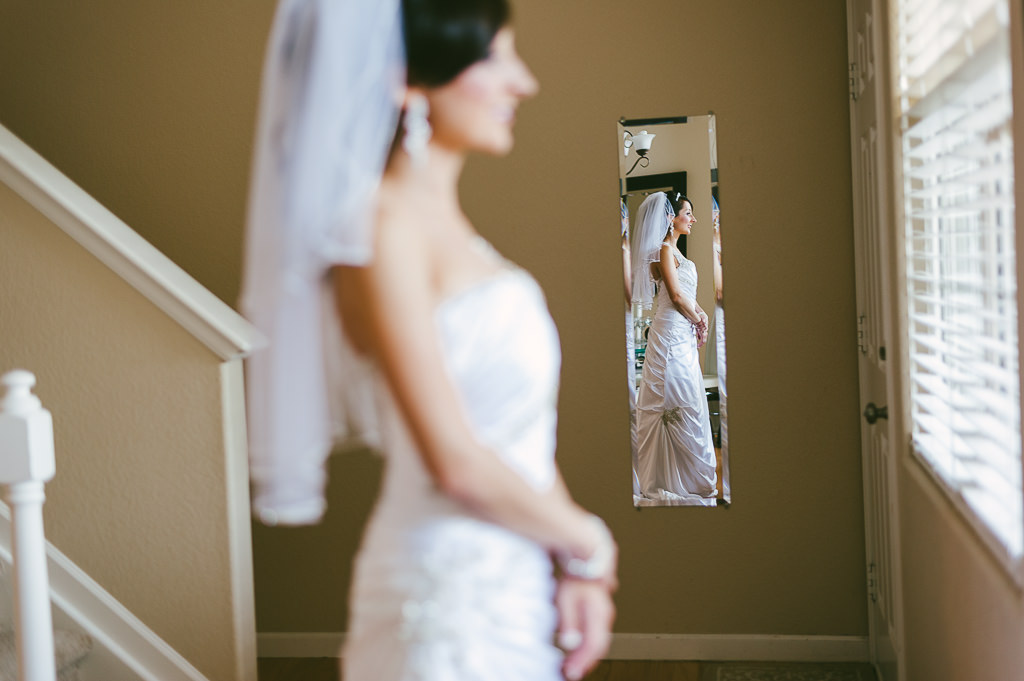
And here is the image after I cropped it vertically, focusing on the bride: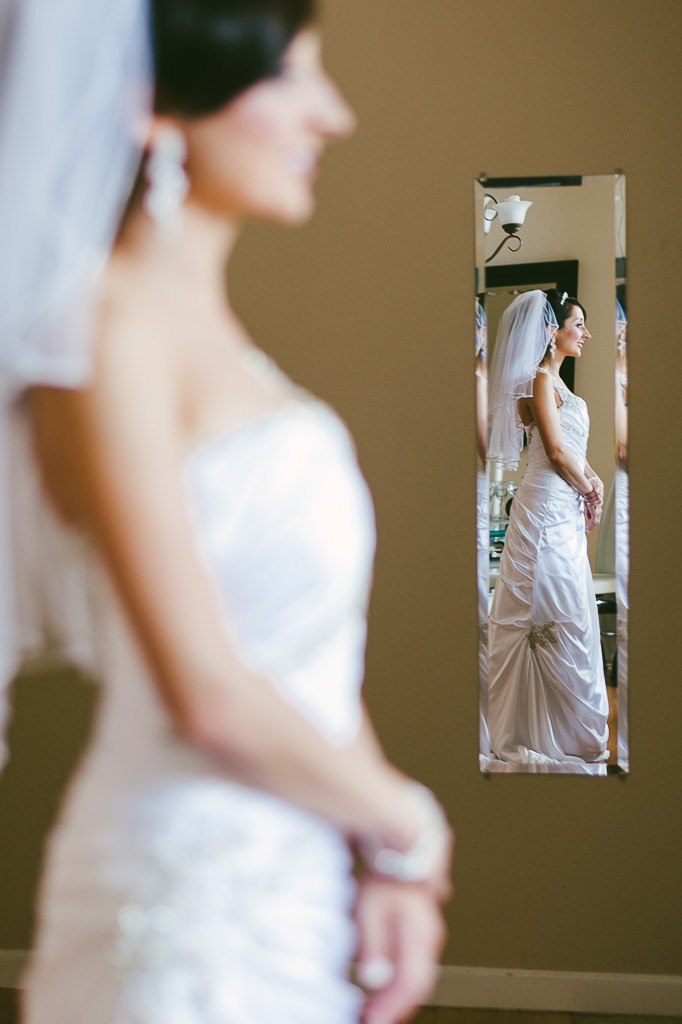
Also, I can crop the image tighter for better composition, applying a rule of thirds. Here is an image straight out of the camera, with my second shooter standing on the left side of the frame:

And here is a better composed crop of the above image: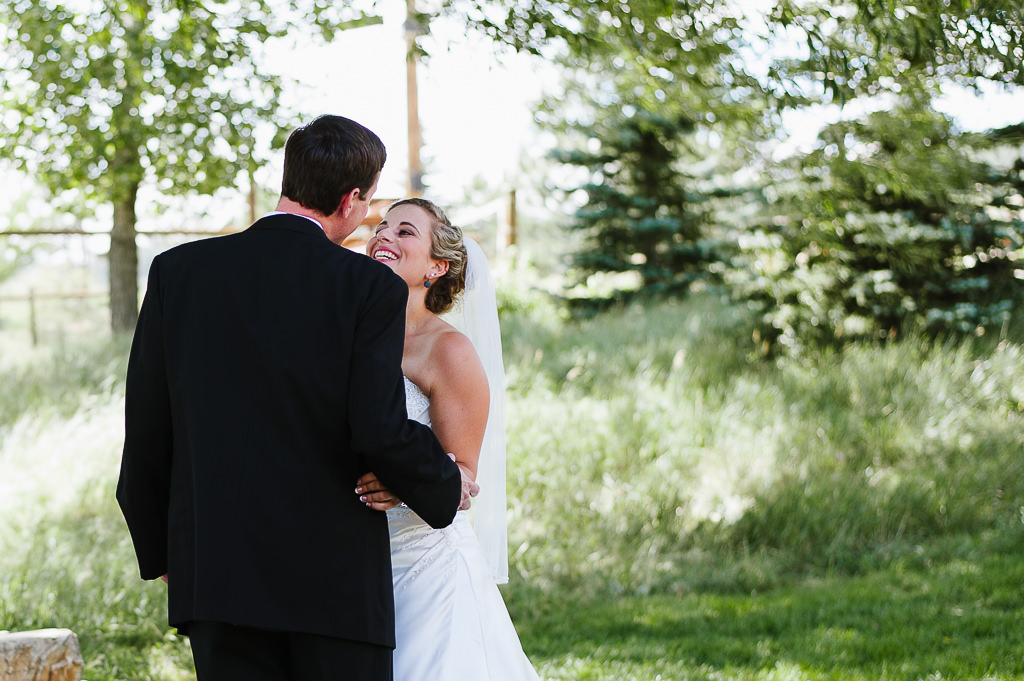
4) Cropping out distractions
It is not always possible to get distraction-free photos. Sometimes you just do not have the luxury of moving yourself or the objects in the frame for a cleaner and distraction-free shot. Although I do my best to mitigate those sort of issues when photographing, I sometimes just have no choice but to leave it up to cropping later. At times, you do not even notice distractions until after the fact and that’s when cropping comes to rescue!
In the below photograph, the tree shadows on the ground look distracting:
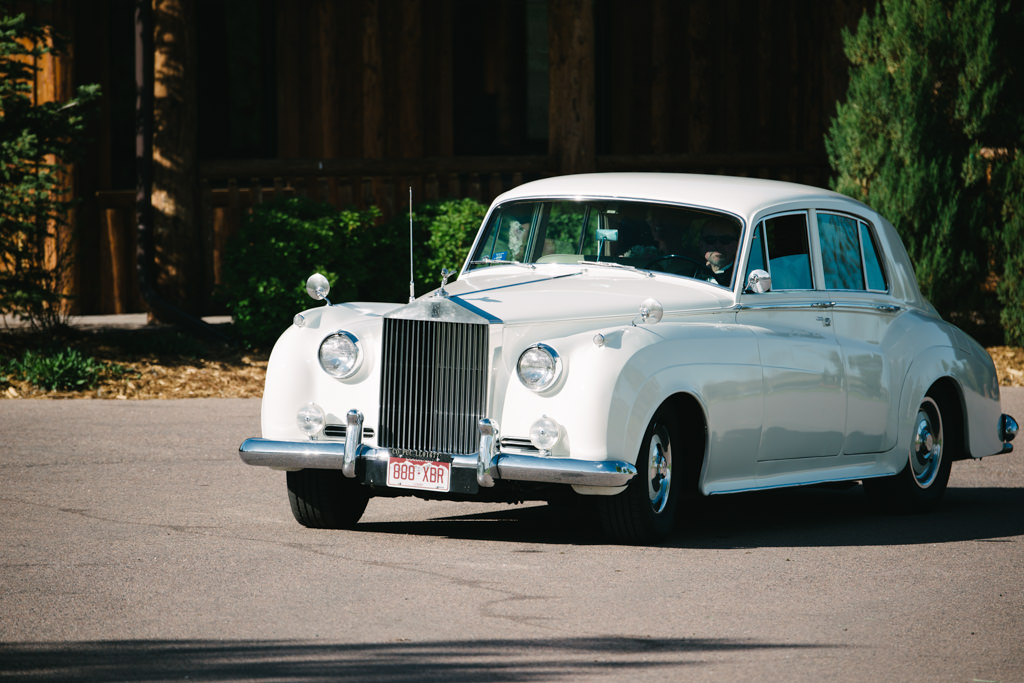
With just two clicks in Lightroom, I was able to easily remove that distraction from my Rolls Royce shot: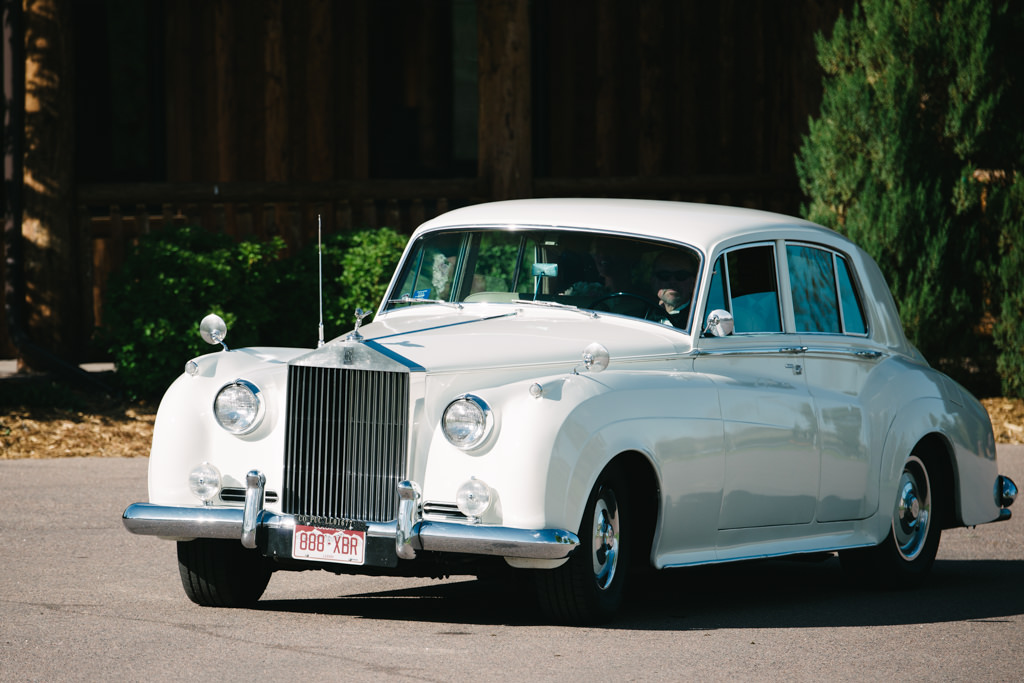
5) Removing unused space
Having free or unused space is most likely a composition issue. But whatever you had in mind for that particular shot, if you feel that it just doesn’t look right and you want the frame a little more localized, your best bet is to crop the unused space out, as shown in the below examples.
Before:
After:
5) Changing aspect ratios
There are several reasons why I prefer standard aspect ratios and choose to preserve them for cropping. First, most people are very used to seeing rectangular photos. Second, it is easier for me to visualize composition and framing with a rectangular photo. Third, rectangular images look better when posted on websites that have set boundaries – square images can occupy too much space if stretched fully, while panoramic images can look tiny at full length. Fourth, I have many printing and framing options for standard aspect ratios and I do not have to deal with custom framing. And lastly, I would rather deal with a single aspect ratio, since it standardizes my workflow. I would not want to end up with images of all kinds of different shapes and sizes – that just breaks my overall visual perception.
While I personally prefer to preserve the original aspect ratios, some people do not mind changing them during cropping. There is absolutely nothing wrong with taking that route and there is no such rule that the original aspect ratio must be preserved. Most DSLRs have the same 3:2 aspect ratio as film, while Micro Four Thirds cameras have a 4:3 aspect ratio (hence the name) that looks a little less like a rectangle. Some 120mm film cameras have a 1:1 aspect ratio, so they always produce square images. And if you are stitching panoramas, aspect ratios can vary greatly. While we will go over different aspect ratios for cropping in a different article, just keep in mind that this is totally your choice.
Happy Cropping!
Can I have references?
Thanks you for a very clear and helpful article.
I have one more question here. What is the ‘agreed’ professional opinion on the resolution of cropped photos?
I understand keeping aspect ratios to a fairly standard set of options such as those you mention.
But what resolution do we keep the cropped images at? I have all sorts of resolutions after cropping… like 5410 x 3066: This was a 16:9 crop of 6000×4000, and then I added a border. Do I resize it to a more “politer” resolution?
hello, I am a very beginner and teach me. Does 3:2 aspect mean it is the same as like when I print 4″x6″ print ?
Great tips !! Thanks for sharing.
those are some great examples of cropping done well!
interesting article indeed. thanks a lot for sharing. one of the ways i use cropping oftenn is to create a panaroma aspect ratio. it helps to really get interesting results.
Great tips! I enjoyed much to see pictures that tells another story by cropping.
Thanks a lot.
many time i cropped photos but when i printed to the standard print sized, the photo get cropped..can you explain how to crop a photo and correctly match with a standards print size?
just keep aspect ratio of your print size
for example 21 by 29.7 cm on A4 print
divide 29.7 by 21 and you get aspect ratio 1:1.4
Enjoyed this article very much. Nicely written, well illustrated and to the point.
Thank you, Gene!
Спасибо. Отлично.
Богдан, я Эйджи с вами. Хорошая статья.
Не могли бы вы отправить Путина и сказать ему, чтобы отправить Боуден на Кубу, чтобы он мог встретиться Фиделя, лидера коммунистического мира в Америке.
Peter, behave :)
Putin needs to return the Super Bowl ring as well. :-)
Hi Lola,
Great article as usual!
I had a discussion the other day with a friend. I told him that cropping let’s say a FF photo to the APS-C equivalent is not the same as taking the same picture with an APS-C camera in terms of DOF, using the same settings. But he insists that both should result in the same image with the same DOF. Who is right?
Thanks!
yeah of coz cropping FF to aps-c with depth of field equivalent of f stop 2.0
is going to appear on aps-c crop sensor as f stop 3.0
thats going to be the difference.
so they both has same depth of field
if u crop the FF to size of APS-C
but they are different when compared in full size
as it is 1.5 times larger image
the depth of field is 1.5 times narrower
but since you crop it
its going to be just the same size and depth of field.
but for wide angle shots it doesnt matter what is depth of field
as its going to be large anyways
also the prime apperture is a lot less than zoom lens anyways
so compensation applied
but the low light will be better with prime wide angle lens
than with zoom wide angle lens
so u can get better photos than with zoom lens
higher shutter speed in low light
or better ISO if light is enough
and clean corners and mids of wide prime
instead of having sharp only center as wide zoom lens does
so more versatile to crop frame any part of image including corners
Am,
now for a normal answer :) Let’s say you take that image with two cameras – a DX and FX – with the same lens mounted, a 50mm f/1.4, while standing at the same distance. You would get a wider view with the FX initially. If you crop it to DX angle in post-process, you would get a photograph that is all but identical to the one originally taken with DX camera. If, however, you take the images while *framing* identically – which would mean you’d have to stand closer with the FX because it captures a wider angle of view – it would have a shallower depth of field regardless if you crop the image afterwards or not.
Hope that clears it up?
Peter, а давайте лучше я Вас в нокаут отправлю. Так быстрее и всем понятней.
А может лучше избегать лишних ссор, Бохдан?
Вот ты их и избегай. Я ссор не начинал, не так ли? Peter написал какую-то ахинею на ломаном языке. Так что не надо меня уговаривать. Был бы он в сан диего, я бы ему показал куда кого отправлять надо и тд.
Всегда пожалуйста, Бохдан!
Вести себя есть, чтобы пропустить веселье может предложить жизнь