Wildlife photography is one of the most demanding forms of photography because so much is unpredictable. At times, there are only fleeting moments to capture the shot you want. Sometimes the mentality of “just get any photo” can get in the way of capturing more intentional, artistic, and interesting photos. The ten tips in this article will help you avoid falling into that trap.
1. Focus on new details
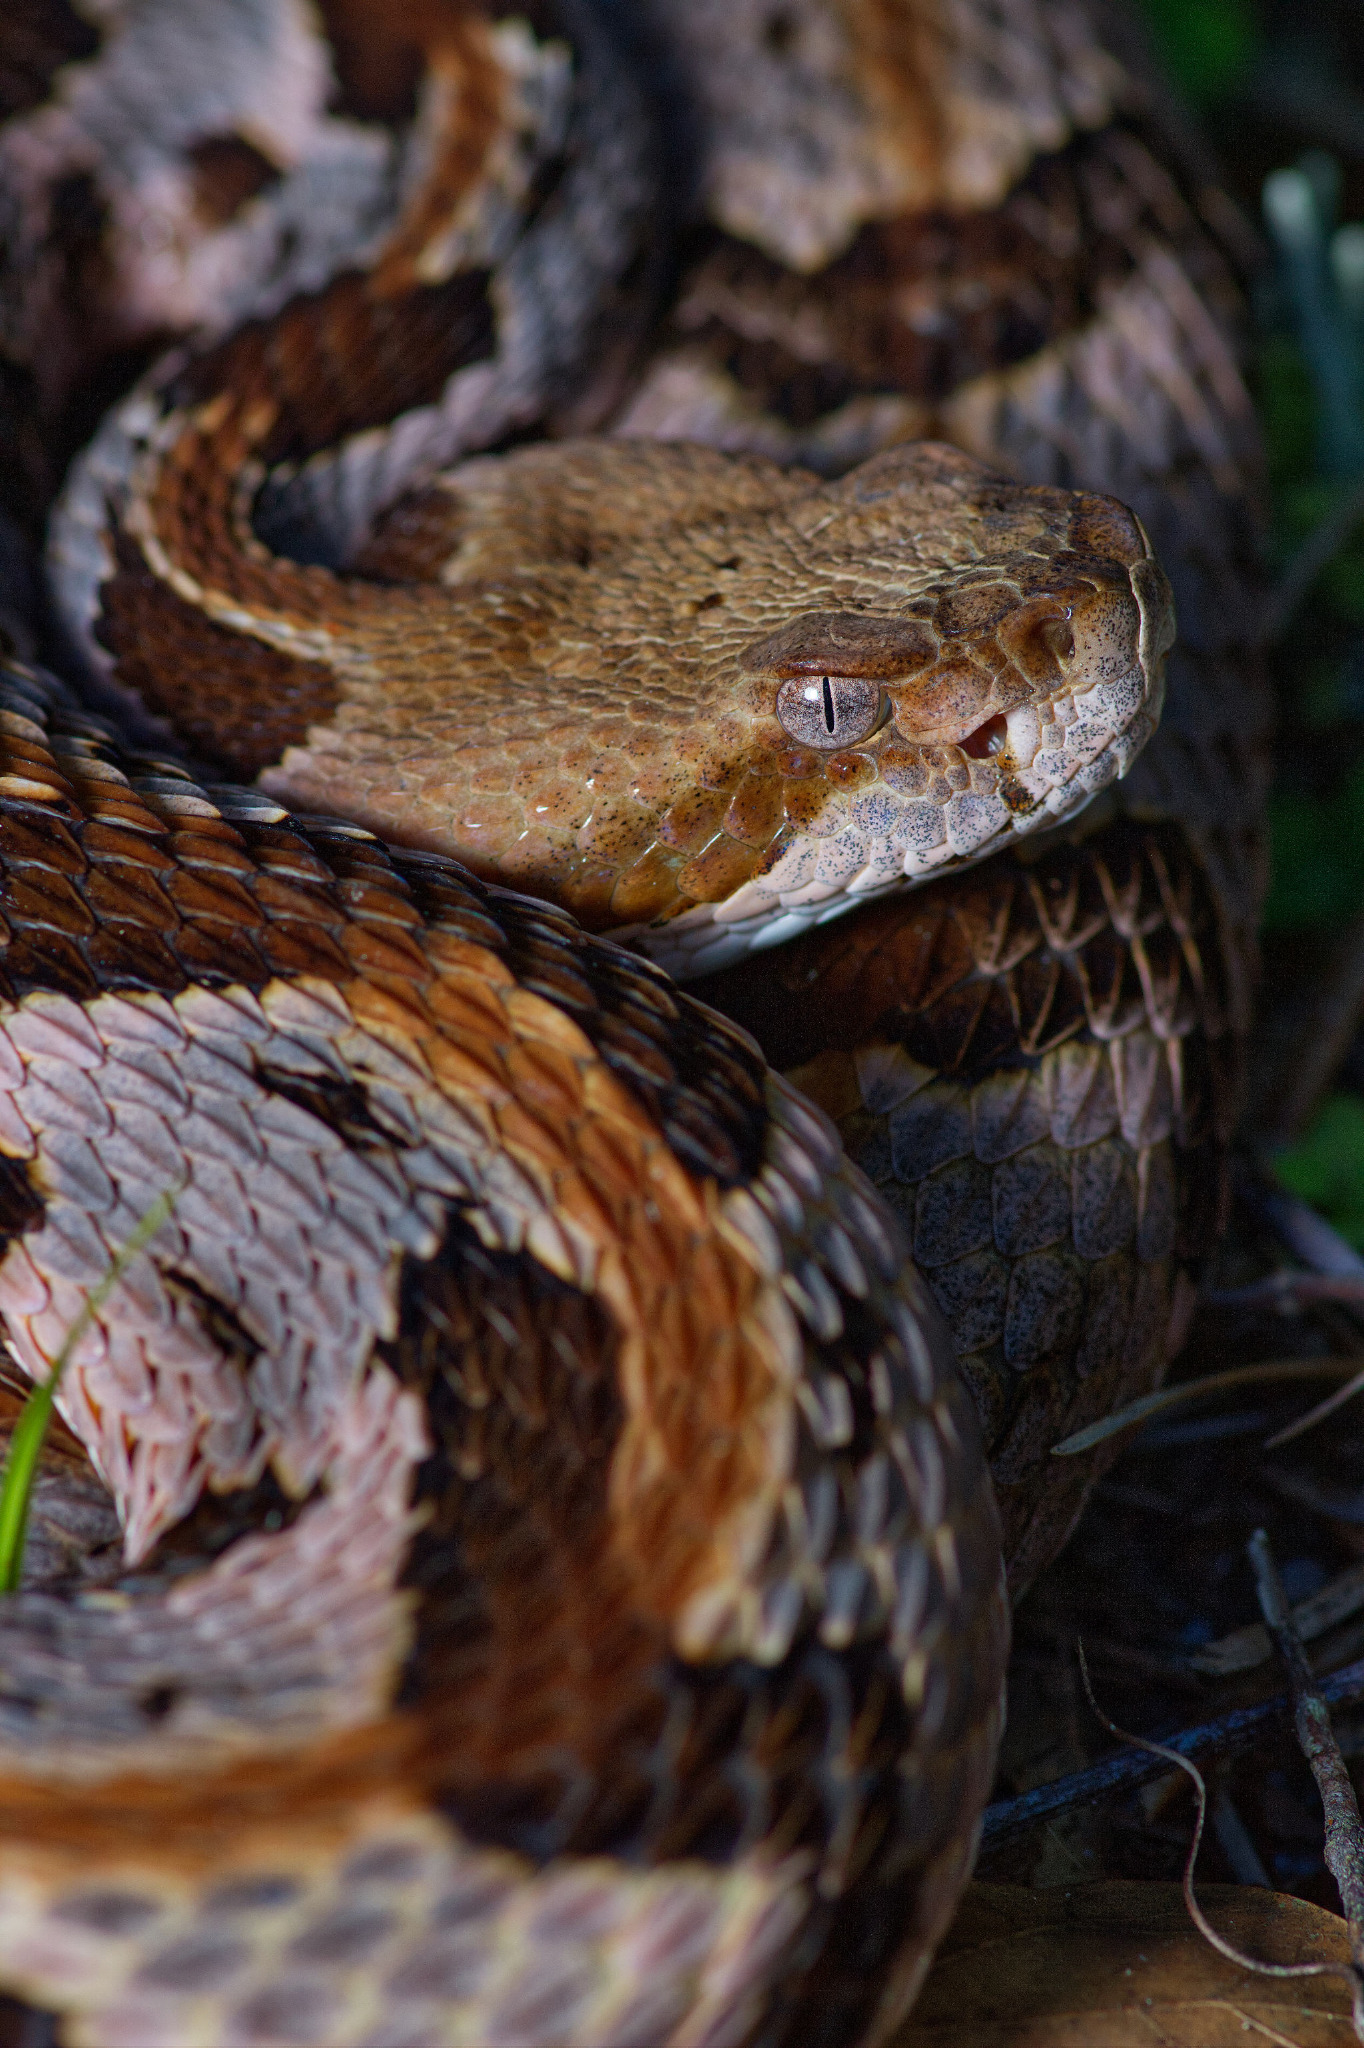
The most obvious and straightforward way to take a wildlife photo is not necessarily the most effective. Rather than a typical portrait-like photo of the animal, see if you can focus on any other details that tell an interesting story.
Ask yourself what makes this animal interesting and unique. This could be its scales, feathers, teeth, or even an odd injury. Usually it is the eye that photographers default to shooting, but many times other features of an animal can be just as captivating, and less often highlighted.
For example, the following photo shows the smooth scales, iridescence, and pattern of an Emerald Tree Boa. I could have focused on the head, but then less attention would have been directed to the vibrant and incredibly smooth scales. They would have been overshadowed by the face had I included it in the frame.
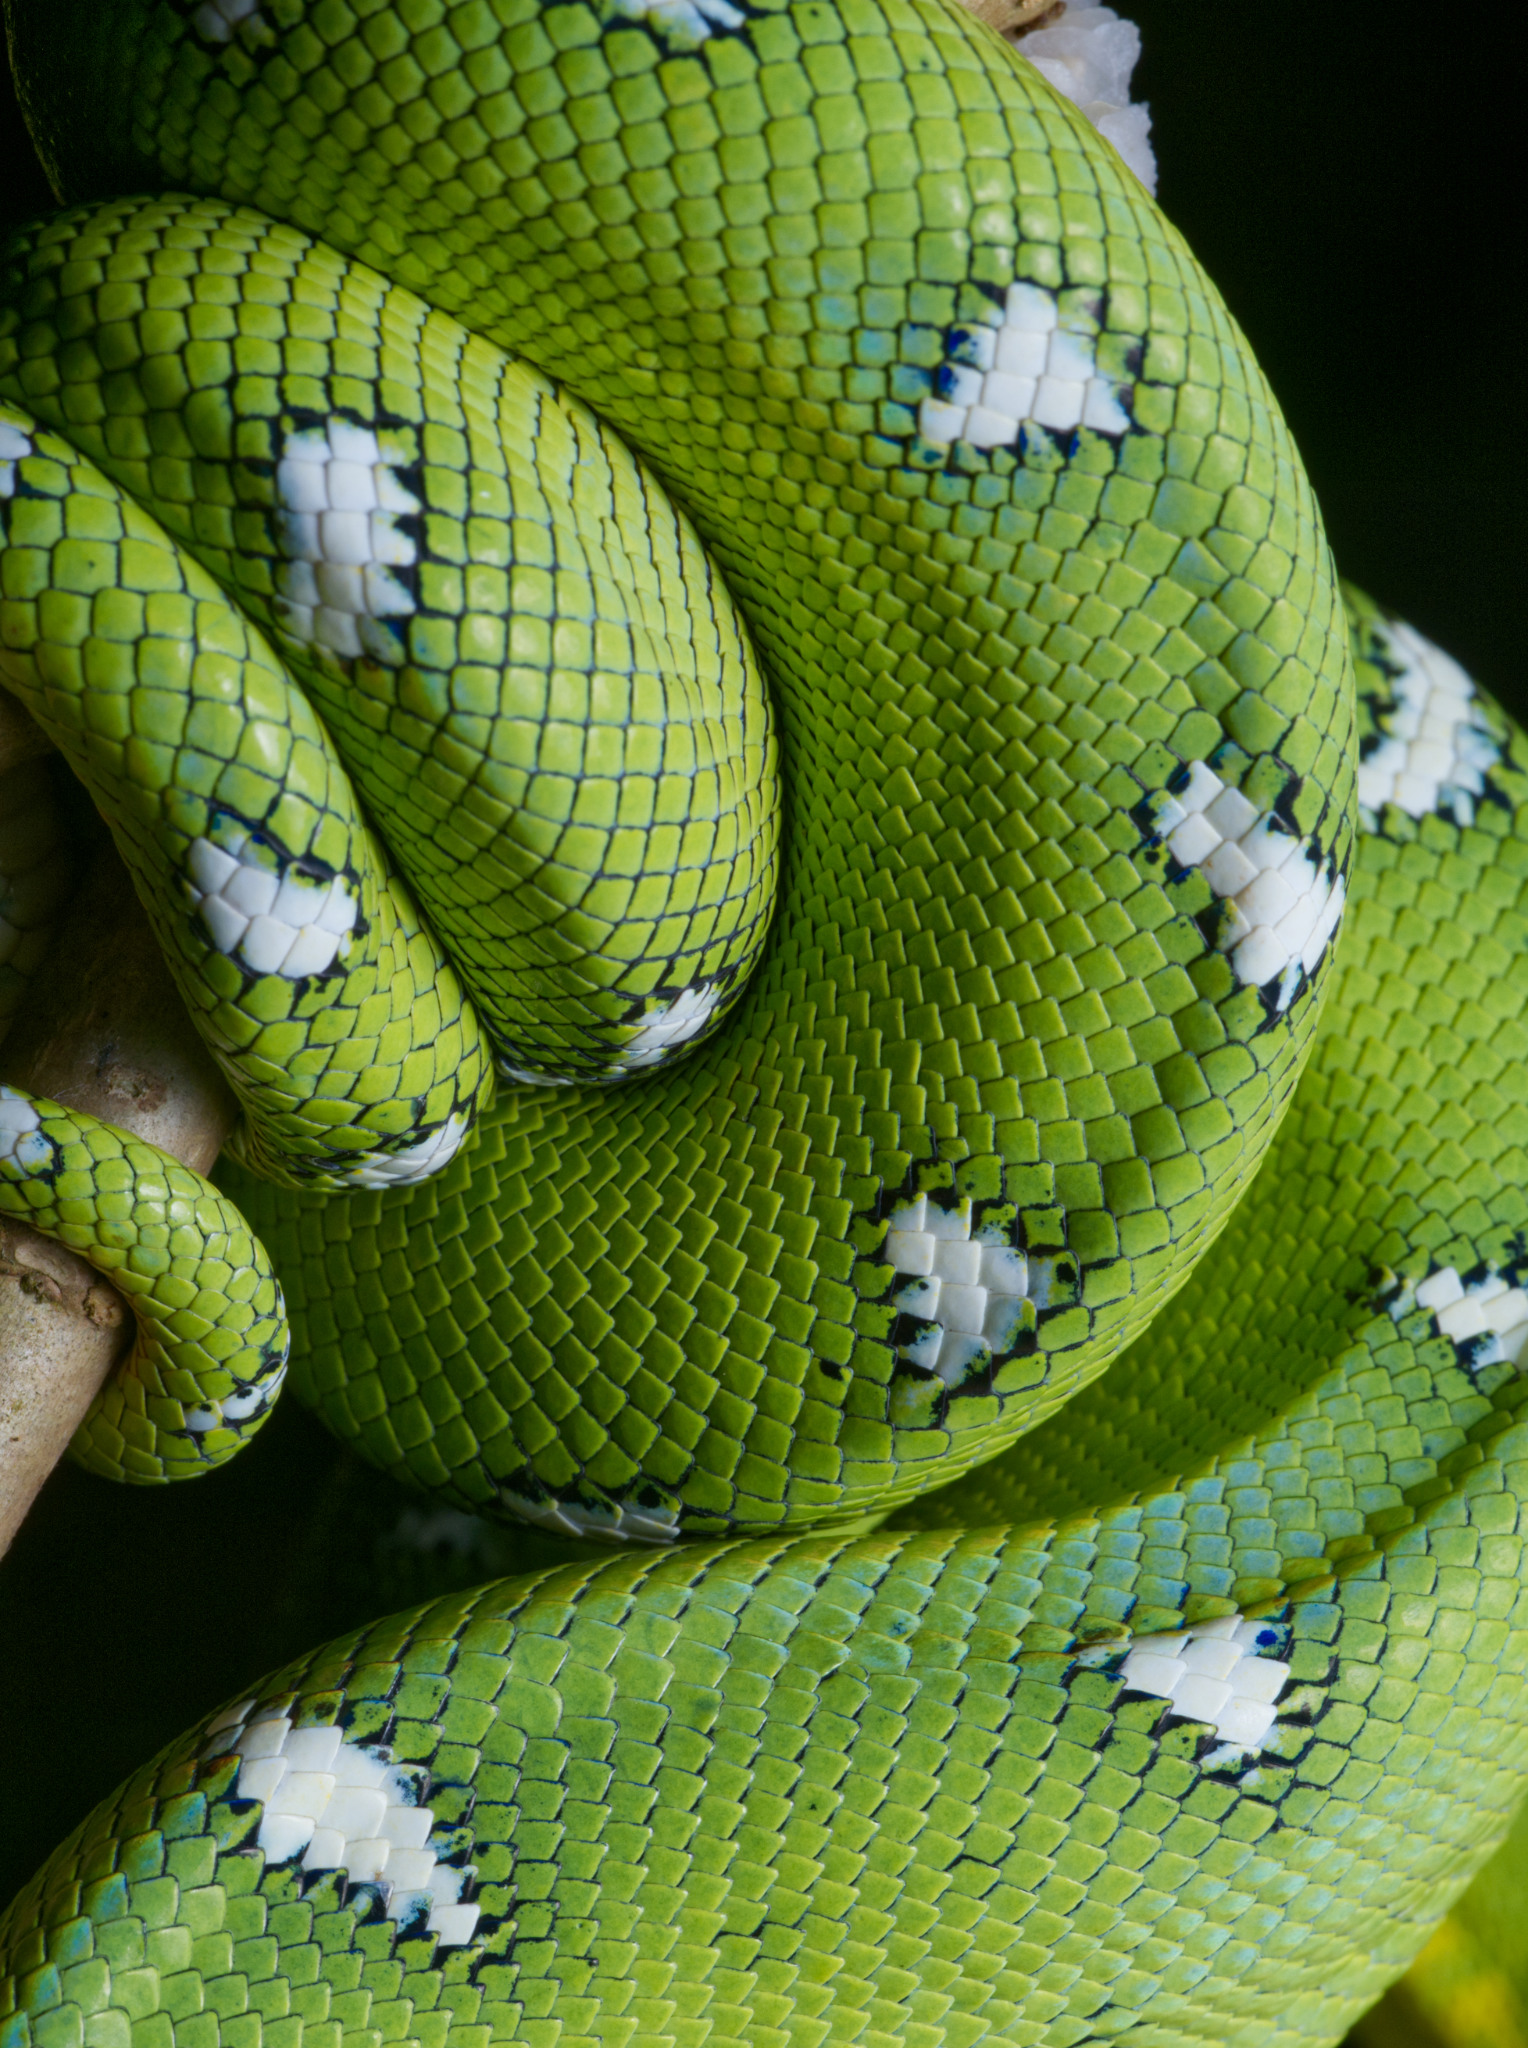
Photos of the animal’s face are cool, too! But sometimes you will capture more interesting results by thinking outside the box. So, pick up your macro lens (if it’s a subject up close) or your longest telephoto and start looking for details in the subject that you can isolate.
2. Show off the habitat
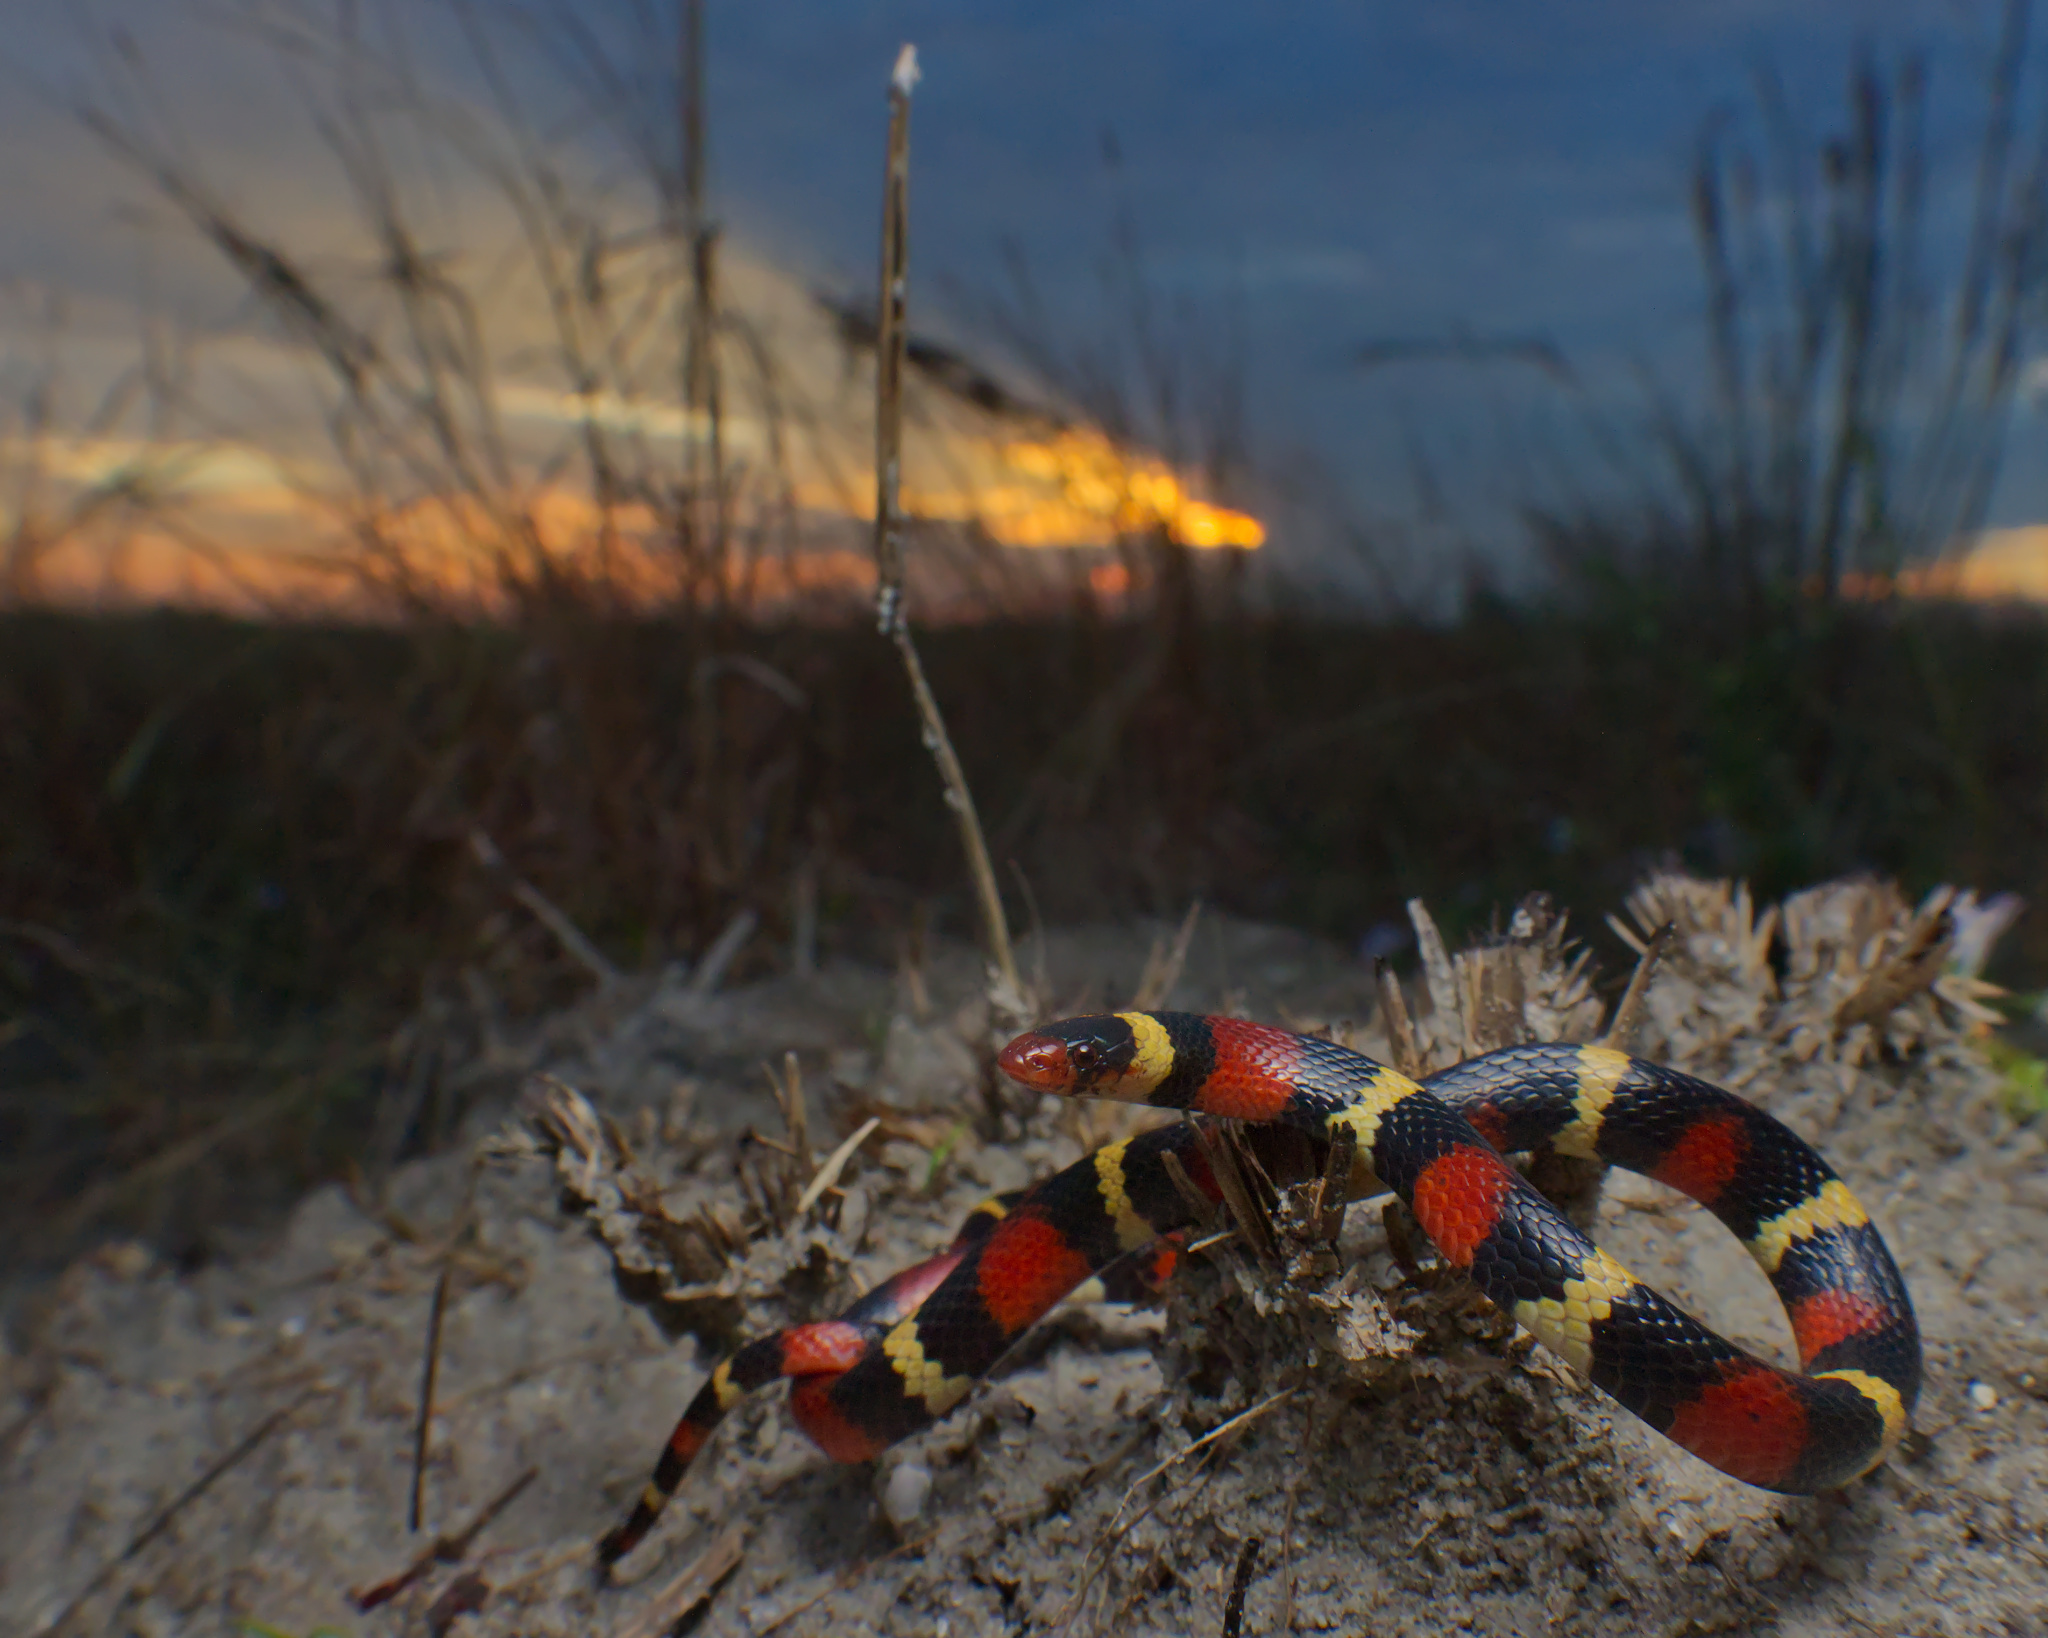
Whether it’s a lush rainforest or a developed city, including the habitat of an animal widens the story that the photo is telling. It gives viewers a sense of place, which in turn helps form a deeper connection to the subject.
It’s easy to get caught up filling the frame with the subject, but the empty spaces you are trying to fill often aren’t truly empty. They contain sky, silhouettes of trees, color, and so on – things that hint at the environment. This broadens the scene portrayed by the photo and expands on the story that you’re telling with your work.
To pull this off doesn’t require any fancy equipment. A wider lens covers a wider field of view, but with clever positioning, even macro or telephoto lenses can be used to highlight interesting parts of the habitat.
3. Consider the focus plane
When photographing a wildlife subject’s portrait, we usually want to keep the eye in focus. But what else is in focus? When you’re focusing your lens, it isn’t about making one point in the photo sharp – it’s about making one plane in the photo sharp. You can align this plane in many different ways while still keeping the subject’s eye(s) sharp.
You can also use the focus plane the other way around, too: to keep things out of focus. Maybe there is some vegetation you don’t want in the photo. By carefully angling your camera, you can keep the subject’s eye sharp while de-emphasizing the less interesting part of the photo.
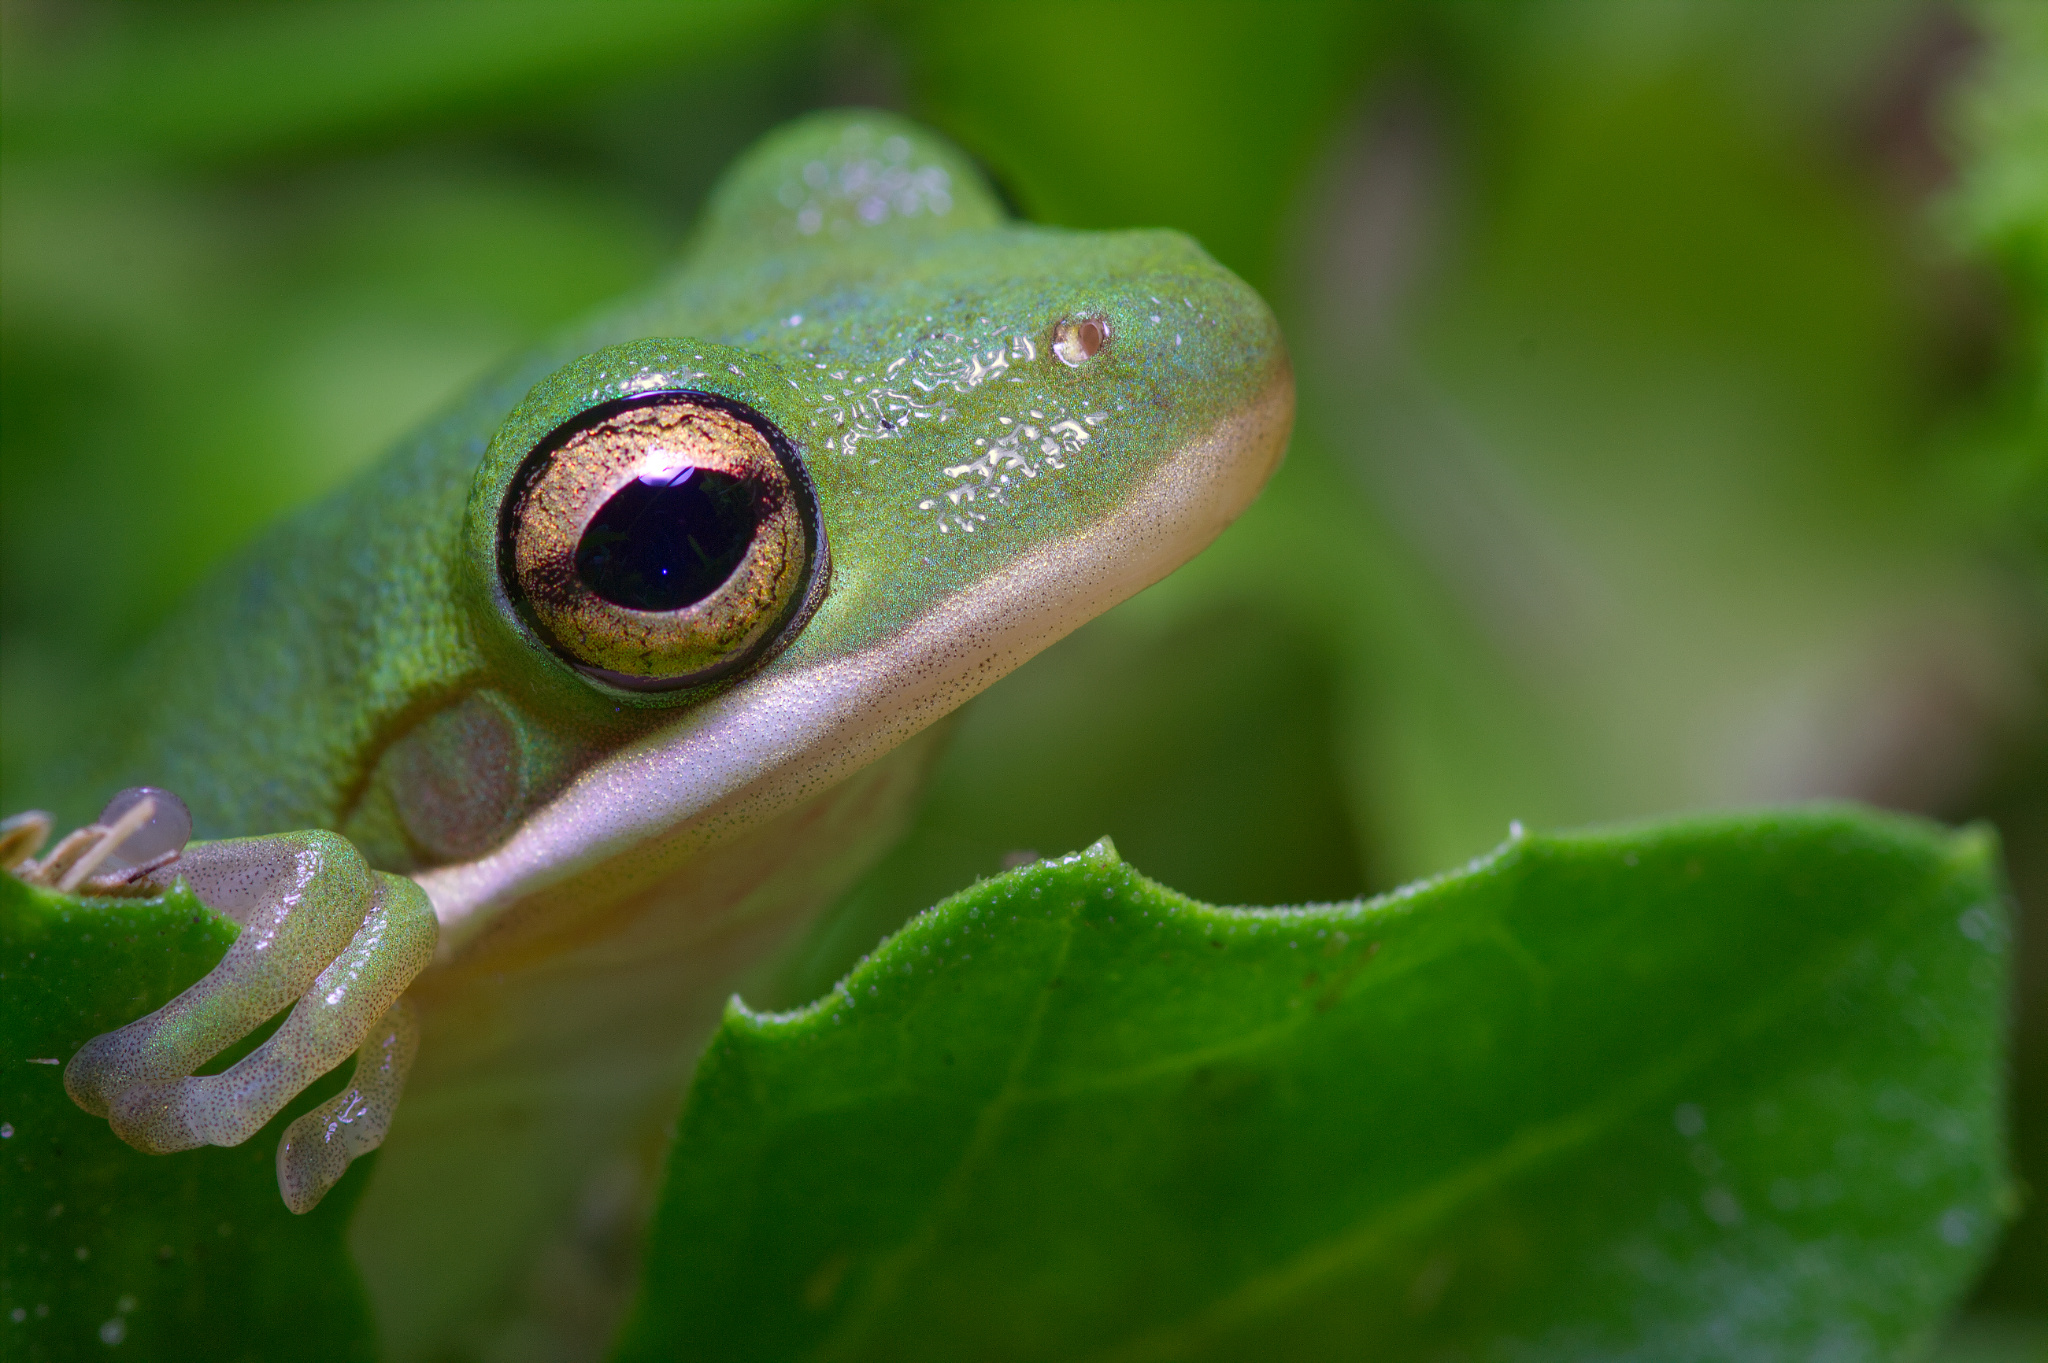
One of my favorite aspects of the following frog portrait is that the foot and leaf are in the focus plane with the eye. If these elements were soft, the shot wouldn’t be as interesting to look at. Achieving this took careful camera positioning! Although a less deliberate camera position could have kept the frog’s eye sharp, the foot and leaf would have been a little out of focus.
4. Incorporate movement
We often get caught up in focusing on a static animal to get the perfect in-focus portrait, and using fast shutter speeds to freeze their motion. But motion blur is not something that must always be avoided in wildlife photography. Animals are constantly in motion, and if your photos freeze all of them like a statue, you may be missing out on some storytelling opportunities.
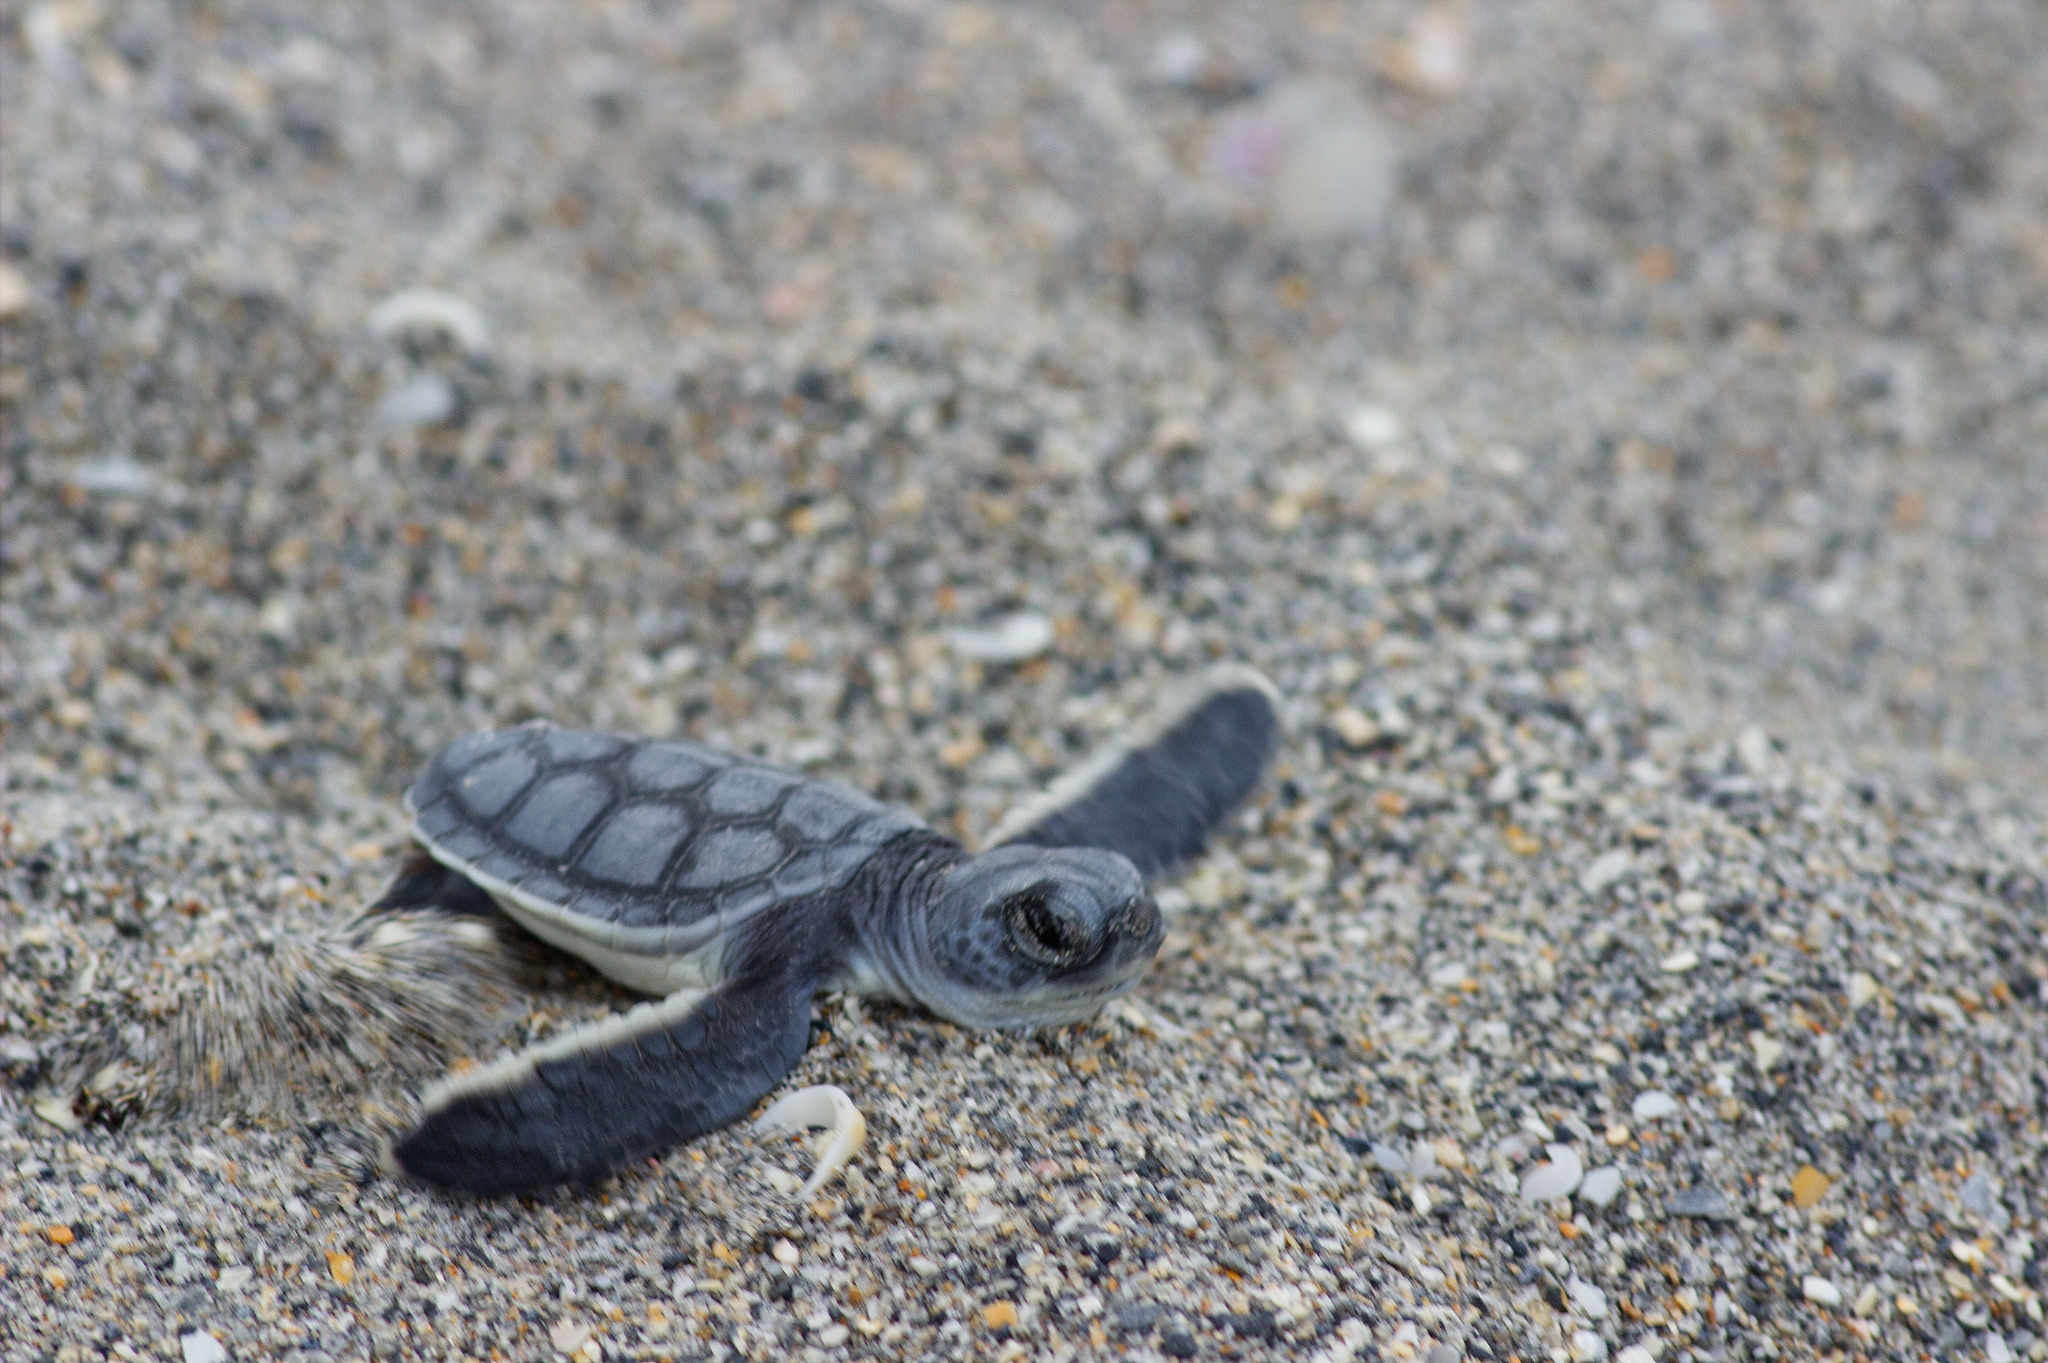
In the following case with a sea turtle hatchling, I didn’t have much time to get an interesting shot as it raced from its nest to the ocean. It was tempting to use a fast shutter speed to guarantee that I would get a sharp photo, but the result would have been a relatively nondescript shot of a turtle in the sand. As it is, the photo feels more lifelike, with motion in the turtle’s flippers and sand being kicked into the air. It gives a much better idea to the whole story.
5. Utilize the foreground
More advanced wildlife photographers tend to give a lot of thought to the backgrounds of their photos, even out-of-focus backgrounds. But what about the foreground? You will often have some ability to reposition your camera and include or exclude various foreground elements from the scene, and you should use this to your advantage.
With your choice of foreground, you can make the viewer feel immersed in the image, as if peering through vegetation themselves to find an animal. Leaves are a great tool for this as they are found everywhere, and you can usually reposition yourself to include some in the foreground. Grass in a meadow or reeds in a wetland also can act as a pleasant foreground element to frame your subject.
Often, all it takes is getting to eye-level of the subject. You can even use part of the animal itself as the foreground – such as the paws of a lion ready to pounce, or the out-of-focus scales on the nose of a snake.
6. Pay attention to lines
I’m sure you’ve heard of leading lines in photography. These linear elements of an image can be used to draw attention to your subject and guide the viewer’s eye through a photo. But be careful – if misplaced, prominent lines can also distract from the image. Lines from trees, buildings, and vegetation are easy to overlook, but they still drag the viewer’s eye wherever they’re going.
Instead of including lines in your photo thoughtlessly, arrange them in such a way that they improve the photo. See if you can compose the photo so that the lines guide your viewer throughout the important parts of the image, from your wildlife subject to its surroundings.
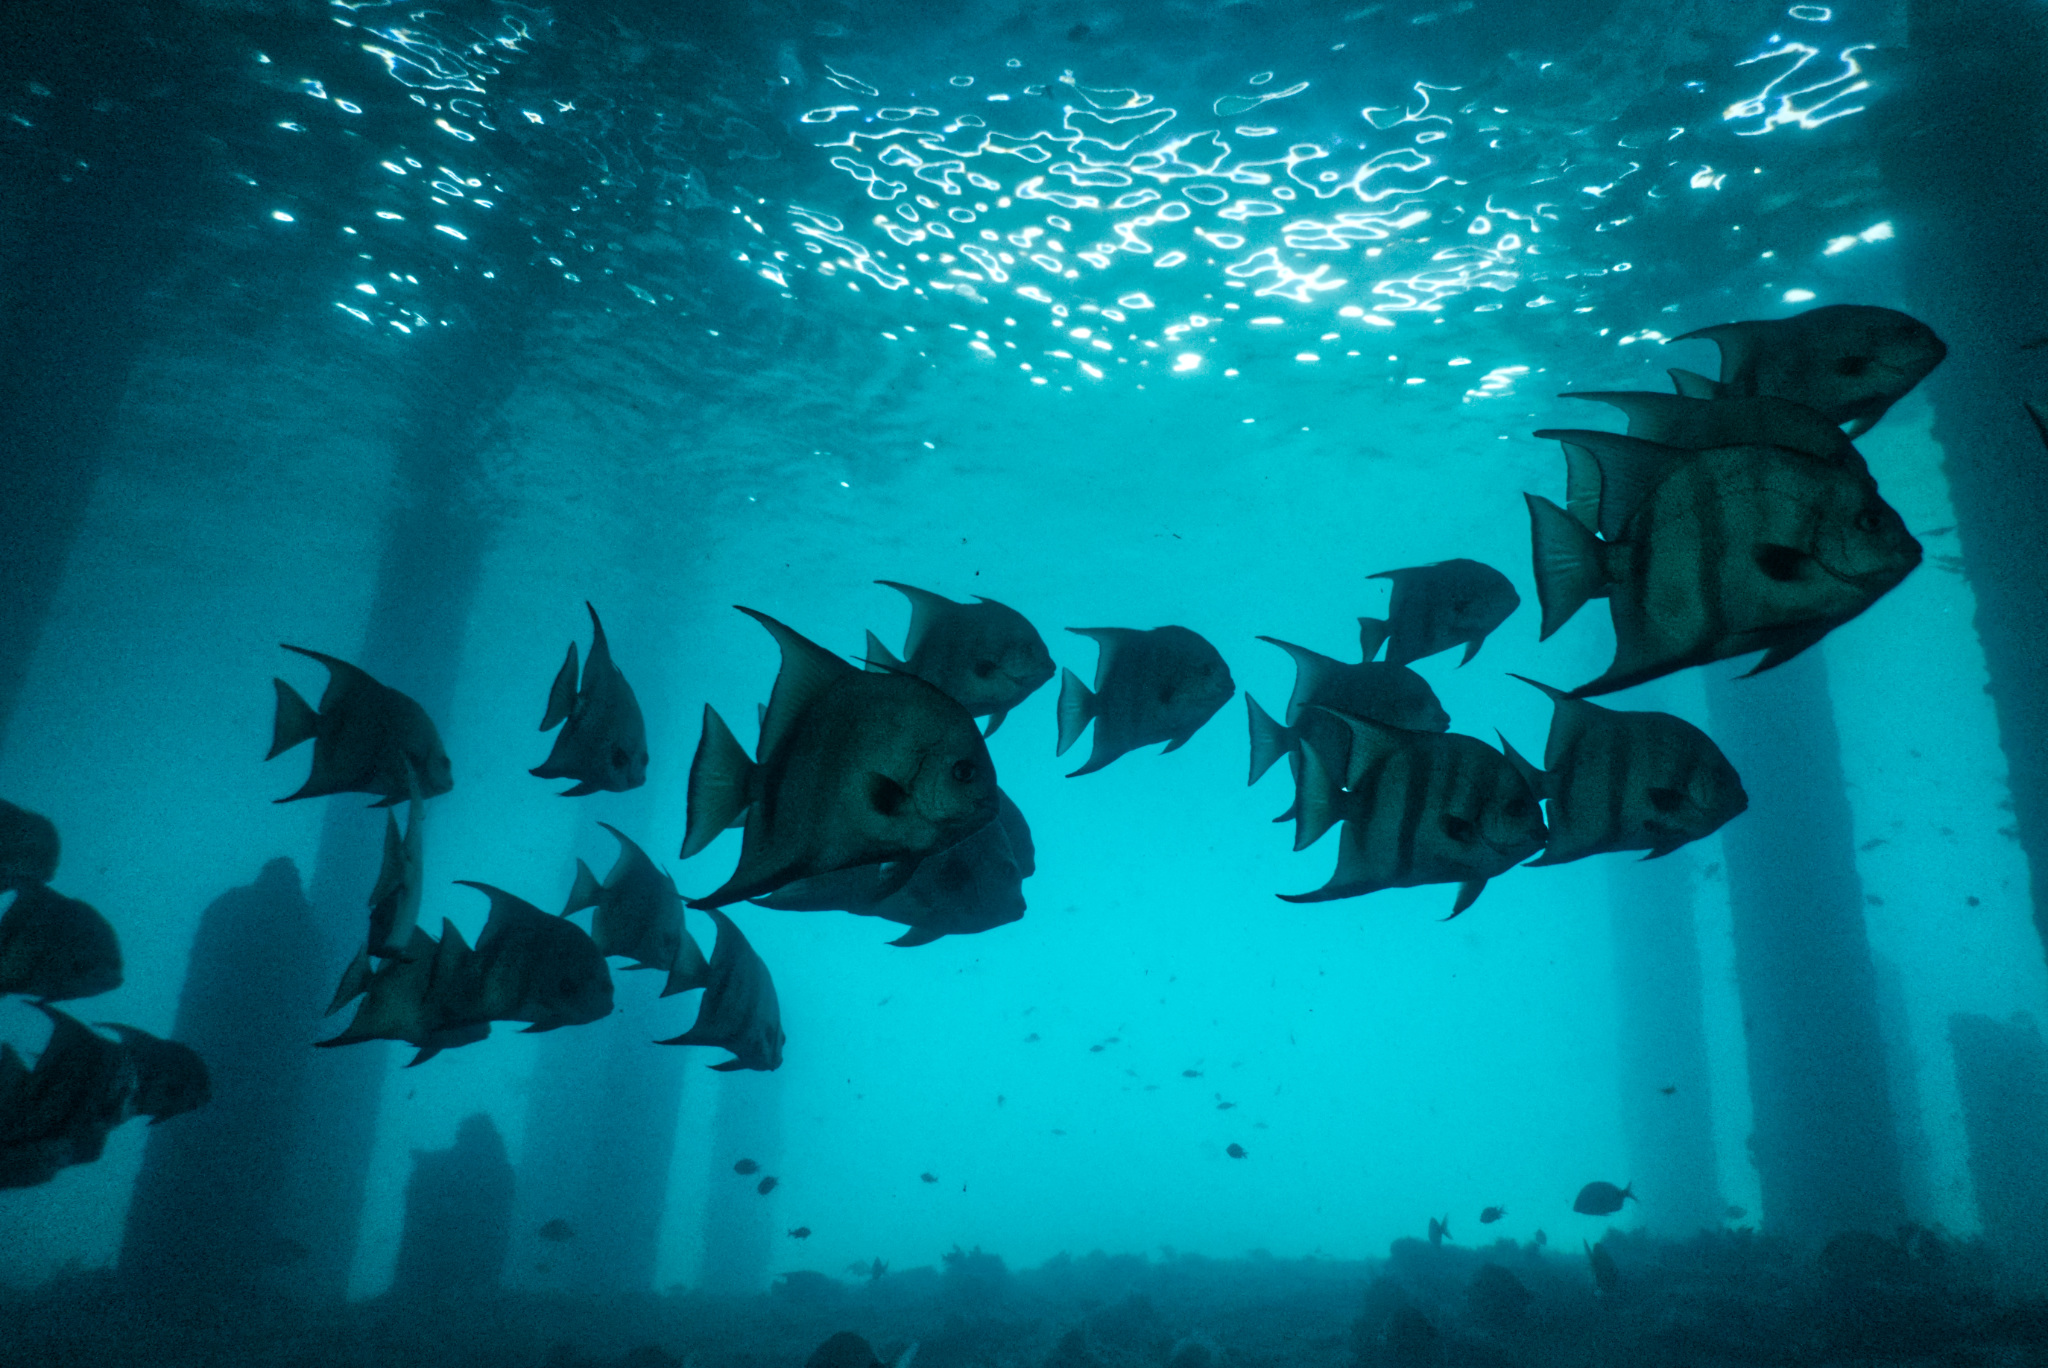
For example, in the photo below, the pillars from a dock guide the viewer’s eye toward the shimmering surface of the water. It highlights the environment surrounding these fish, and it also acts as a sort of frame. I believe the photo would have been less interesting without them.
7. Rotate the camera
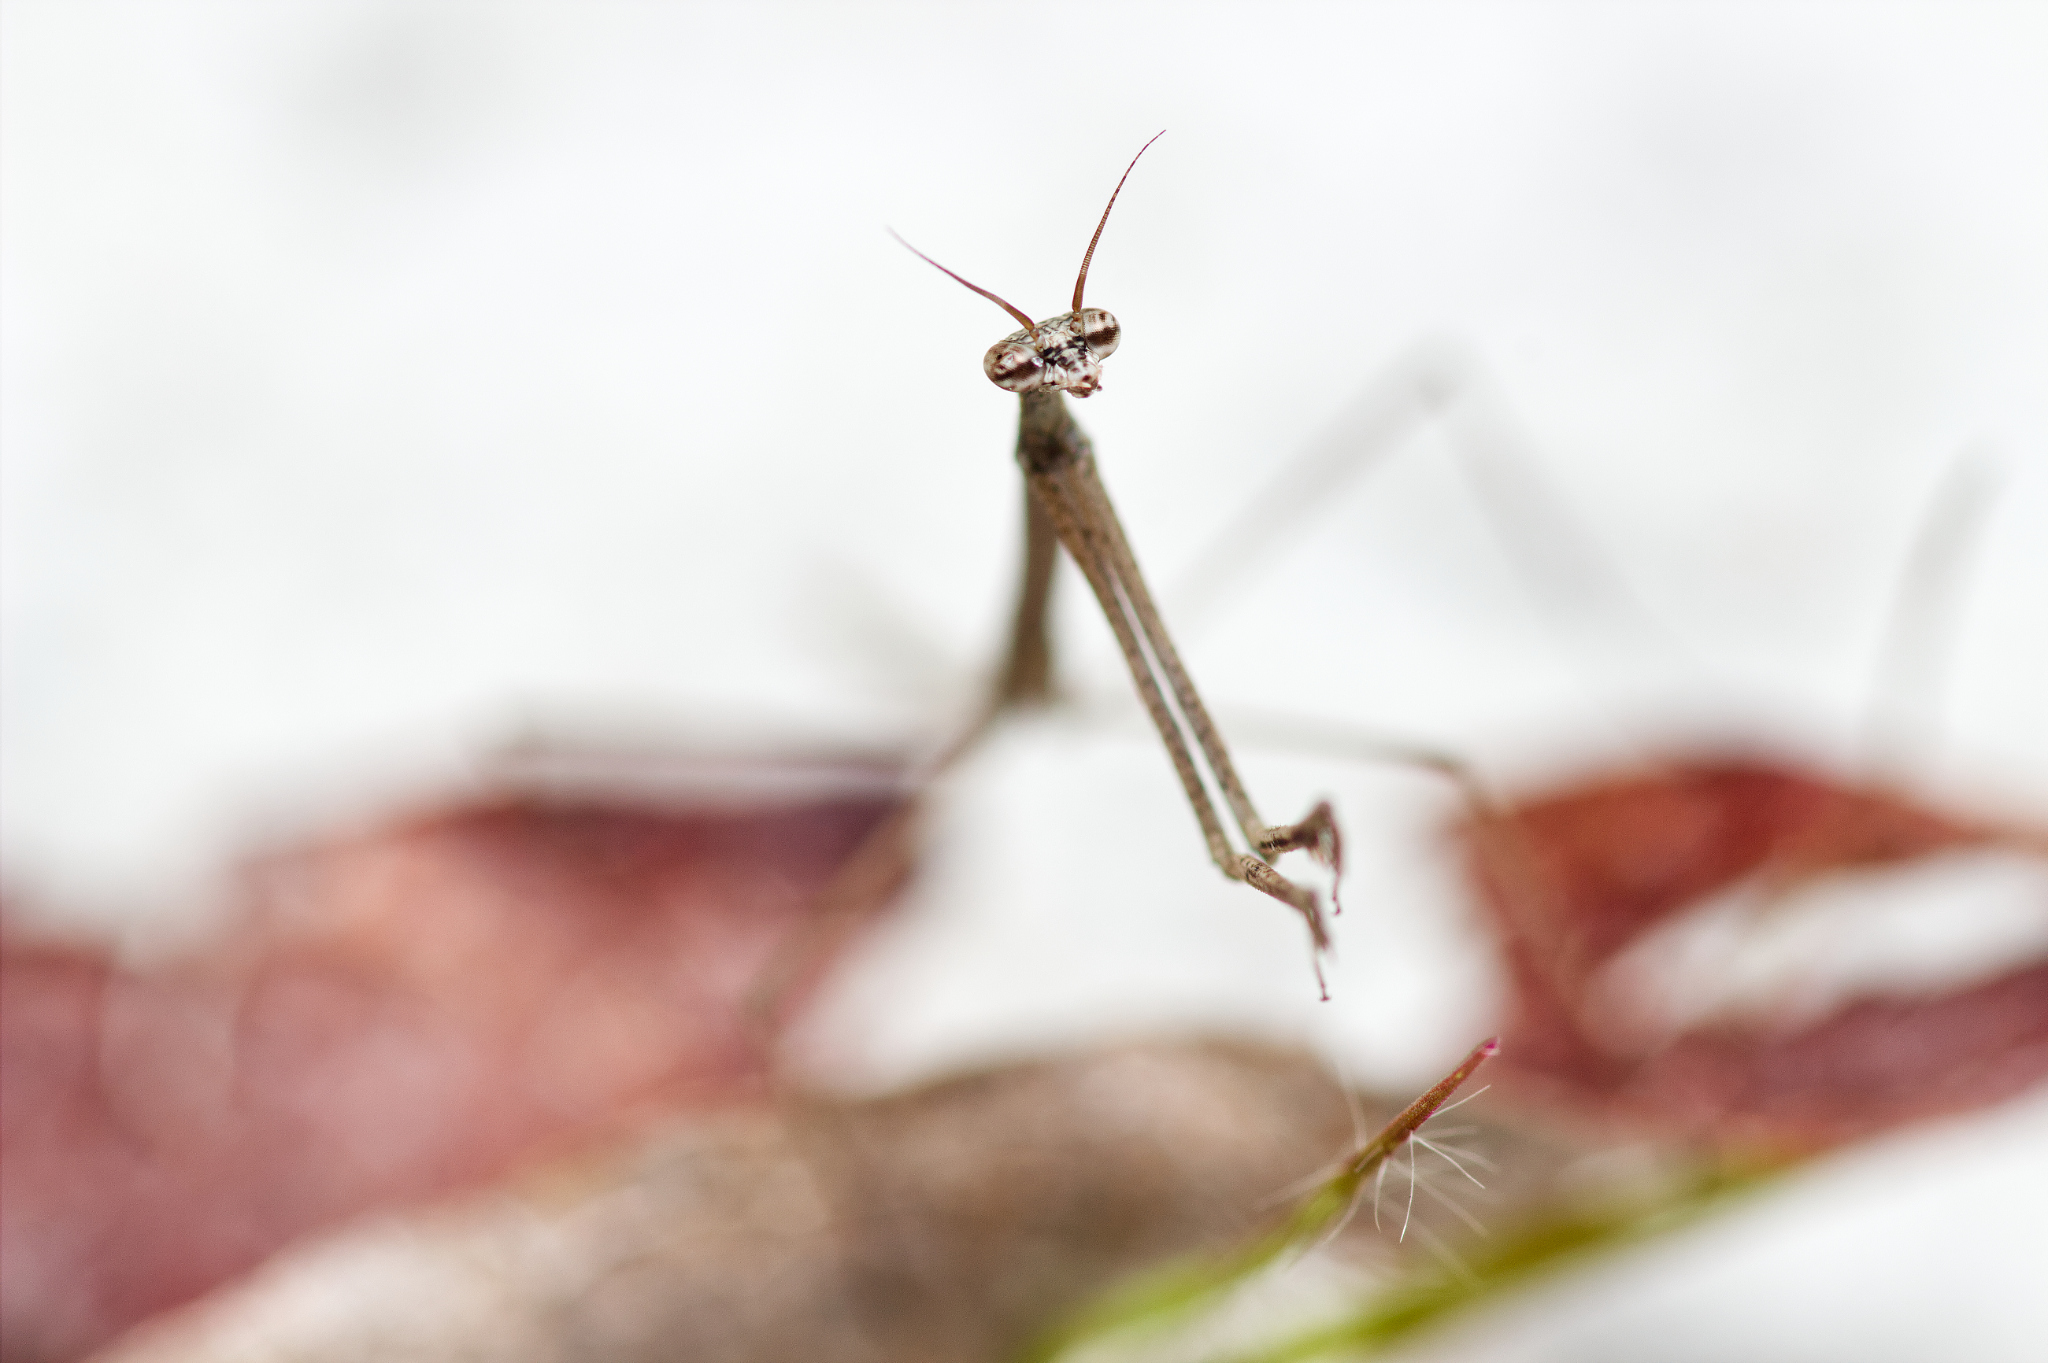
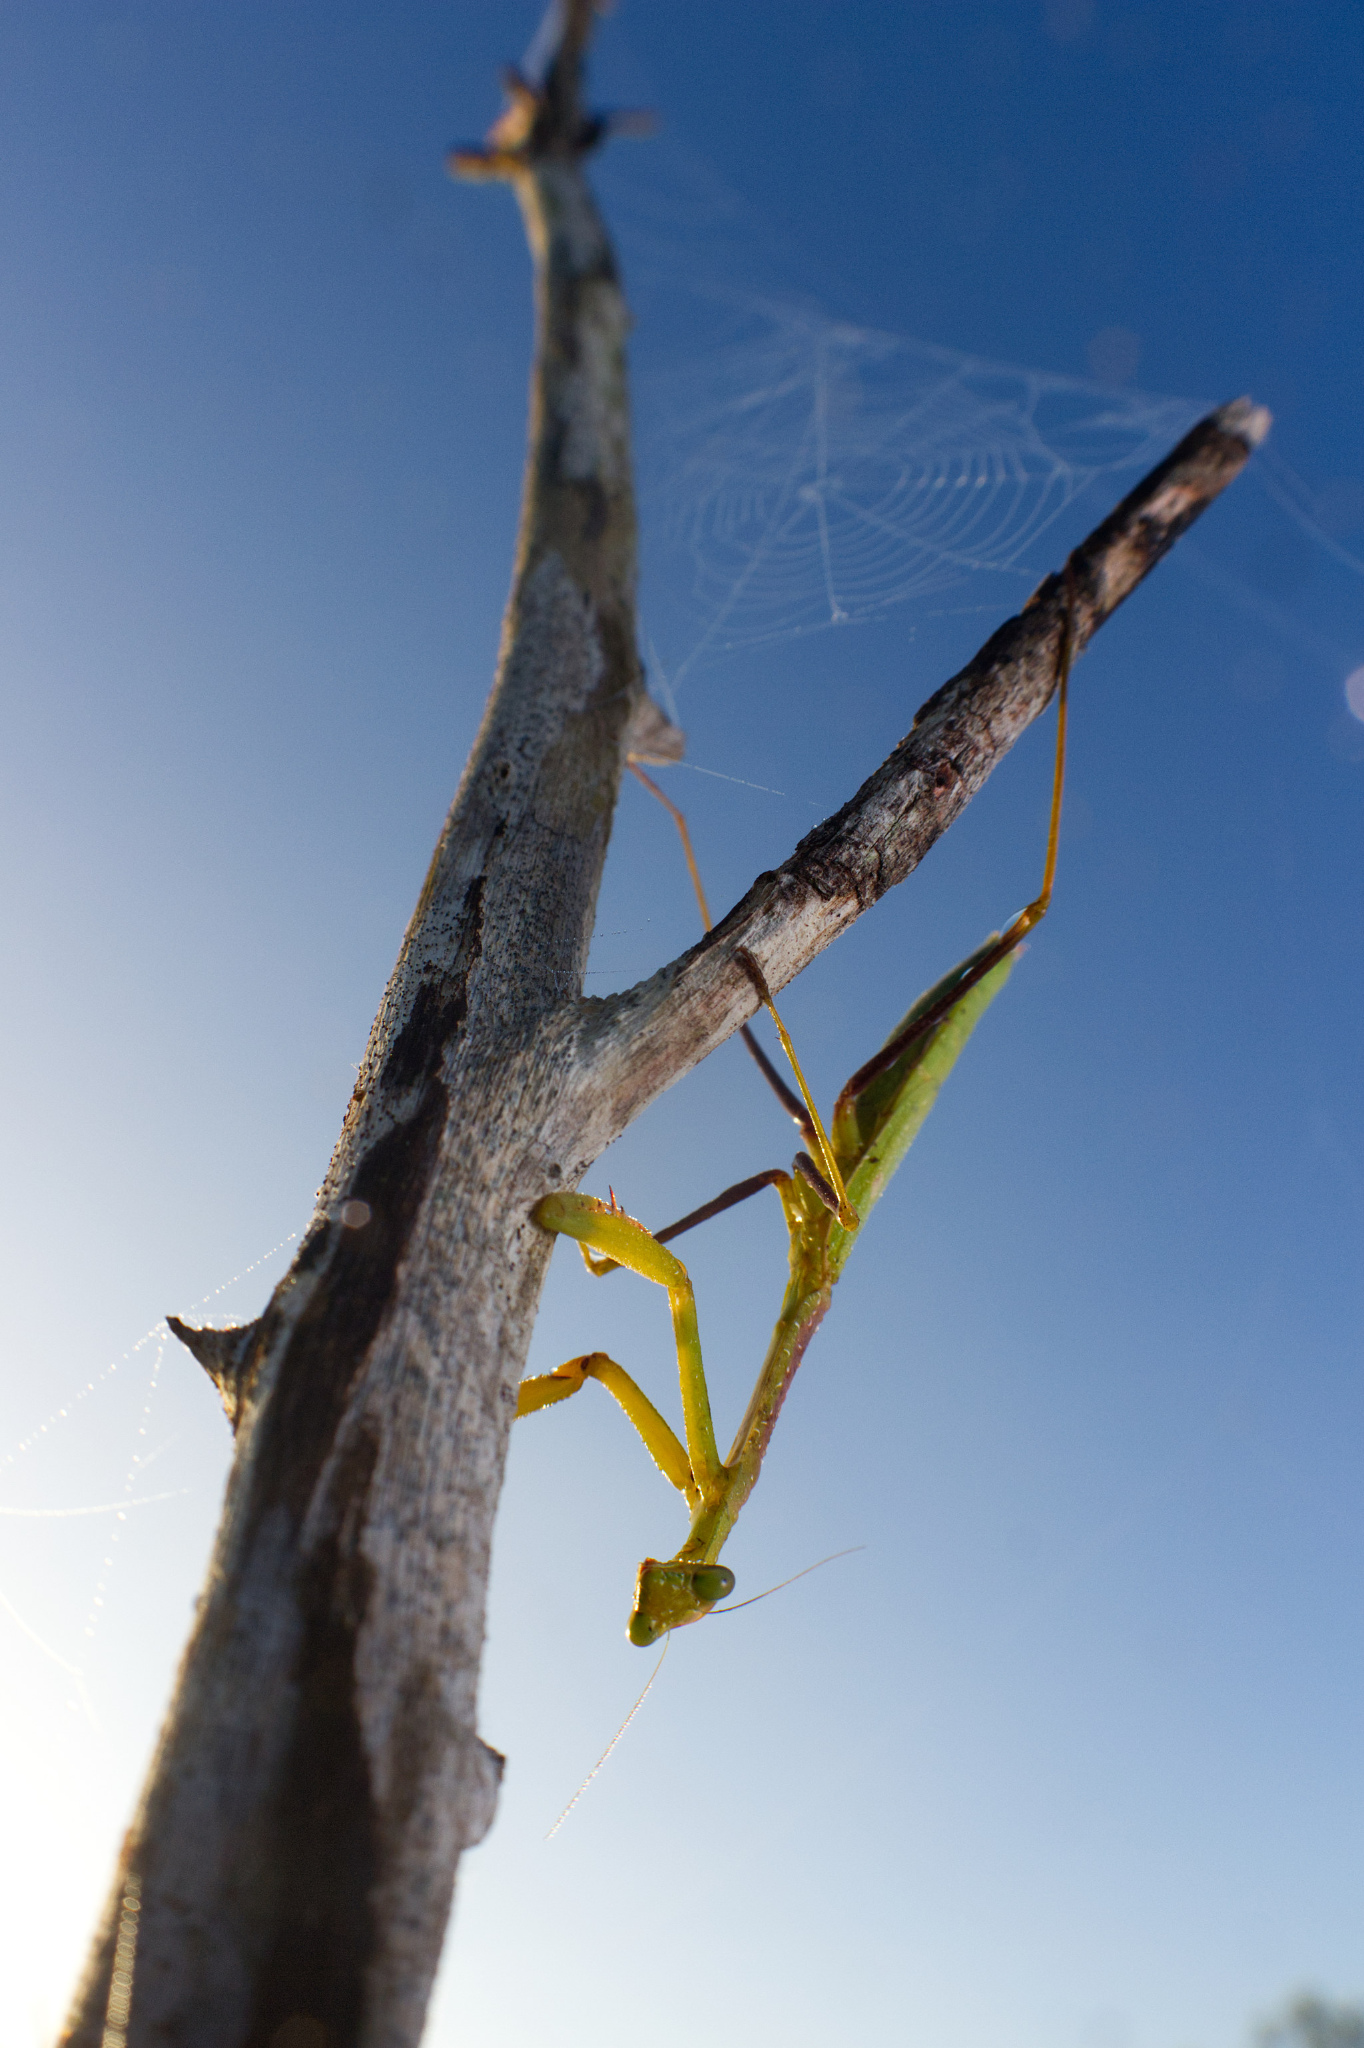
It’s simple, but don’t forget you can always rotate your camera! You aren’t confined to just taking level, horizontal photos – or even level, vertical photos – in your pursuit of great wildlife pictures. The best composition often is not found by shooting from the most comfortable position.
For the photo below, I could have taken a straightforward horizontal photo, but the whole body of the mantis would not have been framed nicely. (Either the legs would be cropped out, or there would be too much sky in the background.) A better choice would have been a head-on vertical photo, but that would have been a pretty static photo, and it wouldn’t have shown the spider web at the top of this tree branch.
Instead, I shot an angled, vertical photo from below the subject. This created a dynamic and diagonal composition, while also making room both for the subject and for the spider web above. The result is a wider vertical field of view and a subject that appears more looming.
8. Pay attention to color
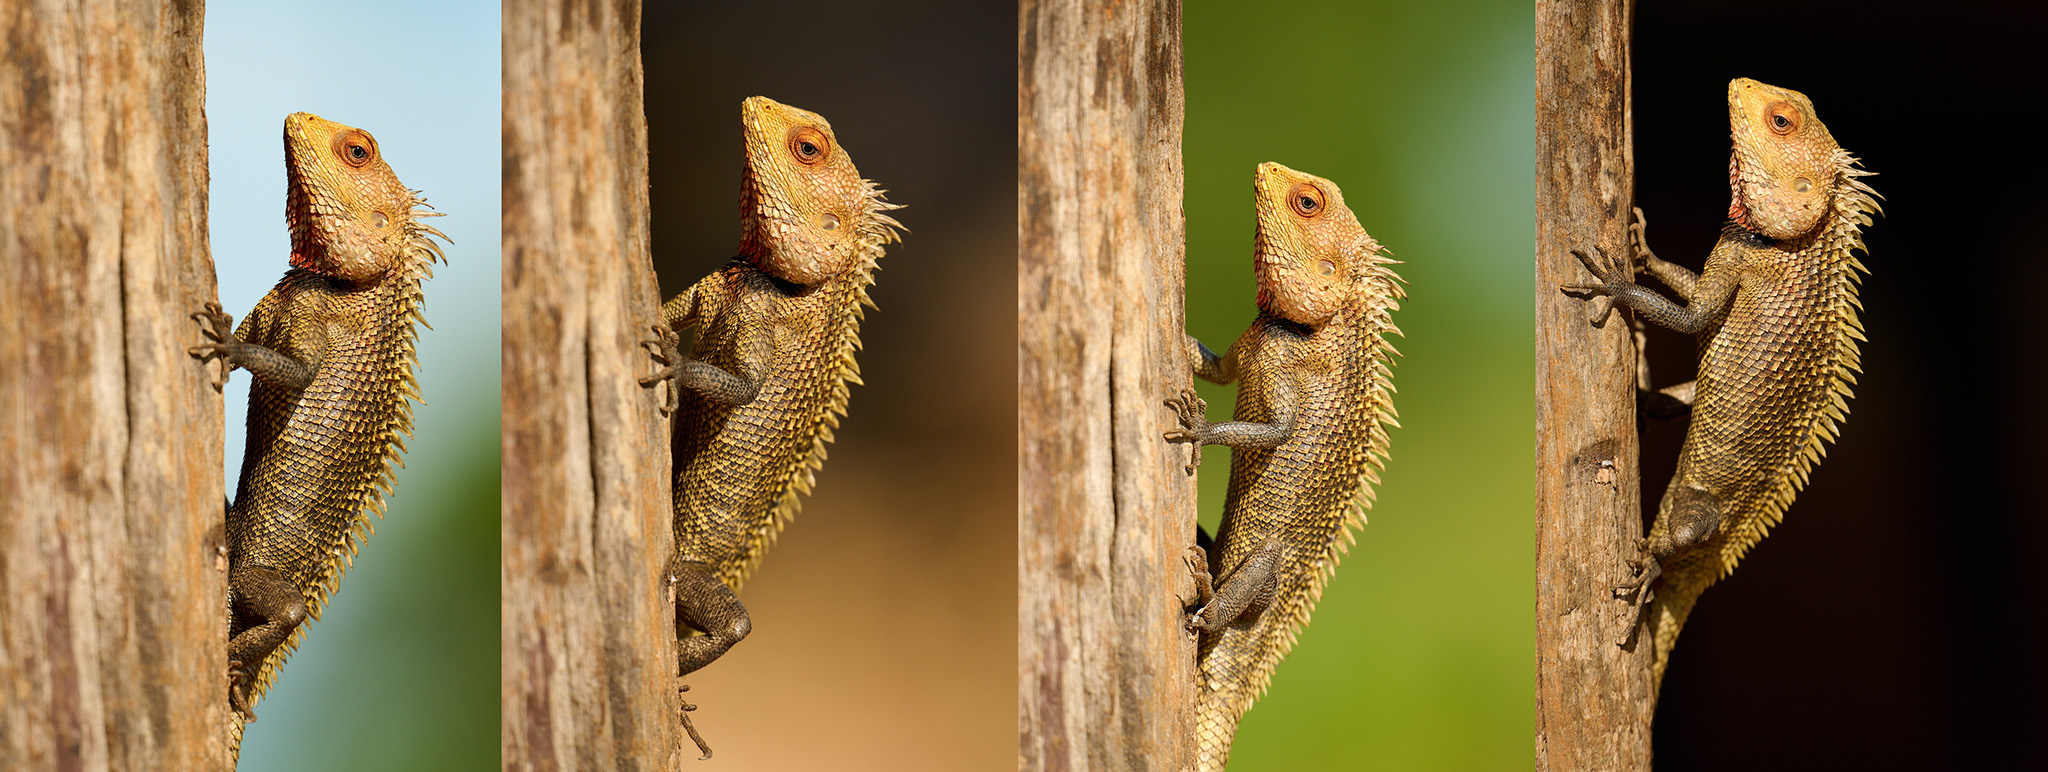
Pay attention to how the color of your subject and the background interact. Does your subject blend in? Is there a way to make it stand out? You can move yourself to change colors and shades of the background. Even slight differences in shades can help subjects pop or create formality with monochrome.
Colors can also distract from the subject. Leaves that are brightly colored often do this. Think like a painter! Would you paint that item in the frame if you could control it? Now, as a photographer, use the tools at hand to change position to get rid of or add elements to the frame.
Libor wrote an excellent article about how your camera position can affect the background color, and you can see below how varied your results can be when you pay attention to color:
9. Create harsh shadows
This is the opposite of what we photographers usually try to accomplish! But try experimenting with moving light (or your position) to create dramatic shadows and silhouettes. An external flash is great for experimenting with this, with the freedom to move it around for new and creative lighting. For larger wildlife, side light or backlighting when the sun is low in the sky is a good way of creating dramatic lighting.
Of course, harsh light is not always going to be beneficial, but it can help your photo stand out and make the subject look more intense. I use it a lot when photographing subjects with interesting textures, such as the photo below.
10. Exploit the challenges
Work with the challenges of wildlife photography, not against them. If the subject is looking away, try to highlight another part of the body. Unwanted objects in the image? Position them in a way that compliments the subject or tells the true story of the scene – even if it’s a sad story like trash in the environment. If there are people in the way, perhaps you could incorporate them into the image and take a documentary/wildlife photo, rather than solely a wildlife photo. Even if you’re working in challenging light, try to use your creativity to work with the difficulties. You may be surprised at the interesting photos that result.
Conclusion
The underlying theme in a lot of these tips is to be adaptable when it comes to photographing wildlife in the moment. Don’t get too hung up on getting the exact photo you have pictured in your head, and don’t always think that the most straightforward portrait of an animal is the best way to take a photo. Subjects move; the light isn’t always perfect; unwanted objects will get in your shot. But if you try to be fluid and keep an open, creative mind, you will be able to take advantage of the situation and capture some great wildlife photos.
Thanks for this thoughtful article, reminding us that photography allows us so many different points of view! Also encouraging us to see what’s there in front of us, and to work with the equipment available to us.
Very interesting and inspiring. Thanks for sharing!
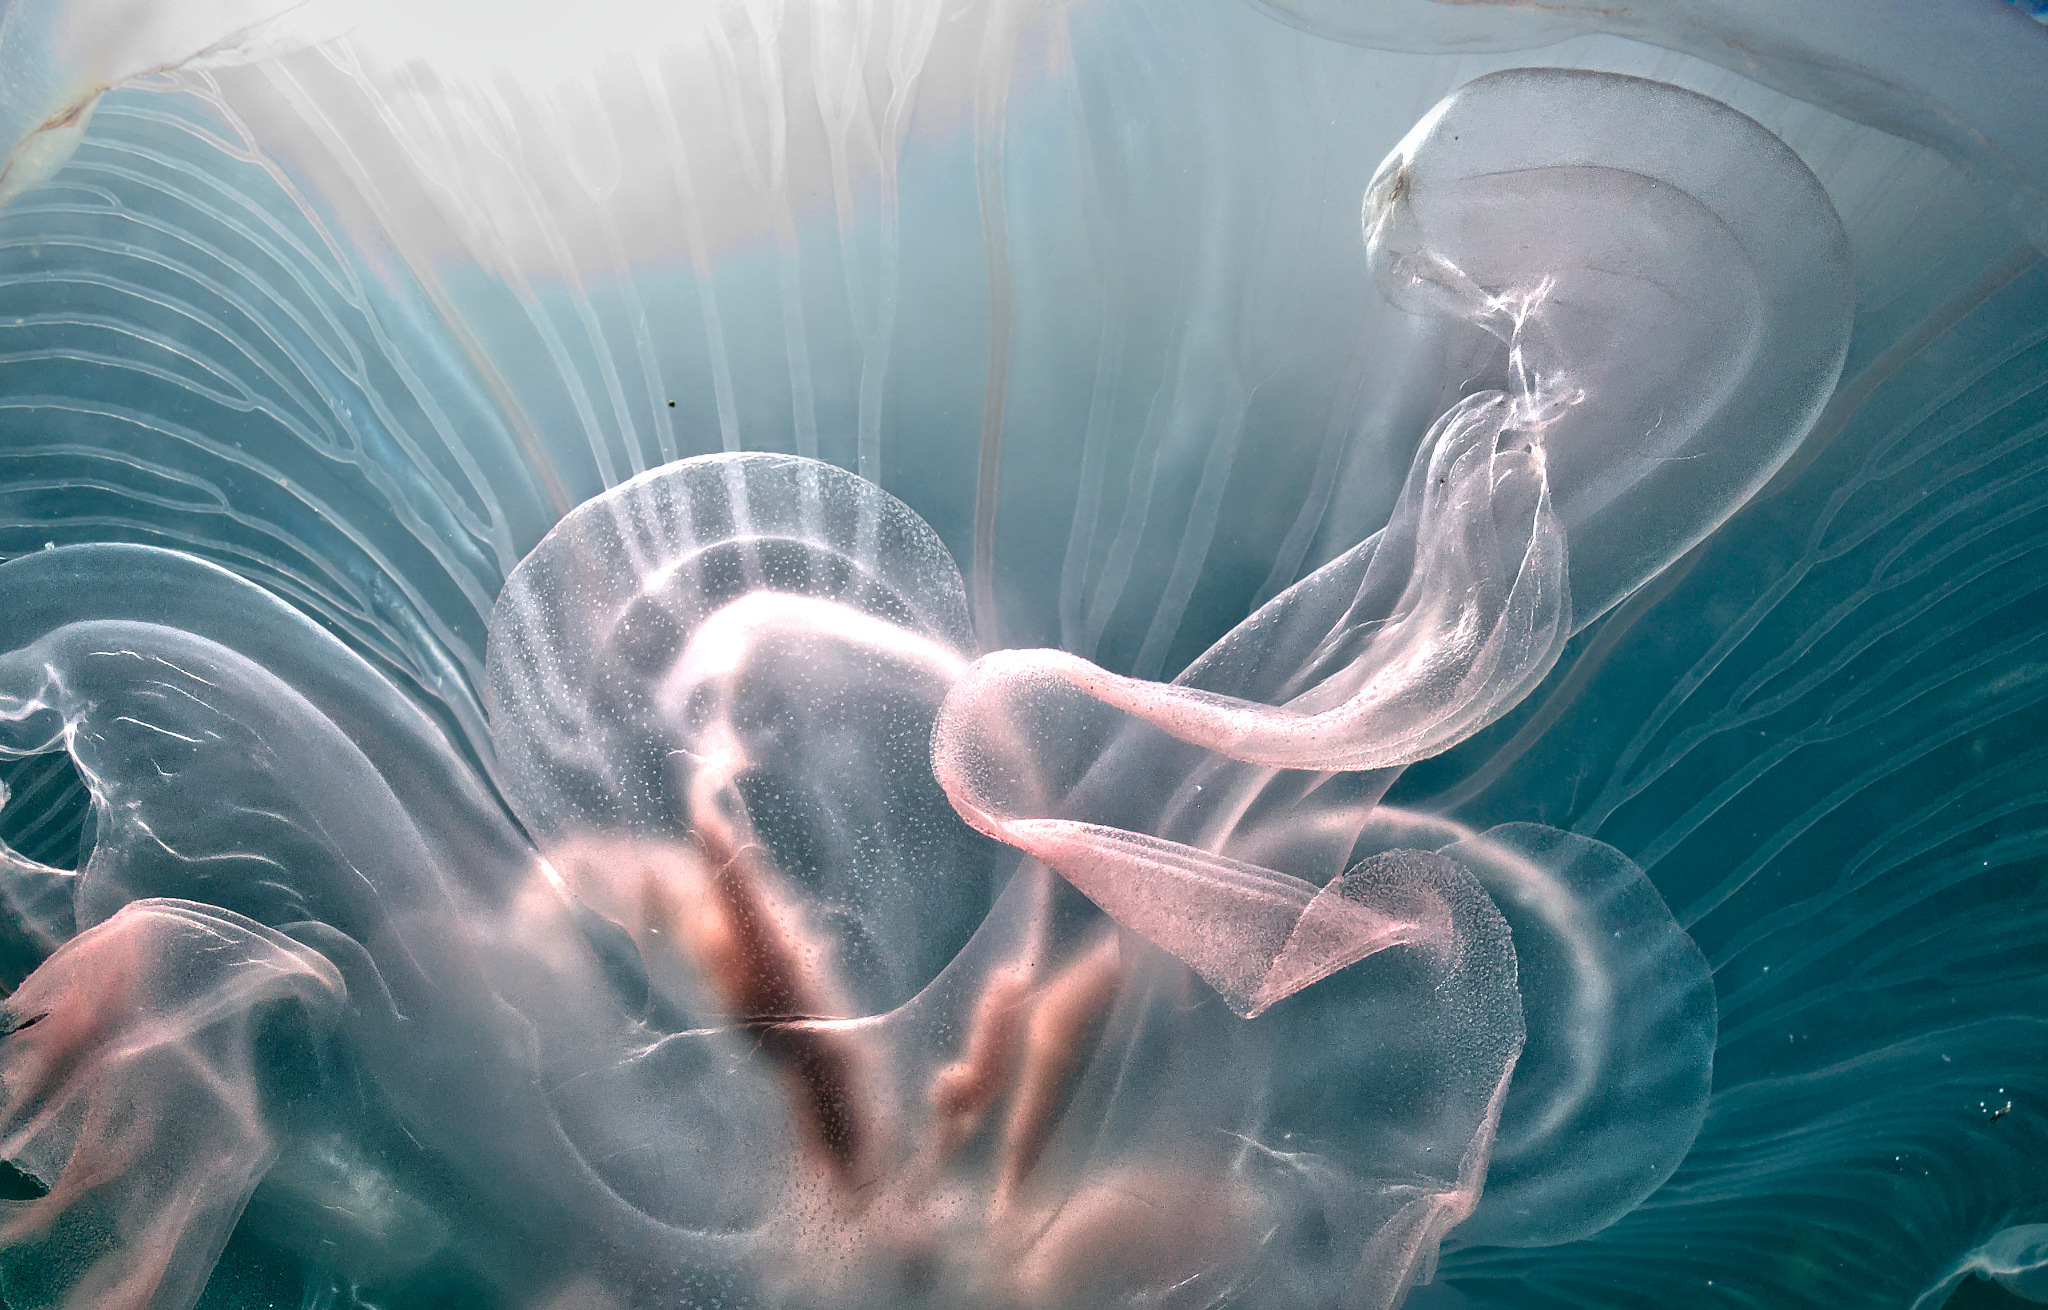
beautiful underwater shots!