Last week, I talked about the process of visualizing and composing with large format film during my trip to Yosemite in the fall. In recent days, I’ve been working in the darkroom to print those photos, and today I finally have some results to publish and discuss!
Visualization
I told you that this series would have some tips even for digital photographers, and that’s partly because the same process – visualization – applies no matter what type of camera you’re using.
The idea is that it’s important to have some understanding of how your “final product” will look, whether that’s a print, a digital image, a book, a magazine spread, or anything else. Then, make decisions in the field with the final product in mind.
For example, it’s important to maximize your post-processing flexibility by using the right camera settings, including things like focus stacking or HDR if the photo calls for it. And when you’re composing the photo, think how it will look on a bigger display size, not just the small image on your camera’s LCD.
In the film world, the biggest component of visualization (at least on the technical side of things) is your choice of exposure and development. The classic adage is to expose for the shadows, then develop for the highlights. In other words, your choice of camera settings in the field allow you to add detail to the shadows, while you can push the highlights increasingly further away from the shadows by using longer and stronger development methods.
Development
I’ll say up front that this is my least favorite part of shooting with ultra-large film sizes like 12×20. There’s no such thing as a daylight tank to develop 12×20 film (at least, I’ve never heard of one) and my attempts with automated Jobo print processors tend to give me uneven development in the sky areas.
Instead, I develop my film in open trays of chemicals: pre-wash, developer, stop bath, and fixer. I use a gentle brush to “paint” developer over the surface of the film and ensure that the entire film gets developed. Here’s how my setup looks – very high-tech, I know:
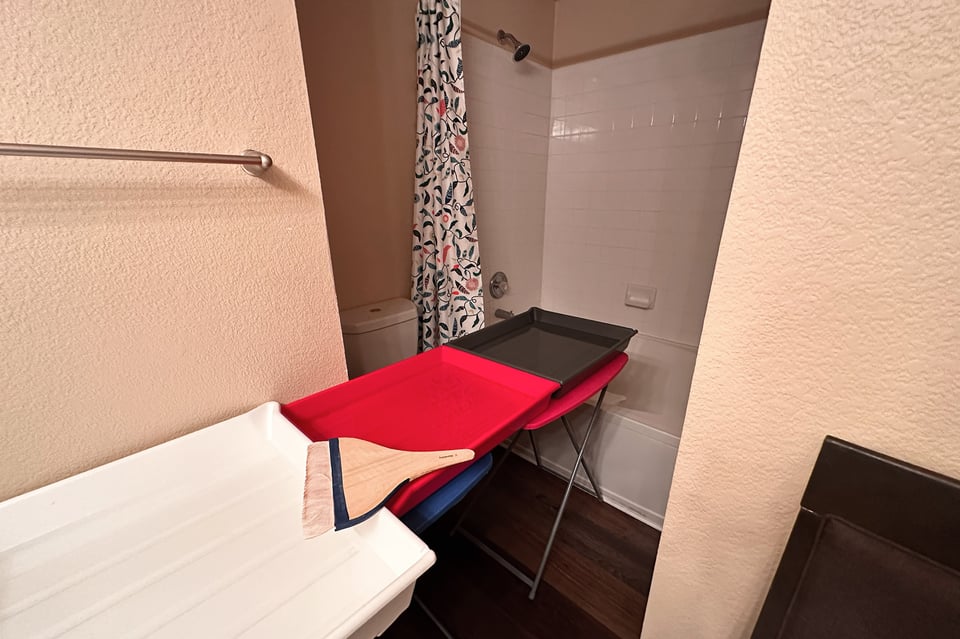
The difficulty is that all of this must be done in pitch darkness, and it takes about 20 minutes of transferring the film to each tray before it’s no longer sensitive to light. If one step goes wrong, the film can be ruined, so it isn’t something to be done thoughtlessly! It’s not a quick or comfortable process, but at least I don’t take very many 12×20 photos per trip.
Here’s how a 12×20 negative looks after it’s been washed and dried, then placed on a light table. This is the first moment since taking the photo that I can really see how the print will turn out:
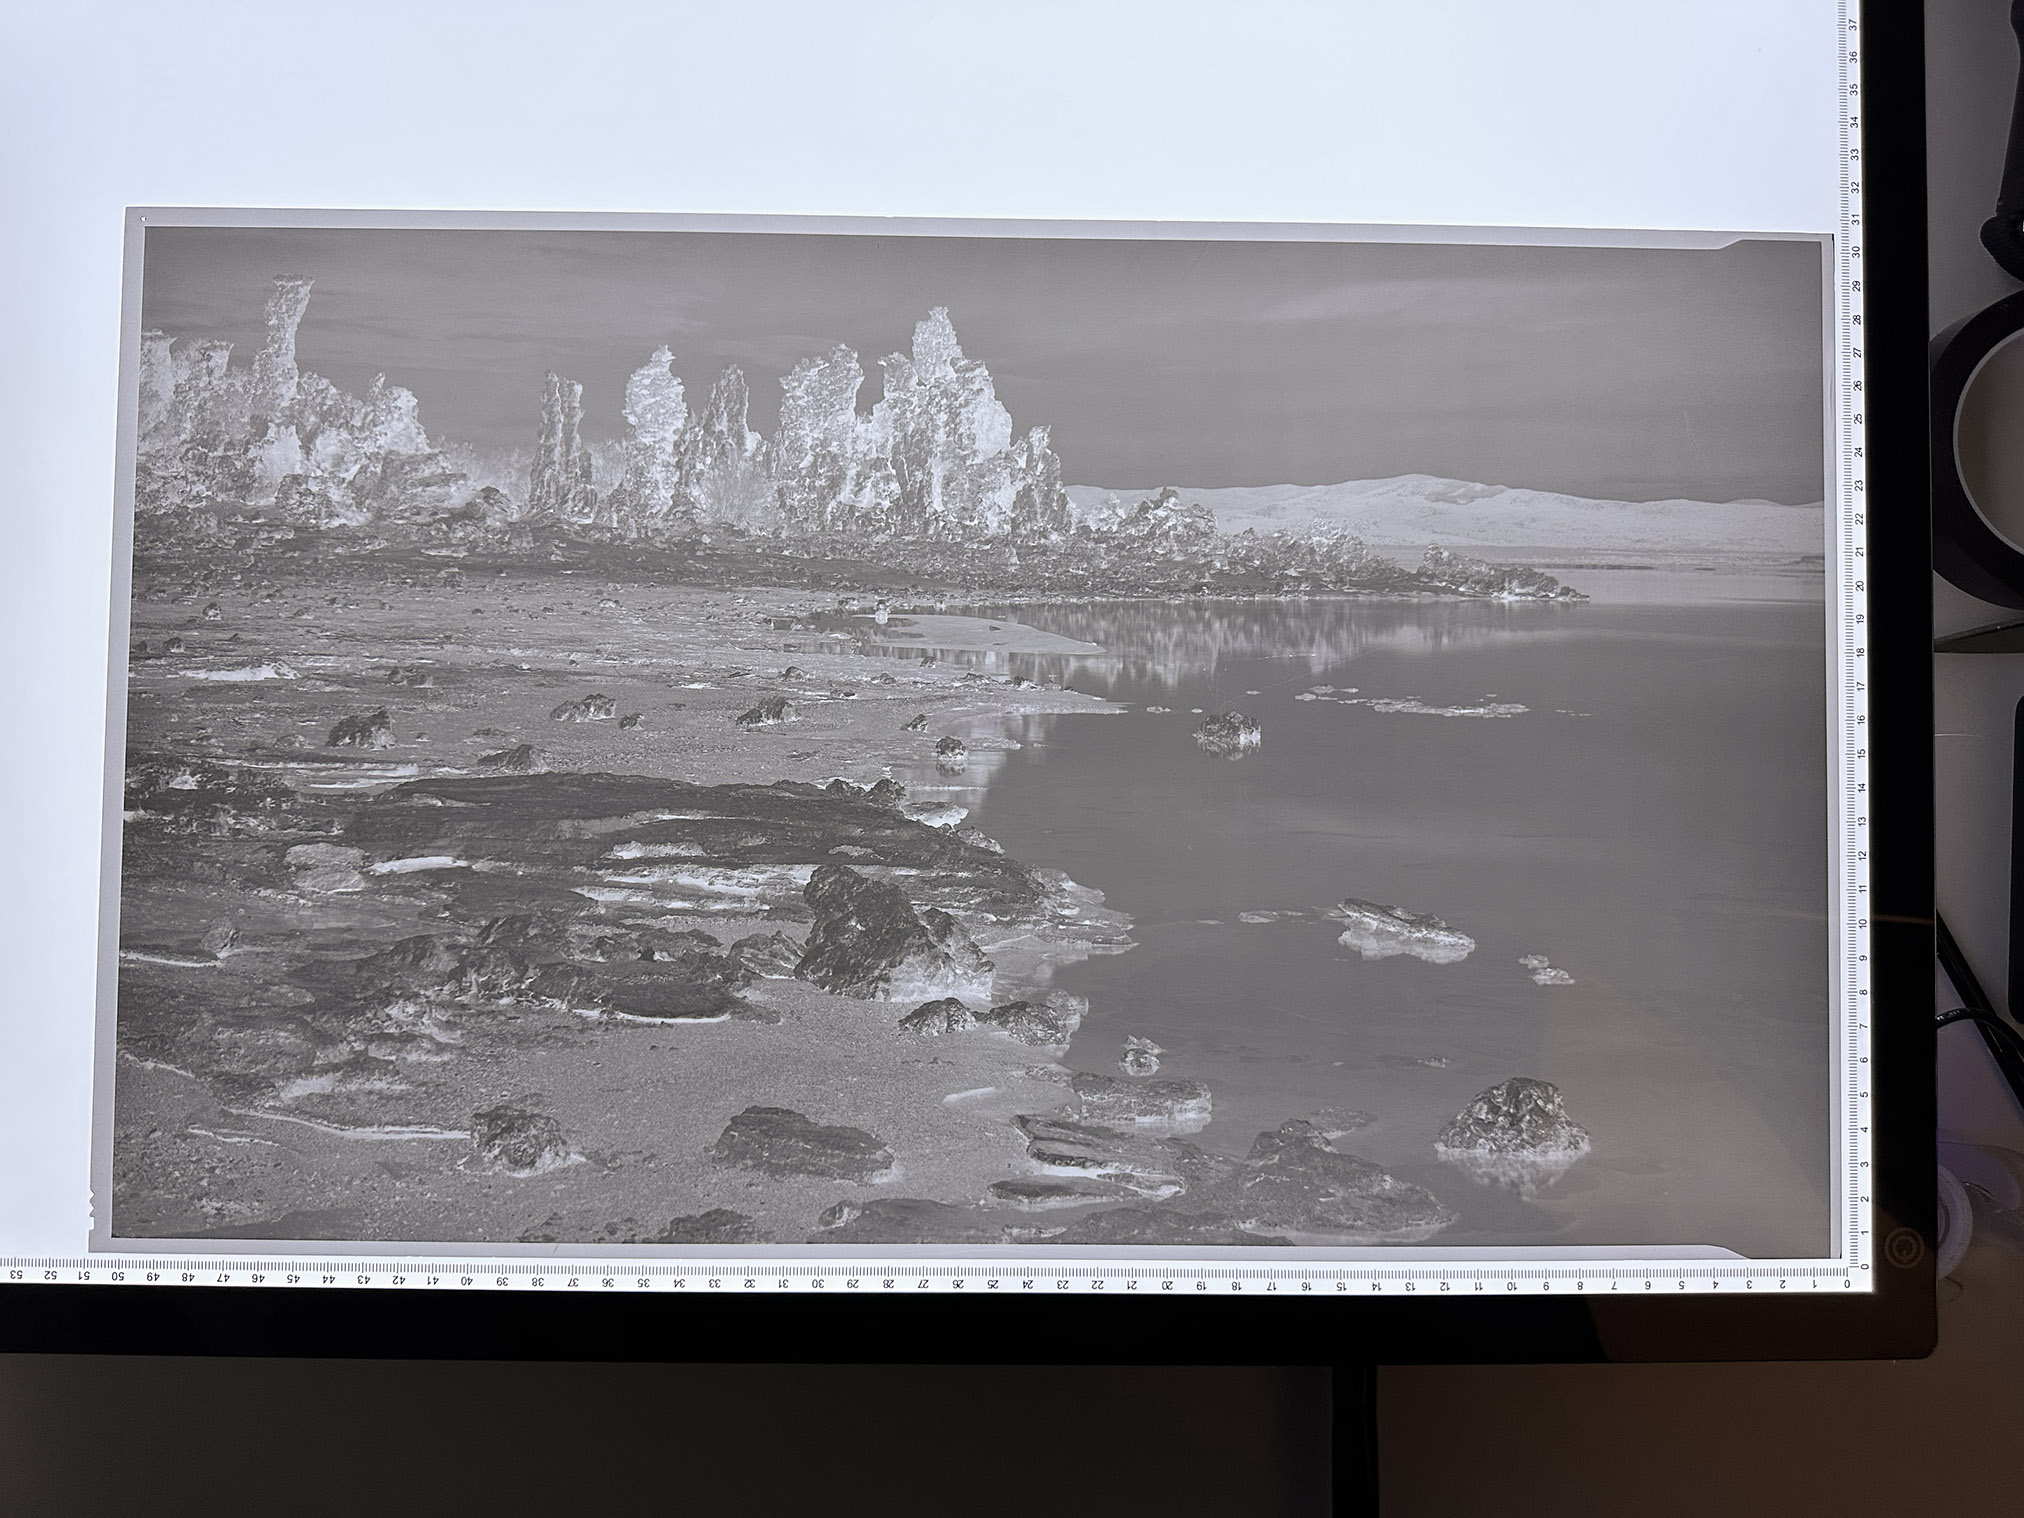
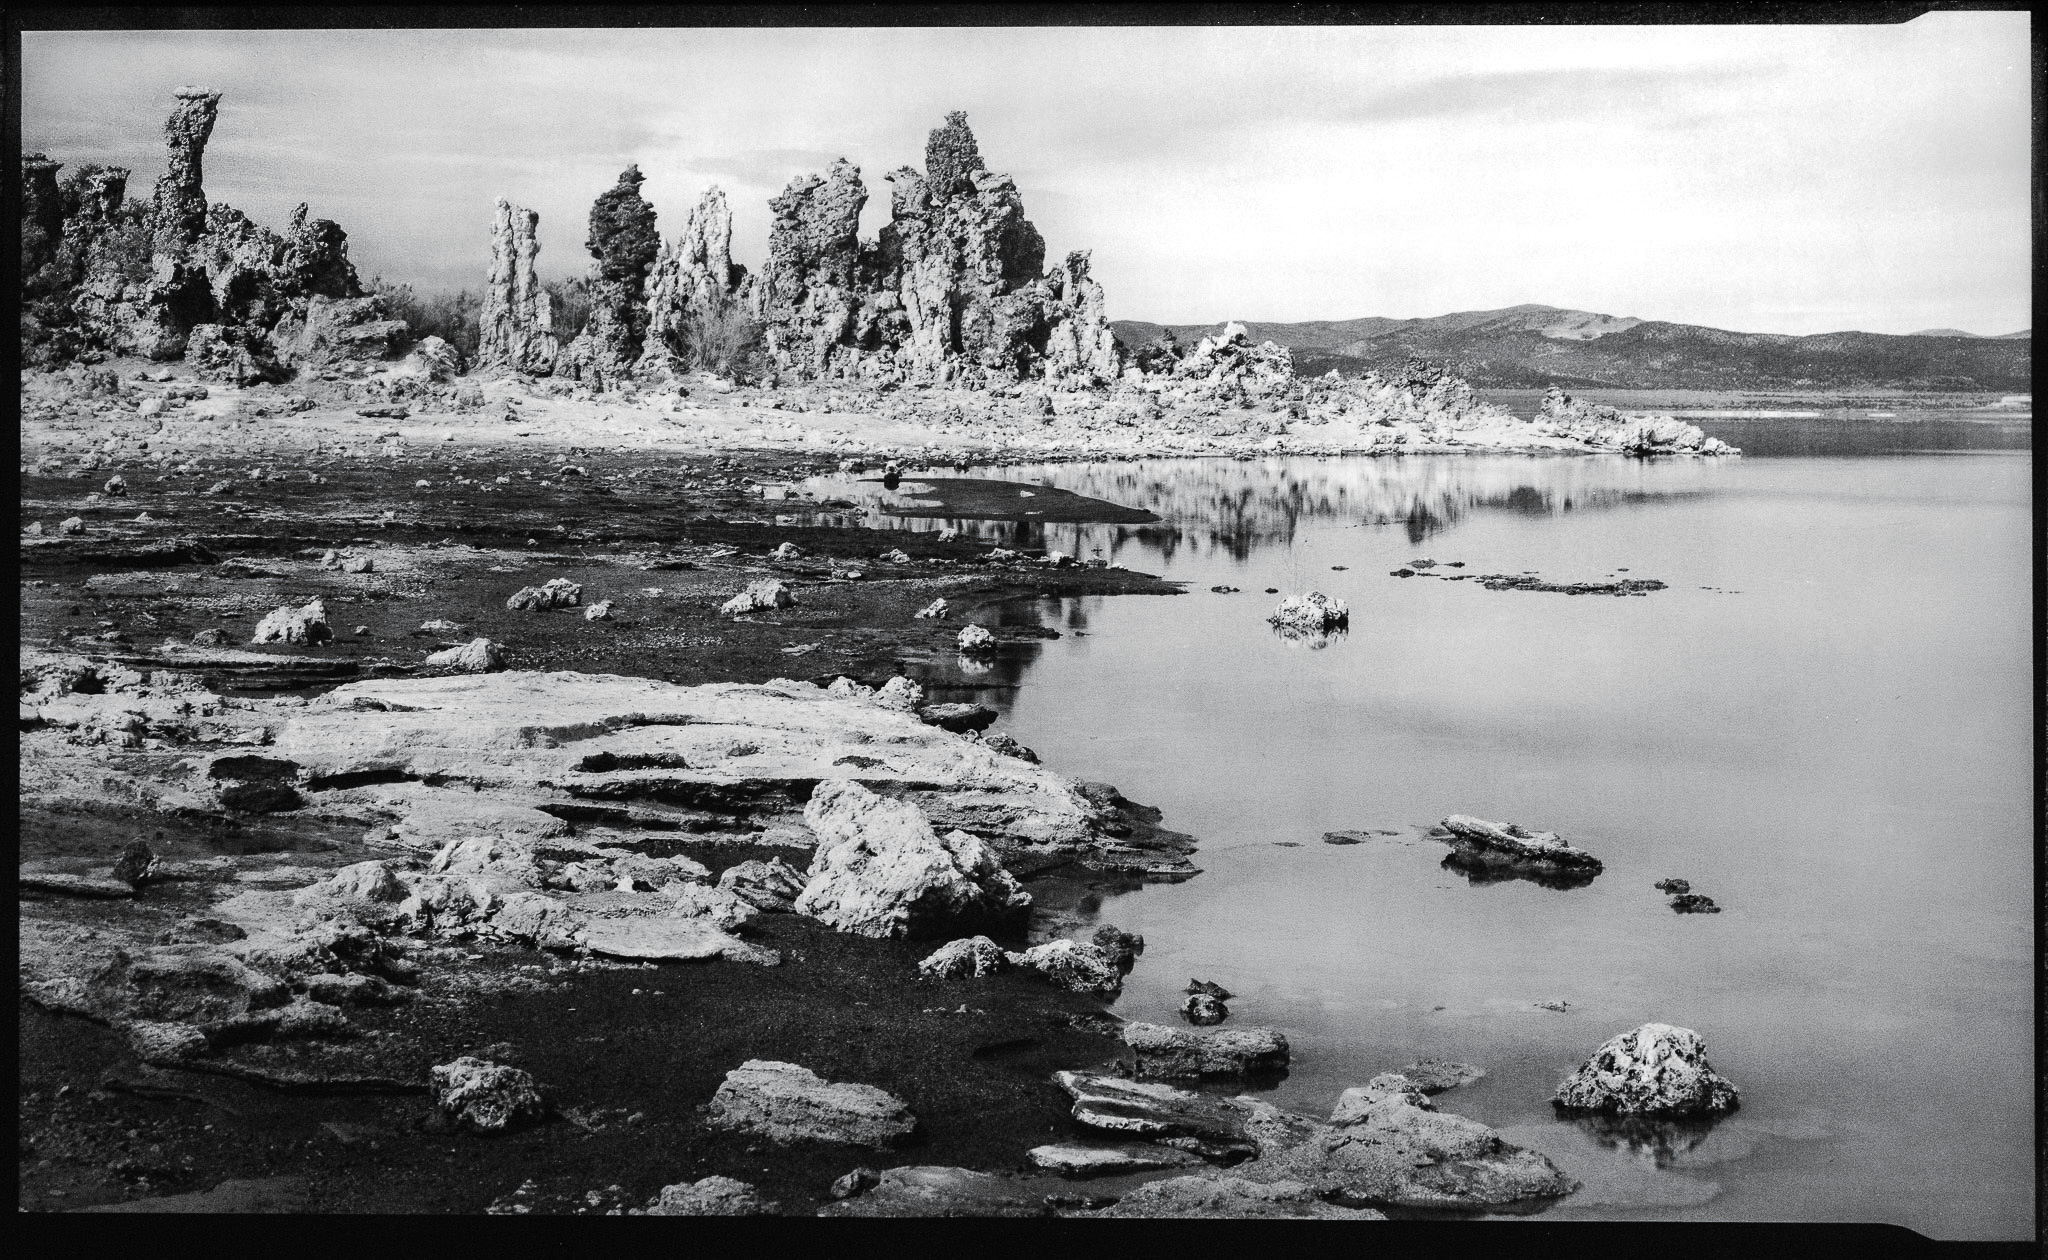
Pretty cool, in my opinion! These days, my target for exposure is to retain full detail in the shadows with no clipped areas, while my target for development is to push the highlights toward a nice spot for Grade 3 contact-printing paper. (This relatively high-contrast paper is the only type of contact-printing paper that I have, and the only one that’s still easy to find these days – although tons of multigrade paper options still exist in case I miss my target.)
In the Mono Lake photo above, I hit that balance pretty well. However, a few of the photos I took during this trip have a bit too much contrast for Grade 3 paper, so I needed to print them on traditional multigrade paper instead. In the future, I’m going to make sure to write down my meter’s reading of the highlights in the field, and then tone down my development times if it’s a high-contrast scene.
Printing
This is the part of the darkroom that I love! At this point, you can use a red or amber-colored light to see what you’re doing, since B&W darkroom paper isn’t sensitive to those wavelengths of light.
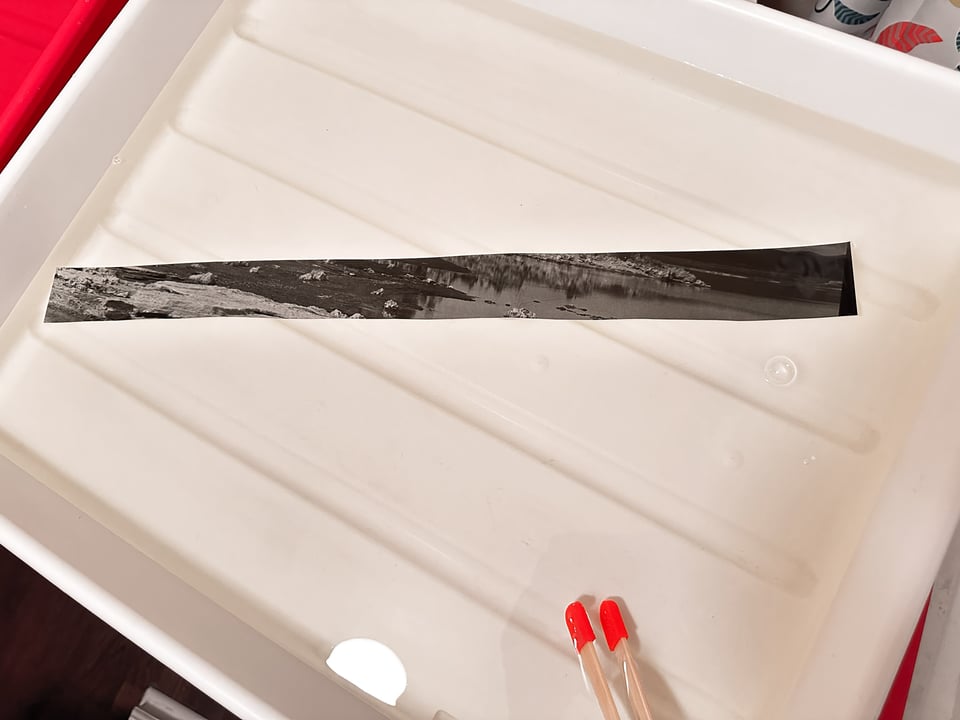
Darkroom printing generally starts with using some test strips of paper to judge the right exposure, like this one:

It ultimately looks like this and allows me to see if my exposure time in the darkroom is right (as well as which filters I need to use, if I’m working with multigrade paper):
Upon finding the right exposure time, it’s time to make the print itself! One of my two favorite darkroom papers is Adox Lupex contact-printing paper. Unlike most darkroom paper, Lupex has a more or less fixed amount of contrast. It’s also very unsensitive to light. In this case, I needed about a two minute exposure with a bright lamp pointed right at the paper!

The final step is to put the paper through a series of chemical baths again – developer, stop bath, and fixer. I use the same stop bath and fixer that I did for my film development, although I do use a dedicated paper developer instead of my HC-110 film developer.
Once the paper has been sitting in the fixer for a minute or so, it’s no longer sensitive to light, and it looks like this:
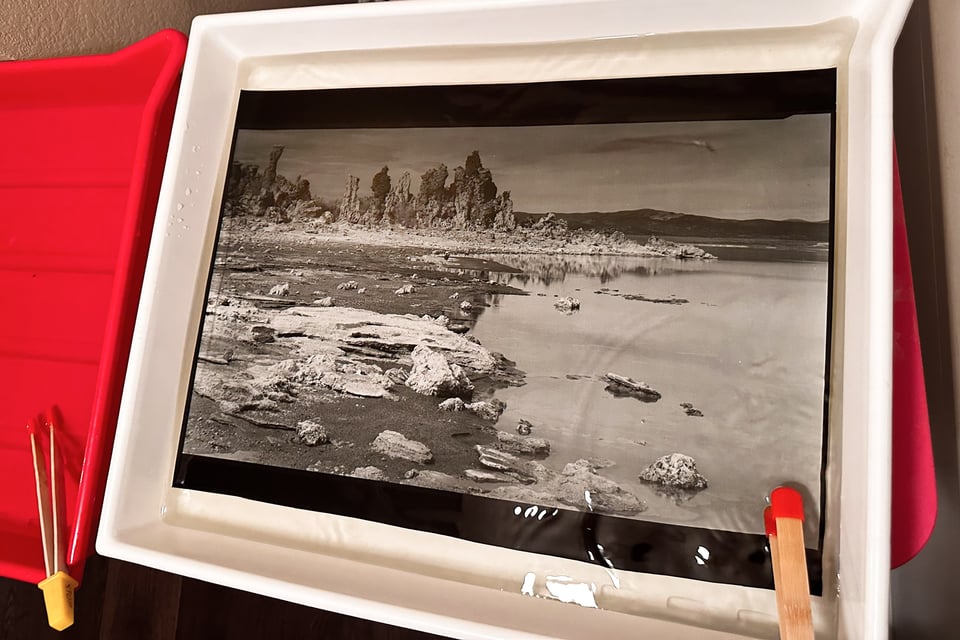
It’s a lot of work for one print, especially if it doesn’t look exactly right! If that’s the case, you have no choice but to keep making prints until you’re satisfied. Here, I thought that the sky was a bit too dark – a symptom of using too strong of a graduated ND filter in the field. I ultimately dodged the sky a bit for my next attempt, which I did by waving a sheet of cardboard over that portion of the photo during the exposure. Again, I run a very high-tech operation here.
After a few tries, I was happy with the final print. After an archival wash, the paper curled substantially while drying, which is normal for high-quality fiber paper like Adox Lupex. The final step of the process was to flatten the paper with a dry-mount press that I keep in my garage. I don’t have a scanner that fits such a big print, so I put it behind glass and did my best to photograph it for this article.
Here’s that result, uncropped to show the film holder lines. (I also made variations with a white border and a completely black border.) The size of the print – like the size of the film – is 12 x 20 inches / 30 x 50 cm:
The level of detail is quite high, proving that even f/180 (as I discussed last week) has a place when dealing with such a large film size:
It’s hard to convey online – and it’s also a bit of a cliché – but the print has a nice three-dimensional quality to it. I don’t know exactly why that is, but I think that the contrast, shadow detail, grain/organic imperfections, and paper texture all contribute to this feeling. Here’s my best attempt to show it in a photo, with some help from a shallow depth of field:

And that’s the process! Still, the result isn’t perfect to me – the print has some dust, scratches, and unevenness due to issues with the negative and my development technique. I’ve improved over the past year, but there’s always room to do better.
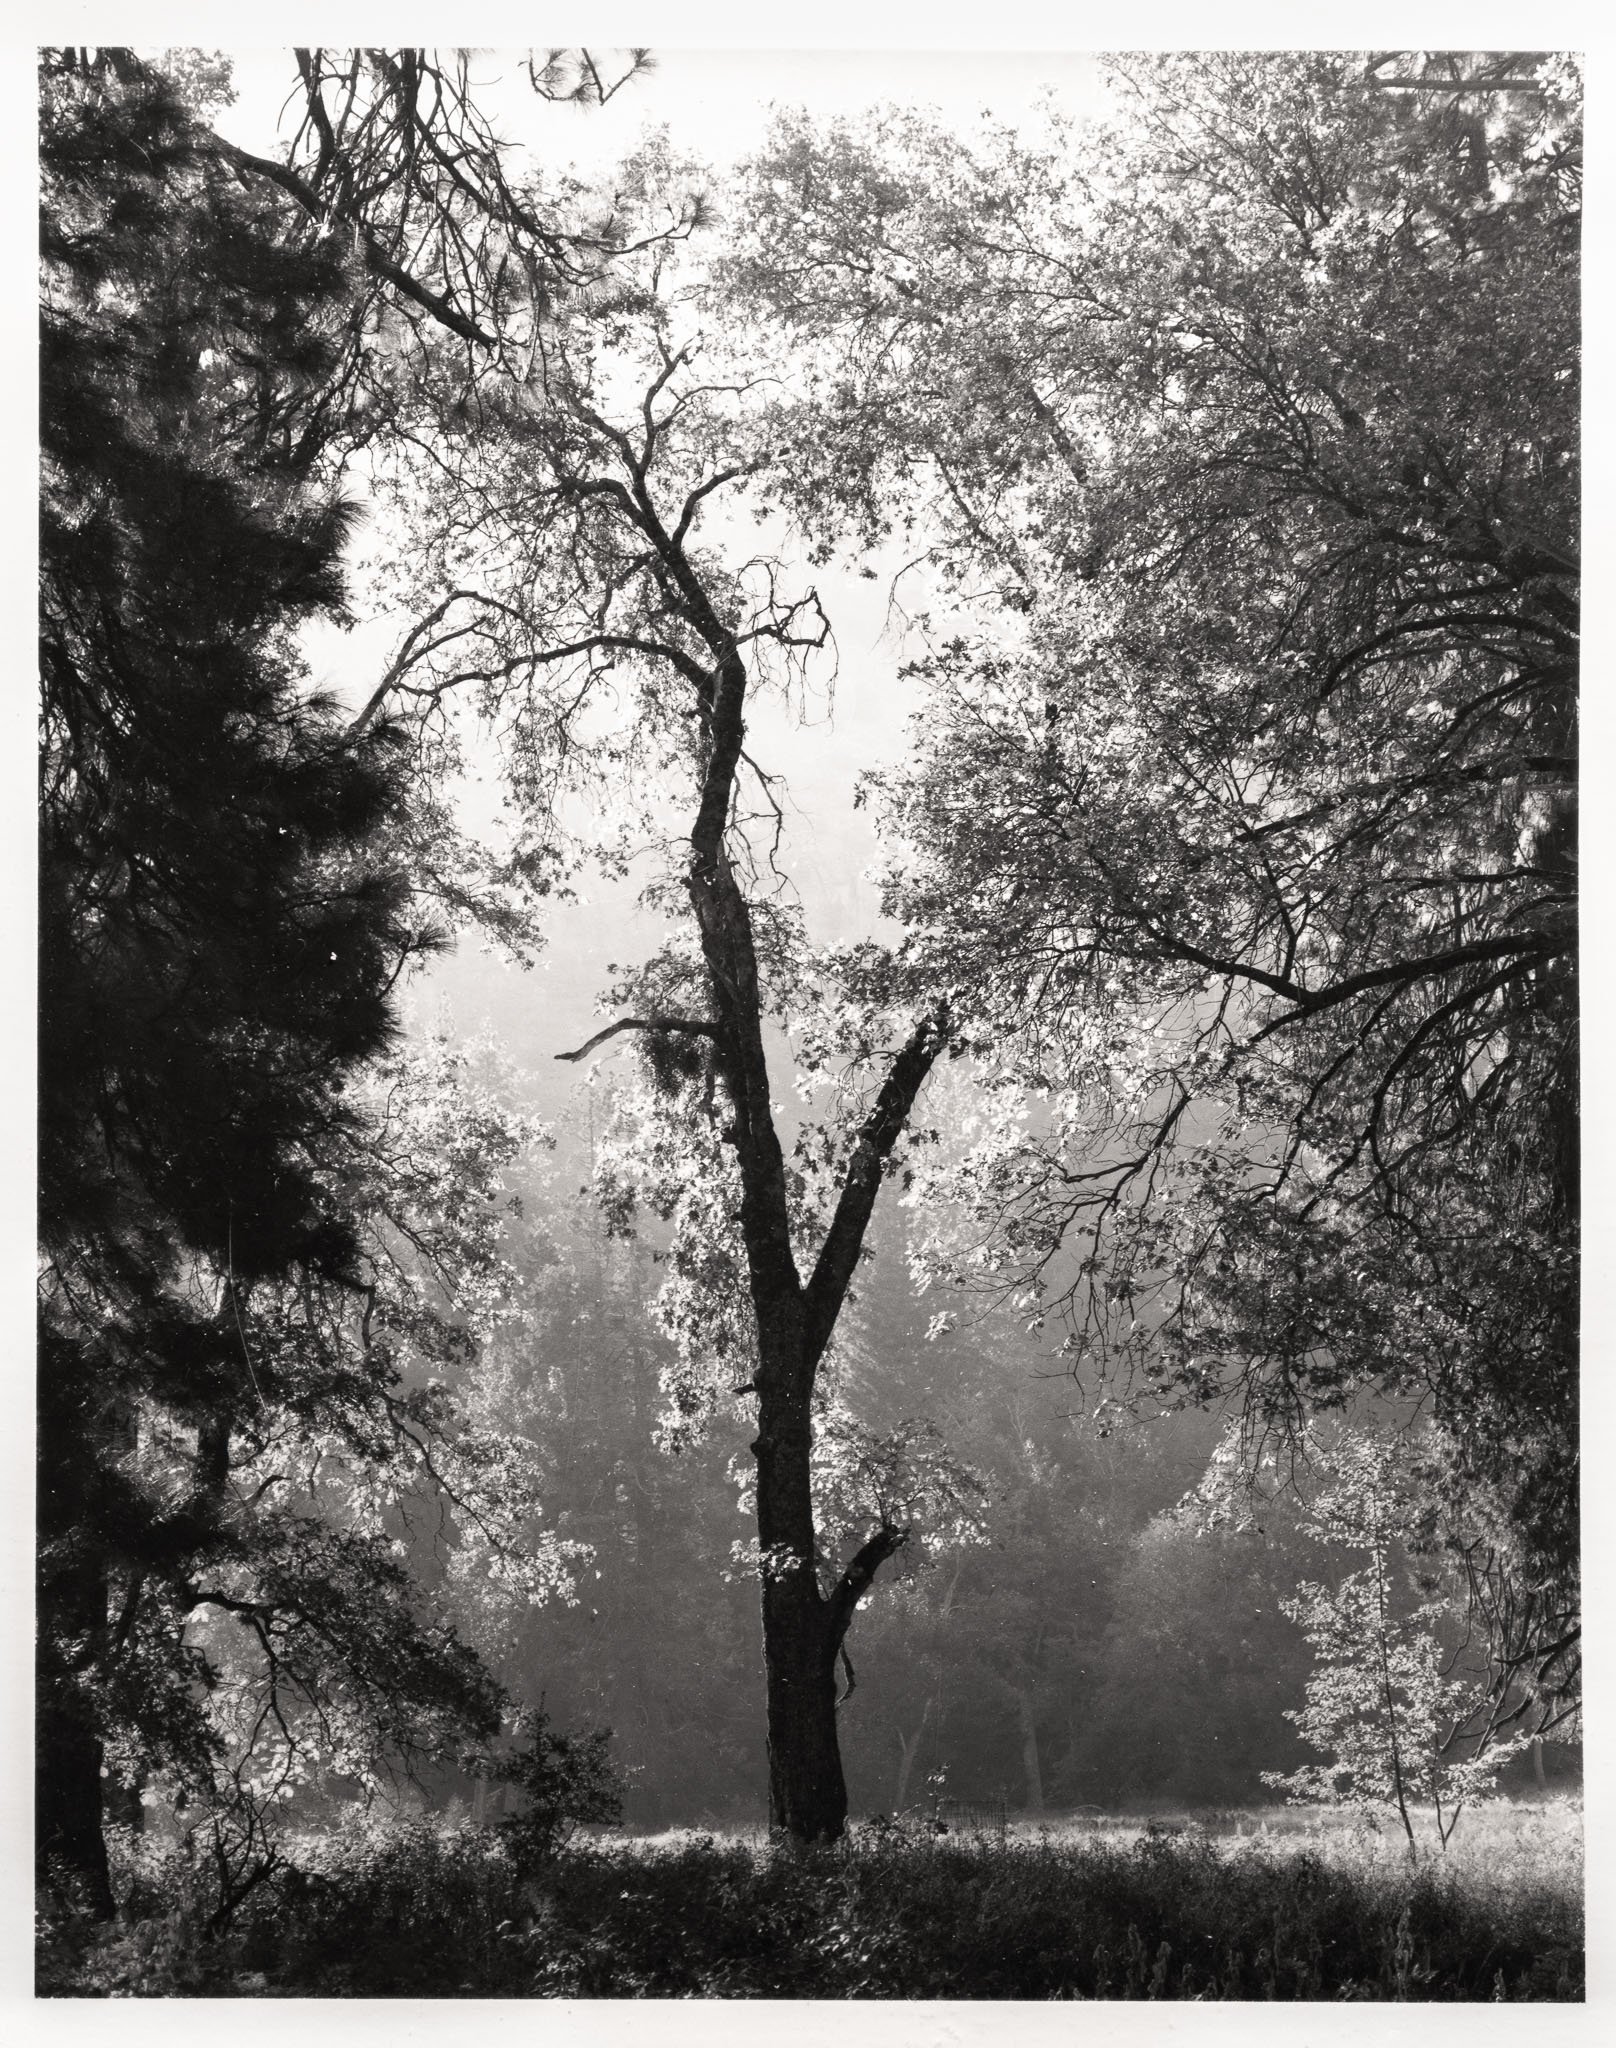
Here are a few other highlights from my trip, which I also shot on large and ultra-large format film. The first one is an 8×10″ print from a sunny morning in Yosemite Valley, taken with a 600mm lens! (Although that’s only an 85mm full-frame equivalent :)
Next is a spot – also in Yosemite Valley – where I had noticed sunbeams on a morning walk, but I didn’t have my film camera. I returned the next day, set up the 12×20 monster, and waited for the sunbeams to return. They eventually did, right in the spot I had marked. It shows the importance of scouting!

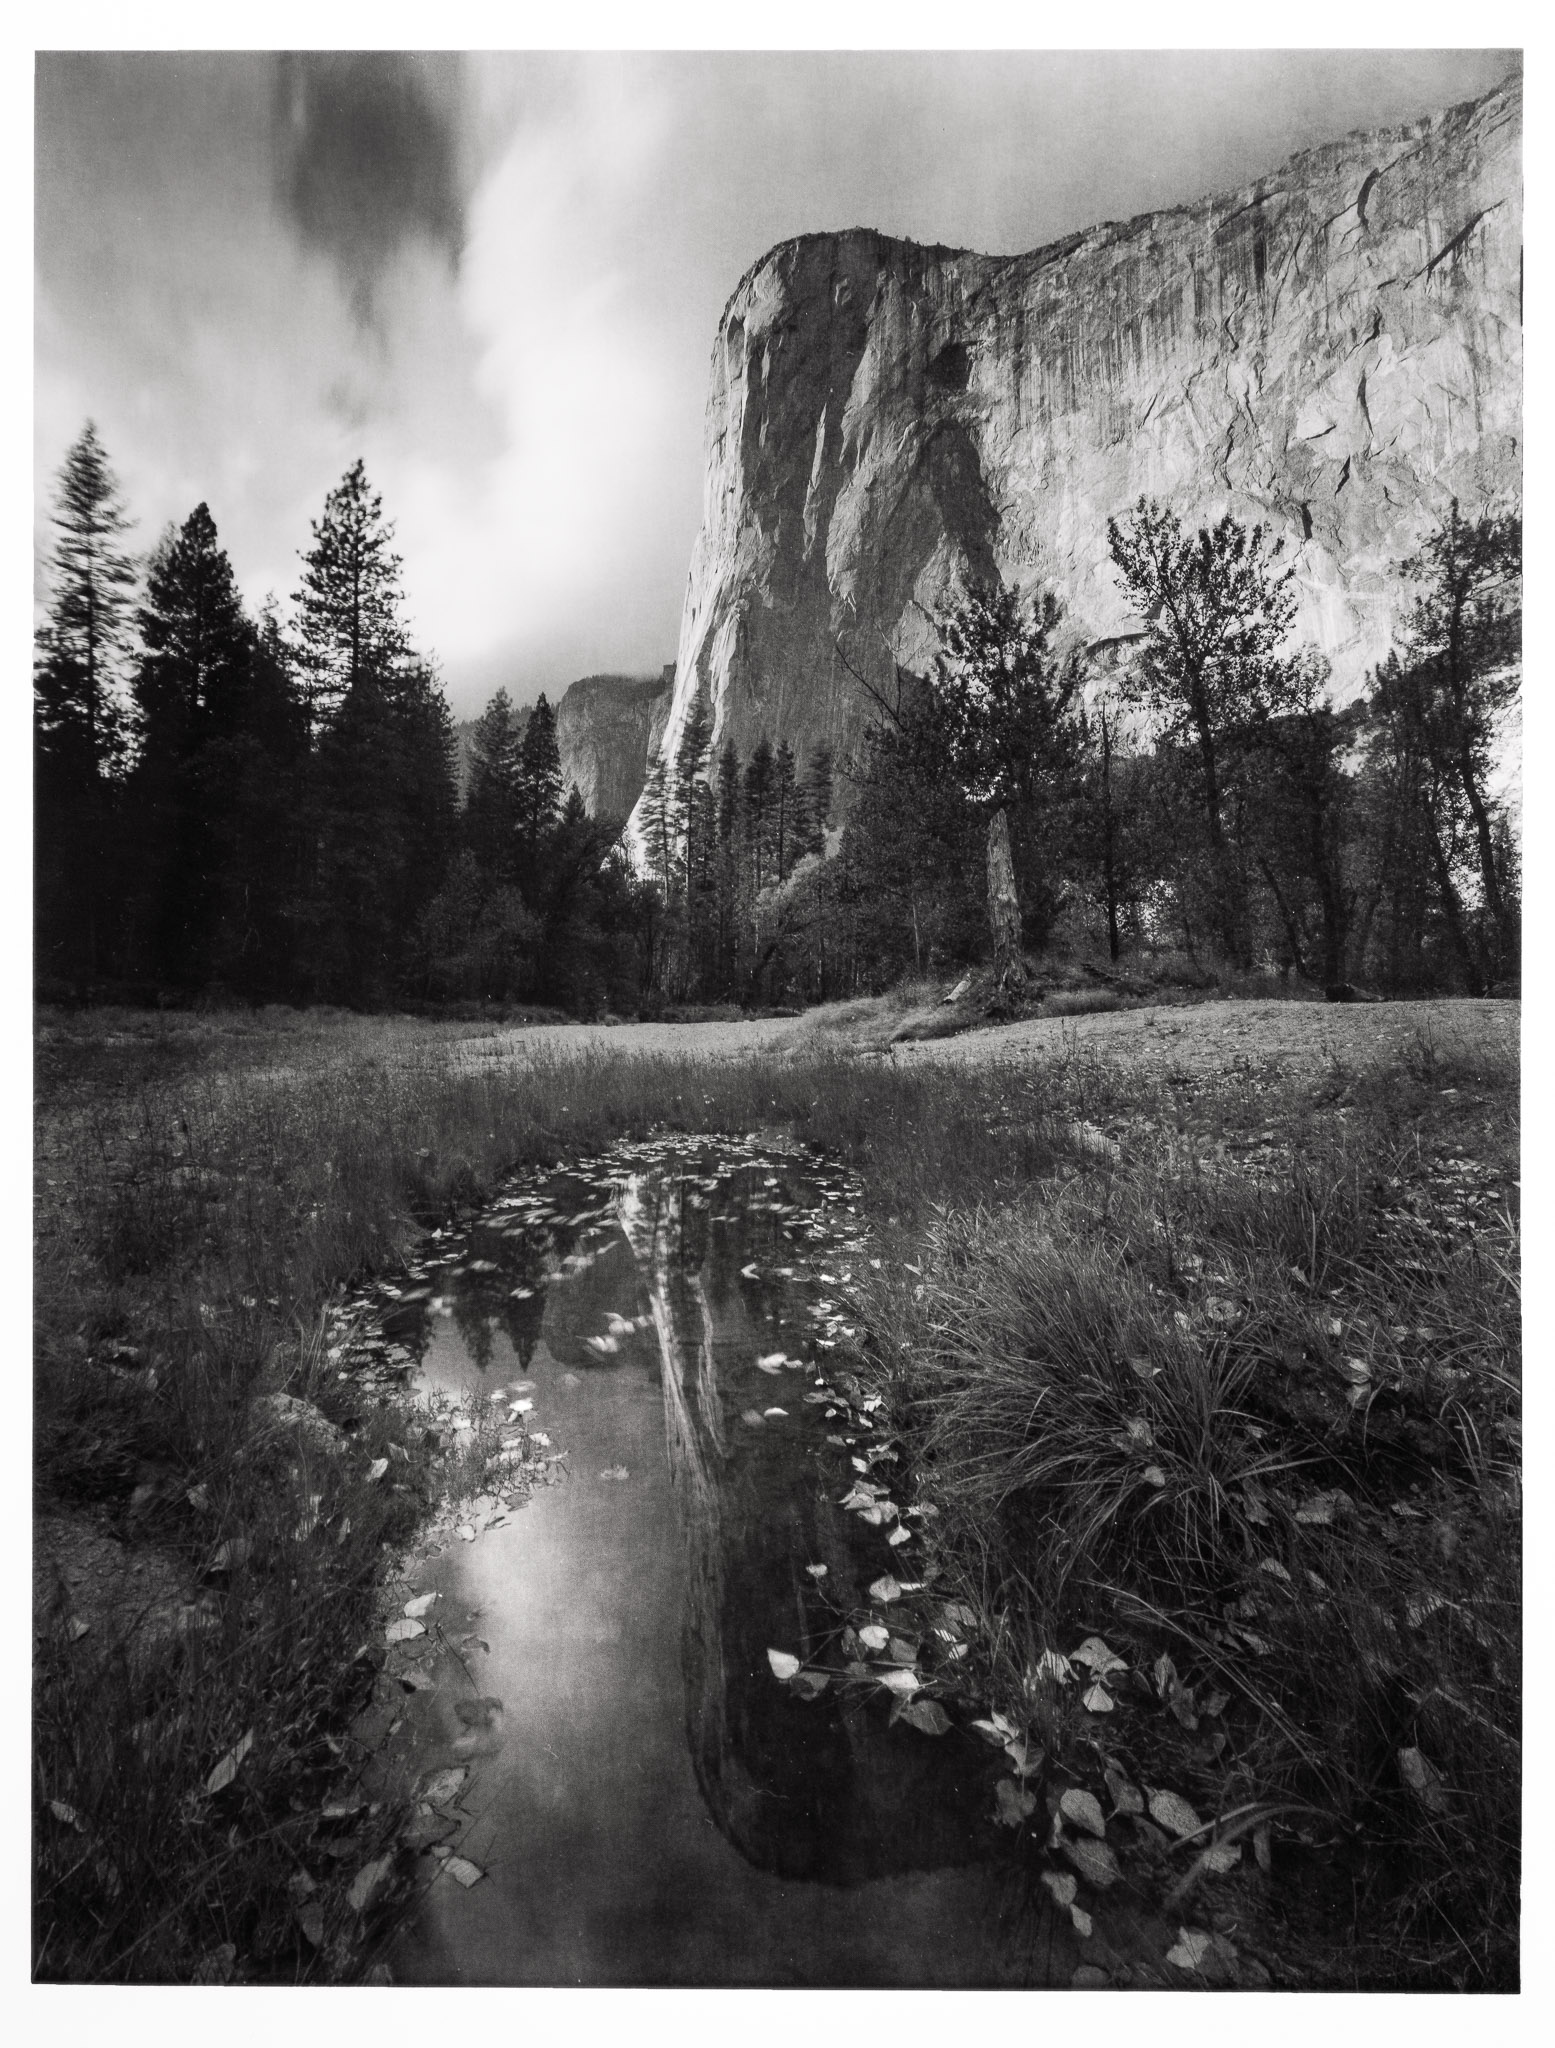
Finally, I was waiting in a prolonged rainstorm for good light on El Capitan. It was a beautiful but miserable wait of several hours in the storm. The clouds eventually parted just enough, and some magnificent light fell on the monolith. (I also took two color photos here that I have yet to develop, but I have high hopes for them.)
I’m looking forward to learning and experimenting more with large format and darkroom work this year. It’s a slow process that requires the photographer to spend time mastering each step, from visualization to printing. But I can tell that it’s improving my photography, including with digital, so it’s worth it.
I hope you enjoyed this short interlude of articles. Next week, I’ll post the reviews of some Nikon gear that you’ve been waiting for. Let me know if you have any questions about the analog process, and I’d be happy to answer!
Dear Spencer,
you don’t know how much I enjoy reading about that big format niche of yours. I hope one day I can muster the courage to follow suit. It’s one of those days when you think “I’ve already seen everything on the Internet” and then you stumble upon a jewel like this. And a personal note: about ten years ago you and Nassim taught me everything I know about photography, and gave me the confidence to pursue the craft professionally. That turned my blasé life into something new. Any hope of Nasim writing on Photographylife.com, by the way? I miss his sense of humour (I’m Polish!) and tech expertise.
Thank you, Adam! Glad you enjoy these articles.
I miss Nasim’s articles too. He’ll be back, but I don’t know how long it will be – the faster Photography Life grows, the sooner he’ll be able to quit his day job and write again, I’ll put it that way.
I love that shot of El Capitan!
Happy to hear it, thanks, John! That photo and the print are some of my favorite parts of the trip.
I have to say the Yosemite photo is wonderful, especially with the deep shadow range and rich foreground at the viewer’s feet. I think this would be hard to top with a digital camera. Can I ask which lens and film type you used? Thanks.
Thank you, James! That was a difficult photo to take because it required such a wide angle. My widest 8×10 lens is the Schneider 150mm f/5.6 XL which is about a 20mm full-frame equivalent – not wide enough for this photo. But, despite what the official specs say, that lens just barely covers the larger 11×14 format! At that point it’s about a 15mm equivalent.
I intend to sell my 11×14 camera once I shoot all of my remaining 11×14 film, but I still have it for now. In short, I took that photo at 150mm on 11×14 Ilford HP5+ 400 film. The print is nice and large in person at 11×14”.
Many thanks, Spencer! Lovely photos and definitely different from the typical digital workflow. I´m shooting LF, but stopped at 4×5 and 5×7. Direct contact printing sounds interesting, but does this whole process really end up in technically better photos as a good 5×7 or 8×10 drum scan and then printed by an inkjet printer on rag or fibre based papers? The huge camera has of course a larger film area, but otherwise is limited by diffraction and more difficulties during usage (shake, wind etc)….
Sure thing Jan! 4×5 makes the most sense for 99% of people who want to do large format film.
A drum scan + inkjet print of 8×10 film will certainly get you a lot of detail, comparable to contact printing. Some film photographers talk about the “look” of a contact print, but I’m not sure. That said, longevity is clearly in favor of the darkroom methods, especially if you use contact printing techniques like Pt/Pd or carbon printing that theoretically last for 1000+ years. (Pt/Pd and carbon, along with others like oil prints, gum prints, cyanotypes, etc. are only feasible with contact printing and don’t work with film enlargers or inkjet printers. Down the line I want to try out a lot more of these printing methods, but I’ve only done a bit so far.)
As for diffraction, with ultra-large format film, you’ve long passed the point where film/sensor resolution is a concern. The sharpness of your photo is down to depth of field, diffraction, lens sharpness, and camera/subject stability instead. I’d say that 8×10 is the largest film size where the jump in resolution is noticeable. There are very few situations where a bigger film format provides a photo-wide improvement in detail.
And you’re right, wind is a huge concern with these sailboat-like cameras. A medium format digital camera with tilt-shift lenses will give any of them a run for their money in terms of detail, if there’s any wind at all.
Nice work Spencer! The Yosemite shots are beautiful and your perseverance has paid off I would say. I especially like the El Capitan image with the very effective foreground lead. Classic!
You have inspired me to undertake a project on my lovely 5X4 (4X5 to you Americans!) Chamonix Field Camera. I am ashamed to say that I have not used it for over a year.
That’s awesome, David! My large format cameras are Chamonix as well, I’m a big fan of them. Do you have a project in mind already? I hope it goes well for you.
The El Capitan image is probably my favorite of the trip, at least among the B&W photos that I took. Sometimes standing in the rain is worth it.