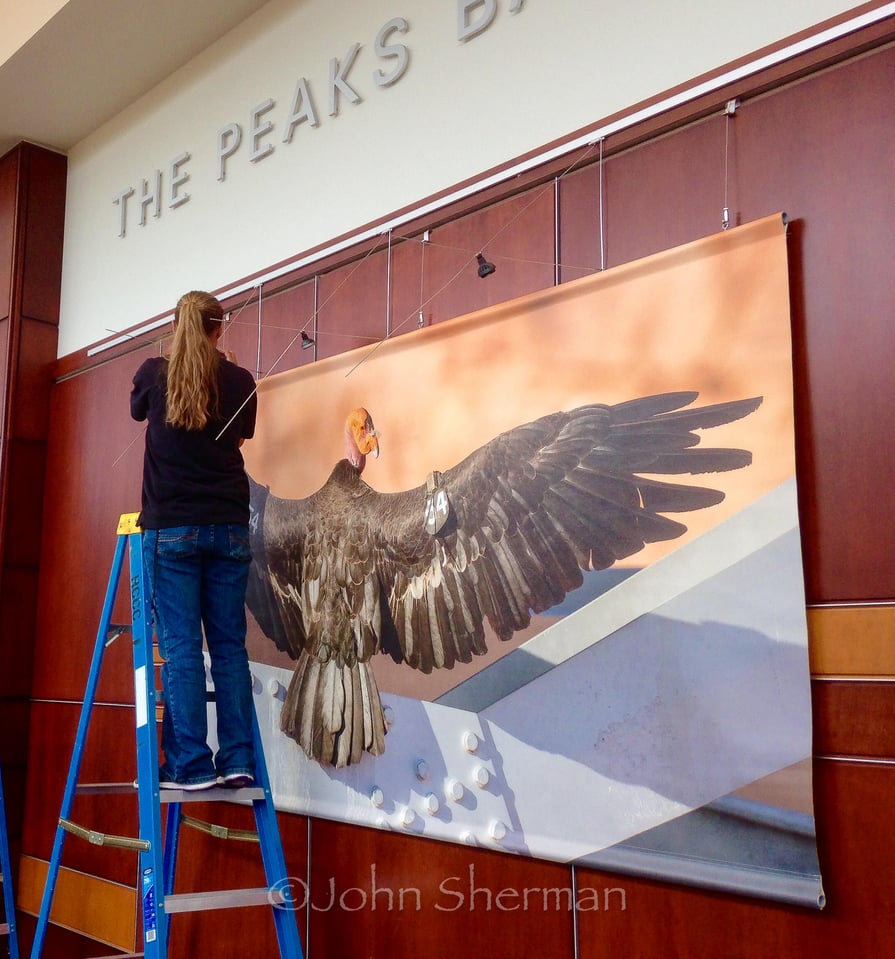
I recently hung my show Plight of the Condor at Flagstaff’s High Country Conference Center. It’s an honor being recognized as so talented, egocentric and stupid that I’d dump hundreds of hours and thousands of dollars to fill an entire gallery with just my work. As this is my last, er, I mean first, one-artist show, of course I want to make a gargantuan impression. My subject is the California Condor, the largest bird in North America and with a population of only 425, one of the most critically endangered species in the world.
The answer has been posted here.
At first glance this seems like a simple shot of a condor hanging out on a bridge girder 460 feet above the Colorado River, but there’s a catch – this came from a file 24000 pixels wide.
Until you’ve seen a condor up close, it’s impossible to fathom how huge they really are. As they are so rare and most people have never seen one, I figured a great way to introduce folks to the bird would be to create a life-sized print of one. As these birds have a nine-and-a-half foot wingspan, that’s going to be an enormous print. I didn’t want some fuzzy blow up, but a print with excruciating detail down to every speck of bird dandruff. A print that would make viewers feel like there was an actual condor right next to them.
Fortunately for my wallet, my subject was at a bit of an angle to me and had some natural curl in its wings, so my final print came out to be five by eight feet. As it would hang in a corridor, viewers would not be able to step back to a “normal viewing distance” hence I couldn’t get away with a low-resolution print. It needed to be very sharp and in-your-face.
Before I created this image I did a lot of thinking. How could I shoot this live animal in the wild and create the big print I had in mind? A print with detail this fine.

How would you do it? I shared this challenge with the PL Team a couple weeks ago and got some very interesting answers. My favorite was Nasim musing that perhaps I had access to a secret camera he didn’t know about. In less time than an iPhone shutter lag, our fearless leader shook off that notion as ridiculous. Please put forth your strategies for this shot – gear used, exposure settings, techniques applied, and so forth – in the comments below and I’ll reveal how I did it in a few days.
All Contents ©John Sherman


Pinhole camera. Scanned projected image.
Super resolution with Photoshop layer average tech?
2 D810 with identical lenses mountet on a gimbal head in vertical orientation with a slight overlapping which gives you a resolution of about 14000 pixel in vertical direction, afterwards “only” a row of ~6 images is needed to cover the horizontal part of the bird. Cameras with 4k-Video like a GH4 or a A7rII would make the task even easier. The picture does not look like 250 ppi “real” resolution so some upscaling could be expected.
Nikon P900 and upsampling in Photoshop…
“In less time than an iPhone shutter lag…”
Is that a hint about how the photo was made?
So my guess is multiple cellphones (not necessarily iPhones, it’d be easier to accumulate pixels with 41-megapixel Nokias) taped to a nearby girder of the bridge, with the final image being the product of both stitching and super-resolution techniques. Unfortunately, the morons at DHS could not be convinced that Mr. Sherman was attaching cellphones, not slabs of plastique, to the girders, so they have taken him away to an “extraordinary rendition” dungeon, from which he will probably never emerge!
On a more serious note, I notice that the light source reflected in the condor’s eye is mostly pentagonal. Is this the result of the natural light source being clipped into that shape by the bridge girders, or the use of a pentagonal umbrella for flash lighting, or does this suggests that the photo was not taken with a modern SLR telephoto lens, which would be expected to have more than five blades?
Not sure about this one. Even if you had a 50 MP camera, getting a picture with this detail after cropping is tough. Maybe some post-processing technique is needed?
Plus one for a drum scanner scanned print,
doesn’t look lika a digital camera shot cuz even tiniest hairs and feathers have volume and depth,
I would say a Nikon film camera with 600-800mm lens, F/4-5,6, 500 – 1000 sutter speed + Kodak Ektachrome E-100G :)
1. “Scan” with the Red Camera @ 6K and highest possible frame rate. Pic The sharpest frames and stitch.
2. “Scan” with Nikon D4 and the highest frame rate. Pic The sharpest frames and stitch.
I would also use a tripod with a gimbal head that is not locked down.
Drum scan of a picture taken on medium format film, such as 6×6 cm,or even larger.
The bird was in some kind of a monitored environment (it has markings on wings), so you did not need an impractical long lens. Maybe it is the moment just before setting him free again. Something like a marking station for such an endangered species.
I would say ISO 100,1/250,F/16. Focal length: the equivalent of a 200mm in the 6×6 format…
The resolution isn’t really a “catch”…Yes or no ?
———————————————————-
My website : www.crimsonavalanche.com