Exporting Your Photos
Almost done! The final step of the process is to export your photos, and, for that, you’ll need to enter the export dialogue.
Along with organizing and post-processing your photos, exporting is one of the most important tasks that Lightroom can accomplish. It’s also quite intuitive and easy to learn for yourself.
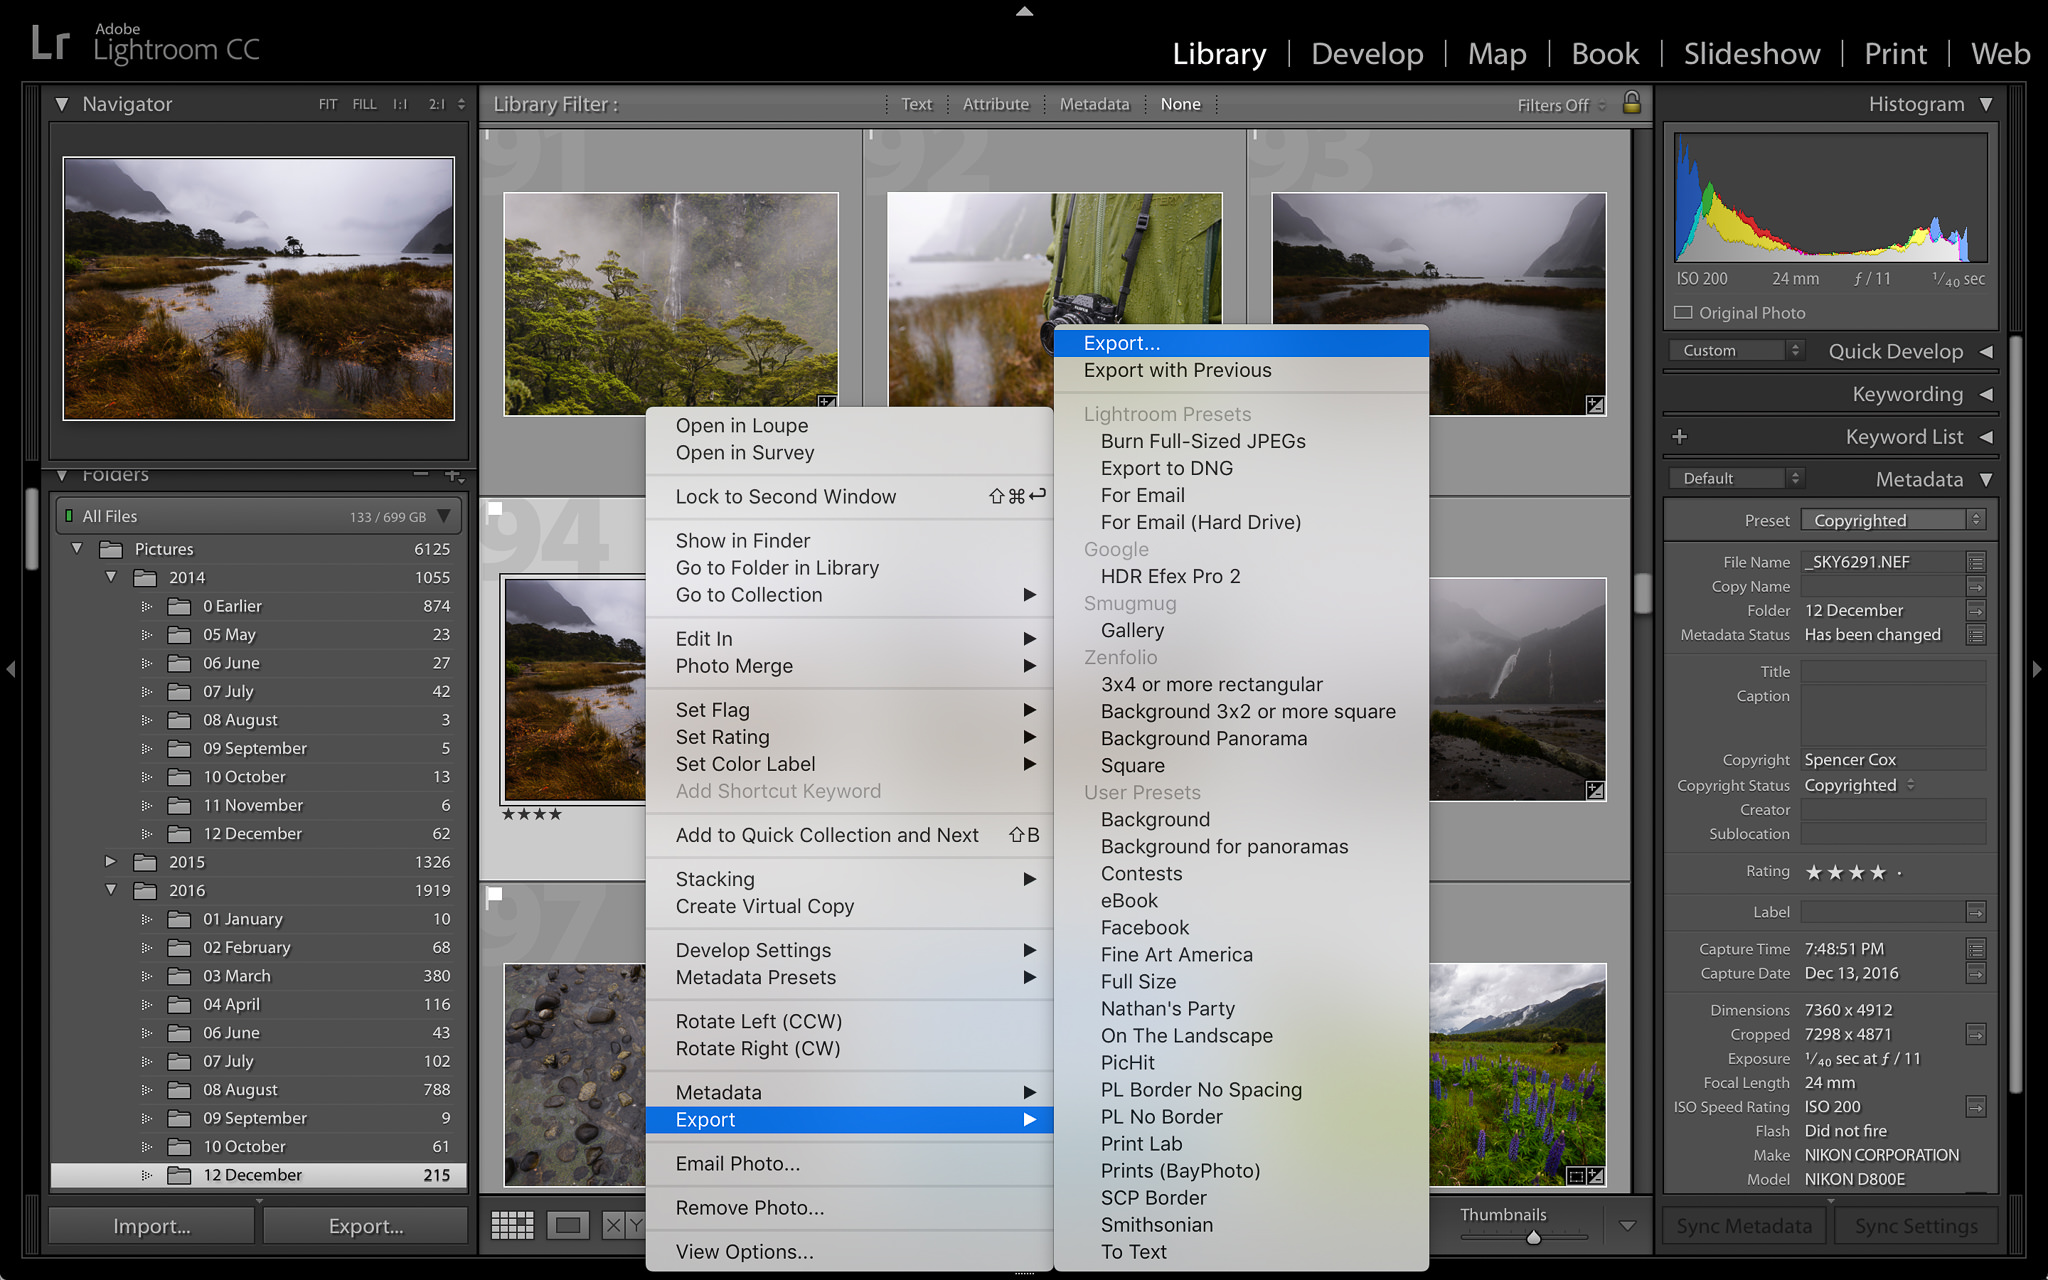
To start, click on a single photo or multiple photos at the same time. (Lightroom can export photos in batches without a problem). In fact, if you want to highlight every single photo contained in a particular folder, press Control A on your keyboard (Command A on a Mac).
Then, right click, and go to Export > Export. The export dialogue will pop up:
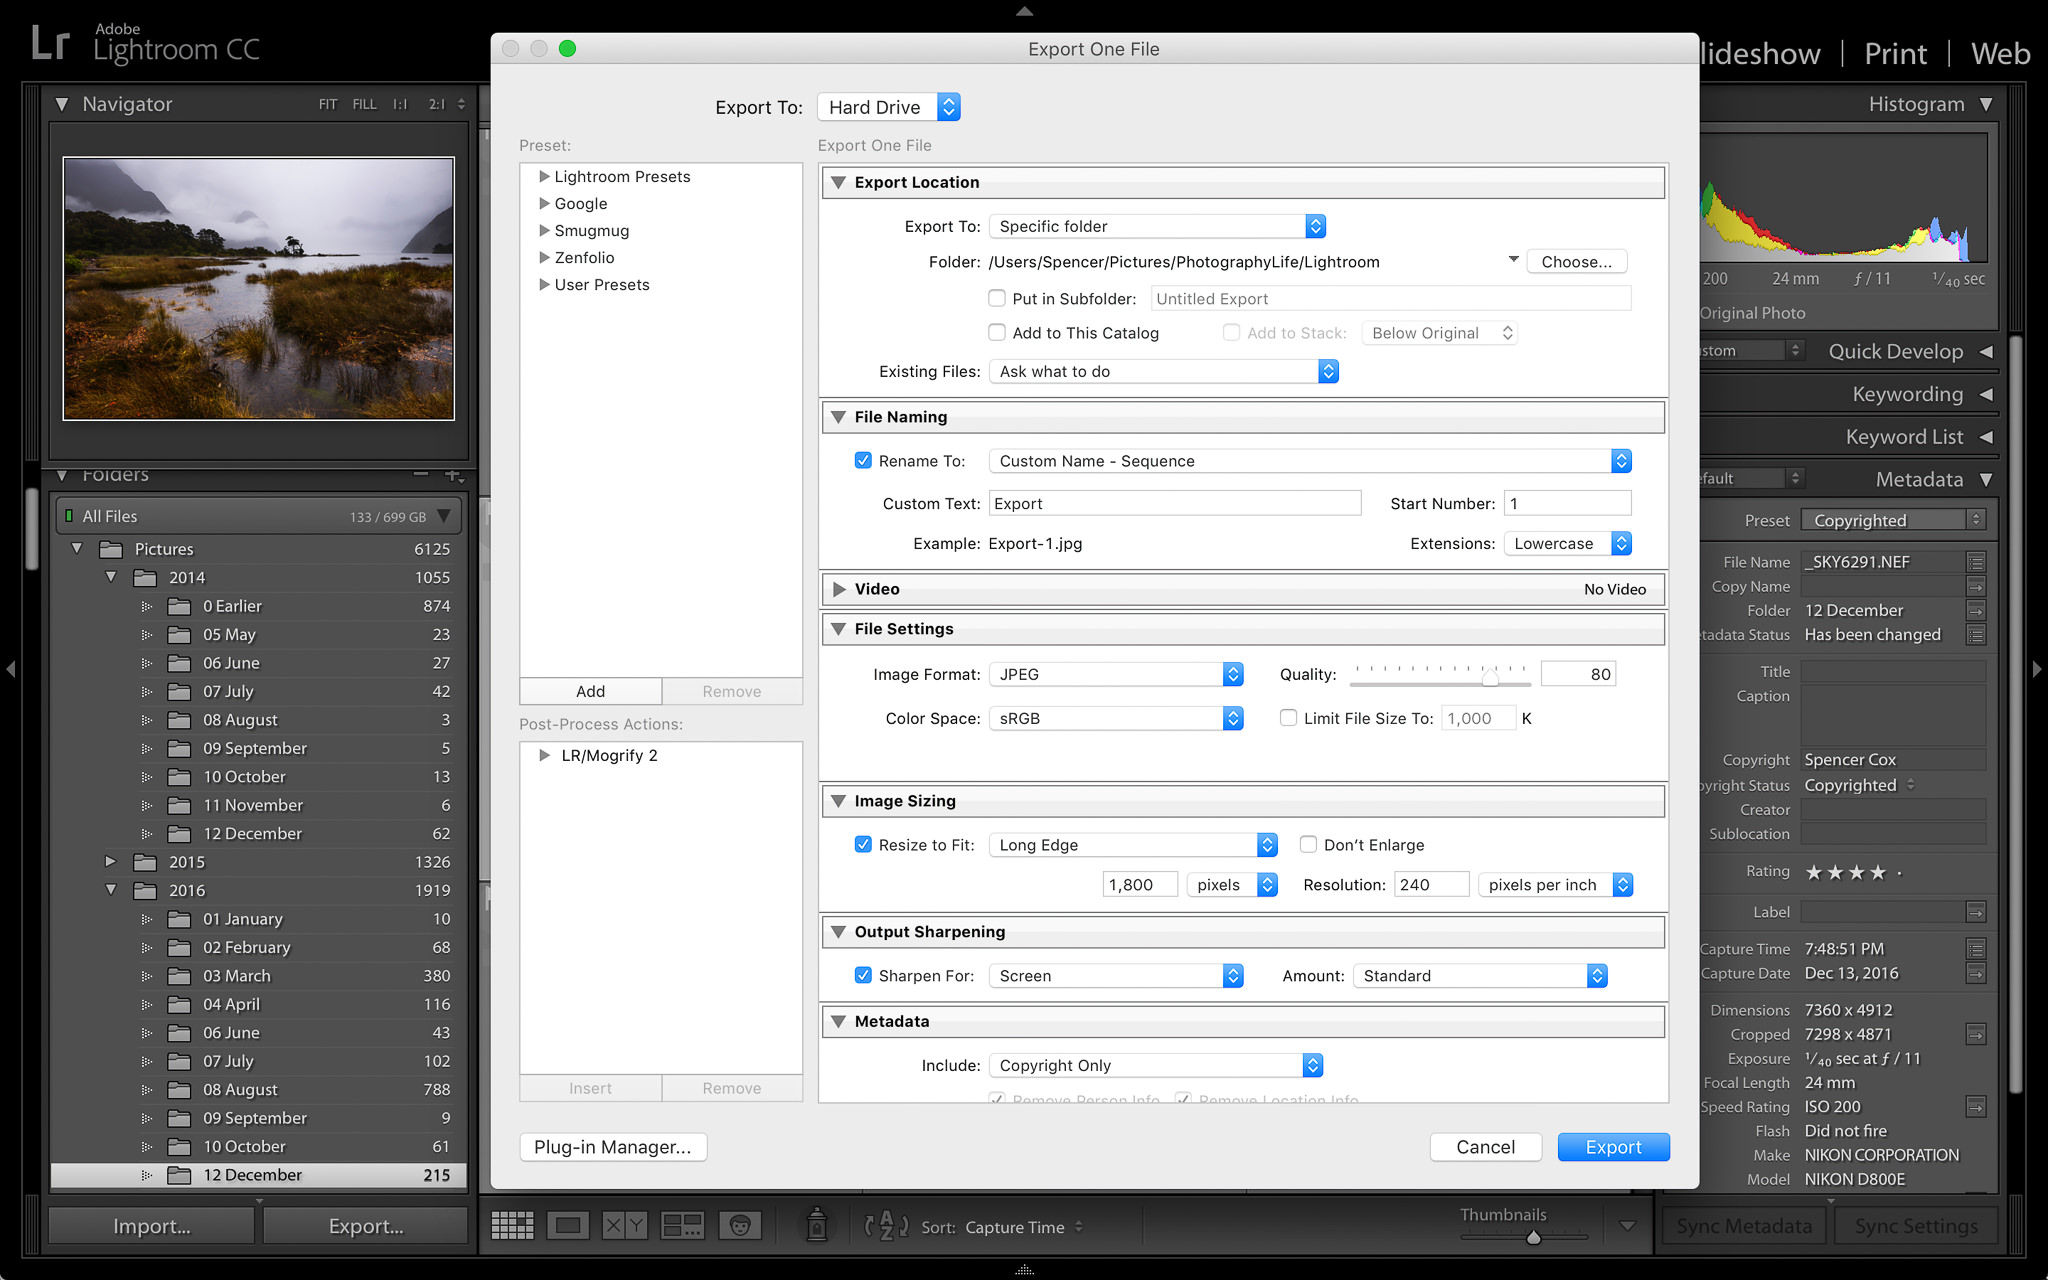
Most of the settings within the export dialogue are self-explanatory. If you want the longest edge of your photo to be 2500 pixels wide, set it to 2500 pixels. If you want a slightly-compressed JPEG, select JPEG at, say, 80% quality.
There are only a few points worth noting.
First, under the “Image Sizing” tab, if you’ve chosen your dimension in terms of pixels (rather than inches or centimeters), the “Resolution” option means nothing. A digital image displayed full-screen will look 100% identical whether you choose 300 ppi, 72 ppi, or 2 ppi. This setting only matters if you’ve chosen your dimension in terms of inches or millimeters instead. If so — which will generally be the case only if you’re trying to print your photo and you don’t want to do any calculations yourself — you can tell Lightroom to print a 4×6 inch photo at 300 ppi and it will automatically calculate that you need a 1200×1800 pixel photo.
Second, under the “Metadata” tab, the idea here is that every photo you take has associated data other than the photo itself. If a photographer hasn’t removed the metadata from an image, you can see a lot of behind-the-scenes data about the photo: the camera and lens, the exposure settings, the date and time it was taken, and so on. If you don’t want people knowing this information, select Include > Copyright Only.
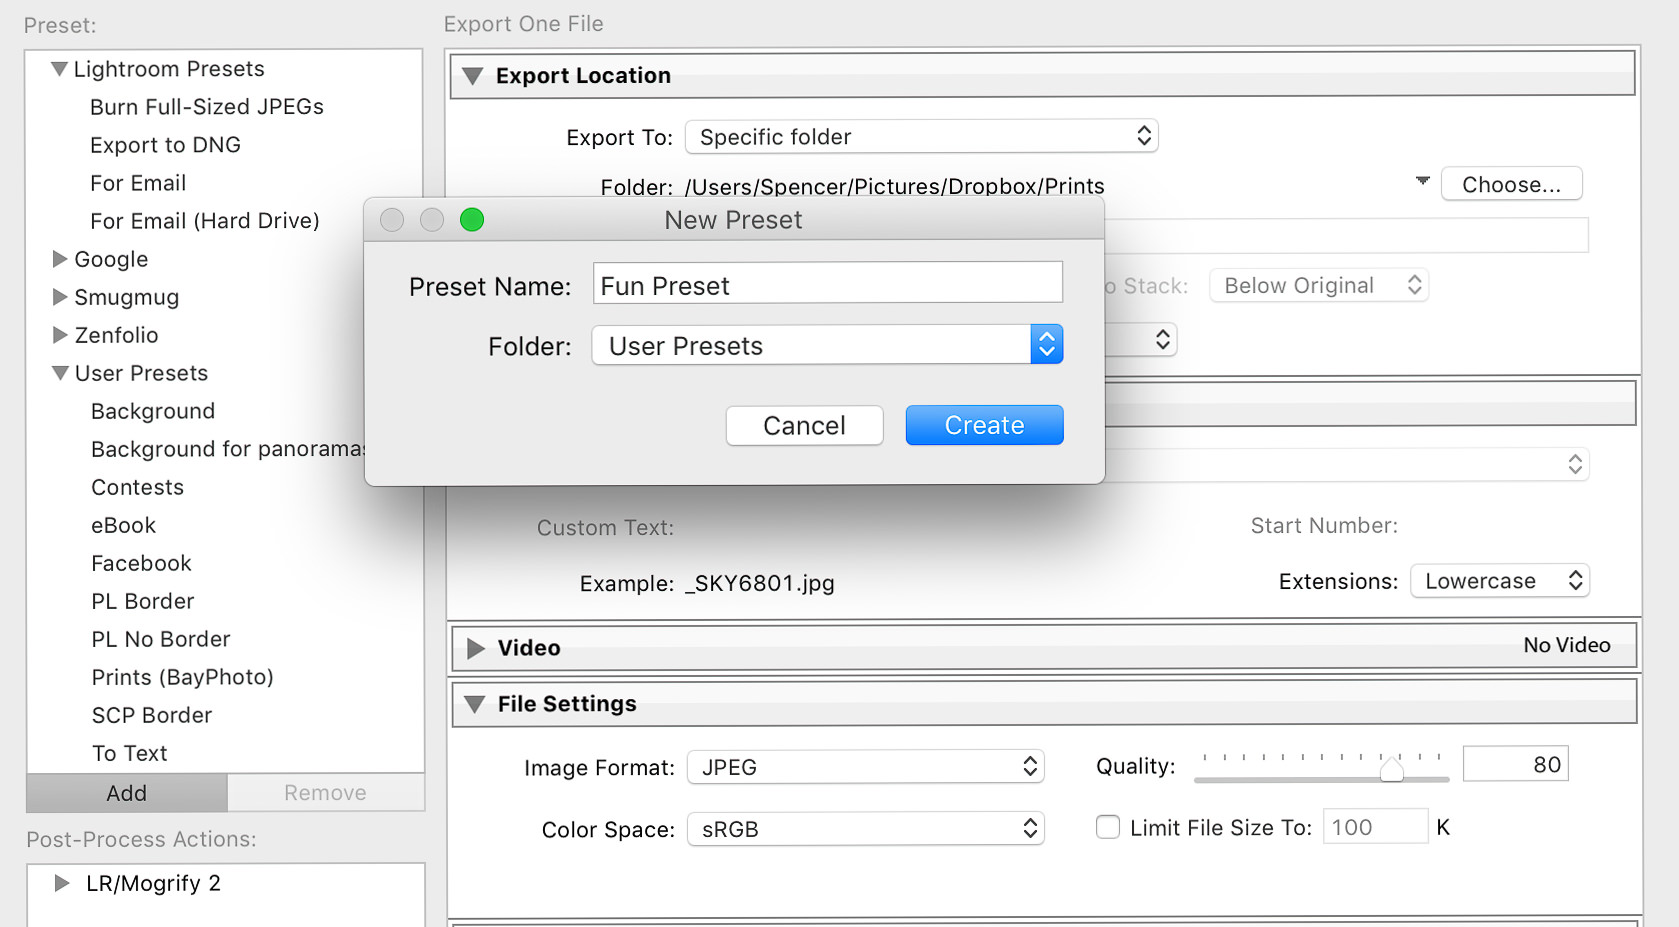
Lastly, if you want to save any of your settings as a preset — something that you can reuse at any time quickly in the future — it’s an easy process. Click on the “Add” button on the left-hand side of the export dialogue, and just name your preset whatever you want.
Backing Up Your Catalog
The final step of the process is to close Lightroom. When you do, you might notice a box pop up that looks something like this:
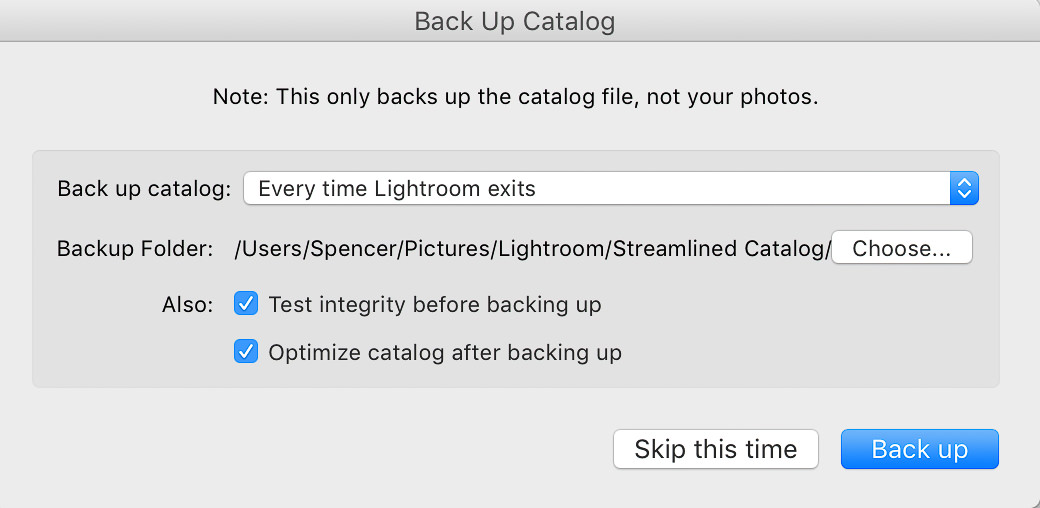
This is the Backup Dialogue. If it doesn’t show for you, go to the menu at the very top of your screen: Lightroom > Catalog Settings > General > Back Up Catalog > Every Time Lightroom Exits.
This is a very useful step to take. Although you don’t actually need to back up Lightroom every single time that you close it — and, personally, I often click the “Skip this time” option — it’s something that you should be doing with regularity.
Why? There are a few reasons.
First, as Lightroom tells you, this doesn’t actually back up your photos. Instead, it backs up Lightroom’s catalog file — the catalog file that contains every edit, star rating, label, collection, keyword, and setting that you’ve chosen for each of your photos. It’s a big deal. If you want to back up your photos — and you should — you’ll need a separate backup service or hard drive to do so.
By backing up the catalog, if something horrible ever happens, you can revert back to an older version. The backed-up catalog won’t have all of your newest edits, but it will be far better than nothing.
Also, since the Lightroom catalog is a surprisingly small file, there’s no real harm in backing it up regularly. As I mentioned earlier, mine is only 300 megabytes in size, which is the equivalent of roughly seven RAW photos from my camera.
Always leave the “Test integrity” and “Optimize catalog” options turned on, just because they can’t cause any harm, and they’ll only add a second or two to the total backup time. The other option — the folder that you’re backing up to — should also be self-explanatory.
Conclusion
You made it.
This was a long article — longer than I expected when I first started writing it! — but that’s because Adobe Lightroom is a complex program. If you’re trying to learn it from scratch, you’ll need a wide foundation before you can start to build anything that is truly solid.
Hopefully, this article built that foundation for you. Still, the best way to learn Lightroom, and anything in photography, is to practice it yourself.
It’s great to know how Lightroom is laid out, and how to import photos, and what the different modules do, but you won’t know any of it intuitively until you’ve used Lightroom for a long time yourself.
There may plenty of roadblocks along the way, and it’s very possible that you’ll spend late nights trying to make Lightroom run faster, search for old photos that Lightroom can’t find anymore, or find the best ways to edit some photos on another computer (tip: File > Export as Catalog). Not surprisingly, all of these examples come from my personal experience.
The bottom line is that Lightroom has a steep learning curve. If you put enough time into it, though, it will pay you back significantly — to the point where you can organize your photos seamlessly, edit them exactly how you want, and export them at the right size for any use.
To me, learning Lightroom (or comparable software, like Capture One Pro) is almost as important as mastering your camera settings. It is critical to keep track of your photos, edit them well, and export them properly for clients. If this guide has helped you do those three things in Lightroom, I would argue that you aren’t a beginner any longer.
If you have any questions about Lightroom, from the catalog file to advanced Develop settings, please leave them in the comments section below, and I’d be happy to help.
Table of Contents