In the world of photography, nothing happens without light. In most cases, there are two types of light that photographers work with: natural light and artificial light. Although I often find myself using artificial light sources, I prefer using natural light whenever possible and consider myself to be a natural light photographer. One of the tools that has made the biggest difference to my natural light photography (and, for that matter, studio photography) is a reflector. In this guide, I will show you how to use a reflector effectively to enhance your photographs by simply bouncing natural light.
Table of Contents
1) Choosing a Reflector
If you have never purchased a reflector before, the options that you find once you start looking might be overwhelming. There are large and small reflectors. There are round, rectangular and triangular reflectors. There are white, gold and silver reflectors, as well as combinations of these three colors with names like Sunfire, SoftSilver, Zebra and Sparkling Sun.
One of the first things you’ll want to decide on is the size of reflector you’ll need. If you’re mainly shooting individual portraits, a smaller reflector might work better for you than a larger one. Of course, a larger reflector will generally produce a larger area of softer light, but larger reflectors are also more difficult to handle, so there is a compromise to be made. A 42″ reflector is a pretty common size that is a nice combination of ease of use and nice light.
Once you know the general size you’re looking for, you can start looking at different brands and shapes. You’ll find reflectors that have handles, brackets or frames. You’ll also find reflectors that don’t have any fancy features. You’ll usually pay a premium and have fewer options if you choose a reflector that has a handle or a frame, but the added ease of use might just make it worth the extra money.
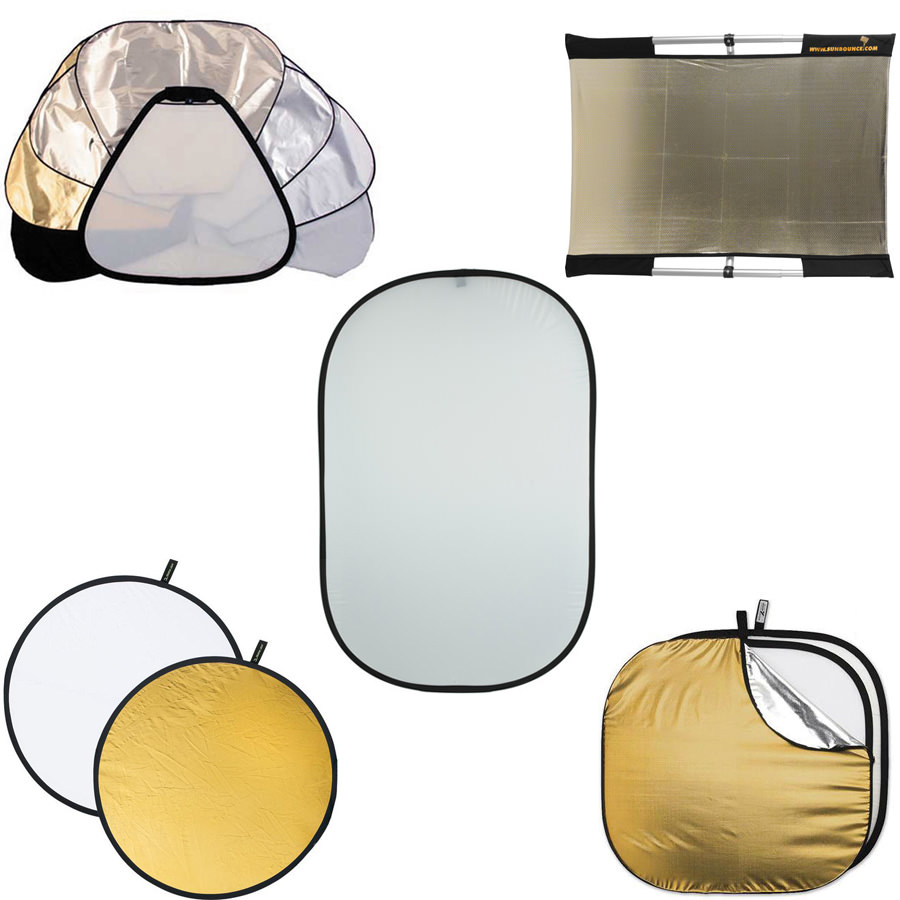
Finally, you’ll have to choose what material you want your reflector to be. This is purely a personal preference, and it might change depending on the lighting conditions you’re working with. Personally, I prefer white or a white/silver mix. Unless it’s an overcast day, I find the silver to be too reflective and specular and the gold to be too warm. Fortunately, most reflectors come with covers made from different materials that you can quickly change depending on your needs.
2) Using a Reflector
There are just about as many ways to use a reflector as there are reflector options. You can hold it yourself, have an assistant hold it, have your subject hold it, lean it on something or buy a stand made specifically to hold it. You can even have your subject sit on it!
As with any light source, the larger it is relative to your subject, the softer the light is going to be. I prefer to use reflectors to provide a soft fill light, so I usually use the white or white/silver side and try to get them as close to my subject as possible. If there’s not a lot of light to work with and I have to use the silver side, I’ll move the reflector farther from my subject so the light doesn’t overpower the natural light and still just acts as a fill.
A reflector does just what it says: it reflects light. If you’re using a silver or gold side, do not let your subject look directly at it, especially in full sun! The last thing you want to do is temporarily blind them. Seeing where the light is landing when you’re using a gold or silver reflector is easy. When you’re using a white reflector it’s a little bit harder. The best method I have found for using a white reflector is to move it back and forth and watch the light on your subject. The change might be subtle, but you’ll be able to find the right angle for your reflector with a little practice.
Although it sounds obvious, if you’re having a hard time finding the reflected light on your subject, make sure that light is actually hitting the reflector. Many times a branch or even your subject will be casting a shadow on the reflector, greatly reducing how much light is being reflected.
3) Natural Light
Everyone will have their own preferences for how and when to use a reflector with natural light, but I’m going to tell you a few of the situations where I prefer to use one. I encourage everyone to experiment with different reflector materials and lighting situations to find out what works best for you.
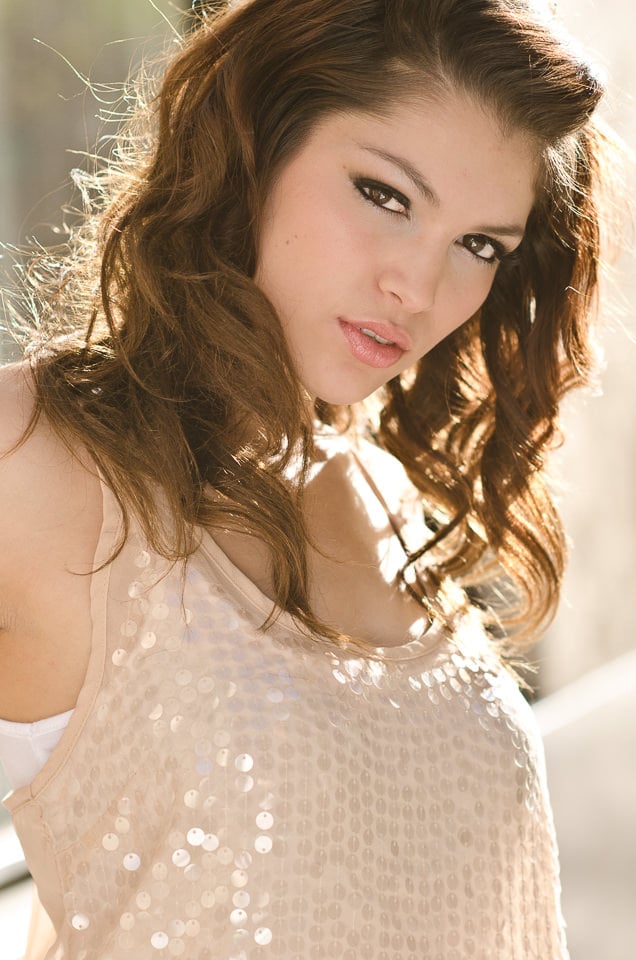
The majority of my photos consist of backlighting. Before I started using reflectors, I just blew out the background and was happy. Once I started using reflectors I discovered I could start bringing a bit of the background back into my shots by decreasing the difference in exposure for my subject and background. For my backlit shots, whether it’s mid-day or the golden hour, I typically hold a white reflector right next to my face so it fills my subject with light that’s coming from almost directly in front of them.
Sometimes the light I’m working in is beautiful, but my subject has something dark underneath them that’s not reflecting any light back into their face. This typically happens with a black parking lot or grass. This can lead to dark shadows under their eyes. In this situation, I’ll put a large reflector in front of them on the ground or at an angle and make sure it’s as close to them as possible. In the first image of Mia, I leaned the top of the reflector on my legs and had the bottom touching her feet. Sometimes I’ll even have them sit on it, as in the second photo of Mallory below.

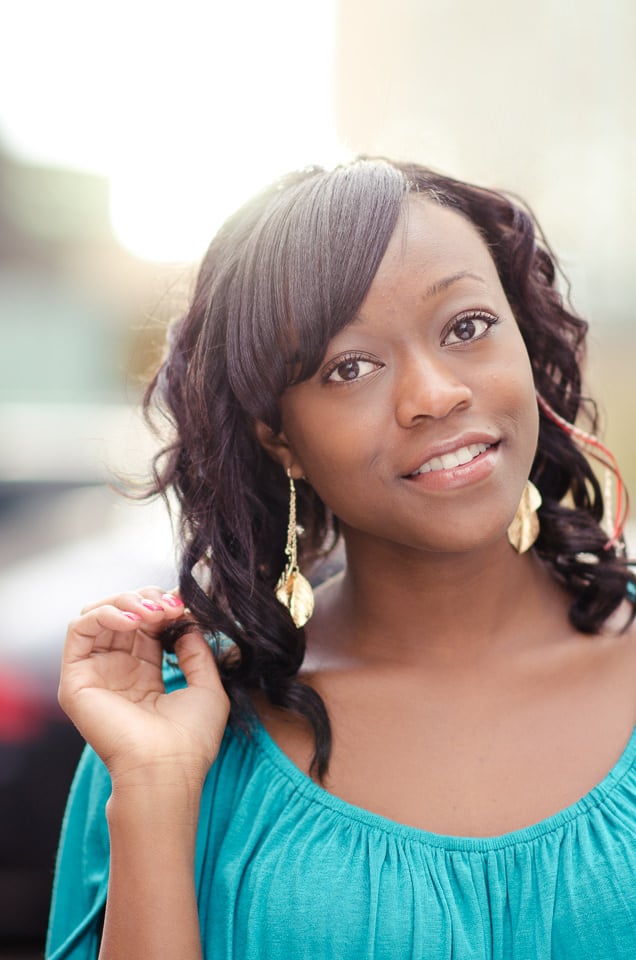
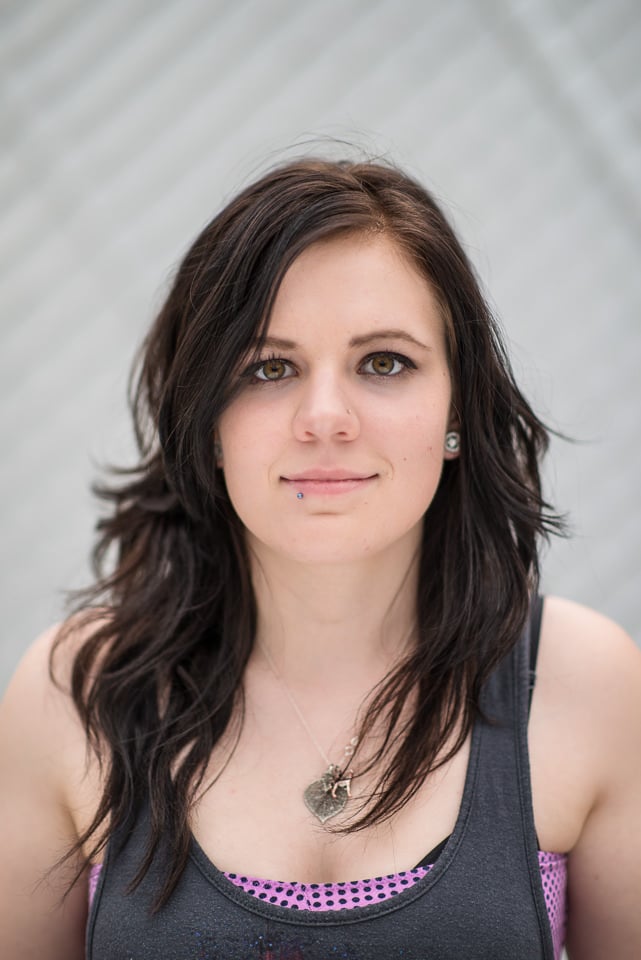
If the light is just not very good, such as on a very overcast day, you’ll see lots of dark shadows around people’s eyes. In this situation I’ll put a reflector directly under my subject’s face, just out of the shot. In the image below, I had Bri hold the reflector just beneath her chest so that it filled in underneath her chin and eyes.
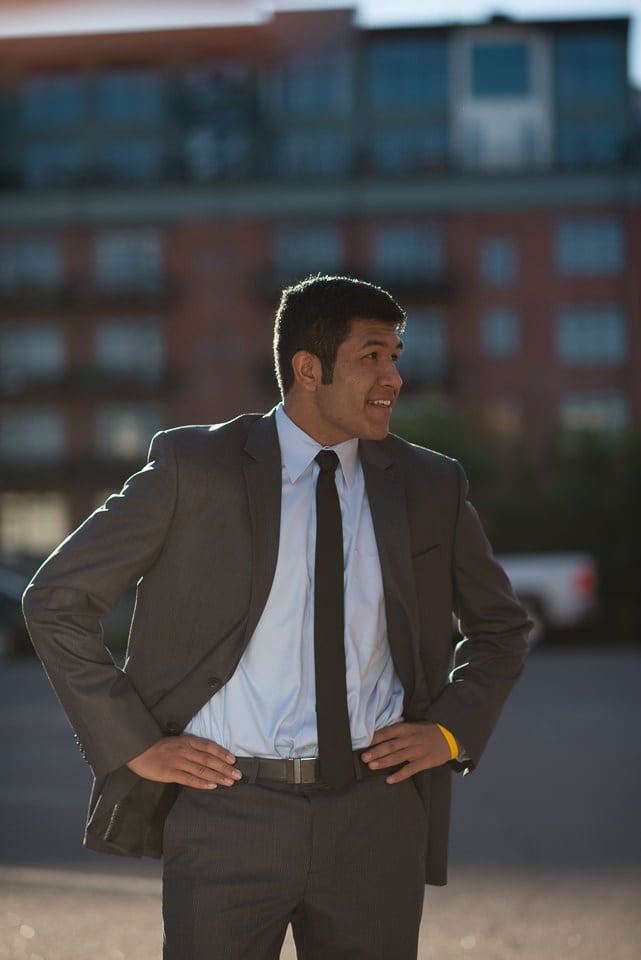
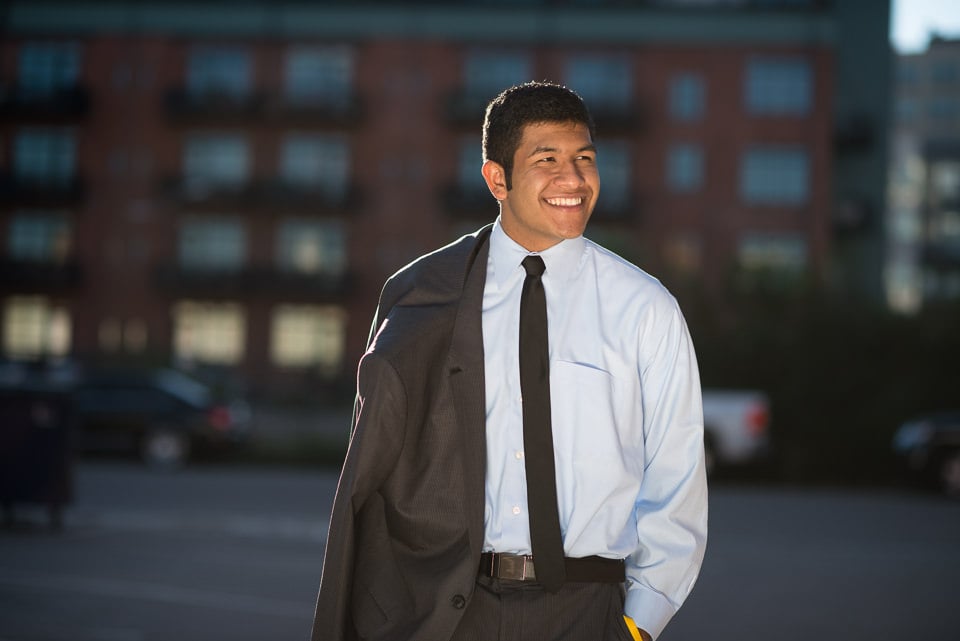
Sometimes I even use my reflector as a key light. In the photos of Sunny below, he was standing in the shade with a nice rim light from the setting sun (the top image was my test image to get the correct background exposure). I wanted to keep the background darker, so instead of overexposing the image, I had his sister hold a large gold reflector so that he was lit by the reflected light and the background and rim light stayed the same (bottom image).
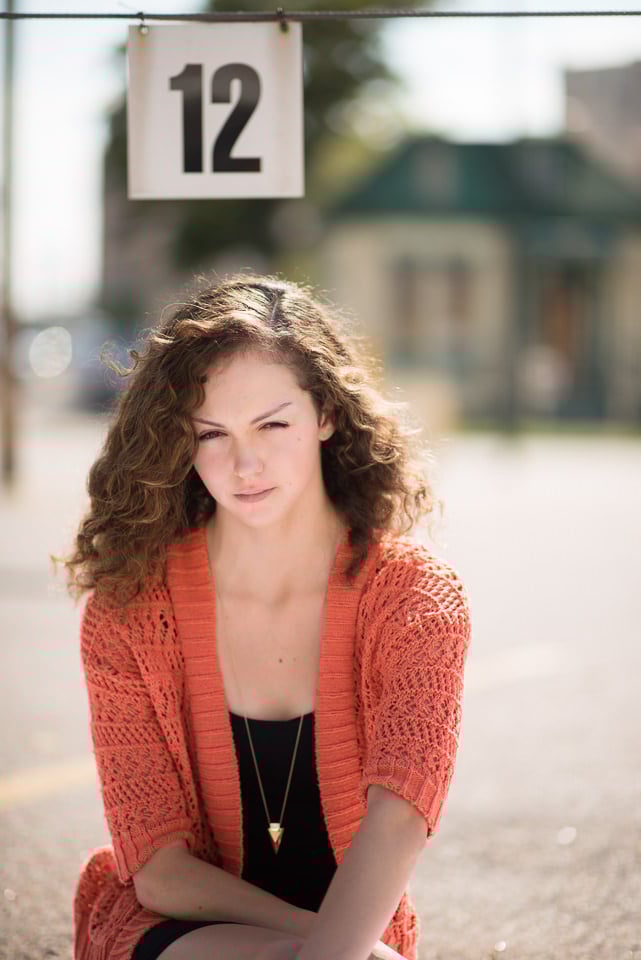
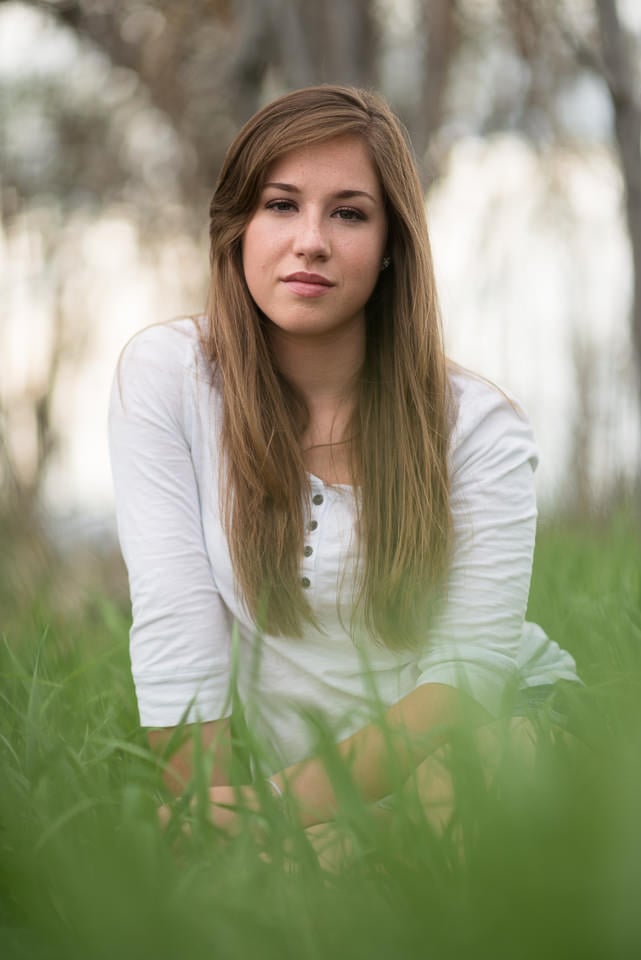
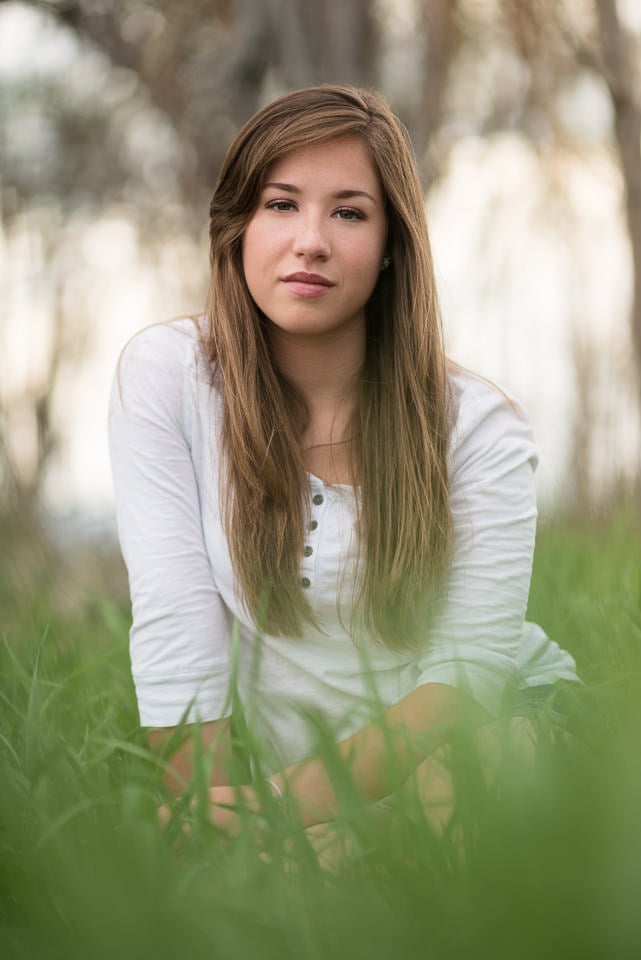
Sometimes I know that I should use a reflector but decide not to. In the images of Claire below, I knew that putting a reflector in the grass would ruin the effect I was going for. You can see in the top image how not a lot of light is being reflected into her eyes. I had to trust that I’d be able to bring some fill light into her eyes in post. The difference is subtle, but I’m glad I chose to shoot through the grass instead of smashing it down with a reflector.
4) Artificial Light
When I’m shooting in the studio, I almost always find myself using a reflector. For something as simple as a headshot, instead of using multiple lights and getting the ratios between the lights just right, I just place a reflector on the opposite side of my subject from the key light. This automatically gives me a ratio-correct fill light that I know will directly track with any adjustments I make to the power of my key light. In the image of Renee below, I had a large softbox on camera left and a large reflector on camera right.

Another way to use a reflector with an artificial light source is to simply bounce the light off of it. There have been many occasions where I’ve been on location without a softbox, but I always travel with a reflector. In situations where I don’t have any light to reflect, I have been able to bounce a small flash like the SB-800 off of a large reflector to create a large, soft light source.
5) Conclusions
In my opinion, a reflector is about the cheapest, simplest, most versatile and most useful piece of lighting equipment you can purchase. As you can see, there aren’t really any limits to how you can use a reflector. With the variety of shapes, sizes and materials available, there’s surely one out there that’s right for you. In a future article, I plan to discuss finding and using natural reflectors while you’re shooting outdoors.
Hi John, have been into photography but have not used reflector before both my outdoor and indoor shots. Right now, one of my customer demands I use it in his wedding comes this April. What is the best size and color of reflector that will serve well for the wedding? Meanwhile I find your article educating thanks so much.
Damian.
Hi Damian, using a reflector for a wedding can be difficult, unless it’s just for portraits, then that won’t be too bad. I would recommend a 48″ reflector, as that’s a good compromise between coverage for two people and being able to handle it by yourself. Look for one that’s a 5-in-1 so that you have the option to use white, gold or silver. If you’re close, white will probably be best. If you’re far away, silver will probably be best. I’d highly recommend practicing with a reflector before the wedding so you get a feel for what works best for your style.
Good luck!
John
I use a dlite 1 in the studio. It works great. My slide is on my left, the side with out the light is a bit darker. Would a reflector fix this problem?
Thank you
Sue.
Hi Sue, Using a reflector on the side without a light would definitely fix this problem. I use this setup all the time for headshots… one light with one reflector on the opposite side.
Hi John
It was a really helpful article.
I was wondering as to what is the diffused white reflector used for? Is it just to shoot through or is that supposed to be combined with the gold / silver ones?
Also, would it be a good idea to use one to reflect light from a remote speedlight, outdoors?
Thank you.
Bharath
Hi Bharath,
I’m glad you found it helpful! The white diffused reflector can be used to diffuse direct light falling on your subject, but is also the “core” for the metallic covers (they zip on top of it).
You can try to use a reflector to bounce light from a speedlight. This works great indoors, but outdoors will be difficult if it’s a bright day. I’m not sure if you’ll get enough light bounced back to make much of a difference. If it’s an overcast day or near sunrise/sunset, it’s a great technique to use.
which is the best size for a makeup shoot thanks?
Harriet, it completely depends on how much of your subject you’re photographing. You could probably use a 36″ and be fine if you’re only photographing upper body or face only. If you have room and someone or something to hold it, a bigger one never hurts.
Thank you – clear and very easy to understand and thank you too for adding them photos – always great to see visually what you are explaining.
Hi John! A friend just sent me this link and said “Look where I found you”. ;) LOVE your work!
You pop up everywhere, Mia! :)
When shooting outdoors, and I need to light my subjects face, I’m always blinding them (test subjects, no paying gigs yet) with the reflector. How do you light someone’s face without the reflector blinding them? I get move it down out of their eyes, but then their full face and eyes are not lit. Thanks!
It sounds like you’re using a silver reflector. Those can be very bright. Personally, I usually use white and only use silver or gold when it’s overcast and there’s no direct sun since it can be very blinding with lots of sun. Otherwise, you can have an assistant stand farther away (just to the side of where your subject is looking) and hold the reflector to add a little extra light that shouldn’t blind your subject.
very great article and helped me alot infact am reading your all article on daily basis all are good and easy to understand
thanks and God Bless you :)
Thanks! Great article helped alot!
Very easy to understand this article. Thanks for sharing your knowledge.