
It’s something we all care about, right? Sharpness! As a landscape photographer, with very few exceptions, taking sharp photos will be an important part of your work. That’s why you’ve spent so much time learning about the technical side of photography — and so much money buying high-quality camera equipment. This article covers everything that matters if you want your landscape photos to have as much sharpness and detail as possible, including the 15 most important tips to keep in mind.
Table of Contents
1. Don’t Go Down the Sharpness Rabbit Hole
The other day, I found an intense debate about image quality in an online forum. Here’s a sample quote (which I changed to make sense out of context):
- “Because the Nikon D810 has a greater pixel density than the Nikon D750, it will have more read noise in the shadows at high ISOs. That’s the problem with high resolution — cameras typically lower their read noise by using larger read devices and lower currents, which becomes more difficult as pixels become smaller.”
On the same website, another discussion asked why young people don’t think of photography as “cool” any more.
Sharpness is a rabbit hole. Do you want to have online debates like that one? Probably not. As landscape photographers, our collective answer should be probably not. Instead, spend more of your energy on the creative side of things. Practice light and composition, and think of sharpness as nothing more than another creative tool to match your vision.
Is it important? Yes. Sharpness is another creative tool to capture your vision, and it absolutely matters in landscape photography. But chasing after maximum sharpness should not come at the expense of other elements of photography, and there is a point where sharpness isn’t what holds a photo back.
With that in mind, the tips in this article aren’t all things that you need to do for every photo. You can take sharp photos without knowing all this info, and you can choose not to do some of the more time-consuming techniques below if it will take away from other aspects of your photography. Still, I elected to share more tips rather than fewer, so that you can choose how far you want to go. The items below start with the must-do tips, and end with some things that have a smaller effect.
2. Avoid Cheap Filters
One of the most basic mistakes I see photographers make is to put a cheap, clear filter (also called a UV or haze filter) on the front of their lens for protection.
I will say that there are some cases where a UV filter will help — say, you’re taking pictures where sand and dust are blowing everywhere — but cheap ones always do more harm than good. There is never a reason to use an inexpensive UV filter on your lens, ever, since it will cause significant harm to the quality of your photos.
When I got my first DSLR, I made the mistake of using a thirty-year-old UV filter for several weeks in a row. I took a whole series of photos which are essentially unpublishable due to their low image quality. Take a look at the photo below, which might seem acceptable at first:
But, when you look at just a minimal crop, the blurriness is easy to see:

At first, I thought this was a result of my lens (an 18-55mm kit lens) having poor optics. Actually, though, kit lenses are surprisingly sharp if you use them properly. Instead, the true reason for this blurriness is the cheap filter.
Even worse is if you leave a clear filter on your lens all the time and never clean it. I’ve seen so many photographers shoot with a dirty, dusty filter on the front of their lens. Sometimes, they’ll tell me that their lens isn’t sharp and ask if I have recommendations for a new one — at which point, my recommendation is simply to take off the filter and see how much sharpness they gain.
To let your lens reach its potential, only use high-quality UV filters, or none at all. Don’t believe Amazon reviews that say a $10 filter maintains your image quality; it doesn’t. If you absolutely have to buy a protective filter, you’ll regret purchasing anything except one of the higher-end versions.
Personally, I don’t use clear filters, except in conditions that also require a face mask. I prefer lens hoods whenever possible (read more here about why you should use one), or something like a polarizing filter that I already have on my lens.
3. Use Your Tripod
No matter where you go, bring along a tripod. It’s as simple as that. For a landscape photographer, tripods are second only to lenses in their importance. They improve the sharpness of every photo you take.
Tripods are heavy and expensive. They aren’t fun to use. But if you want the sharpest possible photos, you should carry one along anyway.
Why are tripods so important? Quite simply, they minimize camera shake. With a tripod, you can use long shutter speeds without the shakiness from handholding a camera. No matter how steady you are, it’s impossible to take sharp photos at long shutter speeds without some sort of camera support.
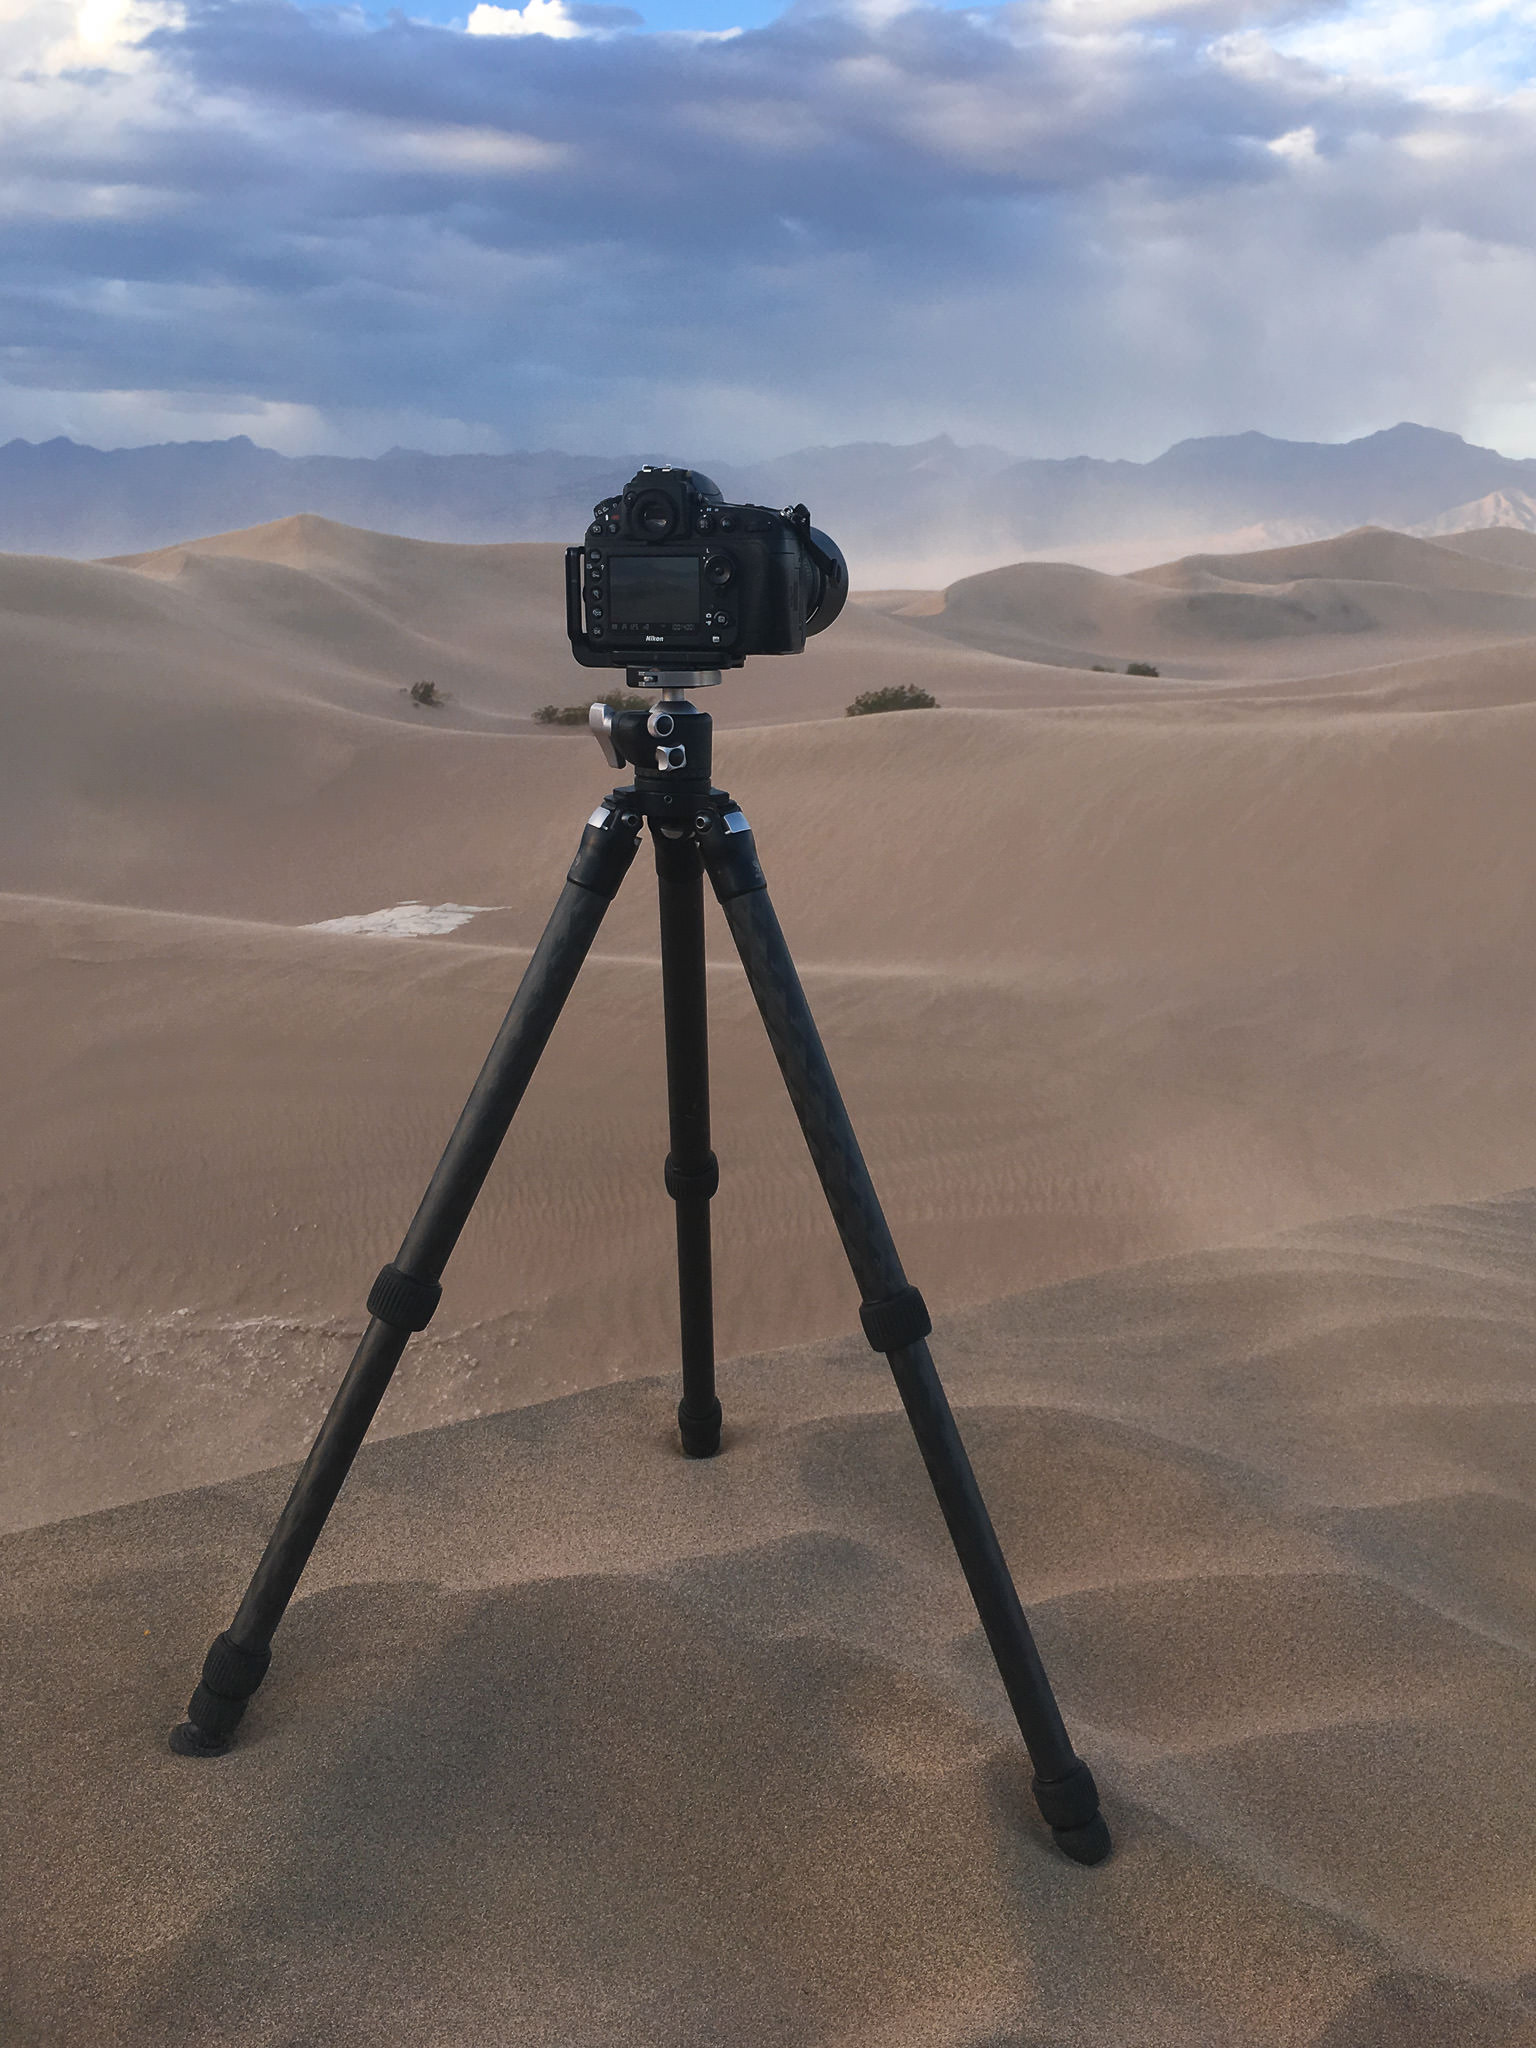
So, which tripod should you get? That’s down to budget more than anything else. At the high-end side of things, a good carbon fiber tripod is worth the price, but it is out of reach for many photographers. The good news is that even a $10 tripod from the dollar store is infinitely better than nothing, and there are plenty of good tripods (See How to Choose and Buy a Tripod). If you’re trying to take sharp landscape photos, a solid tripod is step one.
4. Find Stable Ground
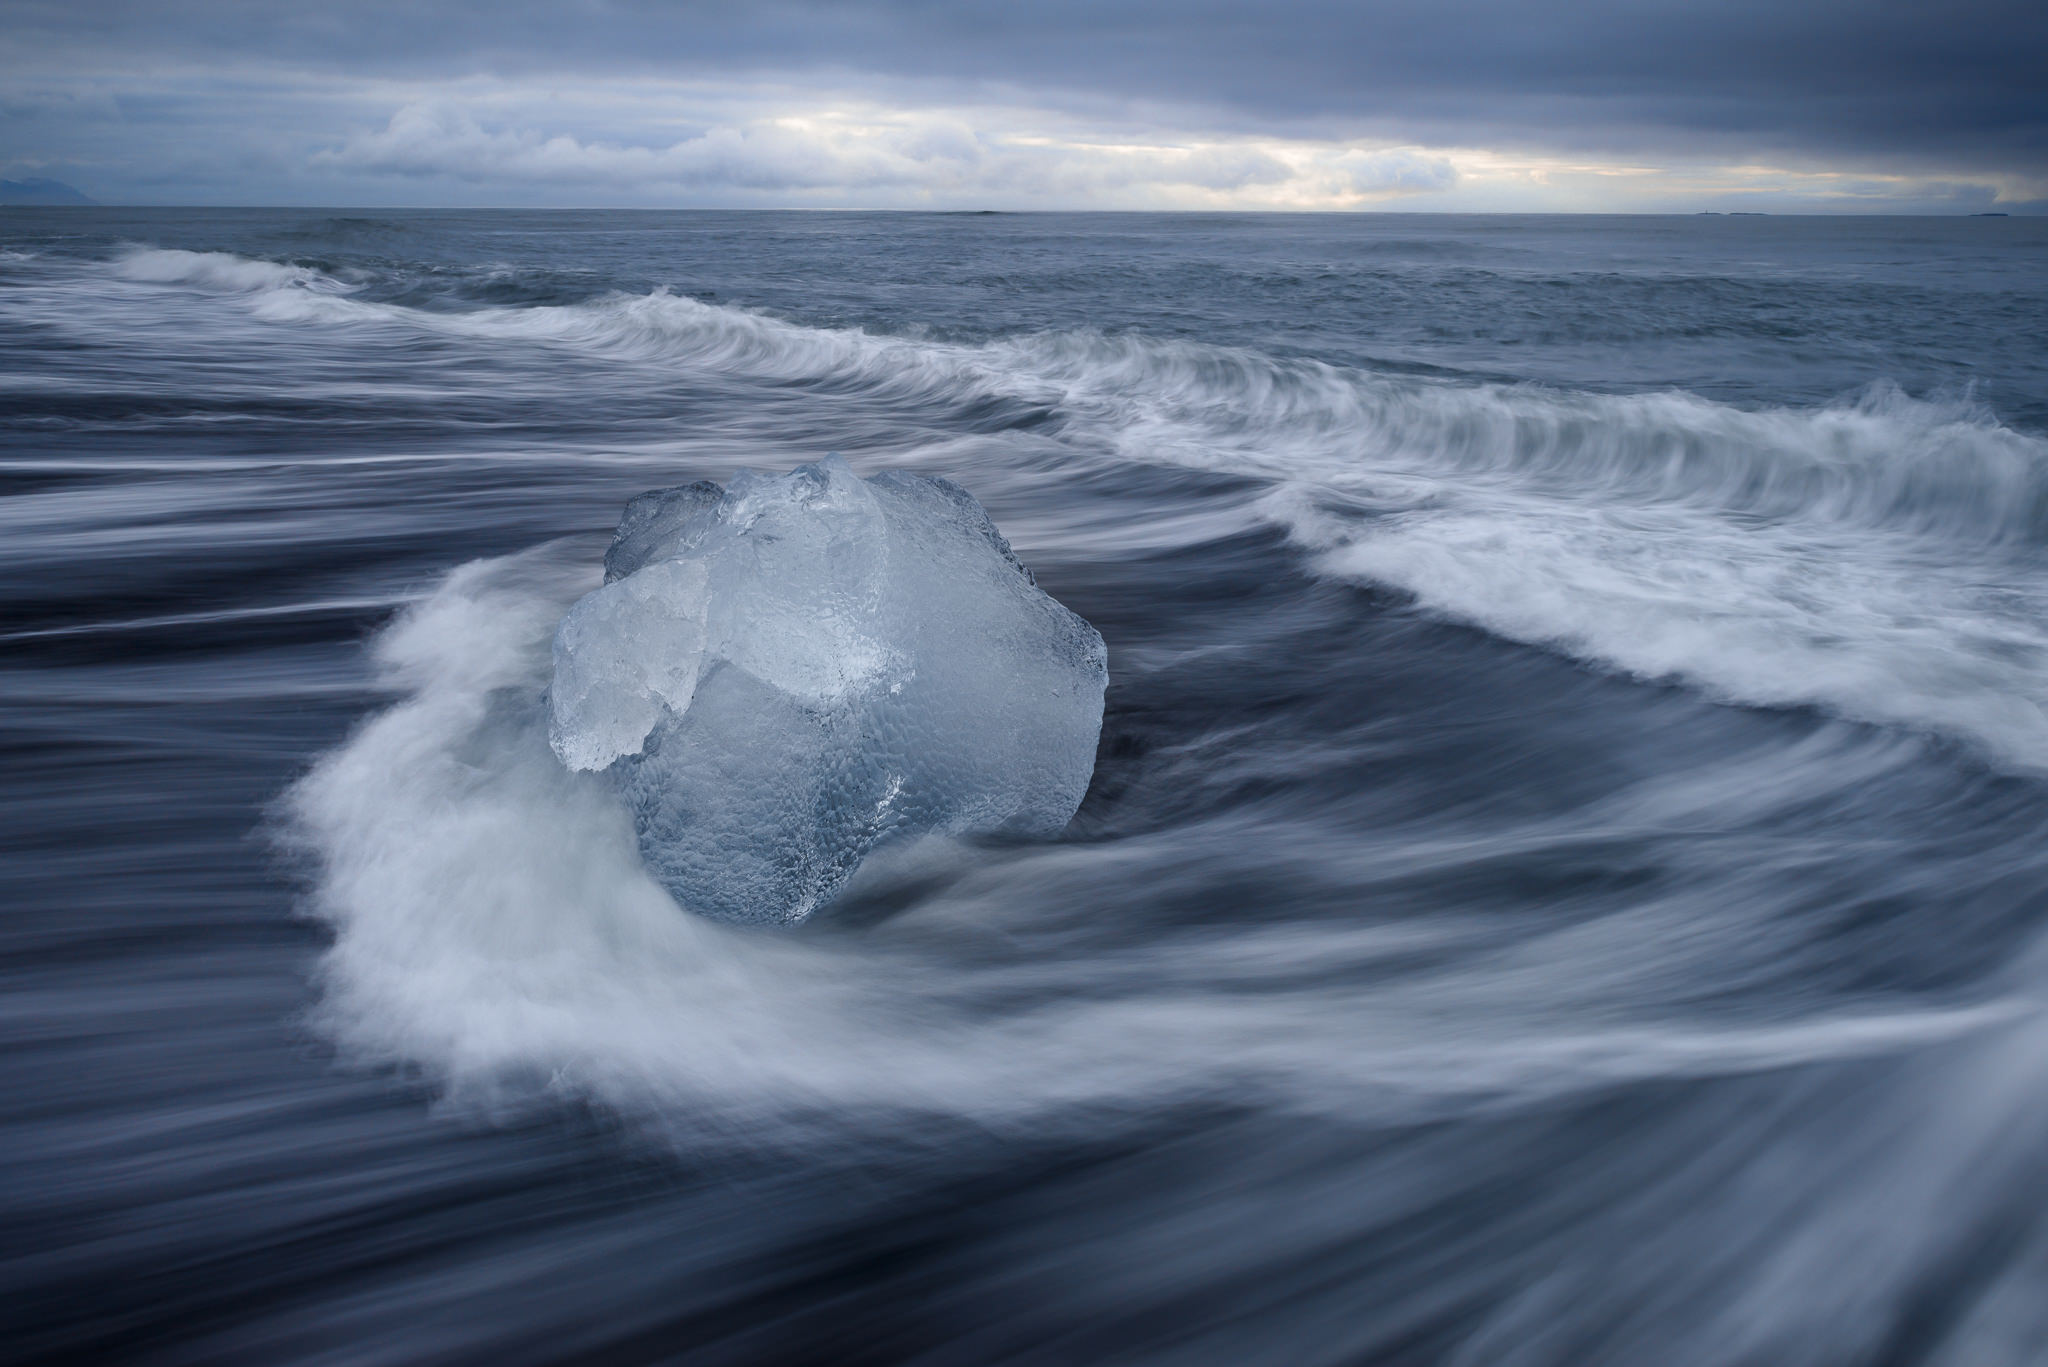
If you set up a tripod in wet sand or moving water, it will move while you take a photo. That defeats the entire purpose of having a tripod. For example, take a look at the photo below. I captured this image in Olympic National Park during a beautiful sunset. I like the colors and waves in this image, and the composition isn’t too bad. One problem, though: The trees on the left are very blurry.
Note the blurry trees in the image.
That’s because my tripod here was halfway underwater. Waves washed ashore during this exposure, and the result isn’t sharp enough to display at any decent print size. Granted, your tripod usually won’t be in the ocean, so this example is a bit extreme. But you still need to avoid placing your tripod somewhere unstable, such as on wet leaves or soft snow. If the ground isn’t solid, your photos may not be sharp.
5. Shoot in RAW mode
Most cameras capture at least two different file types: JPEGs and RAWs. Although JPEG files are quite common, RAW files have significantly higher image quality. This includes the potential for higher sharpness. Personally, I always shoot RAW photos, never JPEG. To me, the image quality boost from RAW files is worth the effort (larger file size, and more post-processing required). You can read more at RAW vs JPEG.

6. Pay Attention to Telephoto Lenses
Telephoto lenses magnify everything that you photograph — which is the whole point of using them in the first place. Unfortunately, telephoto lenses also magnify the blur in your photos. So, when you use a telephoto lens, always pay special attention to sharpness. If it’s windy, for example, consider lowering your tripod for extra stability. Ideally, you would do so by collapsing the thinnest leg sections.
In difficult conditions (such as heavy wind or unstable ground), you may want to review your photos right after taking them, particularly if you’re using a telephoto lens. This way, you can know for sure if you captured your intended sharpness, and you weren’t robbed by unexpected vibrations from the wind. Of course, you need to be sure not to miss anything exciting in the landscape while you’re looking at your camera’s LCD, though.
Telephoto lenses are great tools for landscape photography, but they take some effort to use. Still, if you’re careful, you’ll be fine. Just pay special attention to camera shake, and review important photos after you capture them.
7. Use Proper Focusing Technique
This is a very easy mistake to make. I see a lot of beginners with expensive camera equipment who don’t actually get sharp photos simply because they don’t know how to focus.
First, a very easy mistake: Many beginners think that “pros” use manual focus, and nothing else. Not only that — these same “pros” use manual focus by looking through the viewfinder, then spinning their lens’s focusing ring until things look sharp. No!
Advanced photographers use autofocus all the time. In fact, even as a landscape photographer, I use it more often than manual focus. I only focus manually when I’m not in a rush, I’m using a tripod, and I’m in my camera’s live view mode. That way, I can magnify things 10x or more, making sure that I manually focus on exactly the perfect point in the image.

8. Focus at the Proper Distance
So, where’s the perfect point to focus in a landscape? Sometimes, the answer is just to focus on your subject, if its sharpness matters more than anything else. Other times, you’ll want to have the entire landscape from front to back as sharp as possible, and that’s where things are a bit trickier.
Here’s an example: Say that there are two important elements in your photo — a flower for the foreground and a mountain in the distance. In most cases, you’ll want both of them to be equally sharp. So, where should you focus? The answer, of course, is between them. Of the two, I would focus closer to the flower, since lenses have more depth of field behind your focus point than in front of it.
Technically, in fact, the best spot to focus is at twice the physical distance to the closest item in your photo, assuming that you want the foreground and background to be equally sharp. If your closest foreground object is one meter away, focus on something two meters away. We have a more in-depth article about that goes into this discussion as well, which I recommend reading if you want more information.
The closest element in this photo is some grass at the very bottom of the frame. I focused twice as far away, which aligns roughly with the far edge of the large corn lily plant in the foreground.
9. Use the Right Exposure Settings
Exposure can be a complicated topic. It even requires its own article. Your camera settings have a huge impact on sharpness, which is one reason why people spend so much time trying to learn them in the first place. I’ll only go into a simple explanation here.
9.1. A Simple Explanation
If you’re interested in a broad rule that works most of the time, here’s what I recommend for landscape photography (assuming you’re using a tripod, and nothing in the scene is moving):
- Use your camera’s base ISO — usually ISO 100 — whenever possible. A low ISO is best, since it lets you capture as much light as possible (resulting in the lowest amount of noise/grain visible in your photo).
- Your choice of aperture affects sharpness in a few different ways. For landscape photography, you are trying to balance depth of field with blur from diffraction. The best aperture to use depends upon a number of factors, but a small aperture is ideal, since it gives you more depth of field. Something like f/8, f/11, or f/16 is usually a good choice for landscape photography if you have no clue where to start. (With a DX or aps-c camera, divide these numbers by your crop factor of 1.5. If you have a micro four-thirds camera, divide these numbers by your crop factor of 2.)
- Let your shutter speed fall wherever it needs to be. You want the photo to be the right brightness. Assuming that nothing in the photo is moving, and you’re using a tripod, you can set any shutter speed without a problem. However, if your subject is moving quickly, you’ll have to use a faster shutter speed to freeze any motion blur. This will darken your photo, but you can compensate by increasing your ISO if necessary.
- Don’t use your camera’s fully automatic exposure mode. It might not recognize that you need a large depth of field. Instead, use a mode like Aperture-Priority, where you select the aperture (something like f/8 or f/11) and ISO (your camera’s base value, often 100), and the camera sets the shutter speed. If the resulting photo is too bright or too dark, use exposure compensation, which will make the camera adjust the shutter speed to compensate.
This is a simplified explanation, of course, but it’s accurate for many landscapes if you have no idea where to start.
9.2. A Complete Explanation
The more you learn about exposure, the more nuanced everything becomes. The steps above are good guidelines, but they don’t work all the time (such as nighttime photography, which is a completely different ballgame.) I thought about including a complete explanation of exposure in this article, but there’s a lot of information to cover. Instead, I recommend reading this instead: Understanding Exposure: A Beginner’s Guide.
If you’re interested in learning about the best practices of exposure, including sharpness, that’s what you’ll want to read. Otherwise, the four steps listed above should be enough to start you in the right direction. After all, exposure is something you just need to learn for yourself — it’s nice to read about online, but there’s no substitute for taking pictures in the field.
10. Limit Diffraction
At ridiculously small apertures, you’ll run into the problem of diffraction. This is when the aperture in your lens is so small that it drastically bends light and causes it to interfere with itself.
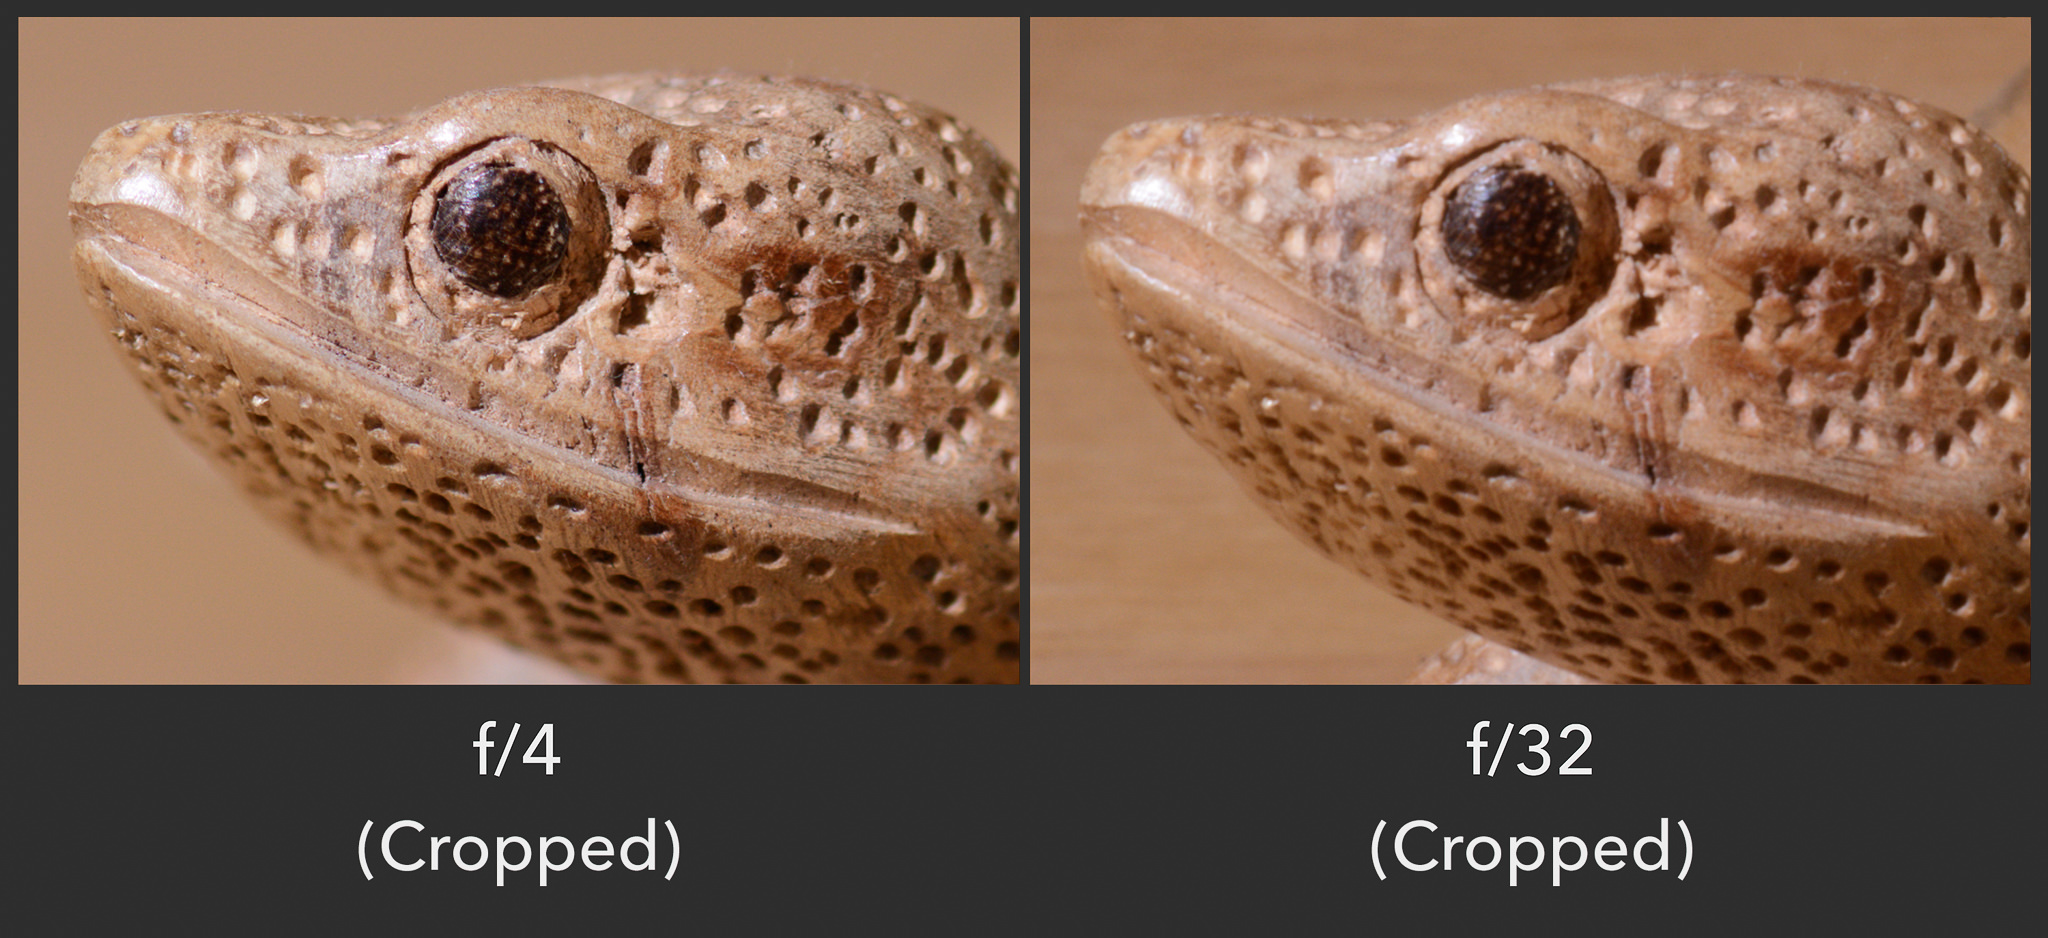
Since aperture is written as a fraction, small apertures are f/16, f/22, f/32, and so on. Personally? I’m comfortable using f/16 if necessary, but I try to avoid anything smaller than that. I’ve only used f/22 a handful of times, and I would never touch f/32 or smaller for landscape photography. (Again, divide these numbers by your crop factor.)
Here’s a sample crop to show the loss of sharpness at f/32, compared to a more typical aperture of f/4. The loss of sharpness here due to diffraction is pretty significant:
11. Choosing Sharp Camera Equipment
If your only goal is to create interesting photos, camera equipment doesn’t matter as much as other aspects of photography (though it is still important to use something which makes it easy to capture your desired photos). However, in terms of sharpness specifically, there are some differences even among high-end gear.
Luckily, camera equipment today is the best it’s ever been. Never before has such cheap gear been able to produce such high-quality and sharp photos. Digital cameras are an amazing value, and even film cameras are vastly more affordable today than they were just a few decades ago. The cheapest consumer DSLRs and mirrorless cameras have more than enough image quality for a good print. No matter what camera you own, even if it’s just a smartphone, you can take good landscape photos.
A sharp landscape photo taken with the Nikon D5100 and the 18-55mm kit lens. This is one of the cheapest DSLR kits you can find (and it’s old enough that Nikon discontinued it in 2013), but the result is still plenty sharp for a large print.
Still, depending upon how you output your images, you’ll find some noticeable differences in sharpness between various pieces of equipment available today. For example, large camera sensors with a lot of pixels will — all else equal — capture more detail than other options on the market. The same goes for high-end tripods, which tend to dampen camera shake better than cheap options.
Finally, pay attention to the sharpness of lenses that you buy, but not too much attention. Some lenses absolutely are sharper than others, but these differences are mainly visible at wide apertures, which landscape photographers don’t tend to use. Although there are some sharpness differences among modern lenses at apertures like f/11, they are not as large as you may think, and generally are not worth obsessing about.
12. Use Vibration Compensation Wisely
If your camera or lens has vibration compensation, turn it off when you use a tripod in stable conditions. This isn’t a big deal, but, sometimes, it might end up compensating for vibrations that don’t exist (harming the sharpness of a photo). More likely, it will just take up some battery power. But it won’t improve the sharpness of your photos if your camera is already completely stable, so you might as well turn it off.
However, if you’re taking pictures in a very windy area — even with a tripod — ignore this advice! In fact, although vibration compensation has an element of randomness, you will tend to get sharper photos if you leave it turned on for extreme conditions. Strong wind will cause even the best tripods to vibrate, and vibration compensation can help keep your images as sharp as possible. (Also, it should go without saying that you should use vibration compensation if you’re shooting handheld, especially if you’re pushing the limits of shutter speed.)
It was very windy while I took this photo. I used vibration reduction to maximize my chances of getting a sharp photo, even though I shot this from a tripod.
13. Turn on Mirror Lockup/Exposure Delay Mode
When the mirror in your camera moves, it causes blurry photos. Even if your camera doesn’t have a mirror (i.e., mirrorless cameras), the shutter will move and potentially cause blurry photos.
Mirrors and shutters typically don’t add a lot of blur, but you’ll notice their effects if you’re looking closely. Luckily, you can fix this type of blur with a simple menu option available in most cameras. Depending upon your equipment, it may be called something different: Exposure Delay (Nikon DSLRs), Mirror Up, or electronic first curtain shutter (mirrorless cameras, and some DSLRs).
These settings have another benefit, too. Normally, if you touch your camera — for example, by pressing the shutter button to take a photo — you could get blurry shots, even with a tripod, since your finger pushes the camera as it takes a photo. With these settings, though, your camera will wait a few seconds before taking each picture. However, enabling this setting is different depending upon your camera. For Nikon:
- Turn on exposure delay mode.
- Press the shutter button.
- The camera raises the mirror, waits a second, then takes a sharp photo.
For Canon:
- Turn on mirror lockup mode and two-second self timer.
- Press the shutter button.
- The camera raises its mirror, and takes the photo two seconds later.
With Canon in particular, it’s very important to enable the two-second self timer. Otherwise, you’ll need to press the shutter button twice — once to raise the mirror, and once to take the photo. The problem with that method is that your second shutter press happens right as the camera takes your photo, which means that you may introduce camera shake by pressing down the button.
Even if you have a Nikon or Canon camera, the exact steps to minimize vibration as much as possible may not look exactly like this on your camera, or you may have additional options (such as the separate electronic first-curtain shutter on the Nikon D810 or D850). When in doubt, read your manual, or search online.
Some mirrorless cameras work the same as Canon’s DSLRs. You can set their electronic first-curtain shutter, but you’ll still get shake from your hand when you press the shutter button. Once again, the only way to fix it is to turn on your self-timer as well as the electronic first-curtain shutter.
14. Don’t Bother with a Remote Release
In the good old days, photographers had to use shutter release cables in order to get rid of mirror vibrations and shake from pressing the shutter button. Luckily, modern cameras are better — just turn on your mirror lockup instead, as described above. Skip the remote release unless you’re planning to take photos with extremely long exposures (shutter speeds more than thirty seconds), or if you have other special requirements (such as timelapses or photos without a two-second timer delay).
15. Combine Multiple Shots (Maybe)
If you’re really crazy for sharpness, you may want to combine multiple photos together. Why would you do this?
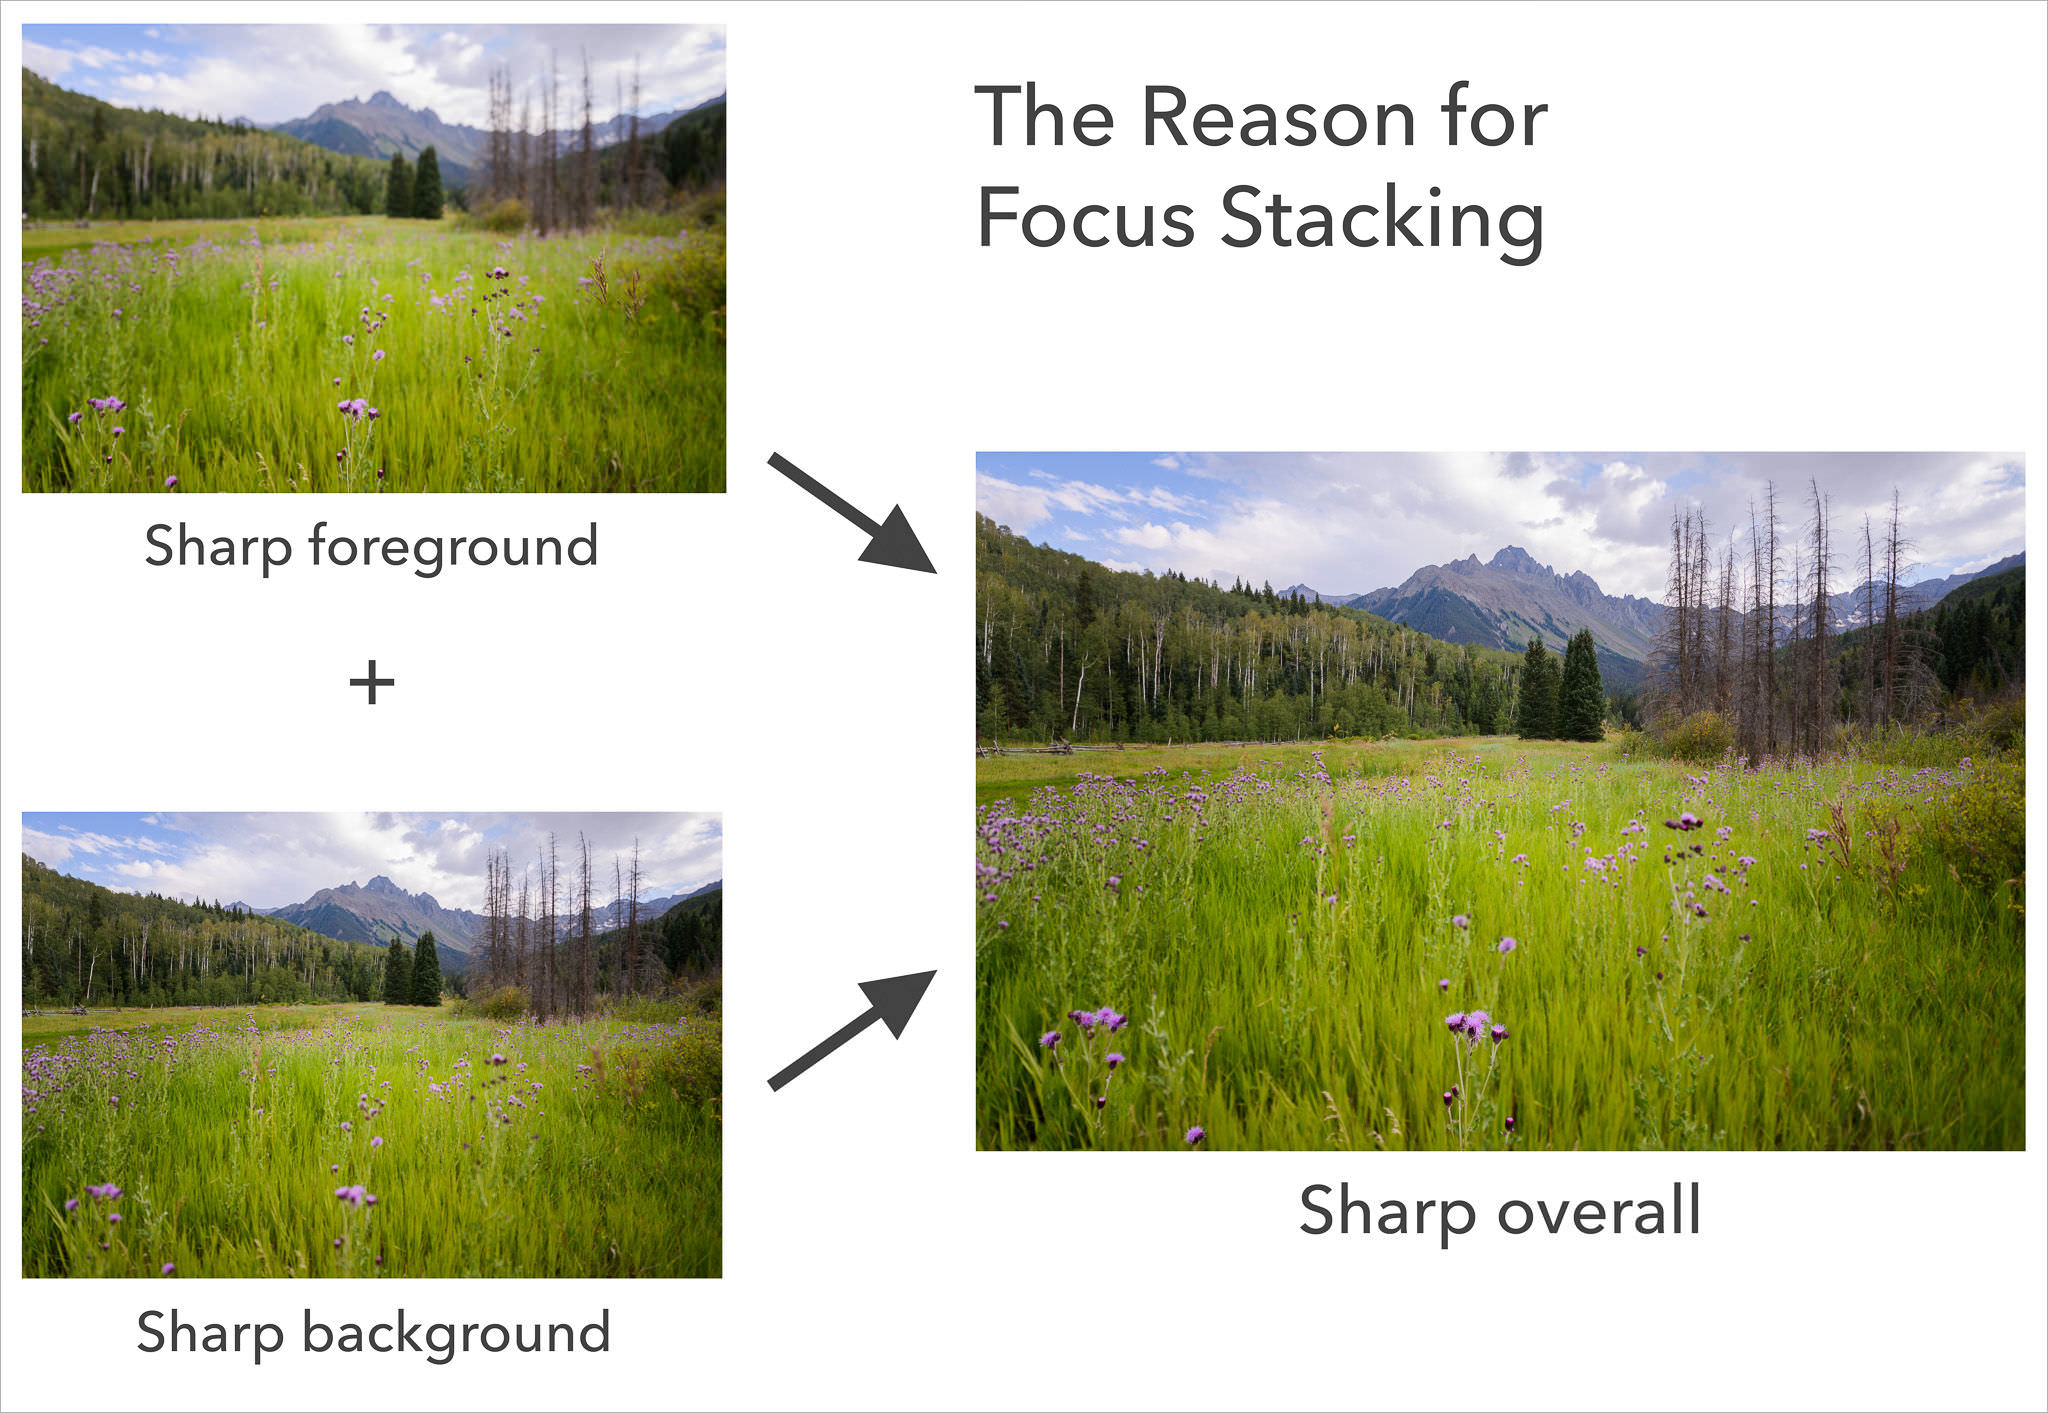
Simply put, every lens has a “sweet spot” aperture where it’s as sharp as possible. Usually, that sweet spot happens around f/4 or f/5.6, which might not be your typical landscape photography apertures, since they may not offer enough depth of field. Still, if you really need the extra sharpness from those apertures, all is not lost. You can compensate for the shallow depth of field by merging a set of photos together.
For example, what if you took two photos at f/5.6 — one focused on the foreground (with a blurrier background), and one focused on the background (with a blurrier foreground)? You could then combine these photos and take the best parts of each one! In practice, this is called focus stacking, and it can work quite well, assuming there is no obvious motion in the scene.
So, if you want the sharpest possible photo of a landscape, you might decide to combine several photos together, taken at different focusing distances, all at your lens’s sharpest aperture. (If you don’t know your lens’s sharpest aperture, you should test it for yourself, or research online for a rough answer.)
Of course, focus stacking isn’t always a good idea. It doesn’t work if anything in your landscape is moving too quickly, and it also takes more time (and memory card space) for every photo, including time in post-processing. That’s why I personally tend not to use focus stacking in the field. Instead, I nearly always take just one photo of a scene, focused properly, rather than going for a maximum-detail focus stack. I only use this technique when f/16 isn’t even enough depth of field.
Still, other photographers use focus stacking far more often, and find it a crucial technique for their work. My main recommendation is to make sure that you’re using it for a good reason, since it may not be worth the effort to gain every extra pixel of sharpness at the expense of time in the field and post-processing (and a greater potential for errors).
16. Sharp Landscape Photos Checklist
There you have it — the most important things to remember if you want sharp landscape photos. Here’s a quick checklist to recap everything:
- If you’ve decided to use a UV filter, pick a high-end option, and made sure that it doesn’t reduce the sharpness of your photos.
- Use a tripod, and make sure the ground is stable.
- If it’s windy, collapse the thinnest section of your tripod and lower the center column. Use vibration compensation if your lens has it.
- Shoot in RAW, not JPEG.
- Review your photos to make sure that they’re as sharp as you want (especially if you’re using a telephoto lens, which magnifies any motion blur).
- Focus properly — either on your subject or at the hyperfocal distance. And, if you’re using manual focus, magnify the LCD screen in live view to make sure that you’re actually focusing where you want.
- Pick a fast enough shutter speed to freeze any motion in the landscape. Aside from that one constraint, it can be as long as necessary in order to capture a photo with the proper brightness.
- Use a small enough aperture to get the proper depth of field (often f/8, f/11, or f/16 for full-frame cameras).
- Avoid apertures that are so small that the diffraction is too strong. I don’t recommend using apertures like f/22 or f/32.
- Set your camera’s base ISO whenever possible. Still, don’t worry about raising it if your chosen aperture and the longest usable shutter speed don’t give you a bright enough photo.
- Use a good lens, a stable tripod, and a high-resolution camera with a large sensor.
- With a tripod, turn off vibration compensation in your lens (or camera body), unless it’s windy.
- Turn on your shutter delay mode (Nikon), your mirror lockup and self-timer (Canon), or your electronic first-curtain shutter and self-timer (mirrorless).
- If you’re after every last ounce of sharpness, use focus stacking to combine photos at different focusing distances.
- Don’t actually focus stack photos unless you have a very specific reason, since it’s prone to errors until you thoroughly understand its limitations.
17. Conclusion
That’s a lot of information! How could one person possibly keep all of this in mind while taking landscape photos?
In practice, though, you’ll end up learning all of these automatically as you keep taking photos. Sure, you may forget to turn off vibration compensation from time to time, or you may not use the ideal aperture for a given scene, but that’s fine. After a bit of practice, it will all be second nature.
With so many factors to remember, maybe you can see why a lot of people online say that perfect sharpness doesn’t matter! It’s not easy to learn and remember all of this. Sharpness does matter, though, at least to a degree. If you have tack-sharp prints, your audience will be impressed. If you enter photos into a competition, judges in the final round may care about the overall sharpness. And, if you crop your photos in post-processing, every extra ounce of detail is helpful.
Just don’t take it too far. If you spend more time thinking about sharpness than the creative side of photography, you should shift your priorities. Sharpness matters, but it’s just a small part of taking the best possible landscape photos.
See also:
- Understanding Exposure: A Beginner’s Guide (Most of the time, exposure matters more than sharpness.)
I can confirm the cheep filter problem I bought Nikon d3200 got poor pictures. I thought about taking biy to repair shop.but bought f1.8 younuo lens thinkin abou the same cost as repair shop. It fixed the problem. Taking my attention to the kit lens. I removed the filter.problem fixed. Good article wish I’d read it earller.
Great article.
And there was I thinking, all the while, that f22 or f32 would solve any problems around DOF !!
Enlightening.
TX
Mr SPENCER COX
I am a beginner in photography. I just want to know in more detail about focusing as all my photos are going out of focus. I read your article as well as all the replies given by various specialists . It has helped me a lot. May GOD bless all of you. I have a strong doubt about viewing thru view finder and magnify 100% and focus sharply on a particular spot – my doubt is after focusing sharply on a particular spot (in the picture that we want to take) should we have to recompose the photo to the original without touching the focusing ring and then take a shot ? otherwise when we focus sharply on a particular point in the photo thru live view and press the shutter release button fully without recomposing it ?
Also please give me the complete Camera settings for Landscape Photography that I have to make for my Nikon d-750 FX camera
Thanks once again
You cover a lot of important facts that can help create better photographs, regardless if shooting Landscape or other genre of photography: However, lets discuss Manual Focus: Actually, most advanced amateurs and professionals (especially any type of landscape photographer) uses Manual Focus. Period. One of the most important camera dynamics used in Landscape photography (and architectural, as well) is calculating Hyper focus setting for best focus vs Dof for a particular composition. Next, and just as important, manual focus is critical for most Floral type photo shoots, especially close up compositions. Perhaps you will add the correct attention this important camera dynamic deserves in a supplemental article. Or I can. :)
Kind regards,
Lance A. Lewin – Atlanta USA
Brilliant article. I learnt a lot. I own a Canon 650D with a kit zoom lens. I’m always thinking I should upgrade in order to get sharper photos. I reckon if I implemented all of your suggestions I could save a lot of money by using my current equipment better!
Thank you
Mick
Spencer. I agree with almost all your comments but one: Tripods. I have taken 10s of thousands of landscape pictures handheld using a D810 at ISO64 and use a tripod only occasionally for really low light / night shots. The flexibility that of not having to carry a tripod far outweighs any advantages to me – unless I know in advance its going to be dark. If the shutter speed is down to say 1/15, I will take several shots using VR. Most of them will be sharp (and even slower sometimes). This is using a wide angle lens of course but the majority of landscape pictures will be wide angle. I take multi-shot panoramas also hand held – and with slow shutter speeds. VR is so good these days, it avoids the need for a tripod in many situations and am not a great fan of blurry waterfalls. I am amused to see rows of photographers in bright sunlight using tripods – and sometimes selecting ISO400 with high shutter speeds. For web sharing, sharpness is a given and I print to 3′ size too with no difficulties.
I often hear conflicting advice on UV filters concerning good or bad ones. I use Nikon/Nikkor lenses and some Tamron lenses too, and the filter size I’d need is 77mm in most cases. I mostly use affordable Tiffen UV filters. I also use the Hoya NXT 77mm filter – much more expensive than my other filters.
Can you recommend a “good” filter?
Young people don’t think “photography is cool anymore”. Who ever said that may be right, as I think back on it neither did I, most likely because it was “fine art”. At that age my mind was in other places as well.
With the age of digital and digital developing, photography has become very technical, (snapshots from a cell phones excluded) and has allowed the hobbyist and professionals to get a great deal more out of their work from the field or studio; producing some very stunning “Art”.
I believe photographers should always keep in mind that what they are creating in the field or studio is art. And, generally good art has a good subject, good composition and good lighting, so that should be the photographer’s main concern.
Scene lighting and color capture your vision where scene clarity comes from learned methods, camera settings, and post processing.
The later are tools to be used, not things that dictate what your vision and mind’s eye want from the scene.
You are the artist; you choose what the end product looks like so make the images satisfy your desired vision.
Use the tools and methods learned that will get you to the place that makes you feel good about what you just did.
Wow, don’t know where that came from but your article inspired me to write this.
As a follow up to my previous comment, here is an example of a landscape taken many years ago with a Canon EOS 20D 8MP camera, ISO 400, f/16-1/100. Surprisingly, the original is really not bad at all, but not good enough. Some work in Photoshop and again using the oil paint filter turns it into something that is okay, or better.
J’accord. Not much wrong, at all.
Thanks for the informative article! Like most other photographers I appreciate sharpness and I often strive to that end; it’s why I own a D810 and a D7200. I also own a D750. For me, however, as a so-called “photographic artist,” sharpness isn’t always the end goal. When I have a unique image that may be lacking a little in sharpness, or has a little too much noise, I try to make something more of it. Even if it is an ordinary photo, say, of a bird. There are many tools in Photoshop that can render your image beyond ordinary, like the “oil paint” filter, or the “liquefy” filter or any of the many other artistic plugins. Painting an image can often compensate or make use of the slightly out of focus quality, as well as attenuate noise. See this image for an example that was terribly noisy and not as sharp as I had hoped for —
The original was terribly noisy and I would not publish or print it as it was; even with standard post adjustments, it simply wasn’t usable. You be the judge, maybe it’s still not up to snuff but I have printed it 36″ x 24″ on canvas and it is impressive from a proper viewing distance.