I want to share with you some useful tips for taking family portrait photos on a budget, including how I got into the satisfying world of portraiture after years of taking random (and disappointing) snapshots. Hopefully, this post will interest family photographers who want less expensive equipment, and any beginners to photography who simply want to capture nice photographs of people. Many amateurs cannot spend lots of money on quite expensive photography gear and do not have time to travel to “magical” locations, but none of that is necessary if you want high-quality pictures. Below, I will demonstrate how you can keep portrait photography inexpensive and enjoyable at the same time, both in terms of camera equipment and finding locations, based upon my personal experiences.
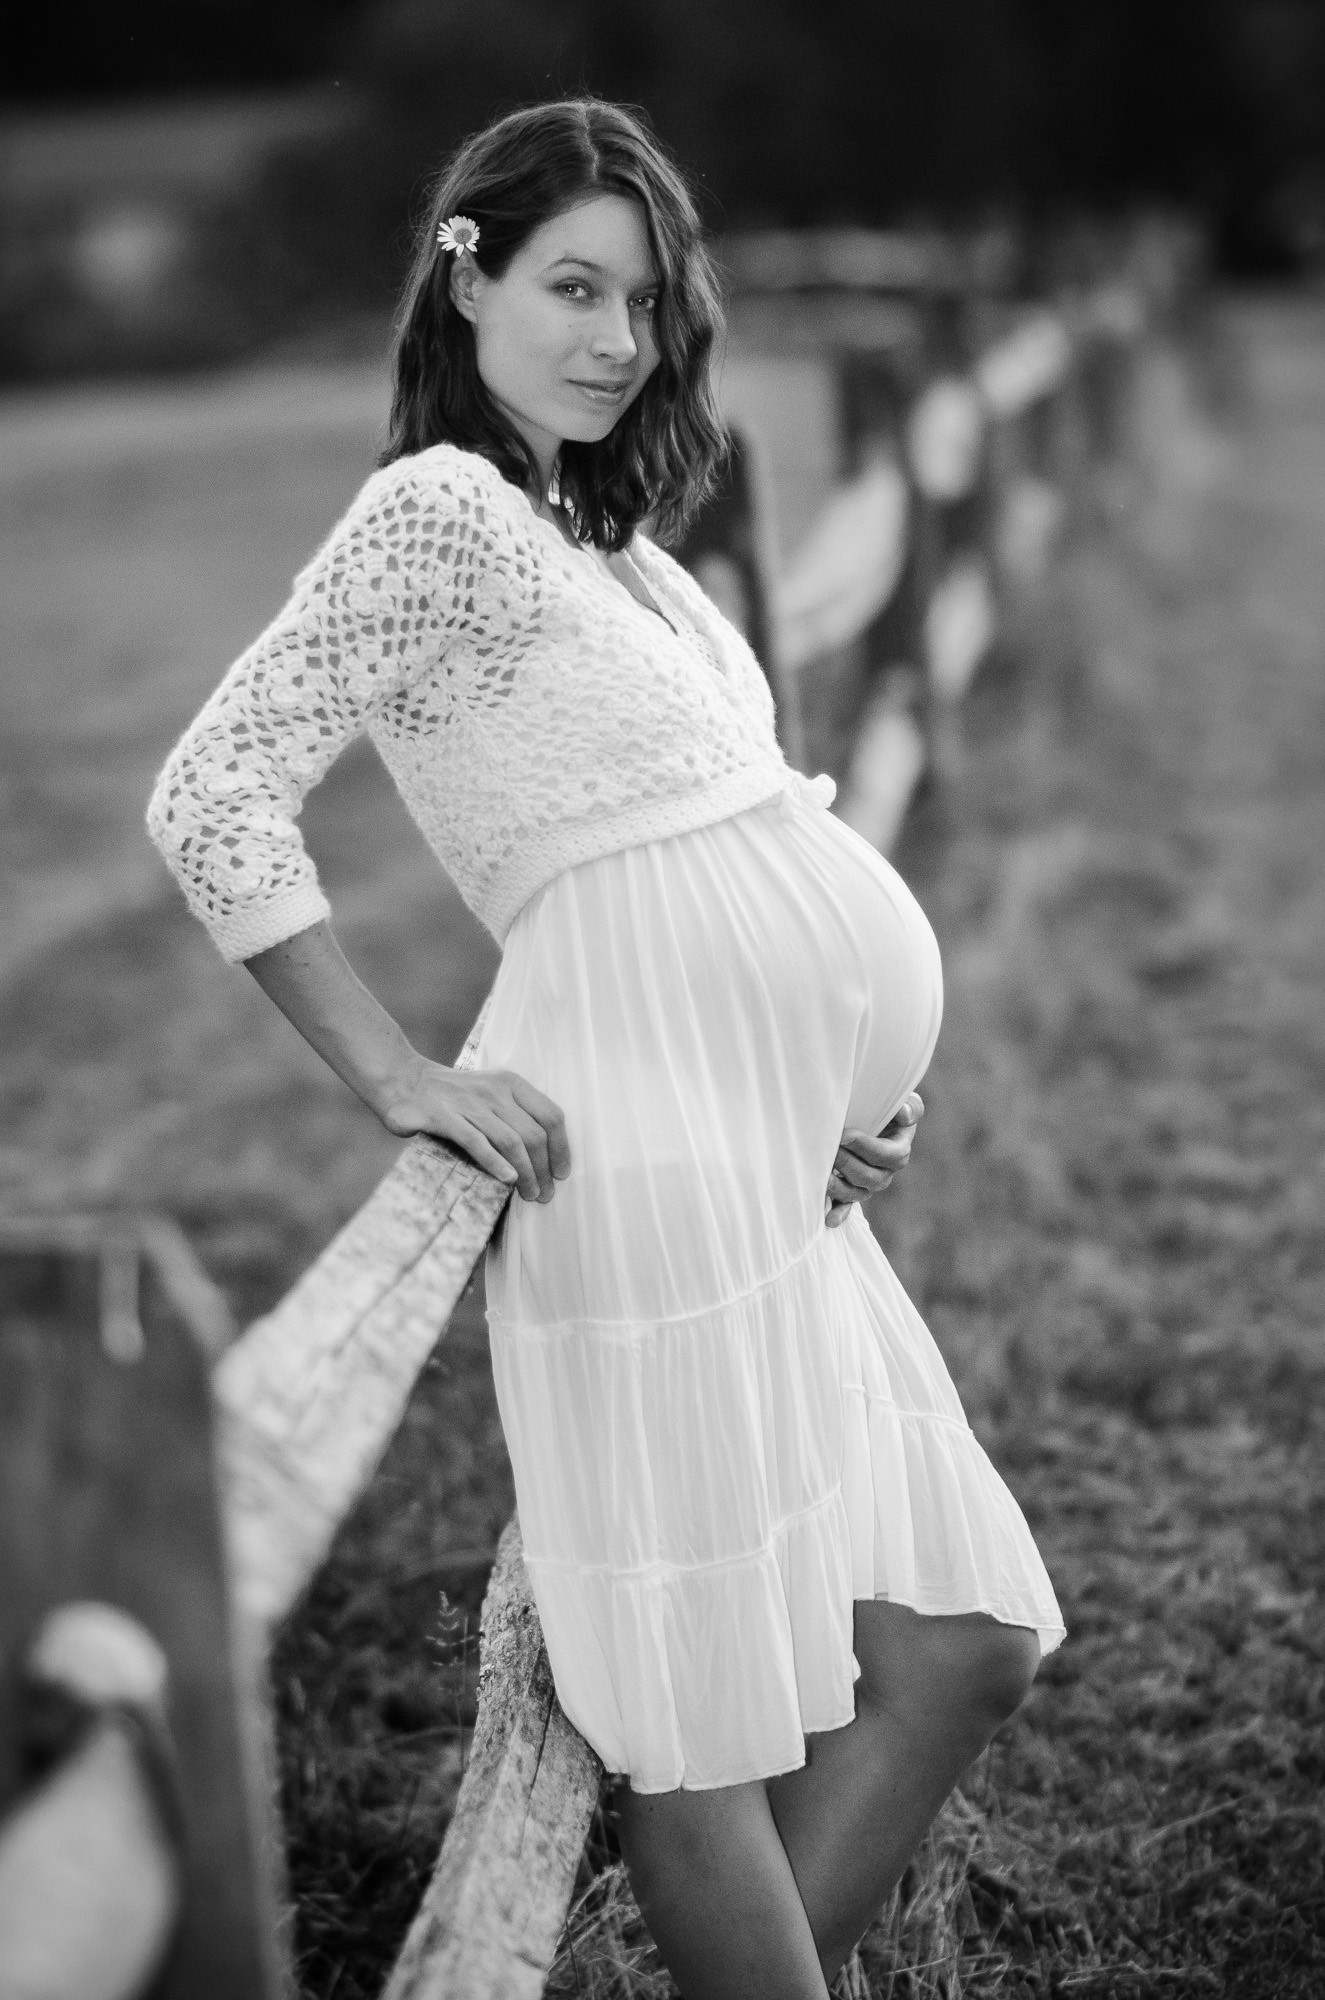
Table of Contents
The Portrait Photography Mindset
I believe that most people require some sort of impulse to change from a dissatisfied snap-shooter into a more advanced photographer. For me, my wife’s first pregnancy did it. I instantly knew I would like to photograph her and our family members as good as possible ever since. Early in her pregnancy, I started learning photography, observing our neighborhood, and planning my first photo shoot.
That is all it took for me – the proper mindset. Without it, I imagine that you can have thousands of dollars of equipment and still take snapshots. (Then again, I would not know, since I have never had the gear to test this theory!)

Finding Locations for a Family Photoshoot
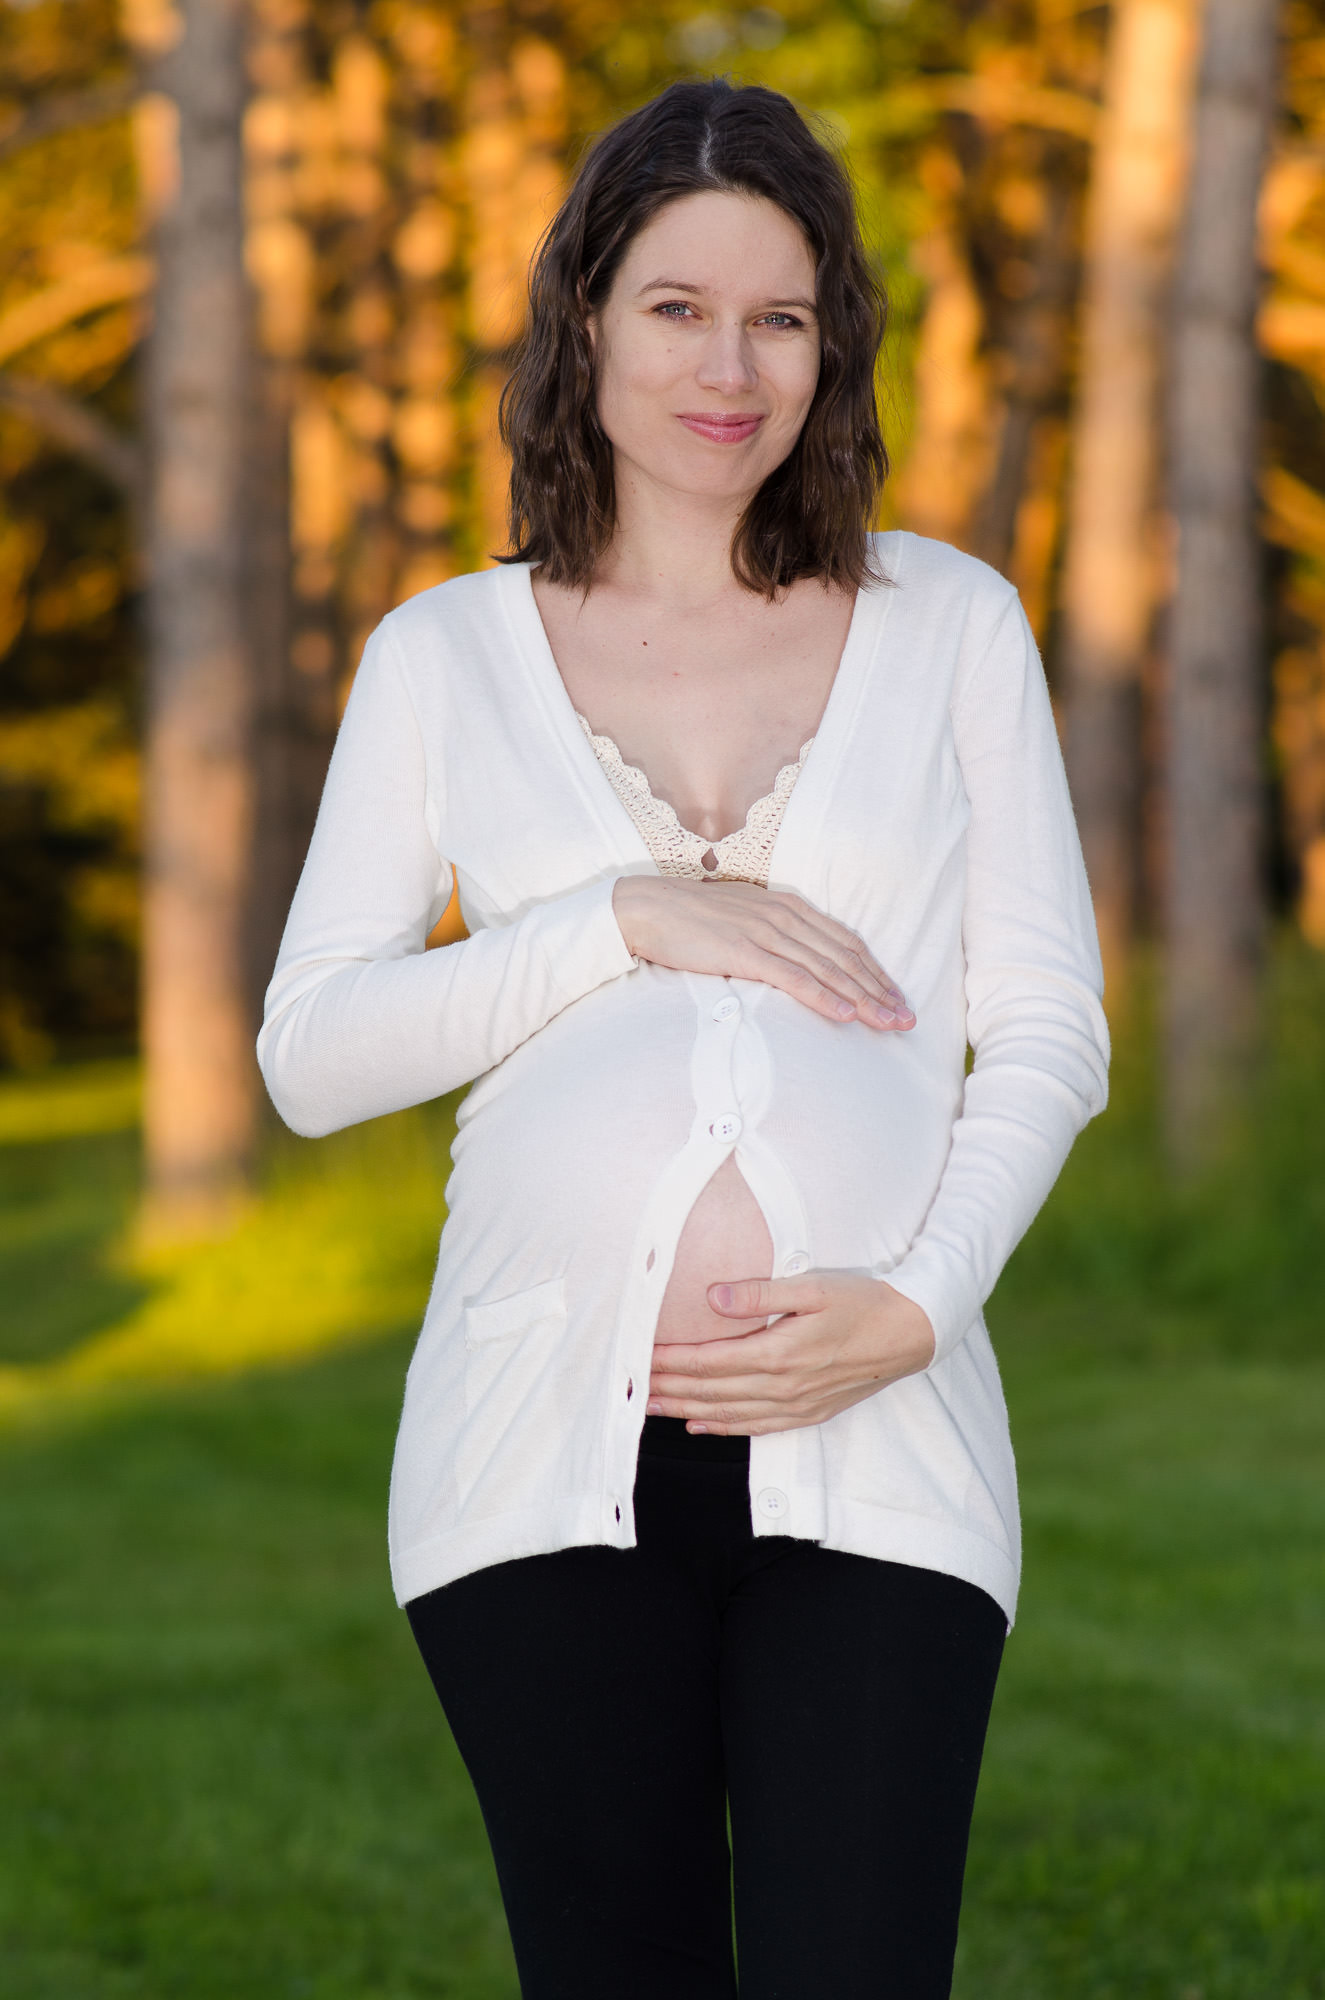
I remember walking back home for a dinner every day around 6pm. It was late spring of 2014, and the sun was setting over a nearby building, with little trees on a hill lit up beautifully before sunset. You could enjoy this colorful magic only for around half an hour when the sun was low enough, but not yet hidden behind the building. Every now and then, someone would cut grass on that hill. The grass always looked the best when it was as tall and long as possible. It took a couple days for them to cut all the grass, so, whenever the smell of fresh greenery was in the air, it was time to act.
Another day, on the way to a shopping mall, I spotted a meadow that looked like it held some potential. There was tall grass and a split-rail wooden fence running along the street. Or, a different time, I would remember a nice lighthouse at the lake where we used to have picnics, or I would notice beautiful sets of flowers here and there.
The key is to pay attention to regular moments like these. Simple things like grass, flowers, and scenery you pass every day all have the potential to be good locations for your photoshoot, and they don’t require any extra money to visit. It was places like this that spoke to me when I was preparing for my first photoshoot of my pregnant wife.
Learning Portraiture
I am not going to rediscover the world of portraiture in this article. There are many great basic and advanced articles about the aperture, depth of field, and perspective that altogether make portrait photography, including on Photography Life itself. (Check out this page for all the portrait photography tips on the site.) My only suggestion is to play with these parameters to control how your photo appears. You have a large amount of control over things like isolating your subject and defocusing the background, which lead to many different creative looks in a photo.
A lot of it is also down to your personal style and decisions in photography. For my own work, I like to use relatively wide apertures and step back some distance from a subject to isolate it well. This perspective also leads to more 2D, flat-like images. (Hence my favourite Sigma 85mm f/1.4 lens on DX camera, see below). Still, I will say this: No matter what, always keep the subject’s eyes in focus!

How to Pick Inexpensive Photography Gear
There are a number of ways to purchase photography equipment for lower prices than you will find with new top-of-the-line DSLRs and mirrorless cameras online. You always have the ability to buy secondhand, purchase an older or lower-end camera, or sacrifice on a few specifications, and your final kit still can be extremely high-quality and affordable.
Personally, I have never had problems with secondhand gear. I always do it using local buy-and-sell options so I can have a look and test everything before purchasing. However, buying secondhand is not the only way to save money on camera equipment if you are on a budget. You also can save big by getting a high-quality manual focus lens instead of an autofocus lens, for example, or sacrifice a bit on specifications (like getting a lens with an f/1.8 maximum aperture rather than f/1.4). Finally, you can save money by purchasing a “consumer” DSLR or mirrorless camera rather than a prosumer option, which will not give you as many buttons and dials, but which usually houses the same great camera sensor inside. Also, a crop-sensor camera rather than a full-frame option is an obvious choice when you are on a budget.
Below is a list of my personal equipment for portrait photography. Next, I will explain why I decided on these particular items:
- Nikon D5100 (or, equivalent sensor, D7000)
- Samyang 85mm f/1.4 ED AS UMC (manual focus lens)
- Nikon 35 mm f/1.8G AF-S DX (autofocus lens)
- Yongnuo RF-603N Wireless Flash Trigger (to use a speedlight remotely)
- Nissin Speedlite Di622, and a homemade softbox
- Basic continuous lightning kit (5500K, 4x85W bulbs, E27 sockets, 20 x 28 inch softbox, 2m tripod)
- Basic white screen background (1.6m x 5m)
Camera and Sensor Options on a Budget
As a self-taught beginner, I needed a cost-effective but decent and relatively high resolution camera sensor with RAW capability. I wanted the sensor to be good enough to provide detailed photos (with a high-quality lens), as well as allowing for some cropping and frame freedom. Along with that, good dynamic range and flexibility when editing in Lightroom were at the top of my list.
A few years ago, this led me to choose a camera sensor with a great reputation – the 16 megapixel option found in the Nikon D5100, D7000, and a couple other cameras. It was already a bargain back then, and it is even more so today. I still use it for all my work! Personally, I opted for the Nikon D5100 to save some money, as well as get the advantage of an articulated frame. That helps quite a bit with manual focus lenses, where I can use the LCD to see my point of focus more easily. It also makes it more convenient to frame family photos. Then again, the slightly more expensive D7000 has the benefit of separate dials for aperture and shutter speed, as well as an AF-fine tune option (among others) if you need to take advantage of more advanced settings.

A Value Portrait Lens (a Prime with a Wide Aperture)
Often, while shooting with my first low-resolution camera kit – the Nikon D50, 18-55mm, and 55-200mm lenses – I was distracted by the zooming option. My indecisive zooming would frequently kill the moment, let it pass, and I would lose the photo. Thus, I decided to go with prime lenses and never regretted it. (By the way, prime lenses also improved my framing a lot.)
I was keen to get similar results as others do with full frame cameras and famous 135mm f/2.0 lenses, the so-called “king” of portrait lenses. My goal was to capture a shallow depth of field and a unique perspective, since you need to step back a bit from your subject with a longer lens like this. I simply sought after pleasant image flatness and great subject isolation from the background.
I looked at some older, less expensive lenses, such as Nikon’s AiS, E or D series. In my opinion, the ones I was looking at suffered from low contrast and chromatic aberrations – not really made for digital photography. However, expensive lenses like the Nikon 85mm f/1.4 were beyond my budget, and I wanted something with an f/1.4 aperture rather than f/1.8.
So, I went a slightly different route and purchased an inexpensive, manual focus lens with relatively new technology: the Samyang 85mm f/1.4 lens. On a crop-sensor DX camera, this provides about the same depth of field and field of view as a 135mm f/2.0 lens on a full-frame FX camera.
You may wonder about manual focusing on this lens. How well has it worked for me? After some time, you simply get used to it, and by now I actually enjoy it. With my Nikon D5100, I mostly did focusing through LCD screen. When I later changed to the D7000, equipped with 1.36x Tenpa magnifying eyepiece (effectively changing viewfinder size to that of full frame body), I did it the classic way. Surprisingly, I can photograph running kids better now with manual focusing technique than while using autofocus tracking on my D7000, although I am that today’s most recent cameras have much better tracking algorithms implemented.
Finally, if I need a wider frame, I go for Nikon 35 mm f/1.8G AF-S DX lens. This lens is also good for photographing a group of people or taking pictures indoors, thanks to its relatively wide angle and large aperture.
Inexpensive Lighting: A Softbox and Flash
There is often a reason to use some soft fill in light in portraiture photography when you’re taking pictures with a flash. Whether it is a high-contrast, sunny day or a cloudy, low-contrast one, shadows often find a way to appear on your subject’s face.
Since speedlight/flash lighting is rather harsh and reflection-prone, a softbox comes in handy to help diffuse the light. I actually made my first softbox together as a DIY project with my wife, since there are plenty of tutorials online for making one of your own. I still have that softbox and use it, which makes it one of the least expensive pieces of photography gear you can own! These days, I also carry around a cheap, folding, commercial softbox in my bag at all times.
As for a flash, it is easy and intuitive to use a simple Nissin Speedlite Di622 with a consumer DX camera like the D5100. (That flash is no longer sold in most stores, but you can buy a cheap AmazonBasics flash, new, for $28.) In general, I use my flash off-camera and place it at different angles to the subject. Indoors, I will bounce the light off a reflective source, such as a wall or ceiling. I use it entirely on manual mode (which is all that is offered on the AmazonBasics model, too). That way, I can set the speedlight’s light power manually to suit my exposure. After a couple of test shots, it’s good to go.

Indoor Portraiture Considerations
In outdoor portraiture, you often need wide apertures for pleasant subject isolation from complex background. I tend to use an aperture of f/2.8 or wider apertures with my Samyang 85mm lens.
If you are in a studio indoors, though, you may be taking pictures against a white wall or scree, where a sense of isolation is already a given. Assuming that you have control over artificial lighting (and, therefore, aren’t running low on light), you can use any aperture you want in order to get the best possible performance on your lens, including something like f/4, f/5.6, or f/8.
Personally, since I do not have spacious rooms and cannot step back a lot, I often use my Nikon 35 mm f/1.8G AF-S DX lens in this case. (In the past, I also used Nikon 50mm f/1.8G AF-S FX lens, but I find a combination of 35mm and 85mm focal lengths to be more versatile with a crop-sensor camera body). Regarding the lighting, the simple option is to bounce a flash off your ceiling or walls. However, you may find that more advanced lighting setups give you better results.
Personally, I find that I get the best shots when combining speedlight and softbox with basic continuous lighting. I will position both light sources at an angle from the subject, resulting in a cross-lighting technique. In addition, I drop a simple white screen from a curtain railing behind the subject. The quick assembly and disassembly of my provisional studio works like a charm every time.

Conclusion
Years ago, when I still used my old Nikon D50 kit, I was queuing with some other tourists to photograph a famous sight. A lady asked me a simple question: Why was I doing this? So I explained some things I had read in a travel guide about the location. Still, she looked at me meaningfully and asked, again: Why was I doing this? She wanted to hear a deeper reason. It is a question we all need to ask ourselves – Why do you take pictures, portraiture or otherwise, and what does photography mean to you?
I believe you can only flourish and truly enjoy yourself in photography after you decide to go your own way. Personally, I love portraiture and taking family pictures, and I have been able to do it on a budget, too. That is one thing I know for certain: You do not need to buy thousands of dollars worth of equipment to capture the photos you want.
Thank you to Lukasz Krzeminski for this article! Lukasz resides in Warsaw, Poland. Previously, he lived in the UK and the US for many years. He took most of these photos in upper New York, Ithaca. Lukasz is an amateur photographer capturing family moments and portrait photos. As a scientist, he is also imaging life at the molecular level, using super-resolution microscopy, as you can see on his website.
© 2018 by L. Krzeminski. All images and post content are the property of the author. All rights reserved.
Good day Lukaz: I need your advice please, I have a Nikon D750, what do you think about the Sigma Lens 150-600/5-6.3 Dg Os HSM Af Contemporary Nikon or the Tamron 150-600mm SP f5-6.3 DI VC USD G2 Telephotot lens. is it good lenses. want to use it for sports. Nikon to expensive.
I have ‘bookmarked’ your website and often come here to get ideas and knowledge!! Keep going!! I love your work!
Lukasz, why don’t you stick to your day job?
Hi Lukasz,
Thanks for a great article.
I am going on a trip from Australia to Finland and Norway at the end of the year to have a white christmas (something I don’t get where I live) and hopefully photograph Northern Lights etc.
After being a “point and shoot” for a long time, this was the incentive to “try something new” and change what I had been doing. After a trip to Canada a few years ago with average photos, I decided that something had to change. I am encouraged with your “less is more” in that you don’t need the most expensive gear to take great photos.
In my researching what was needed to photograph the northern lights and low light photography in general, as that is essentially what Finland and Norway will be in December/January, was starting to get me discouraged as it seemed you needed the latest and greatest to get anything even half decent, and there was no way I could aford that. You’ve encouraged me to look again and really get to know what gear I get and how to use it. In reality, how many people print their photos the size of a house wall where graininess (if that’s a word) or lack thereof is important.
Thanks
Hi Malcolm. I am not into night photography yet :) but I have friends using very inexpensive wide angle Samyang 14mm f/2.8 (also called Rokinon 14mm f/2.8) for this purpose and they are happy about the results. It is a manual focus lens, but wide angle so the precise focusing makes only sense up to around 3 meters. If you take landscape photos and set it to hyperfocal distance somewhere between 2-3 meters than everything from around a meter to infinity will be in focus. I am sure some day light testing is required where exactly place focusing ring in between these 2-3 meters to get best sharpness of your landscape images viewed on LCD for example. After you find the sweet spot you can white mark it on a barrel for example and you are ready for night shooting. I am sure sturdy tripod is necessary for longer exposures but I think you can already get relatively stable $$ tripod with a hook that you can further stabilize after putting some weight on it. Relatively inexpensive full frame sensor of D700 or better resolution D600 would be advantageous in low light situation when you need to boos ISO. But I think even crop sensors of D5100/D7000 will do a decent job :) All the best with your photography and thanks for reading. Lukasz
Thanks Lukasz.
I’ll keep looking as I have a bit of time to find something, buy something and play with it before doing our trip.
A tripod is a necessity for the longer shutter speeds and I will be taking one. Remote stutter release is also recommended to prevent movement on the tripod.
I have also been shown the micro four thirds mirrorless cameras as lightweight for travelling etc. and there is a wide variety of lenses available.
Thanks
Malcolm
Lukasz,
very useful article and really fine and beautiful photos, that I think transmit the reason you made them, your love for your (family) subjects! (you wrote “why are you doing this?”, meaning taking those particular photos you shot).
I found it of particular interest, expecially for the flash tips (diffuser and softbox), since I’m a dad (now he’s about 3 years) and uncle (he’s about 8 months).
One element you mention captured my attention too. You write: “When I later changed to the D7000, equipped with 1.36x Tenpa magnifying eyepiece (effectively changing viewfinder size to that of full frame body)”.
I was tempted to buy a viewfinder magnifier and saw the Tenpa 1.22x, the most similar to Nikon Dk-17m plus adaptors for my Nikon D300, but since my aid was to have a view through a larger viewfinder, as my eyes could have the feeling to look through a wider viewfinder, allowing for an easier view of both the frame and the viewfinder indicators at the bottom (ISO speed, aperture, etc ..), I was said that any magnifier lens wouldn’t have suited for me, as it would have also “cut” part of the viewfinder image, forcing me to move more my eye to look at the viewfinder parts – the image I was going to shoot and framing, the indicators that below.
So I asked myself if you mainly did this because you wear eyeglasses (which I don’t).
Would it be possible for you to make some photos of the viewfinder with/without the magnifier, to so alloe us to see how the image is vignetted or cut by the magnification tool?
Another question is about the focal lenses you use. I’d like to take some “35mm” view like photos, that you’d make by a 35mm on a Full Frame.
To shoot such perspective I’d to use a 24mm or similar fast prime, that isn’t a cheap gear at all for Nikon F-Mount DSLRs.
One choice could be the Sigma Art 18-35 f/1.8, that is said to be a great zoom lens, but I’d mostly use from 24 to 35mm, so I don’t know if it’s worth for me.
I own a Nikon 50 f/1.8 AF-S G, a Nikon 28-105 IF f/3.5-4.5 (incredibly sharp but less sharp and nice as 50mm) and a Nikon 18-35 IF-ED f/3.5-4.5 I almost never use for portraits because of its distorsion. I had this lens when I used my Nikon F60&F80, but I often ask myself if it would it better to sell as used and buy the 18-35 Sigma or a fast 24 prime.
What’s your opinion on that?
Thanks in advance, Sebastiano
Sebastiano,
If your goal is portraiture, then I believe that you are choosing lenses that are much too wide angle. The convention is that the perfect portrait focal length is 85 or 100 mm. Wide angle lenses are known to distort facial features, and to avoid that you would have to shoot too far away. Perhaps you should consider the Nikkor 24-120 or another brand with the same focal length. It gives you the wide angle but also will give you a better focal length for portraits, which will allow you to use it for diverse purposes. Though it may cost more, its multiple uses might make it the better buy. Good luck with your photography.
Hi Elaine,
thanks for your feedback. I understand a moderate wide angle lens, like 35mm on Full Frame, is not the best for portraits if you stay close to the subject, but I know it’s widely used by photographers of people (expecially in street, which is anyway another kind of photgraphy).
I suppose 35mm is the best when you want to capture also the environment around the subject, not only the subject himself. This is the main reason why I’d like to explore this kind of composition also for family portraits.
Thinking to my son, for example, there are moments when he plays at home and it would be nice to capture not only him but also the toys he’s using, and where he’s playing them.
This sometimes requires to have a wider view than the “classic potrait” 85mm or longer lens, and also wider than 50mm on FF, even if slighlty wider. The 35mm would be right.
But why do I need a 24mm or similar prime lens if I still own a 28-105, where you can see you have the 24mm like field of view if you step back a little setting the lens at 28mm?
Because any zoom having 24mm (or 28mm) are not fast enough to shoot in natural light if using a Nikon D300 (or such “old” Dx DSLRs), where you cannot count on a relatively noiseless ISO range over 1600ISO.
For such kind of photos I’d need at least f/2 24mm (or f/2.8 35mm on Full Frame).
Distortion apart, I’ve made some framing test using both my Nikon 28-105 and 18-35. They are f/3.5 to f/4 open at about 24-28mm, noticing I’d need at least ISO 1600 to shoot 1/125 or faster shutter speed (kids tend to move too much sometimes :) ).
I anyway agree with you, for portraits in general the range from 85mm on (to 135mm, for me) on FF cameras is the best.
Using the 50mm f/1.8 on Dx cameras is like shooting a 75mm field of view (quite similar to 85mm), and this give a very nice perspective to the subject.
Kind Regards, Sebastiano
Hi Sebastiano,
I have Tenpa 1.36x magnifier on my D7000’s viewfinder, which definitely gives me a sense of full fame viewfinder. When I look though it I can see indicators but yes there is some cut corners problem, you cannot see them all very well unless you move your eye around. I would not advise it to people with glasses that cannot accommodate their eye very well to see everything. But if you can live with the fact it is not going to be exactly the same as viewfinder on full frame, it is OK.
I understand you have DX camera, and yes unfortunately Nikon did not do any cheap fast 24mm prime lens for DX, as they wonderfully did with 35mm 1.8g DX. I do not have a good answer for you, any Nikon 24-70mm f/2.8 zoom is bulky and rather expensive, I never shoot with one, I cannot tell anything.
But if you want to do portraits and stay with Nikon and autofocus then Nikon 85mm 1.8g is fabulous lens (manual focus Samyang 85mm 1.4 is also great :)). It will deliver much better results than Nikon 50mm 1.8g in my opinion, which is also a great lens by the way in its own focal length class. Then there is already mentioned 35mm 1.8g DX for wider shots, but that is 50mm-like image… However, if I was considering buying more expensive wide lens, than both Sigma 18-35mm 1.8 or Nikon 24mm 1.8g are about the same price. IMHO, third party AF it is never going to be as an original Nikon firmware so I would personally go for Nikon 24mm 1.8g.
Best,
Lukasz
Hi Lukasz,
really thank you for your comments.
I just have the cutting corners problem without using eyeglasses, I cannot see the entire viewfinder and I need to move my eye, and it may be due to my slight astigmatism, so I should try first to see if something improves for my view using a magnifier.
Regarding your suggestion about a fast prime lens, I think it’s a good idea. Nikon 24mm f/1.8G is a FF autofocus lens, and I could try to buy as used in mint conditions.
Best Regards,
Sebastiano
Great article! This is really take less for do more.
Thank you Gabriel. I am glad you liked it.
Lukasz,
Good article, great photos.
I got my start with photography when I had kids and I (actually my wife) wanted better photos of them.
Then, in the first two years I took so many photos that we all burned out and I drifted away into others forms of photography.
Anyway, one pitfall I noticed with people trying to transition into serious photography is that they usually prioritize the camera over the lens. In other words, they’ll get the best camera within their budget and that usually requires going with the kit lens. The problem with the kit lens is that it will deliver photos only marginally better than the point-and-shoot or smartphone they were using before. So they get deflated and lose interested. This happened to a friend of mine until I pointed him to a 200$ 35mm 1.8 prime lens. When he saw what he could do with that lens, it really brought his interest in photography back to life.
So yeah .. that initial choice of gear really does matter but not in the sense most people see it.
Thank you Talha. I could not agree more with you. I too saw people discouraged because they bought expensive full frame kit and wanted to use it as a regular point-and-shoot expecting much better results. I always advice my friends to learn some photography before they decide for investment and to start small before they find what they really need, where they want to go with it. Not surprisingly, I recommend D5100 together with 18-55mm kit as well 35mm f/1.8 DX to see what focal lengths they like, how big of a change a wider aperture is, and what is it like to use zoom vs. prime lens. If they mostly stay at 55mm and try portraits then again I surprisingly hehehe recommend Samyang 85mm f/1.4 (I really do believe this portrait lens has best quality-to-price ratio out there) or autofocus Nikon 85m 1.8g if they cannot stand manual focusing… So yes, initial learning, rationally buying and testing can save on investment disappointment.
Neat photos, good story (my same story – kick to get started was wife’s first pregnancy), and great timing as baby T2 is due in two weeks. Good for you. Have you started to do portraits as a paying hobby? I’ve found I’m better at photographing my family since I started doing small paid jobs – I work harder and think more when I’m getting paid and that pays off when I’m shooting fun family shots too.
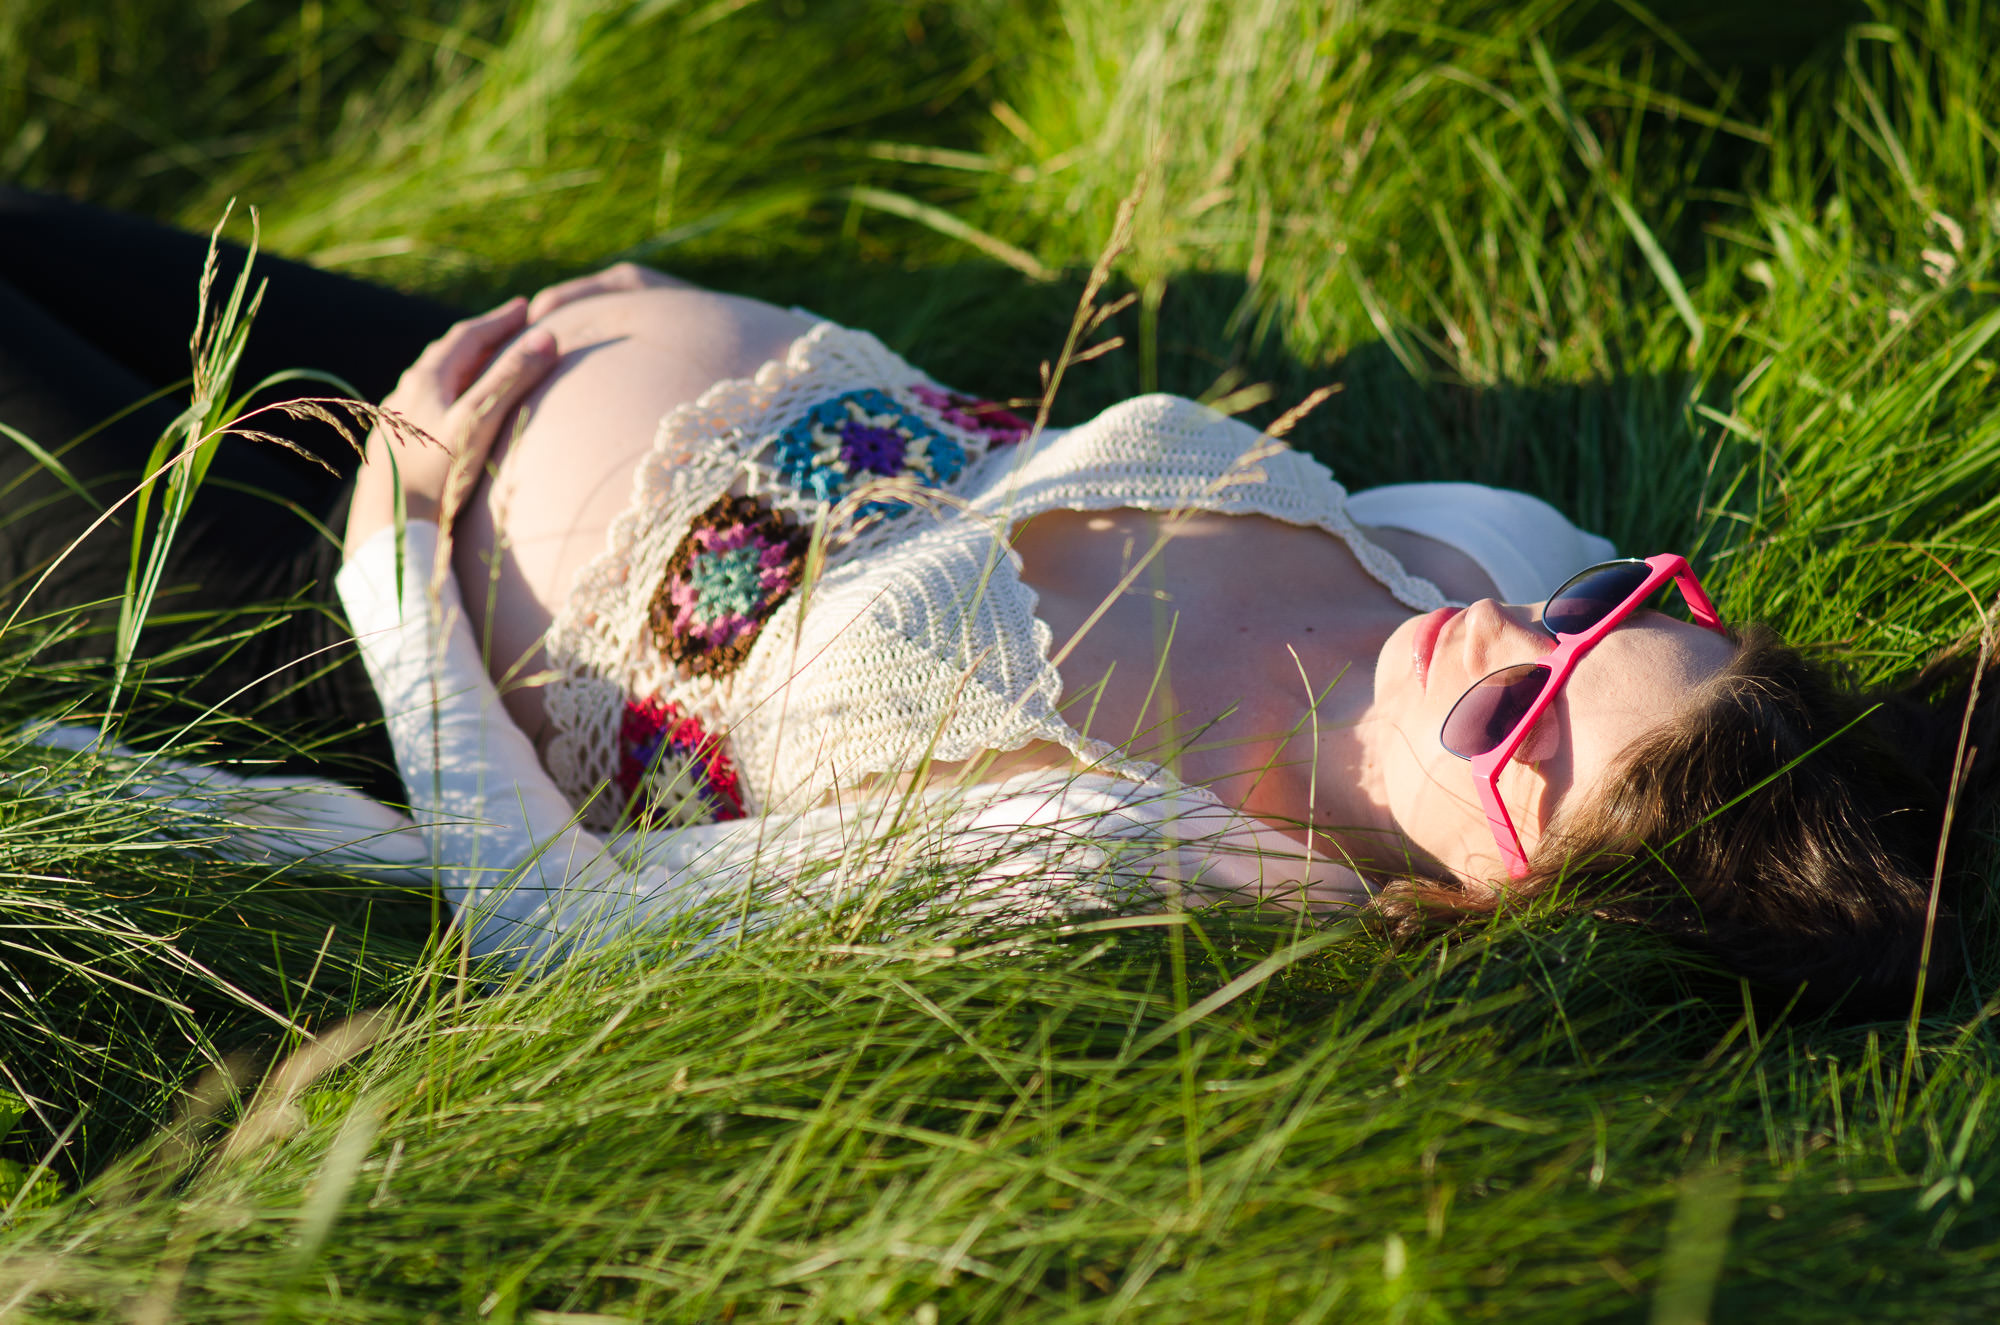
Thank you Sean. No, not really. I was thinking about it though, my wife does crocheting for the hobby (she made herself all the crochet items from this post) so I guess we could make a nice combo :) Maybe someday, thanks for the advice. Have fun with photo shooting you second baby. I now have two boys and less time for everything, but always try to find some time to take photos of them.
Great article!
So true that we don’t need the latest and most advanced gear to make beautiful photos.
Your article make me want to go out and take picture.
Thanks.
Thank you David. I am glad you liked it and wish you all the best with your shooting!
on a budget ($$$) : you will very likely spend more money on kid’s gear than on anything else for awhile…
I would also advise to get some rugged used gear. I got myself a good deal on a (little) used D700, and I use cheap & used AFD glass. Some of the best though : 85 1.4 and 180 2.8.
on a budget (time) : it’s not always easy to find time for shooting and post processing.
but it is so rewarding when you get, once in awhile, a perfect shot at the right moment
motivation : your babies are unique, they grow fast, their attitude changes even change faster. Every moment you spend with will never come back, Can you think of any better reason to use your camera ?
Agreed. Carefully selected $$$ gear can place you where you want to be with your family photography. Another nice thing is you know you make the most (or at least a lot) of the gear you have instead of owning $$$$ gear and not having enough time to use it well, because you are still amateur photographer and have regular everyday job …