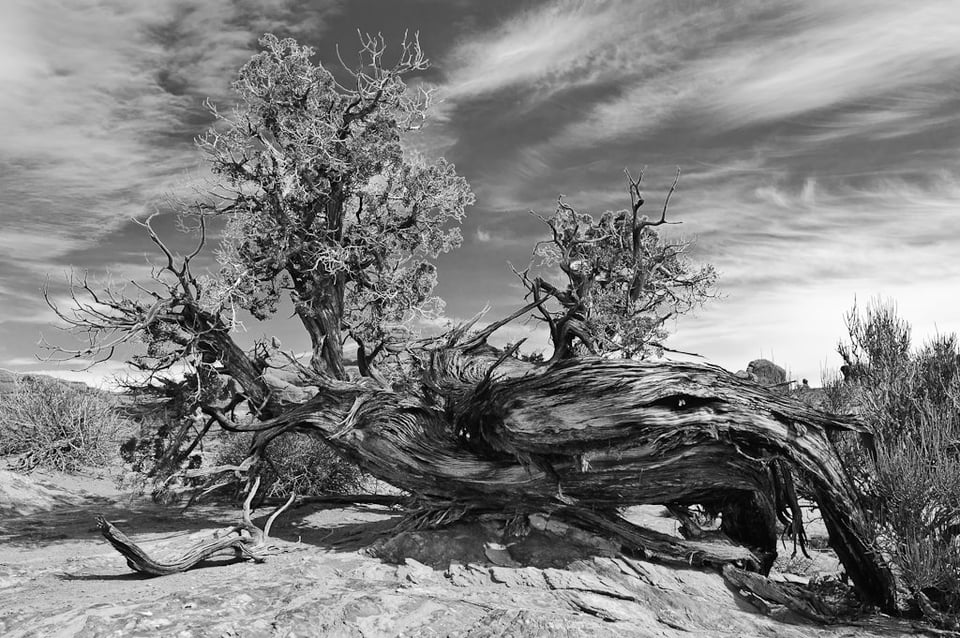
If you are inspired by the works of Ansel Adams, James Nachtwey or other masters of black and white photography, you probably want to try doing some B&W yourself. If you don’t know how to take black and white pictures and where to start, then the tips below might help you to get into the world of B&W photography. (And check out our new comprehensive guide to black and white photography if you want additional tips.)
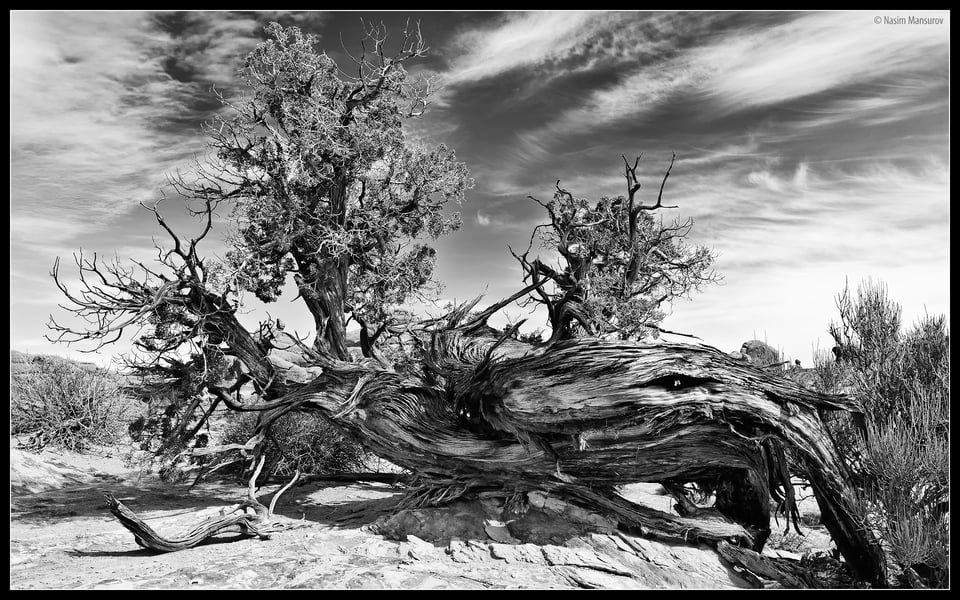
Table of Contents
1) Colors in Black and White Photography
As strange as it may sound, black and white photography is not about the tones of white, grey and black colors that we see in B&W images. Instead, it is all about the colors that are recorded by the camera and how those colors are converted to different shades of grey, whether in-camera or through post-processing. Back in the film days, photographers used color filters in front of their lenses while shooting B&W film, then would employ special darkroom processing techniques like dodging and burning on top of that to lighten or darken particular parts of a photograph (some landscape photographers still do it today with medium and large format film).
With modern digital cameras this cumbersome process is no longer necessary, since most of the effects, including the effects of color filters, can be simulated in post-processing software like Photoshop and Lightroom/Aperture. The nice thing about digital, is that you can non-destructively (meaning without damaging the original file) experiment with black and white as much as you want and get many different “looks” of B&W by playing with colors and adjusting some sliders. Before jumping to B&W techniques, let’s go over color filters and camera settings first.
2) Color Filters
When a specific color filter is used in front of a lens, it absorbs other colors and lets the same color as the filter pass through. For example, if you use a red color filter, it will let the red color through, while blocking green and blue colors. Since all colors are combinations of red, green and blue (RGB) colors, filters are capable of blocking certain colors from a color combination. For example, a green filter will make a yellow object (which is a combination of green and red) appear green, because the red portion of the color combination is blocked. Now that’s what would happen in a color photo. What if we are converting colors to black and white? One thing you need to remember, is that filters lighten their own color and darken the colors that get blocked. So if you were photographing a landscape with a blue sky using a blue filter, the sky would be very bright when converted to black and white. If you used a green or a red filter, on the other hand, the sky would appear much darker. Take a look at the following example with different filters:
Now pay attention to what happens here. When a blue filter is used, the sky looks very bright, but the green and the red colors are very dark because they are blocked. When a green filter is used, the green leaves on the tree appear lighter than the red and the blue colors. When a red filter is used, the red colors appear bright and green with blue are much darker. That’s how color filters affect images in B&W photography!
3) Camera Settings
Many of the current DSLR cameras allow you to switch from color to black and white/monochrome inside camera menu and some of the advanced DSLRs even allow you to pick different types of color filters for better black and white conversion (Nikon DSLRs have a “Monochrome” Picture Control to convert to B&W). While it is nice to be able to shoot in B&W from DSLRs directly, since you are stripping the colors from images, you are basically limiting your post-processing options if you shoot in JPEG format. Once colors are converted to B&W, there is no going back. On top of this, in-camera B&W processing is often poorly implemented and the camera gives you no control on how specific colors or regions of the image should be treated. Therefore, it is best to take pictures in color, then convert them to black and white in post-processing.
If you shoot in RAW, no matter what color profile you apply on your camera, the file will contain all information you possibly need from the camera for successful B&W conversion. If your intent is to shoot in B&W and see the effect on the camera, feel free to set the camera to B&W mode. During the import process, if you use software like Capture NX2, your images will be imported as black and white, although you can change them back to color any time later. If you use Adobe Photoshop or Lightroom, the images will be imported in color and the black and white settings you used on your camera will be lost. That’s because Adobe products do not have the capability to read the proprietary manufacturer information from RAW files. So shoot in RAW and you will be good to go.
Here is what I would use on my camera:
- Image Quality/Format: RAW
- RAW Bit Depth: 14-bit (if available)
- ISO Sensitivity: Lowest ISO (base ISO)
- White Balance: Auto
Similar to color photos, you want to shoot in RAW with the highest bit depth available in order to be able to pull as much data as possible for color filters, with a minimum amount of noise. As for White Balance, I personally set mine to “Auto”, since WB settings are not important when shooting in RAW. The only thing that you need to make sure, is that your White Balance is corrected after you import your photos to Lightroom/Photoshop – or you will have problems with colors during the B&W conversion process.
4) Methods to convert color images to B&W
When it comes to converting color photographs to black and white, there are many ways to skin the cat – from a very simple method of desaturating colors to rather complex methods of applying different shades of gray on particular colors. Let’s go through some of these methods in detail and see the type of results we can get from these different methods.
4.1) Simple Black and White Conversion
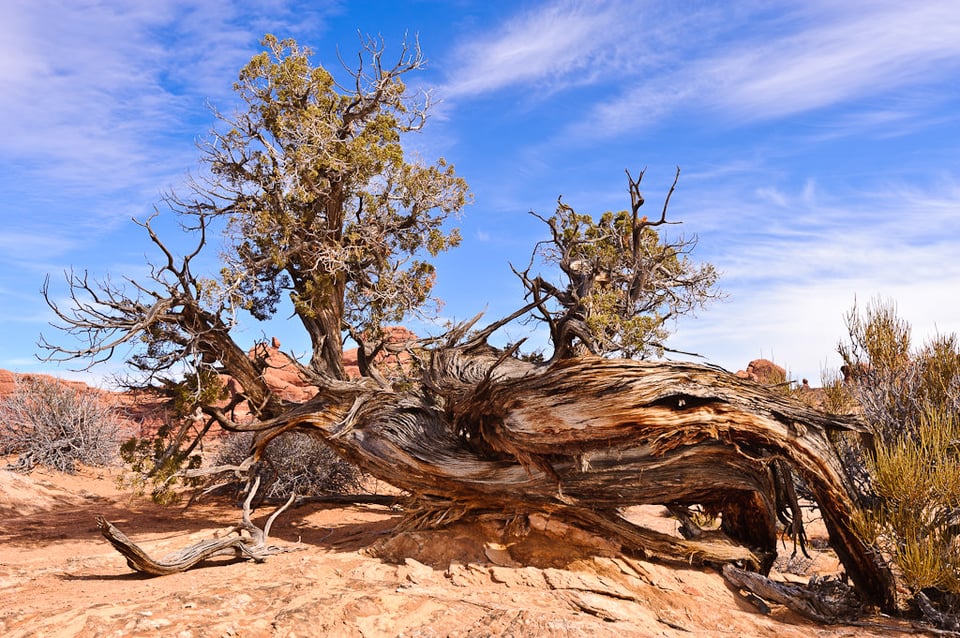
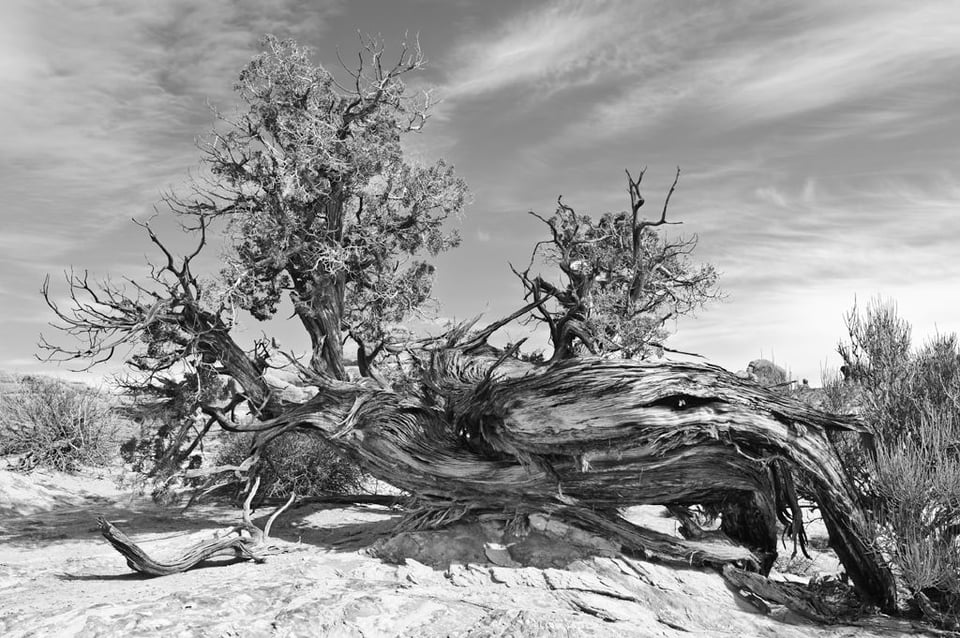
The simplest (and the worst) method to convert color photographs to black and white, is to simply desaturate or “discard” the colors. You can do this pretty much in any image editing software. If you use Lightroom, you can simply go to Develop Module, then click “Black & White” under the “Basic” tab. If you use Photoshop, you can achieve a similar result by going to “Image”->”Adjustments”->”Desaturate” or press Ctrl+Shift+U on the keyboard. Here is the color version of the first image on top of this page:
And here is how the image looks when I desaturate the colors:
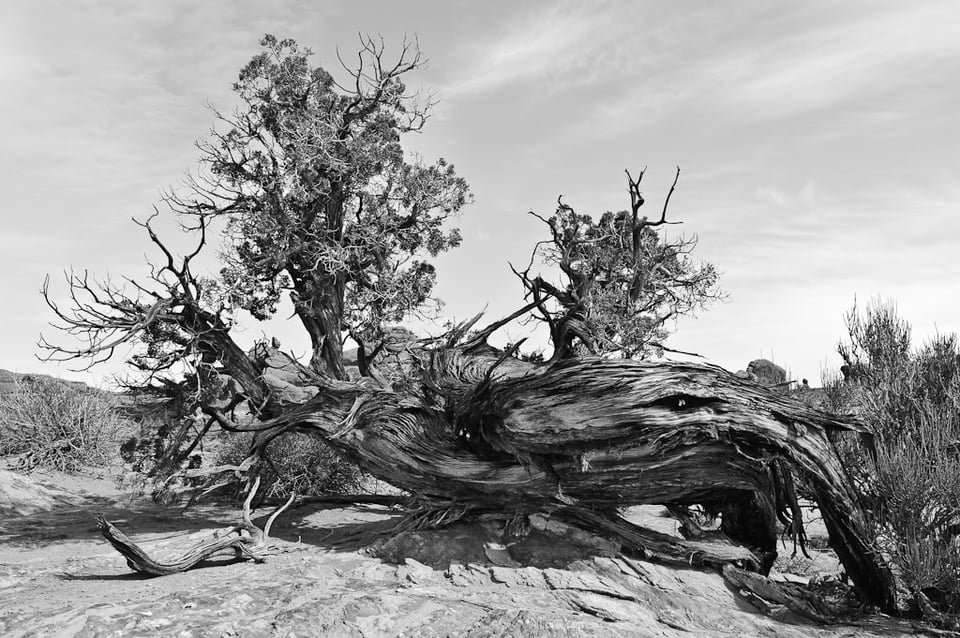
The tree and the ground look fine, but the deep blue sky and the clouds are now mixed together and look very pale together. That’s what you get when you desaturate colors – you cannot control which colors you want to emphasize and how bright/dark they should come out in the final image. Let’s move on to better ways to convert color photographs to black and white.
4.2) Lightroom Black and White Mix
Lightroom has a much better method to convert color images to Black and White besides the method shown above. It is located in Develop Module, under the “Tone Curve” tab. You will find three different selections you can click on and one of them is “B & W”. Once you click on it, the information below will change to “Black & White Mix” with some color selections. Here is how it looks:
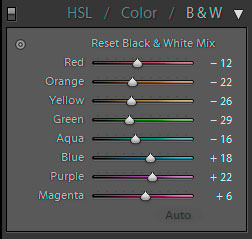
The initial look of the image will be similar to an image that was desaturated and you will have to play with the colors and tweak the image to get a better result. The above colors sliders (Red, Orange, Yellow, Green, Aqua, Blue, Purple and Magenta) allow you to control how dark or light each color will be in the final image. When I desaturated my sample image earlier, the sky and the clouds got mixed up in a very similar shade of gray. Let’s see what happens when I move the blue slider to the left to make it darker (-40 value):
Not bad, the sky is now darker than the clouds and I am getting a good separation between the two. I can do the same thing for other colors like orange and red and control how dark or light they will be in black and white.
One very powerful feature of Lightroom a lot of people do not know about, is the “Direct Adjust” functionality that can be found in some of the tabs, including B&W. Here is where it is:
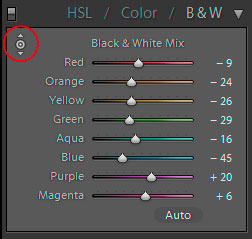
What it allows you to do, is instead of moving the sliders on different colors, it allows you to click on any part of the image and change its brightness by moving the mouse up or down. Give it a try – once the little dot is clicked with your mouse and transformed to a dot with up/down arrows, left-click on any part of the image you want to brighten or darken and then move your mouse up and down to see what happens. Moving the mouse up will increase the brightness, while moving the mouse down will decrease it.
4.3) Photoshop Black and White
Photoshop has a very similar functionality as Lightroom that allows you to move sliders to control the different shades of gray in black and white images. You can access it through “Image”->”Adjustments”->”Black & White” or by pressing Alt+Shift+Ctrl+B shortcut on your keyboard. Here is how it looks:
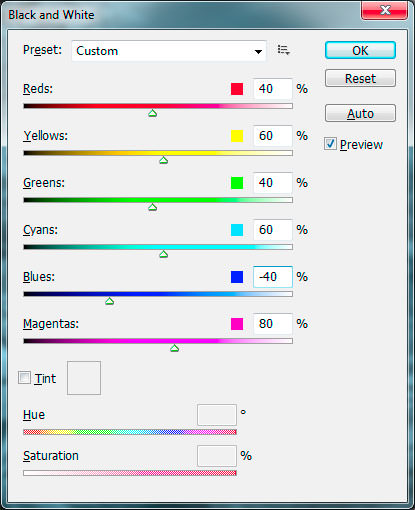
The nice thing about this tool, is that it comes with different “Presets” to choose from. Before you move any sliders, I would start off with the presets and see if any of the particular presets looks good on your image. Once you pick a starting point, you can then adjust different colors to brighten/darken certain colors. I recommend experimenting with the tool to get the desired result.
4.4) Photoshop Channel Mixer
Another popular method to convert color images to black and white is using Photoshop’s Channel Mixer. You can access the Channel Mixer by going to “Image”->”Adjustments”->”Channel Mixer”. Compared to the Black and White method above, the Channel Mixer works more like the traditional method, where a color filter is used on the camera lens. Here are the available color filter presets:
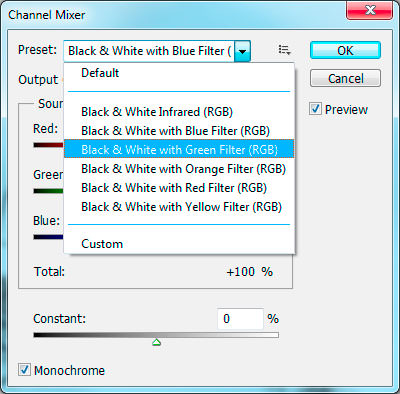
You can pick Infrared, Blue, Green, Orange, Red and Yellow color filters with the Channel Mixer tool. As I have pointed out under “Color Filters”, different color filters affect how light/dark certain colors will be. So if you have a scene with a blue sky and you want the sky to appear dark, pick any color filter except blue and see which filter works best for you. The only caveat with using this tool, is that whatever changes you make to each source channel, the total of the three (Red, Green and Blue) should be 100, or the image will be either brighter (if over 100) or darker (if under 100):
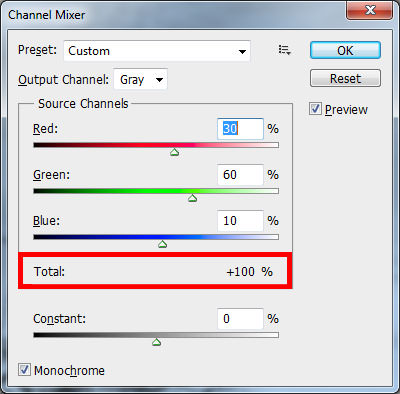
Once again, I would encourage you to play with the Channel Mixer and see what settings work best for each individual photograph.
5) Adding Contrast and Clarity/Structure to B&W Images
No matter which conversion method you use, once the images is black and white, it will most likely look rather flat. For those situations, adding more contrast and structure to your black and white images will make them look more “punchy”. Let’s go back to my earlier example with the tree. Here is how it looks like after I used the Channel Mixer with a Red Filter:
Indeed, looks rather flat. The clouds are mixing with the sky and there is definitely a lack of contrast here. The first thing to do in situations like this, is the obvious – increase contrast. You can do it by sliding the “Contrast” to the right in Lightroom and by going to “Image”->”Adjustments”->”Brightness/Contrast” in Photoshop (you can also use “Curves” in Photoshop to increase contrast). Don’t add too much contrast, as it will add too much black to the photo. I would start with +20 and try not to exceed +50 contrast. Once the contrast is added, go back and compare before and after to see how the image was affected. Now you should see a little more punch and structure in your B&W image.
Next, we work on the image details or “structure”. If you use Lightroom, you have something called “Clarity” under the Basic tab in Develop Module. Slide that Clarity to +50 or more and see what happens – you should see more separation and structure in the photo, giving a 3-dimensional look to your B&W photo. In Photoshop, the best way to do this is by using the “Unsharp Mask” tool. Go to “Filter”->”Sharpen”->”Unsharp Mask”, which will bring up a new window. Normally, when you sharpen your images, you would use a very small radius of 1-2 pixels to bring out the edges. In this case, our purpose is not to bring out the edges only, but to make the photo look very detailed. We achieve this by using a very large radius, which will not touch the detail edges, but rather will make everything look more detailed. All features, including the clouds, will look more separated from the sky and other plain areas. Let’s take a look at this effect in action:
Not bad, the B&W image now looks even better. Compare it to the previous image and you will notice a big difference in detail/structure. Here are the settings I used for the above photo:
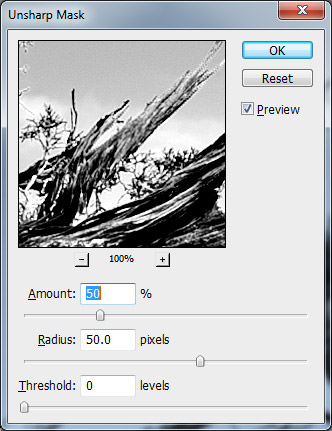
The amount and radius values you should use varies by photograph. In some cases, a larger radius with a 50% or more amount will yield better results, in others a smaller radius is sufficient. The radius will also depend on the size of the image you are working with. If you are working on the original image with large dimensions, a bigger radius will work better. For smaller resolution images, use a smaller radius.
6) Sharpening
The final step is now to sharpen just the edges of the photograph, so that the whole image looks sharp. In Lightroom, go to “Sharpening” under “Detail” in Develop Module and increase the amount of sharpening from the default value of 25 to 50 or higher. I personally use the following values as as default for my images:
- Amount: 50
- Radius: 1.0
- Detail: 50
- Masking: 0
When I export my images in smaller sizes to be published on my blog, I typically set “Output Sharpening” to Screen and Amount: Standard in the Export window.
If you use Photoshop, use the same “Unsharp Mask” tool, but we will have to drop the radius back to 1.0 or so. I recommend applying sharpening after resizing your images, not before. The “Amount” of sharpening depends on how much sharpening you have already applied before, but I typically pick between 50 to 75.
7) Photoshop/Lightroom Plugin – Silver Efex Pro
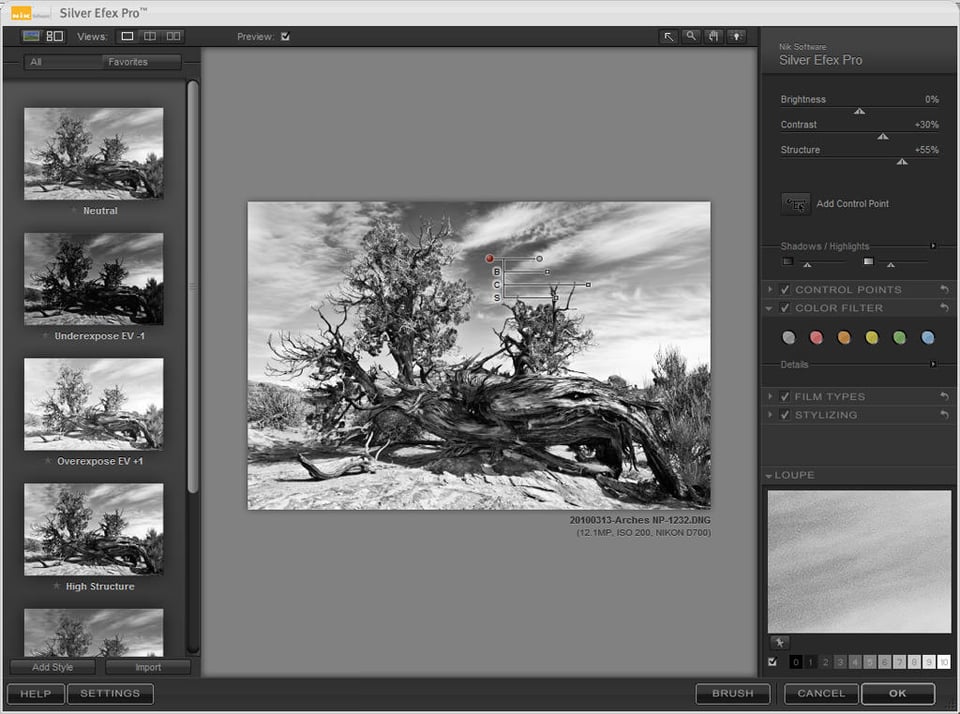
All of the above methods and steps I have shown are great, but they are somewhat limited in their functionality and require multiple steps to get the desired look. If you do not have the time to experiment with each individual photo and you are looking for simpler ways to instantly transform your color photos to beautiful black and white images, then I would recommend using specialized plugins that do the B&W conversion. My favorite tool for the job is Nik Software’s “Silver Efex Pro”. I have tried several different Photoshop plugins and Silver Efex is by far the best one on the market. Its power is not only in providing lots of different presets to choose from and using color filters, but also in selective conversion – a unique, yet very useful feature that is common to Nik Software’s plugins. You can place a control point (or multiple control points) on a particular spot or color within the image and you can adjust its brightness, contrast and structure. You can change the radius of the control point, which allows you to limit the affected area. For example, if you have a blue sky and another blue object on the ground, using any of the above methods would result in both the sky and the blue object to be converted to a similar shade of gray. With Silver Efex Pro, you can make the blue sky dark and the blue object on the ground lighter by using the control points. Here is a screenshot of Silver Efex Pro in action:
In the above screenshot, I selected the “High Structure” preset (I use it more than any other) and then added a control point to the sky. Next, I moved the “Brightness” slider on the control point to the left, which dramatically darkened the middle portion of the sky. Contrast and Structure were already set to +30 and +55, respectively (through the selected preset).
Silver Efex Pro has lots of different options to convert color photos to black and white. It even has the ability to give a different tone such as sepia to images through the “Stylizing” menu and can do other cool stuff like burning/darkening edges and vignetting.
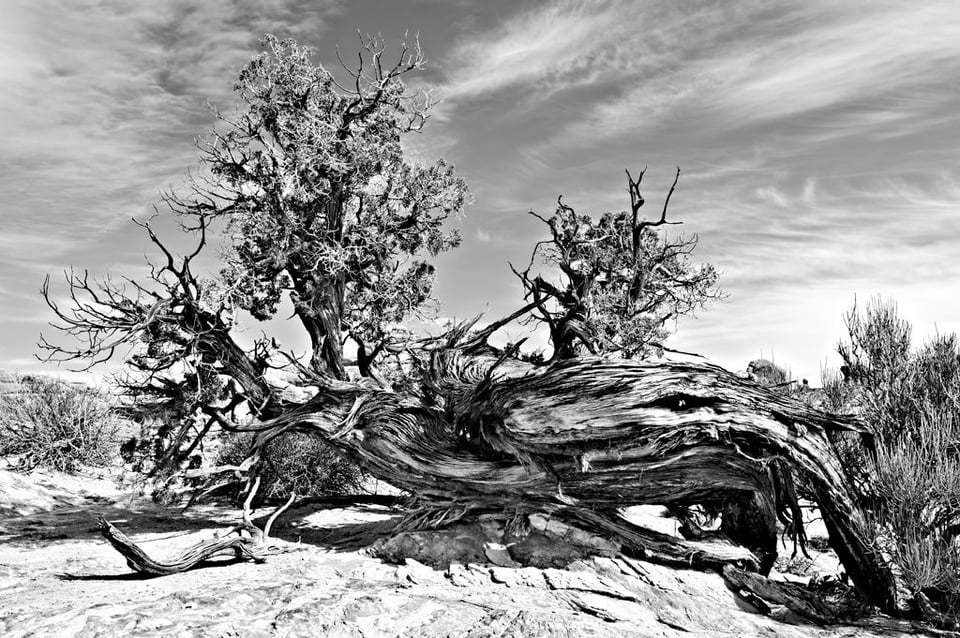
The first image in this article was converted to black and white using Silver Efex Pro. Here are some more B&W images that were also converted in Silver Efex Pro:
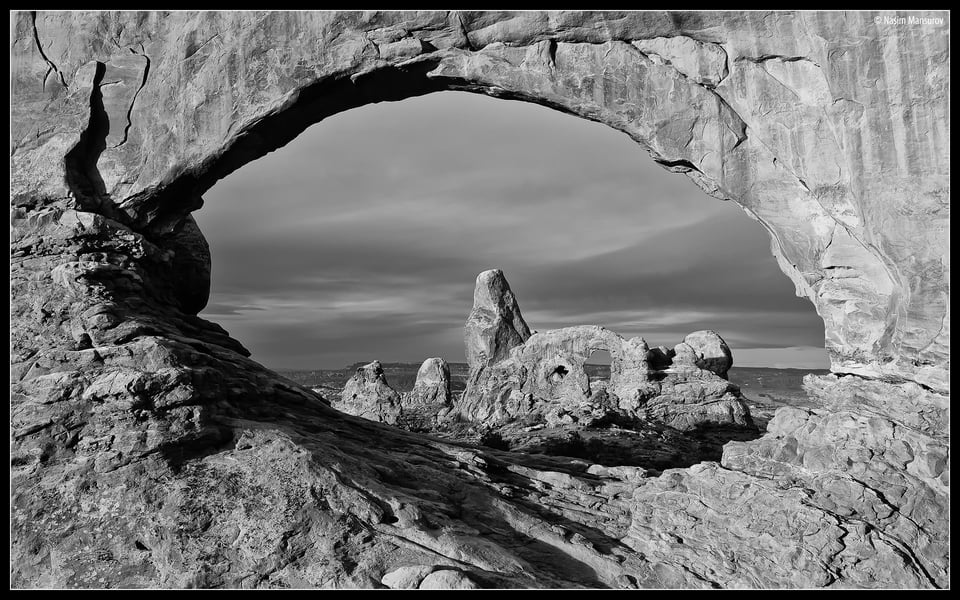
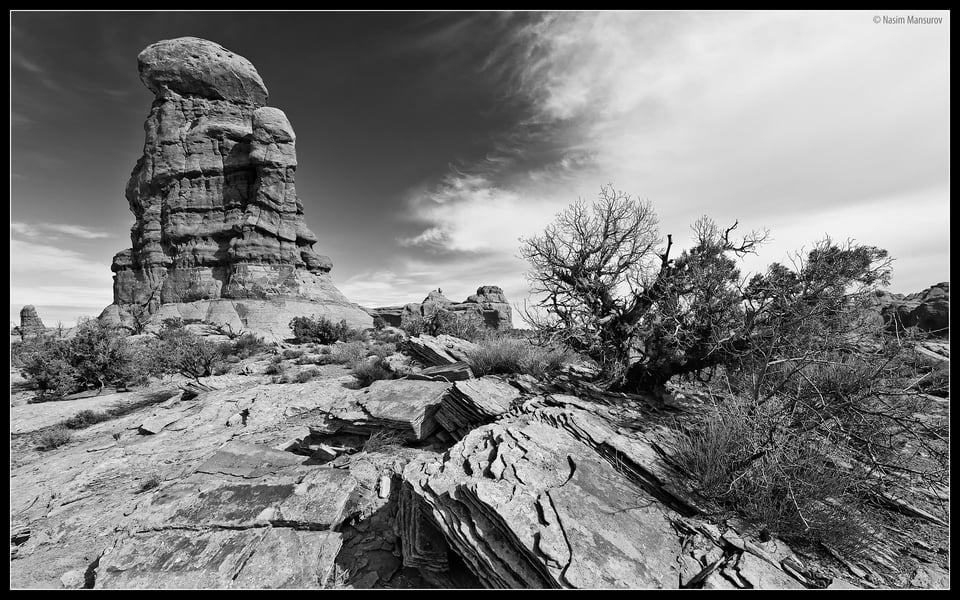
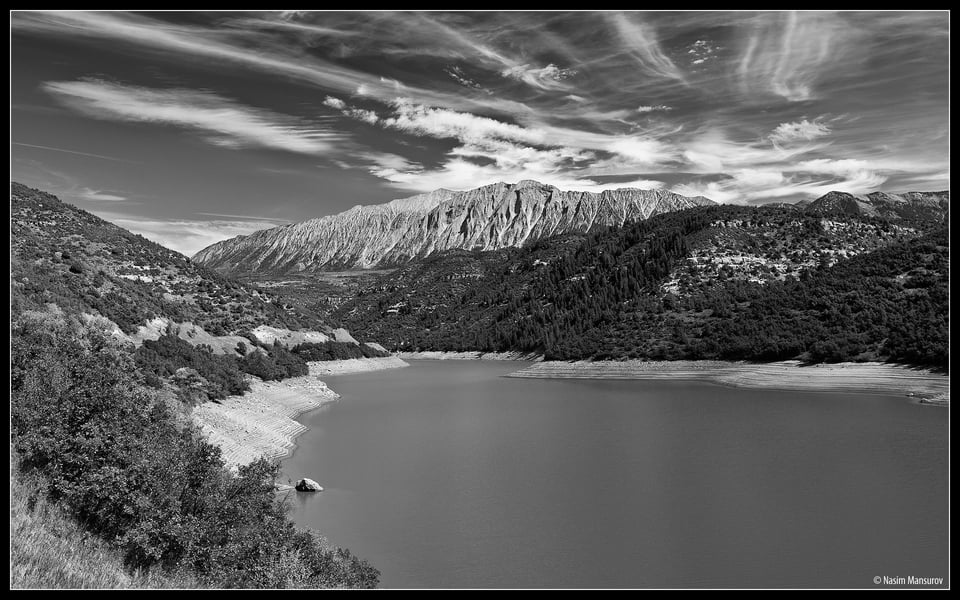
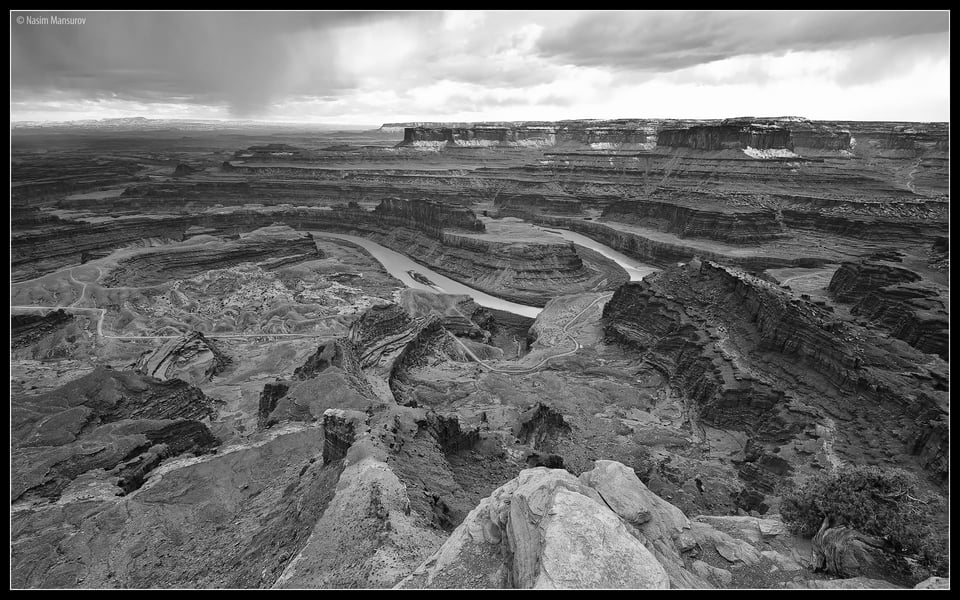
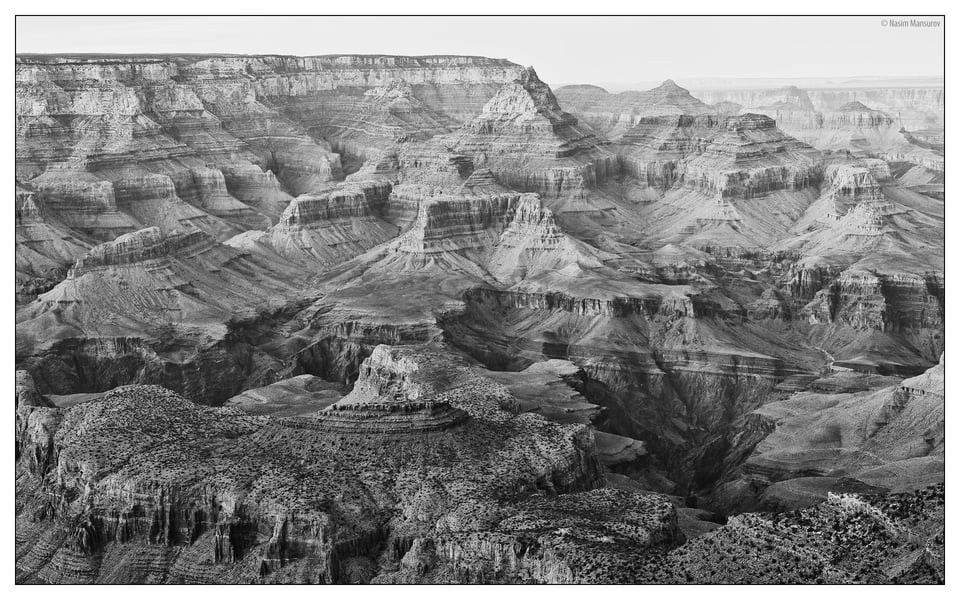
The high-resolution versions of the above images can be found in the Wallpapers section of the website.
The last thing I wanted to point out, is that when it comes to black and white photography, there is no “magic template” or workflow that works for every single picture. While you can have a standard set of settings for color photographs, you cannot apply the same B&W techniques to all photographs, due to different colors and shades of gray in images. In addition, converting color landscapes to B&W is also not the same thing as converting color portraits to B&W. When you work with portraiture, you have to employ different conversion techniques and be more careful with color filters, contrast and structure settings.
If you enjoyed this article, you may be interested in reading about our complete techniques for taking the best possible black and white photos. And if you have any questions about black and white photography, please feel free to ask in the comments section below!

Nice article!
Can you tell me did you do some global adjustment in LR and after that export ( edint in … ) to SILVER EFEX PRO?
Thanks!
Hello, can someone help, is there a more easy way to switch from colour to monochome in aperture mode?
Hello I am still learning photography and am struggling with switching from monochrome to colour. Is there a simpler way to switch rather that going to the settings. I have done a couple of friends weddings and was switching from auto to TV as TV was set up in monochrome. Can I keep the camera on the same setting so I am not switching back and forth? Thank you.
Hello I am still learning photography and am struggling with switching from monochrome to colour. Is there a simpler way to switch rather that going to the settings. I have done a couple of friends weddings and was switching from auto to TV as TV was set up in monochrome. Can I keep the camera on the same setting so I am not switching back and forth? Thank you.
Nasim: I’d love to see location information for some of these pictures. Not that i want to visit each of these locations but it gives me a sense of the type of locations to scout for these types of pictures.
I recently discovered this website & love how you & your team have catered to multiple segments of readers.
thank you for a generous and clear article. you have saved me a lot of time and heart-sink !
really the best lens work and a proper guidance is shared by you helpful for newbie as well as beginners
Your pictures take my breath away. As someone who has just taken up photography these pictures are incredibly motivating!
Nasim- Thanks for this article, some months back I purchased Color Effex Pro and think it’s great. It has transformed my wedding portraits (subtly but very positively too). This software has a B & W conversion filter included with presets and the usual sliders; if I already have this option….. do you think Silver Efex Pro is worth buying as well?
Paul, absolutely. I love Silver Efex – it is one of the best B&W conversion tools available on the market today…
Ok, thanks….. I had a feeling you would say that :) Think I’ll have to treat myself!
I use both Iphoto and Aperture on my Mac.
Can I manipulate gray shades as described
in your article with either of these programs
or do I need to buy (and learn) Lightroom?