Many of our readers ask me how I smoothen skin and get rid of blemishes in Photoshop. While the manual process below is fairly simple, there are some available presets and programs that could be utilized to help streamline the process for photographers. Many professionals though (including myself) prefer to have a full control over the image and do all the blemish removing and glamour skin smoothening manually.
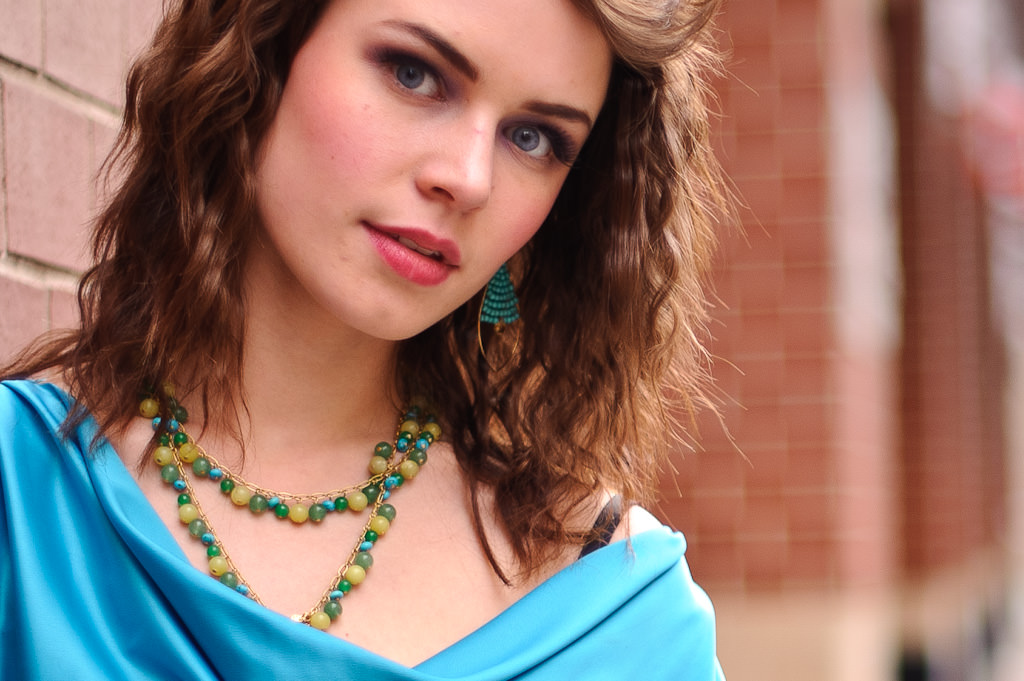
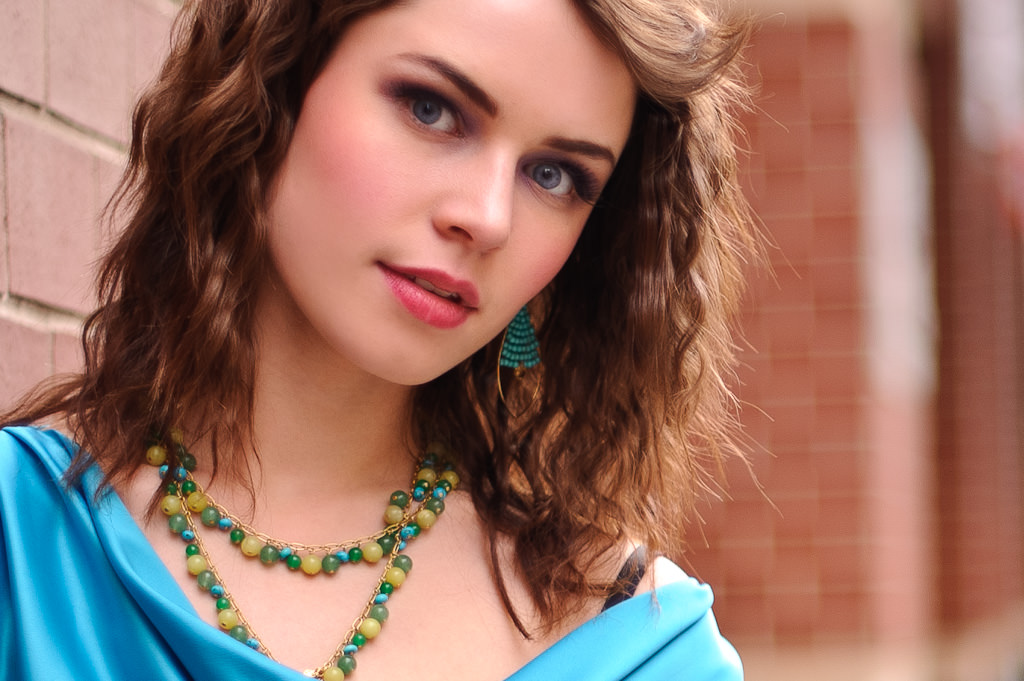
This is probably the most known and most used method out there to help you achieve the radiant skin tone. Once you know all the steps, it gets pretty easy to utilize this method. I will use the following image as an example:
If there are many blemishes to get rid of, use Photoshop’s spot healing brush to clean them out and you can use below smoothening method to even out the skin tone.
Note: This method will not get rid of major skin blemishes. It is intended to even out the skin tone and give the skin a smooth look while preserving the natural pores of the skin. In order for this method to work effectively, you will need to use the healing brush to remove bigger and visible blemishes. You can also use the clone tool and the patch tool to effectively remove the blemishes.
Once you open the image in Photoshop your first step should be taking care of the blemishes.

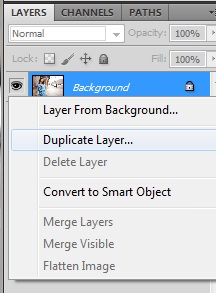
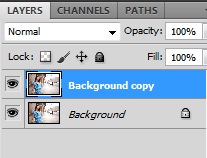
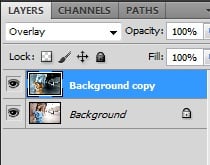
After you are done with the above step, create a background copy by right clicking on the Background and choosing Duplicate Layer.
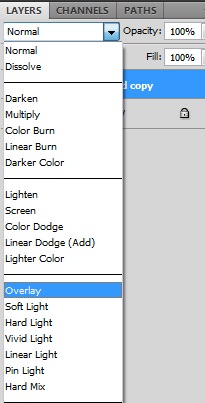
Change blend mode to Overlay and Invert the layer by pressing Ctrl+I.
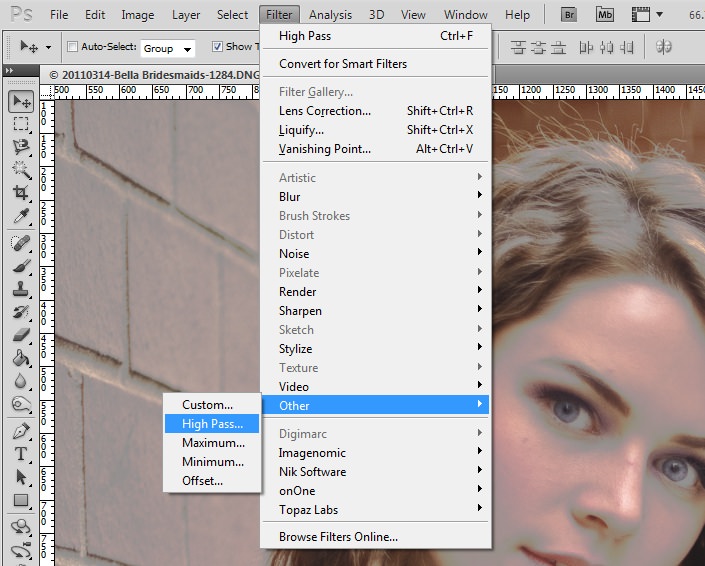
Go to Filter->Other->High Pass.
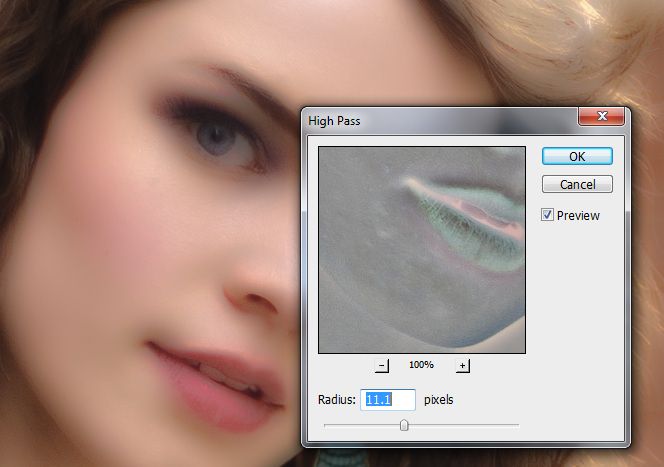
When the High Pass window opens up, start increasing the radius until most skin blemishes are gone. Soft edges are not a problem at this stage as we will reverse the effect in a little bit. For this particular image, I settled it to 11.1 pixels and hit the OK button.
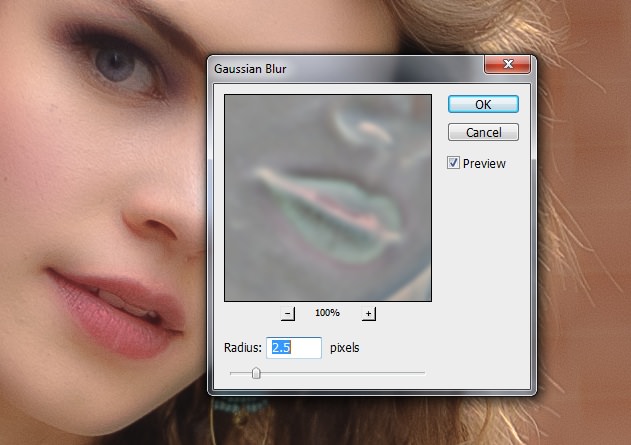
Now go to Filter->Blur->Gaussian Blur. This step will reveal how much of skin texture you are willing to preserve. Set a high radius this time, which will reverse the High Pass step. But by gradually going down on radius, visually you will be able to tell if you are comfortable with the combo of High Pass and Gaussian Blur; Smoothening and still preserving some skin texture.
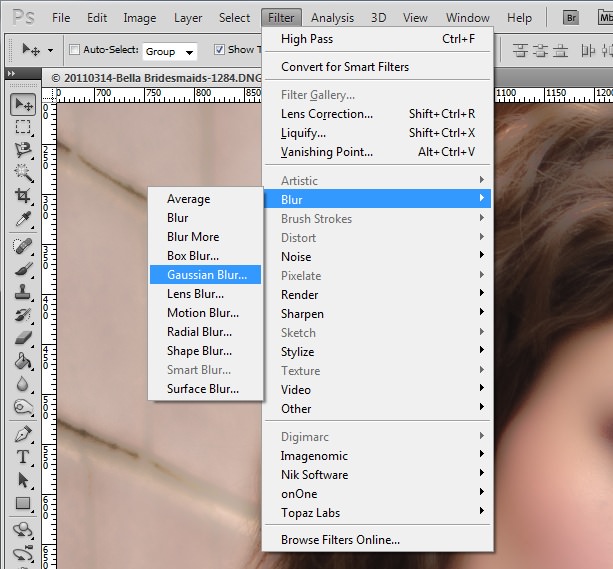
For this particular image I ended up with 2.5 pixels. Visually I thought this was good enough for me to have a smooth, evenly toned skin with some skin texture I want to preserve without turning my model into a plastic doll. Next, hit the OK button.
The next step is to work with masks in order to blend all the previous steps. Make sure you are still on the Duplicate Layer, press Alt+Click on layer mask icon which will yield a black mask. You can see it on the Background Copy:
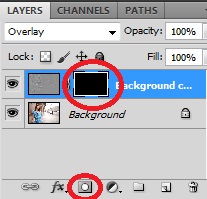
Choose a Soft Brush, set your foreground color to white and start painting over the blemishes and the skin. Remember that we want the skin to be soft and other parts of the body to be perfectly intact. While painting, be careful not to paint over the edges of the face, nostrils, lips, hair, eyes, eye brows and such.

Once you are satisfied with the result click Ctrl+E to merge the layers and Save the image. Here is our final result for this image:
I hope you will find this tutorial helpful. Once you get used to the entire process, it is going to be a breeze. Let me know if you have any questions!
dear Lola, thank you so much for the tutorials, i’ve been learning so much from your website
i have a question , right after i put 2,5 px on gaussion blur, i went to click alt on layer mask, but it didnt give me the black layer mask, did i do something wrong?
thx
Dear Lola,
Thanks a lot.Really appreciate your willingness to share knowledge. Remember reading more than one article by Mansurov that starts with ” I will tell you all I know about ” When I read that I feel that I know ‘this’ man ! :) God bless you both.
Lola, thanks for the tips. I appreciate so much that you share your knowledge and tips.
I’ve found that the eraser tool functions, not the paint brush. The paint brush functions for other aplications, but not on the mask. What is the reason?
Makes no difference what i do…THE PAINT BRUSH HAS NO EFFECT ON THE MASK..cannot find any fix, followed the steps to the T..all goes well until time to paint white on the black mask, the brush has no effect!
Wow!This is something that is not taught in a Photoshop school.I have been wondering how this was possible without any blemish on the skin surface of a model. I once saw an actress(i would not name it)in real whose skin were not that smooth than in her photos and advertisements. This magic has been hidden like a myth by photo journalists so many years. This article is like discovering a mythical land. Thanks alot for such selfless zeal!
Wow! All that i can say is WOW! This website is really helpful! Currently I collaborate with some photographers and do photo editing for them and you make my life easier!
Dear Lola,
You are really very dedicated to your passion. I m developing my photography passion now a days.
As I m new photographer, i have only one lens Tamron 80-270mmwith D7000. I think its really good. Do you have any inputs on the lens I have or i should have ??
I always think I cannot take nice portraits as I don’t have prime lens ;-)
But now i think with this above technique I should be able to make my portrait more better.
Btw, your site is really fantastic and daily I started reading it to get lot of knowledge.
Many Thanks,
Sucheta
I have the same issue asJohn Acevedo above, the paint brush has no effect after adding the layer mask. I noticed there was no response to his issue. As far as rastorize it was done at the beginning. Flattening is another step at the end. It doesn’t apear we are on the same page.
Hi Max, are you inverting the layer after changing the blend mode? I use tried the tutorial with multiple different images and each time it works.
Hi! I’m having the same issue. I know I’ve done this very tutorial in the past and had zero issues but for some reason it is just not working once I add the layer mask and try to paint over it. I’ve tried it with a few different file types but no luck. Any suggestions?
The missing step> “RASTORIZE”…
Hi Max, yes, you have to flatten (merge layers) the layers and It has been mentioned in the article right on the bottom.
Rastorize and flatten are two different steps. The paint brush has no effect after adding the layer mask. What am i doing incorrect?
Hey, Max
I do not quite understand what you are referring to by “rasterize”, as there are no rasterization steps involved in this tutorial. Might you be referring to Converting the layer? That being said, every image edits differently. You may need to play with the numbers while doing High Pass and Blur.
Thanks for the response. I opened a raw file, did some spot healing, but before that can be done the image must be “rasterized” or it cannot be edited. At that point i had to flatten the image, the proceeeded with the steps of the turorial, and it functioned as tutored, acheiving the desired effect. When i did not flatten the image before duplicating, inverting, applying filters, alt clicking to apply black mask the paint brush had no effect on the mask. Again thanks for the response…I realy ejoy Your tutorials, and comments.