As a landscape and travel photographer, I take a boatload of pictures. Sometimes I take a series of shots when I do not want to miss a moment. Other times, I take multiple shots to properly expose a scene or to capture a panorama. The result of it all is a photo catalog with tens of thousands of pictures each year. While storage is cheap and I run everything off a fairly beefy NAS (Network-Attached Storage), my photo catalog over the years has bloated to many terabytes. In this article, I will go through what I had to do to significantly trim my photo storage.
Table of Contents
The Problem with “Photo Bloat”
One of my biggest problems I have had in the past, was importing too many images into my photo catalog. I would come back from a trip, then unload the whole memory card into Lightroom. I would delete truly bad images, edit a few of the solid candidates, then keep the rest. Until I started really paying attention to how I shoot and how I cull through my images, the process was somewhat messy for a number of years. As a result, I would average between 20-40 thousand images each year, which took significant effort to store and back up. This year, I decided to really clean up my photo catalog and add an additional process to my year end workflow.
The problem with most photography workflows that entail long-term storage of images, is that it results in a “photo bloat”, with hundreds, if not thousands of images, taking too much storage. Are you ever going to touch a blurry, badly exposed or a duplicate image? Not likely.
The thing is, if you have not gone back to pick another candidate for editing from your set of existing photos, chances of you ever coming back to do that in the future are close to nil. Those images will likely never be touched again. So why keep them on your computer or storage in the first place?
That’s what I decided to do with my old images.
What to Delete
Let’s go through what content should be a candidate for permanent deletion:
- Duplicate images
- Blurry images
- Badly exposed / processed photos you will never use
- Non-picked images that you will never post-process
- Badly edited TIFF and HDR / panorama-stitched images
- Any video content that you will never use
What Not to Delete
What content do I recommend against deleting from your catalog? Let’s go through those, one by one:
- Original RAW images of your top picks
- RAW images from HDR / panorama sequences
- Any other images or video you are unsure of
Deleting original RAW files, even if you are not likely to go back to re-edit them is always a bad idea. Post-processing technologies and tools we use today will not be the same tomorrow. Think of all the amazing tools that have been introduced to us in the past 10 years. Going forward, we will be seeing more AI-based post-processing tools that will make it even easier to quickly post-process images.
The way you post-process your images will also likely advance and get better. Once you flatten a RAW file to a JPEG, your post-processing options are thrown out of the window. Therefore, my recommendation is to never delete your RAW images. Do not worry about converting your RAW files to DNG or other formats to try to future-proof them either. I stopped converting to DNG a long time ago and I am not going to reverse that decision. Anyone who says that a RAW file might not be supported in the future is just full of it. In the past 10 years of being heavily involved in photography, I am yet to see any software that discontinued support for an old camera.
1. Backup
Before you decide on purging any content from your primary storage, it is important that you back everything up. Even if you know that you have a bunch of duplicates you need to take care of, it does not matter – back up everything from all of your storage. In case you mess up and you want to go back, you should have a full backup of all your content.
In fact, storage is indeed very cheap nowadays. If you can afford a large external drive, just keep your full backup there for a few years before you finally purge it all permanently.
2. Use a Proper File Management Tool
In order to make the process of shrinking your photo storage easier, you should use a proper file management tool that is able to assist you in quickly sorting through, tagging and finding specific images. If your file management tool comes with a built-in ability to find duplicate files, it will make the process of deleting duplicate images much easier.
For this article, I will be using Adobe Lightroom to eliminate duplicates, mark keepers and delete unused images. Although Lightroom does not come with a built-in tool to find duplicates among imported images, you can install third party plugins to do it.
3. Eliminate Duplicates
The first step is to find all duplicate images and get rid of them. Duplicate images can potentially take a lot of space and they are easy to tackle, especially if you have the right tool for the job.
There are plenty of third party and open source tools out there to find and delete duplicate images. Personally, I would recommend to use specific tools designed to identify duplicate images, not just any files. This becomes especially important when going through RAW images, which contain important EXIF information that helps identify duplicate images. For example, if two images are captured with the same camera, lens, exposure, date / time and they have identical file size, they are likely duplicates. Such files should be deleted.
I went through a number of different tools and the best one for the job turned out to be Duplicate Finder for Adobe Lightroom by Michael Bungenstock. It is freeware / donationware, and it does an excellent job at finding and properly marking duplicates in Lightroom.
To get it working on Lightroom CC, I had to download the ZIP file and manually copy it into the “Users -> ID -> Library -> Application Support -> Adobe -> Lightroom -> Modules” folder.
Once you install the tool, go to the root folder of your Lightroom, then open it up through Library -> Plug-in Extras -> Find Duplicates. Here is the way I configured the tool:
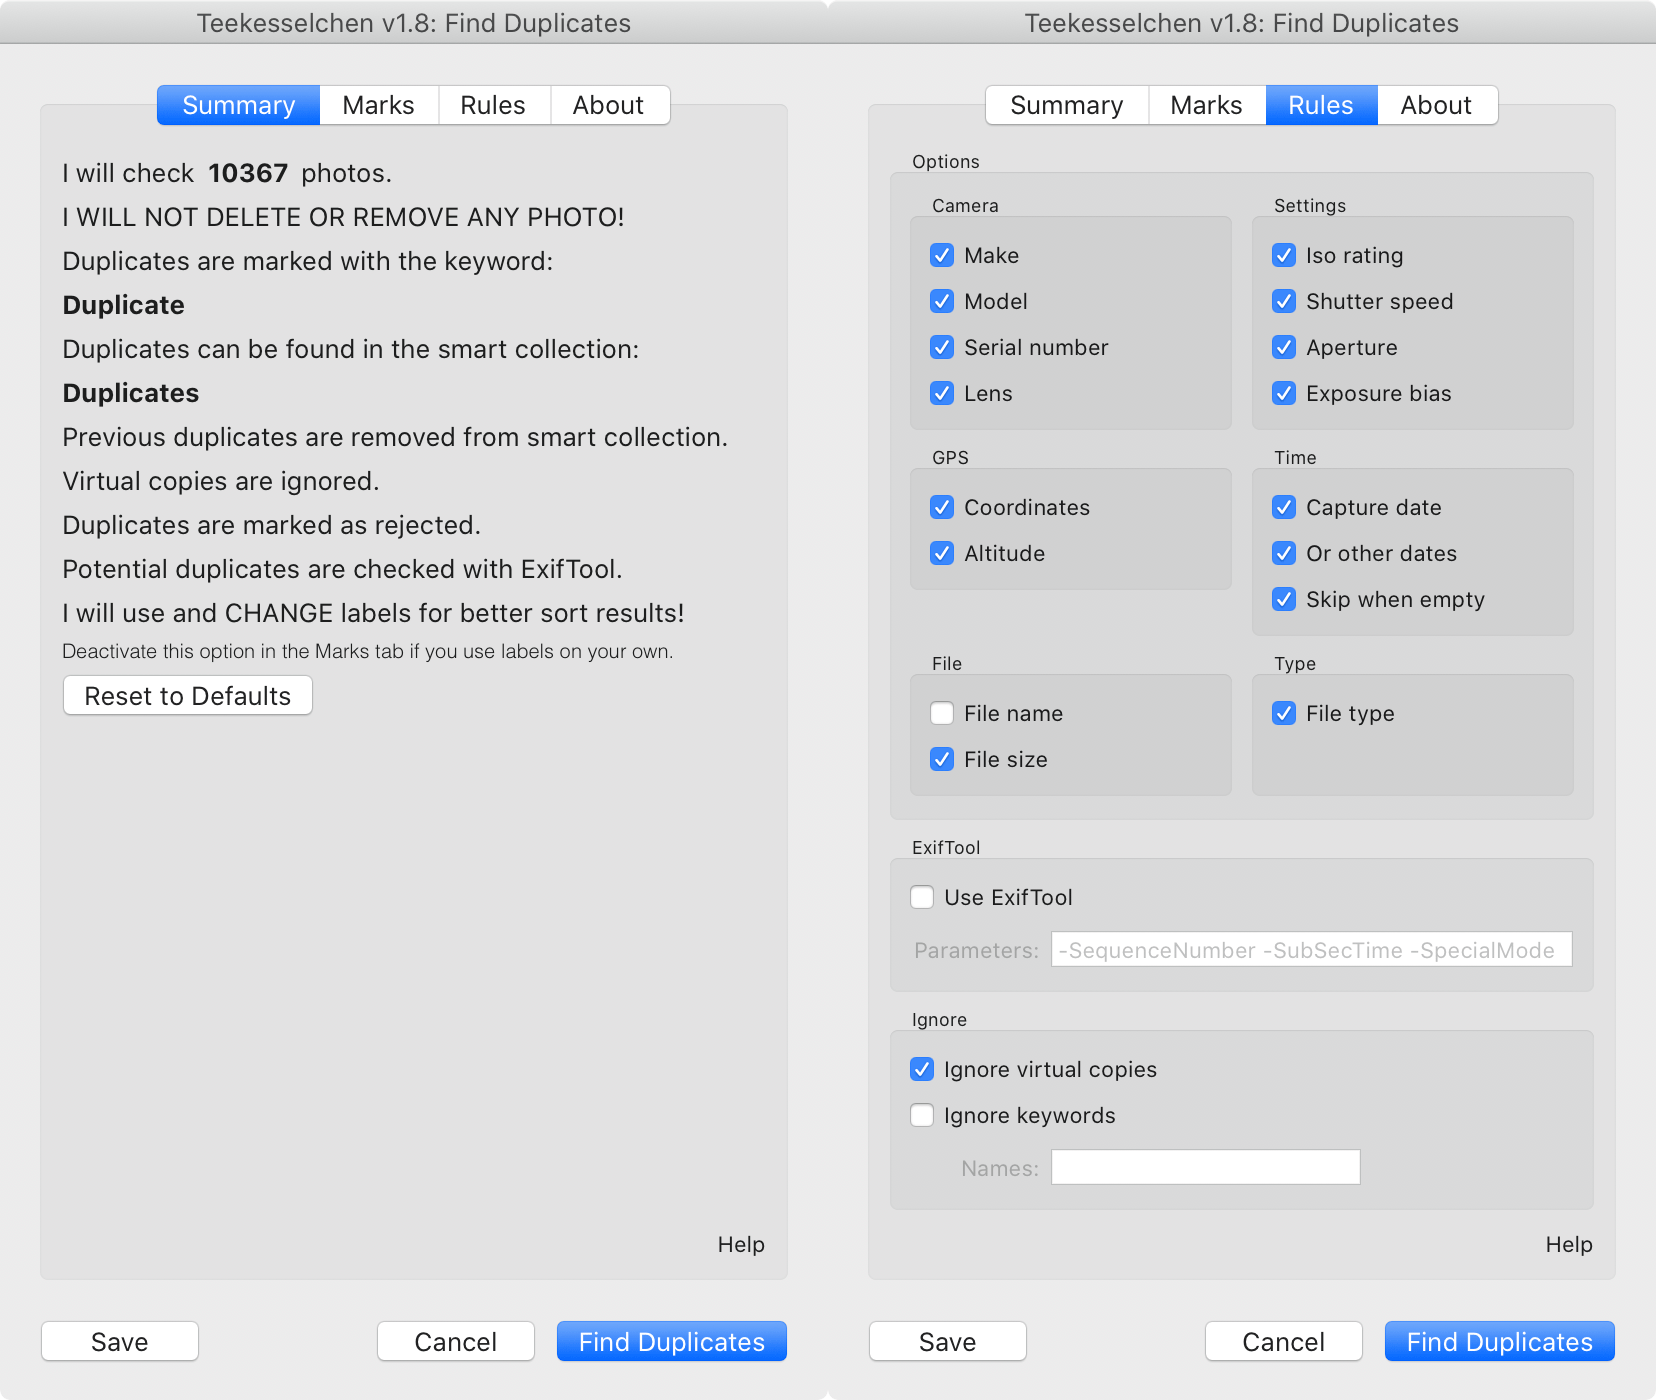
My 2019 catalog contained a total of 10367 photos. After it scanned through the catalog, it was able to identify 900 duplicates, as shown below:
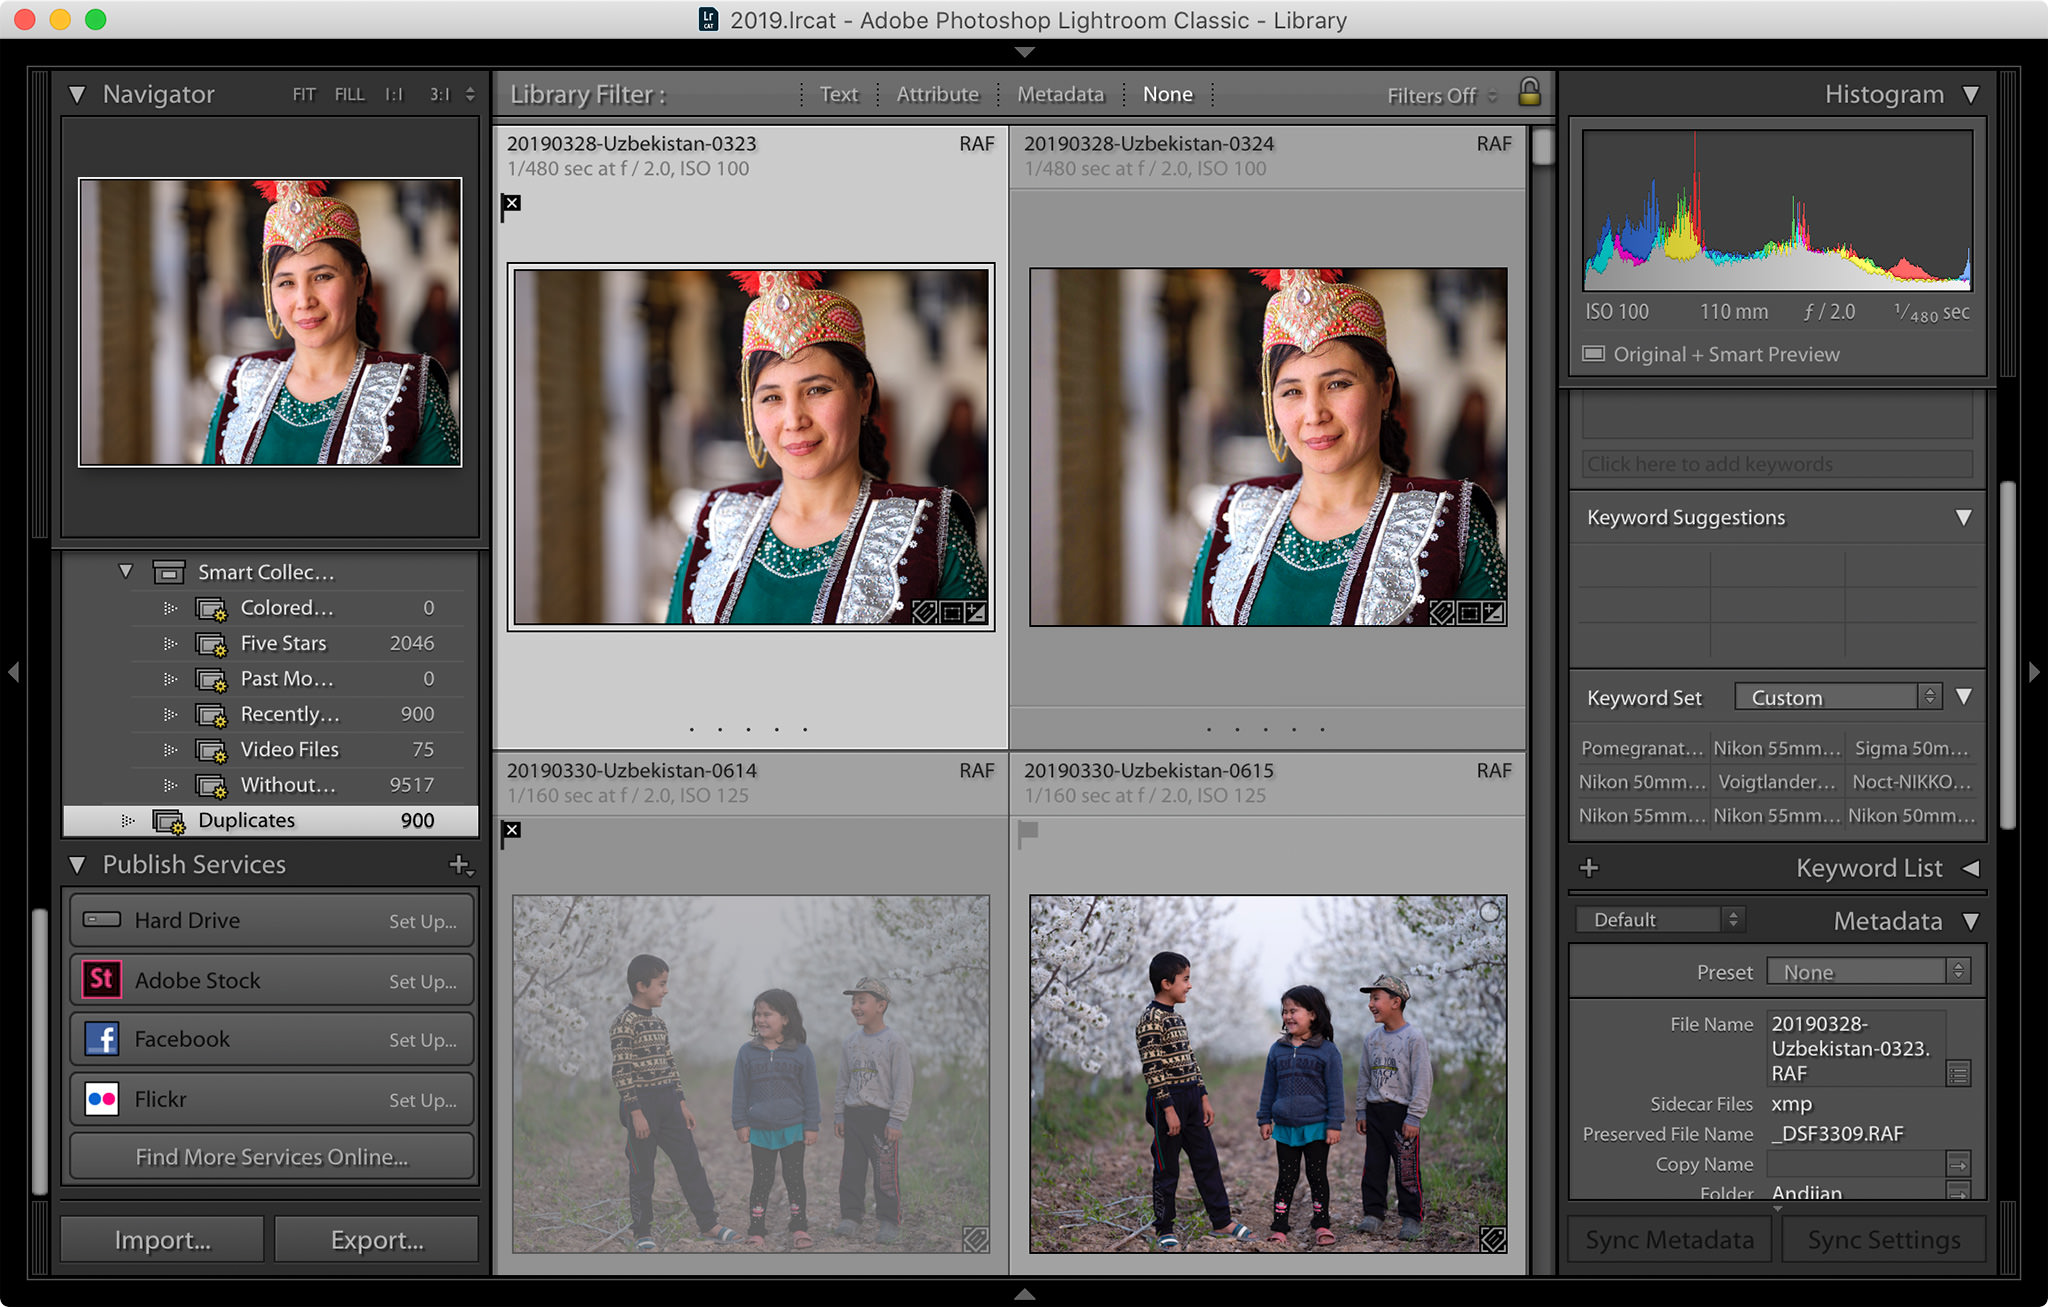
The plugin will automatically create a “Duplicate” keyword and add it to the “Duplicates” Collection. It will leave out one image and mark all others from the same duplicate batch as “Rejected” (configurable through one of the tabs), so that you can quickly review the duplicates and delete them.
Unfortunately, the plugin is not perfect – if you have a series of images that you captured through shooting in a burst (with identical date / time), it will still identify those photos as duplicates. I recommend going through those photos and eliminating the ones you truly don’t need.
4. Properly Mark Your Keepers
Once you go through all the duplicates, the next step is to narrow your images to the ones you are truly intending to keep in your photo catalog. Personally, I always mark images I intend to edit with 1-5 stars as part of my image culling process. However, once I start post-processing, I sometimes pick images that I did not originally mark with stars. Those images, as well as the ones I already post-processed (via Lightroom or Photoshop), are always starred at least with one star.
This makes the process of identifying candidates for post-processing, post-processed images or keepers quite easy. If you have not been marking your keepers and edited images, now is the time to do so.
If you want to skip this process and simply find all the images you have previously edited, there is a filter within Lightroom that you can use in order to show all the edited images. You can access it by bringing down the Library Filter, then picking “Edit” from the drop-down. Once you do that, you will see two filters “Edited” and “Unedited”:
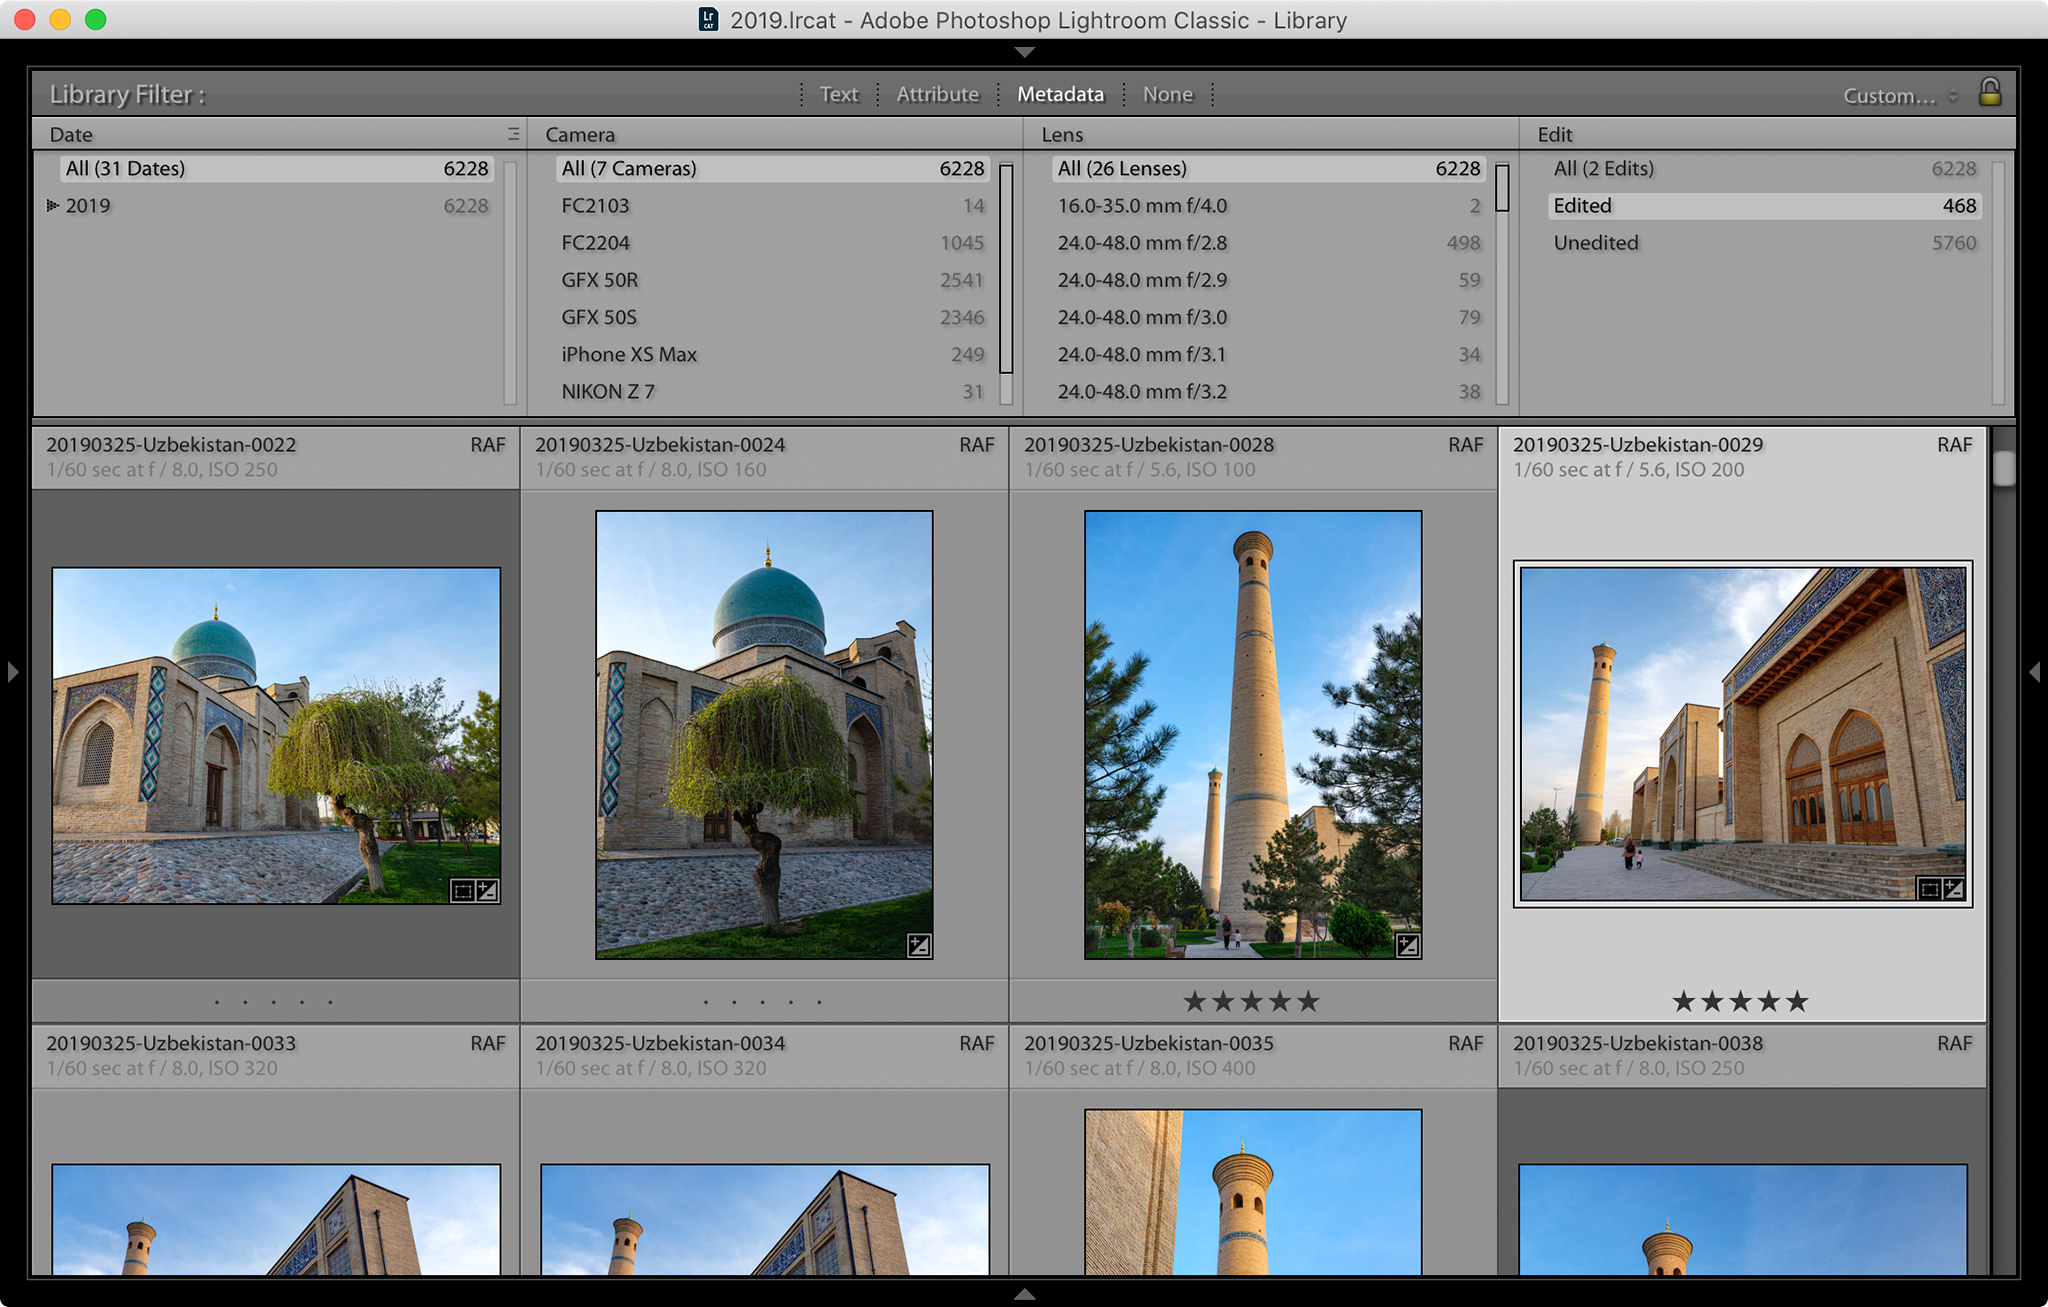
Clicking on the “Edited” filter will only show all the images that have been previously edited. You can mass select these images by using the CTRL+A / CMD+A shortcut, then either star them, or attach a temporary color label that you can use later to filter these images out.
5. Select All Keepers
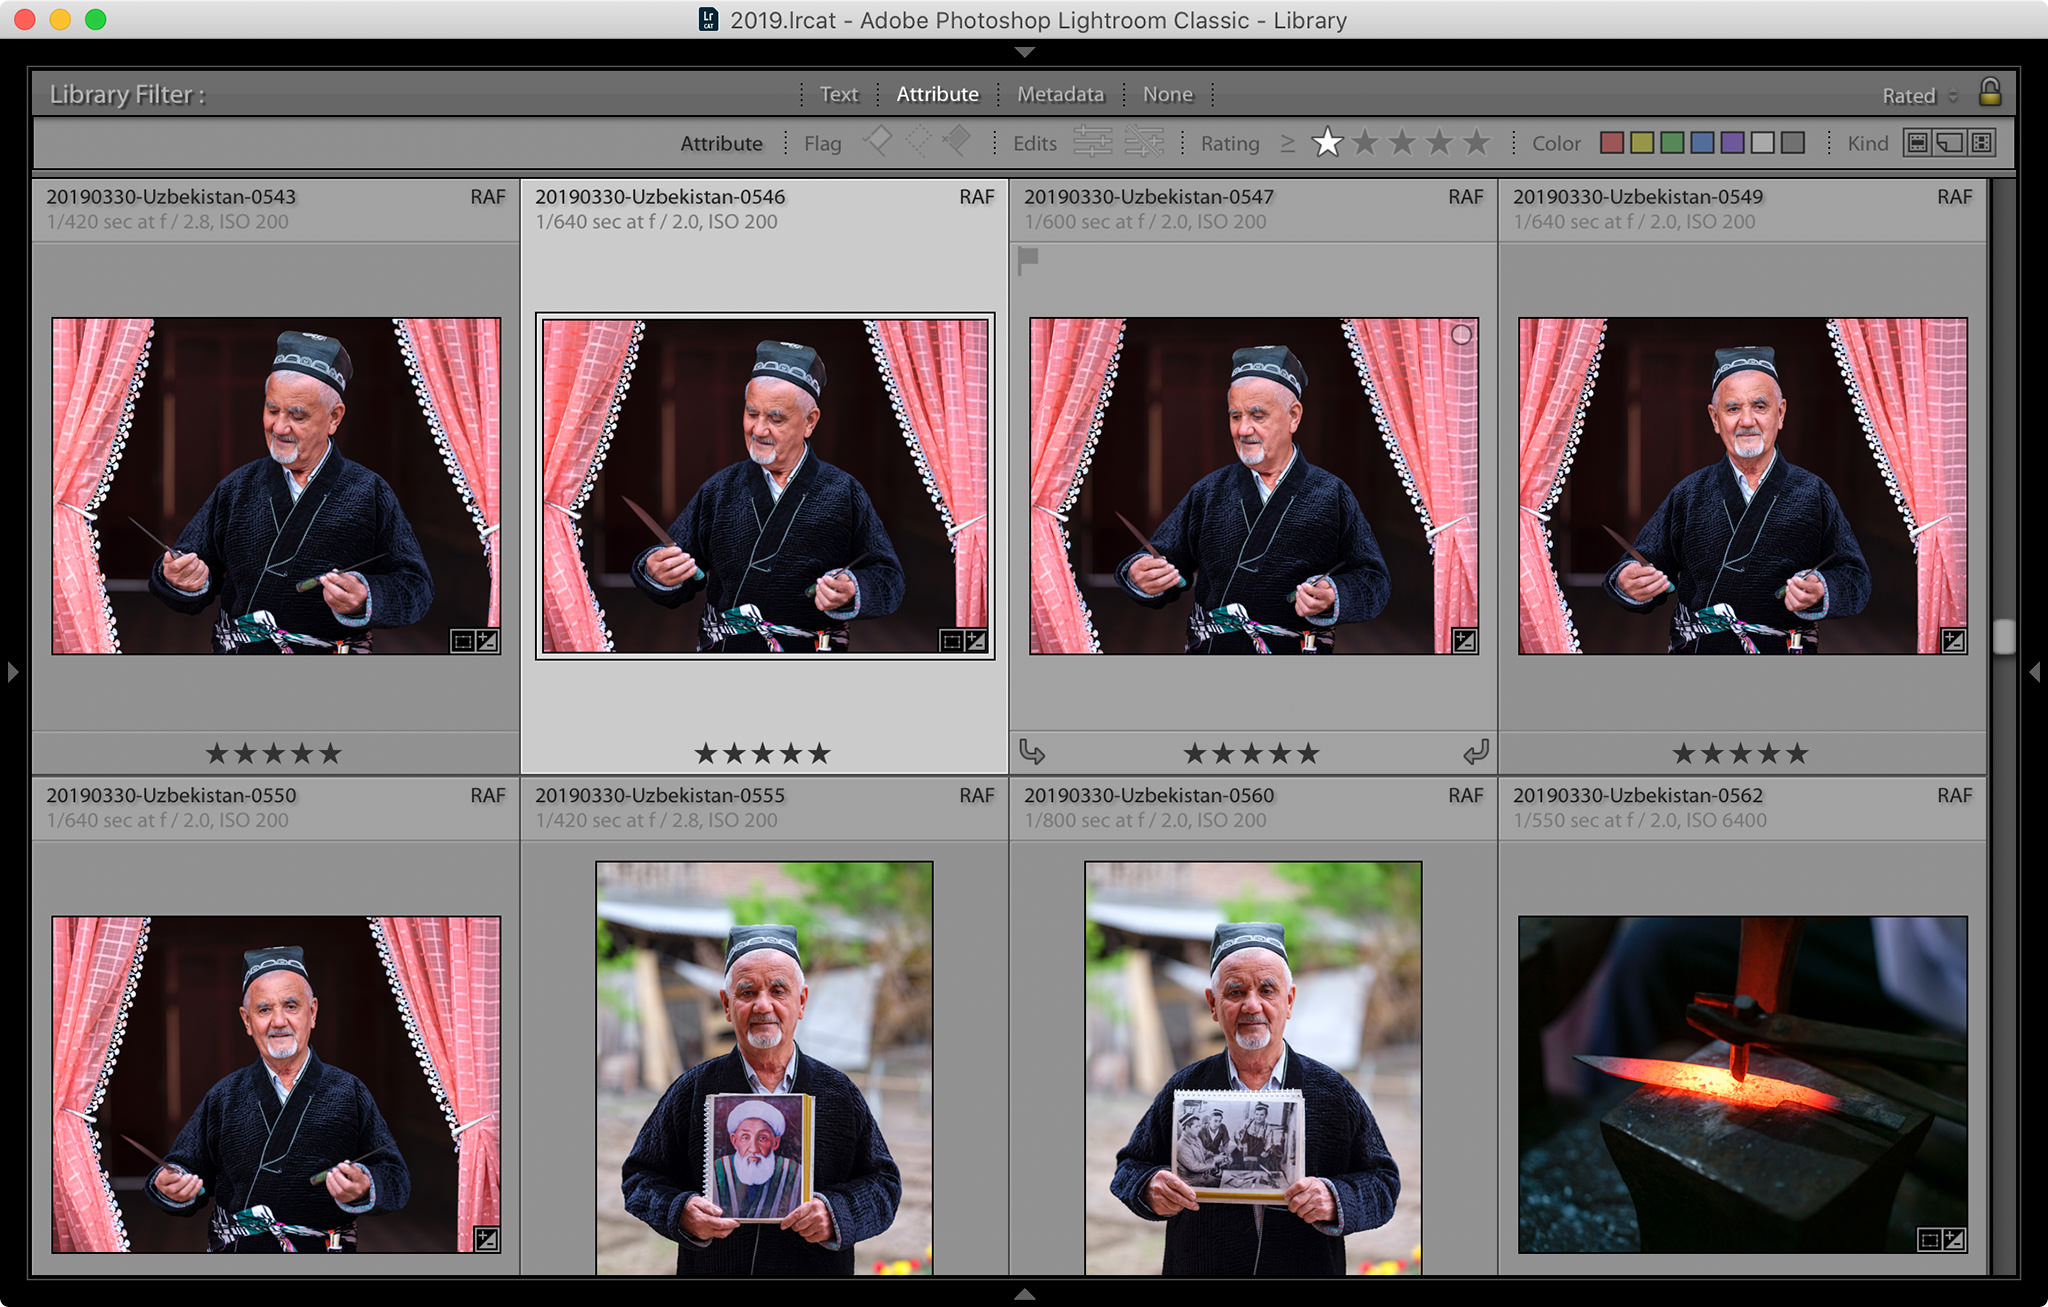
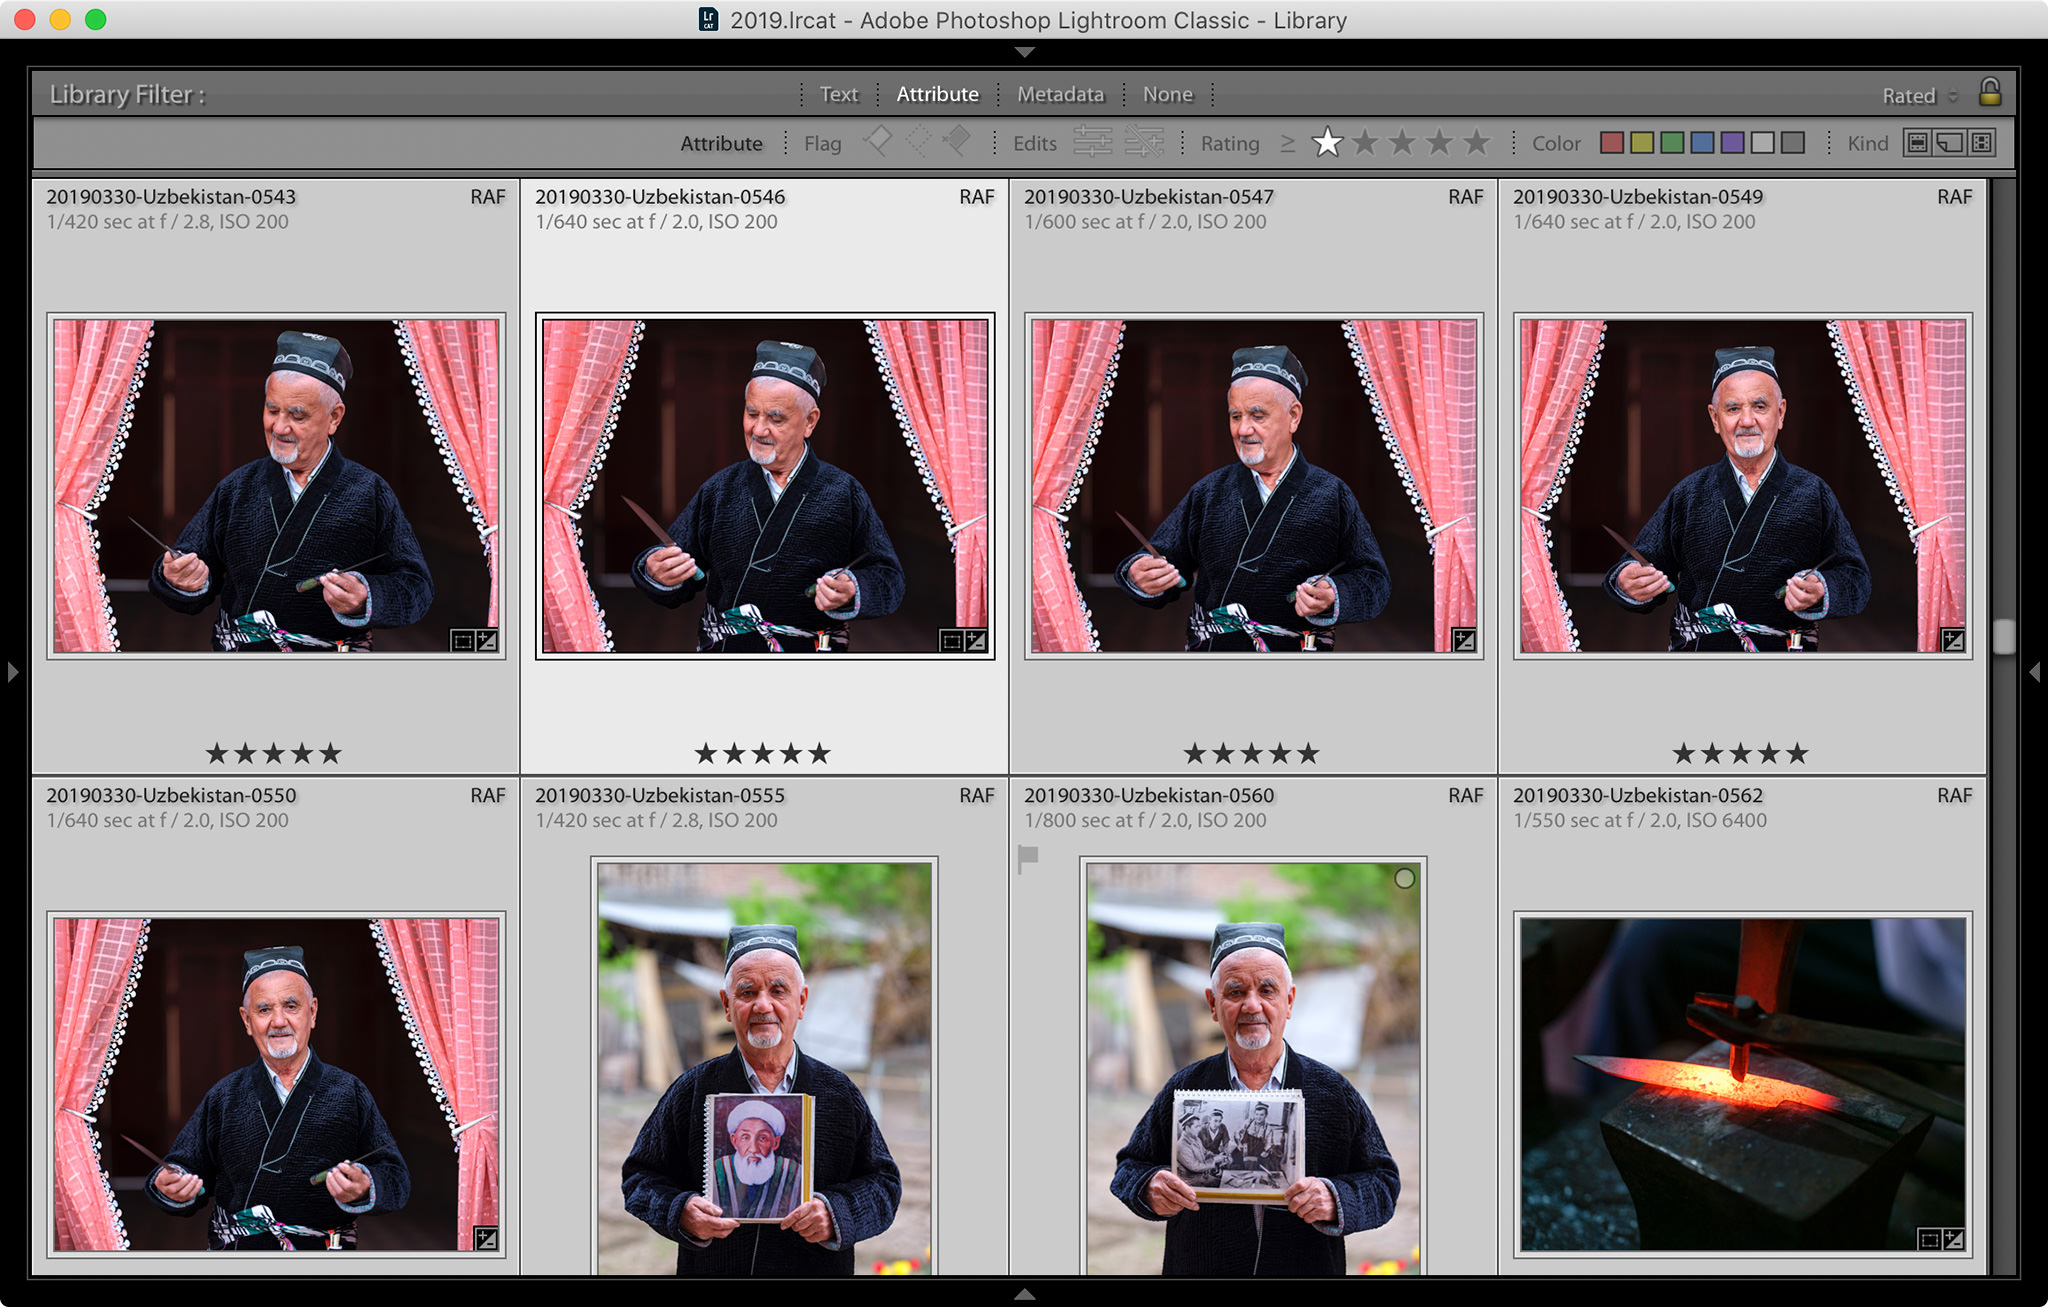
The next step is to select all keepers. Either use the above filter, or use a particular filter like “Attribute” (or a combination of the two) in order to pick particular images that you have previously edited, or saved as candidates for editing. For my images, I marked every image I intend to keep with a star, so using the “Attribute” filter with a single star (≥ 1 star), only showed these images:
From there, I simply selected all images by using the CTRL + A / CMD + A shortcut:
The next step was to undo the filter and inverse-select the images I did not intend to keep.
6. Inverse-Select Candidates for Deletion
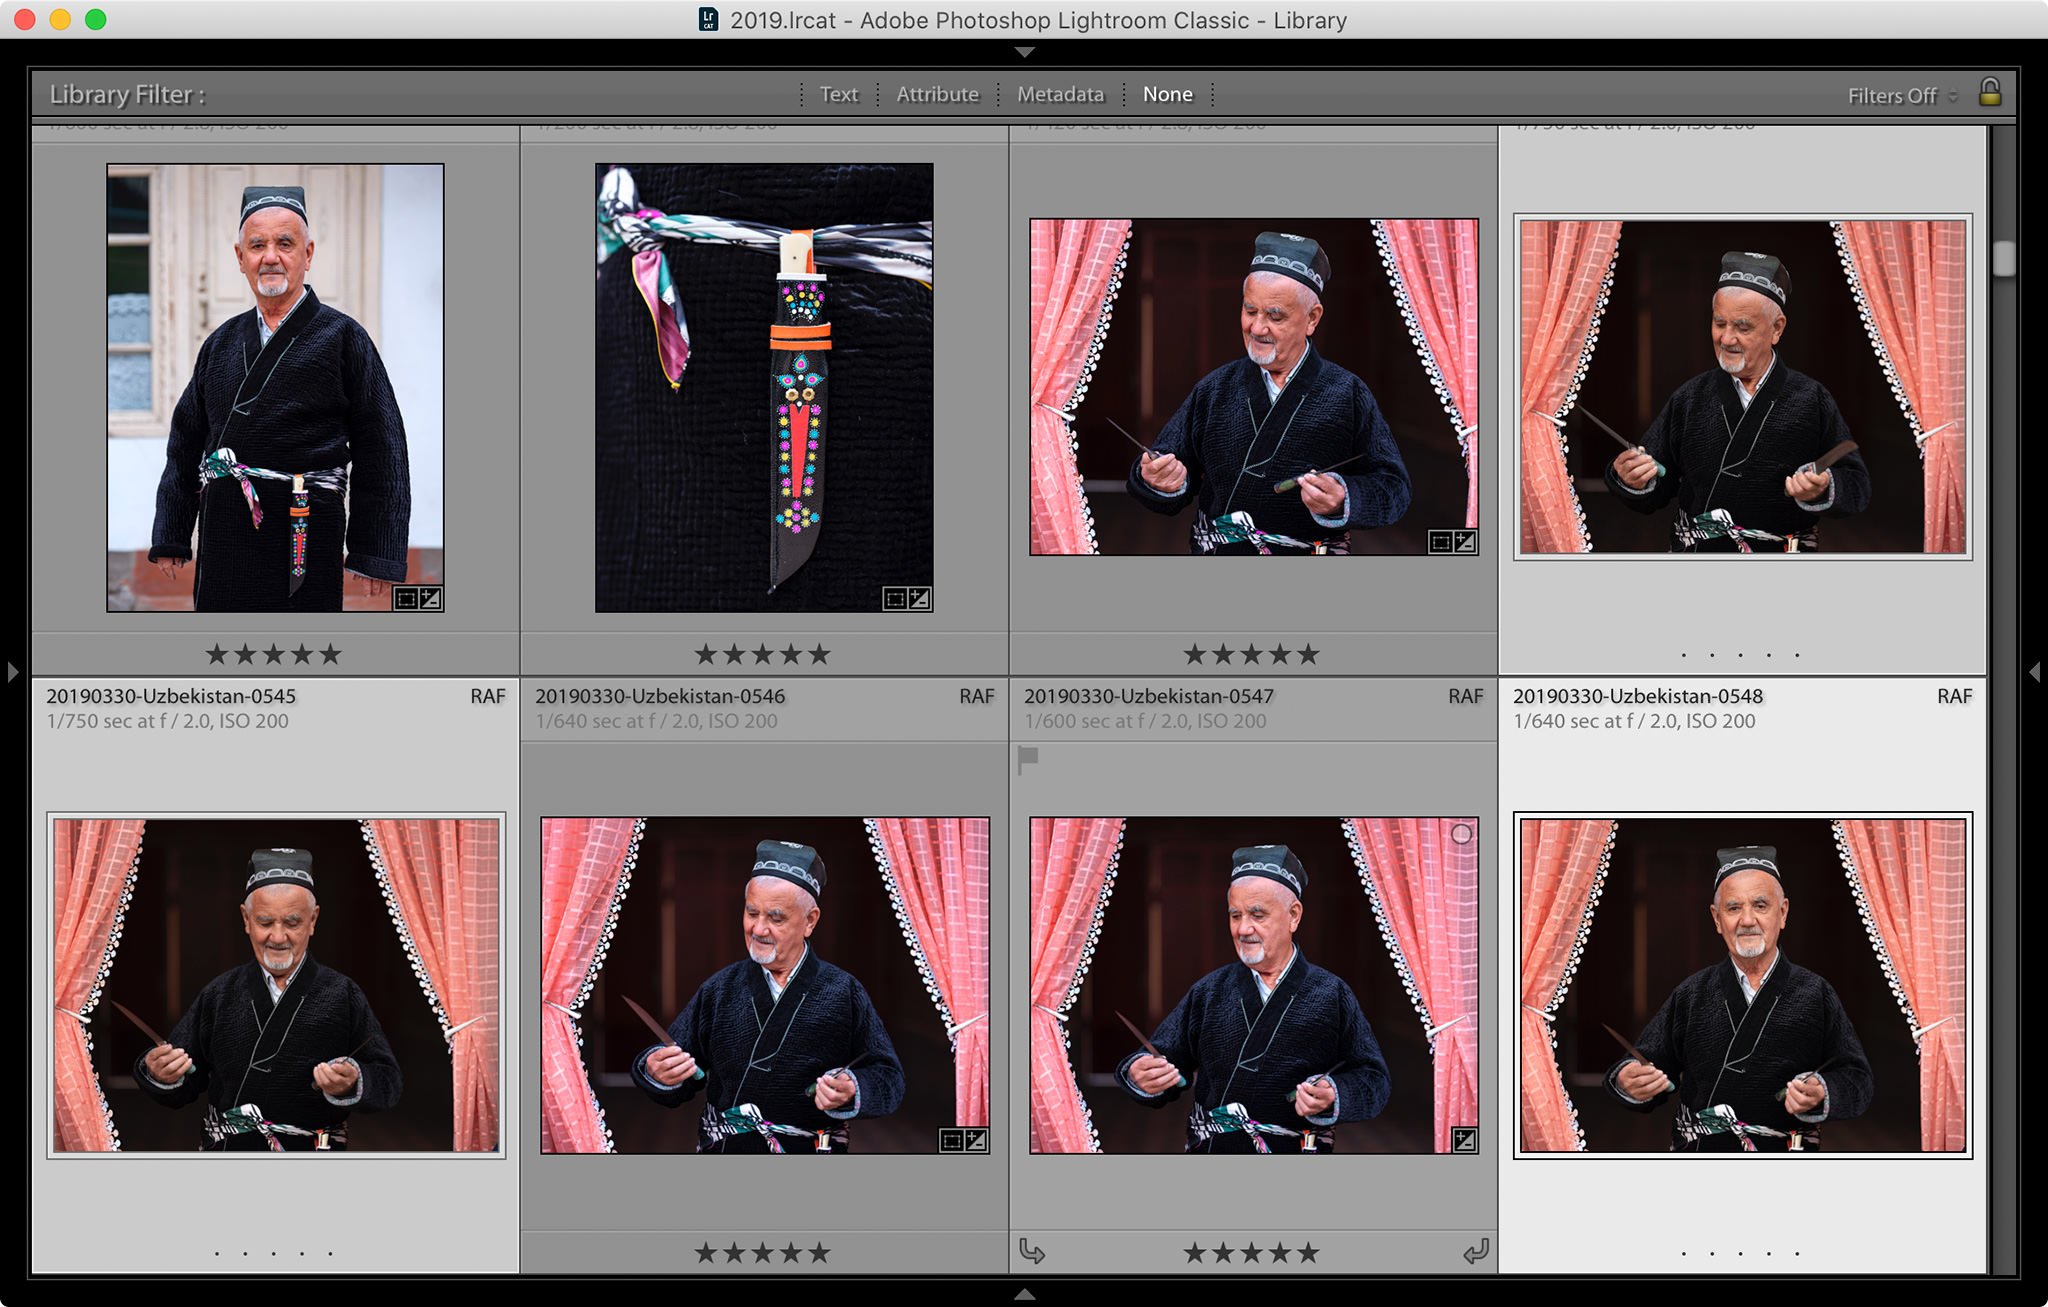
Once you select the images, click the “None” shortcut on the Library Filter, which will reveal the rest of the images. Now go to “Edit -> Invert Selection”. This will deselect all the selected images, and select the images that were not previously selected, as shown below:
7. Delete Images
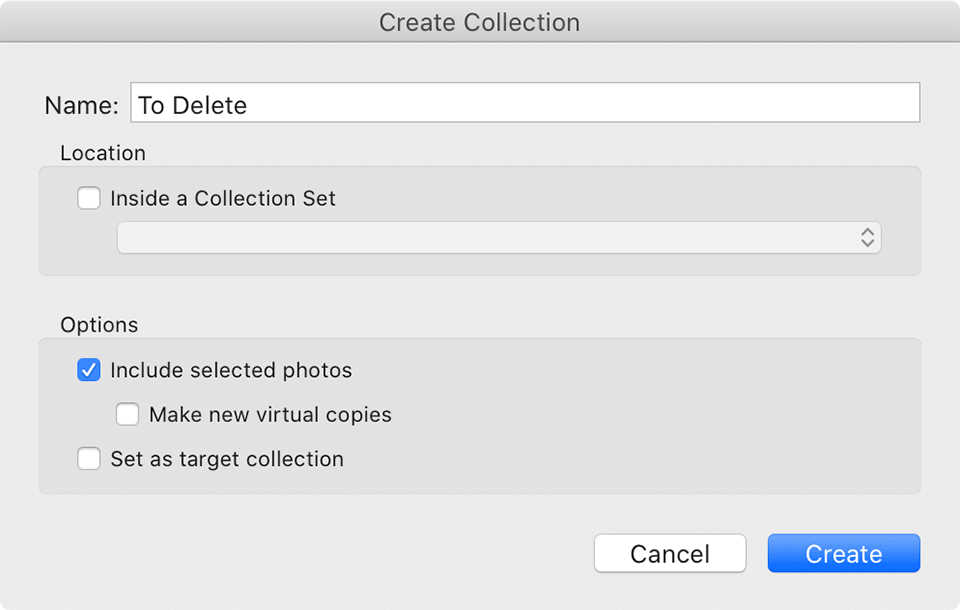
The next step is to create a Collection where you will put all the candidates for deletion. Go to Library -> New Collection (CTRL + N / CMD + N Shortcut), then give it a name like “To Delete”. Make sure that “Include selected photos” is checked:
This will create a new Collection that you can navigate to any time, review images and flag the ones you want to get rid of as “Rejected”.
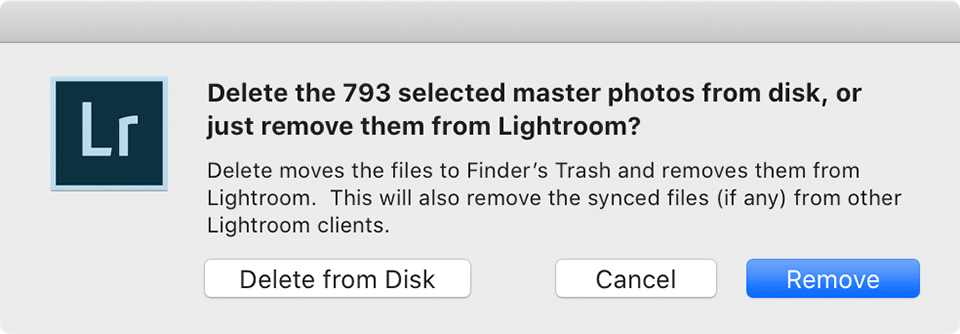
After you review every image, either select all the images from the Collection and press the Delete button to get rid of the images, or navigate to “Photo -> Delete Rejected Photos” (CTRL+DEL / CMD+DEL shortcut). When Lightroom asks if you want to remove the photos from the catalog, or want to delete them from disk, make sure that you select “Delete from Disk”:
8. Consider Shrinking TIFF and PSD Files
If you use Photoshop to edit your images, you will likely find a bunch of large TIFF / PSD files along with your RAW photos. Those files typically take a lot of space, especially if more than one layer is preserved.
To free up a bunch of space, consider flattening your TIFF / PSD files. If you want to preserve layers that are likely to change in the future, or contain your edited masks, keep those, but discard others. High resolution panoramic images can particularly take too much storage space – consider flattening those images to keep their size to the minimum.
Doing the above steps helped reduce my Photo storage considerably for 2019 alone. I am planning to go through the same process for all previous years, which should reduce my storage needs by at least 50%.
I hope you found this tutorial useful. If you have any questions or concerns, please let me know in the comments section below!
This is an excellent article on every level. Thank you Nasim!
Very informative article. Thank you.
I need to start doing this one of these days. I’m still early enough in my learning curve that I can only bring myself to delete the obviously blurry or misframed shots, out of a “if I’m picking from near-identical multiples, what if my eye for this just hasn’t developed enough to tell which one really is the best and I want to go back and re-process later?!?” voice in the back of my head, which results in keeping waaaaay too many raws. I like the idea of an end-of-year revisit, will have to add that to my calendar.
Thank you for this advice! I’m good a deleting the “bad” images right away, have trouble with the “meh” ones, and had no idea how to locate the duplicates. I’m going to try Michaelas Bundenstock’s Duplicate Finder first, then go back for all the unstarred images to delete. I just got a new iMac and it has taken Lightroom over 11 hours so far to add the images from my photo drive, and now many more hours to “Fetch initial previews”. Fewer images would have shortened this frustration.
Is till would have to make the transfer of all pre-CaptureOne raws stored in Aperture – until today. And I think, I’ll keep one of my Macs able (meaning, no OS Catalina) to read these databases. I also don’t look for old pictures on a daily or weekly basis. But my experience so far is, I’m searching 3-5 times longer in Capture One than I need to find a 10 year old picture in Aperture.
Still I am used to the refined and still top intelligent search strategies of Apple/Aperture. So far I haven’t found a better DAM – and I will not step into the Adobe milking stable. Beside, searches in LR or Bridge are not even close.
I was hoping during the last 4 years one other company stood up and step in, but most develop either only for Windows or for both and then the weaker system (Windows, in terms of search possibilities) defines the standard.
So, one day I also will need to purge, but until then: I delete radically after importing and browsing. After a while I also delete unrated or 1 star pictures – and I don’t come from one weekend with 1000s of files. On the contrary, I more and more ask myself “worth or not?” before clicking the shutter release. RAW are the holy grail for me, I rather delete exported JPGs than their sources. Exceptions are focusstacks.
I realized a couple years ago that I seldom go back and re edit images once delivered to customers. So after about one month, raw images are deleted and only delivered jpegs are saved. I have had customers ask for photo or video and have always had it available.
David, I can see why one would do this when doing wedding or corporate photography. Personally, I keep all of my important RAW images, because there is a chance I will be going back to them in the future.
With advances in AI, great (composition/emotion) but technically flawed images could be 100% fixed. With a forward-thinking positive view, you would keep all your RAWs and wait for technology to fix them.
Often I am about to hit delete on a great photo with emotional load that is just not sharp which is super distracting, but I always feel sometime in the future this can be fixed using computational imaging. Already some great research into that area has been published.
I used to keep all RAW photos I shot. Then I selected much more strictly getting a ratio of about one keeper in every three pictures. Now I keep the really good pictures are original RAW. All others I convert to lossy DNG which saves about 2/3 of the space.
Isn’t that a lot of work (and potential loss of information) given how cheap storage space is?
That’s what I used to think too, until my library grew to 10 TB of storage. The reality is, I rarely ever go back and edit images that I didn’t pick as candidates for editing, so why bother keeping those?
I keep an archive for my RAW files and a separate directory with 30 or so subfolders in it of all my finished jpegs. Three years ago I deleted 19,000 pictures from both of them. These were the blurry, blown out, duplicate and bad pictures. Earlier this year I deleted over 6,000 more pictures, this time of photos I no longer liked or weren’t good by my current standards, along with any blurry etc. that got past my current culling criteria. I did it the time consuming way, going through every single picture and evaluating it. I made sure that every jpeg I used had its corresponding RAW photo in the archive, which to me is very important. You never know when you want to apply your growing editing skills and reprocess. It took me months, but I was very happy with both the streamlined archive and the higher quality finished galleries. This is a task well worth doing and I endorse the idea that every photographer needs to do it at some point. Archives can get really clogged after years of shooting digitally. Cleaning out really clears the space for all the newer and better work yet to come.
Great to hear above – I went through the same experience. And also, as you become a better editor you return back to quality shots when reviewing your archive and enhance the work even more. Cleaning the archive is not any more about the cost of terrabytes it´s about focusing on the good photography.
Elaine, very happy to hear that you went through this – that’s the biggest challenge for me. I am also planning to go through all the pictures and individually evaluate them, which will probably take months for me. But I know it is worth the effort, because I do not want to continue bloating my photo library…
Great article. While I use Lightroom for post processing, I never use it as a library. I just process the RAWs and make the best possible JPEGs, then export them in the original size and in a 12 mpxl version. I have a system of folders in the Mac app Finder where my images are sorted by Year, Month and then by the particular shoot. I back up the original RAWs and high-def JPEGs onto 2 external disks. The downsized 12 mpxl JPEGs I drop into Apple’s Photos app, that nicely sorts them by location and date. I also batch name all photos the same and add a sequence, so when I search for a particular photo, it’s easy to find it in the photos app (or in Finder). Thirdly, I backup the Photos app to a paid online service. I have over 100,000 photos since I started to go into photography 5 years ago.
Because I am such an organized person who values the time of postprocessing and organizing as well as the cost of storage, I highly doubt I will hop on the high-megapixel train. Currently shooting with the Nikon D810, RAW files are on average 30+ MB, which is already high in my opinion, but still manageable. I can’t imagine how high the Sony A7R IV or the Fuji GFX files must be. I see diminishing returns for myself with everything above 36 mpxl. The D810 allows me just enough cropping space for my needs. I plan to add a Nikon Z to my kit some time in the future and it will definitely be the Z6 or the Z50 or any new model that is below 30 mpxl. I think 24 mpxls will be fine for most photographers decades to come.
A useful article on an important topic, Nasim.
In recent years I have become much more inclined to identify and delete images I don’t really need, bearing in mind that I may later discover images to process that I initially overlooked.
I wouldn’t expect to have any duplicates though, except from a period many years ago when I used to save different versions of scanned files processed in Photoshop.
Filtering by Edited or not also wouldn’t work for me because apart from obviously deleted images I undertake minimal processing of most images as part of the selection process.
Apart from my local backup, I backup to the cloud using CrashPlan. This is more expensive than Backblaze but it offers unlimited version backup so I can always get back an image I accidentally deleted at some time in the past.
I don’t really understand the advantage of creating a collection of images waiting for deletion. I take the more obvious route of marking images for deletion by pressing “x” to flag them as rejected. Most images I leave as unflagged except monochrome images I set as flagged (“p”). I usually do this by folder. Then when I have finished processing or revising a folder, I filter for only images flagged as rejected, then delete them from the disk.
Thank you for sharing Murray! The idea behind creating a collection is to be able to easily go through it in case you navigate away to another folder. One would still go through the images in the collection and flag them as candidates for deletion. The above way is a quick and easy process to identify images that you did not care about by not marking them before…