LED lights have been a big trend in the last few years in dance parties, Many of us have photographed events where harsh LED light was used on the dance floor, and these LED lights have flooded our images and prevented us from taking available-light photos without them looking over-saturated and alien. One obvious option is to use a flash, whether ON or OFF camera, but you may be losing those moments where the light is causing interesting shadow situations. A second option is to convert the images to black and white, which is also a good solution, however sometimes you want to show certain characteristics, for example showing a party full of people with red-hair :)
In this small article I will present a method of eliminating the majority of the LED artifacts from your subject and photos exclusively in Lightroom. I am trying to demonstrate what can be achieved with the tools provided in Lightroom, however if you still want to retain some of the vivid “party” colors you do not need to complete the entire process and can safely stop at any stage which looks adequate.
The following images were taken in the kickoff party at Redhead Days Festival in Breda, Holland. In which I had used a Sony A99 with a Sigma 30mm f/1.4 lens set on aperture priority, all images were shot in RAW. In the following 3 examples we can see how much we can recover from led lights using this method.
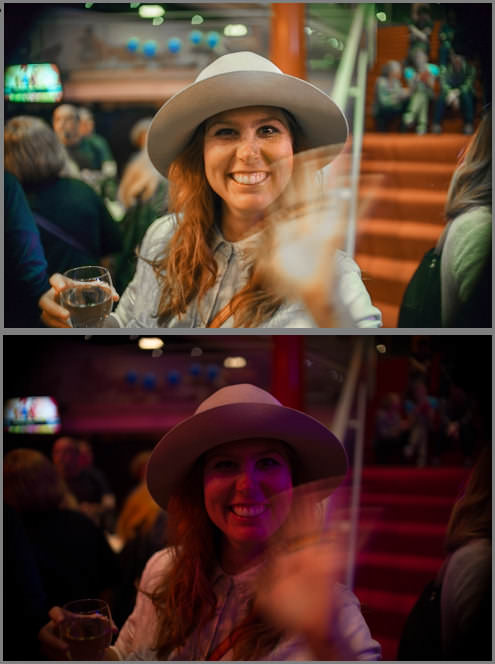
The image above was taken in available light situation. Four stages of editing are needed in order to recover from that awful pink cast and achieve a more neutral final result, with natural hair and skin color. The idea behind this process is that the LED is just shifting the whole color spectrum and we need to shift it back as close as possible to what it really was. The method is applicable to any color cast, but analyzing which colors need to change depends on you, the photographer.
We’ll start with the last image, which has the pink cast:
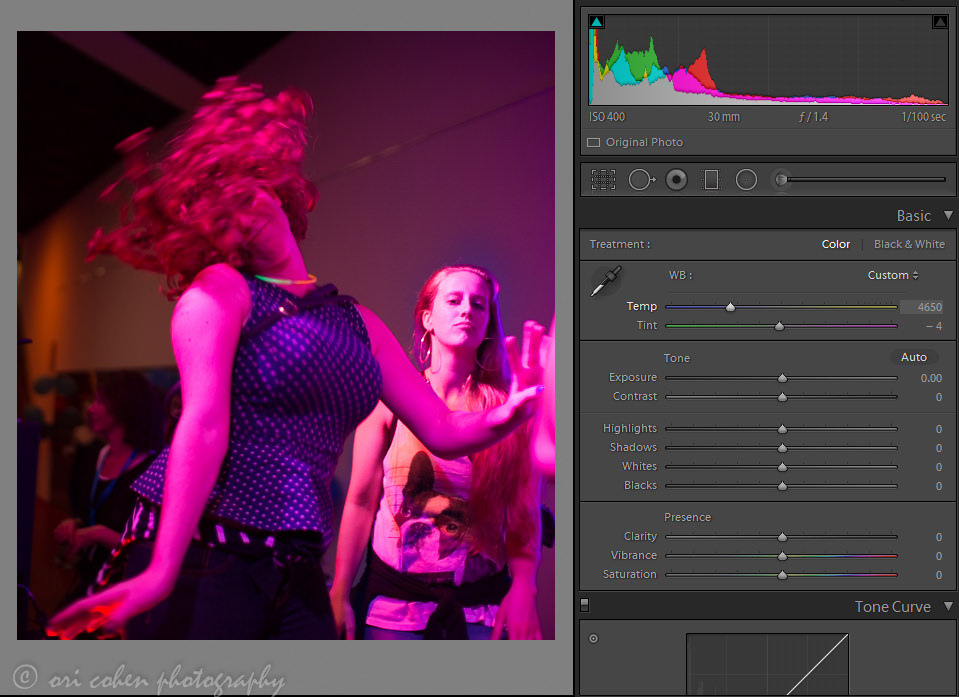
Table of Contents
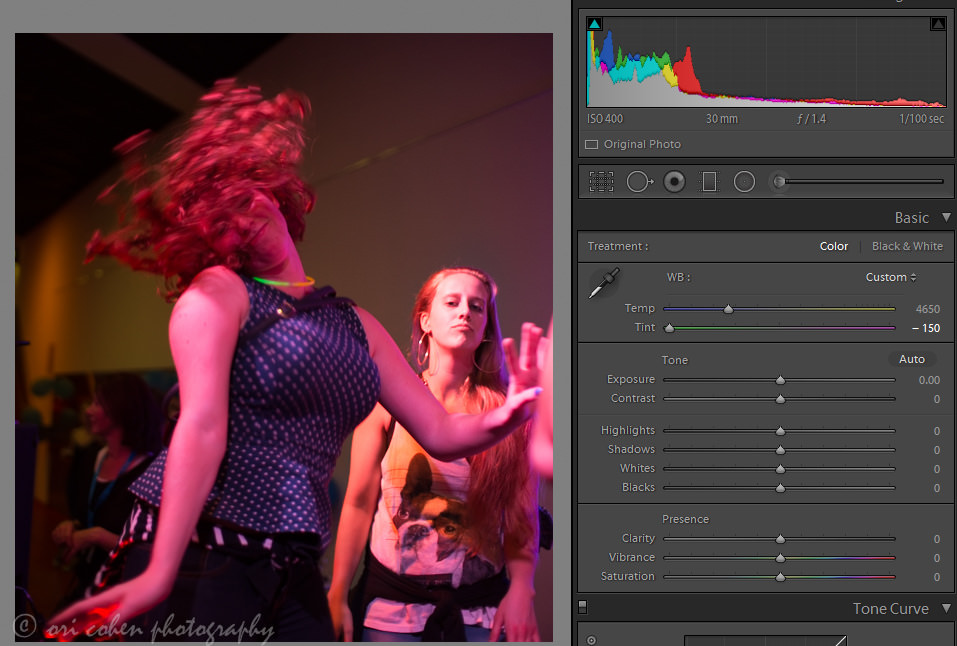
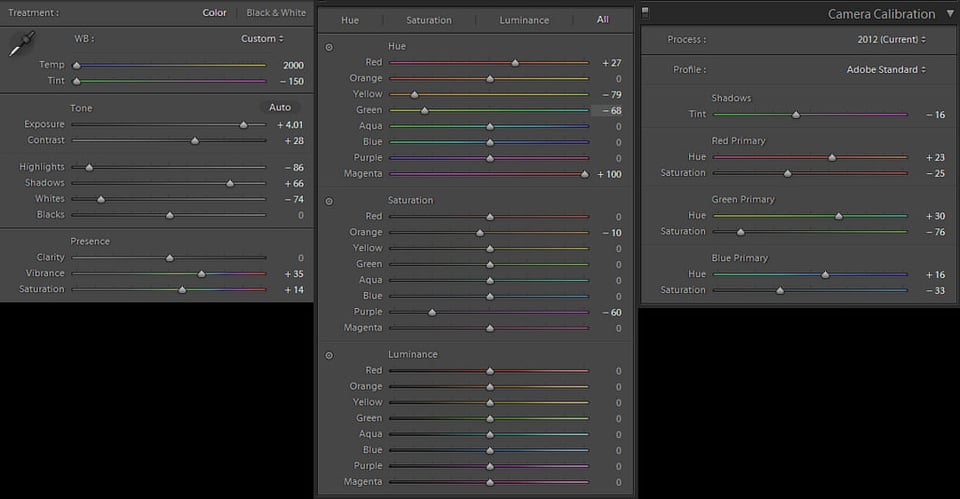
Stage 1: our main tool is “TEMP” and “TINT”
We use Tint first, in order to reduce some of the magenta and pink.
We use Temp to further reduce the orange cast that is slightly showing. I have to stress that the amount of reduction depends on the image, for the Temp and Tint sliders. We are already in the general area where the image starts to look reasonable, however we are not finished yet.
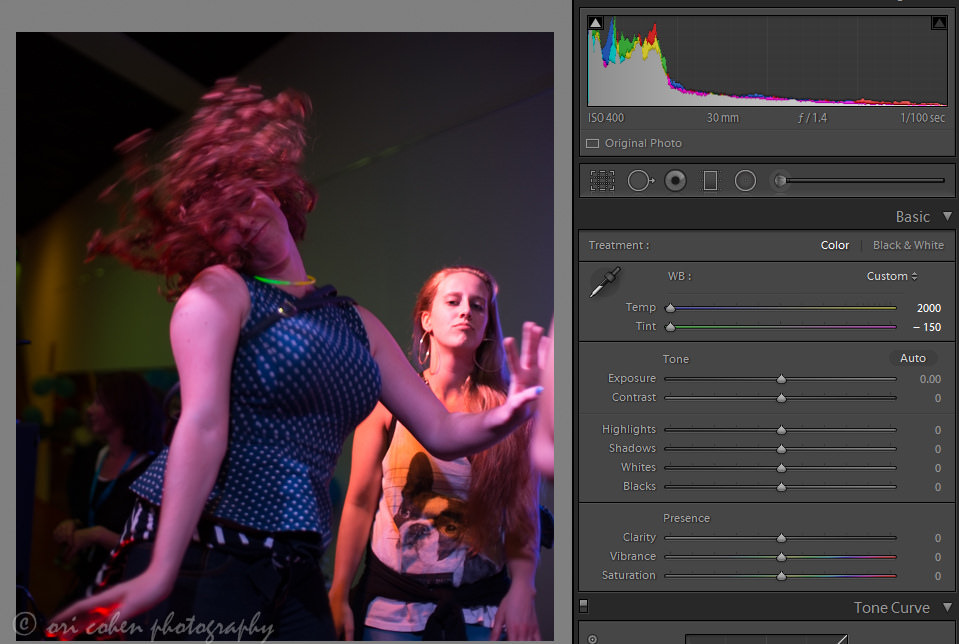
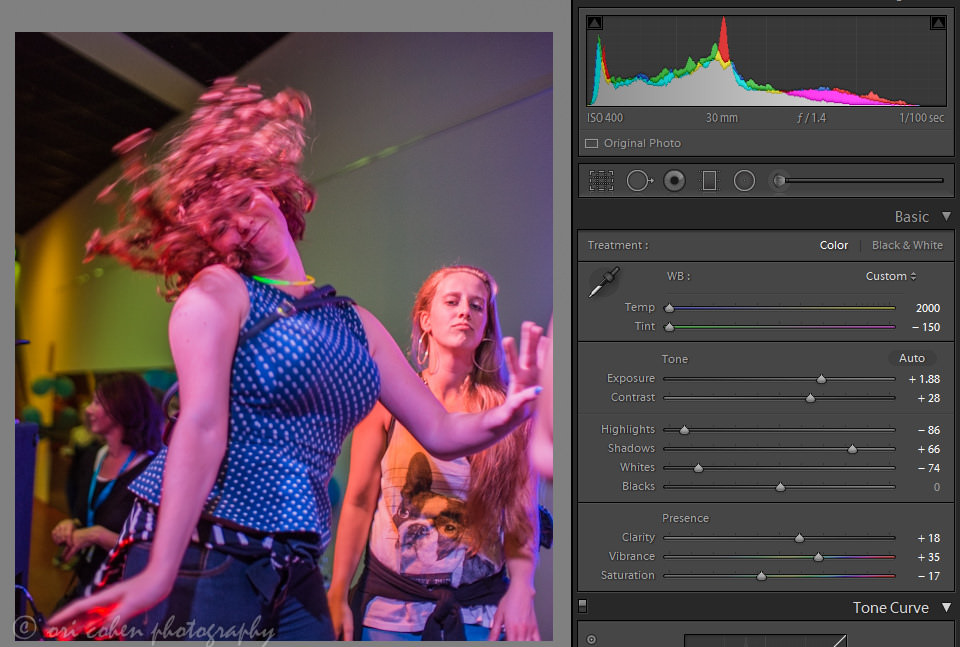
Please note that for some images that do not have multiple LED sources this stage gets you close enough. At this point, we have a chance to do some “normal” editing in order to see the colors better and flesh out the entire image, as you can see in the histogram the image was shot under-exposed intentionally so that I could shoot at reasonable shutter speeds. The editing includes exposure, contrast, highlights, shadows, whites, blacks, clarity, vibrance and saturation. however it is now glowing a bit and the colors do not look natural. Please note that I don’t consider this part as one of the four stages.
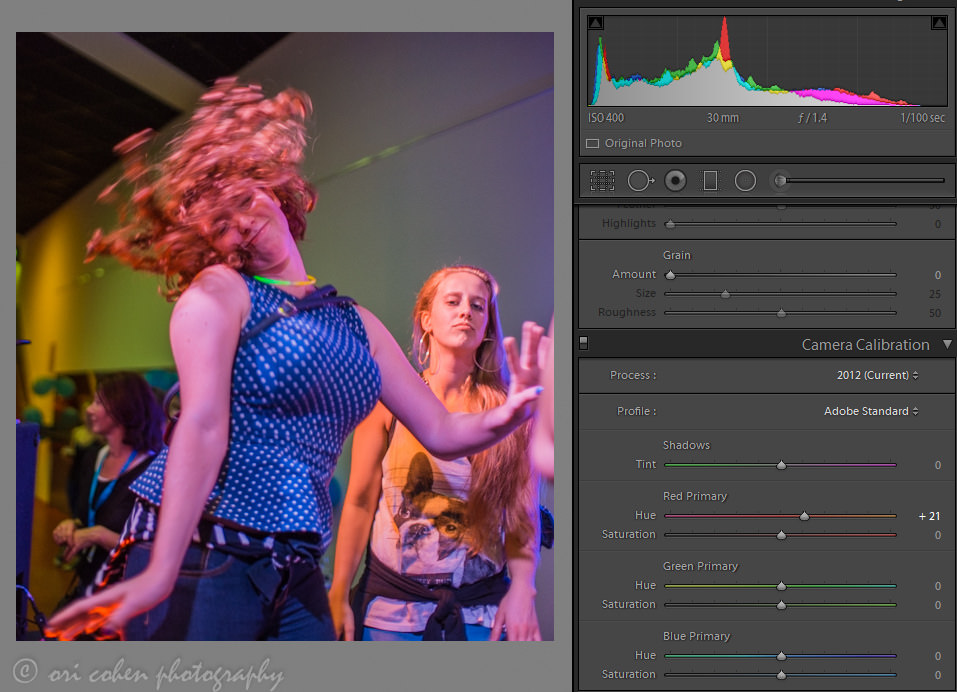
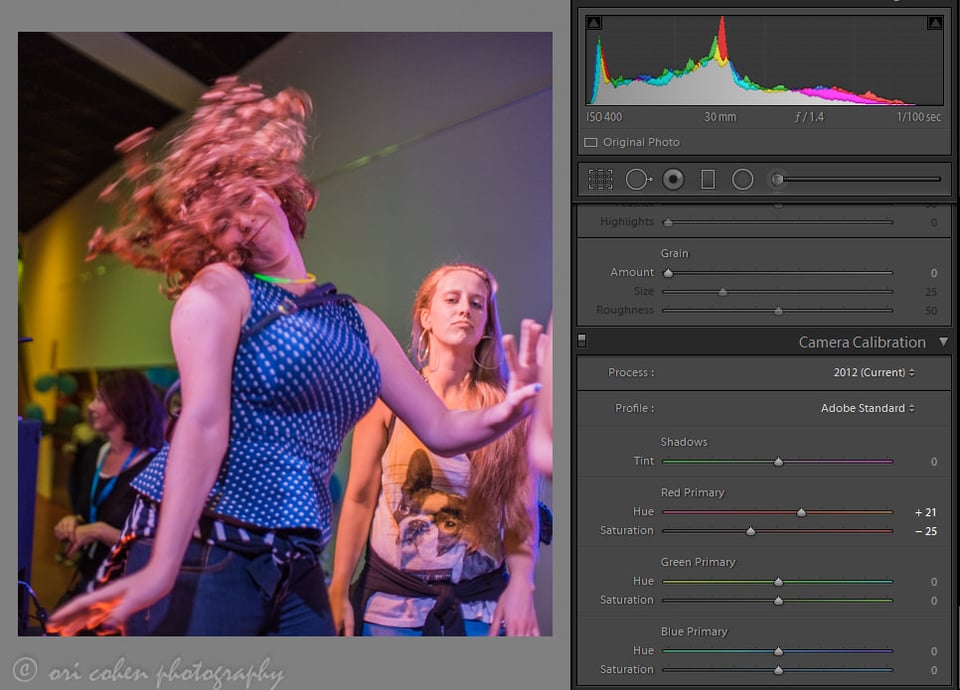
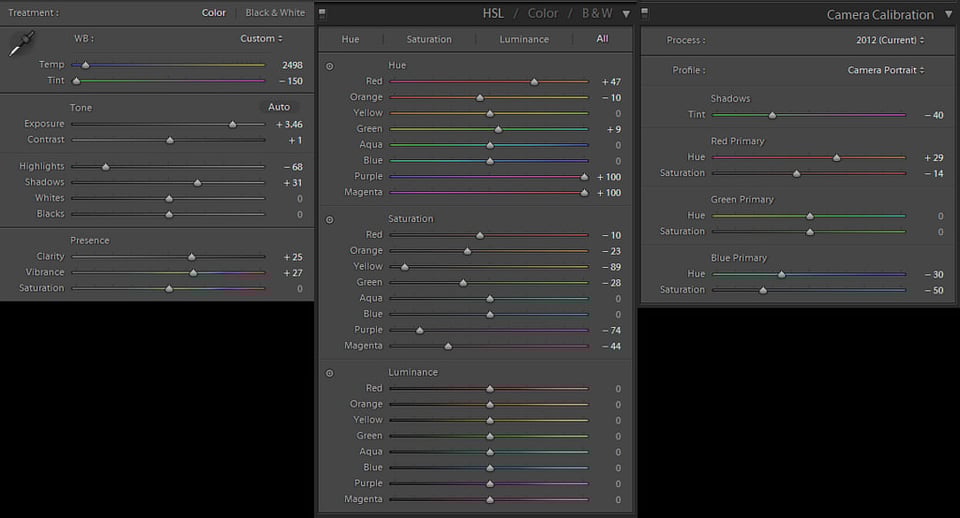
Stage 2: Camera Calibration
The Camera Calibration module is usually underestimated and overlooked in Lightroom, but it is extremely helpful in controlling your primary channels. The idea behind the camera calibration is to globally influence the relevant channels for the whole image. In this image the RED and BLUE are too dominant and need some tweaking (they also influence purple and pink). I decided to go with the RED channel first and push it a little toward the orange side.
I proceeded in reducing the saturation a bit, to make her hair look a little less fake red (below)
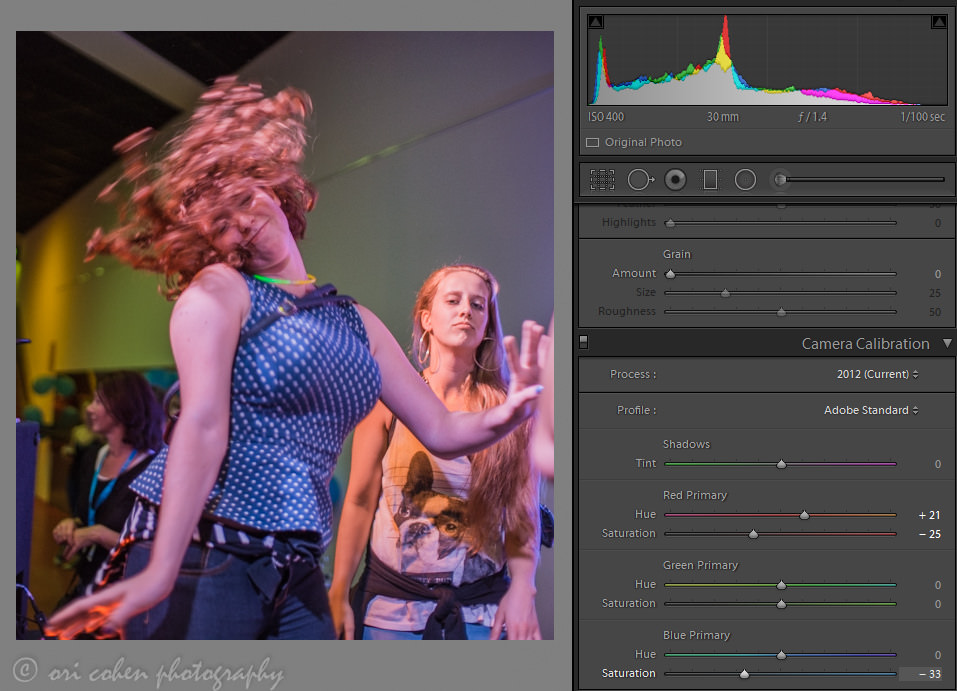
The Blue also seemed too saturated, so I reduced it a bit.
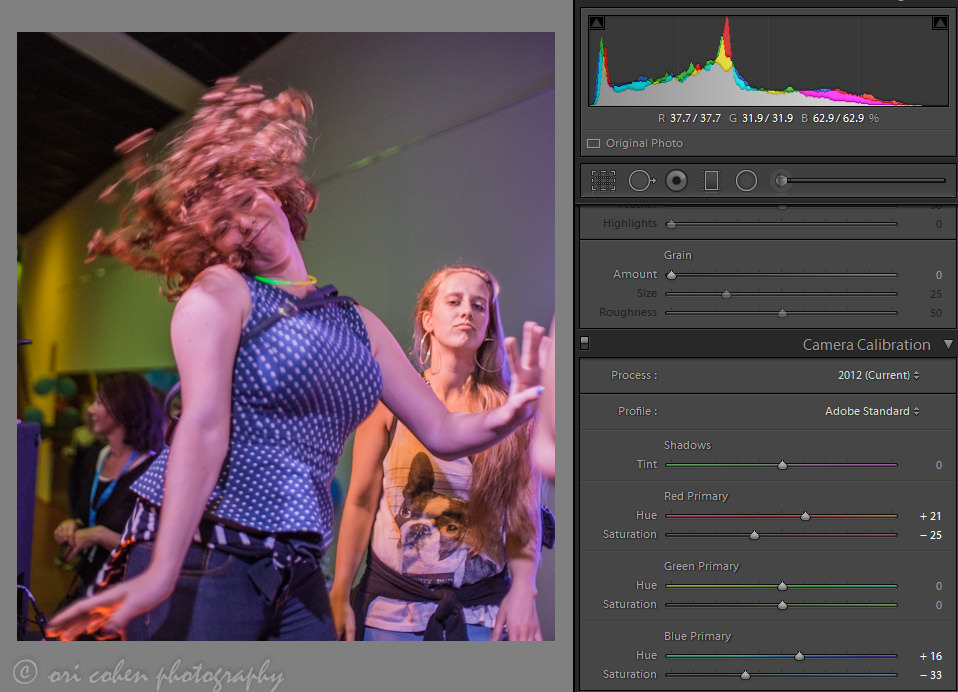
Then I pushed the Blue HUE toward the blue to make the jeans look more natural. However by doing that, I pushed the skin toward the pink again, but its still better than what we started with.
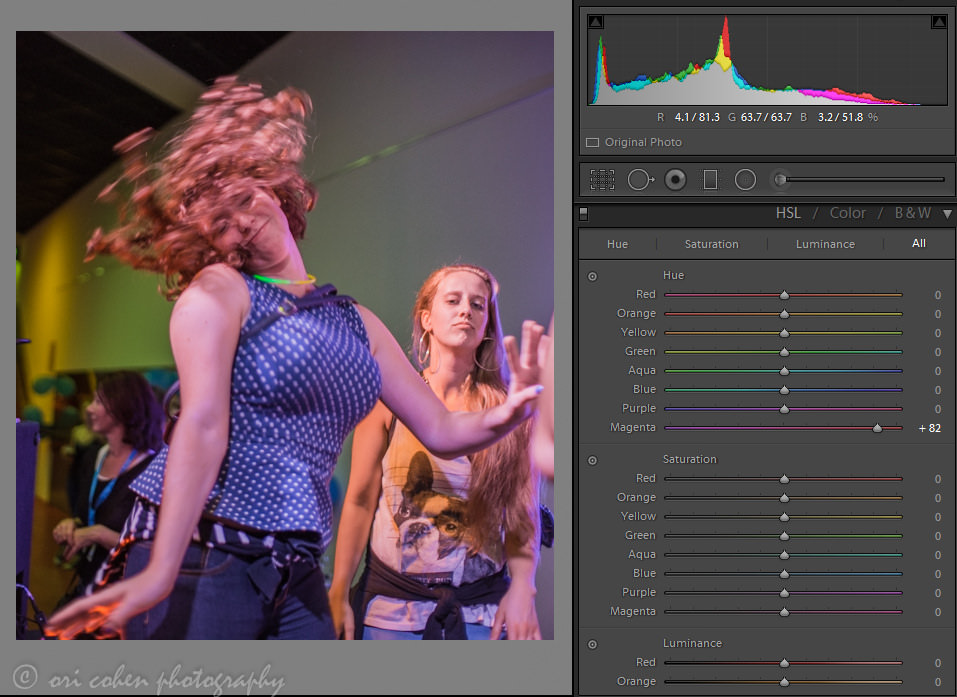
Stage 3: Selective Color Editing
In this part the idea is to treat each offending color and push it toward its neighbour or reduce some of its saturation. I decided to counter my previous BLUE shift which resulted in a little more pink and shift the magenta toward the red\orange. The result made her skin look more natural looking.
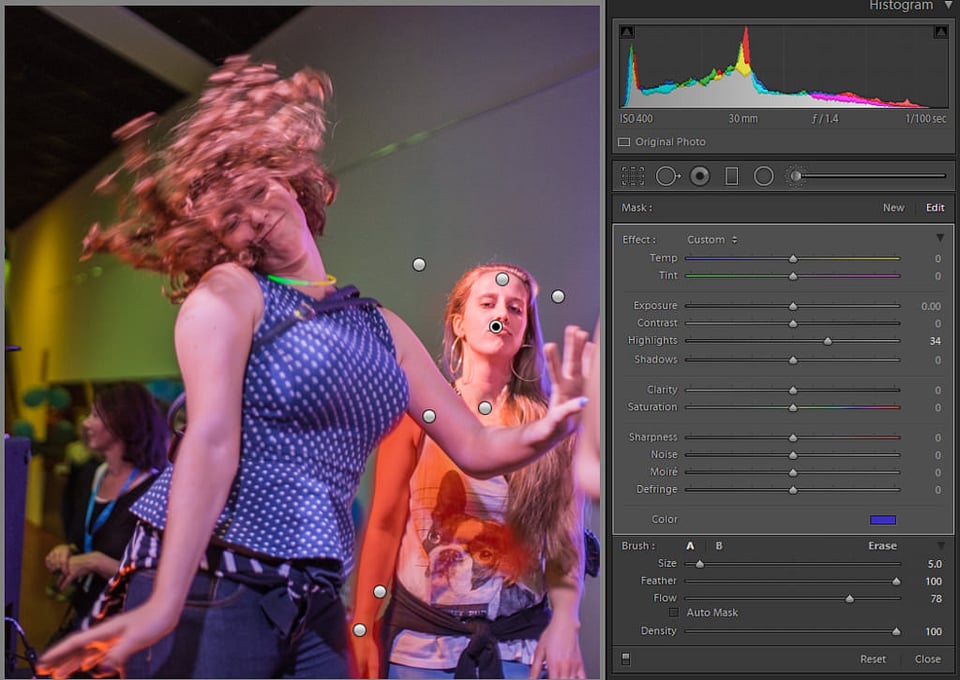
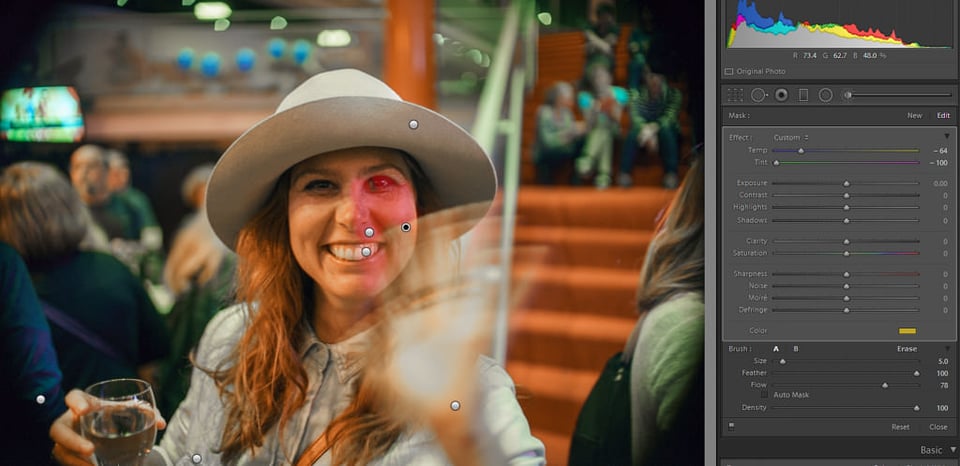
Stage 4: Brushing
As you can see the girl behind she has an orange cast. A brush can help you correct her cast by overlaying it with a blue color, again this feature is rarely used or mentioned. To enable it you have to click on white box with the X on the right.
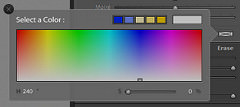
An interface will then appear in which you can select a color to overlay on top of the brushed areas. The idea is to find a color that is not over saturated and practically cancels the current cast. Adobe provided us this tool which makes this whole process so much easier than doing it in Photoshop.
Final

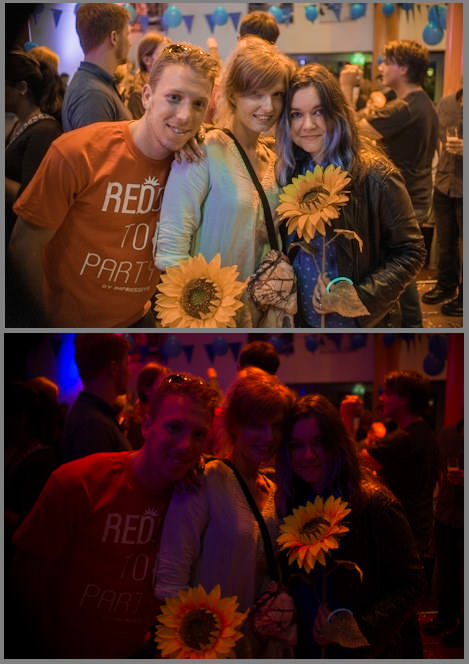
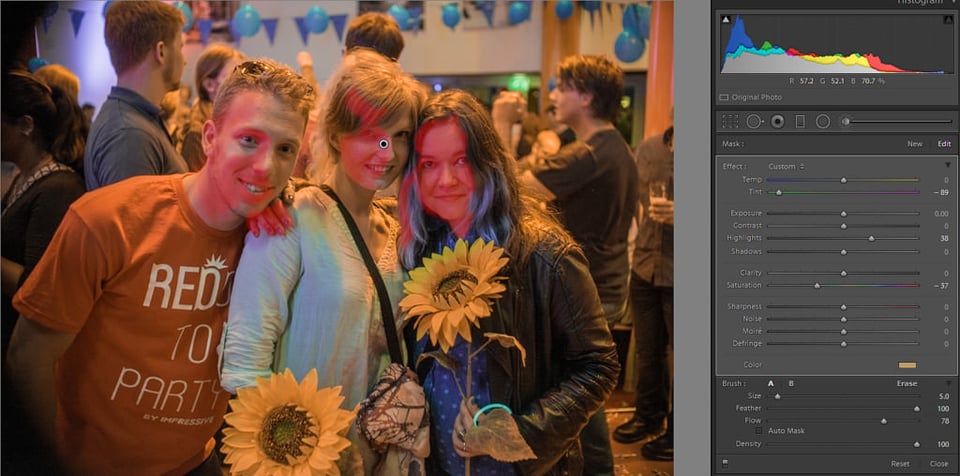
For the two other photos I will share the entire process without explaining each stage, as they are similar to the other ones but have subtle differences. In the “Friends” image, we use the same process with Temp, Tint, Basic editing, Hue & Saturation, Camera Calibration and Brush work.
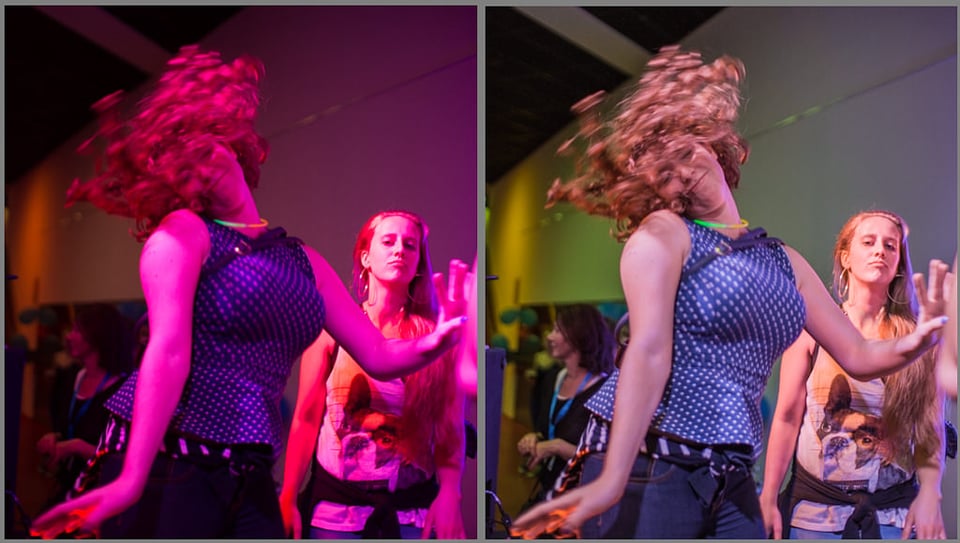
And also for the “Wave” image:
Thank you for reading, if you have any questions please feel free to ask in the comments. You can see many color corrected image similar to these on the Redhead Days 2015 Kickoff Party.
This guest post was contributed by Ori Cohen. You can visit his Facebook page to see more of his work.
Thank you :D
Great, I’m happy that this small tip can help you.
Great tips – didn’t really know how to use the mask color option! Thanks.
Hello Ori Cohen,
I could easily mail two jpg files: my original reddish drummer portrait and the editing that partly profited from your tutorial.
However, the comment field does not accept jpg files. I could upload them to smugmug where I have subscribed. However that seems complicated. Or you send your E-mail. What do you suggest?
Henning
One of the guys above managed to post a link to imgur.com, can you try that?
Hi,
I decided for smugmug, no idea how to handle imgur.com …. Here is the smugmug link
palma.smugmug.com/Other…st-images/
Henning
looks good, you can actually keep going and remove most of the magenta and green, but i guess you want to keep some of it.
Thank you for the posting!
It was very useful for me as I regularly have to correct colors of concert photos. Like another reader I’m quite good at LR as I regularly have to cope with queer colors of stage lightning, yet didn’t know two of your tricks: camera calibration and the mask’s color option.
My normal work flow starts with correcting white balance. I search for white areas in the face, these are often teeth or the white of the eye. Very often this helps me produce decent skin colors. After this step I try to moderate or balance the remaining colors in the image using HSL color options.
Henning
That’s great, maybe you can show us one of those pics that was harder to correct before my article?
[Damn, impatience ate my reply… ): ]
The typical advice I’ve seen is to match the camera profile to the one set in your camera, as the names should match.
But you’re right that it’s hard to give a simple generic tip to that, and “play with the profile selection until you find one that looks better” isn’t great either.
Thats right, and playing with something until it looks better is also very subjective. That is why I usually poll and see if the profile I believe is “right” is also acceptable to others – those who use the same gear more or less. As variability in sensor tech usually brings changes to the internal colors as well. The subtleties of color are probably one of the hardest things to figure out, i.e., what is more “correct” for skin, for all types, without affecting the environment’s natural colors. I’ll try to write something about it in the future.
The Camera Calibration should be the first step you do before any of the others.
In the one you show the editing for, it’s on Adobe Standard, which is terrible, and the cause for a lot of the horrible colours [it’s notorious for over-saturated blues]. It may also be the cause of the red colour problems too..
Set your import defaults to apply a neutral profile, to give a much better starting point.
Your suggestion is worth trying. I tested different color profiles for my redhead gallery and I found out that adobe standard was more natural than any of the others supplied with in LR, including Capture one default profile which was suggested as a better alternative on another photography site. however, I did not try it on these party/LED photos, only on morning & afternoon natural light photos.
The experience I have with the profiles has been with concert lighting, alongside a definite lack of experience of knowing how to handle colour management. [I need to learn that still…]
The profile has a very distinctive look to it, which was evident in the before shot. My preference has become to use Camera Neutral [a Canon profile]
Here’s an example of mine where the only difference is the camera calibration profile used: imgur.com/a/wFd3E
[they both have the same adjustments to highlights, etc. WB was not touched, and no other colour modifications]
I’d never thought about the lights being used which may also affect this, to be honest.
Yes, no doubt a good profile can get you a better starting point, but does it work across all camera manufacturers and sensors (which change with each camera)? If I had recommended to use a certain profile which only applies to Canon, then the whole method would not be generic enough and may not work for some people.
Thank you very much.
Very little info about that.
Nice, I’m quite good at LR as I get the pictures out of it the way I want them, but I didn’t know two of these tricks, the Camera calibration and the mask’s color option. Great tuto!
Thank you!
Great reminder of some of the “forgotten” tools in Lightroom!
Glad you liked it!