Love it or hate it, Facebook has become an important social media platform for not only promoting your work but also for finding new clients. Whether you choose to create a fan page for your business or just upload your photographs to your own profile, you might be wondering what the best resolution and export settings should be for your images, so that Facebook can display them at the highest quality. In this article, I will not only go over Facebook’s resizing and compression behavior but also show you the proper settings to use when exporting images from both Lightroom and Photoshop.
Table of Contents
1. Facebook Image Resizing and Compression
A few years ago, Facebook was terrible at resizing images. If you were to upload an image back then, it would not only make it look awful by compressing the heck out of it, but it would also strip out the color profile. If you were not very careful about the particular resolution you resize to and if you exported images in anything other than sRGB, your photographs would look nothing like they did on your computer. Since then, a lot of things have changed for the better – Facebook’s image processing engine has gotten much more advanced and better, so most issues of the past have thankfully been addressed. Still, Facebook recommends resizing images to certain resolutions before they are posted, as explained in this article. As of 11/09/2014, below are the recommended sizes for uploading photographs to Facebook:
- Regular Photos: 720 px, 960 px, 2048 px
- Cover Photos: 851 px by 315 px
- Full Width Link Thumbnails: 484 px by 252 px
- Profile Picture in Header: 180 px by 180 px
Based on the above data, the three best resolutions to extract photographs are 720, 960 and 2048 pixels. What I wanted to find out, was what happens if one is to upload images at these and at different sizes. What is the impact to a photo, if it is uploaded at say 980 pixels instead of 960? And what happens if one accidentally uses a different color profile like Adobe RGB or ProPhoto? Let’s take a look at these case scenarios and see.
1.1. Facebook Image Compression
What does Facebook do to an image that is extracted at a recommended resolution? Let’s take a look at the before and after of an image that I extracted from Lightroom at 960 pixels wide resolution and 77% JPEG Quality:

The original file size was 204 KB in the “Before” state and Facebook resized it to 64 KB, so there is a pretty aggressive compression algorithm taking place here. If you look closely, the “After” image shows some artifacts in the sky and around the subject, but it is not bad and certainly tolerable. How much compression is applied? It depends on each image, but it seems like the compression varies between 47-61% quality equivalent in Lightroom. In addition to compressing the image, Facebook’s image compression algorithm also removed all of EXIF data, PPI data and changed out the color profile information, replacing “sRGB IEC61966-2.1” with a “c2” color profile. When looking at images using a color space aware image viewer or my browser, I can see no difference between the two, so the “c2” profile is indeed very similar to sRGB, as indicated in this article from a Facebook engineer.
Summary: Even if you upload at the recommended resolution, Facebook still applies a compression algorithm on images. The only way to prevent compression is by uploading images that are smaller than 100 KB (which is often too little for a high-quality image).
1.2. Facebook Image Resizing
Now let’s take a look at what happens when one uploads an image that is slightly different in size than the recommended value. For this test, I uploaded two images – one at 960 pixels and one at 980 pixels. Below are the results for the 960-pixel image:
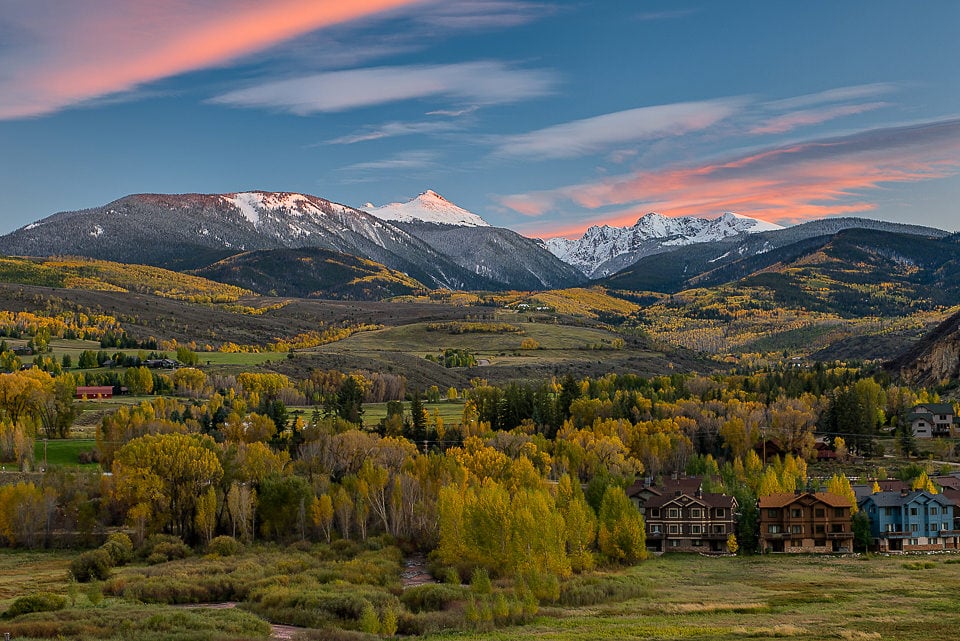

Just like in our first test, there is a massive amount of compression taking place. For this second landscape shot, I extracted the image at very high quality – 85%, which is a step lower than 100% JPEG quality. The original image size was 772 KB, with EXIF and other JPEG data preserved. Facebook’s compressed the image all the way to 150 KB and removed all the embedded data. Again, the embedded color space was replaced from “sRGB IEC61966-2.1” to “c2”.
But what happens if the image is not provided at the recommended resolution of 960 pixels? Let’s see what happens to an image that I exported at 980 pixels:
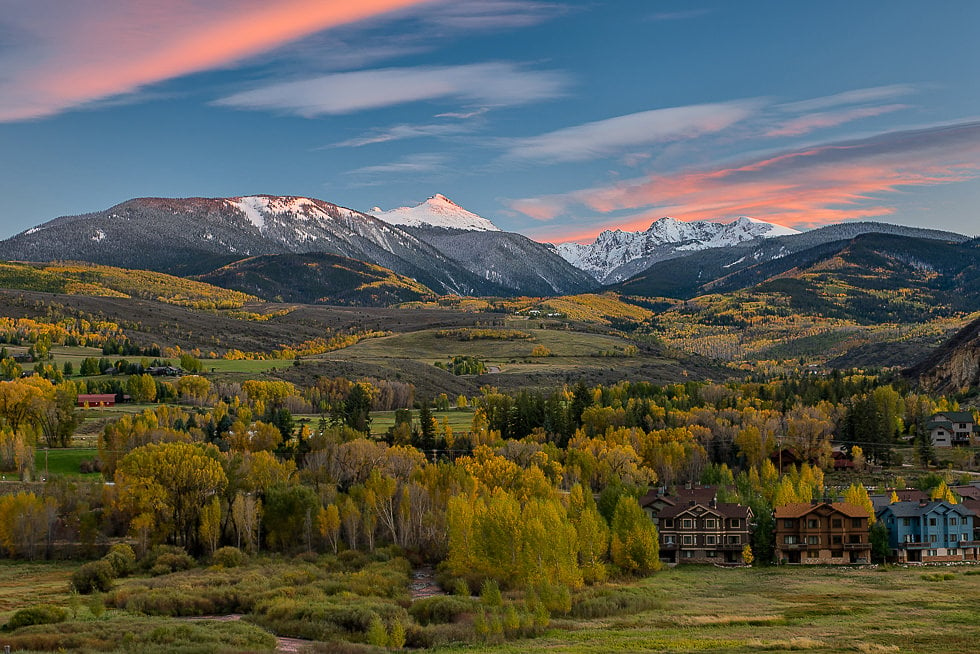

Interestingly, the image looks remarkably close to the image that I extracted at 960 pixels. Facebook’s algorithm did not resize my 980-pixel image to 960 pixels and the only thing that happened here was compression again – the image went down from 802 KB to 159 KB and EXIF data was wiped out again. The only difference is, this time, the color space was replaced with “sRGB IEC61966-2-1 black scaled”. Not sure why the profile’s name was not “c2”, but the image did not differ in any way in terms of colors.
I also tried uploading higher resolution images at 1024, 1200, 1600 and 2048 pixels. All images were simply compressed and the data was removed, without any resizing taking place.
Summary: It turns out that the resolution of your images is not important, so it does not matter whether you extract images at recommended sizes like 960 or 2048 pixels. Any image size works and each image will be treated with plenty of compression and removal of embedded data.
1.3. Facebook Color Space Conversion
What happens if you accidentally export images with a different color space like Adobe RGB or ProPhoto RGB instead of sRGB? Let’s take a look at the two images below that I exported in Adobe RGB and ProPhoto RGB color spaces (Before: Adobe RGB, After: ProPhoto RGB):

If you compare the two images above to the first image in this article, you will see that the colors are the same. This means that Facebook’s image compression algorithm is also doing a conversion from Adobe RGB and ProPhoto RGB to sRGB automatically. So if you do upload an image with a non-standard color space, Facebook will still change it back to sRGB automatically. The color space change can be seen clearly from the below screenshot, where all three images appear the same, despite having different color space before upload:
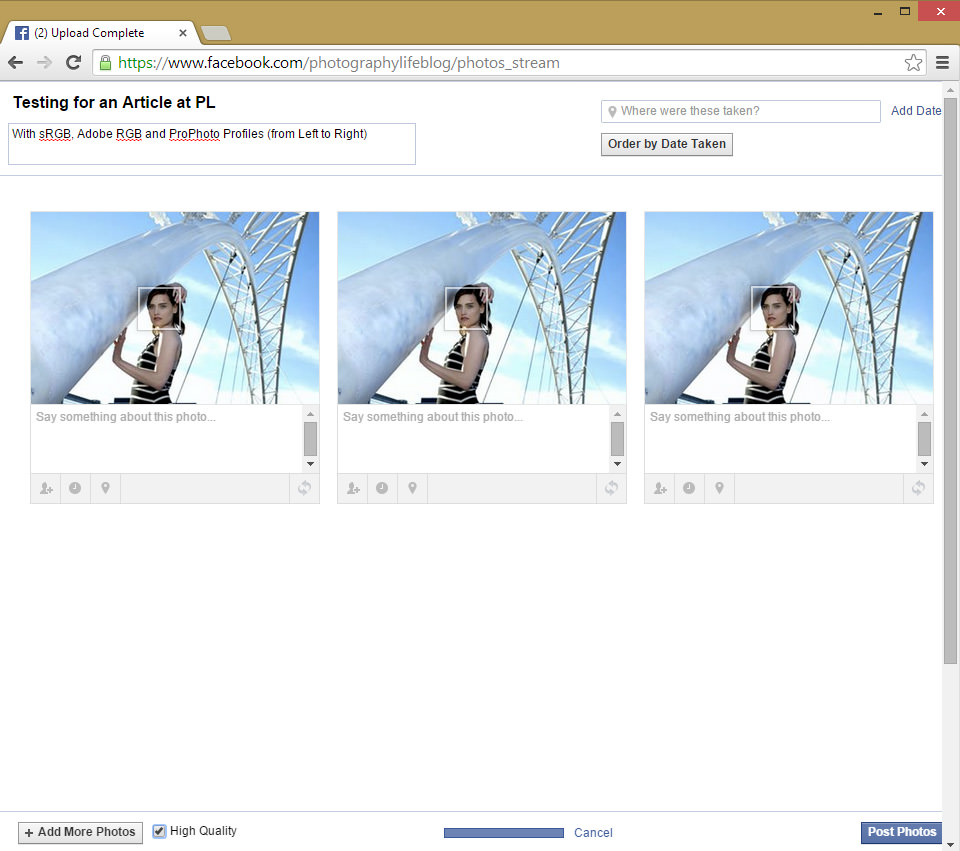
Does it mean that one should not care about what color space to use during exporting? No, I would still use sRGB during exporting, because rich colors could get altered and look a bit different after the conversion process. You are better off with color conversion taking place on your computer, rather than relying on Facebook’s conversion engine.
Summary: Facebook automatically converts color space to sRGB, even if Adobe RGB or ProPhoto RGB images are provided. To avoid color conversion issues, I would still recommend to extract images with the sRGB color space.
2. Resizing Images from Lightroom for Facebook
Now that we know a few things about Facebook’s compression and color conversion process, we can move on to the process of exporting and resizing images for Facebook using Lightroom. Here is Lightroom’s export window that shows me exporting an image at 960 pixels (feel free to change this to any resolution you are comfortable with):
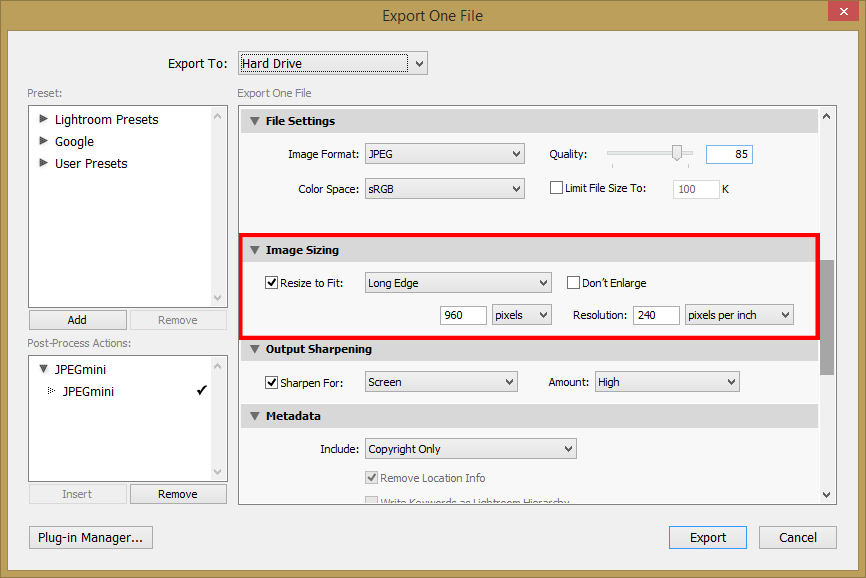
As you can see, I picked “sRGB” for color space and 85% quality for the image. Actually, JPEG quality is not critically important, because Facebook compresses the heck out of it anyway. When I experimented with a 100% quality JPEG file and compared it to an 85% quality JPEG file, Facebook compressed both to about the same size, with 1 KB difference. However, if you pick anything lower than 85%, Facebook will compress the image even more and degrade its quality, so my recommendation would be to stay at 85% or higher.
In the “Image Resizing” window, pick “Long Edge” from the dropdown and indicate the longest side in pixels. For best presentation of your work, I would recommend to upload images at higher resolution than 960 though. Keep in mind that many people own high resolution screens nowadays (Retina, 4K, etc), so making your images tiny will not help promote your work. Do not worry about the “Resolution” setting (shown as 240 on my screenshot) – that’s only used for printing and it has zero effect on how it is displayed or processed by Facebook. In fact, Facebook completely strips out that data from images anyway. I usually keep my resizing sharpening at “Screen” and “High”, but if that’s too much for your taste, you can either lower the value or skip the output sharpening completely. The EXIF data / metadata gets stripped out by Facebook anyway, so you can skip that part as well.
3. Resizing Images from Photoshop for Facebook
When working with images in Photoshop, you can perform resizing either in a separate step through the “Image Size” dialog (CTRL + ALT + I), or you can also resize the image in the “Save for Web” window. I personally prefer to do it through the Image Size dialog, as shown below:
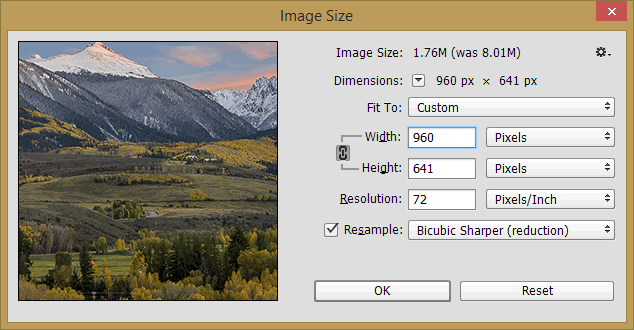
Pick the size you are comfortable with and put it in the Width input area for landscape orientation or Height input area for portrait orientation. For the same landscape shot above, I picked 960 in width and Photoshop automatically computed what the right height should be. Again, resolution does not matter, so you can leave it at its default value. For resampling, my preference is to use “Bicubic Sharper” when reducing image resolution, since it does a good job with the details and I rarely have to worry about sharpening the image.
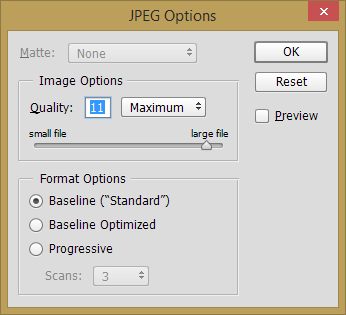
Once you resize the image, you can save it. When the “JPEG Options” dialog box comes up, pick a value between 10 and 12 for the best quality JPEG file, as shown below:
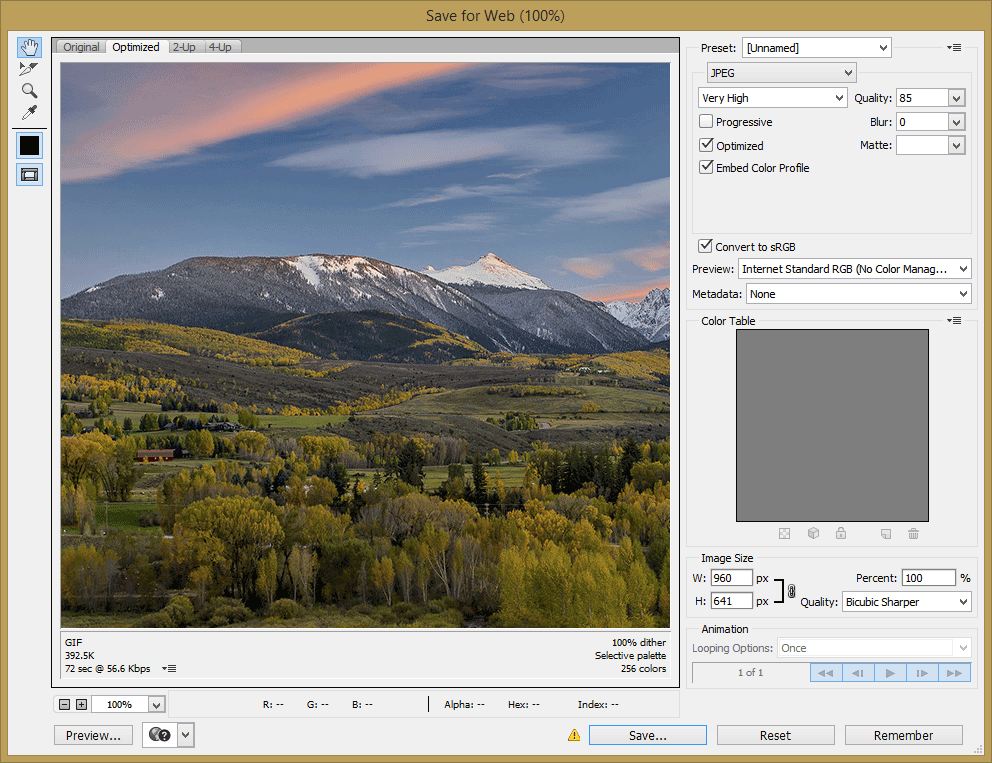
Another way is to use the “Save for Web” tool in Photoshop, which you can access by pressing ALT + SHIFT + CTRL + S, or by going to “File -> Save for Web…”. In this window, pick the JPEG quality between 85 and 100, make sure to keep “Embed Color Profile” checked and also make sure that “Convert to sRGB” is also checked:
With the “Save for Web” tool, you can skip the process of resizing the image completely – simply put in the desired image size under “Image Size” and pick the resizing algorithm such as “Bicubic Sharper”. Photoshop will resize the image and save it for you in the desired format and quality setting.
4. Summary
Despite Facebook’s recommendation to resize photographs to 720, 960 or 2048 pixel resolution for best image quality, it seems like there is no harm in picking other non-standard resolutions. As I have shown in the above article, as long as you are not trying to upload a full resolution image higher than 2048 pixels, Facebook will not resize the uploaded image to a smaller resolution – it will only apply compression and strip out the embedded metadata. For showcasing your work, feel free to pick any size you are comfortable with. I personally pick 2048 pixels and that’s the same resolution we provide images here at PL, but some people might not be comfortable with providing images at such resolution. Still, keep in mind that devices that people are using to access the Internet are increasing in resolution rapidly, so larger images will certainly look more presentable than tiny ones.
If you are updating your timeline cover photo or your profile image though, I would recommend to extract those in the exact dimension recommended by Facebook to avoid resizing. You can use the crop tools in Lightroom and Photoshop to achieve that…
ISN’T 960PX WAY TOO SMALL/
Facebook fools enlarge pictures no matter what size you try to post and what you get is a picture so LARGE that it needs a 75in 4K HDTV to see it……….way to large for a laptop monitor and just imagine wth you get on a cell phone.
No matter how many times I resize to make a picture fit FB enlarges it to a HUGE page filling mess.
Not to mention the website still is about as modern as Netscape 1998
Hi. You can use a free online tool to resize image freetools.site/image…ors/resize
I wish people would date their articles so we can tell how old (and therefore relevant) they are!
The action may solve the problem to the author…since it is not described :-)
At least a download button could have been posted…
Dear Sir
I’m a novice at using FB and posting photos to FB. I use a Canon A85 powershot model. All my photos appear to small when trying to put them in FB
Like the size of thumb nails or similar. How do I make them larger in face book? Thank you, Geene
With this action solves the problem :)
graphicriver.net/item/…ok/8688286
Is it possible to define an action using this method of “Save for Web” for both Landscape & Portrait images?
Thanks in advance.
Miguel
Does anybody have problems with their “Portrait” aspect ratio images looking incredibly compressed and pixelated? I am totally fine with my landscape aspect ratio images at 2048 pixels long (85% quality), but my Portrait images at the same size are always horrible!! I’ve tried uploading at 1600 pixels long, but that doesn’t seem to be working anymore. Can anyone provide suggestions??
Export at 1024 or 960 px portrait as png and you will have a clear image. See for yourself at my fb page facebook.com/nemanjas.rs , I followed old Mansurov’s tutorial about exporting for web.
My current process standard is to use SMUGMUG. I convert images from RAW to medium jpegs in Lightroom adding watermark/copyright. Then I place them into my SMUGMUG page usually as a date/content album. Then, I share that album out to FBook via the SMUGMUG option. The initial image in the SMUGMUG album appears in FB with my comments. Clicking on the image redirects folk back to SMUGMUG which does not have issues with sizing, resolution, color, cropping, depth…..
Good thinking! A way to get around the confusion and keep your images protected! Well Done!