Four seasons is a marvelous gift of our planet to landscape photographers, at least in certain parts of the world. In the past, I preferred anything but winter. I always impatiently awaited fall colors, peaking around late October and beginning of November, or the lush green tones of mid-April. But in the past few years, I learned to love winter too. Well at least when there is snow and frost. Here are my tips on how to photograph snow in cold weather.
Winter is not an easy time to photograph, as some extreme conditions may occur. Among other issues, low temperatures often lead to discomfort for photographers and shorter battery life. Winter, however, brings several benefits for landscape photographers that are often underestimated:
- The sun hangs much lower over the horizon compared to other seasons;
- The sun rises in the southeast and sets in the southwest (in norther hemisphere) – which might be useful for some locations;
- The sun does not rise as early as in the summer;
- Snow and frost can substantially transform the atmosphere in many locations;
- Snow and ice can be very photogenic on their own;
If you have not done so yet, perhaps it is time to get out in the cold and bring home some great photographs. Below are my ten tips for shooting winter landscapes.
Table of Contents
1) Thorough Preparation is Important for Tough Conditions
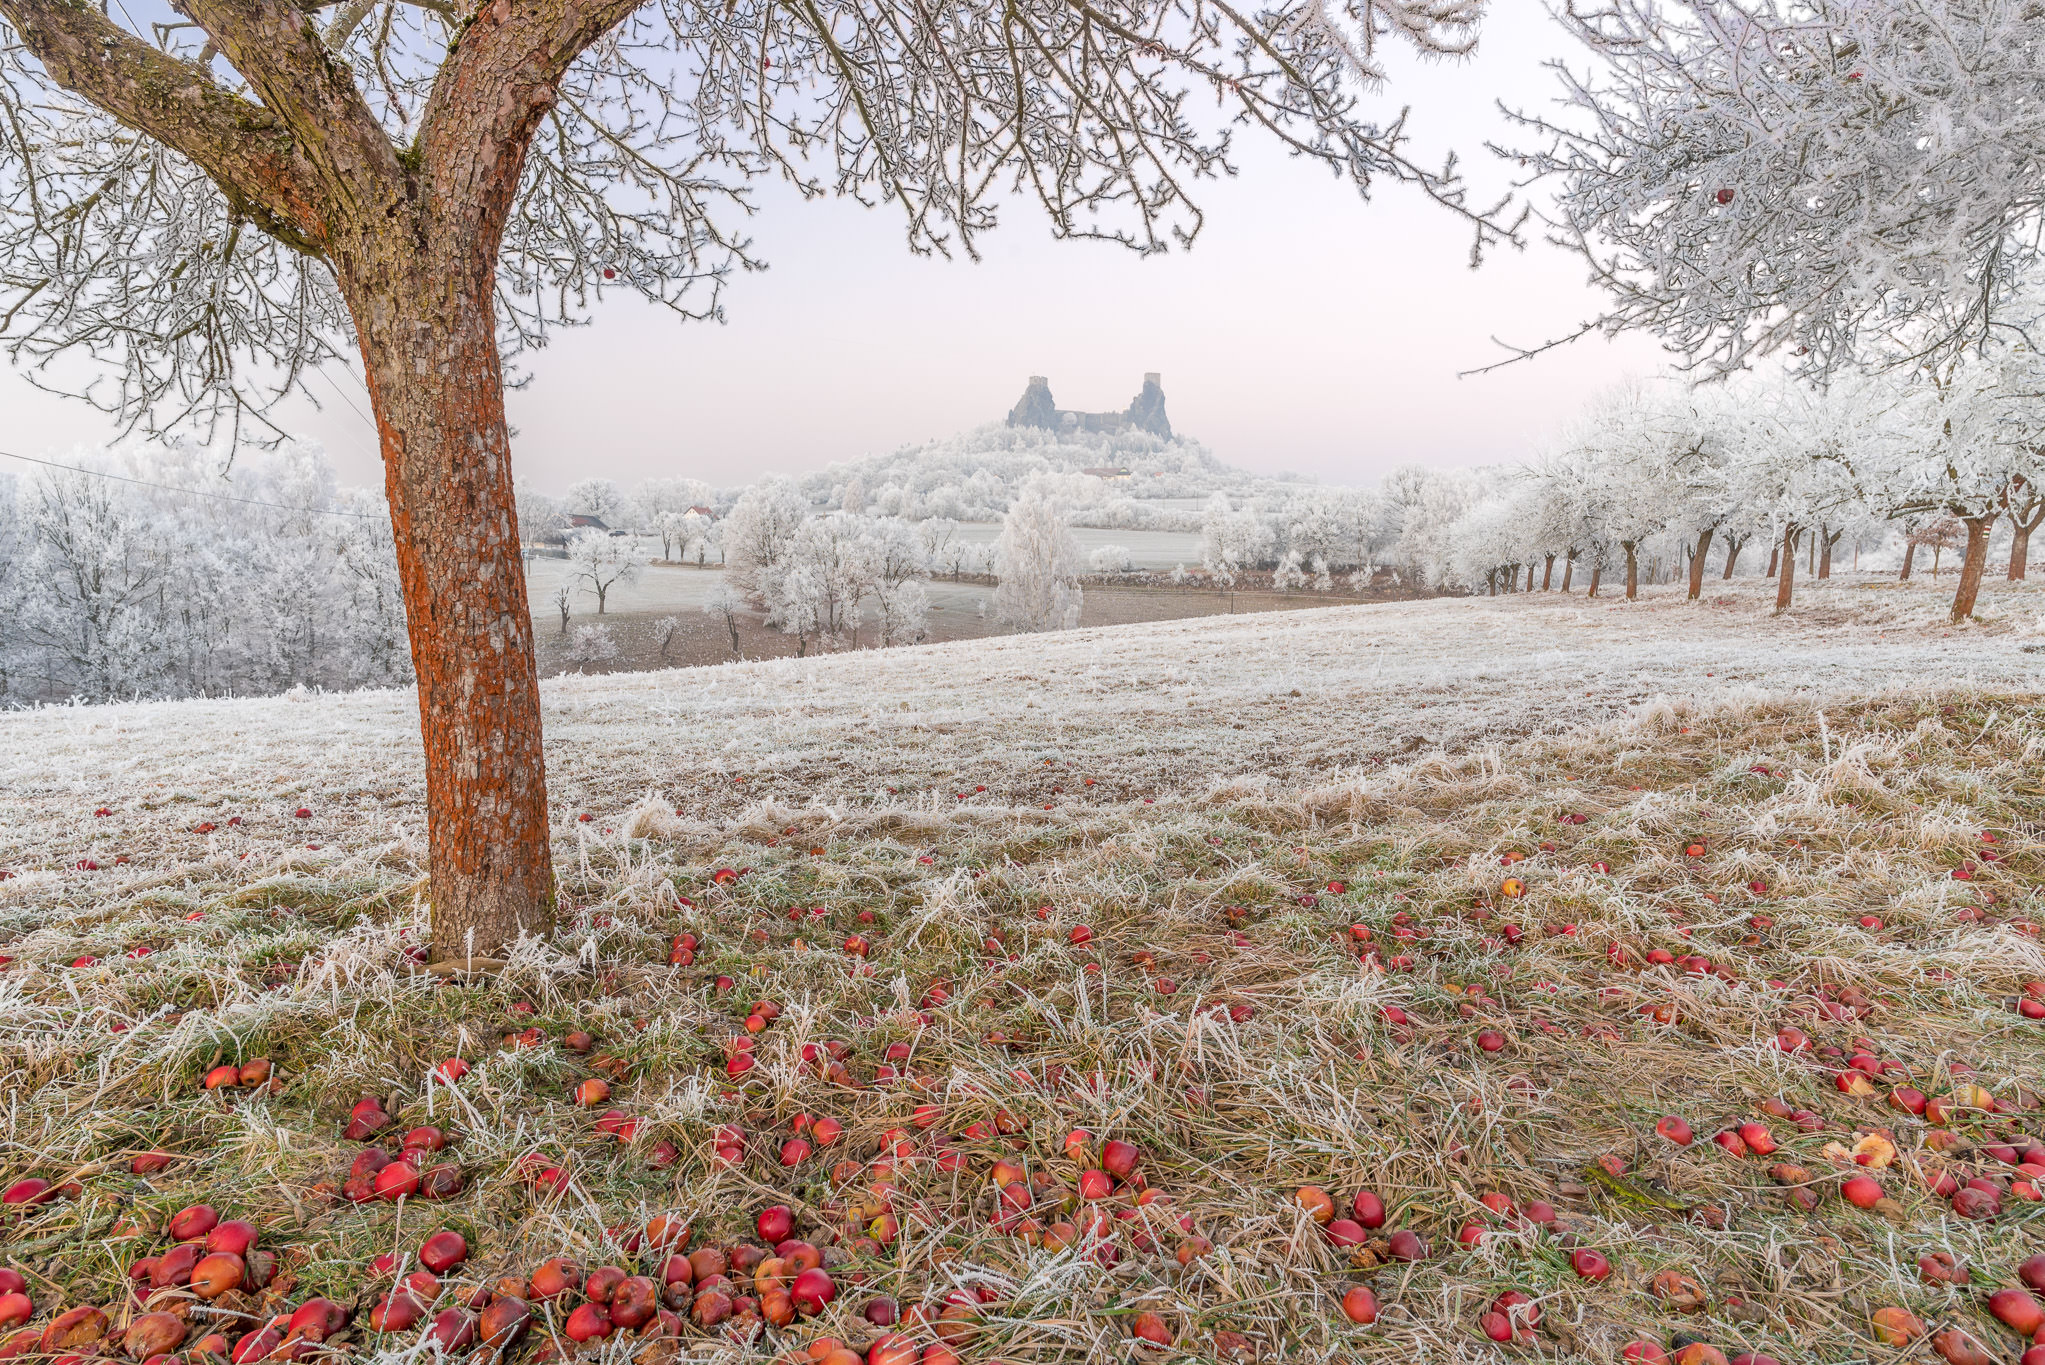
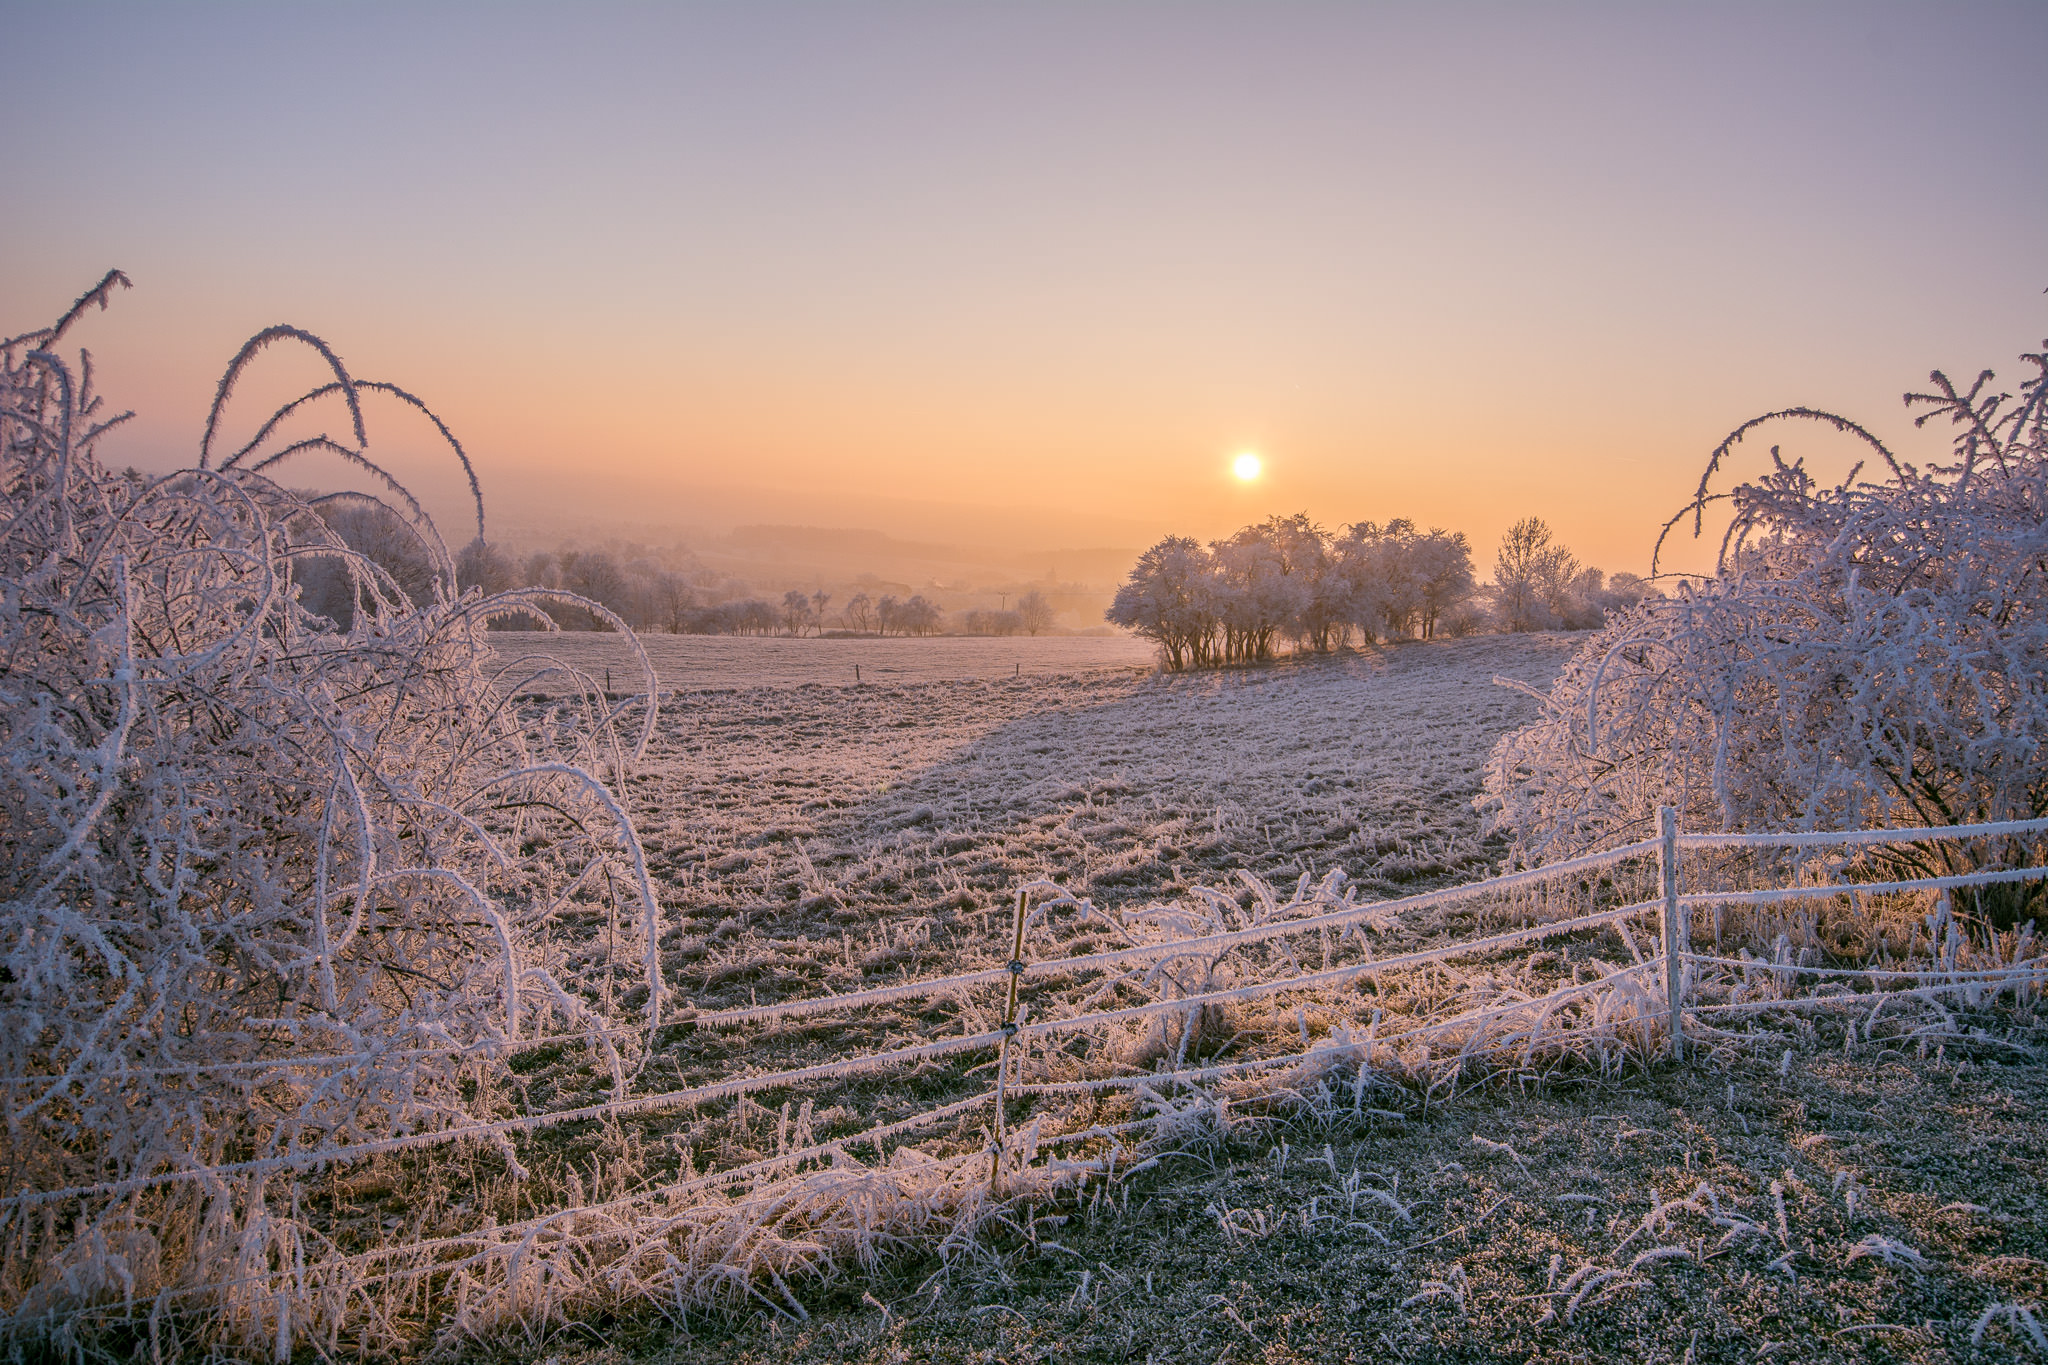
Look at the weather forecast and prepare appropriate clothes. Pay attention not only to temperatures but also to wind speed and to air humidity – the latter two can decrease the subjective feel of the temperature big time. As a landscape photographer, you should be set up at your shooting location ideally 30-45 minutes before sunrise, as pre-sunrise pink clouds can show up pretty early on. But that is also when the temperatures reach their lowest point. The first photograph above was shot at the beginning of January of this year. When I got out of my car, it was -24.5°C (-12 Fahrenheit). Sunset photography can be slightly more weather-friendly in winter months, however, as soon as the sun disappears below the horizon (and you do want to stick around after sunset), temperatures typically drop very quickly too. What’s worse is that you would be standing right next to your camera, waiting patiently for the best light, which means lack of body movement and hence getting cold much quicker than usual. Therefore, it is critical to wear proper shoes and clothing that won’t let you down. Here are some recommendations in those areas:
- Use multiple layers of high quality clothing. Merino wool-based layers can provide the necessary warmth – make sure that the base layers are close to your skin.
- Use warm waterproof shoes. If the snow is deep, you might want to use gaiters.
- Have two pairs of gloves – one thick hard shell for those waiting moments and the other should be thinner gloves to be able to manipulate your camera.
- Wear long johns for really low temperatures. Sometimes several layers might be necessary. Again, Merino wool can be very useful as a base layer.
- Have a thick and warm head cap, perhaps even two layers.
- Hand and toe warmers can be life-savers in very cold conditions, so if you know that it will be freezing cold, you should equip your hands and feet with those.
- Have multiple fully charged spare batteries. Remember, cold temperature drains batteries much faster than usual.
- Ideally, try to pre-set your camera settings before getting out (in car or at home) so that you only change the absolute minimum while shooting in harsh conditions.
- A tripod would be a must during early hours due to lack of ambient light and very slow resulting shutter speeds. However, make sure that you have foam or other material protecting your tripod legs – you do not want to be grabbing a bare aluminum tripod with your hands, as it will freeze your palms and fingers. I personally carry my tripod attached to my camera bag, so that I do not have to hold it for a prolonged period of time.
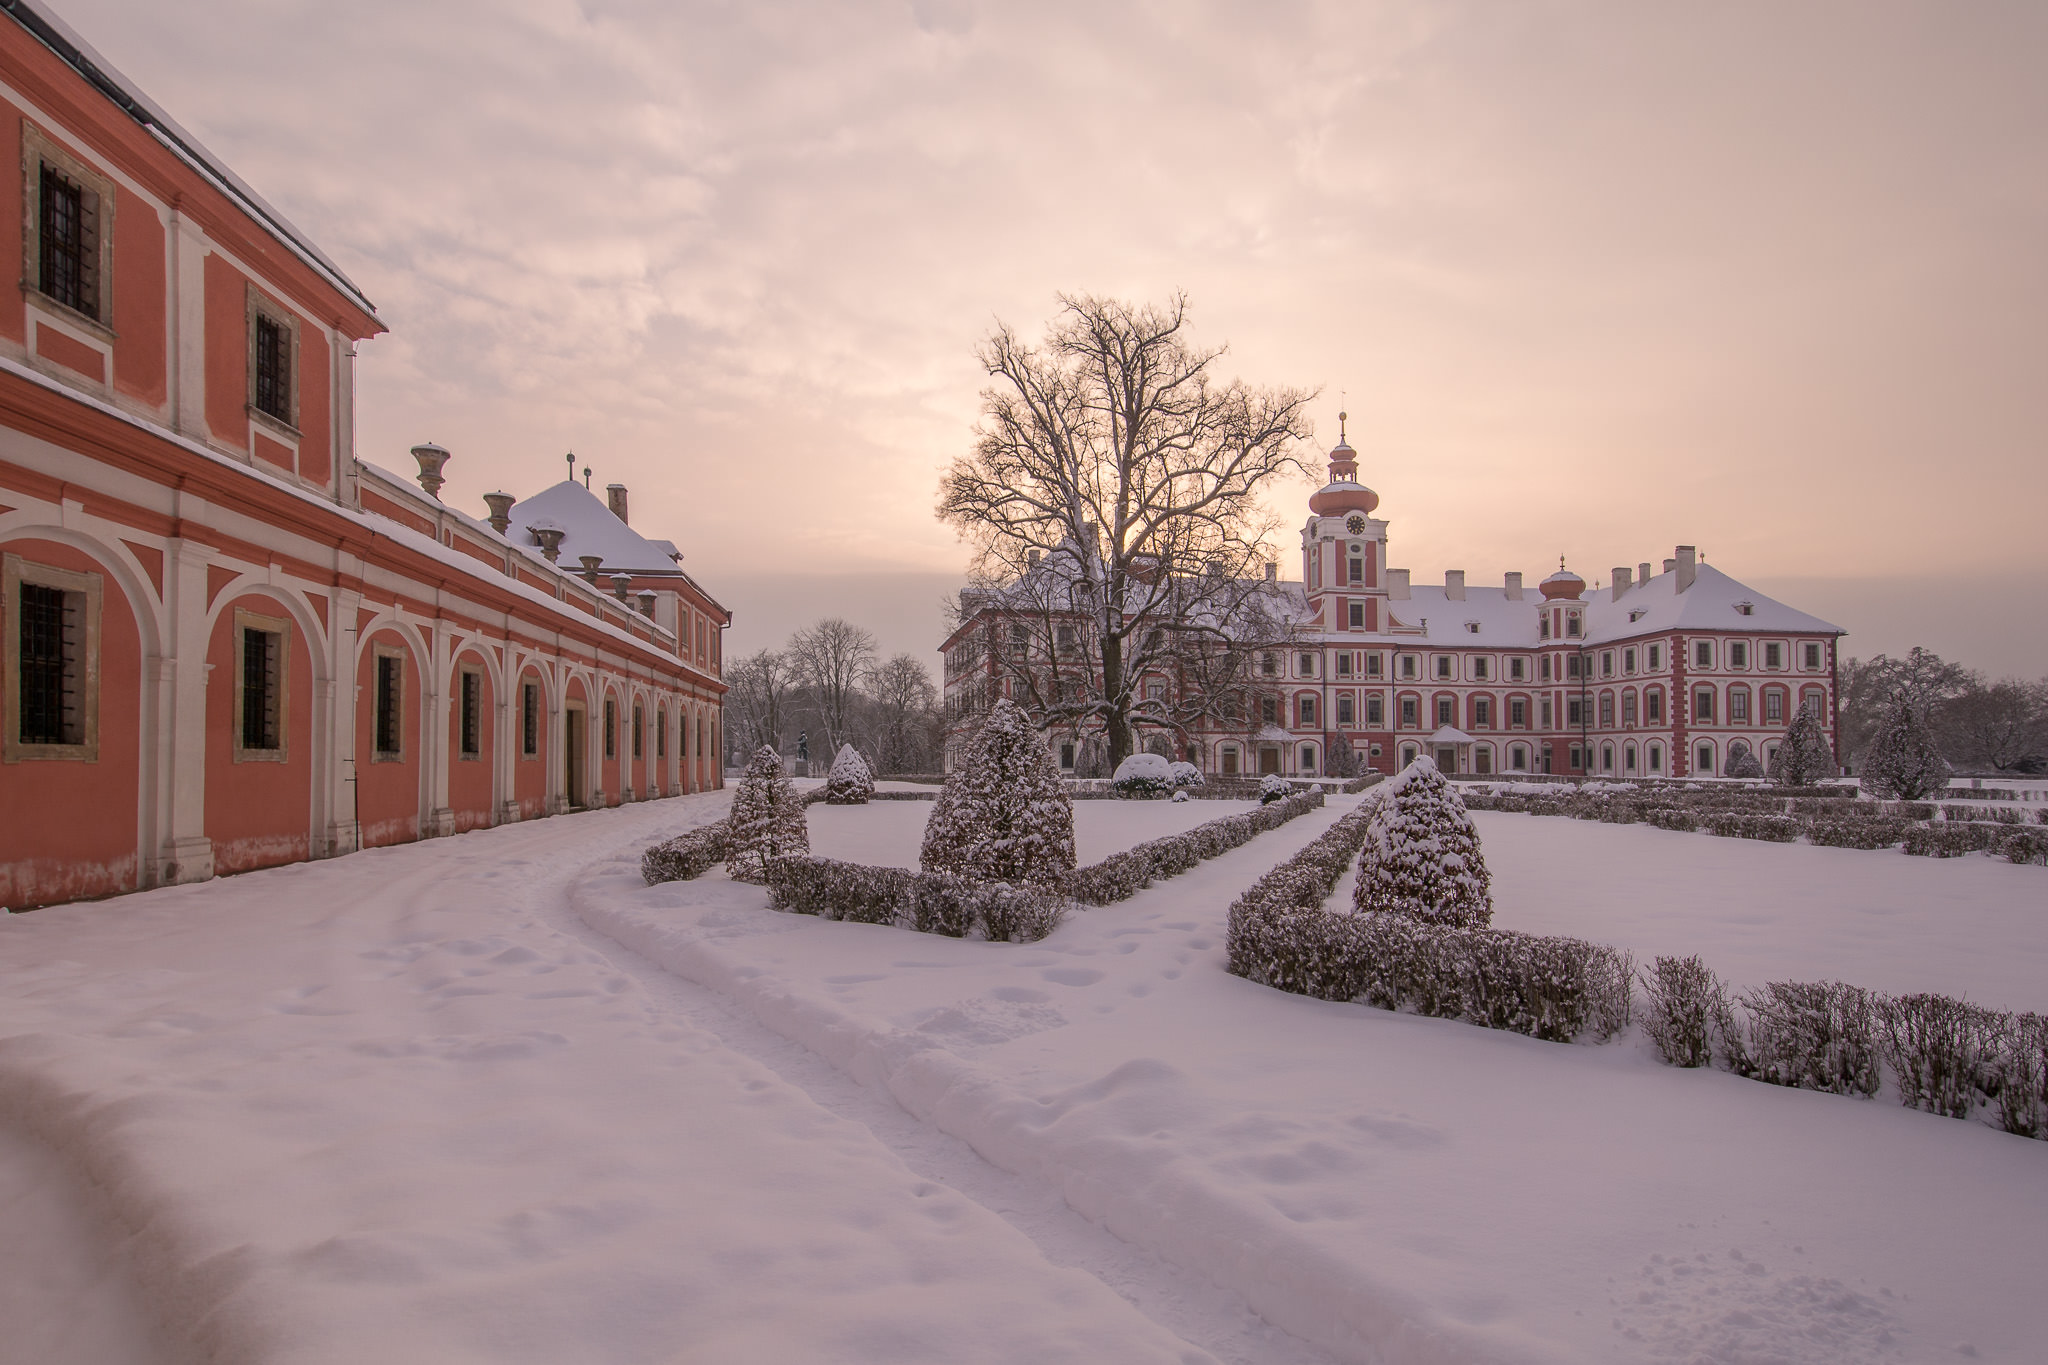
2) Plan Your Trip Immediately After Snowfall
To get amazing photos in the winter, timing is much more important than your gear. In lowlands where I live, unlike in the mountains, fresh snow is rare and often melts and gets dirty within a few days. I pay attention to weather forecast and especially try to identify short pockets of good weather following the snow storms. Often, even cloudy weather can be good, especially if the clouds are structured. Shooting while it is snowing hardly ever leads to good results (unless the snow storm is combined with direct sun, but that hardly ever happens).
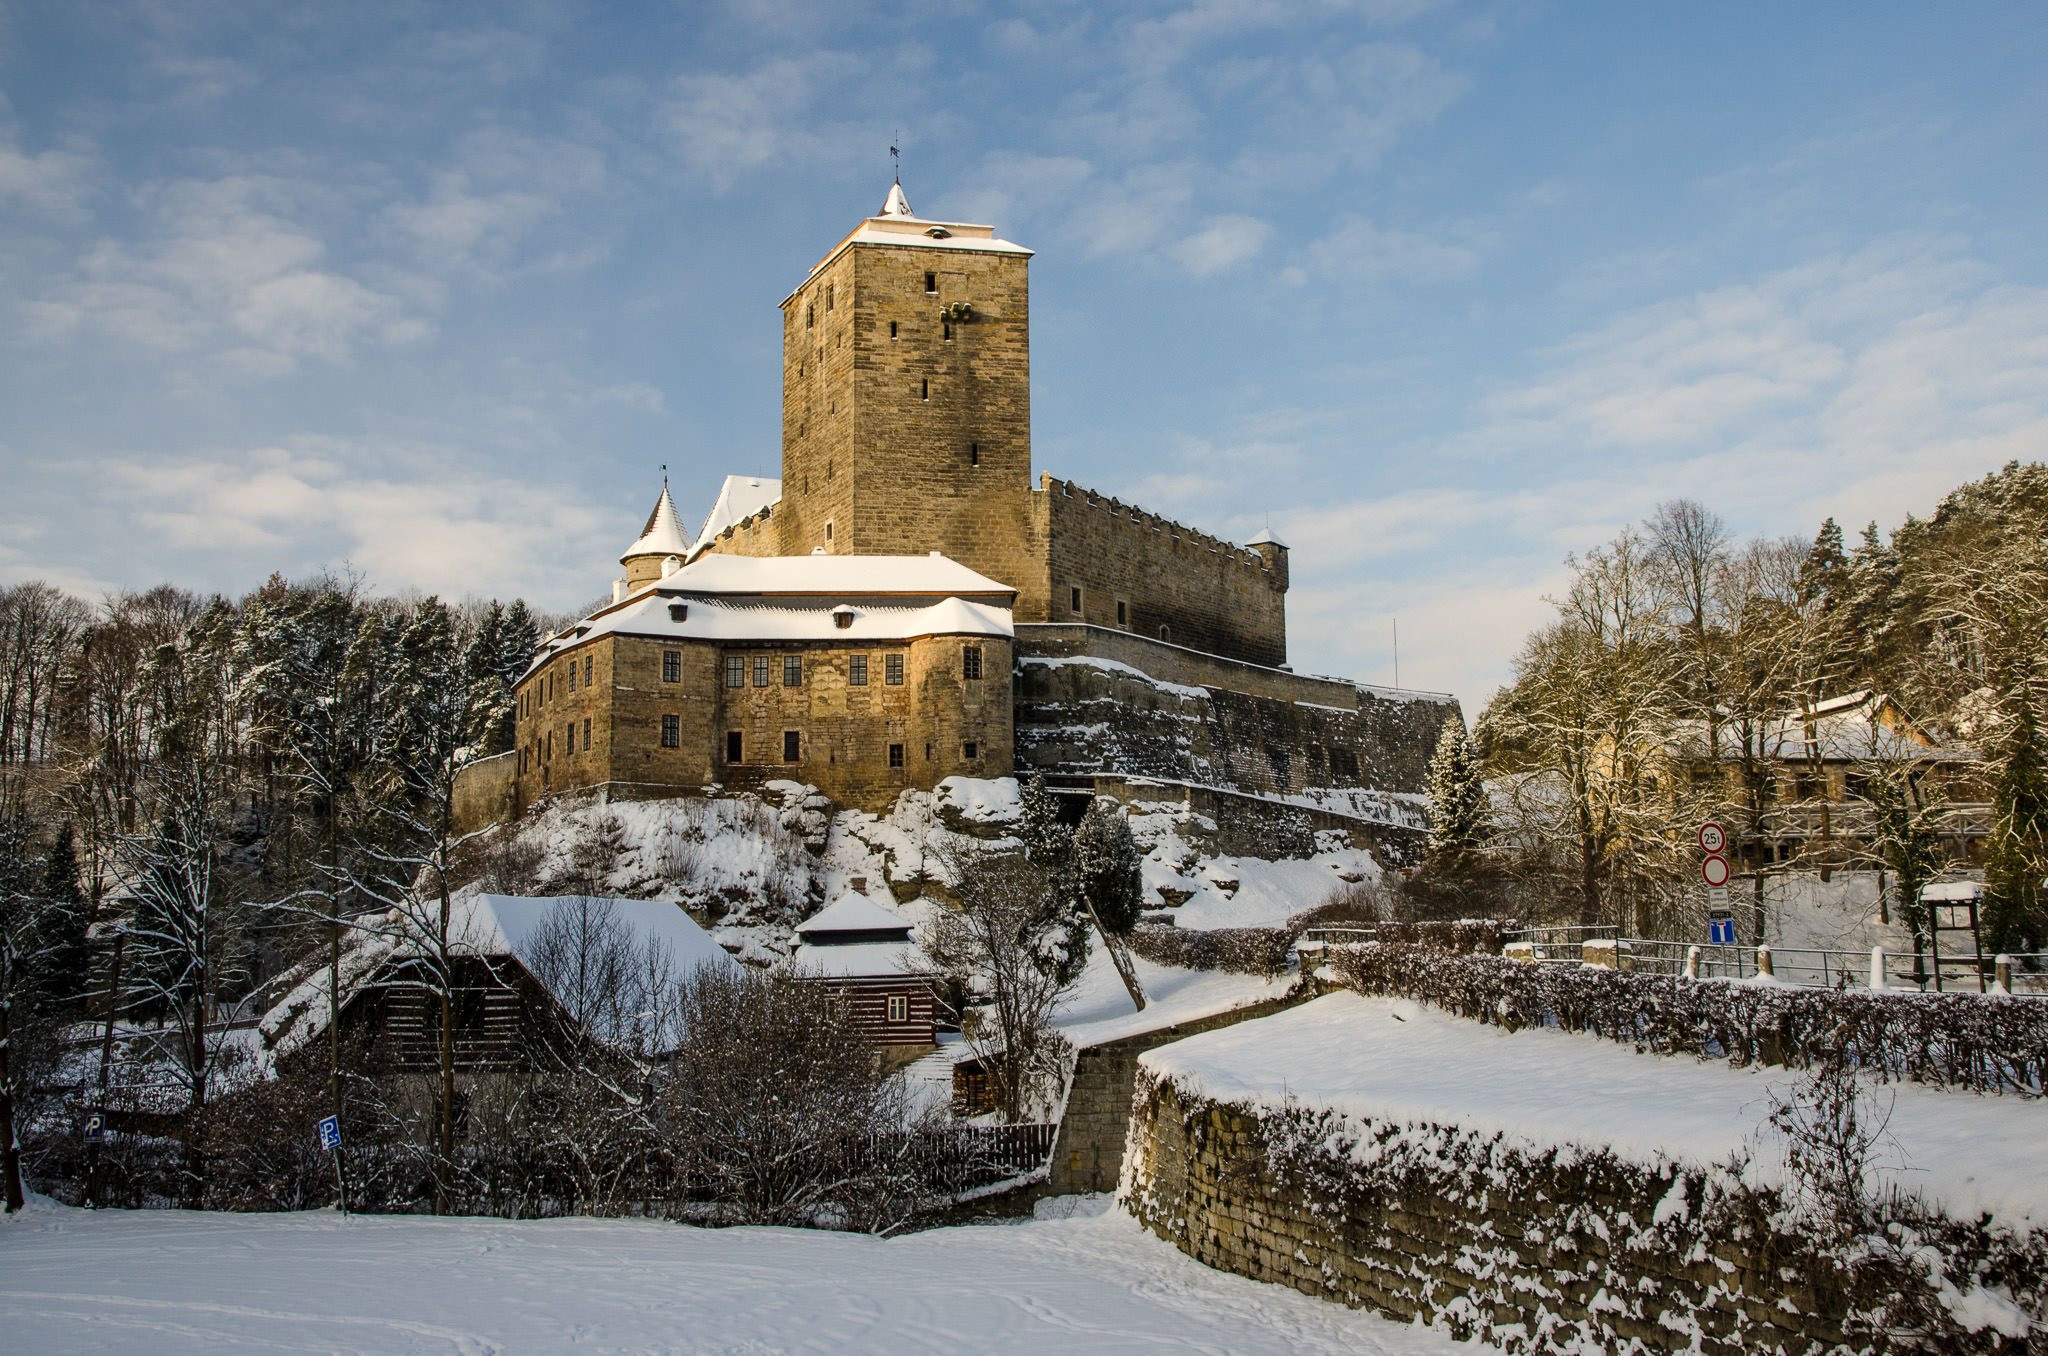
These images were captured after a snow storm. Here, the snow covers everything, including branches of the trees, roofs and roads. Some ugly subjects, which might otherwise be difficult to get out of your frame, such as trash bins in natural parks, literally disappear from your scene under the snow cover. The downside of this is the fact that roads might be difficult to ride – so again be extremely careful (and do not drive if you do not have winter tires and chains in reserve). Inform your family and close friends if some hazard may occur during your trip. Safety first – do not risk just for the prospect of a potentially great image. Your health and well-being are far more important.
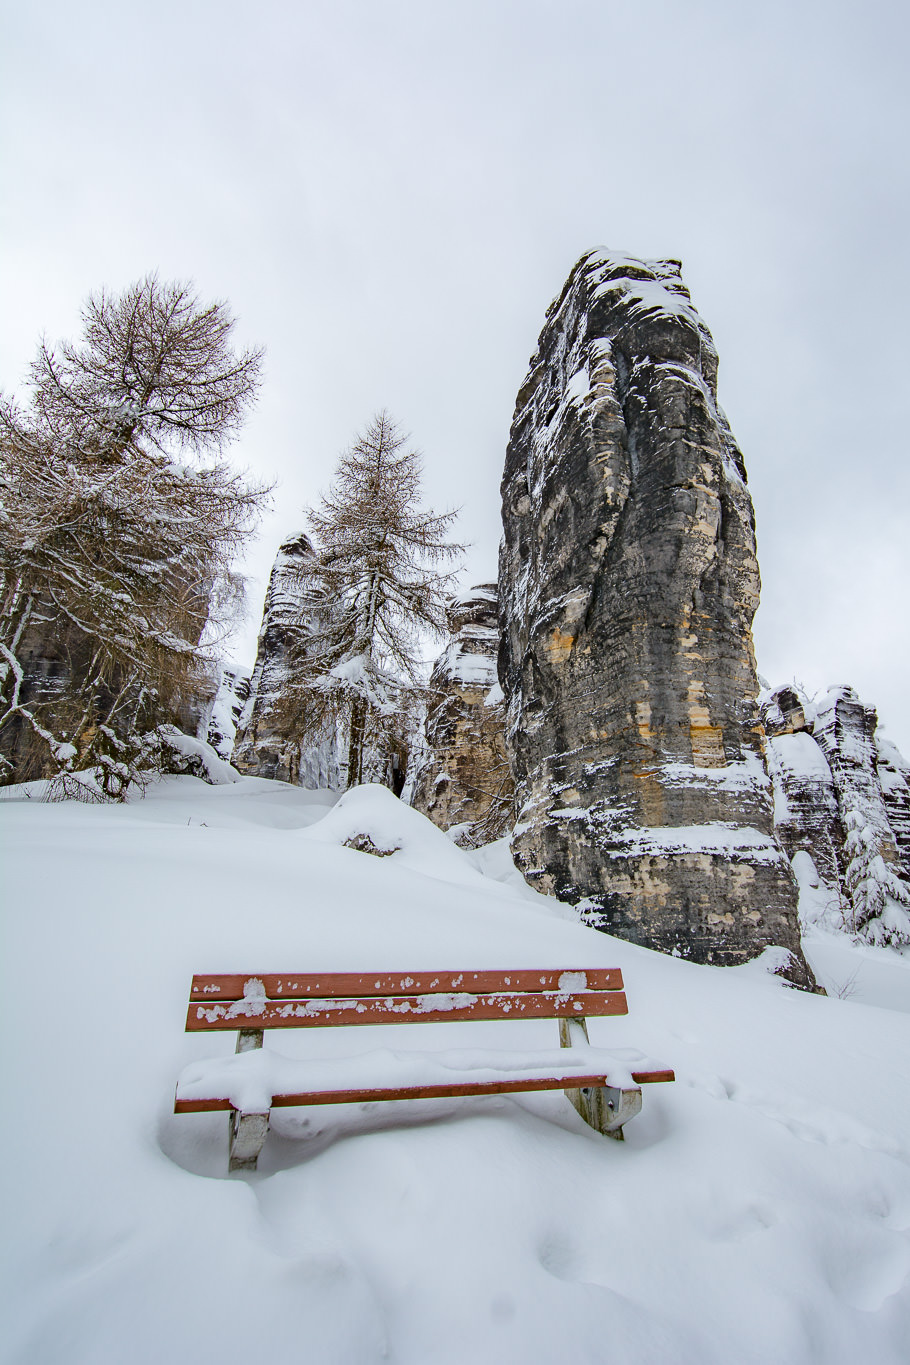
3) Work with Snow Structures in the Foreground
Wind and frost create beautiful shapes and structures in fresh snow. Such a theme is ideal for your foreground. If snow cover is older, perhaps already partly melted, look for foot imprints or any tracks in snow – these can serve as leading lines in your composition. Get low and close to those structures and use a wide angle lens. Control your depth of field by applying hyperfocal distance measurements to determine the best spot to focus on. And don’t forget about diffraction, as it can make snow particles and other important details look mushy rather than sharp and detailed.
4) Use a Different Color Palette
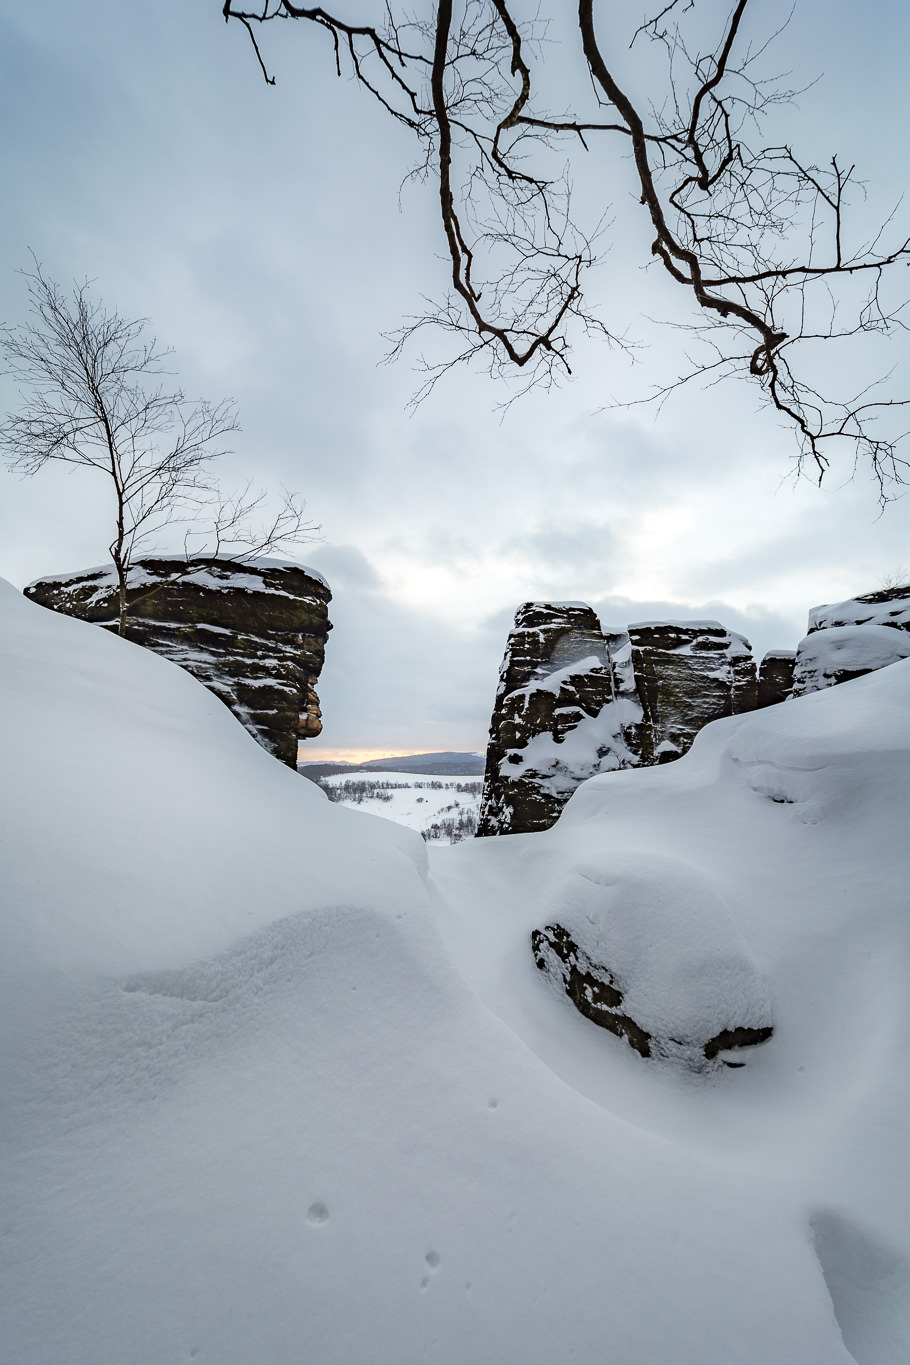
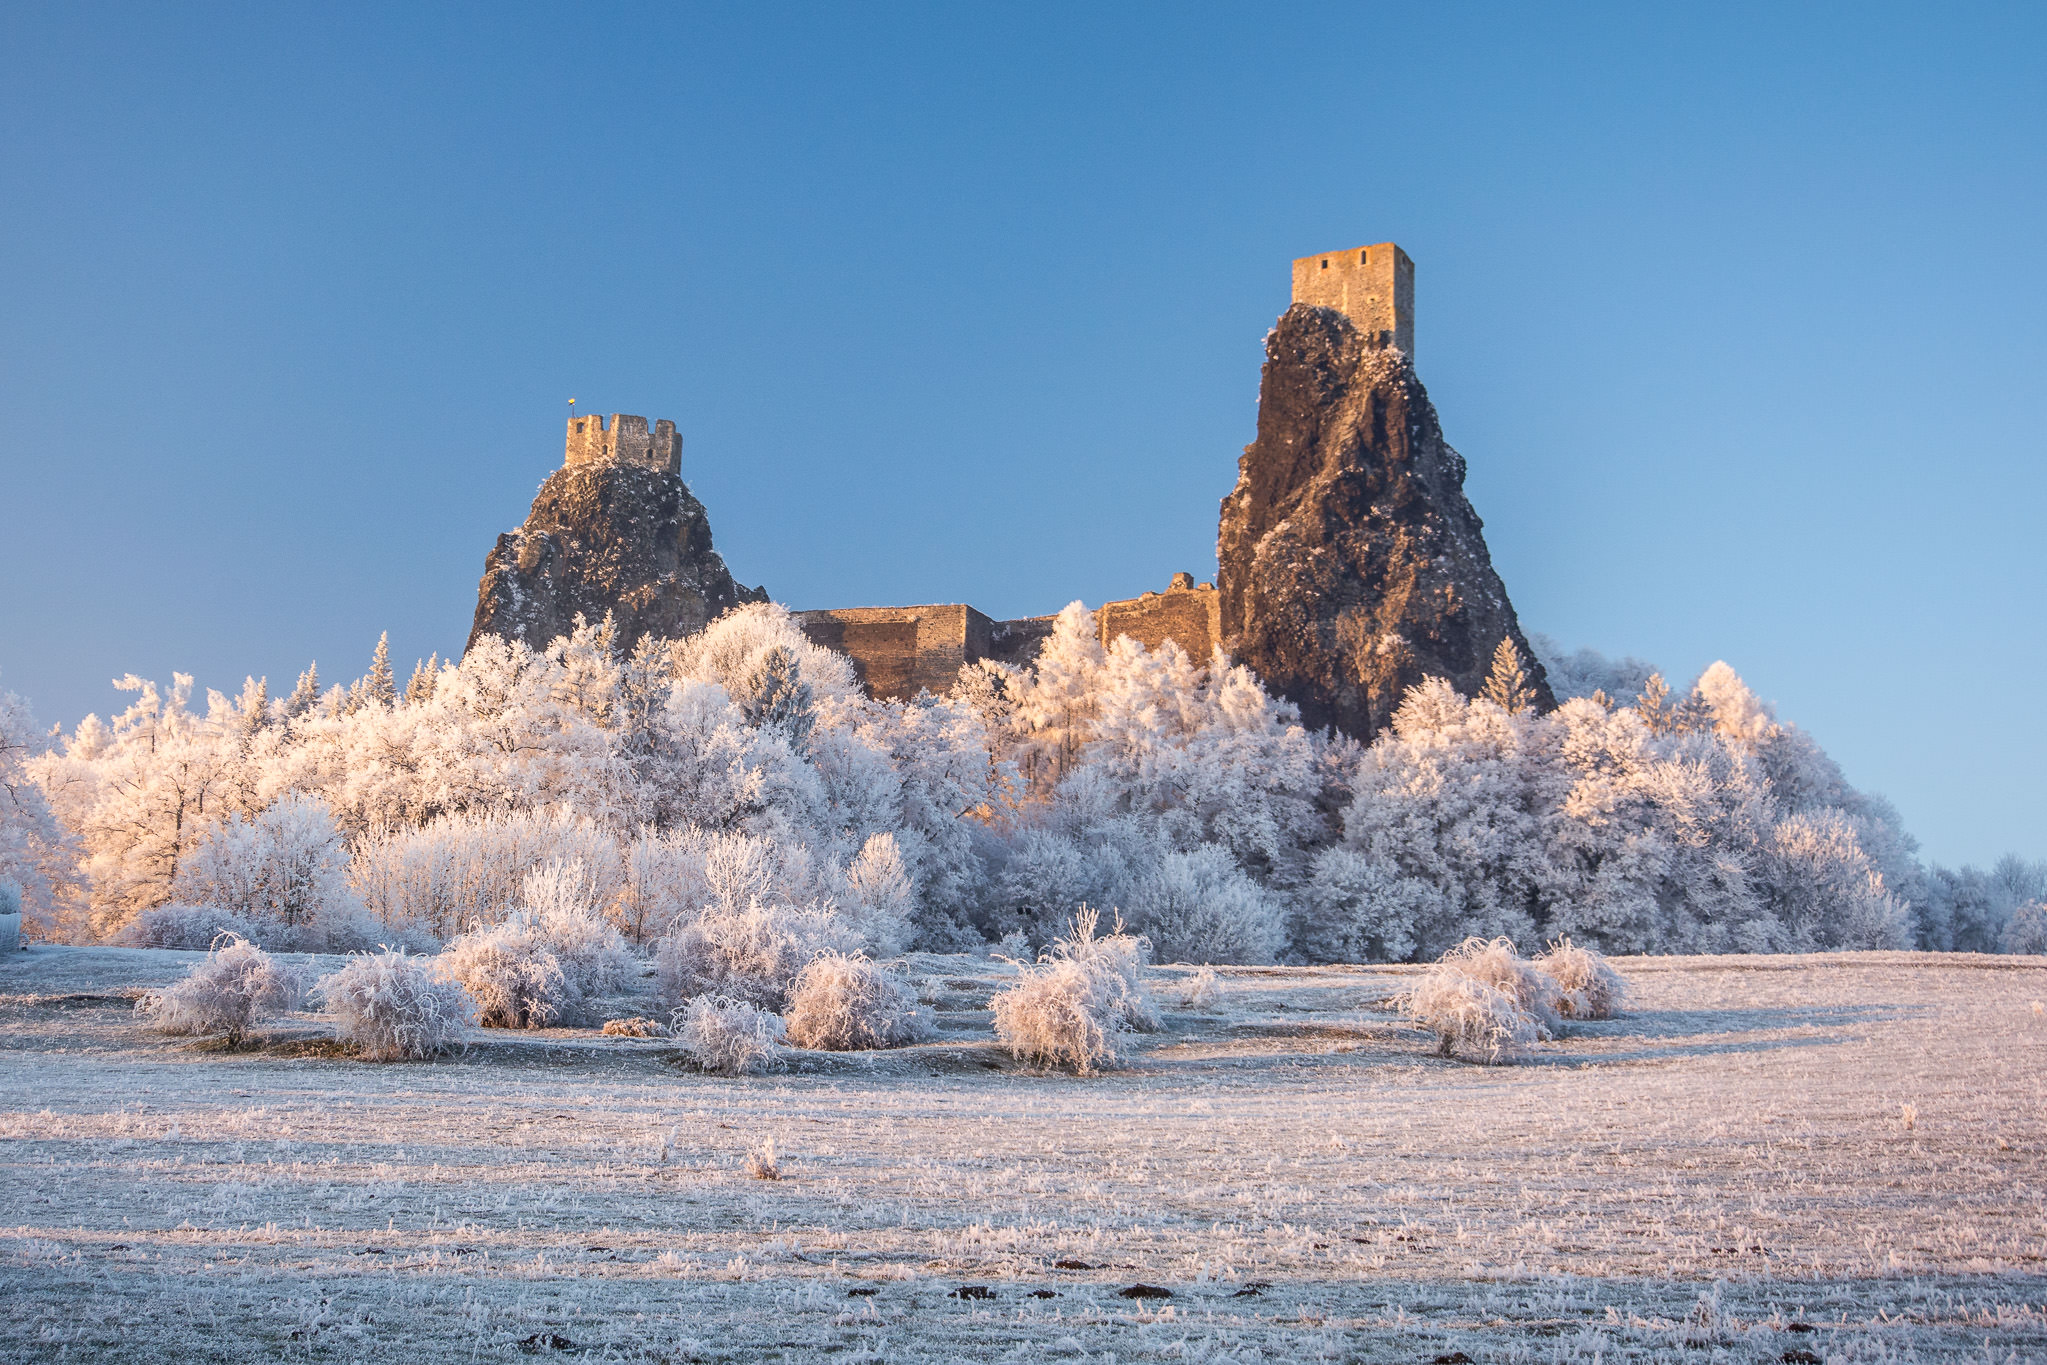
What I enjoy about snow-covered landscapes is the very special color palette they exhibit. Snow and frost change the tonality of the landscape. The hue palette gets simplified. Snow softens strong tones and highlights the otherwise less visible pastel colors. Very often, the only saturated color is deep blue of the clear sky. Moreover, snow covers the unfitting color elements on the ground (such as non-complimentary green-brown hues of the empty fields).

During sunset and sunrise, the white snow nicely reflects the saturated tones of the sky. In extreme temperatures, I often observed rich purple and orange tones in the low sky above the horizon before sunrise and after sunset. Don’t be surprised to see bluish shadow areas in sunny conditions – it is just your brain that compensates your perception of the snow color in shadows in real life.


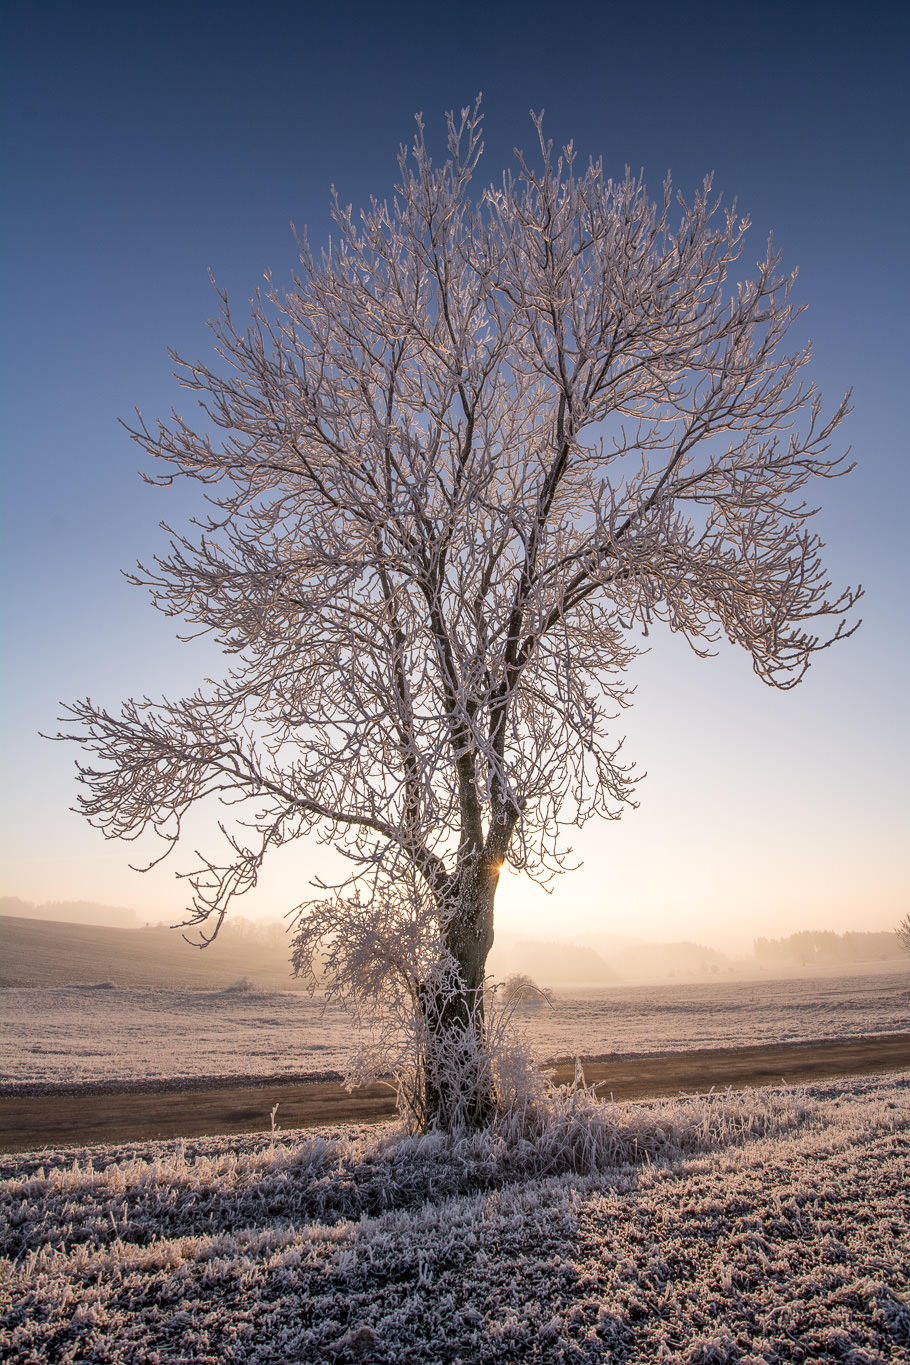
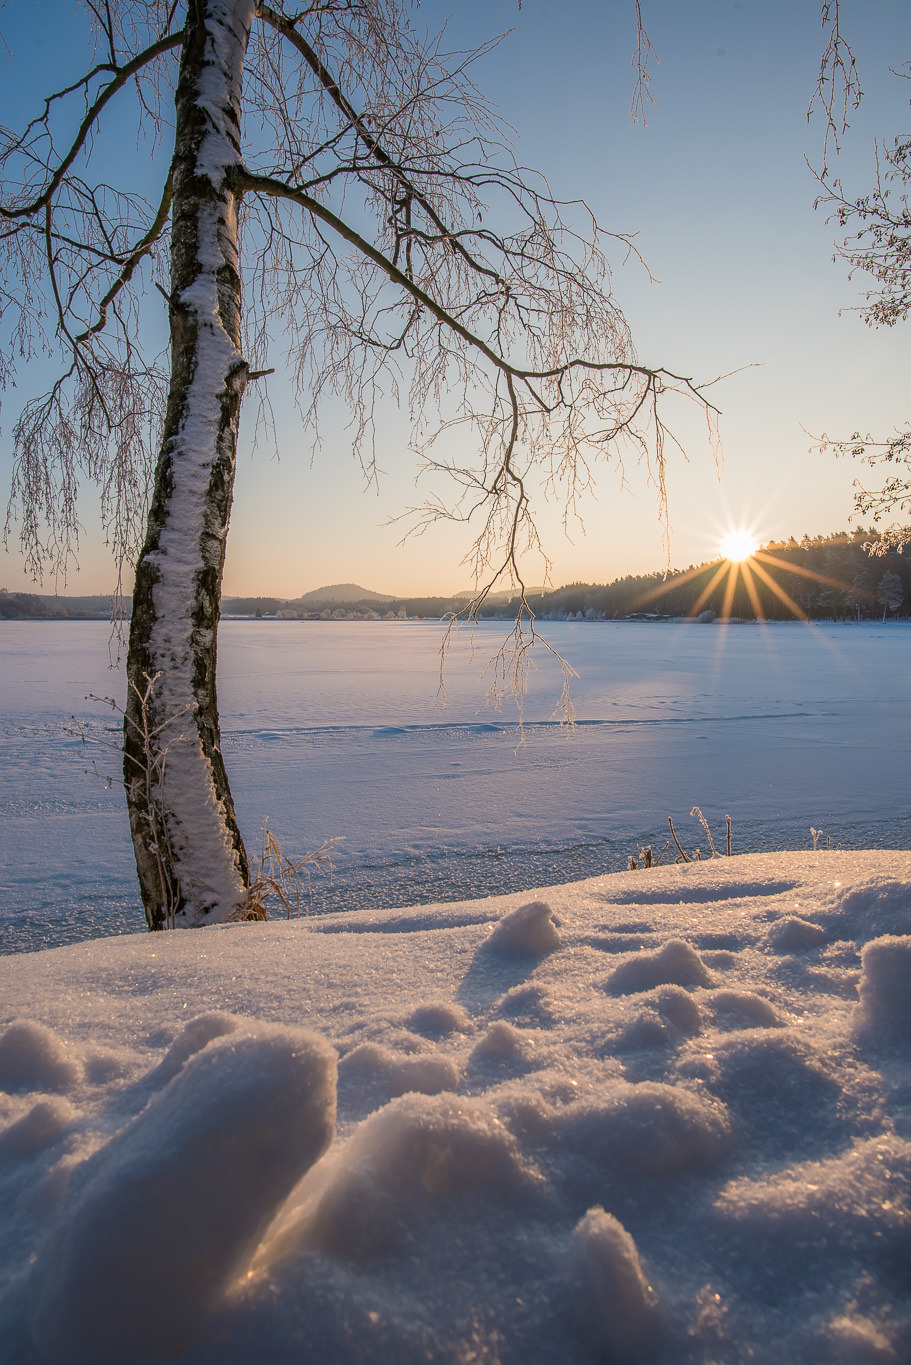
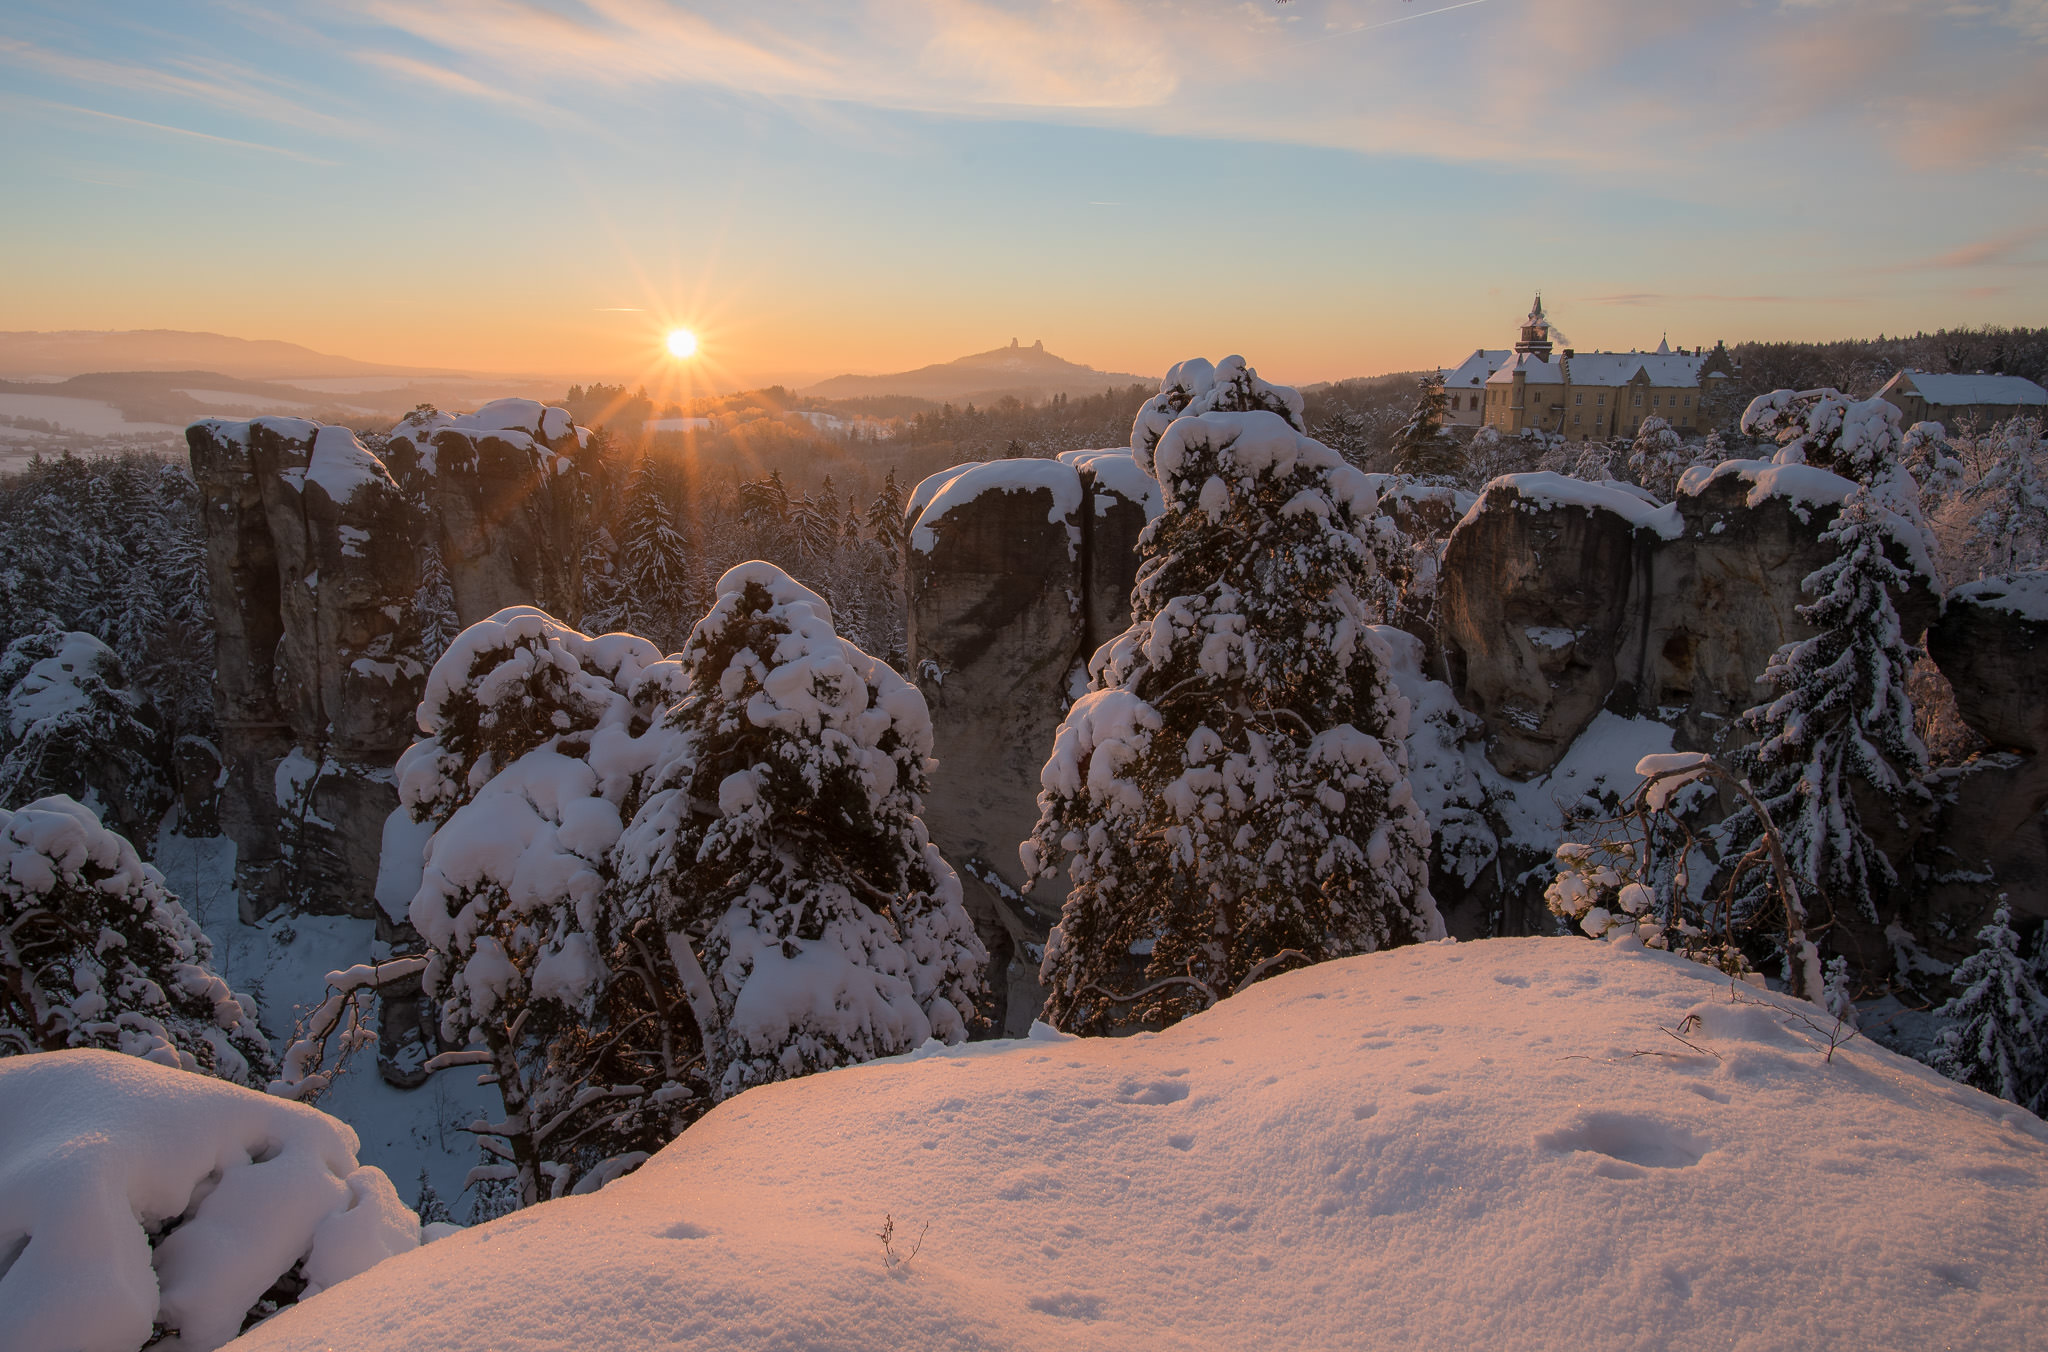
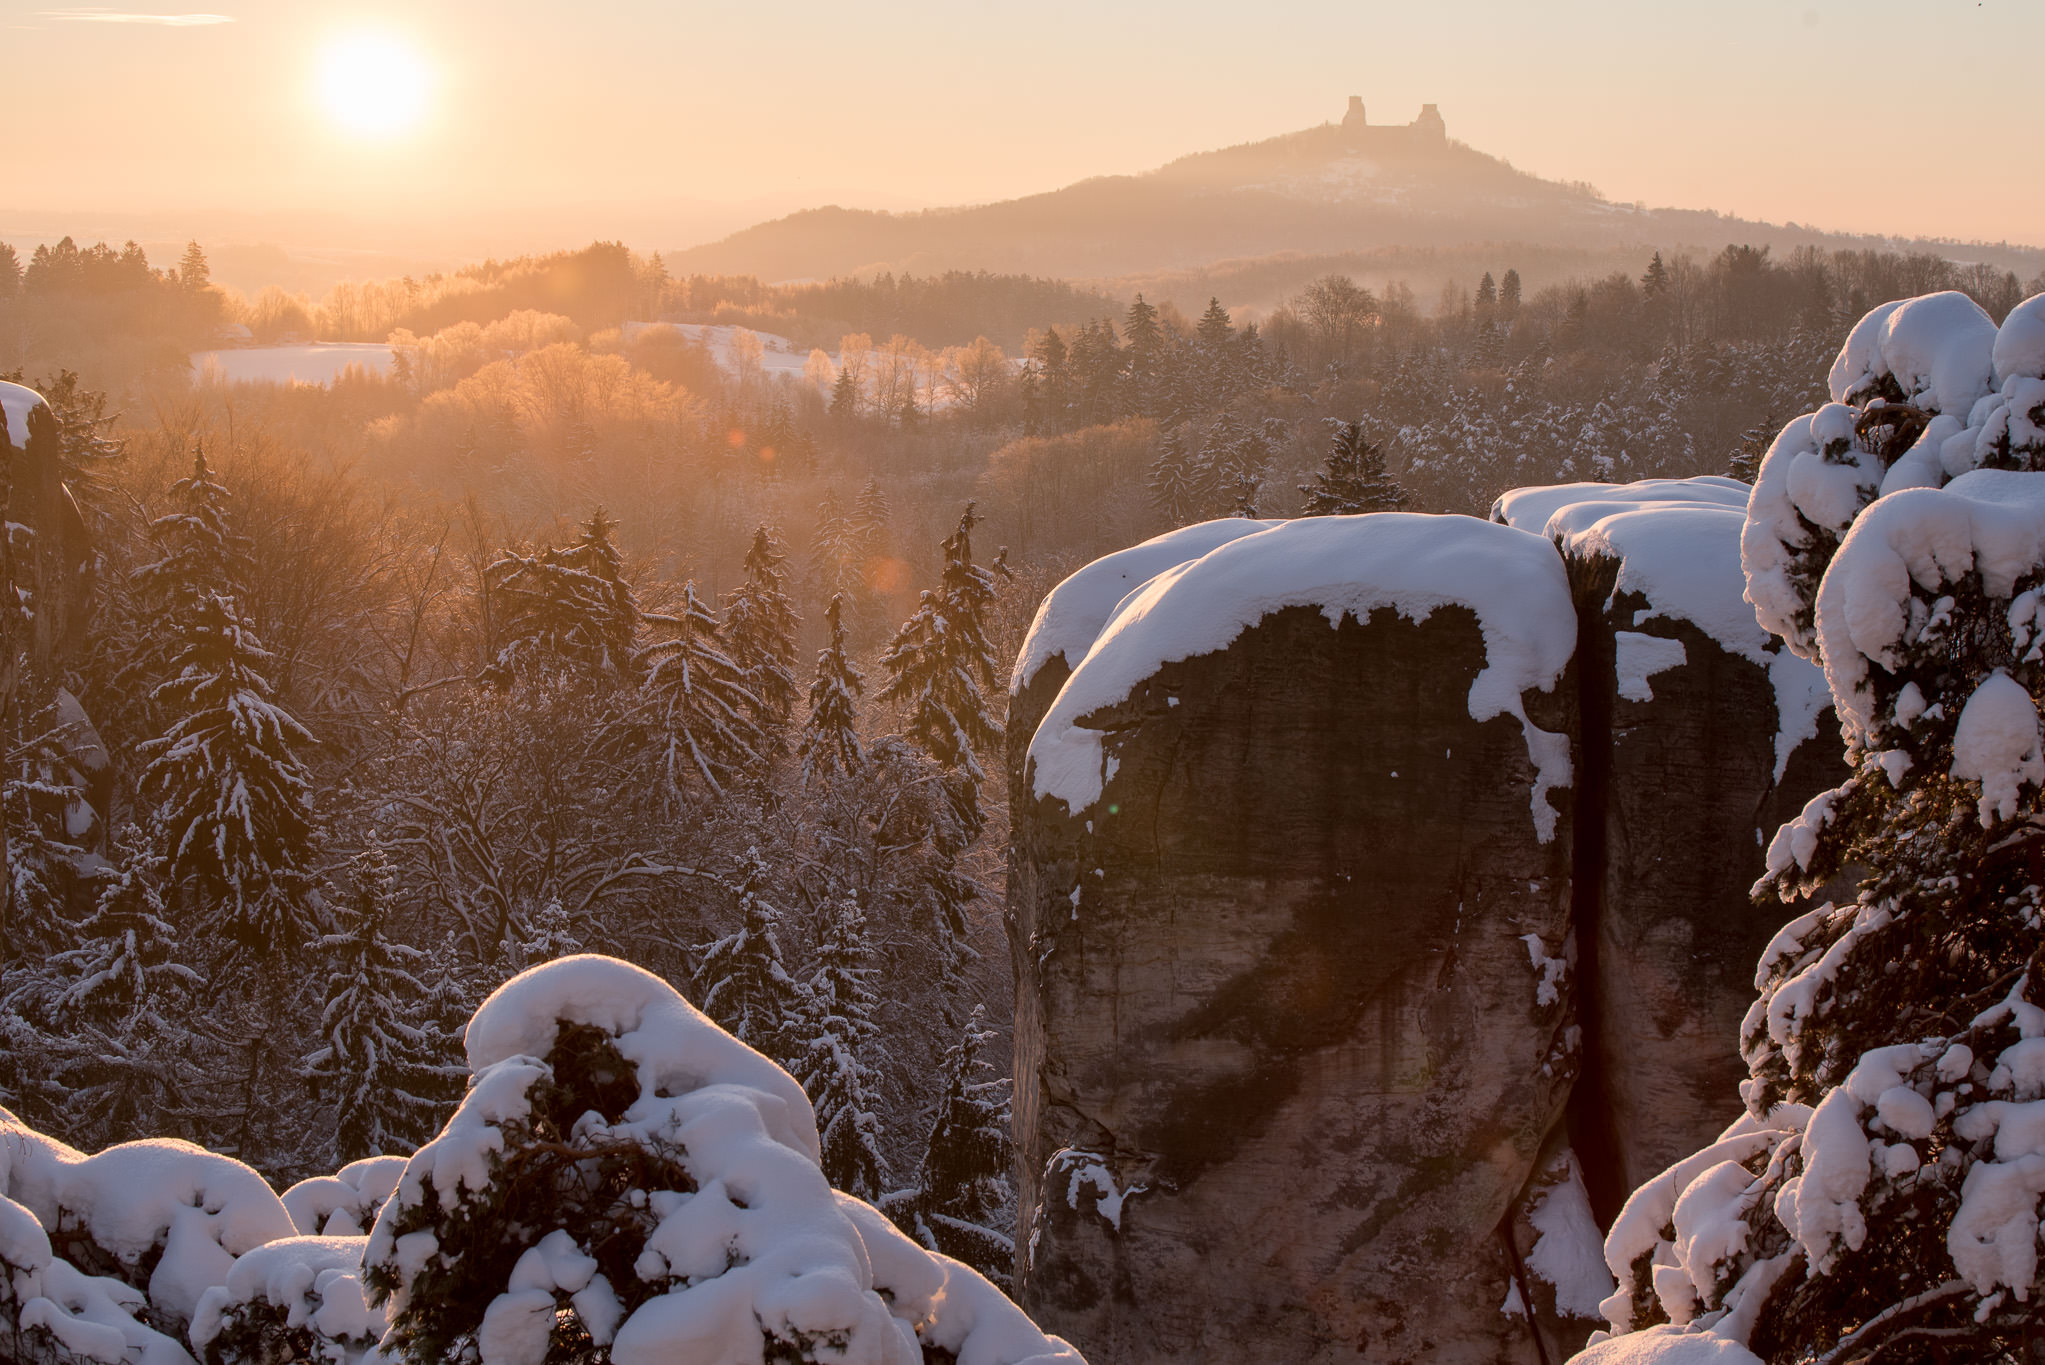
5) Use the Sun as the Primary Subject
The sun makes a wonderful primary subject when you shoot against it and include it in the frame. In the mornings and late afternoons, it hangs really low. If you have a good lens that handles flare well and draws nice sun-stars, the sun will serve as a wonderful compositional element in your images. To get those sun-stars to appear, you would need to stop down your lens to a very small aperture such as f/11 or f/16.
If you see flare and ghosting, you can use a great trick described in detail in Nasim’s article on eliminating ghosting and flare in landscape photography. If you are comfortable with image blending in post, there is another great technique to avoid over-exposure and diffraction: shoot two images – one for the sun at f/16 and one for the foreground and background at a larger aperture like f/8. Then combine the two images in post and use simple blending techniques with layers to bring those sun-stars into your image.
Also, consider if filters (such as CPL, UV or ND) are helpful in any way when shooting against the sun. If not, detach them, as they could make things worse in terms of additional ghosting and flare. If you do use filters, make sure that they are of high quality and have multi-coating applied to them. For more details about lens filters, see Nasim’s article on lens filters and also check out his must-have filters for landscape photography article.
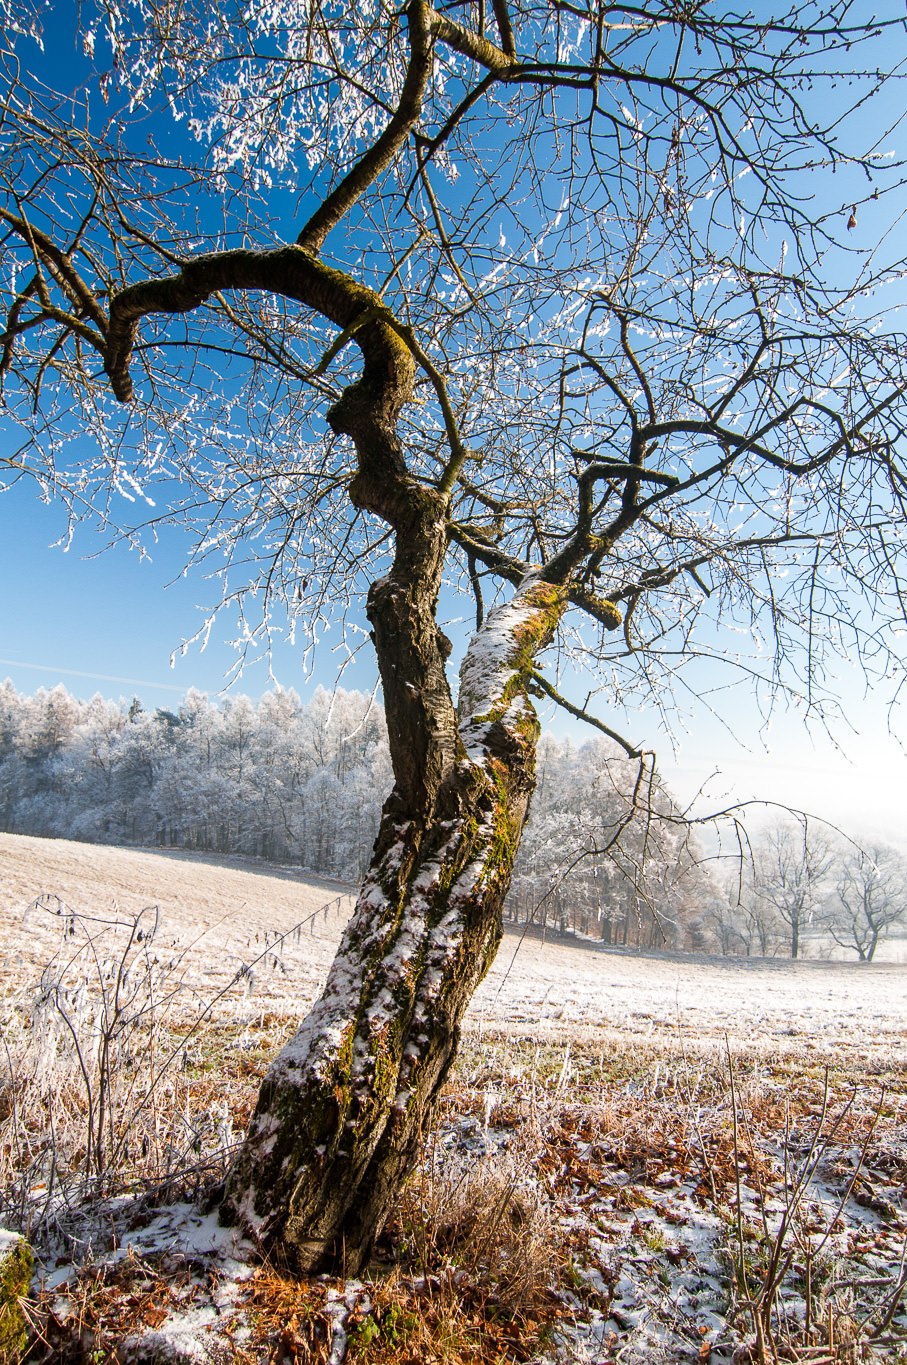
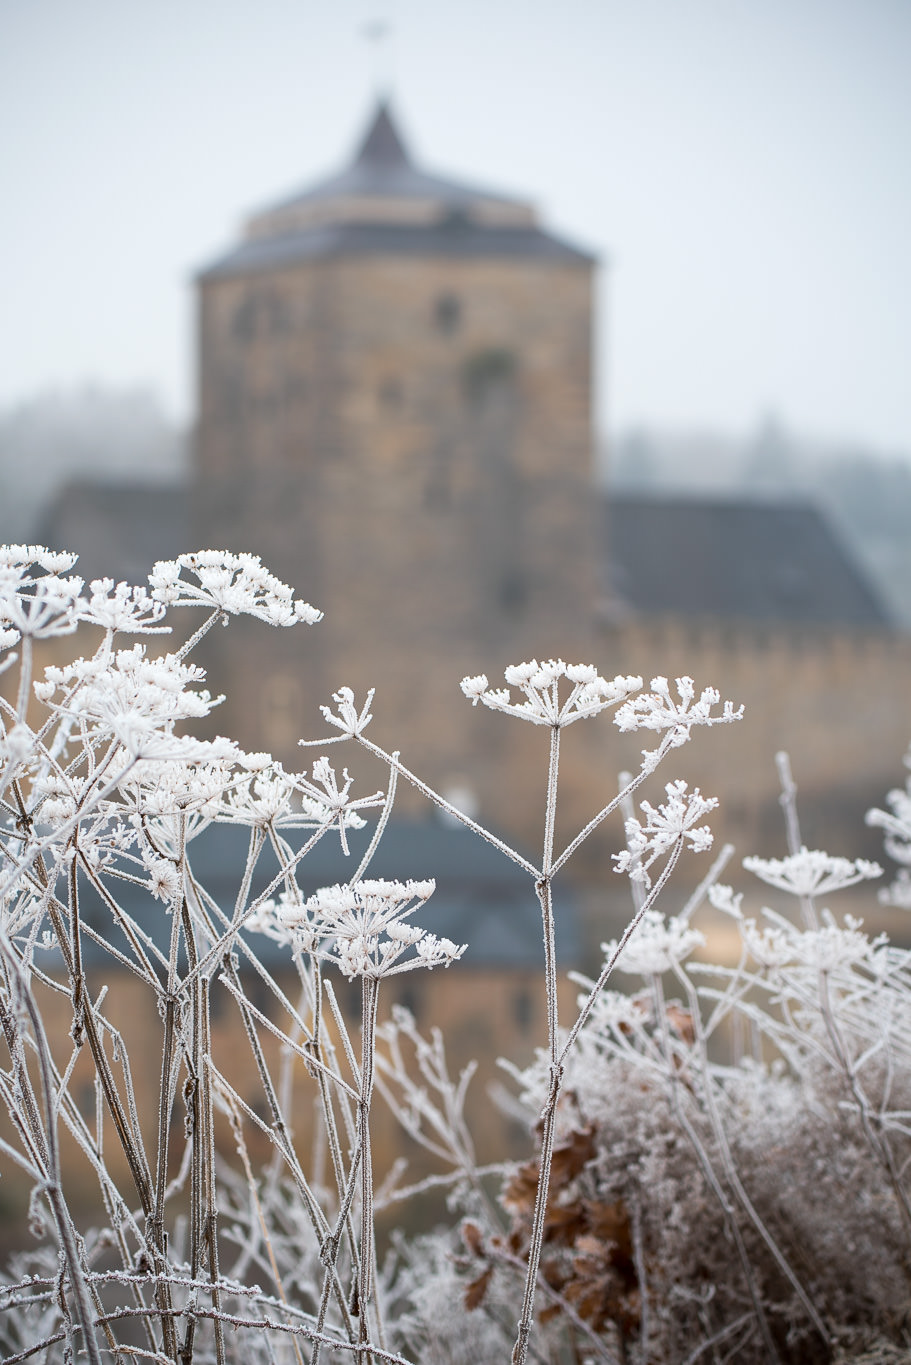
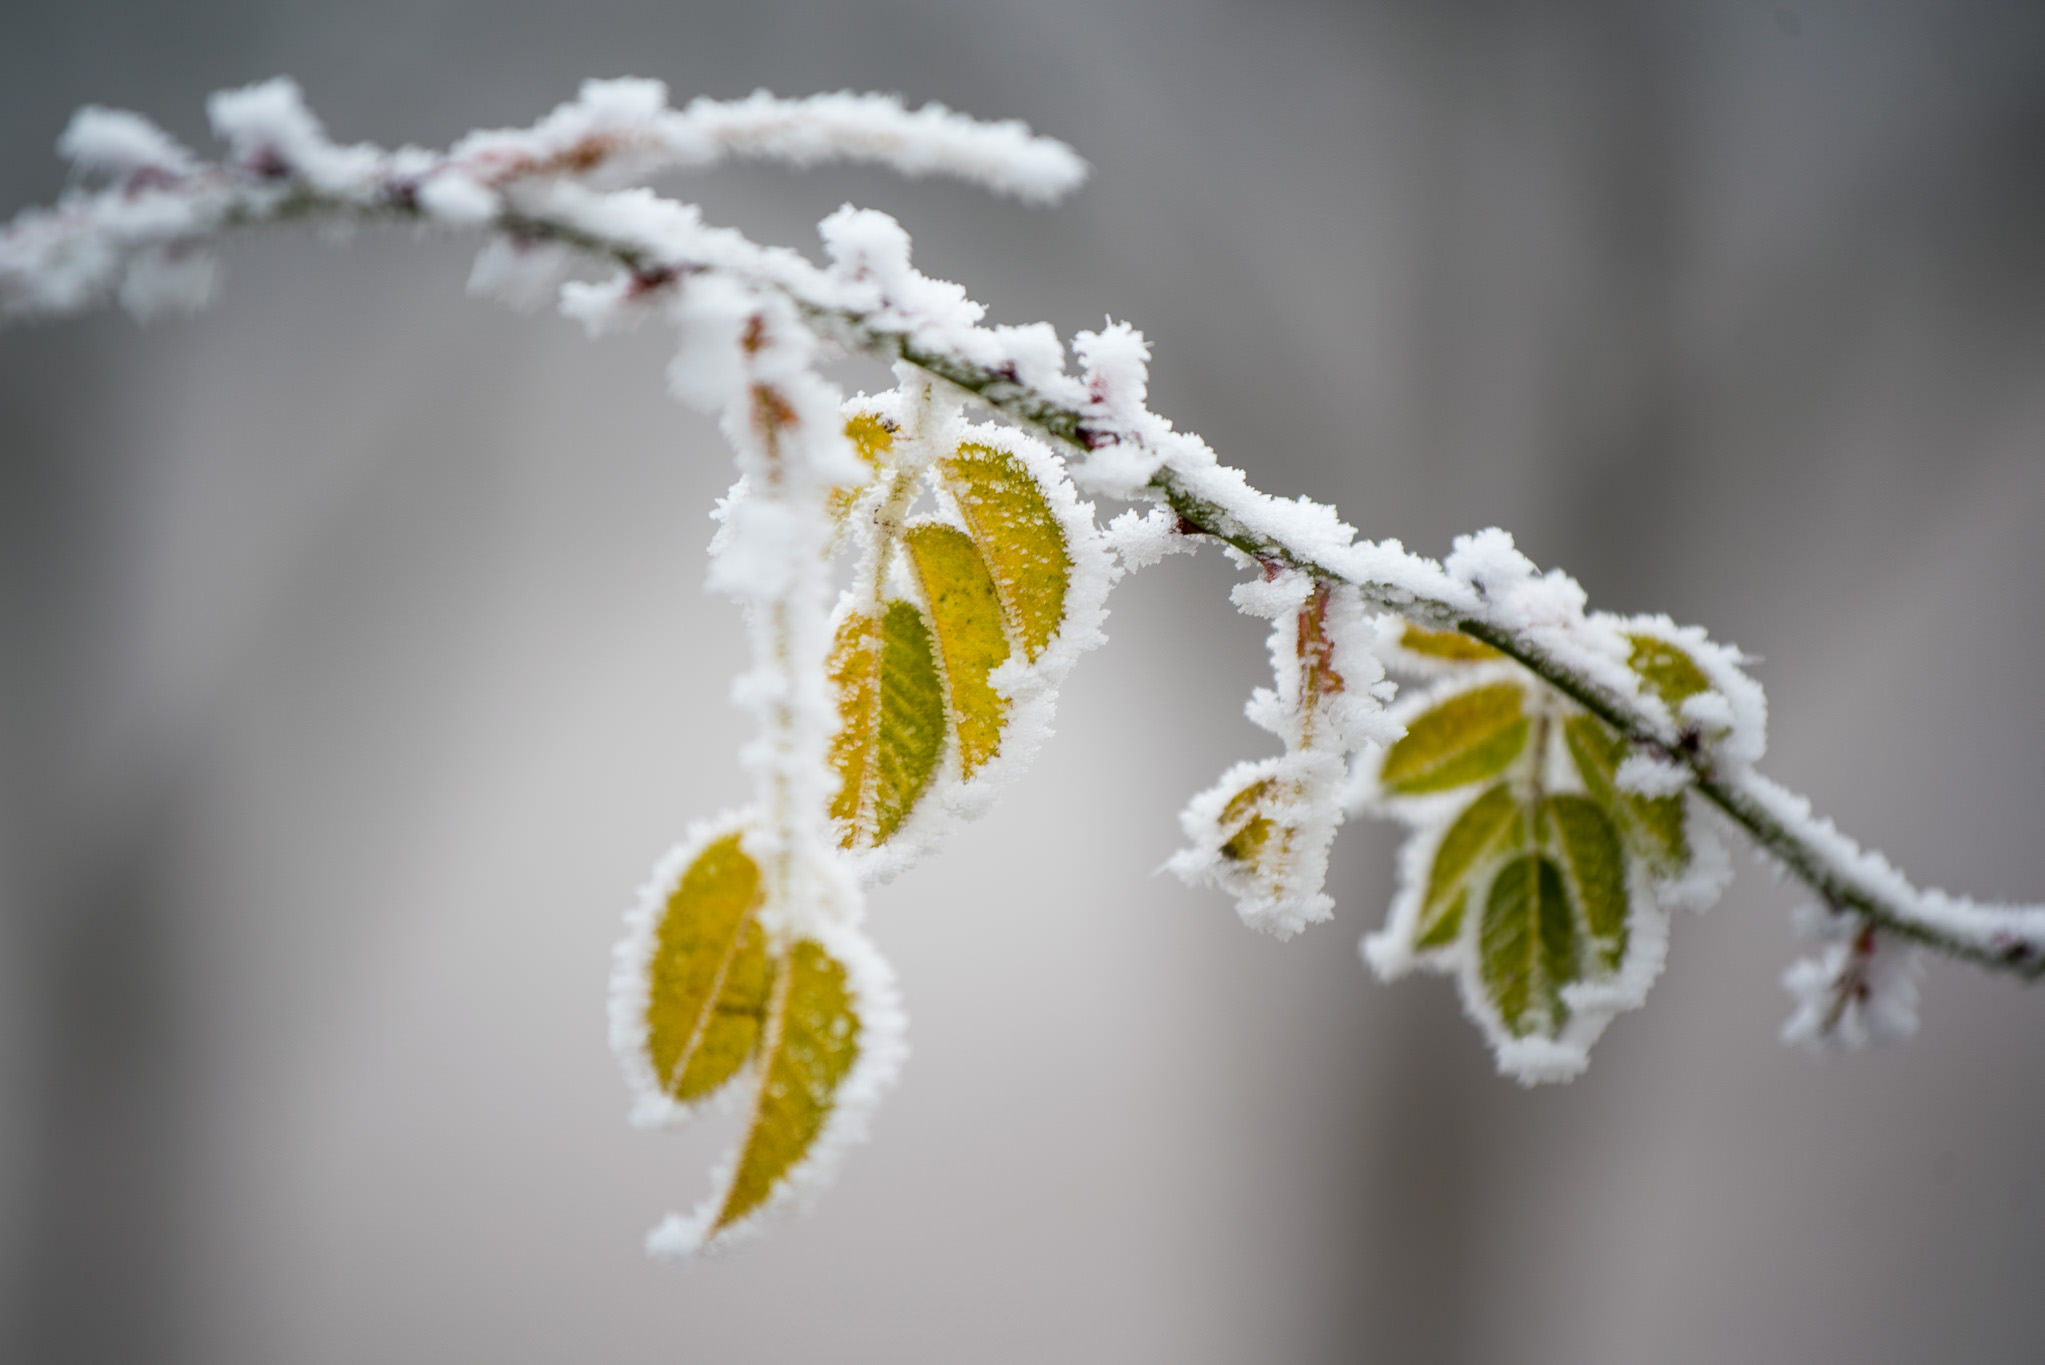
6) Make Use of Frost
White frost can turn almost anything into a very attractive subject. Paradoxically, that is exactly what makes it difficult to photograph. With a thin layer of frost covering everything, landscape looks like a fairy tale, which may obscure the focus of the photographer for a good composition. I personally live in an area where the combination of freezing frost and blue sky is relatively rare.
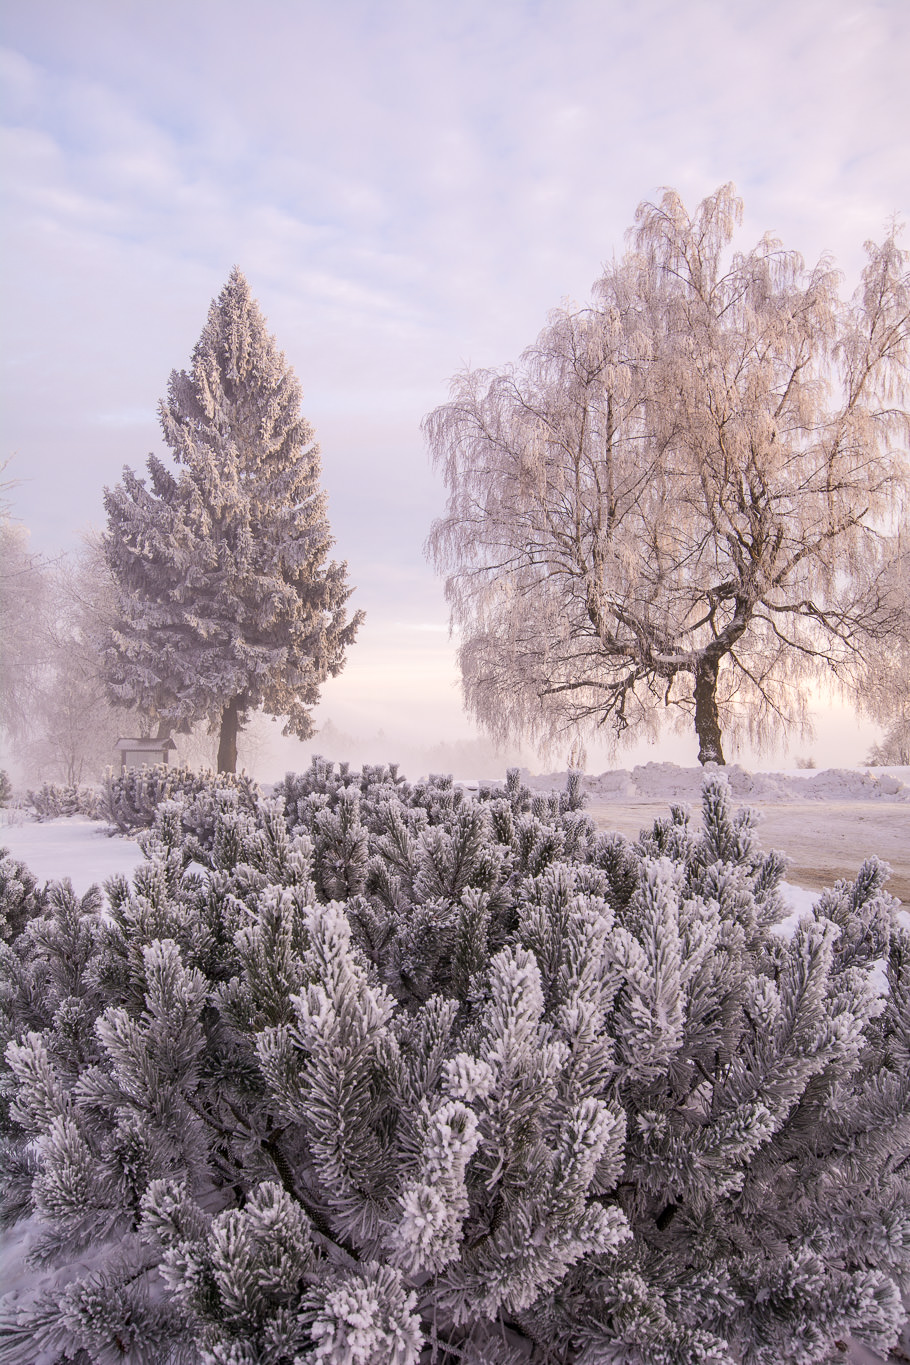
So when I got it earlier in January of this year, I got totally excited – and out of excitement I forgot to turn on VR on my lenses. When I discovered that, I was at first angry at myself, but then I took it as a good sign that I should take my time and focus on what I am doing, rather than let my excitement take over and ruin my photographs. Good composition and framing should always be your priority, but do not underestimate other variables that come into play while shooting, whether it has to do with proper exposure, focusing, depth of field or simpler things related to your camera settings.

9) Try Black and White Photography
Even if I really enjoy the winter color palette, snow and frost often create handy conditions for black and white (B&W) photographs. Low sun prolongs the shadows of all subjects. These shadows can create interesting shapes and lines. I prefer B&W when I shoot in relatively harsh midday sun.
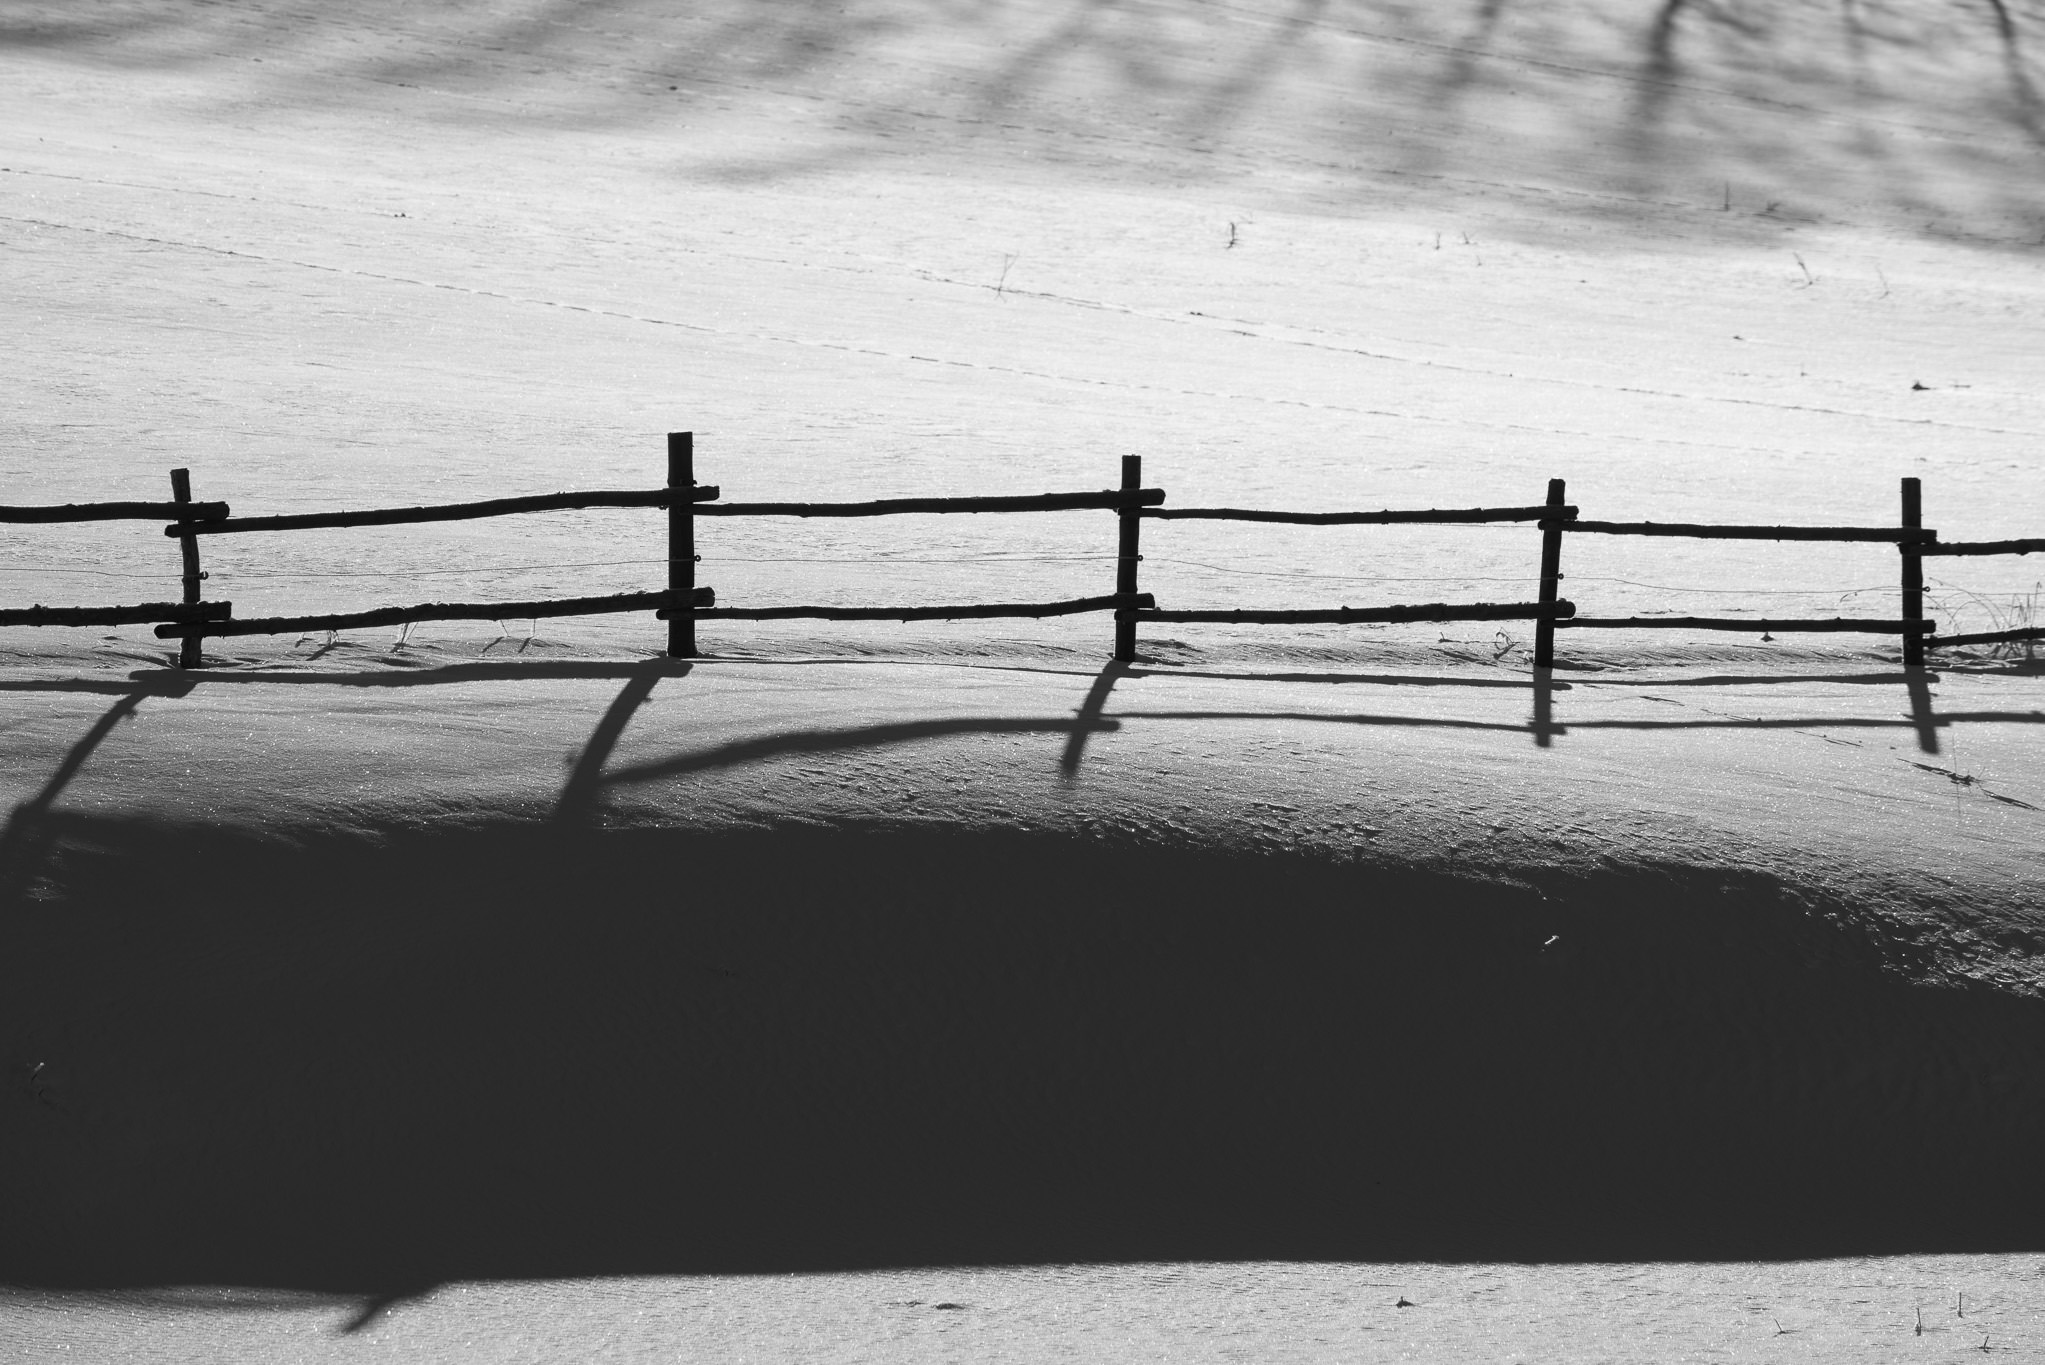
Basic composition elements (such as lines and shapes) are much more visible in black and white, especially once you highlight them a bit in post-processing, whether through color conversations or through dodging and burning. During sunny winter days, you can play with shadows projected on the snow and also get some great shots.

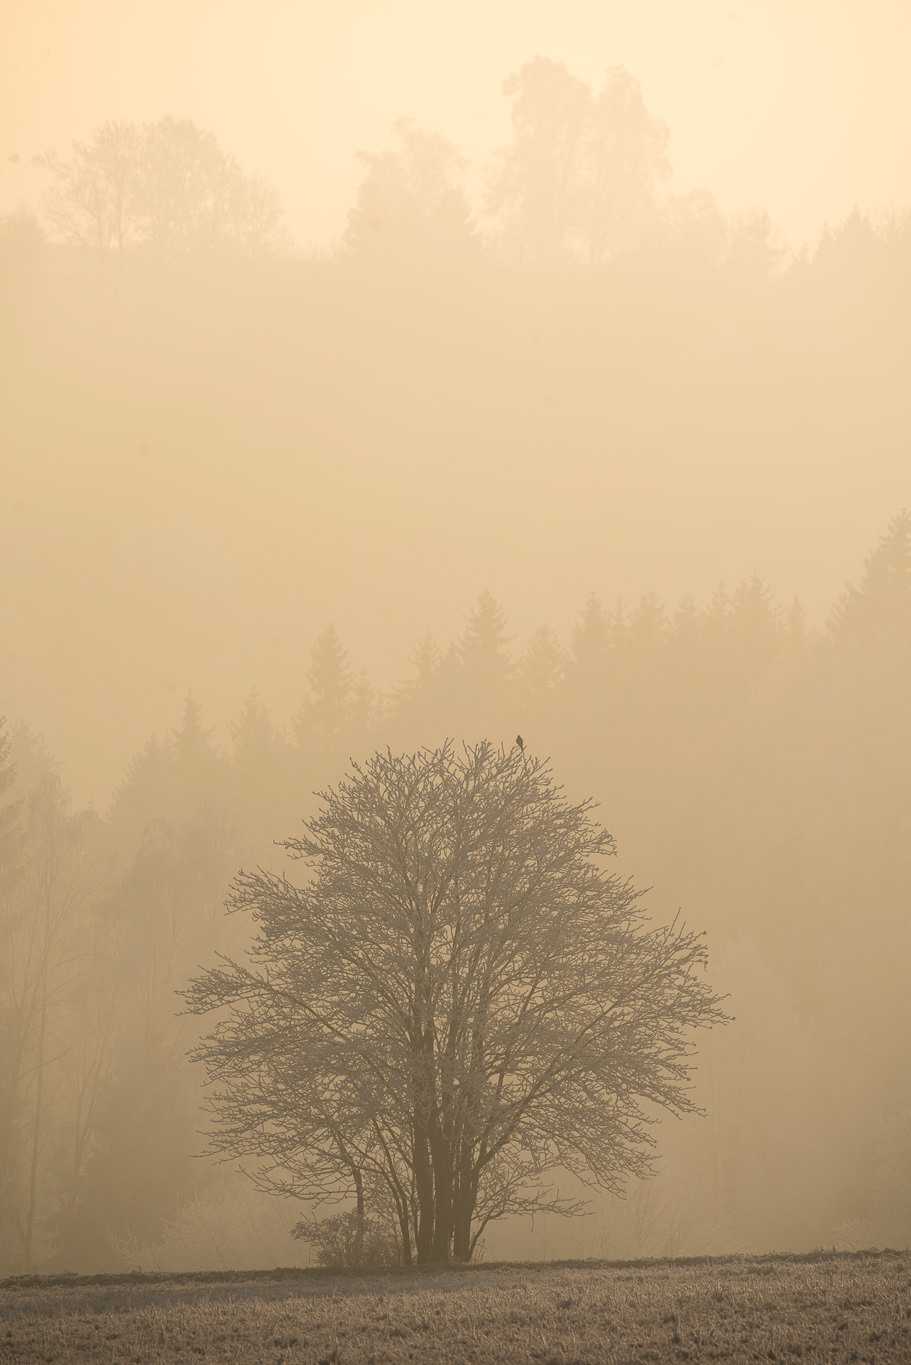
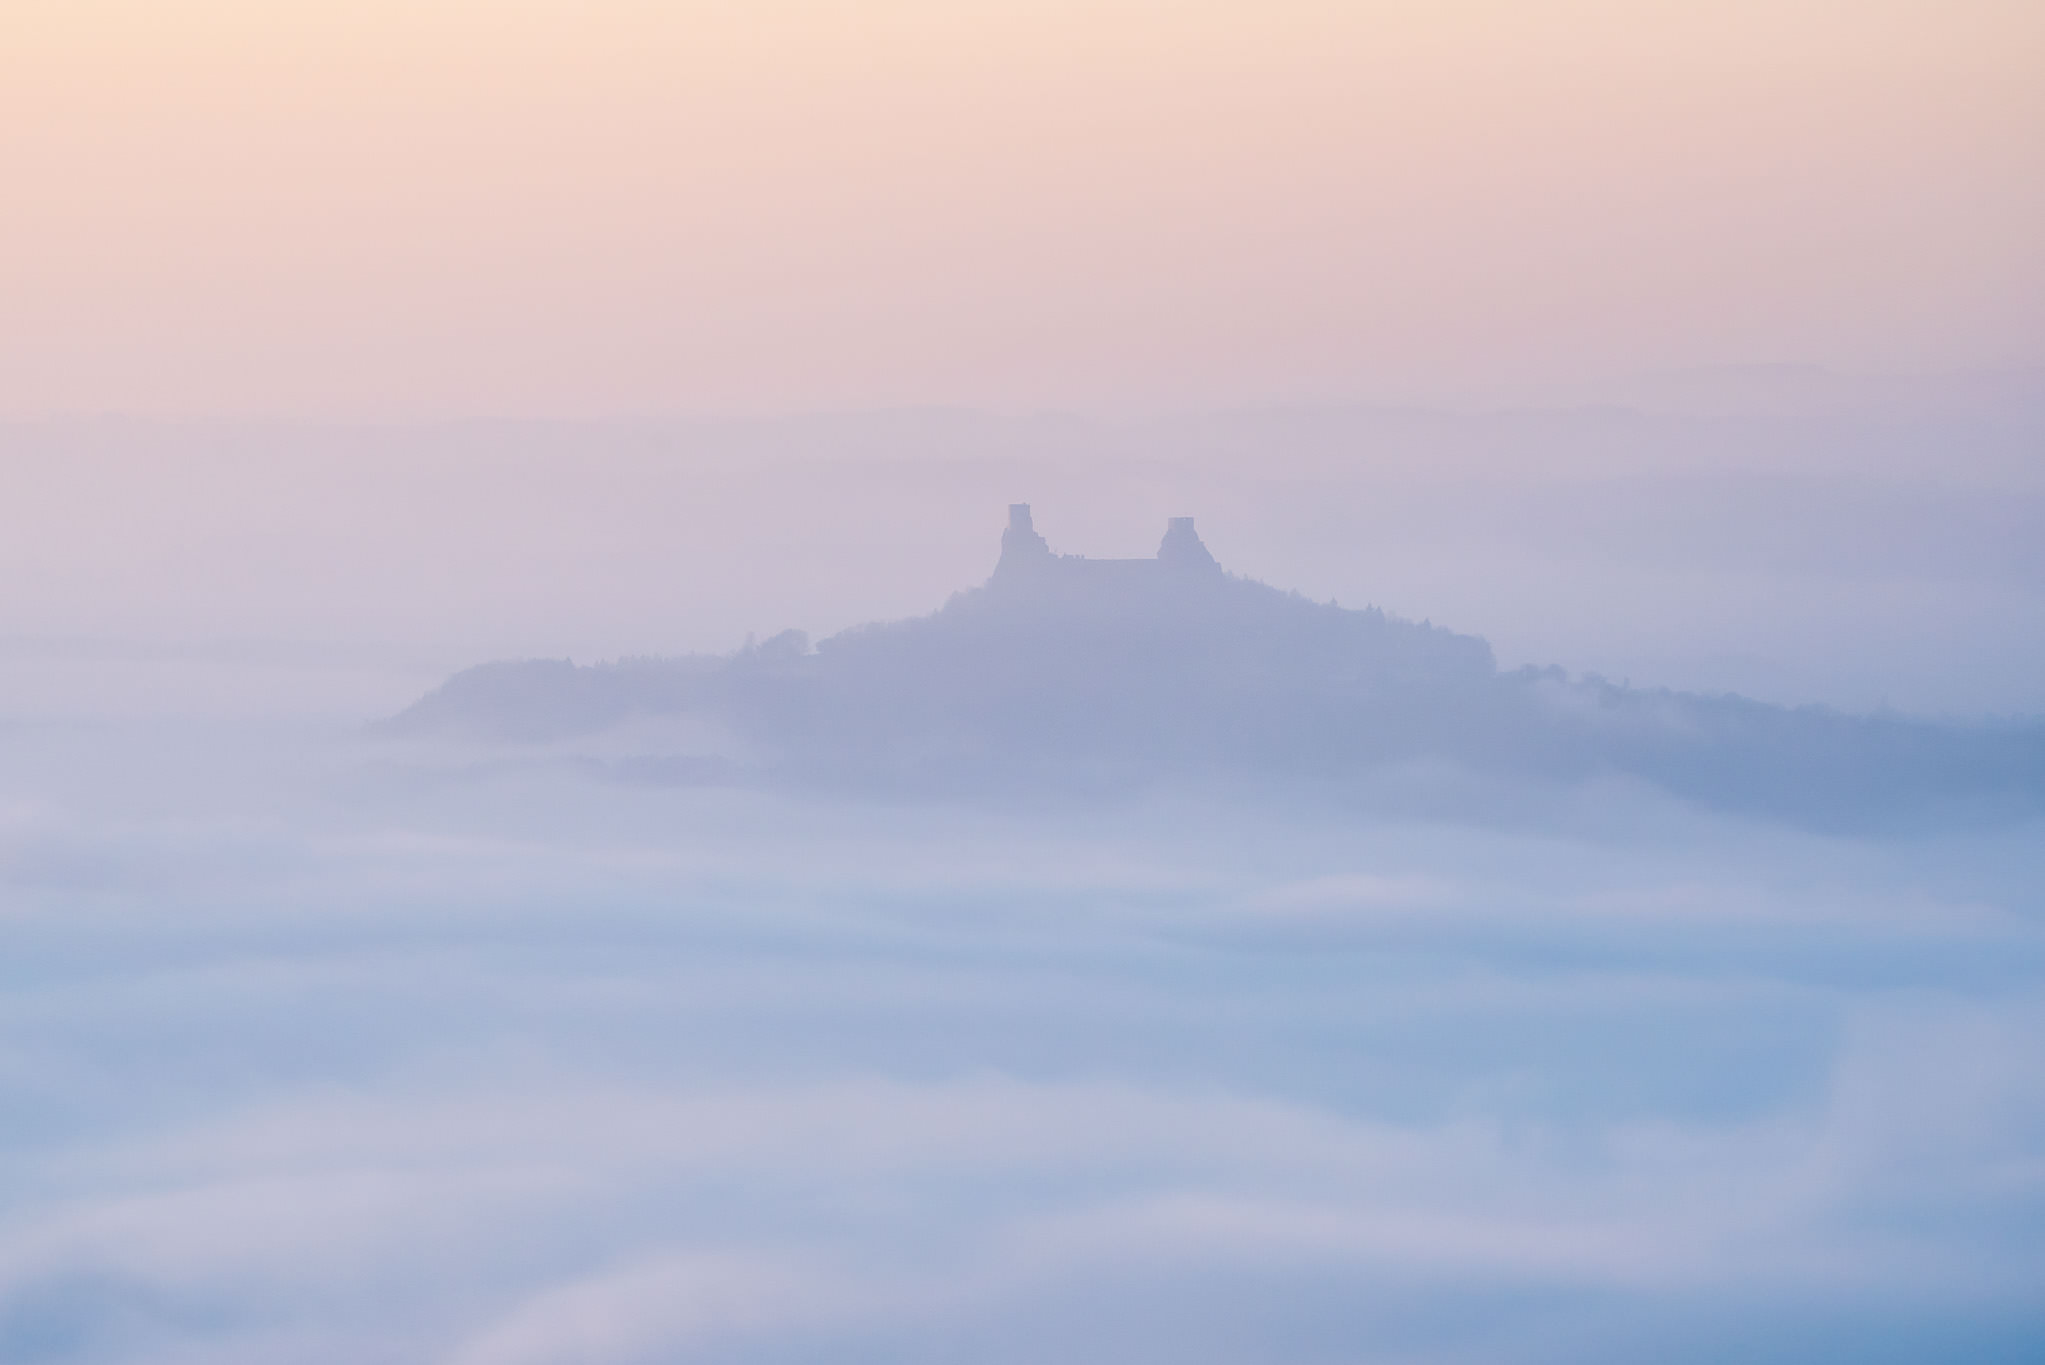
10) Go Above the Inversion
If you can, go above the inversion. What do I mean by inversion? In winter, there are often specific conditions when lowlands have lower temperatures than higher altitudes. This usually leads to low-hanging clouds that cover anything but mountains. Underneath the clouds, the light is usually dim and dull. Above the clouds, you get a clear sky – and the clouds below look like a sea. Only some mountains peak out and you can create some really interesting compositions with them. Come around sunrise and sunset – that is when the light and colors are going to be ideal.
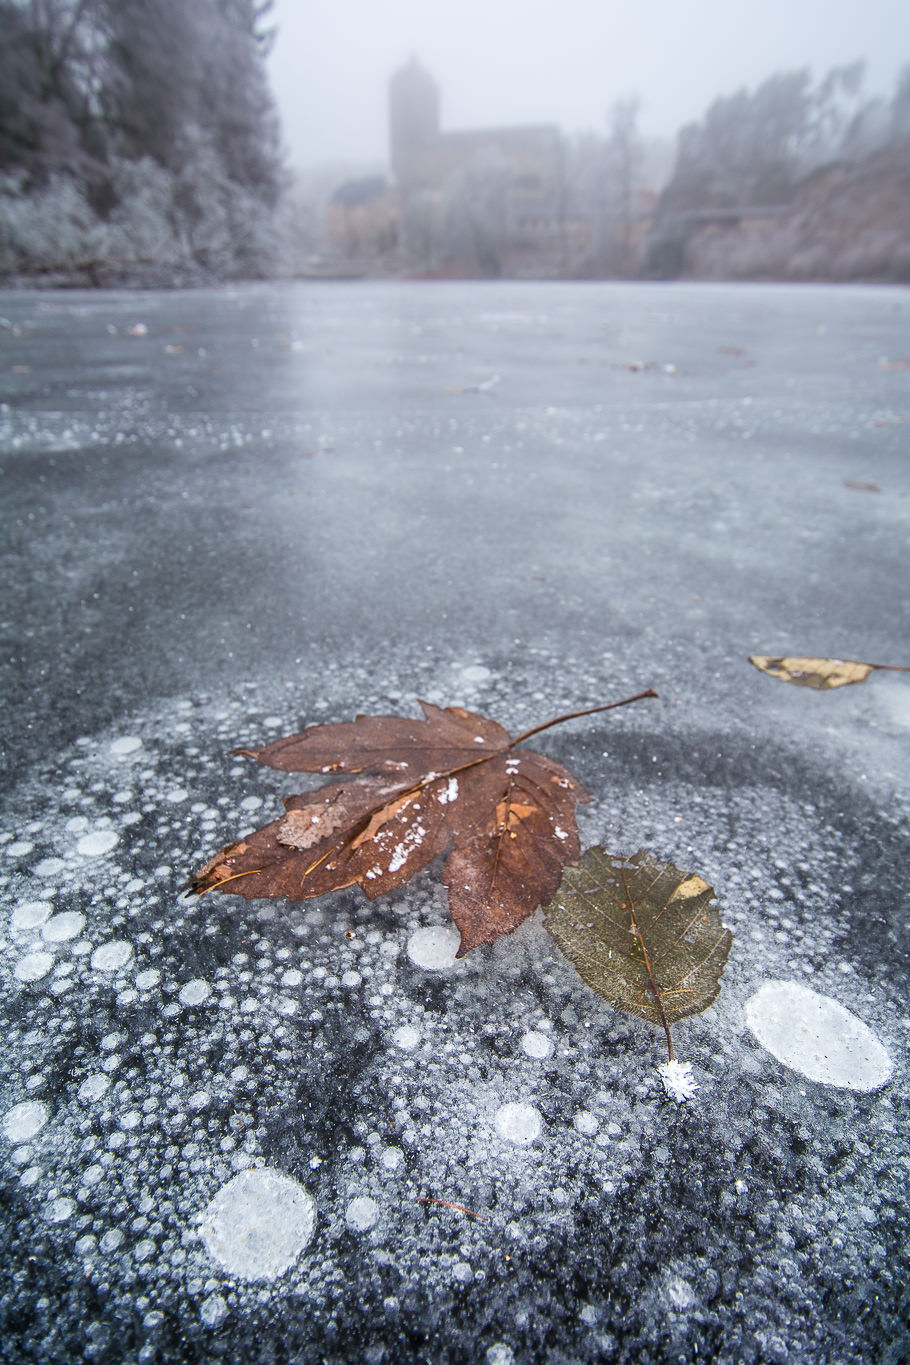
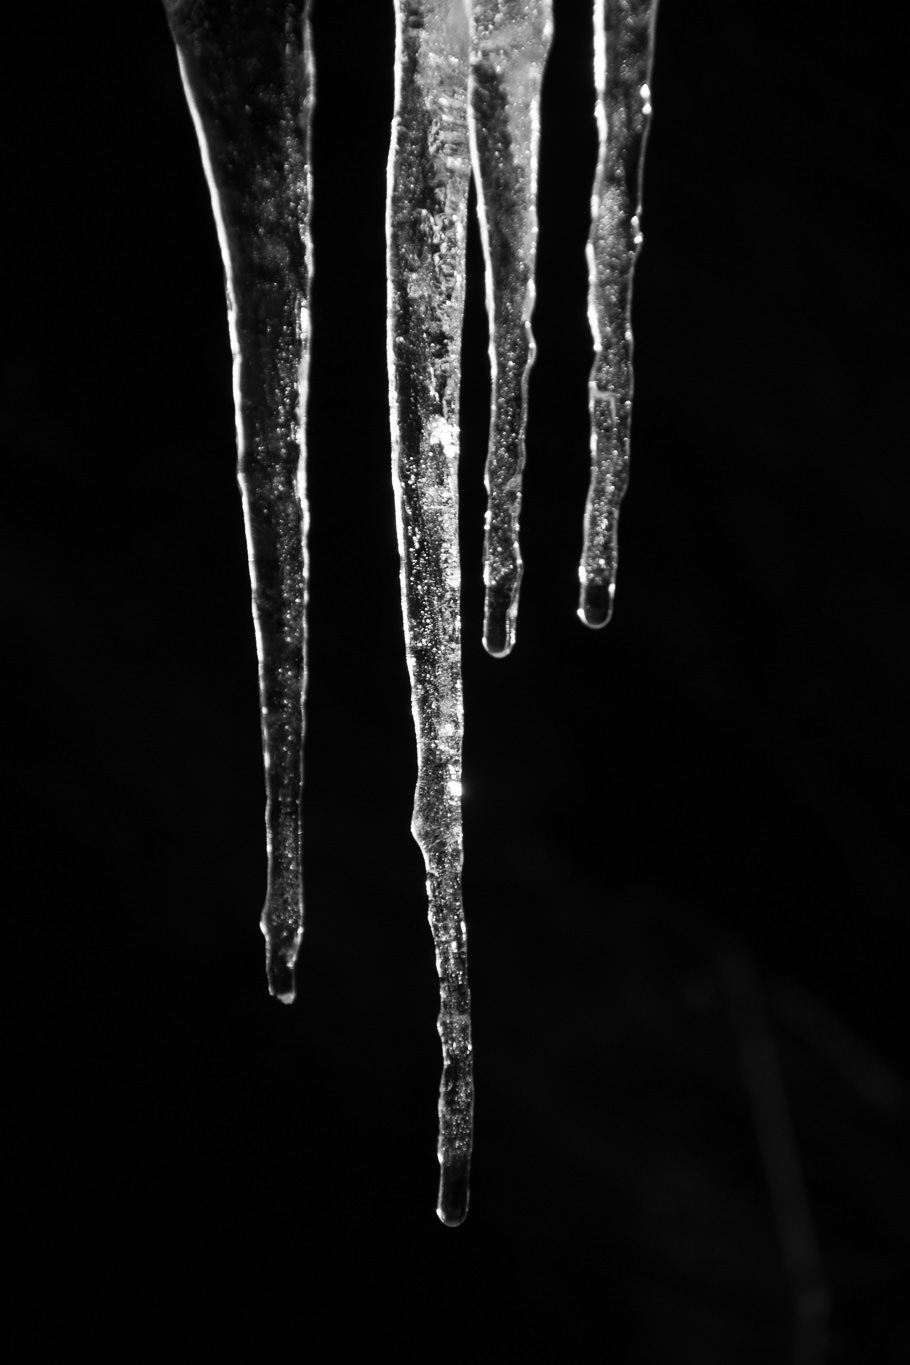
11) Look for Details
If snow covers the landscape, I recommend looking for tiny details. Even in cloudy days you can find some objects that look a bit different with snow than without it. Branches, fences and other mundane subjects are placed on a flattering white background. Ice, icicles, snowflakes, bubbles or cracks in ice – all of those are great themes to use. Do not forget to get really close to different structures and take a few detail shots which can make your winter portfolio more diverse.

12) Try Different Post-Processing Techniques
This point will be a subject of another article. For now, I will recommend that you do not boost the “Clarity” slider too much. Compared to standard landscape images, I prefer using a different post-processing technique for winter landscapes. The simplification power of snow holds for luminosity as well: what portrait photographers know as high-key photography can be achieved with snow too. Mid and high tones dominate with very few areas reaching black point.
Hope you enjoyed this article on photographing winter landscapes. If you have any questions or feedback, please feel free to share your thoughts below!
Great article! Loved the photo examples.
All good advice!
Thank you for the wonderful pictures and the very helpful and practical advice!
Hey there, I’m somewhat new to all this photography stuff, as I started taking it more seriously only half a year ago or so. I have no trouble with composition and all that, but exposure drives me crazy. I just came home from the freezing -20 C and all the pictures are, in lack of a better word, crap. They’re like someone took a bucket of blue paint and threw it all over the pictures. I’m a bit at loss here, can you give me a hint where I’m going wrong? I think compared to music theory this exposure thing is rocket science : ) Thanks in advance!
P.S. I think I cannot find a better website than this when it comes to photography. The articles are immensely inspirational and the writers obviously know what they’re talking about! Many thanks to all the writers for all those wonderful articles!
Dear Tim, thanks for your kind words about the article and the overall quality of this website.
As for your question: what you write here rather indicates a problem with White Balance setting (check whether you do not have indoor setting while shooting outdoors). It is quite normal that landscape scenes covered with snow result in blueish tinted photos. This is especially strong if you shoot throughout the day and the sky is clear (=blue). Basically the snow then reflects the blue colour of the sky. The problem is that our eyes (or rather our brain) assume that snow is white and hence we tend to see it white even if it is blue in reality! How to get a decent photo then? 1) Shoot in RAW and play with WB in postprocessing (I sometimes use local adjustments to whiten the hue of snow). 2) Shoot during sunset and sunrise hours when the sky gets more interesting (warmer) colours which are then naturally reflected in the snow.
Keep in mind that this holds generally, even if you do not shoot winter landscapes.
I hope this helps! Vaclav
If you want, you can send me one sample and I can tell you better where the problem might be.
Hi Milenko, I own the 16-35mm f/4 VR lens and use it with my FX cameras (D3, D800, and D810). It is a solid lens and very good for the price. If you use LightRoom to remove lens distortions and a little sharpening, it looks like a $5000 wide angle lens (to my eyes). The colors are vivid and image is crystal sharp. Here’s a link to my website and one of my shots with this lens while on a cruise. www.russmacdonaldphotos.com/Famil…-LXTVZsf/A . It was handheld at ISO3200, f/4, 16mm, 1/40th .
Russ
Hi Vaclav,
I would ask you a question? I have Nikon D750 and macro lens Nikon105mmf2.8. I need one wide angle lens for landscapes and photographing inside churches and general use. I am thinking to buy Nikon lens 16-35mmf4. What is your opinion? Thanks
Hi Milenko, first of all sorry for my late reply, I was sick lately…16-35mm is a good choice, but be aware that I did not have it in my hands, I judge only by reading a lot of reviews and from word of mouth from my colleagues.
I would also consider the combo: Nikkor 18-35mm VR (cheap by with solid optics and great price/performance ratio)+ Rokinon 14mm f/2.8 (manual focus only though). Price wise it is the same as 16-35mm. 14mm can come handy in churches, where I guess you need to go pretty wide…
Vaclav
Consider also the temperature of your camera verses the outside temperature. You must have a camera capable of functioning in extreme cold weather and extra batteries, but also remember that you lens or filter will immediately fog or frost when you change from inside to outside. AND NEVER, EVER REMOVE OR CHANGE A LENS ON A COLD CAMERA! The moisture in the camera will immediately condense on the sensor or the inner components of the lens. In this case your shoot is done for the day. Always place a cold camera in a gallon ziplock bag before going inside and leave it unopened for at least 4 hours to allow it to come to room temperature again.
Hi Randy, thank you – that is a very relevant point. This holds 100% for situations when going from cold to warm. Luckily, most of the time I go from warm place (my home) to cold (outdoors) and then the camera is mostly fine, even if you change lenses.
The only situation where I was really frustrated was in Hawaii, when I photographed sunrise at Haleakala Volcano summit (over 3000 m above sea level) with freezing winds and then went to see where there was high humidity and unfortunately both my cameras and lenses were still pretty cold and I could not photograph for a good hour. I had to warm them up using my car heating.
As someone who lives in a wintery place, I can verify these are top tips. Great article!
Thank you very much for such an instructional and clear article, illustrated with superb photos.
Lucky chap. Here in the south of the UK, the last good winter weather we had was in December 2010. Before that – I can’t remember!
This winter we might have had one good frost – I think.
Thanks for the images. Makes me want to head north next year …
Yeah, that’s why I wrote I feel quite privileged. Even here in Central Europe the winter seasons 2011-2016 were pretty week, hardly any snow and frost either. And yes, I can also remember 2010 – that was a strong winter. V.