In this article, I will share some tips on photographing waterfalls and hopefully teach you how to take advantage of your camera gear when photographing moving water. While it seems like a simple task, taking pictures of waterfalls and making the water look silky smooth can be a little challenging, especially if you do not have the right equipment. Although it is certainly possible to capture waterfalls with your camera hand-held, your best bet would be to use a stable tripod in order to allow for very slow shutter speeds without introducing camera shake.
")
Table of Contents
1. Your Goal – Slow Shutter Speed
In order to make the water look smooth, you need to use an extremely slow shutter speed of several seconds or longer. Slow shutter speeds create the “ghosting” effect, making the subject appear smooth and blurry, which is exactly what you want. Fast shutter speeds only freeze the running water, making the scene look too ordinary. Here is an image of falls that I captured with a relatively fast shutter speed of 1/250th of a second:

Now take a look at a waterfall that I captured at 5 seconds:
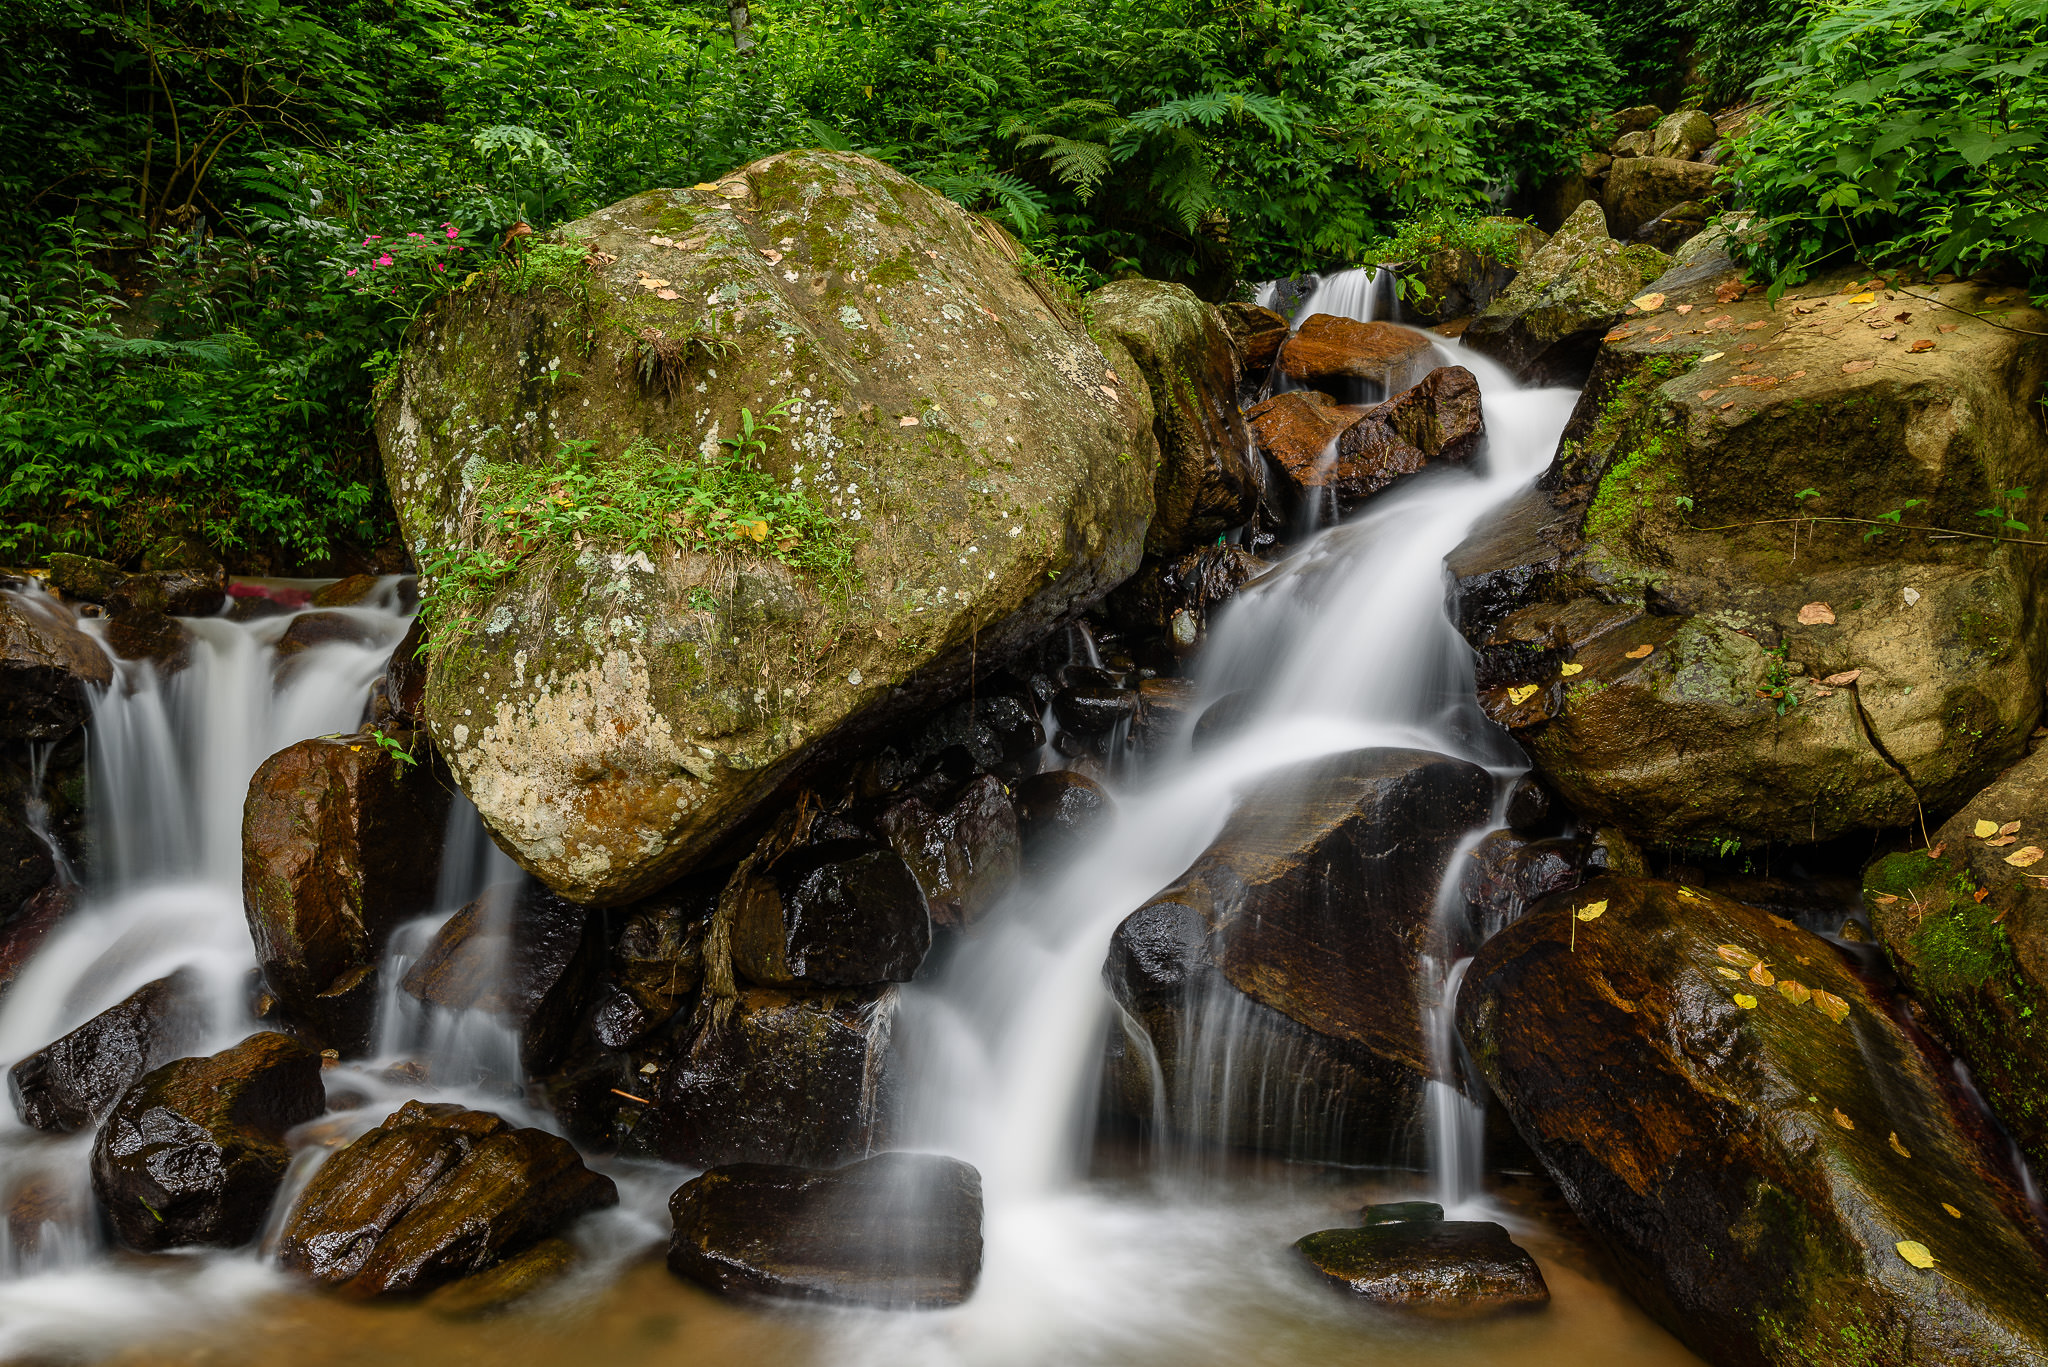
The image looks more dramatic and the silky water looks more appealing and pleasing to the eye.
2. Use a Tripod
If you want to capture moving water and make it look smooth and soft, you need to use a tripod, because it is not possible to hand-hold a camera without introducing camera shake when using extremely slow shutter speeds. While you could set your camera on a stone or some other object, you would still be limited by how much you can move and what part of the waterfall you could capture. If you do not yet have a tripod, I highly recommend getting one as soon as possible – I recently wrote a detailed guide on how to choose and buy a tripod, which will hopefully help you with the selection process.
3. Use the Lowest ISO
Once you set your camera on a tripod, you need to continue working on decreasing your shutter speed. Lowing the camera ISO to the smallest value such as ISO 100 not only increases image quality, but also decreases the shutter speed. For example, decreasing camera ISO from ISO 800 to 100 on a DSLR decreases the shutter speed by three full stops, so if you were shooting at 1/200th of a second, you would end up with a shutter speed to 1/25th of a second.
4. Stop Down / Change Aperture to a Larger Number
Stopping down, or increasing the f/ number, decreases the amount of light that passes through the lens. If your shutter speed is too high, try changing the aperture to a larger number like f/11 or even f/16, if necessary. Changing aperture is the last thing you can try on your camera, if you do not want to spend the money on a good ND filter (see below).

5. Use a Neutral Density Filter
If you have already tried decreasing your camera ISO to the lowest number and you have already adjusted your aperture to the largest f/ number and you still cannot get to multiple seconds of exposure, it means that you are most likely shooting in bright-day conditions and there is still too much light entering through the lens. The only way to decrease the amount of light going through the lens, is to use a filter in front of the lens that blocks a large portion of incoming light. “ND” or “Neutral Density” filters are specifically designed for this purpose – to only let a small amount of light into the lens in order to decrease the camera shutter speed. There are many different types of Neutral Density filters out there and most of them differ by the amount of light they let through. I personally use the B+W 77mm ND 1.8 and B+W 77mm ND 3.0 circular filters.

Most ND filters have a number at the end that says something like “ND 0.3” or “ND 1.8”. These numbers represent the amount of light the filter stops. For example, an “ND 0.3” filter would block one stop of light, while an “ND 1.8” would block 6 stops of light. What do these stops mean? Let’s say you changed your ISO to 100, changed your aperture to f/16 and you still have a fast shutter speed of 1/250th of a second. If you use the “ND 0.3” filter, your shutter speed will drop to 1/125th of a second. If you use the “ND 3.0” filter, your shutter speed would drop all the way to 4 seconds, transmitting only about 0.1% of light! That’s a big change from 1/250th of a second freezing water action to a silky-smooth water with just one filter.
6. Use Wide-angle and Telephoto Lenses
Take both wide-angle and telephoto zoom lenses to photograph waterfalls. High and powerful waterfalls can release plenty of moisture into the air, which might land on the front of your lens or even potentially damage your equipment. Use a telephoto lens such as Nikon 70-200mm f/2.8G VR II to photograph falls from a distance and a wide-angle lens such as Nikon 16-35mm f/4.0 VR if the falls are smaller and you are standing close to them.

Ok
I’m not sure why you say ISO will speed up your shutter speed. We all know that shutter speed, aperture and ISO are the 3 pillars of photographu and that each of these settings contribute to the final result; however, I can set the shutter speed to 15 seconds, aperture to f4.5 and ISO to 100 or 1000 independently in manual mode and the time the shutter remains open is unchanged. ISO truly only affects the exposure.
What are lovely article well written. I’m a total novice so this stepped me through the process nicely. Thank you.
I shall try it out tomorrow
Or if you are a Pentax user, don’t worry. Take your APS-C camera with the 18-55 WR, or Your FF camera with 28-105 WR. They all are safe to be used very close to waterfalls. I live in Norway, and here we have a very interesting waterfall where you can walk back of it, and photograph it from behind.
Nice article but you didn’t mention circular polarizers which are MUCH more important for waterfall photography than ND filters. ND usually isn’t needed unless you want an excessively long exposure (which doesn’t look good anyway) or are photographing in poor light. Polarizers though are a must to reduce shiny glare on wet rock.
I’m in agreement. Circular polarizing filters, which I constantly use, also reduce glare on the water itself, and on the foliage. It defies “common “logic,” but overcast conditions are best for any kind of moving stream photography. Thank you.
Great tips for the new amateur. photographers.
Thank you for sharing your wisdom, most helpful and easy to understand.
Great help, I plan to go to the water falls this weekend, I will practice your help. I have a Nikon d500 plus my main lenses will be Tokina 11-16, or my a Tamron 150-600 G2 . Rick
Hi sir we know both nd and gnd can stop light from entering to the camera, hence prevent over exposed area. My question is at the same time is it reduce light from a proper exposed part of a scene resulting under exposed or darken more if any part of the scene is already under exposed?
Nice explanation in detail specially with reference to water fall,soon going to shoot hope to get good result.