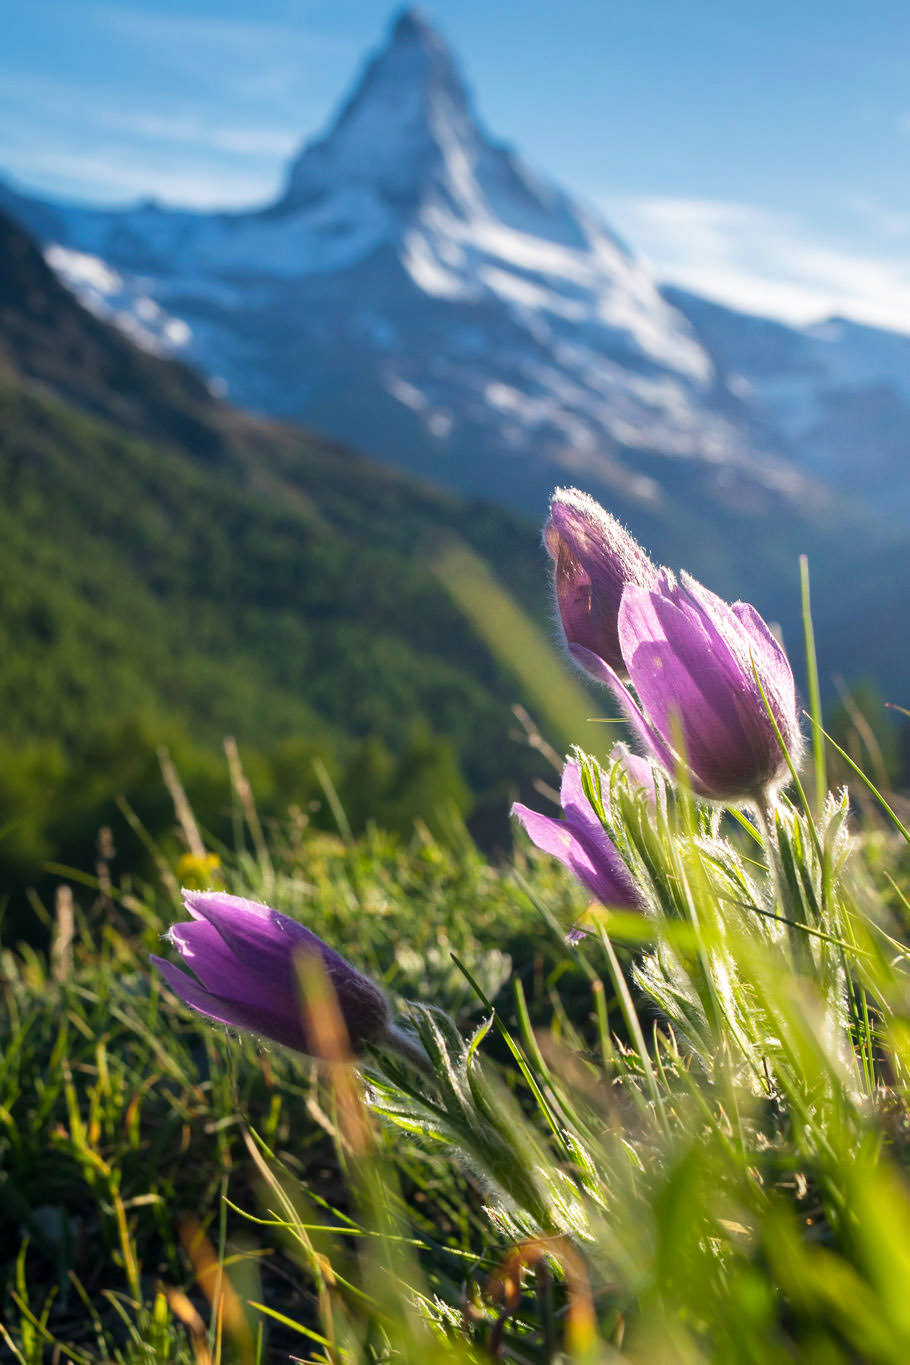
In this article, I will try to give you a few tips on how to photograph the Matterhorn in Zermatt, Switzerland. Moreover, I will also add a few pieces of advice on how to plan a trip to Zermatt. Matterhorn, located in south Switzerland on the border with Italy, is one of the most famous European Alps peaks. It towers to 4,478 meters above the sea level and is marked by its sharp pyramid shape. Its pronounced shape has always attracted many tourists and photographers. How shall you plan your trip to Zermatt and where to go to get nice Matterhorn photographs and not leave with your wallet ruined?
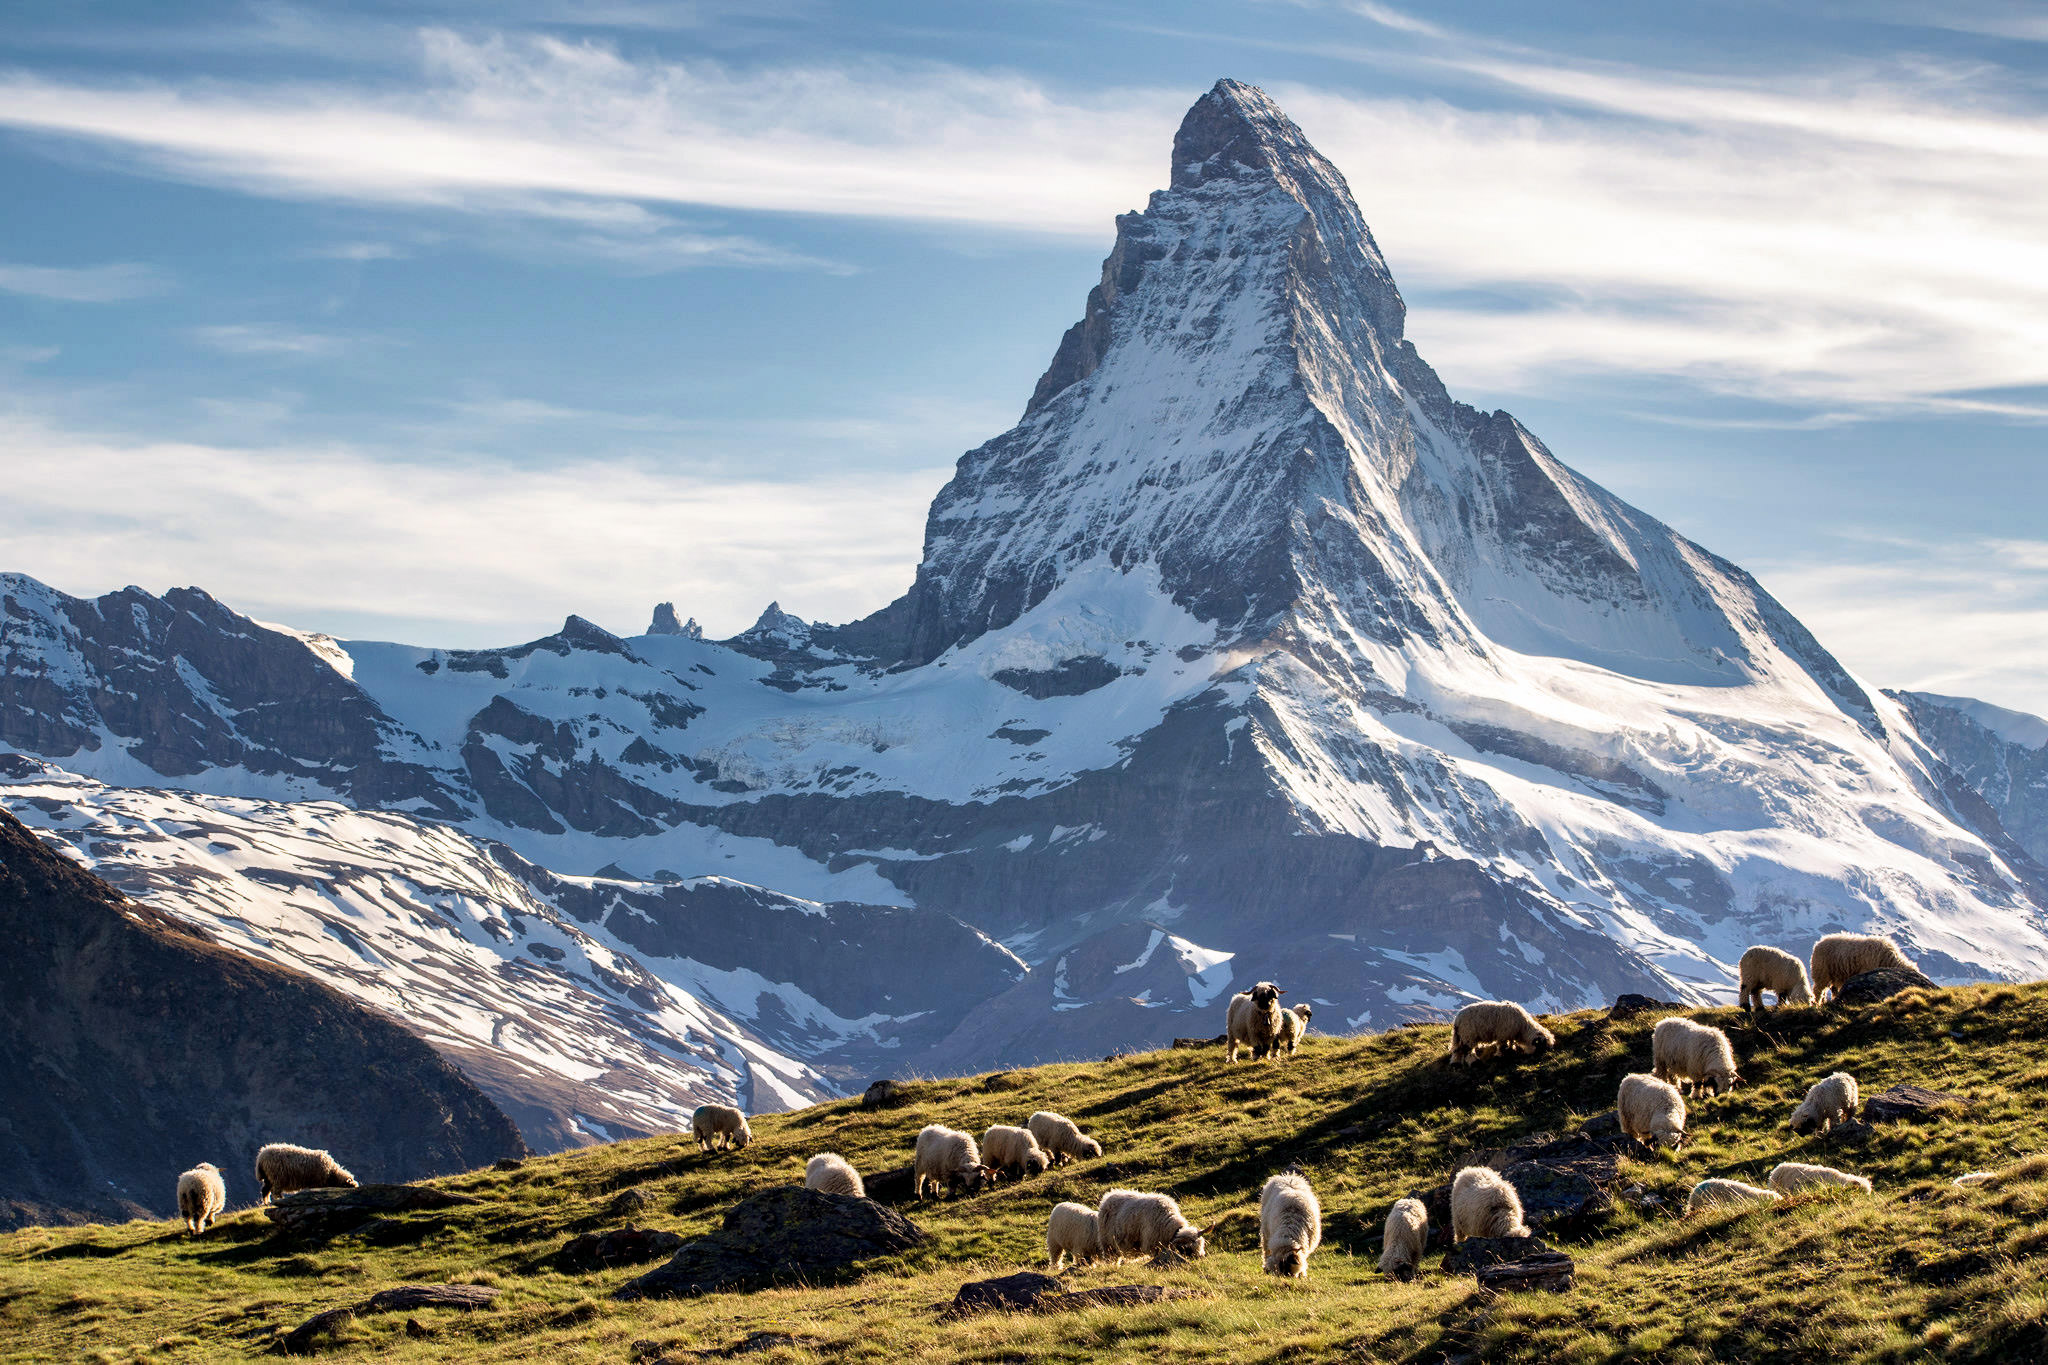
Table of Contents
Photographing From the Swiss Side
I will focus on the Swiss side of this mountain, as it is from here (north-east side) where the most beautiful viewpoints are. Matterhorn can be climbed from the south Italian side, but there are no vista points where the emblematic pyramid shape of this mountain would be clearly discernible.
The Bad
The beauty of Matterhon is also a bit of a curse, since Matterhorn and the nearest Swiss Alp-resort Zermatt has become one of the most visited places in Europe. The place is full of tourists and lately it has been especially swarming with Japanese and Chinese tourists. To put it bluntly, Zermatt is expensive as hell. So if you come as a low-budget photographer, you will immediately notice that the average tourist here is a pretty well-off person who can easily afford to travel to such destination.

The Good
You can still plan a relatively low-budget trip to some of the best locations, if you are willing to backpack and sleep in a tent or walk during the early night hours with a headlamp. This has two advantages: you will not only be at the right (i.e. photogenic) places, you will also be there at the right time – around sunset and sunrise. You will avoid crowds no matter how busy the season is, and most importantly, you will not have to book the very expensive Zermatt hotels.
Getting There
The first thing to pay attention to, is that Zermatt is a completely car-less city. To access this location, you must leave your car in Täsch, the closest village down the valley. At Täsch, there are huge garage parking places available (for a fee) and you can take a regularly (every 20 minutes) pending train (for a fee again) to Zermatt. Or you come by train all the way from some other Swiss city (beware, trains in Switzerland are expensive, however the rides tend to be very pangrammatic).
Where to Go in Zermatt?
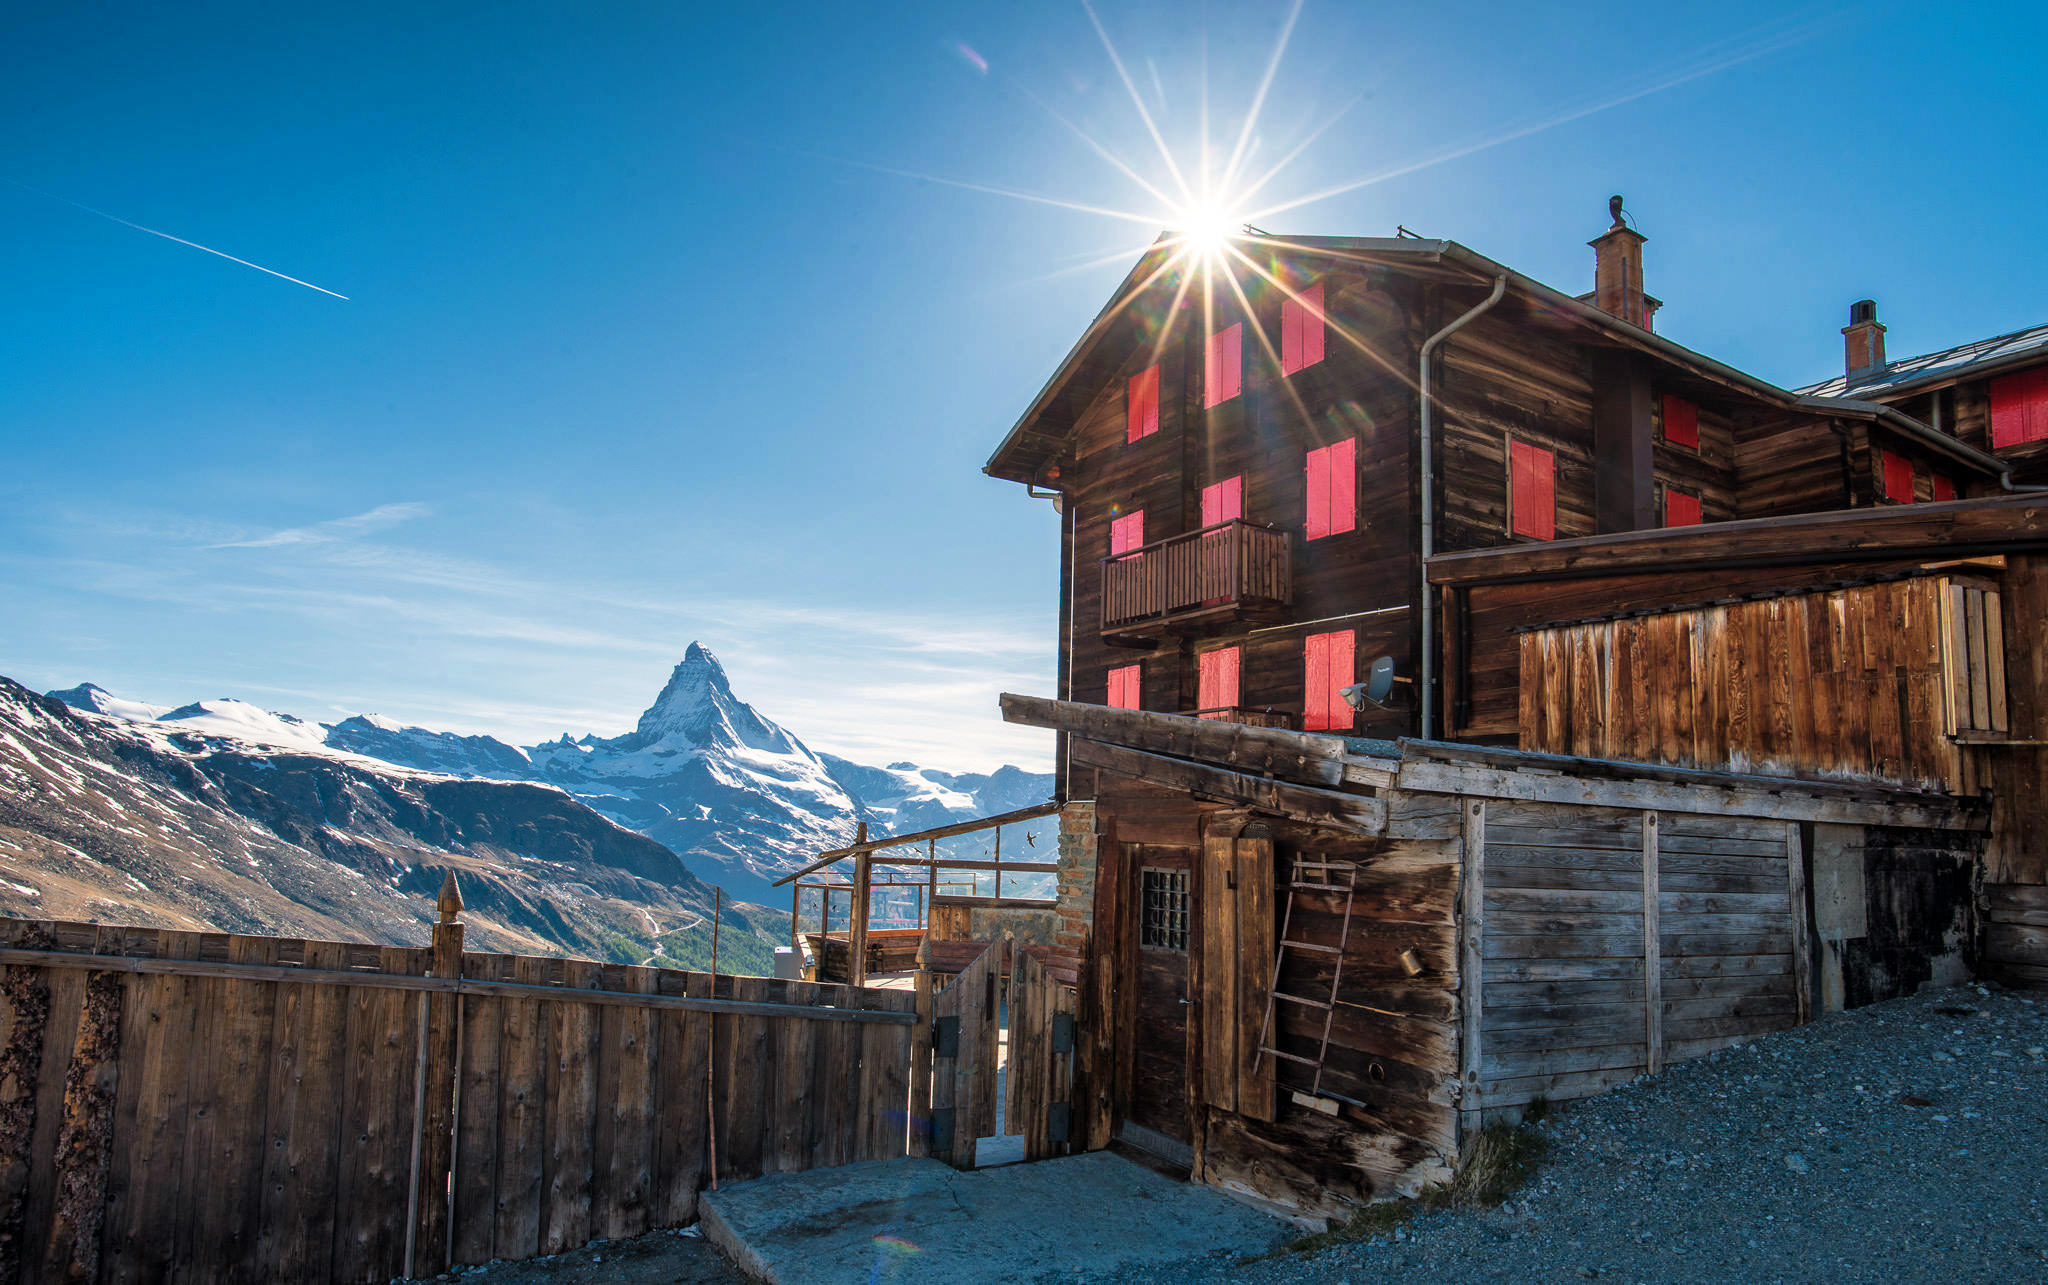
Zermatt is an Alpine village with many wooden houses overlooked by the majestic mountain in the background. The fact that Matterhorn can be seen only after reaching Zermatt gives this place something extraordinary. Apart from that, these are the same small places with tiny shops and restaurants, a church and a posh shopping street with all the luxury brands. For some, Zermatt may have its charms, but for me as a lover of unpopulated mountains, there was nothing to do there, so I had to leave this place as quickly as possible.
Where to Go in the Mountains?
First of all, we are not talking about hiking up to or climbing Matterhorn. With its height and prominence, this peak is one of the most demanding ones to climb, even for experienced mountain climbers. So it is definitely not an attraction to easily hike to for tourists, let alone photographers. But why should we even attempt to climb a mountain which shall be the main subject of our photos anyway? We want to go to places with nice views to create beautiful compositions. Where would we find such spots? Below are my most favorite locations:
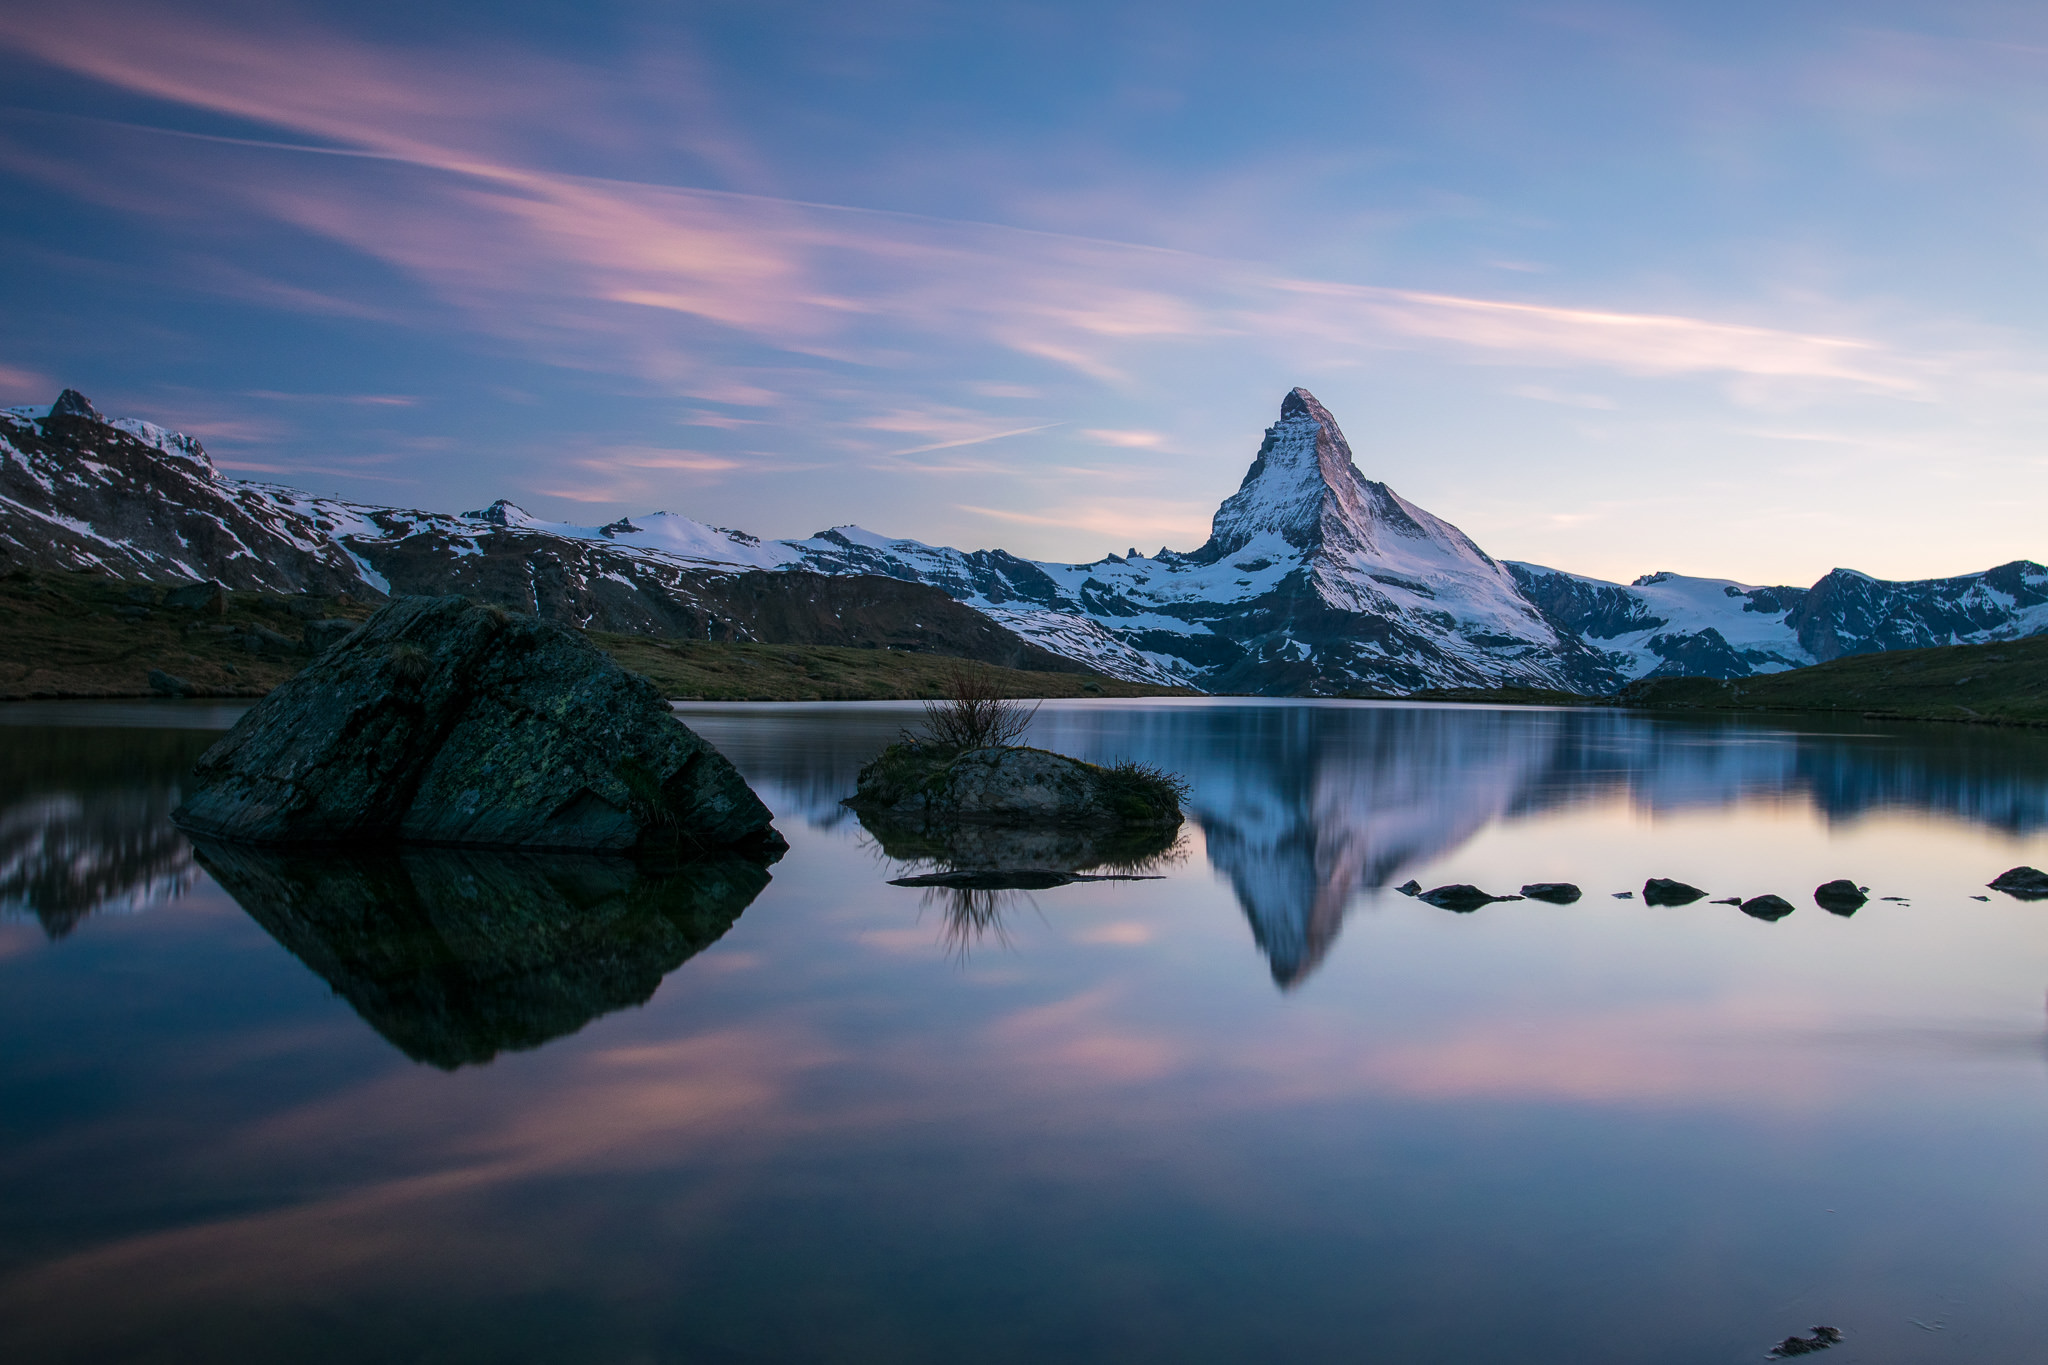
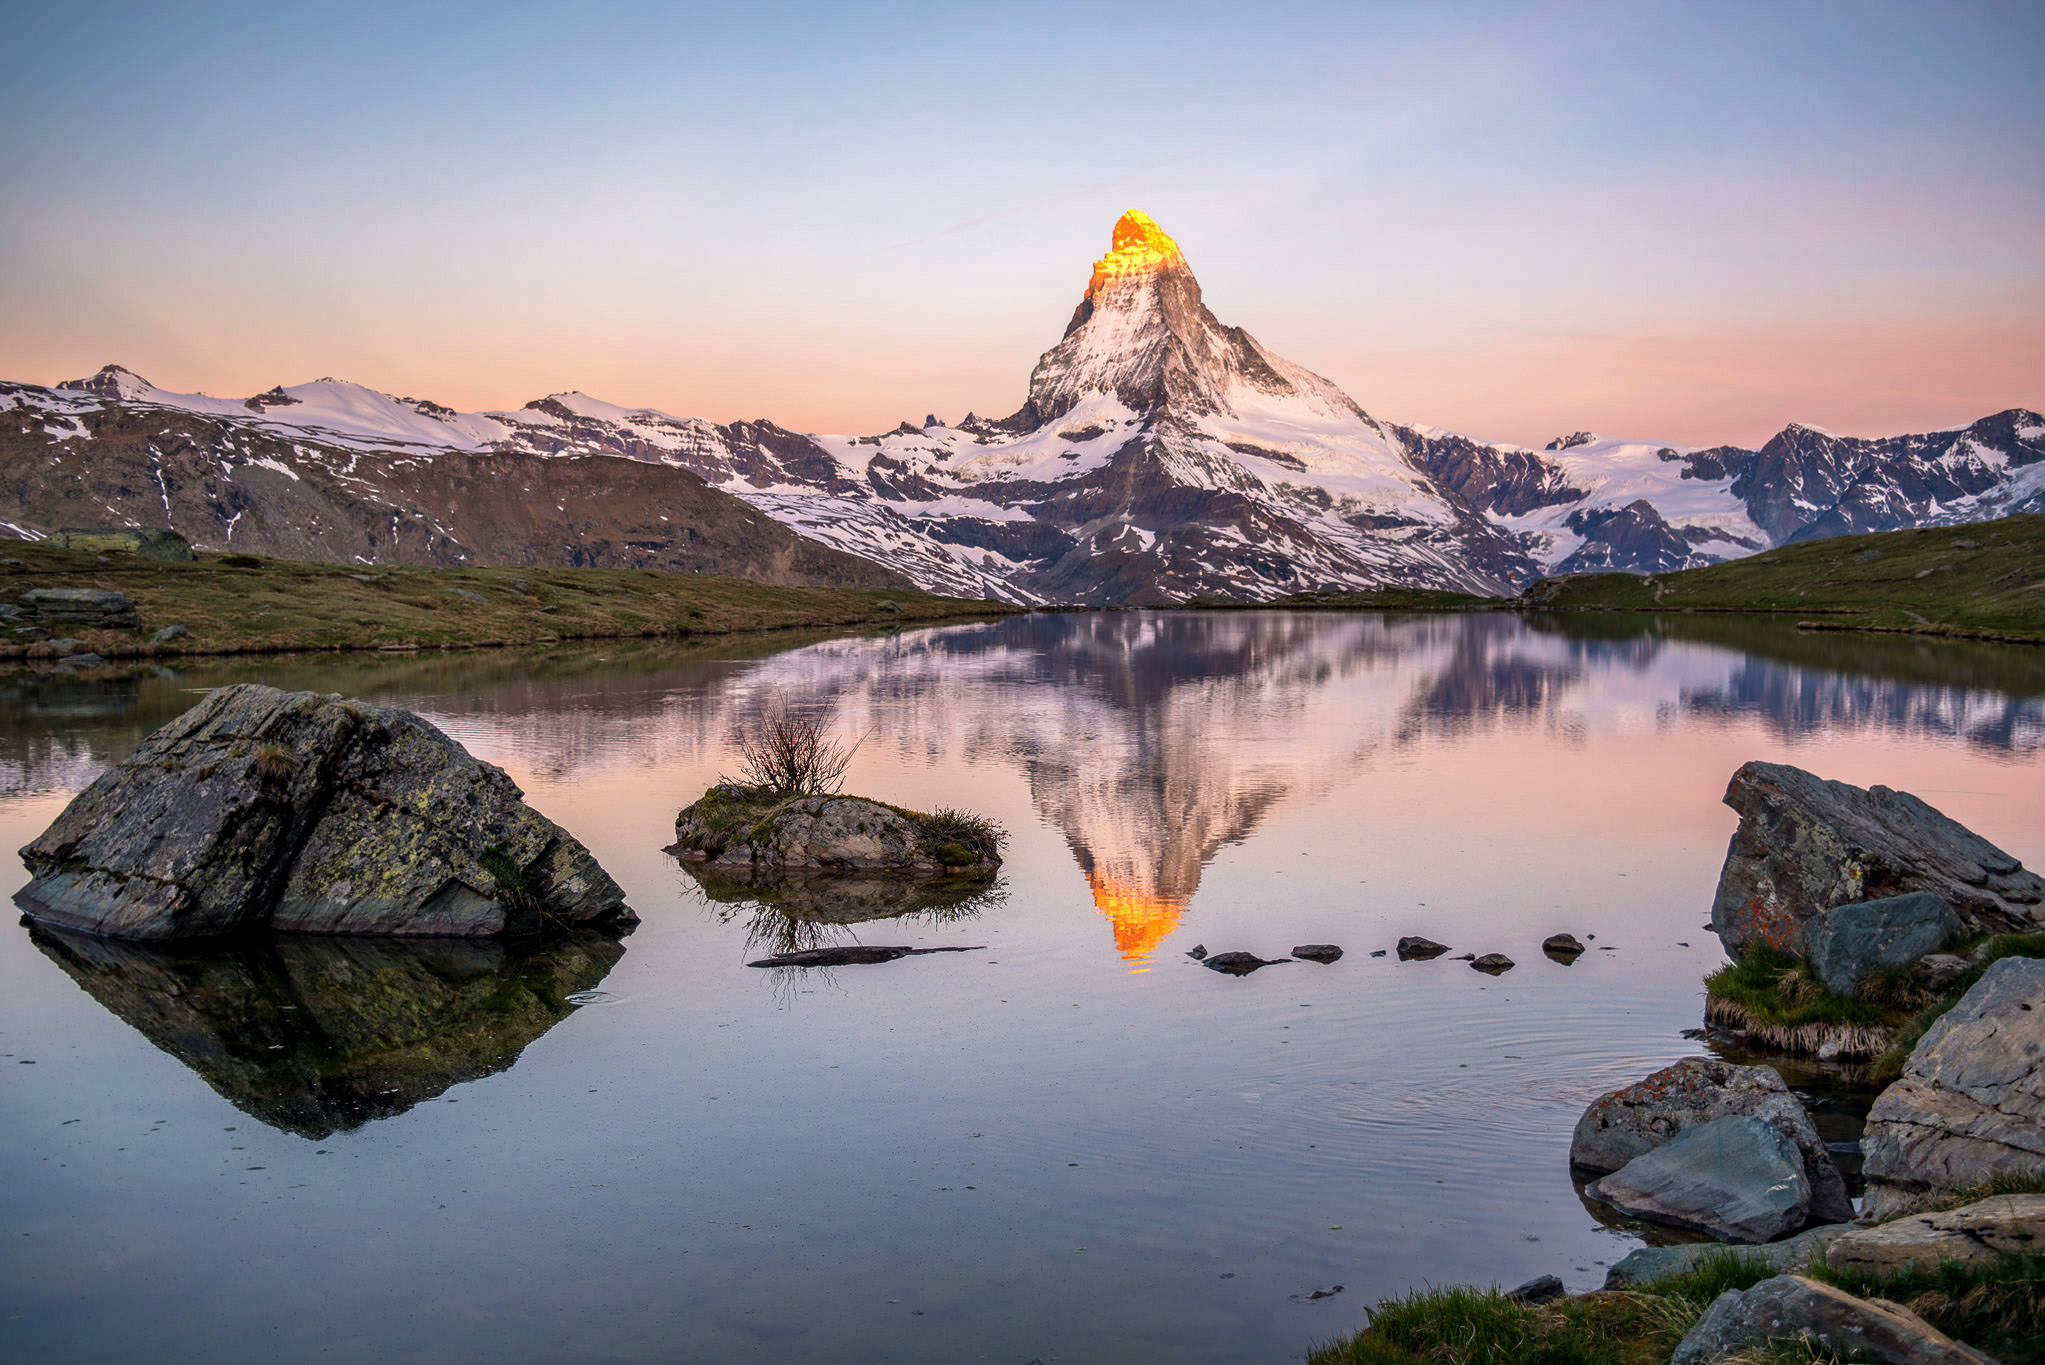
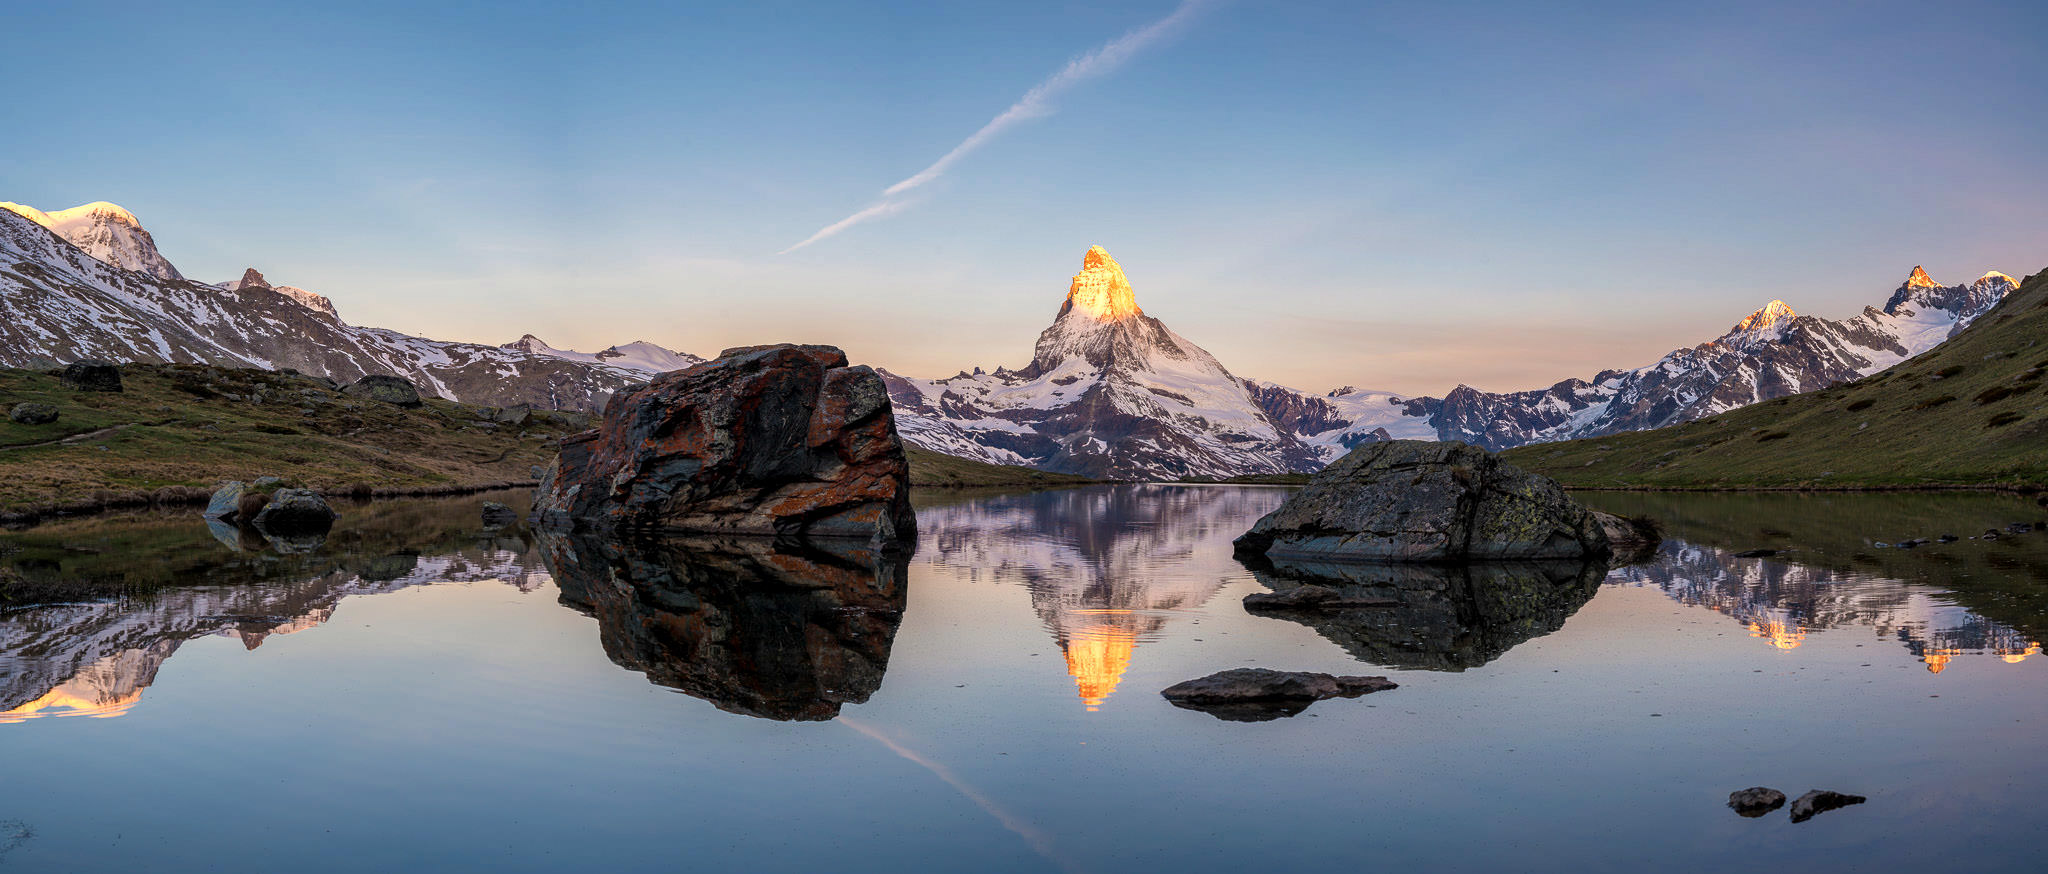
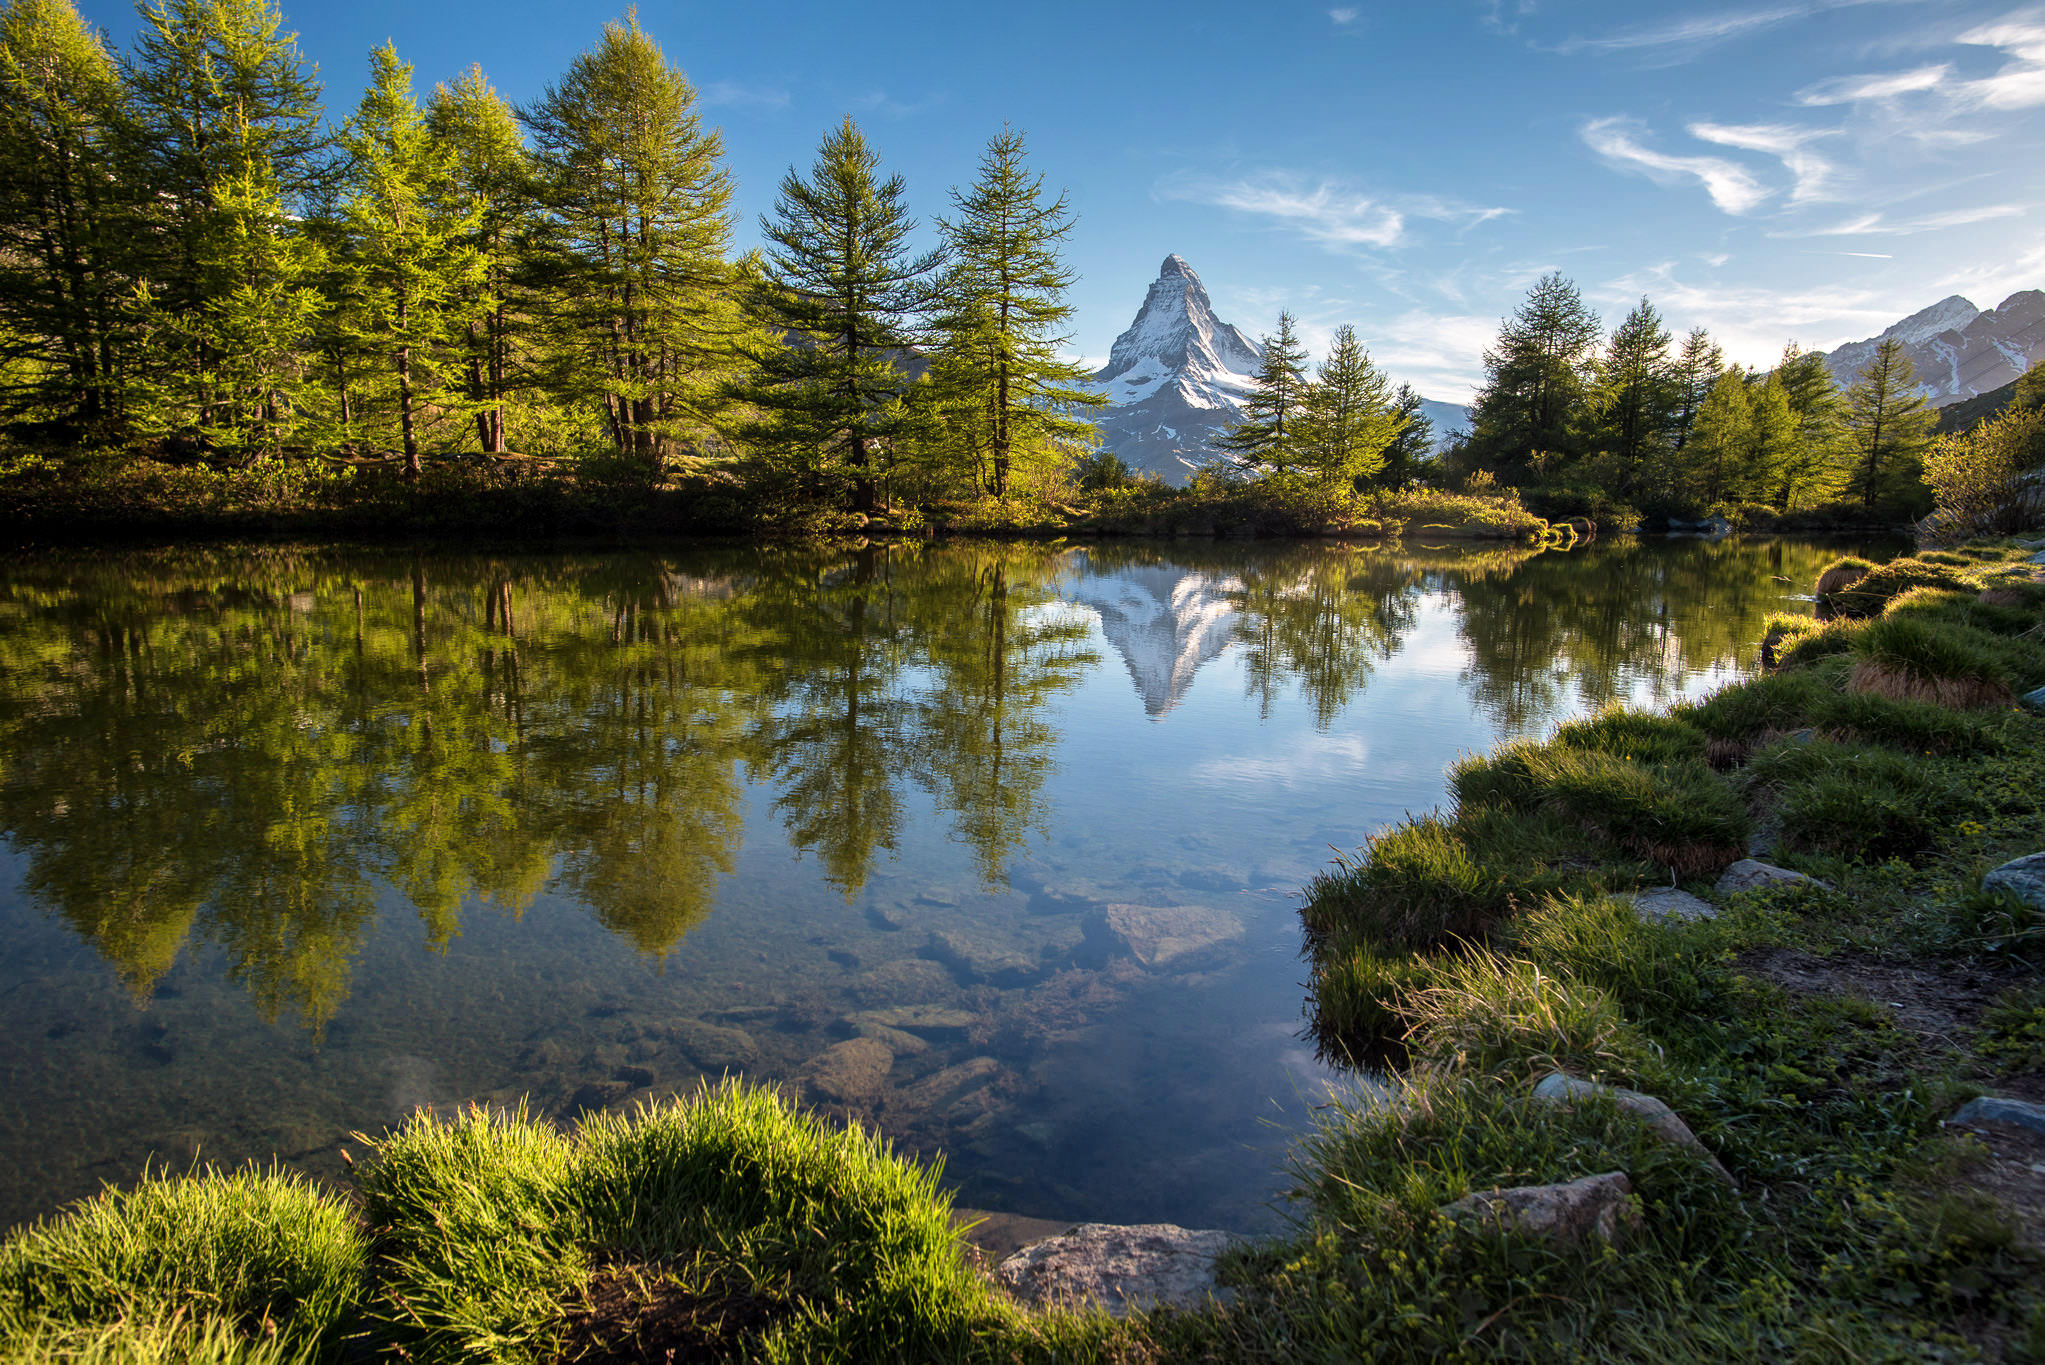
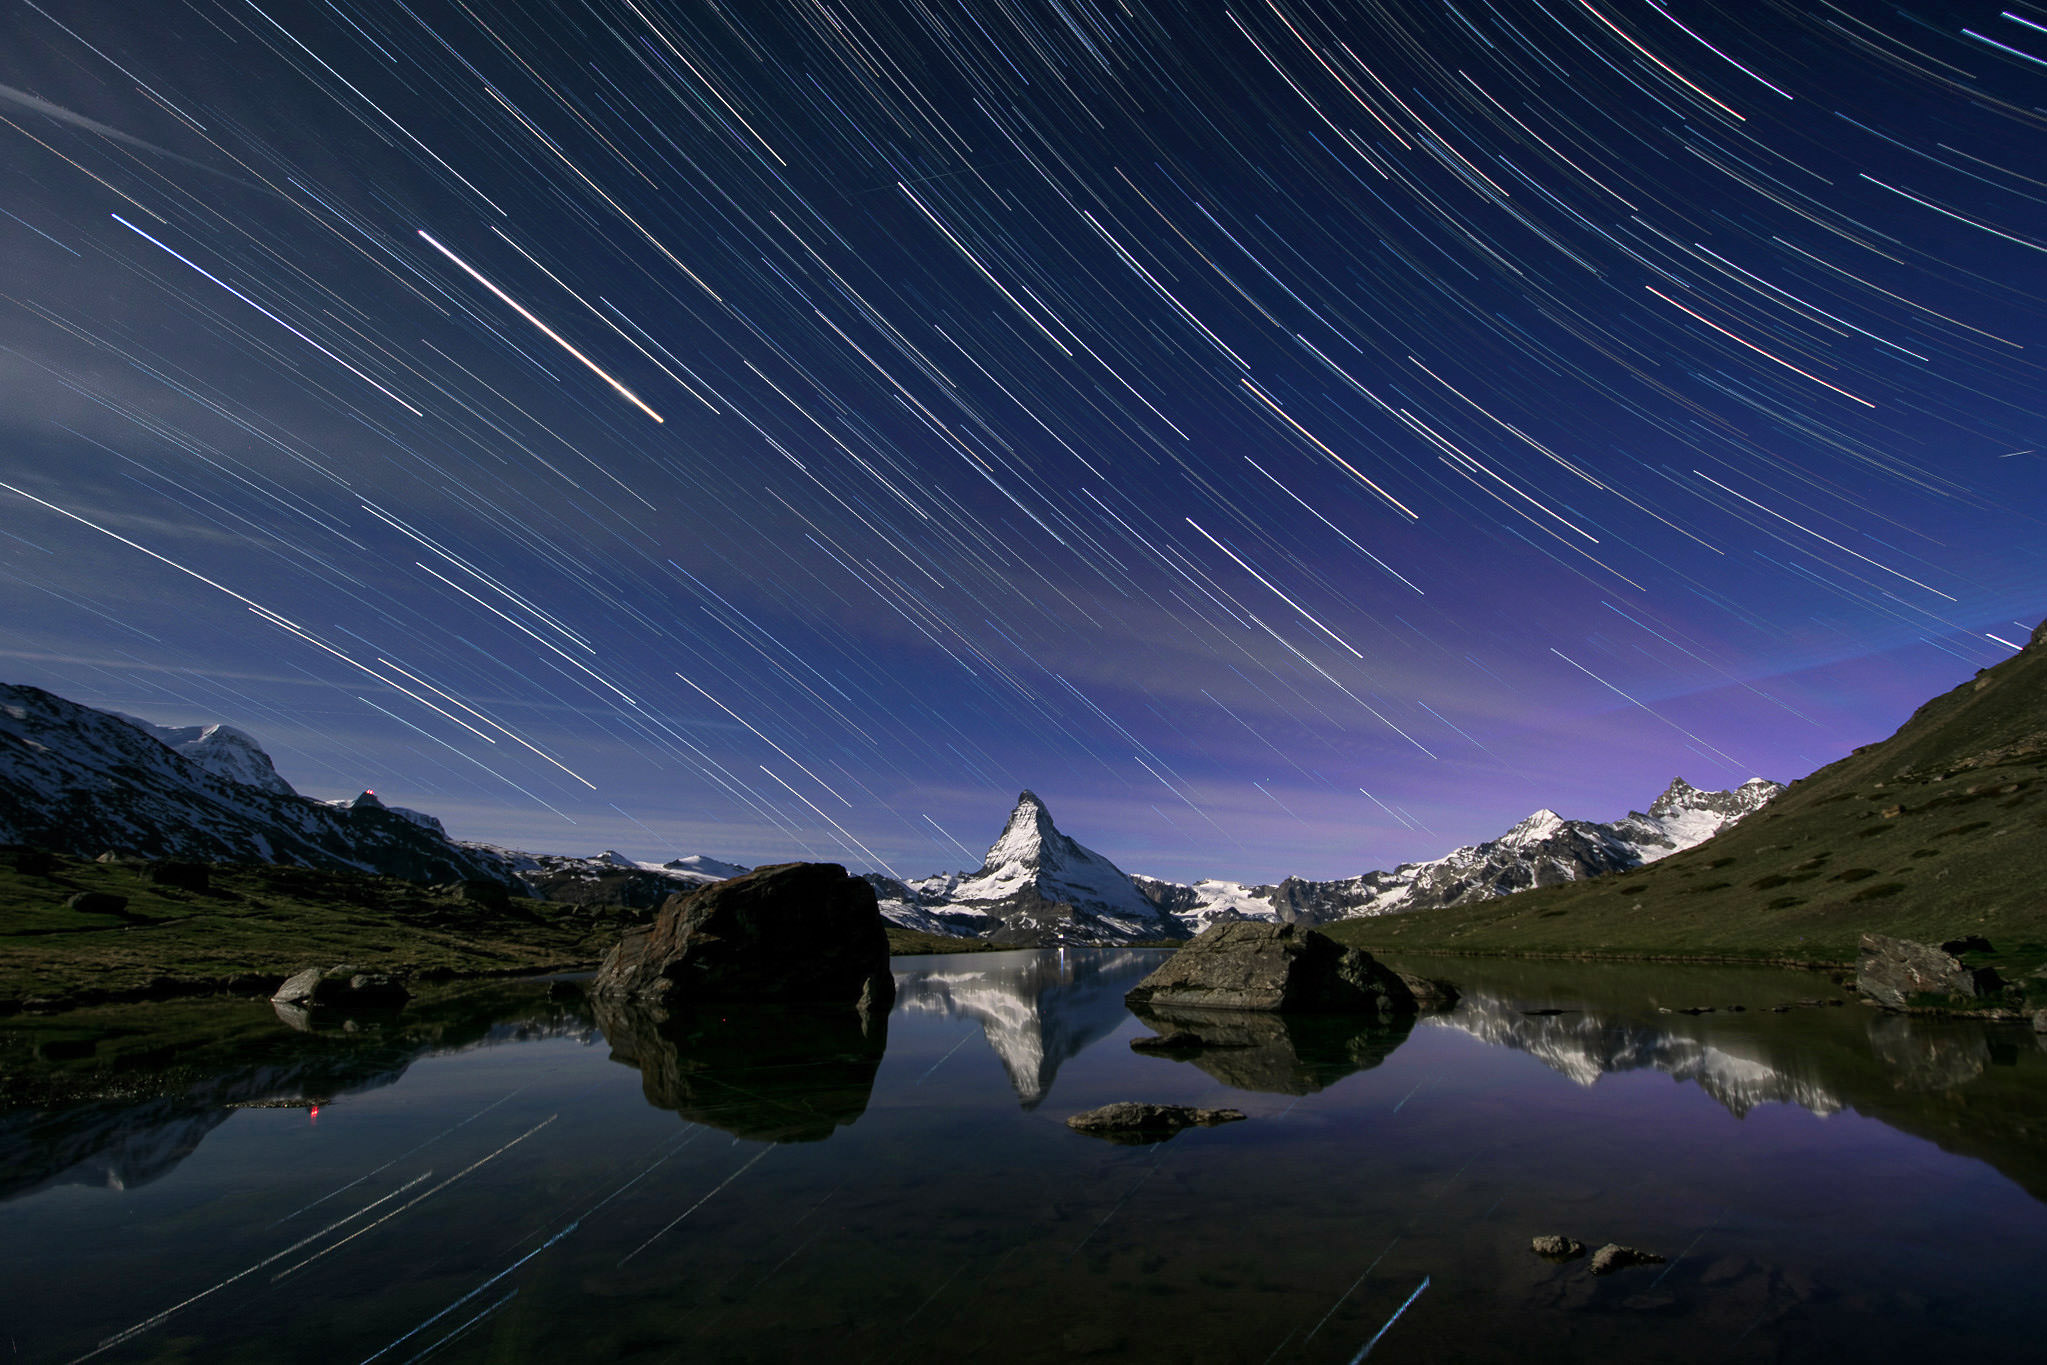
1) Stellisee
If I were to recommend only one location, I would go for the 5-Seenweg (the 5-Lakes Trail) and specifically for Stellisee. Stellisee is a mountain view that offers perfect mirror reflections of the Matterhorn peak located some 15 km (air distance) southwest. Except for afternoon times around 3-6 PM in Summer, the sun is in a very favorable position for good photographs throughout the day. This location is perfect for both sunrises and sunsets. In late summer and early autumn, the Milky Way will be visible from here right around the peak of Matterhorn. In late autumn and winter, the sun will be setting near or behind.


What is more, Stellisee has some lake banks with huge boulders at very convenient positions. You can find quite a few different composition options here.
How to get to Stellisee
One option is to walk all the way up, following some marked trails from Zermatt. While you will enjoy some very photogenic spots and vistas on the way, Matterhorn most of the time will be behind your back, so I actually recommend taking this route on the way back.

On the way up, the most convenient and fastest way to get up is taking the Sunnegga-bahn funicular. The Sunnegga-Rothorn valley station lies about 10 minutes’ walk from Zermatt railway station. The tunnel-train will take you up to the upper funicular station Sunnegga. Here, at the altitude of 2,280 meters above the sea level, you can either start hiking the 5 Lakes trail, which at first climbs up some 250 height meters along the ski lift and get to Stellisee after roughly 90 minutes of a nice walk, or you can actually take this ski lift and get to the Unterrothorn station at the altitude of 2550m. From here, reaching Stellisee is fairly easy and takes about 30 minutes.

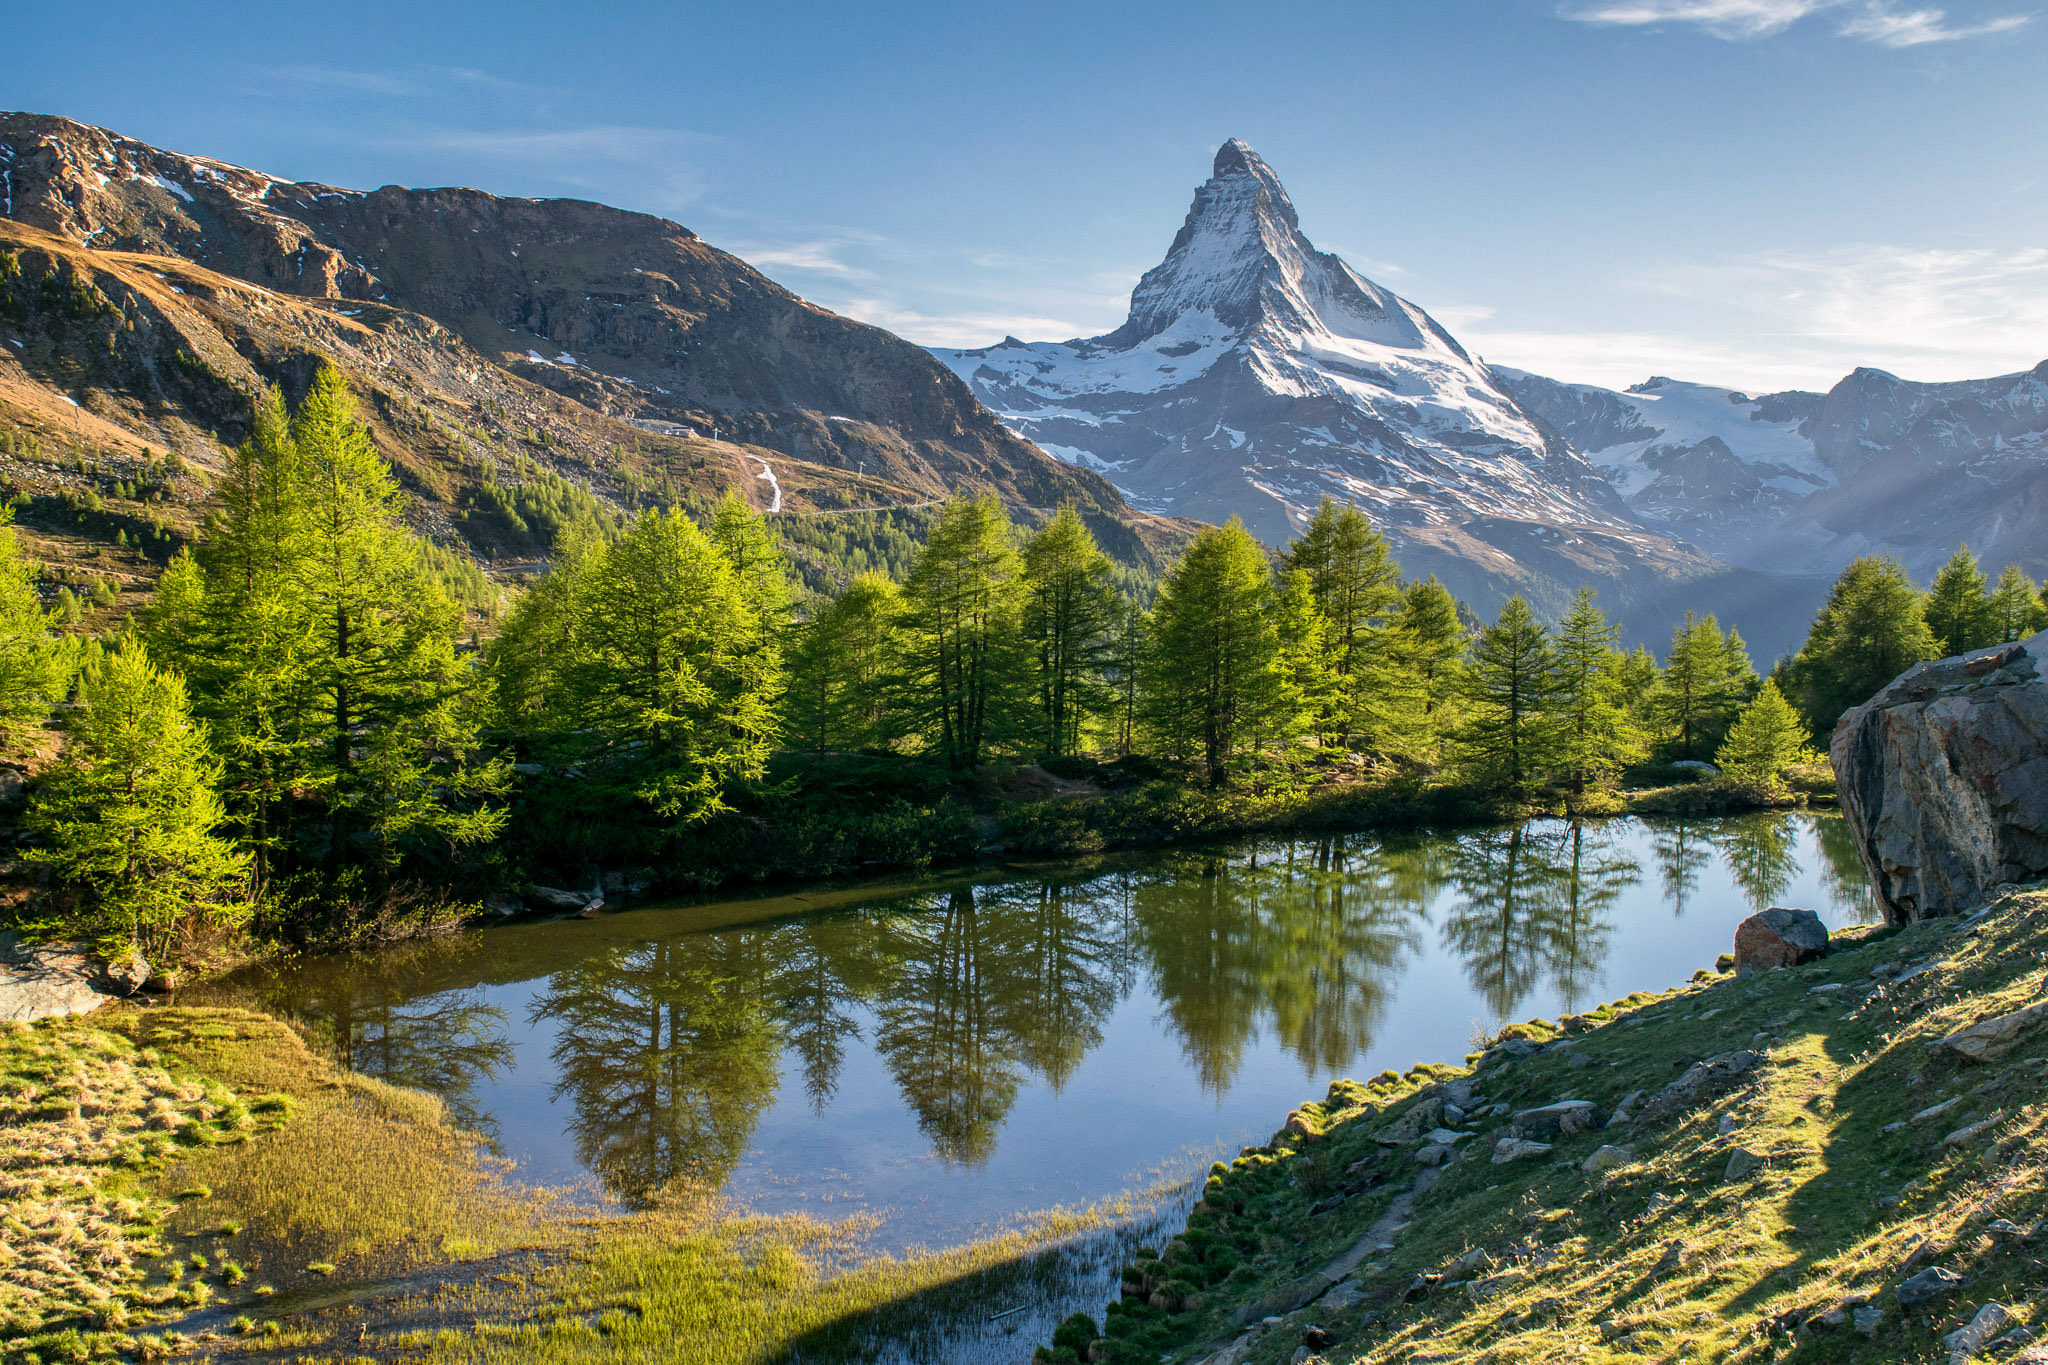
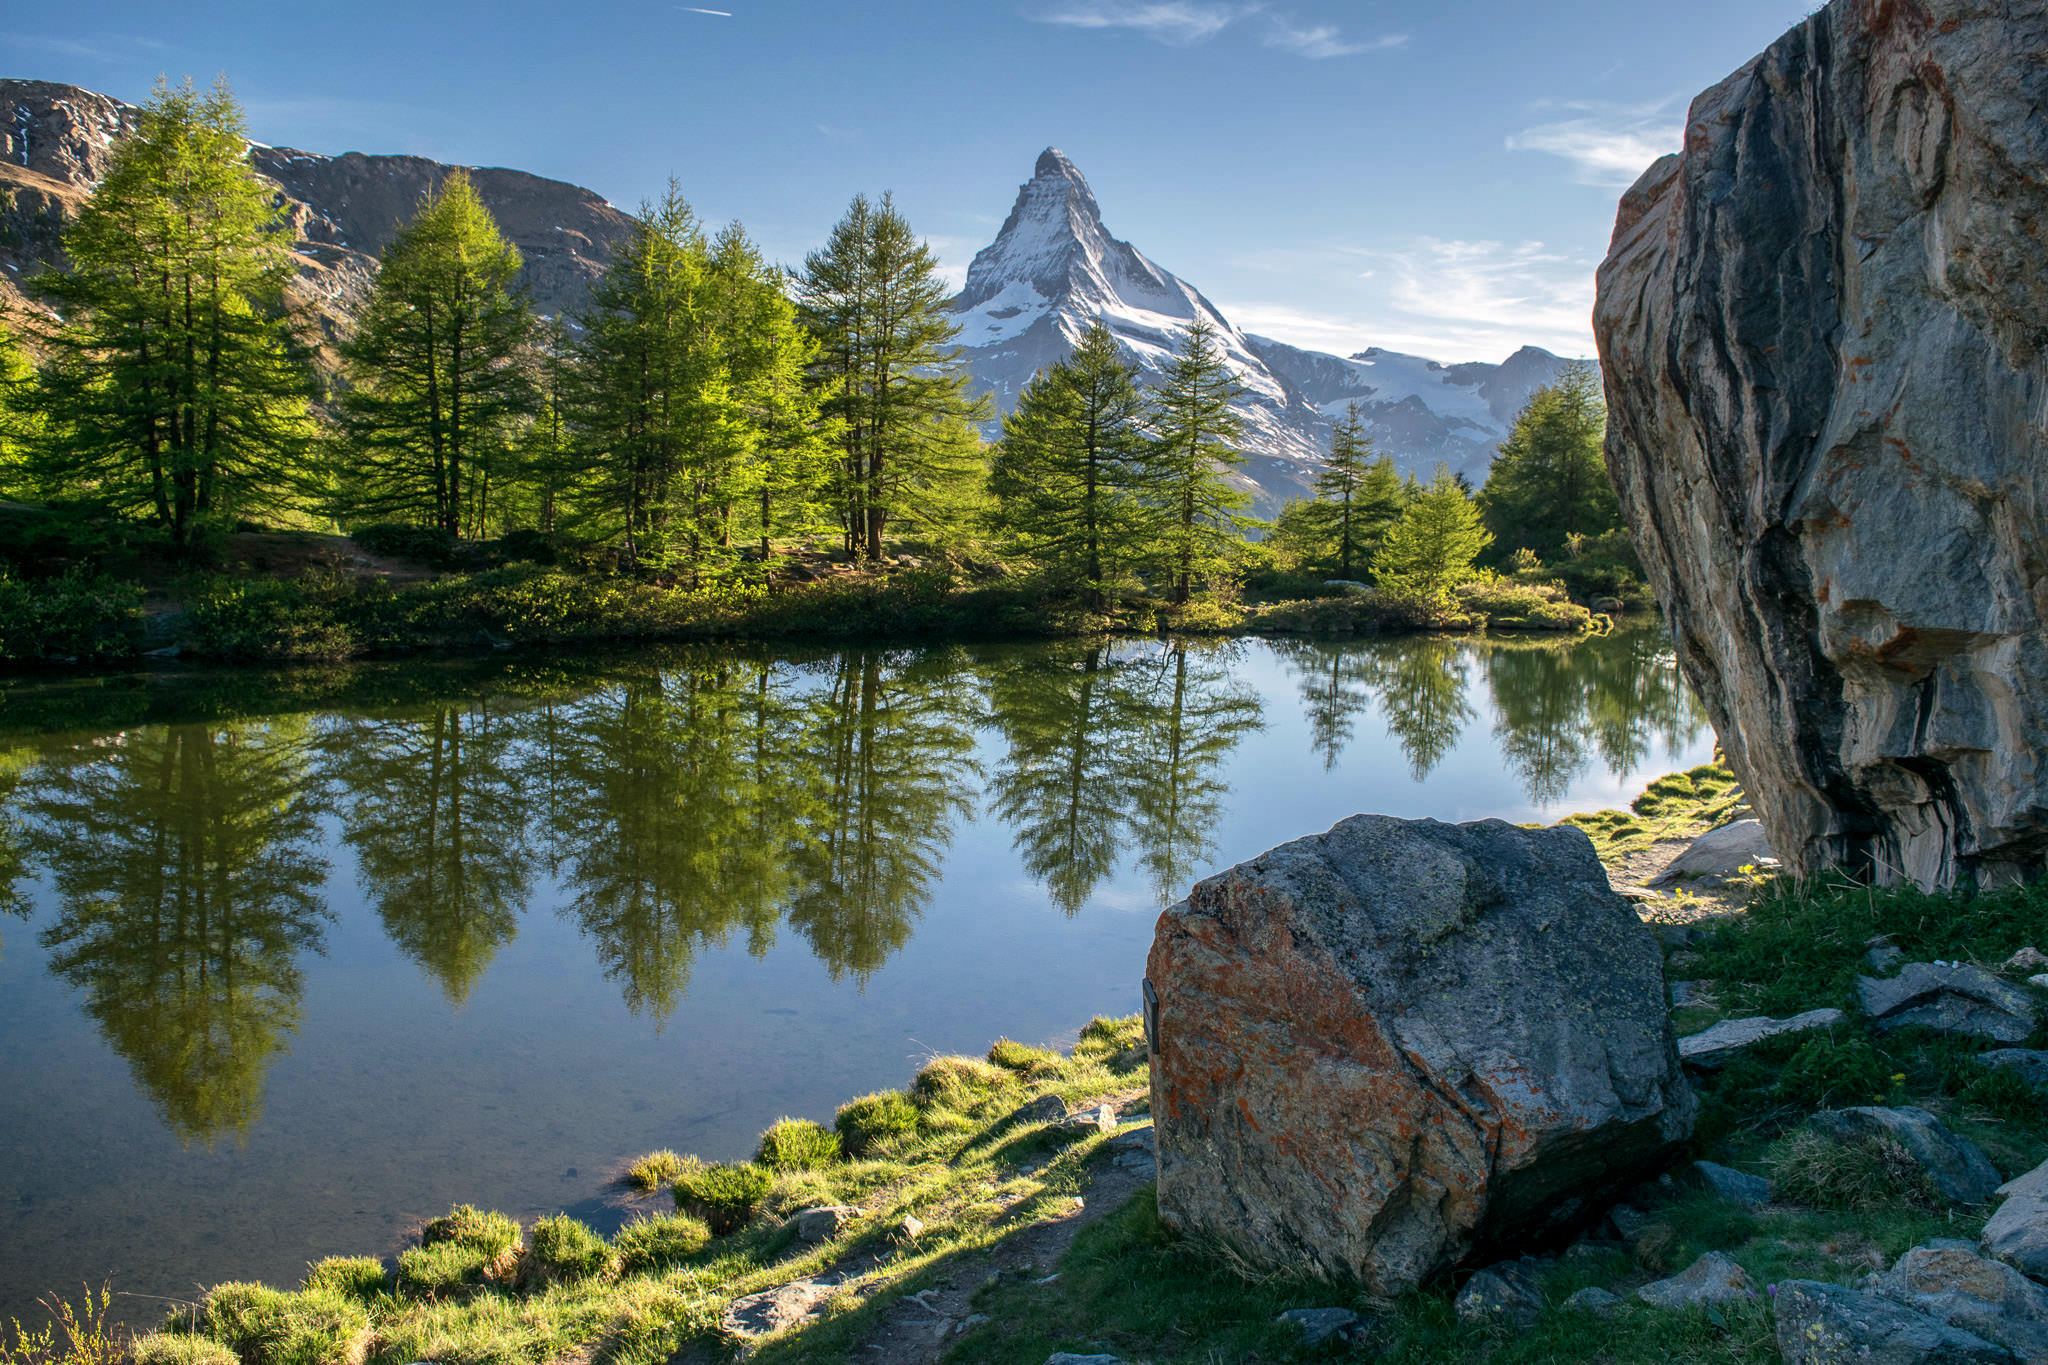
2) Grindjisee
The second lake to be admired in the 5 Lakes trail is Grinjisee. Although this lake also reflects the Matterhorn peak on its surface, the location and setting of Grinjisee is very different compared to Stellisee. It is much smaller, it is in a relatively deep valley, and its southwest shore is lined up with nice trees (larches). This is the place to be in autumn. There are some huge boulders close to the lake and behind the lake a steep slope enables making compositions from the higher perspective. The best time to shoot is roughly 1 hour after sunrise and 1,5 hours before sunset (if you want to have the foreground around the lake lit by sun).
3) Riffelsee
The Riffelsee lake might be more famous than the previous two, but I do not find photos from this lake more appealing. The reason why most of the photos available in different online galleries and stock databases are from here is simple: this place can be easily accessed by a famous cog railway called Gornergrat Bahn. A little nice train takes you higher and closer to the summit compared to the 5-Lake Trail. But the trails here are very crowded.
When I visited Zermatt, this lake was still partly frozen and I decided to go to Stellisee and Grindjisee instead. Gornergrat Bahn is very expensive (around 100 USD one way). The good news for photographers: this train operates from early to late hours. For more information about this lake and the railway, visit this website.
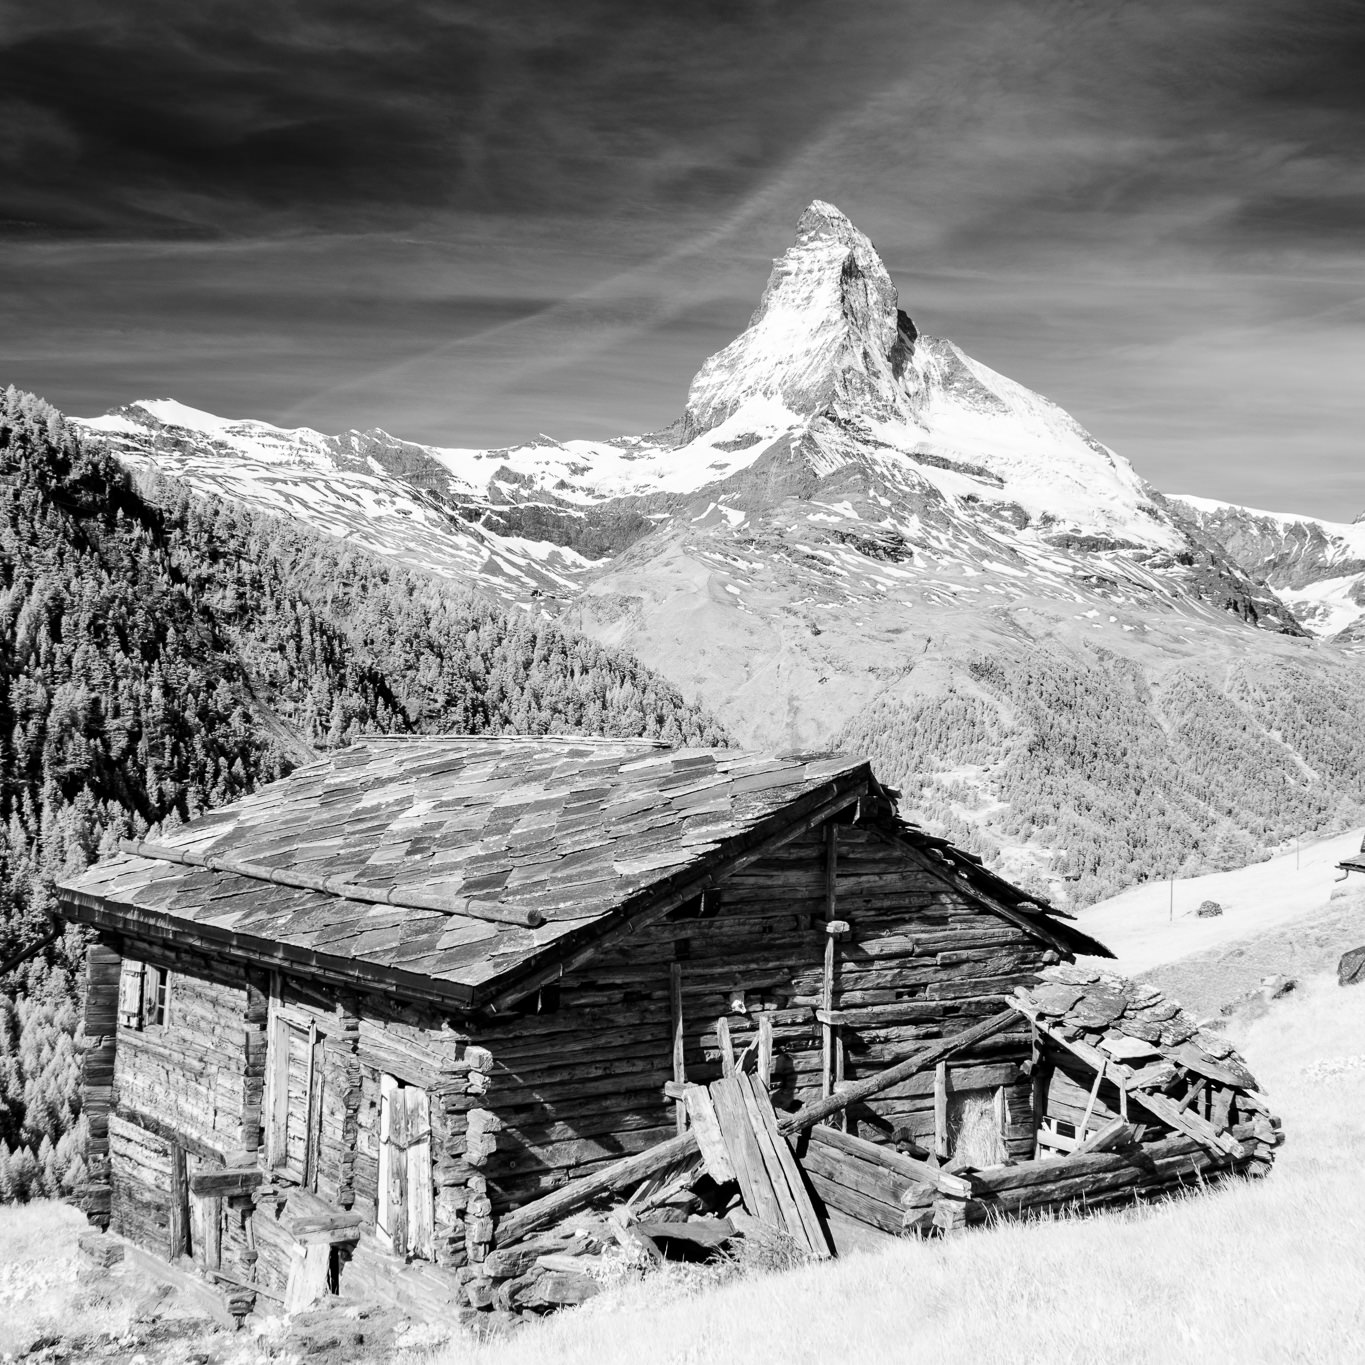
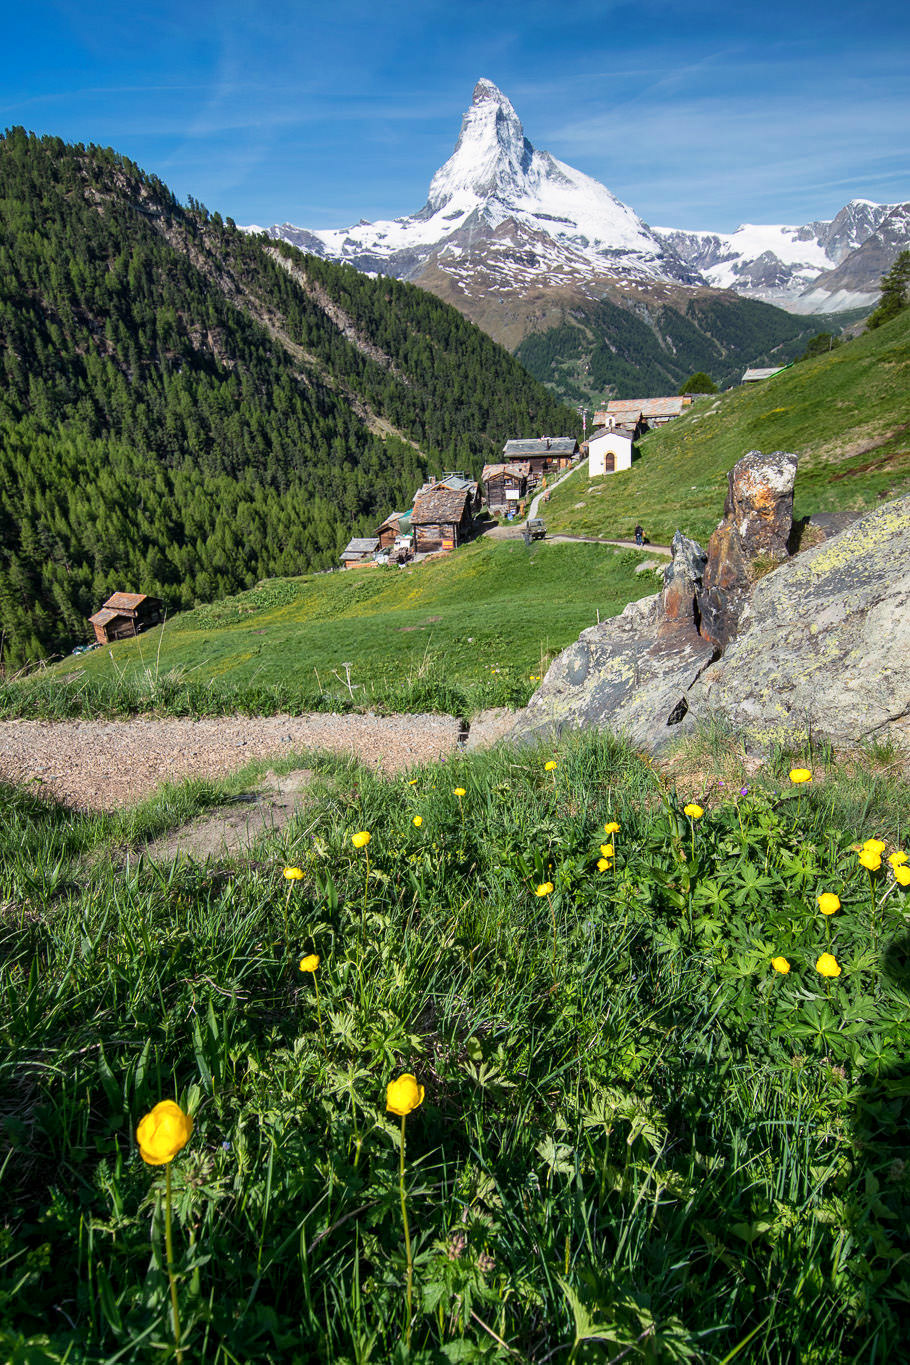
4) Ze Gassen
Ze Gassen is a tiny old-looking village on the slope near Zermatt. This village is passed when walking back to Zermatt from the 5 Lakes trail. Some of the wooden cottages and houses are very picturesque.

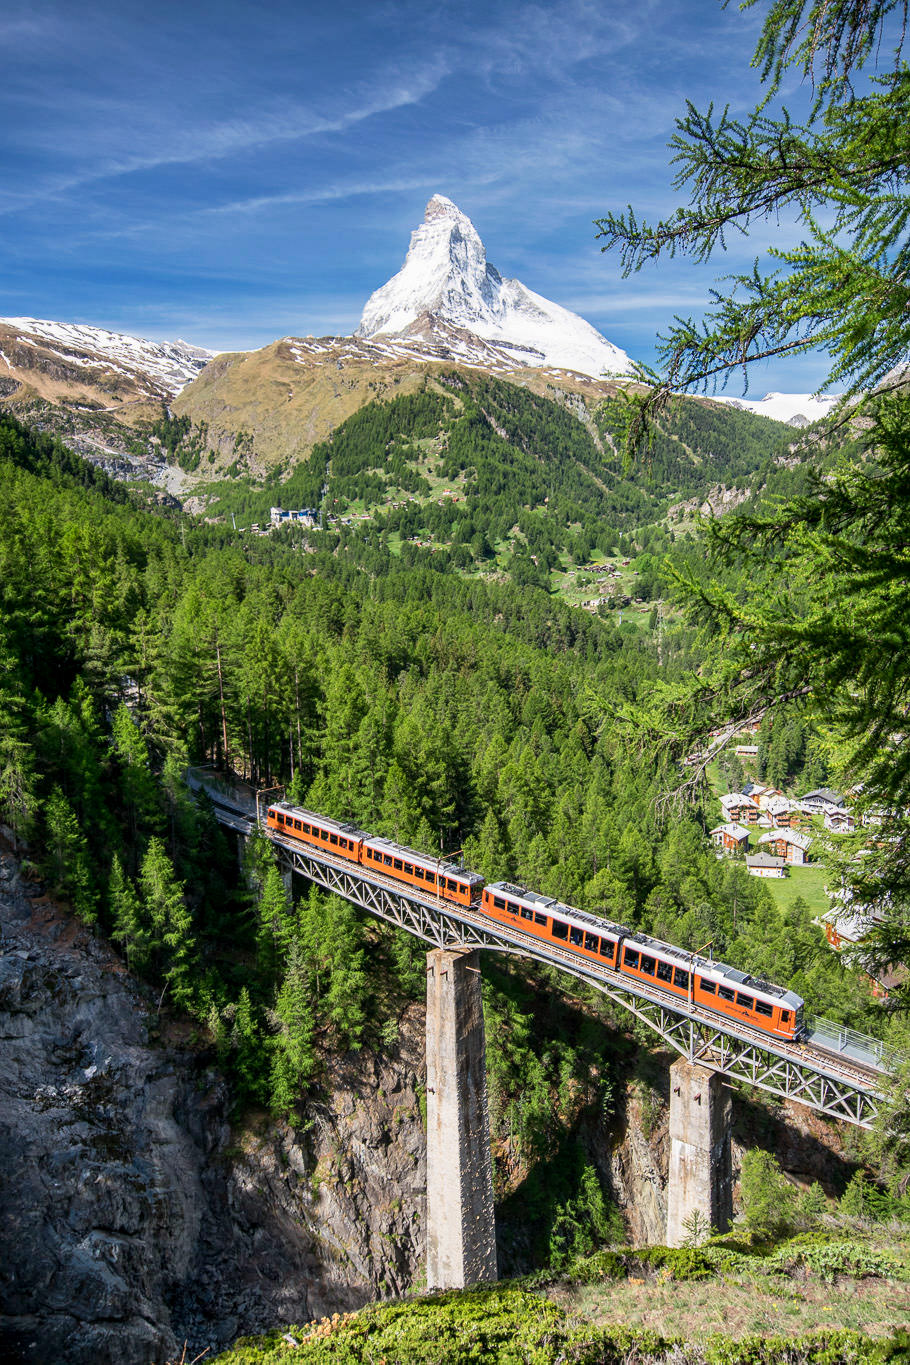
5) Findelbach Bridge
Just a few hundred meters below the Ze Gassen village there is a deep valley spanned by a railway bridge. This is a good spot to wait for the train and get a shot with Matterhorn in the view.
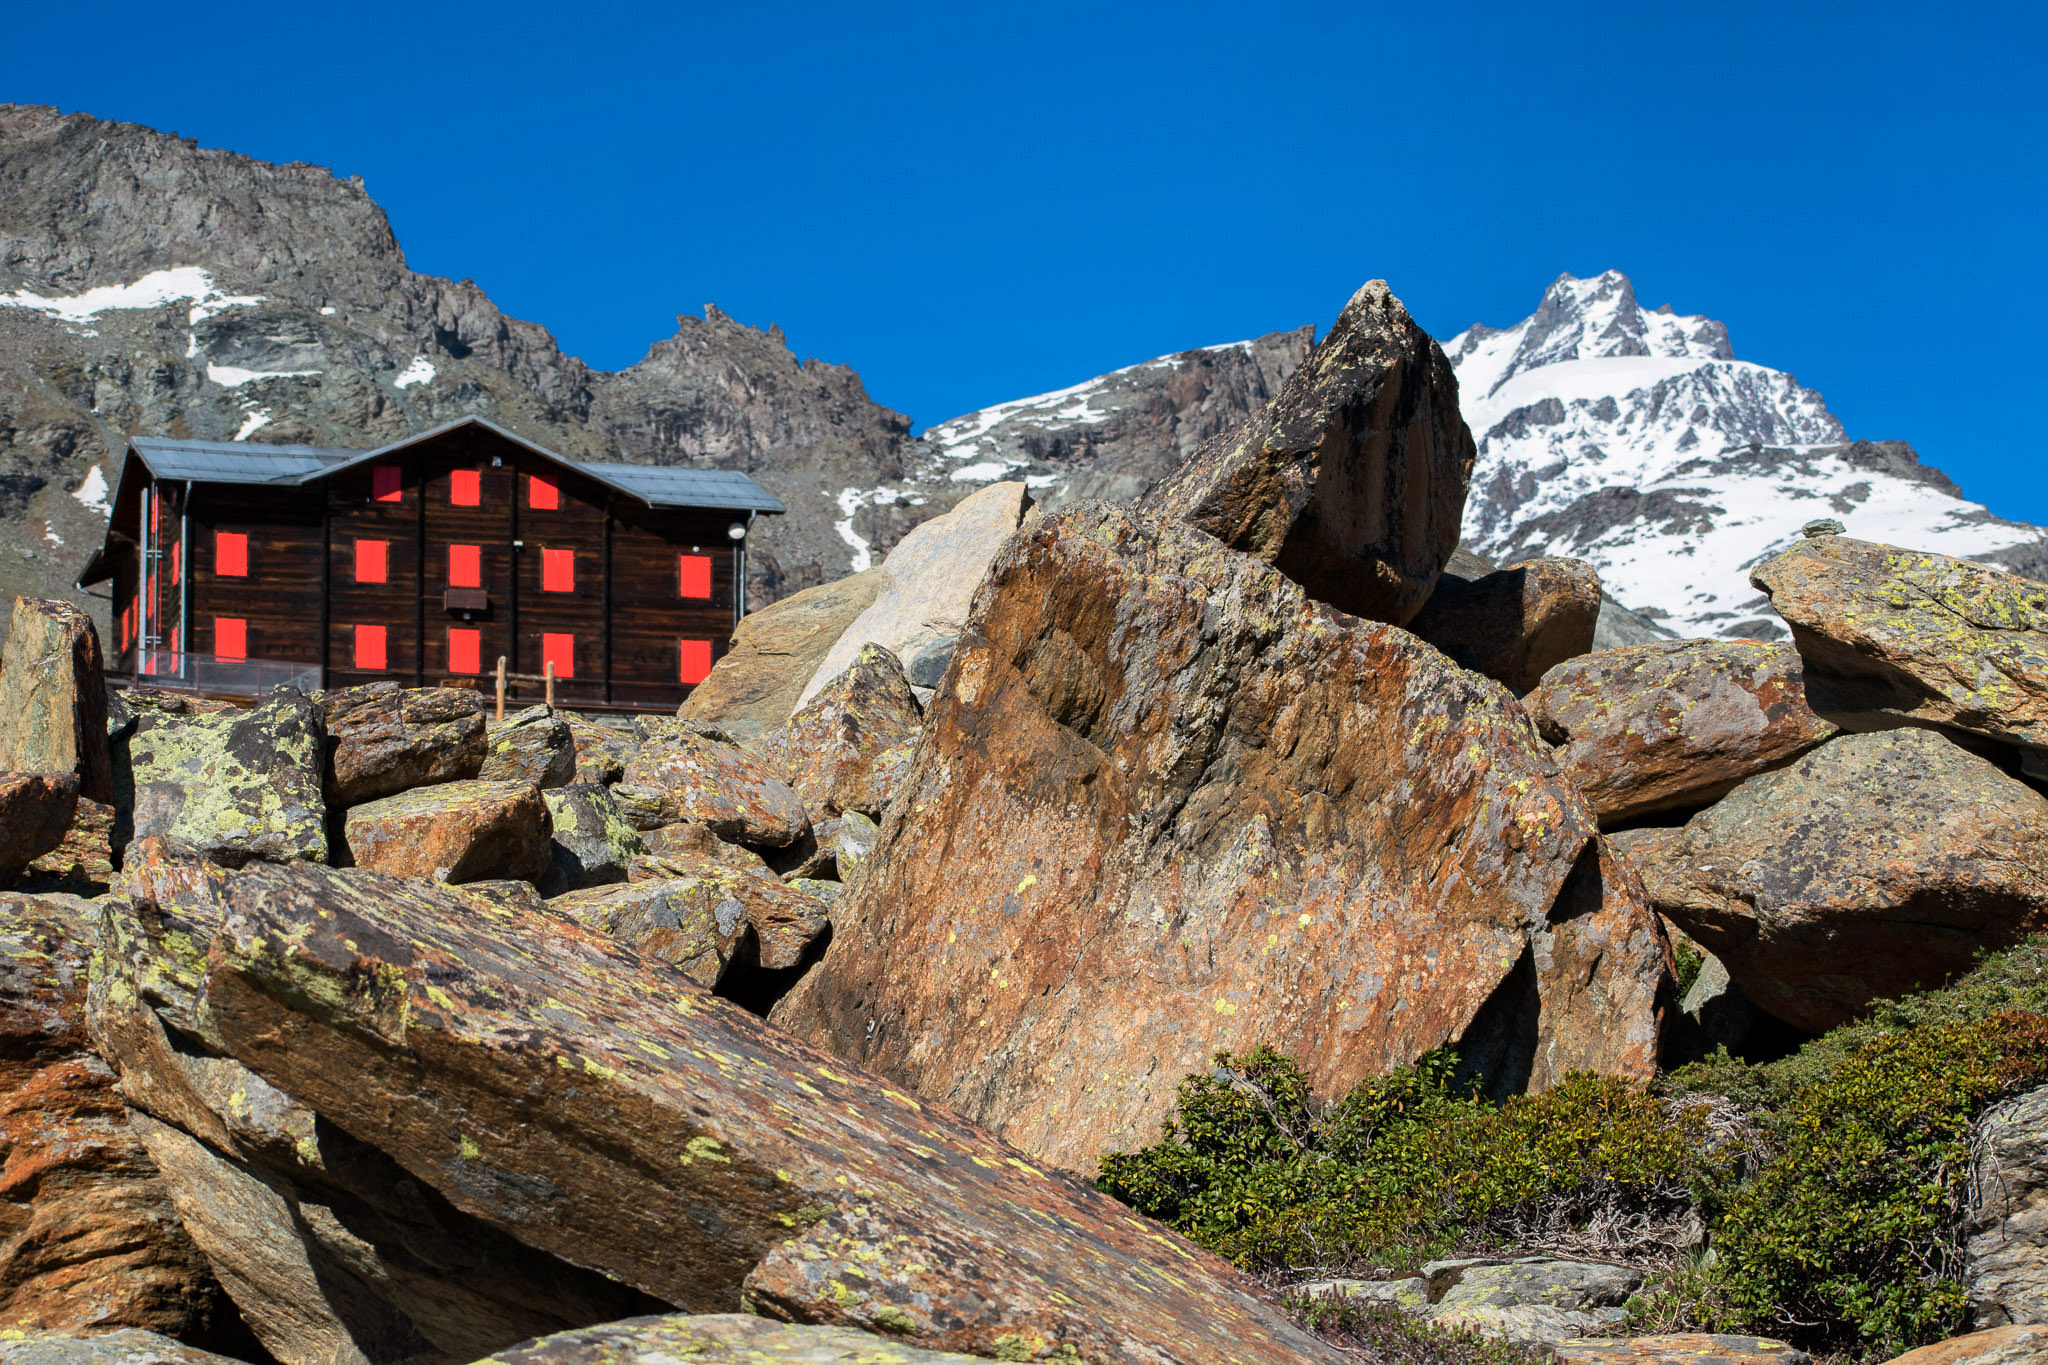
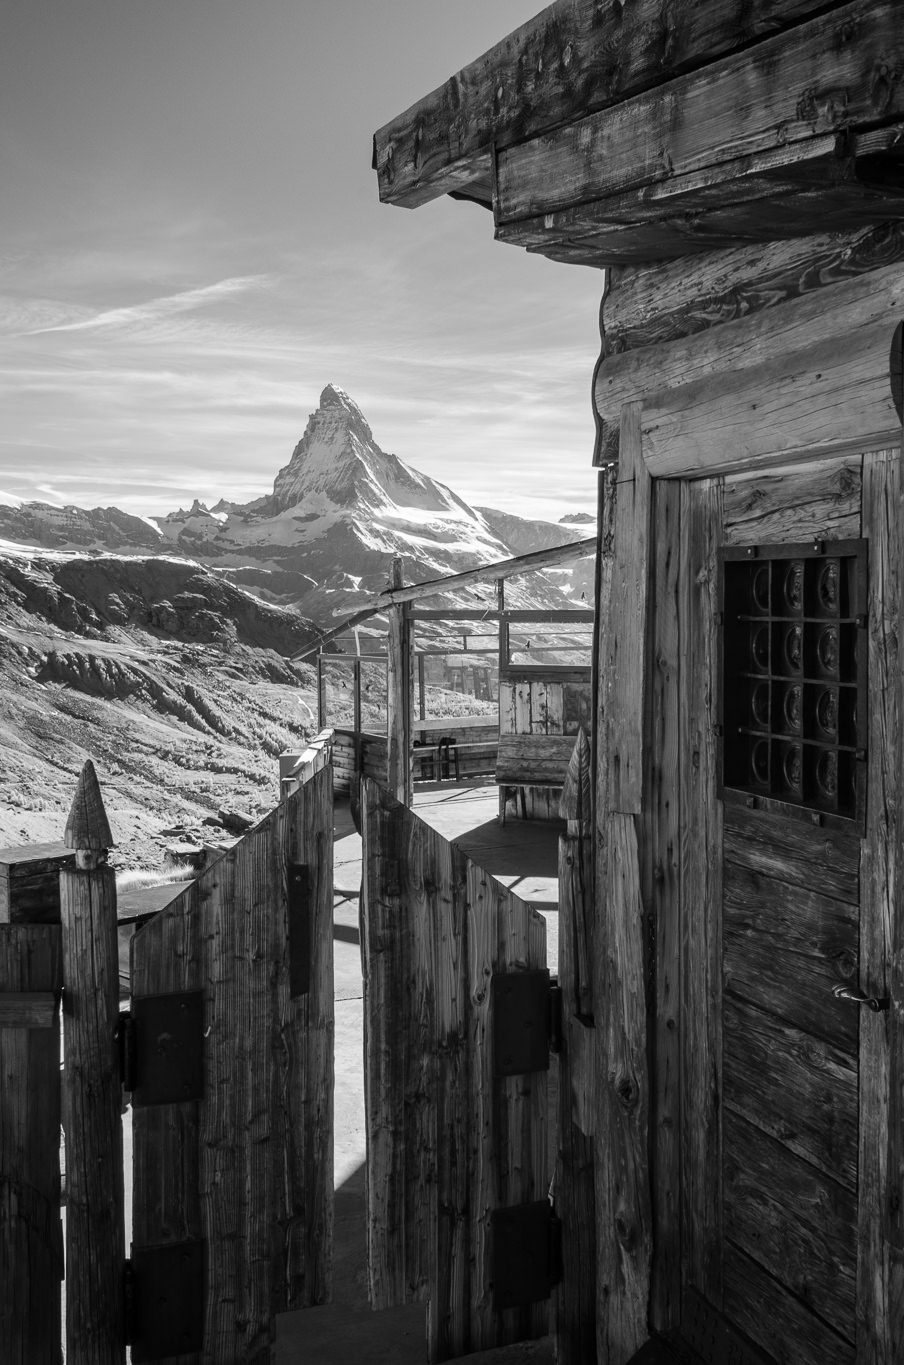
6) Fluhalp
Fluhalp is a mountain hut just a few hundred meters from Stellisee (at 2,606 meters). Do not miss this place when hiking the 5-Lakes Trail – you can have a nice lunch there and get some nice composition with the hut in the foreground.

Being There at the Right Place and at the Right Time
This is obviously crucial for any landscape photographer. As you could see above – all of the places I recommended are high up in the mountains. Most of them are accessible via funiculars, ski lifts or cog railway trains. But these do not operate around sunset and sunrise hours (at least not in summer).
So my recommendation is simple – stay in a tent and sleep near one of the lakes, preferably the Stellisee. By doing this, you will gain a lot. You will:
- have plenty of time in favorable light conditions (golden hour, blue hour, possible also some night shots)
- skip the crowds and enjoy some more “intimate” moments with the landscape and wildlife around (no dangerous wildlife to worry about)
- get calm lake surface in dusk and dawn hours (it is usually windy during the day)
- save money by not spending on hotels in Zermatt
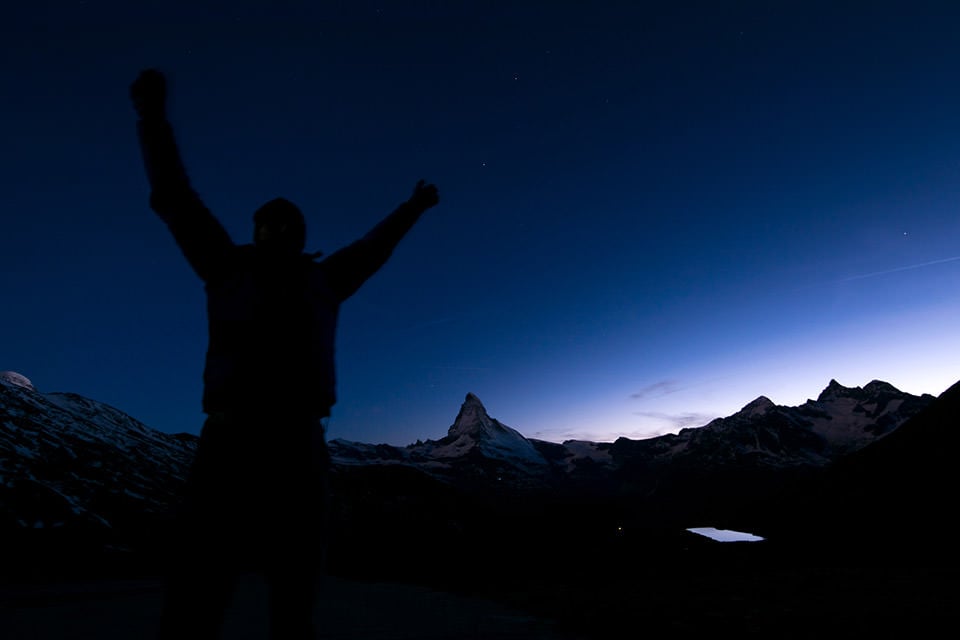
If free camping and some backpacking is not an option for you, then I would take the last cable car / lift / train (just before the closing time) and stay for sunset, walk down during the blue hour, reaching Zermatt at night with a headlamp. There are no bears and no real hazards to worry about – perhaps some summer storms and some rocks that you could stumble on.
Hope you’ve enjoyed this article. If have been to Zermatt before, please share your thoughts or perhaps even some tips below!
Thanks for this great info! Am planning to visit this summer,
No need to diss the Japanese and Chinese travelers. Don’t forget, unless you are from Zermatt, you yourself is also a tourist just like anybody else from another country. Racist!
Many thanks for the info on how to photograph Matterhorn as this will be one of our planned destination in September.
Glad to hear this! I keep fingers crossed for you so that your trip can happen in September!
Fantastic article on exactly the information I need to know, when planning a trip to Zermat! Many thanks!
Great article and amazing photos. This helps me a lot in my planning. One thing I was wondering about though. Is wild camping allowed in Switzerland? I‘ve read that it is not. Did you tent as well while there? (I would imagine so given the light in your shots). Thank you
Hi Alex, it is most likely not, I have not checked this recently, I was sleeping in a sleeping bag on the floor of a wooden patio of the still closed mountain hut called Fluhalp.
Beautiful shots. You mention
“If free camping and some backpacking is not an option for you, then I would take the last cable car / lift / train (just before the closing time) and stay for sunset, walk down during the blue hour, reaching Zermatt at night with a headlamp. There are no bears and no real hazards to worry about – perhaps some summer storms and some rocks that you could stumble on”
How long is the hike to go back to Zermatt?
Thanks in advance and greetings from Kuala Lumpur
Hi Bernd, I have just checked the exif of my photos to see the time stamp and it tells me that I made it within 3 hours – but keep in mind that I was not in hurry and took tons of photos. I believe it is doeable within 2 hours of a quick descend.
Vaclav
Lovely shots! I’m going back after a 40 year “break.” Looking forward to showing my partner one of my favorite places. Especially at Christmas time. Singing X-Mas carols in the English Chapel on X-Mas Eve is really special! Fortunately I’m retired now and can afford a few days there. Most of the rest of the time we will be spending with friends who live in Zurich and Klosters, and then outside of Munich. Funny that there is seemingly no mention of Infrared in his photo descriptions? I’m planning on taking a converted IR camera … 850 filter … for max contrast. There doesn’t seem to be very many IR Alp photos around?
Enjoy the trip! Zermatt is indeed very expensive, but I am sure you will find plenty of interesting motifs and subjects around Munich too.
Yes, I use converted IR camera with 850nm filer. So you should have a lot of fun with that (just pray for mostly clear skies, otherwise the photos turn-out dull). V
Václav,
Thank you so much for sharing all this precious information! I will go to Switzerland for work at the end of October 2018 and will have one free day to take advantage of for photography. This will be very helpful to try to catch something at sunrise and sunset that at Stellisee. The Sunnegga-bahn funicular + ski lift to the Unterrothorn station tip and knowing that it’s safe to walk back during blue hour with a headlight is a gem and exactly what I was looking for. These tips just aren’t out there on the internet.
You are welcome, enjoy your trip! V.
Stunning photos and very informative and quality article. Many share good pictures but don’t really tell us how to get it, even the place they were taken! But you share all these precious information, complete with detailed follow-able guidance how to get there and the timing. I am now get better insight and hopefully can follow your trail soon ;) Very much appreciated, keep up the good work! Keep sharing, stay adventurous, stay humble, and stay generous… this beautiful world need someone like you <3
Oh thanks, your feedback is a very good motivation for me to keep writing such posts!
Fabulous photos and priceless information. My husband and I will be in Zermatt for three days in mid July then on to Wengen for 3 days. I have a Nikon D5300 that I have used to shoot many Milky Way photos. I am hoping to get a the Milky Way and Matterhorn shot on this trip. I plan to follow your advice of taking the last train up and hiking down after getting my shot. Fingers crossed that the skies are clear. Thank you for your wonderful article!
Jen
You are welcome! I hope you had good luck with the weather! let us know how it was…