There are no times of day more famous for photography than “Golden Hour” — sunrise and sunset. Although great light can happen at any time, the edges of the day are perhaps the most consistent sources of inspiration you can find. Still, just because they’re beautiful doesn’t mean they’re easy to photograph. In this article, I’ll cover some suggestions for capturing sunrise and sunset as well as possible, including tips for exposure, creativity, and post-processing.
Table of Contents
Exposure at Sunrise and Sunset
As the day begins (or comes to a close), you may find it tough to capture the proper exposure. The biggest issue is that Golden Hour isn’t nearly as bright as other times of day. So, you’ll have to deal with less light than usual.
This is one of the many reasons why landscape photographers tend to use tripods. If you’re short on light, a tripod lets you use a long shutter speed and capture the proper exposure.
However, even if you’re using a tripod, your work isn’t over. Often, the sky at sunset will be several times brighter than your foreground, leading to an excessive amount of contrast in the image. Dealing with this can be a challenge.
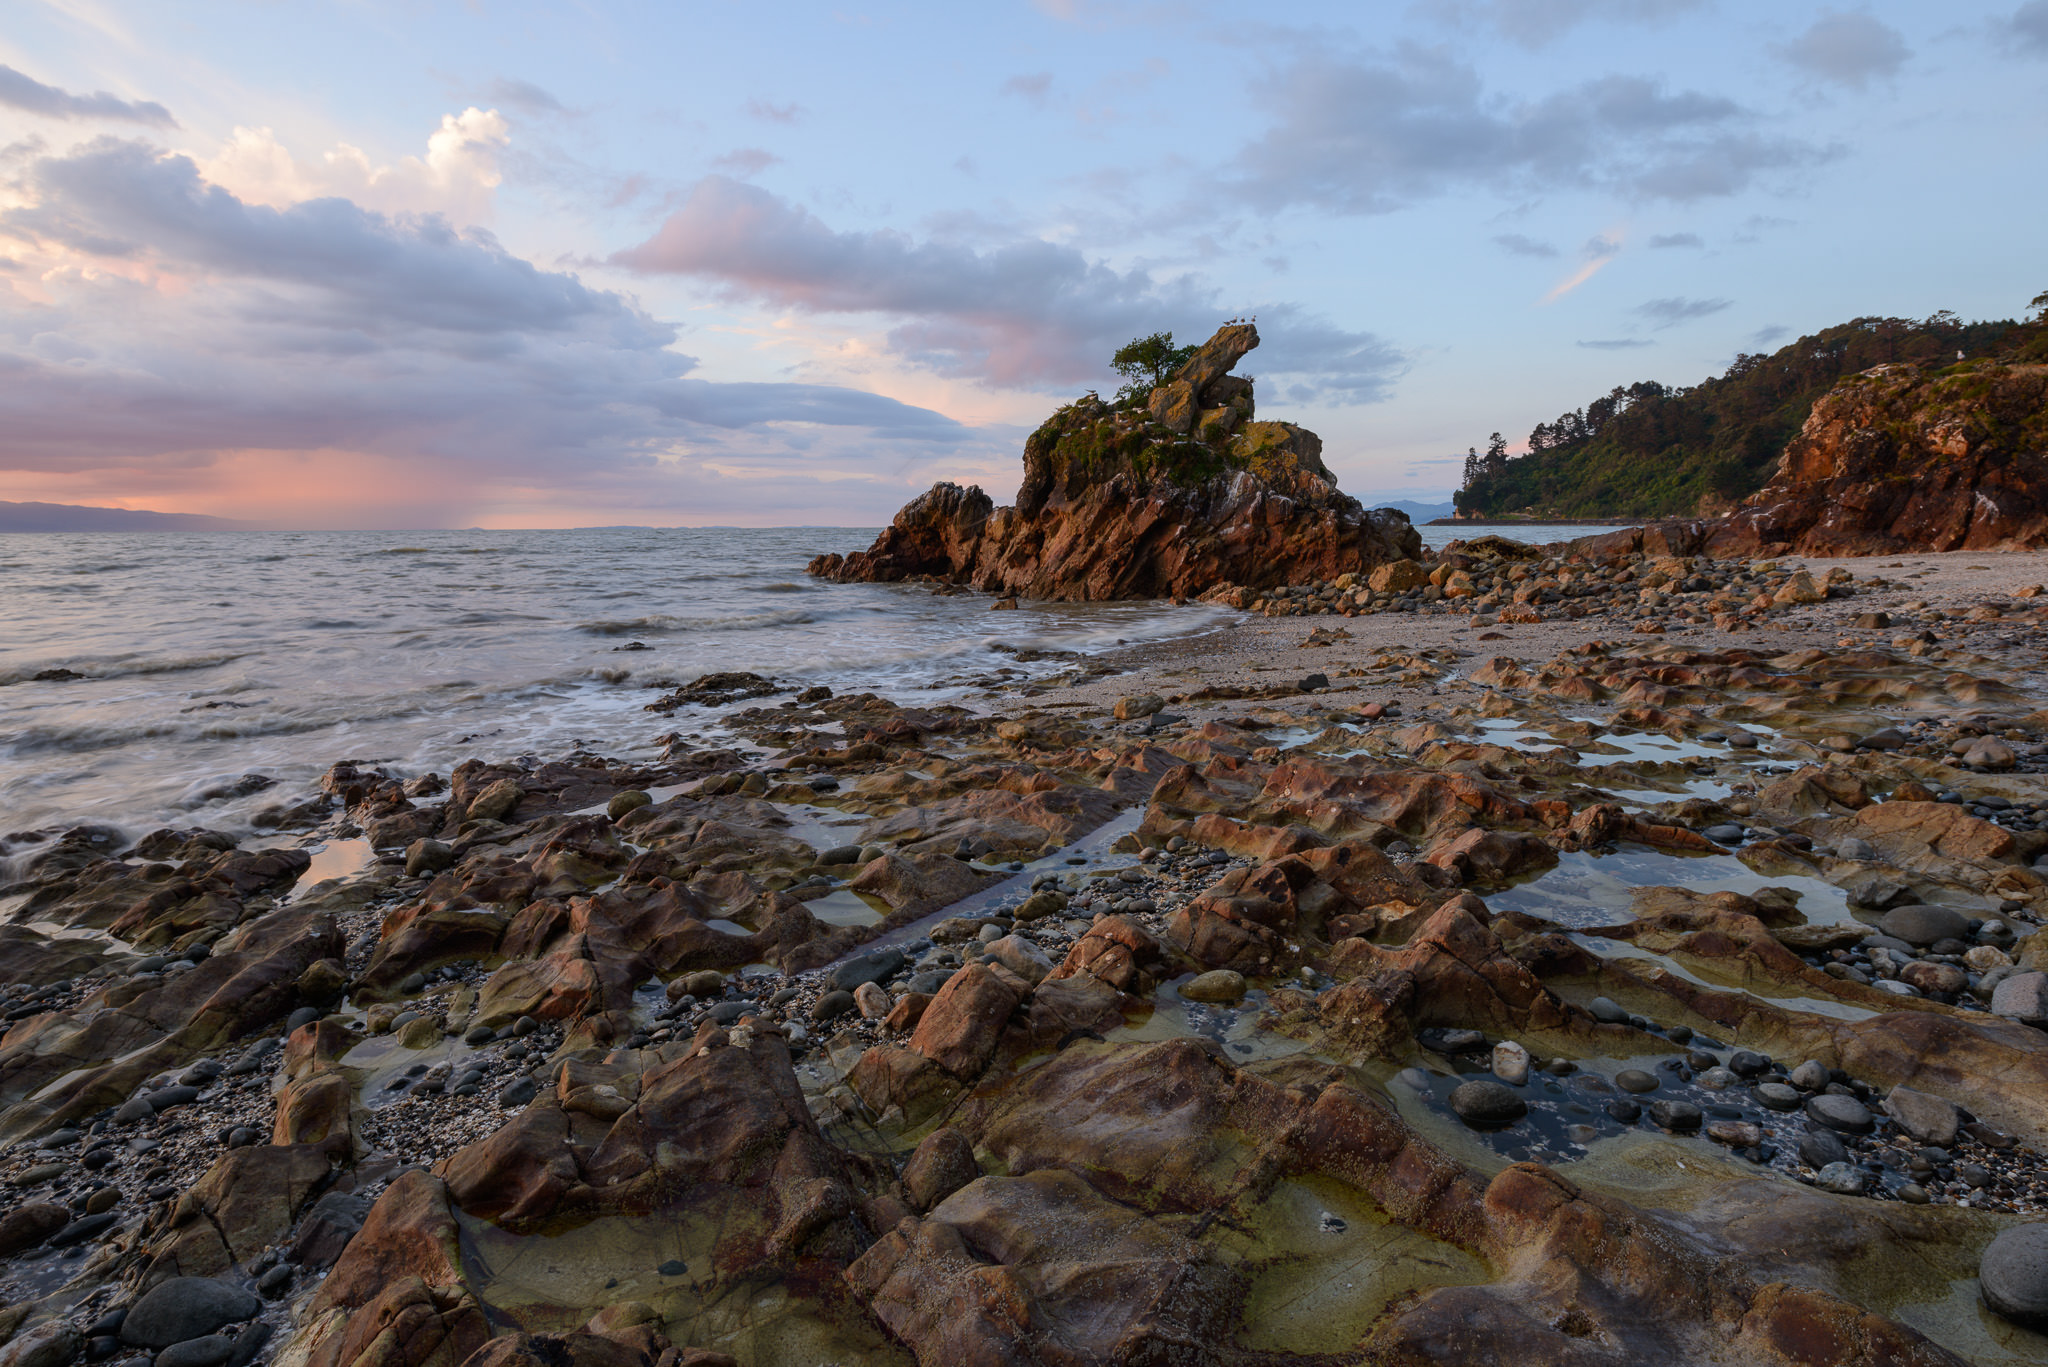
I exported this JPEG from Lightroom without any edits at all. As you can see, the sky is too bright, and the foreground is too dark. This is very typical for sunrise and sunset photography.
So, what can you do to make the photo look more like what you actually saw? There are a few techniques you can employ.
Expose Like Normal
The first — and simplest — is just to do nothing, at least in the field. You could take photos exactly like normal, and all you need to do is make sure that none of the important highlight detail in the sky is completely white. That’s because it is impossible to fix any regions of the sky that lose all their detail.
Then, once you’re in your post-processing software, just recover the shadows using the “shadows” or “darks” slider (or whatever your equivalent may be). You also might end up darkening the highlights somewhat. So, the final result may look like this:
However, although this technique works, it isn’t necessarily ideal. Boosting the shadows to an extreme degree sometimes looks fake and unnatural — not all the time, but certainly in some cases. It also makes noise more visible in the dark portions of your image. So, some photographers turn to other techniques instead.
Filters
One that’s important to know is the use of filters. We’ve covered filters before for landscape photography, but the simple explanation is that they physically alter the light that reaches your camera sensor. In this case, the two filters that are most relevant are polarizing filters and graduated neutral density filters.
Polarizers are helpful for a number of reasons, but, at sunrise and sunset, the most relevant use is that they can darken certain regions of the sky. Specifically, 90 degrees away from the sun in every direction, you’ll see a significant reduction in brightness, assuming that there aren’t many clouds.
So, if you’re shooting 90 degrees away from the sun, a polarizer can be a very good way to darken the sky. (Although it’s worth mentioning that a wide-angle lens combined with a polarizer can result in an unevenly-lit sky, and is best avoided.)
However, a more flexible filter for darkening the sky — one that works no matter which direction you face — is a graduated neutral density filter (also called a grad filter). They look something like this:
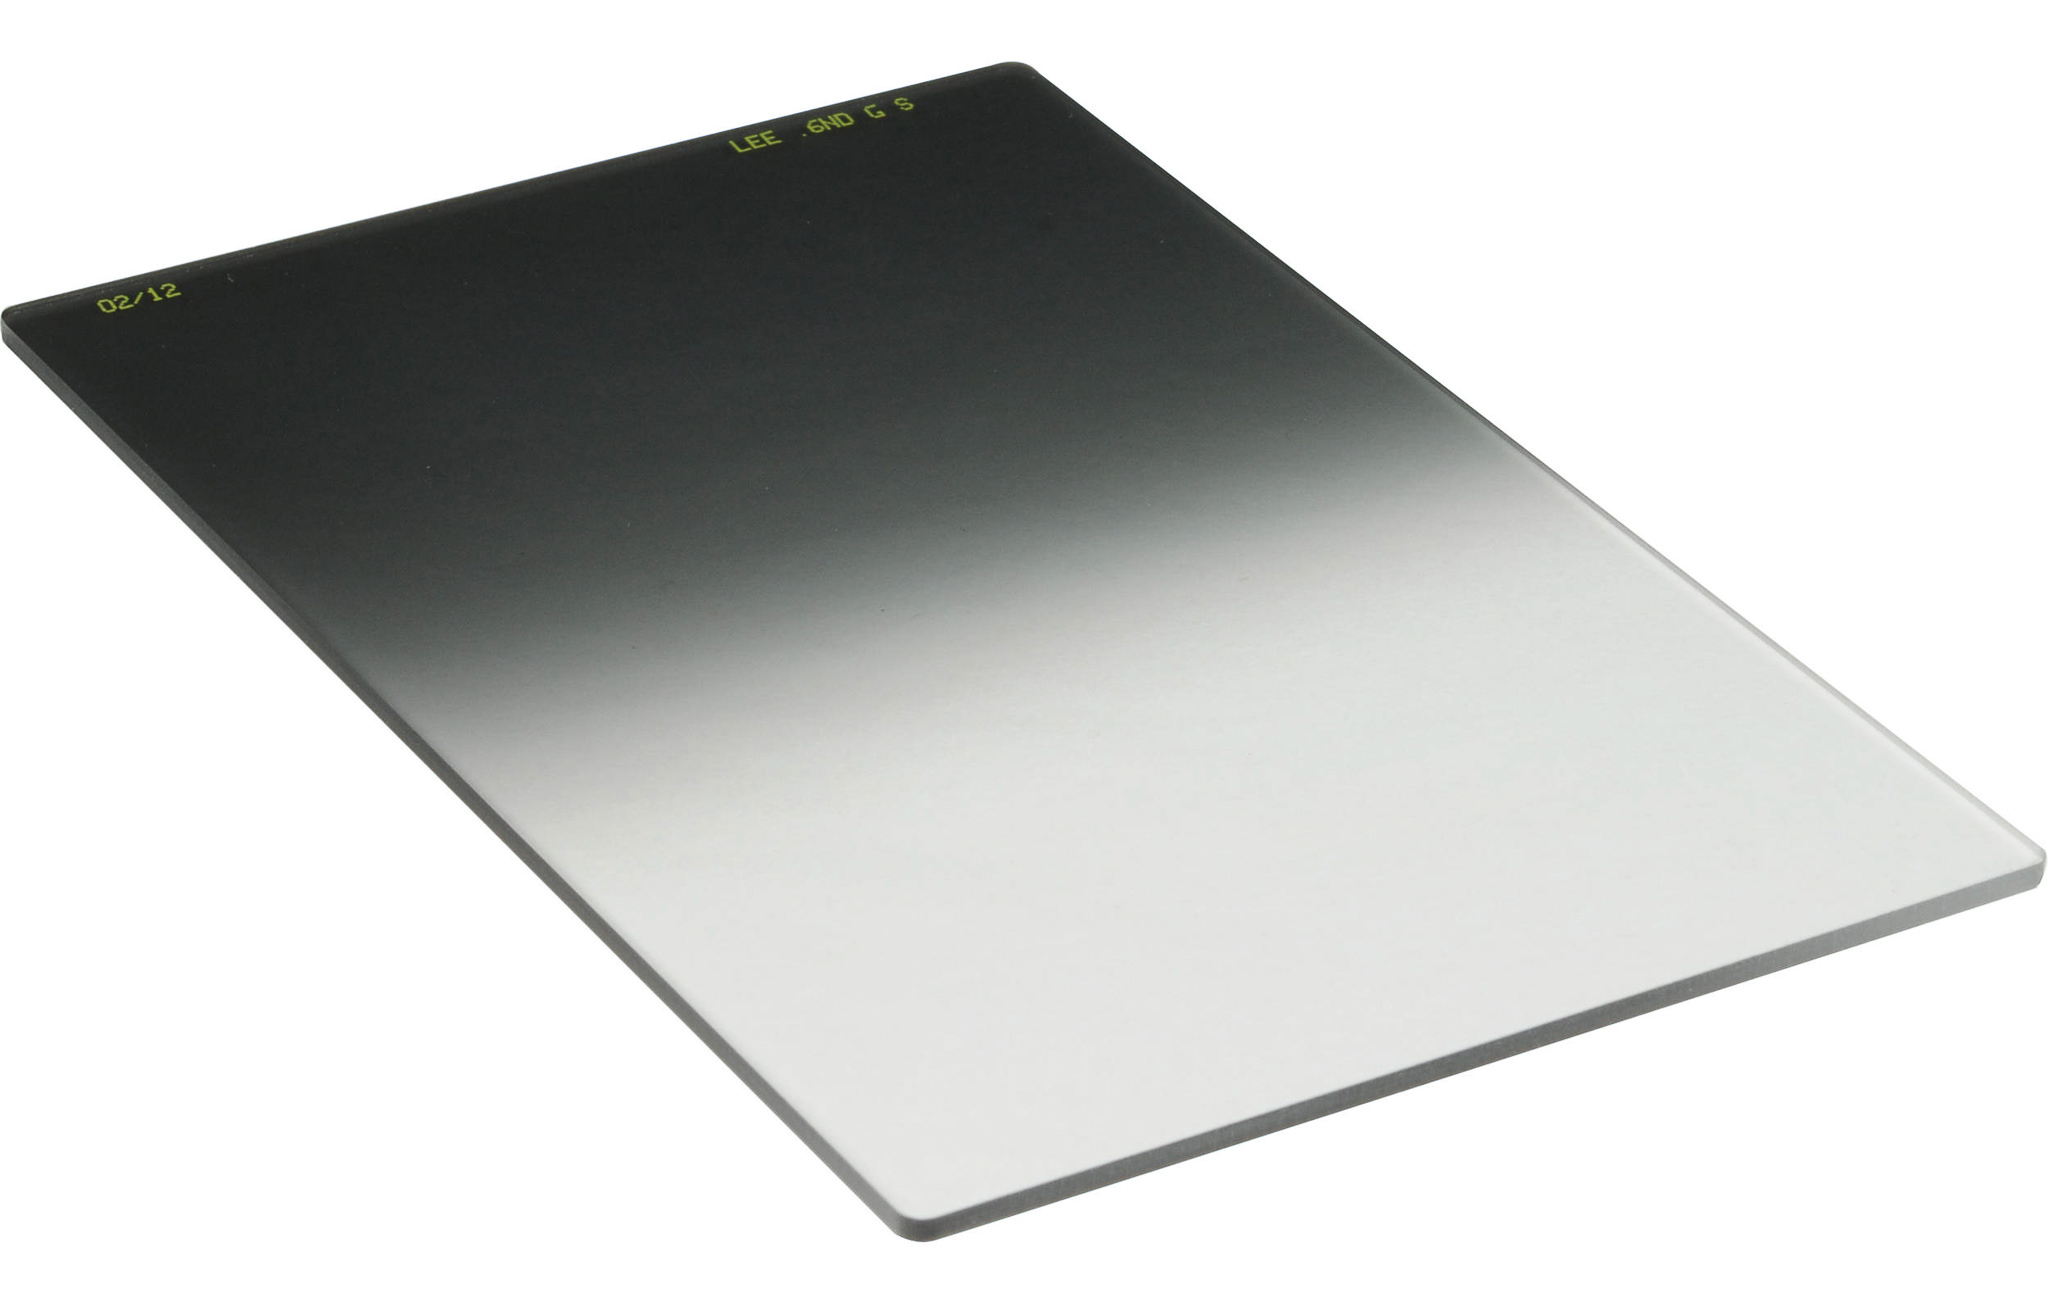
The idea is that you put this on the front of your lens, and the darker portion of the filter blocks out some light from the sky. In general, you would want to use this with a holder that lets you slide the filter up and down, matching the height of the sky in your image.
Graduated neutral density filters are intended to have no color cast whatsoever. They simply darken the top portion of the frame (or any other portion, if you rotate them around), and that’s it. Since the sky in your image is nearly always brighter than the foreground, this is a great filter to have.
We’ve written about grad filters in the past if you want to read more, but the bottom line is that they can be quite useful at sunrise and sunset. Although there are some circumstances where you wouldn’t want to use a grad filter — say, if a tree or sharp mountain peak rises above your horizon — they’re helpful in many cases.
HDR and Blending Techniques
The last method has a few more issues with it, but it’s also quite common: blending multiple exposures of the landscape together.
If you’ve heard of HDR (high dynamic range) photography before, you’re already familiar with how this works. You take a series of photos without altering your composition at all. It involves taking two or more photos of the scene — one exposed for the sky, one for the foreground, and sometimes other images in between — and then combining the best parts together in post-processing.

This technique can be useful, since, in some cases, it is impossible to replicate what we saw in the field with just a single exposure. Even the best camera sensors simply don’t have enough dynamic range (although they’re getting close).
One issue with this method, of course, is that it’s very easy to overdo — to create a result with far more highlight and shadow detail than you could have seen in the field. Images like that immediately make viewers call foul. They simply don’t look very good.
On top of that, HDR photos aren’t a great idea if your subject is moving rapidly. Think waves rolling into shore, for example — a situation where your image will look pretty different from shot to shot. Even if you’re photographing a tree with leaves blowing in the wind, it can be very difficult to patch together a workable HDR.
That’s why this isn’t a perfect technique. But it is still a useful technique, if you know its limits. Only a small handful of my photos are HDRs or exposure blends, but it can be a life saver in certain instances.
The Creative Side of Photography
No matter what time of day you’re taking pictures, the creative side of photography plays a huge role. Although technical settings like exposure and focusing are necessary to produce good photos, you need to flex your creative muscles to capture something great.
This includes things like light, emotion, and composition. Get these right, and you’ll see your photos take a huge step forward.
For the most part, the creative side of photography isn’t different at Golden Hour compared to other times of day. However, there are a few considerations that apply at sunrise or sunset that might not be as relevant under other conditions.
Light
First, of course, is the light. It’s not just the color of light that’s distinct at this time of day, either — the angle of light also lowers, and the overall character tends to soften (since it has to filter through much more of the atmosphere).
The fact that the sun is lower on the horizon has some major implications. Most of all, you can turn 180 degrees and get a totally different quality of light. Do you want backlit silhouettes? Just face in the direction of the sun. Do you want long, dramatic shadows? Face 90 degrees away from the sun, in either direction.
A lot of landscape photographers don’t think about this consciously, but they do it anyway. When the sun is coming from an angle, pay attention to the different types of light you have available, and use them to your advantage. This is yet another reason to keep turning around and looking in different directions as you take pictures. If you always know what’s behind you, it’s much harder to miss something incredible.
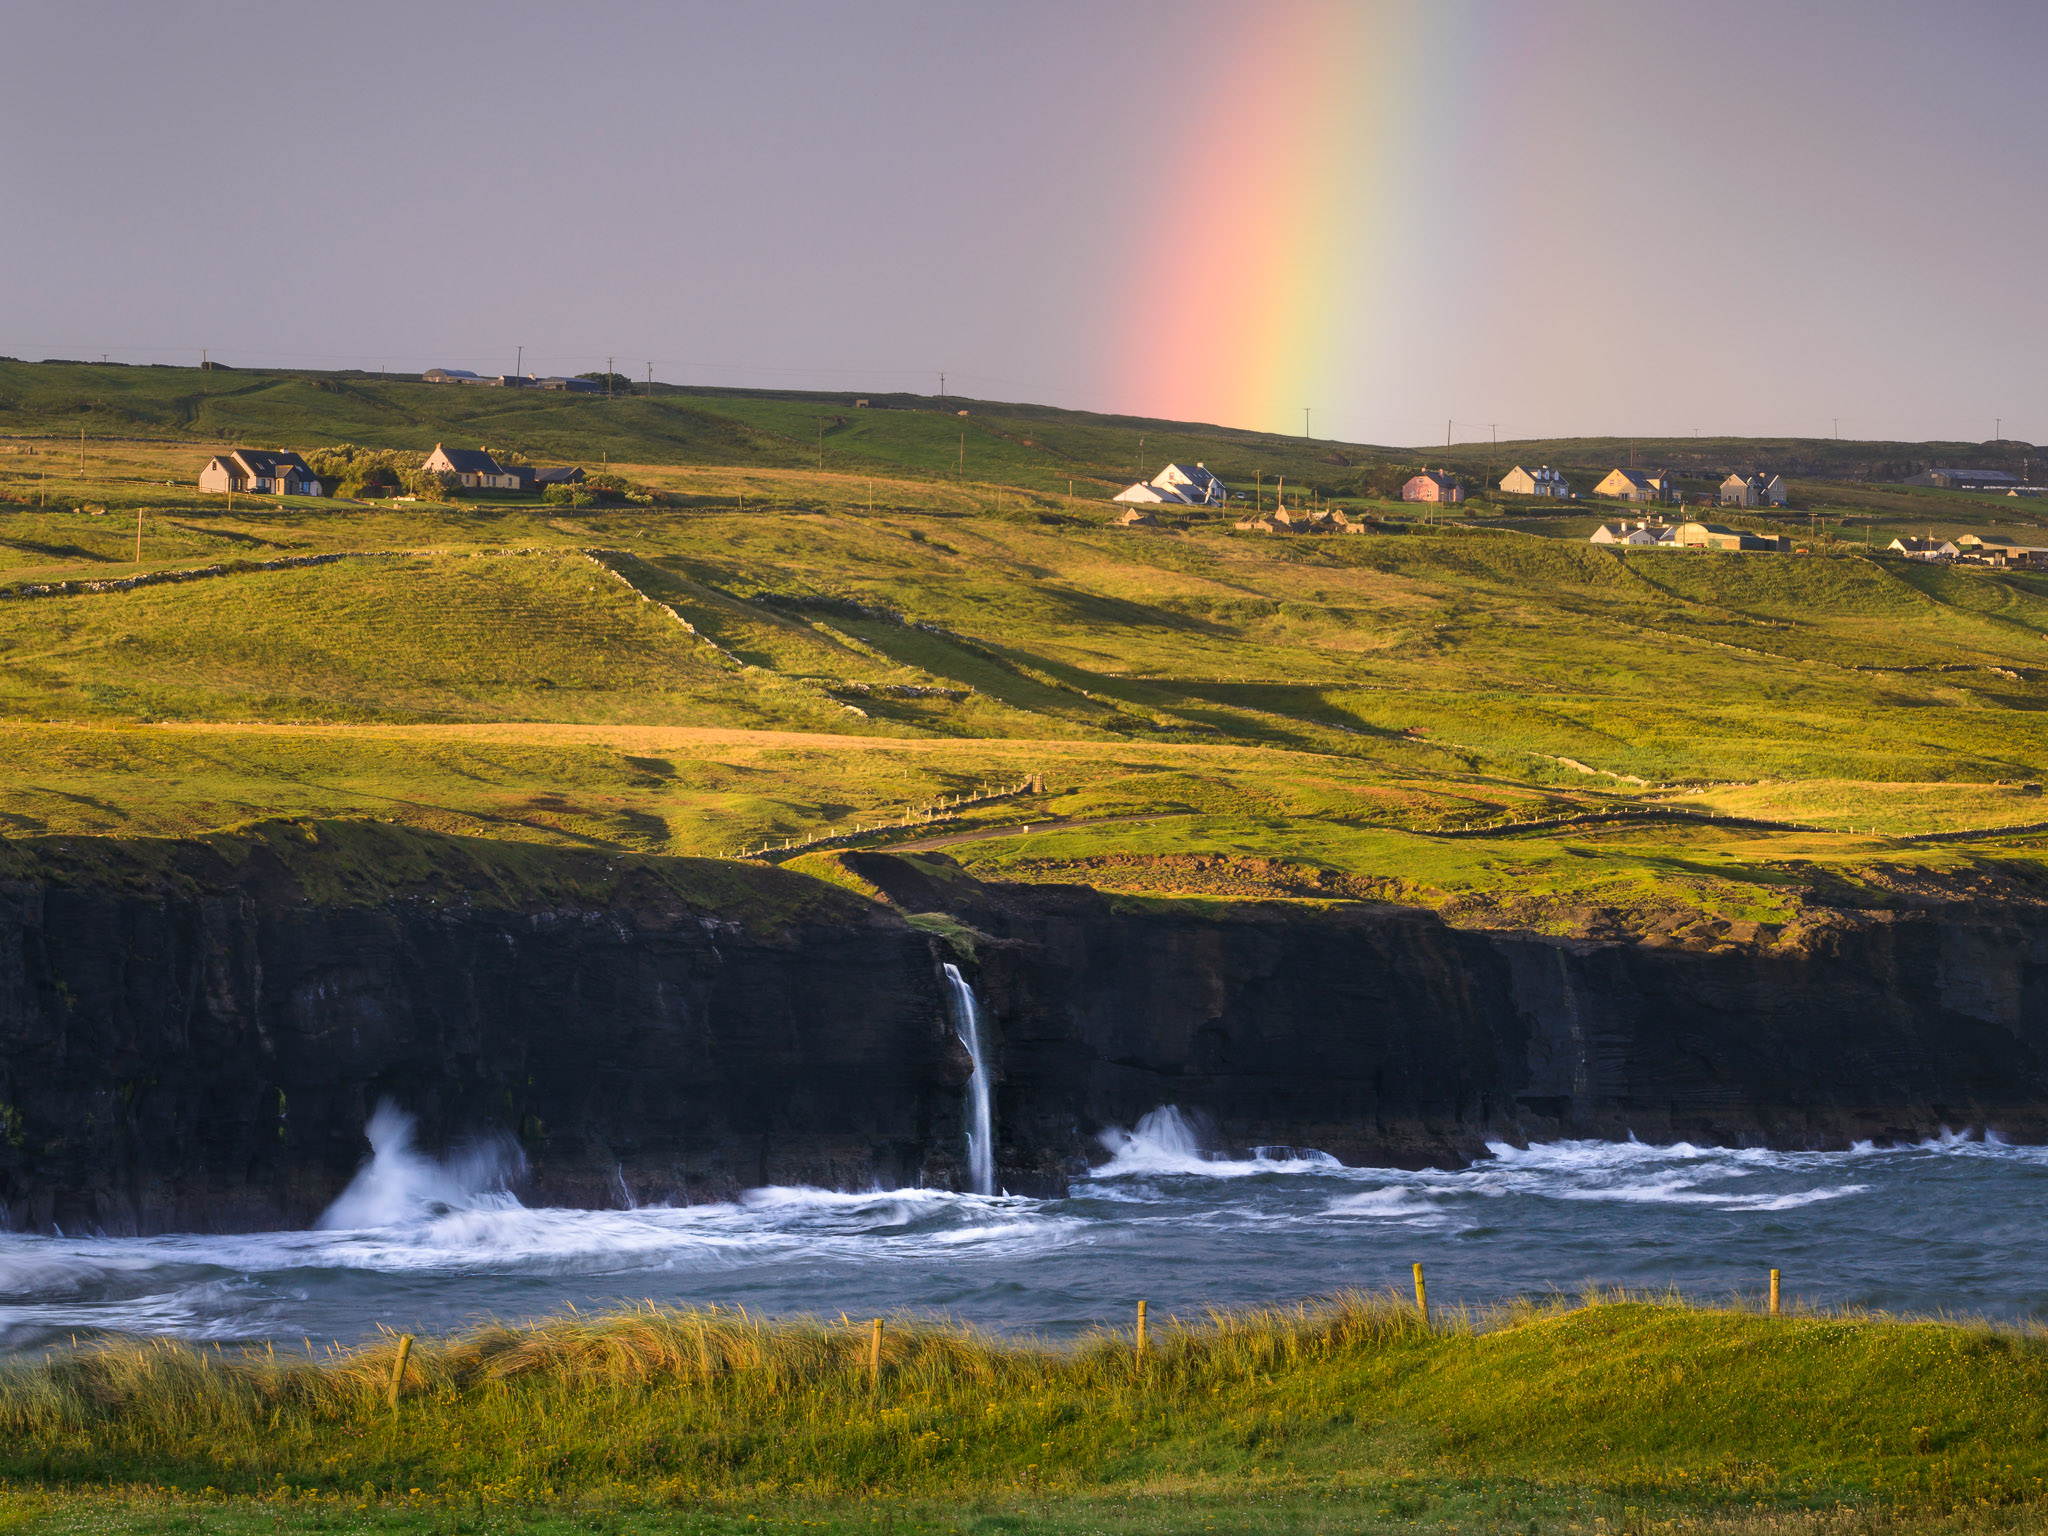
I happened to see this rainbow when I looked behind me one morning. I had been taking pictures in the opposite direction, and I almost missed this beautiful show of light.
Emotion
Light carries emotion very strongly in your photographs. At sunrise and sunset, the entire character of your landscapes will change.
Use this to your advantage. If the sunset is throwing soft, gentle, beautiful light on your subject, try to take photos of something that is equally pleasing and calm. If you do, you’ll amplify the emotional message of the image (since your light and subject both will be “saying” the same thing).
Or, if it’s a stormy sunset, with high contrast and punchy colors, you might look for subjects that are more dramatic as well. The end goal is for your entire photograph to form a singular, strong message. If the light and subject are giving off conflicting emotions, the overall impact may be muddy. (One exception — there’s always at least one — is if your deliberate goal for the photo is to capture a sense of conflict, and you act on that goal intentionally.)
“Good light” is only good because it makes your subject look right. Even the most beautiful sunset in the world won’t be ideal for photography if it doesn’t match your goal (vision) for the image, or if it doesn’t complement your subject.
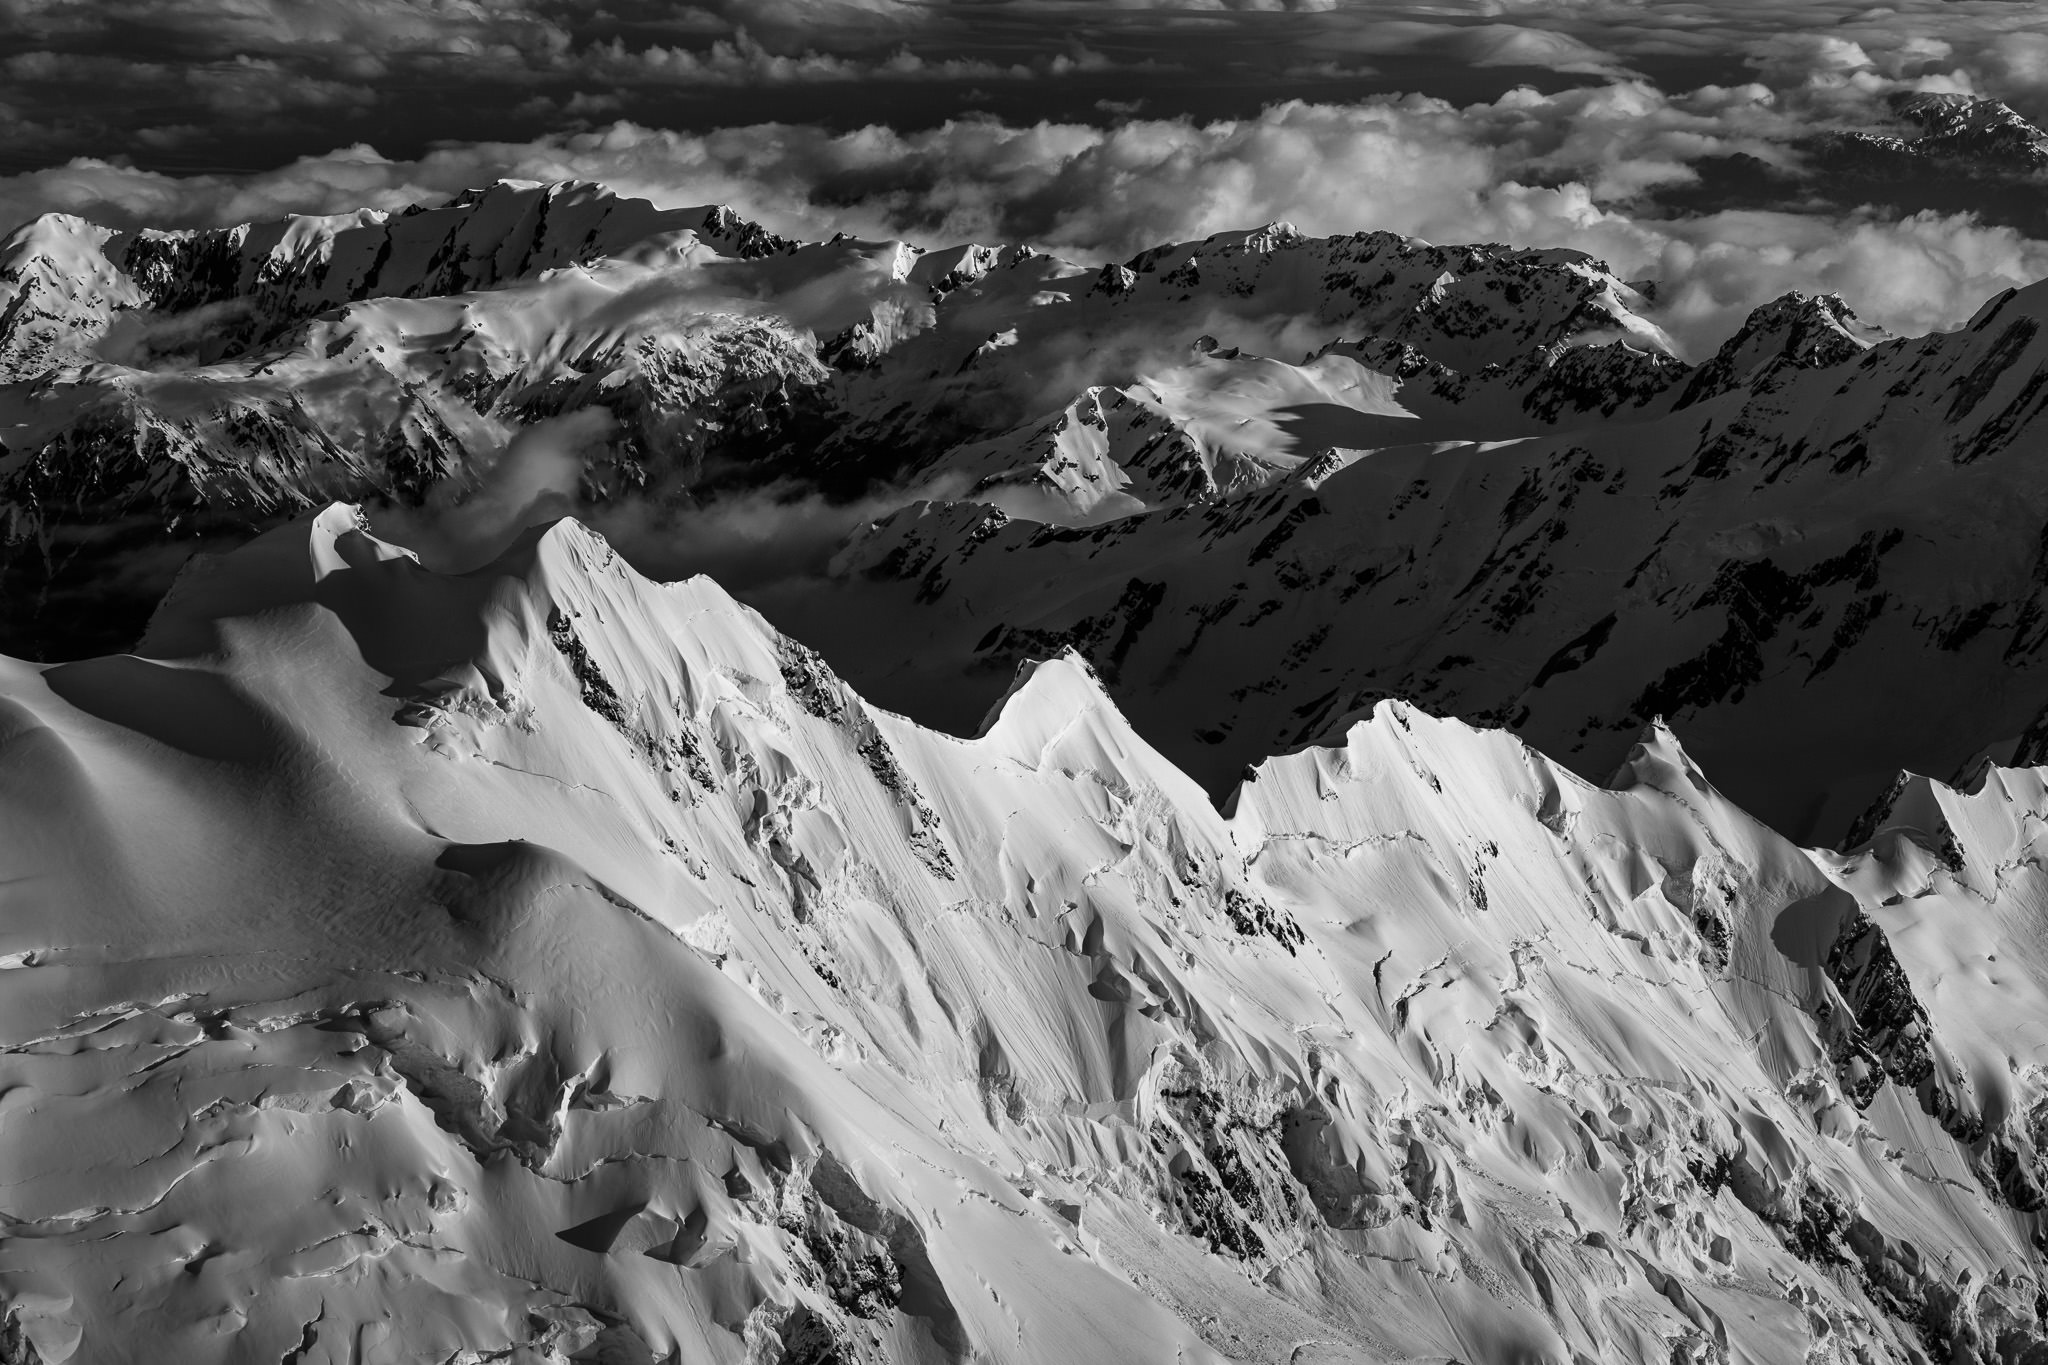
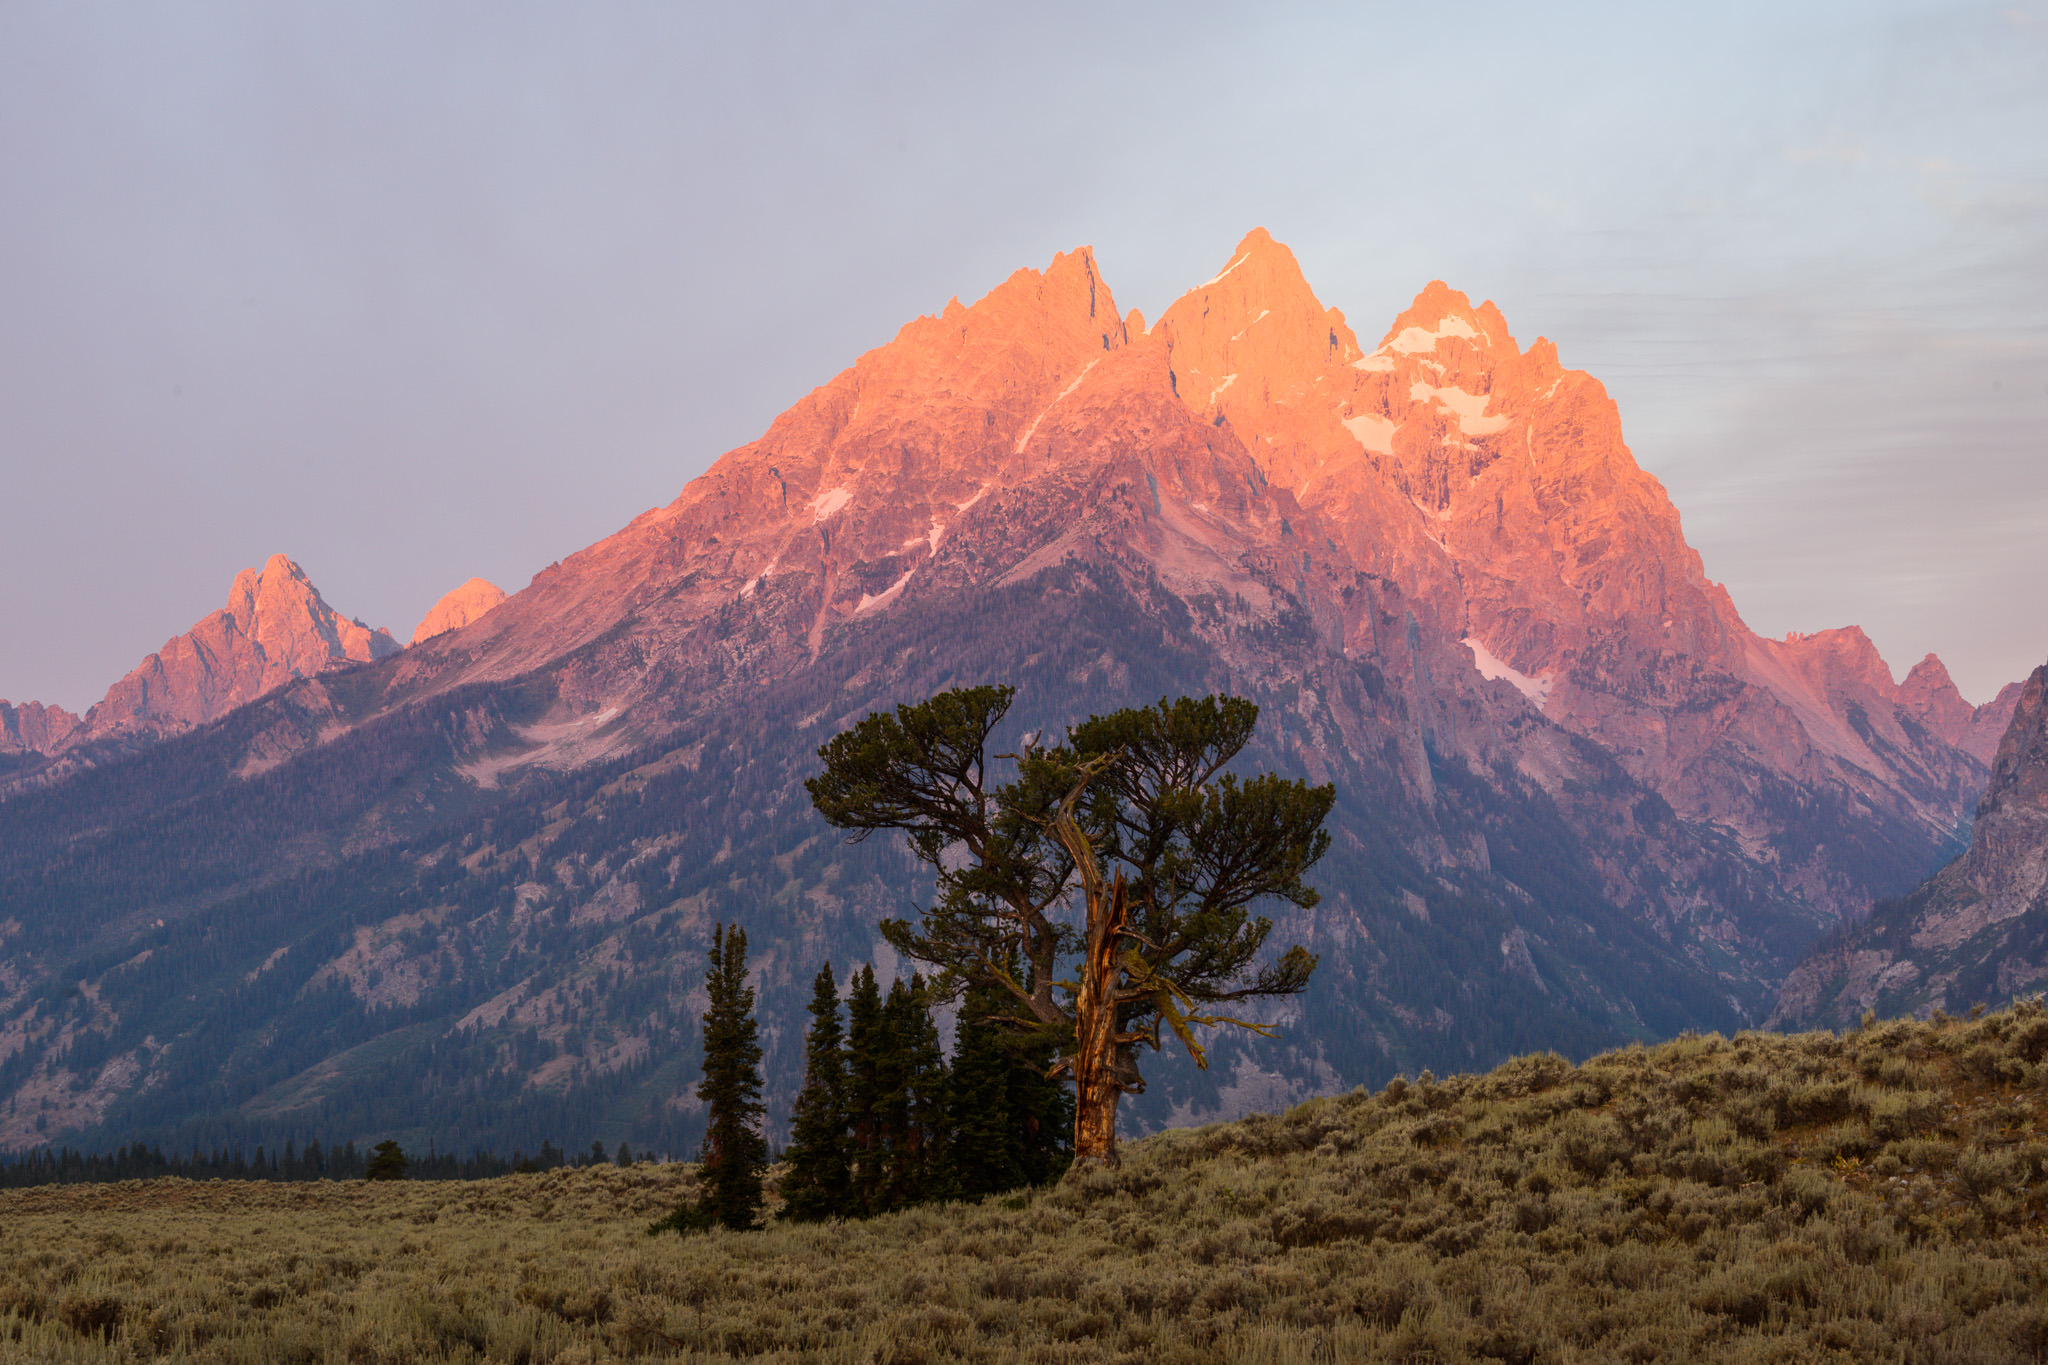
I didn’t take this photo at sunrise or sunset, but the light still works well. Since these mountains are so harsh and foreboding, high-contrast light is a good match.
Composition
Most of your composition at sunrise and sunset revolves around the sky. How much of it do you want to include? Are the specific clouds important, or would you rather draw attention to the interesting colors in the foreground?
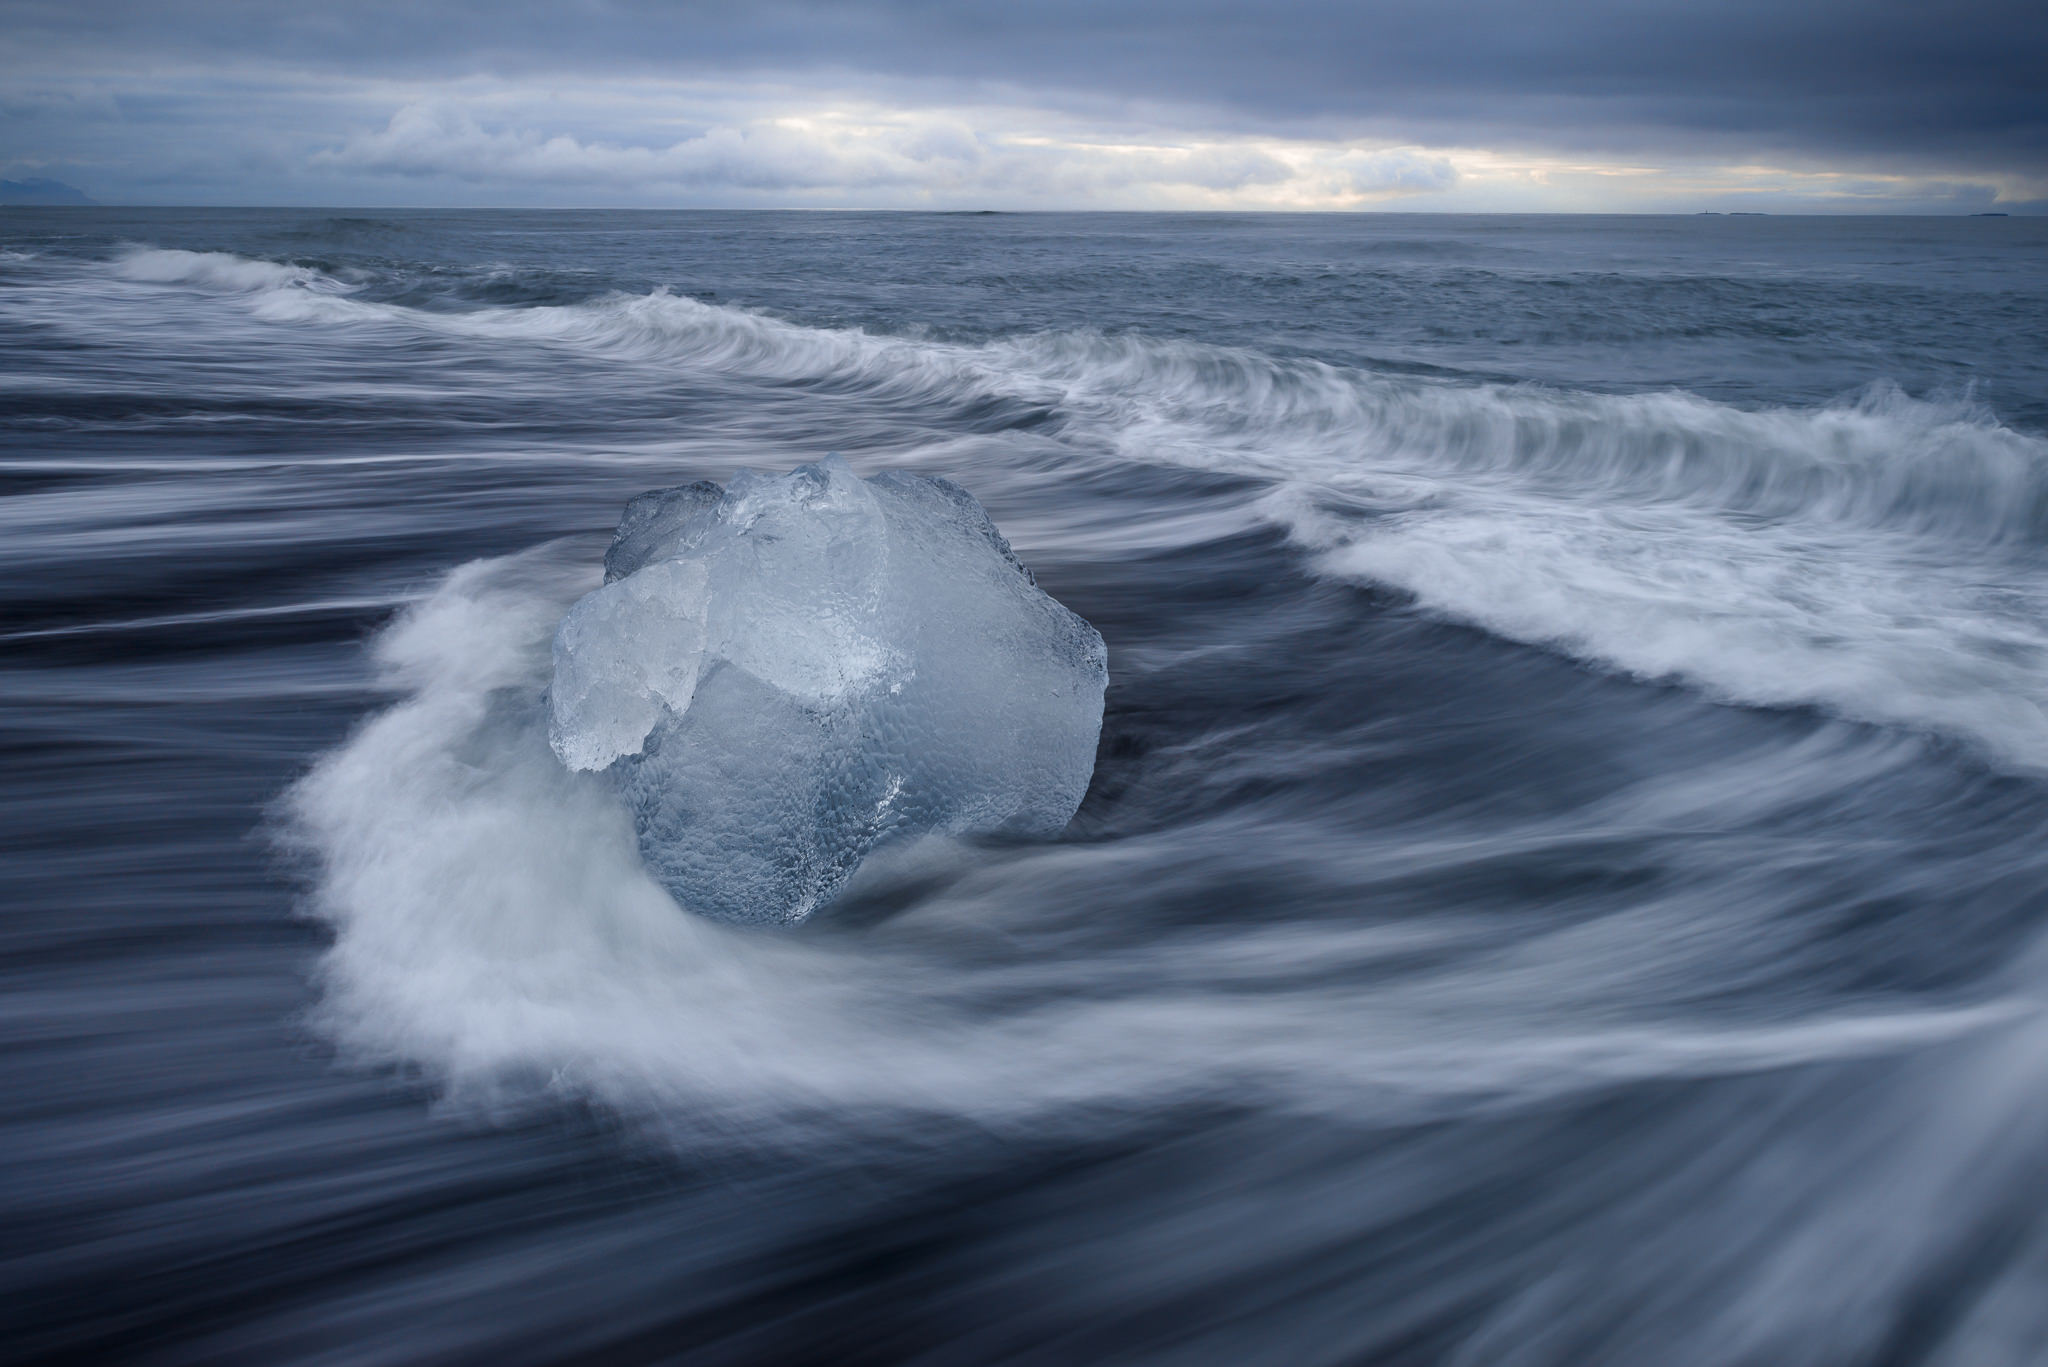
There are no clear answers. Even if the sky is magnificent, the best photo at a scene might be one that gives more room to the foreground. It once again depends upon the type of subject you’re photographing, as well as your plan for the image.
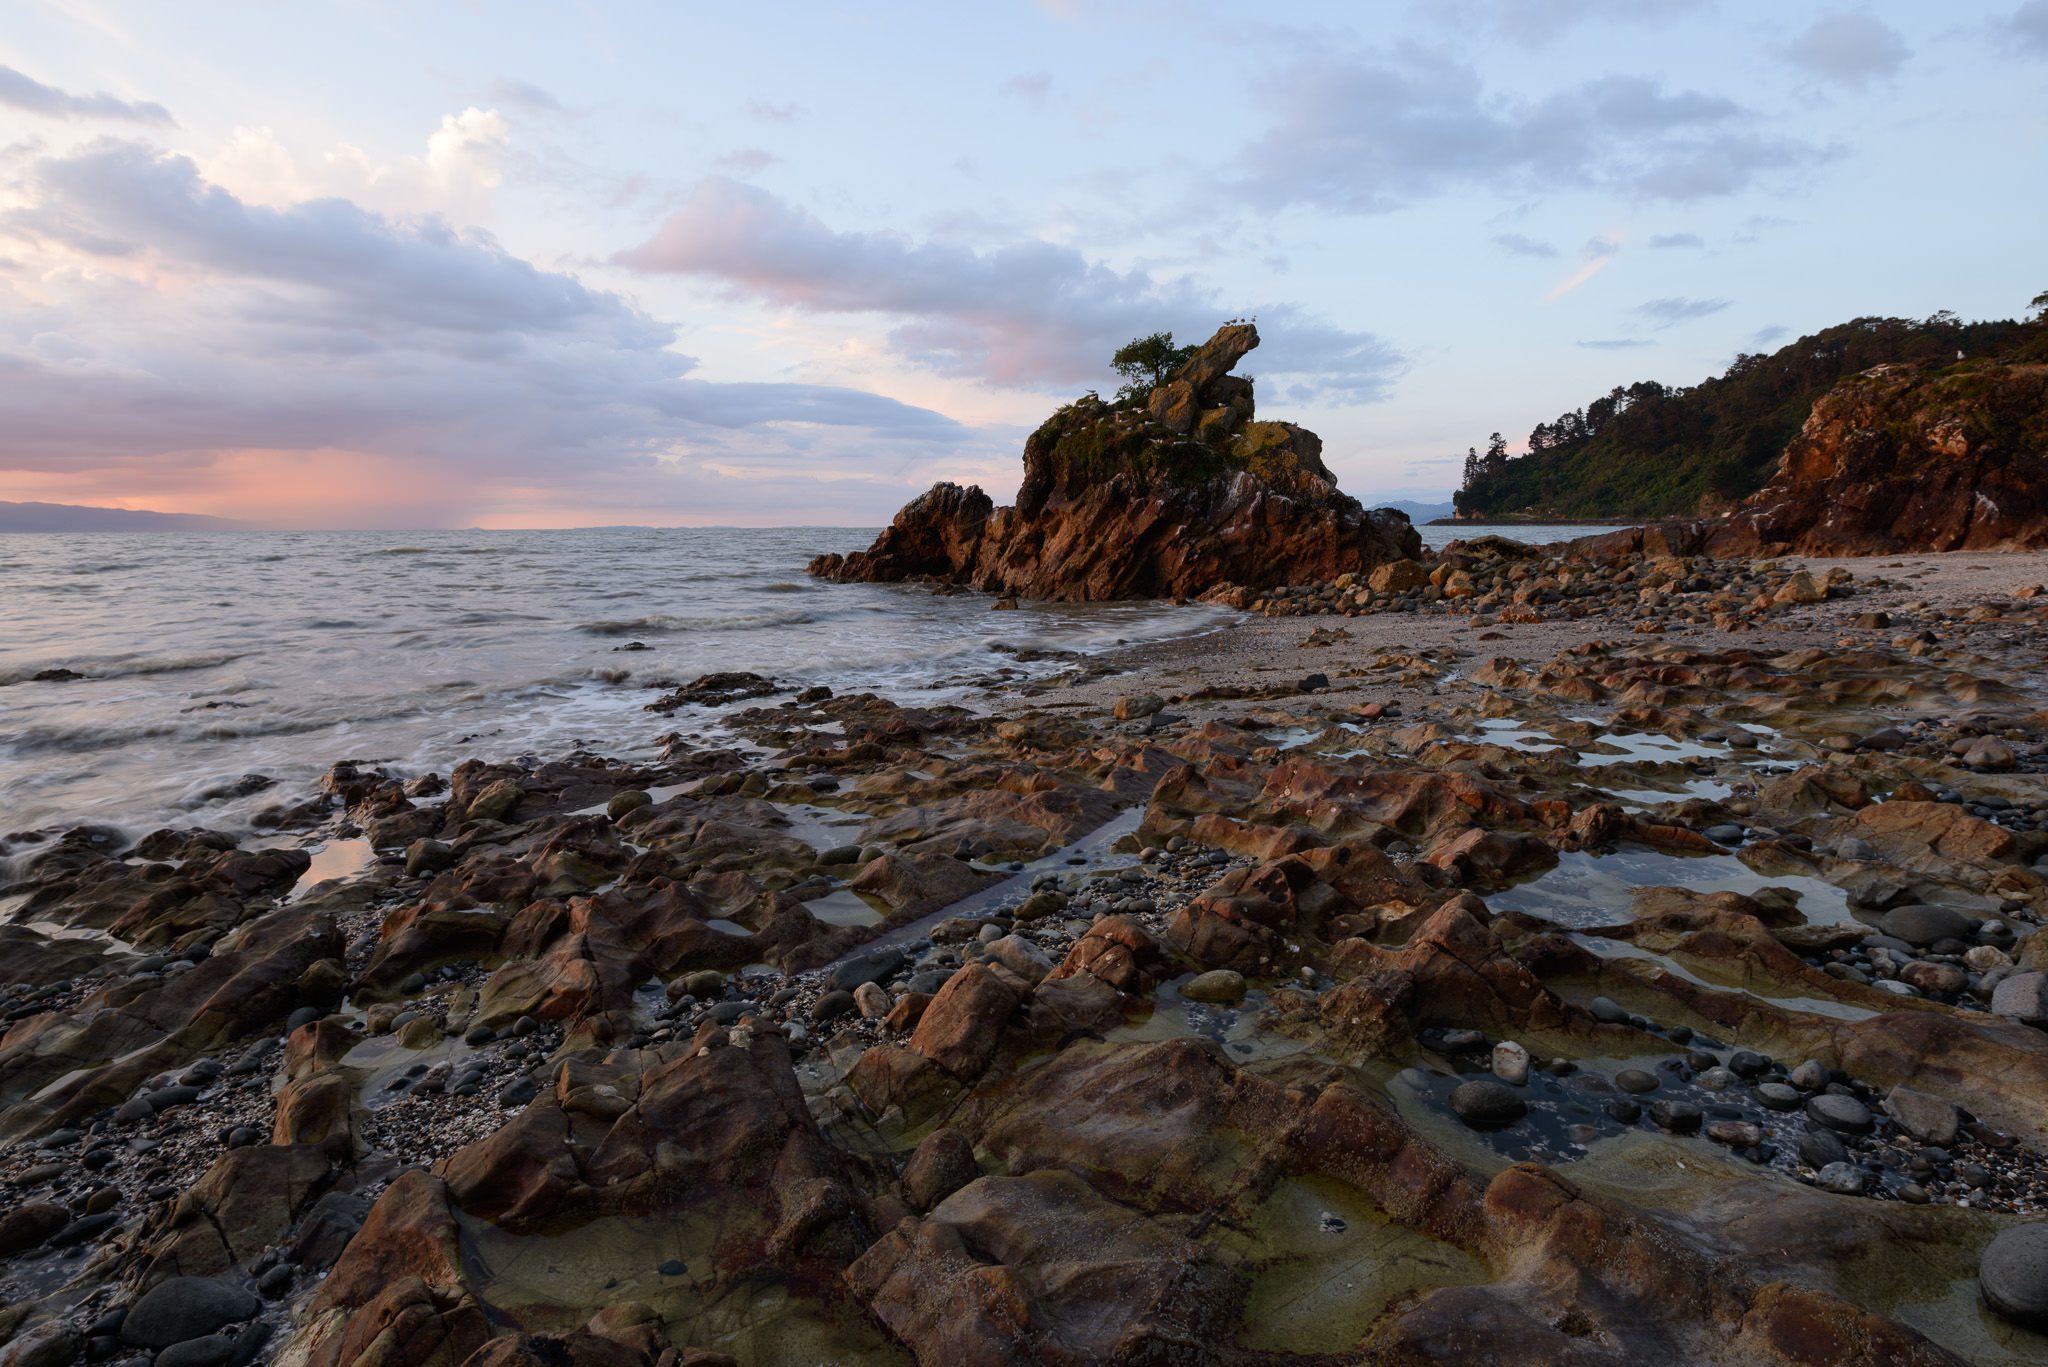
In this photograph, for example, I didn’t care about the sky very much. Although it had some interesting clouds, the star of the photograph was the foreground:
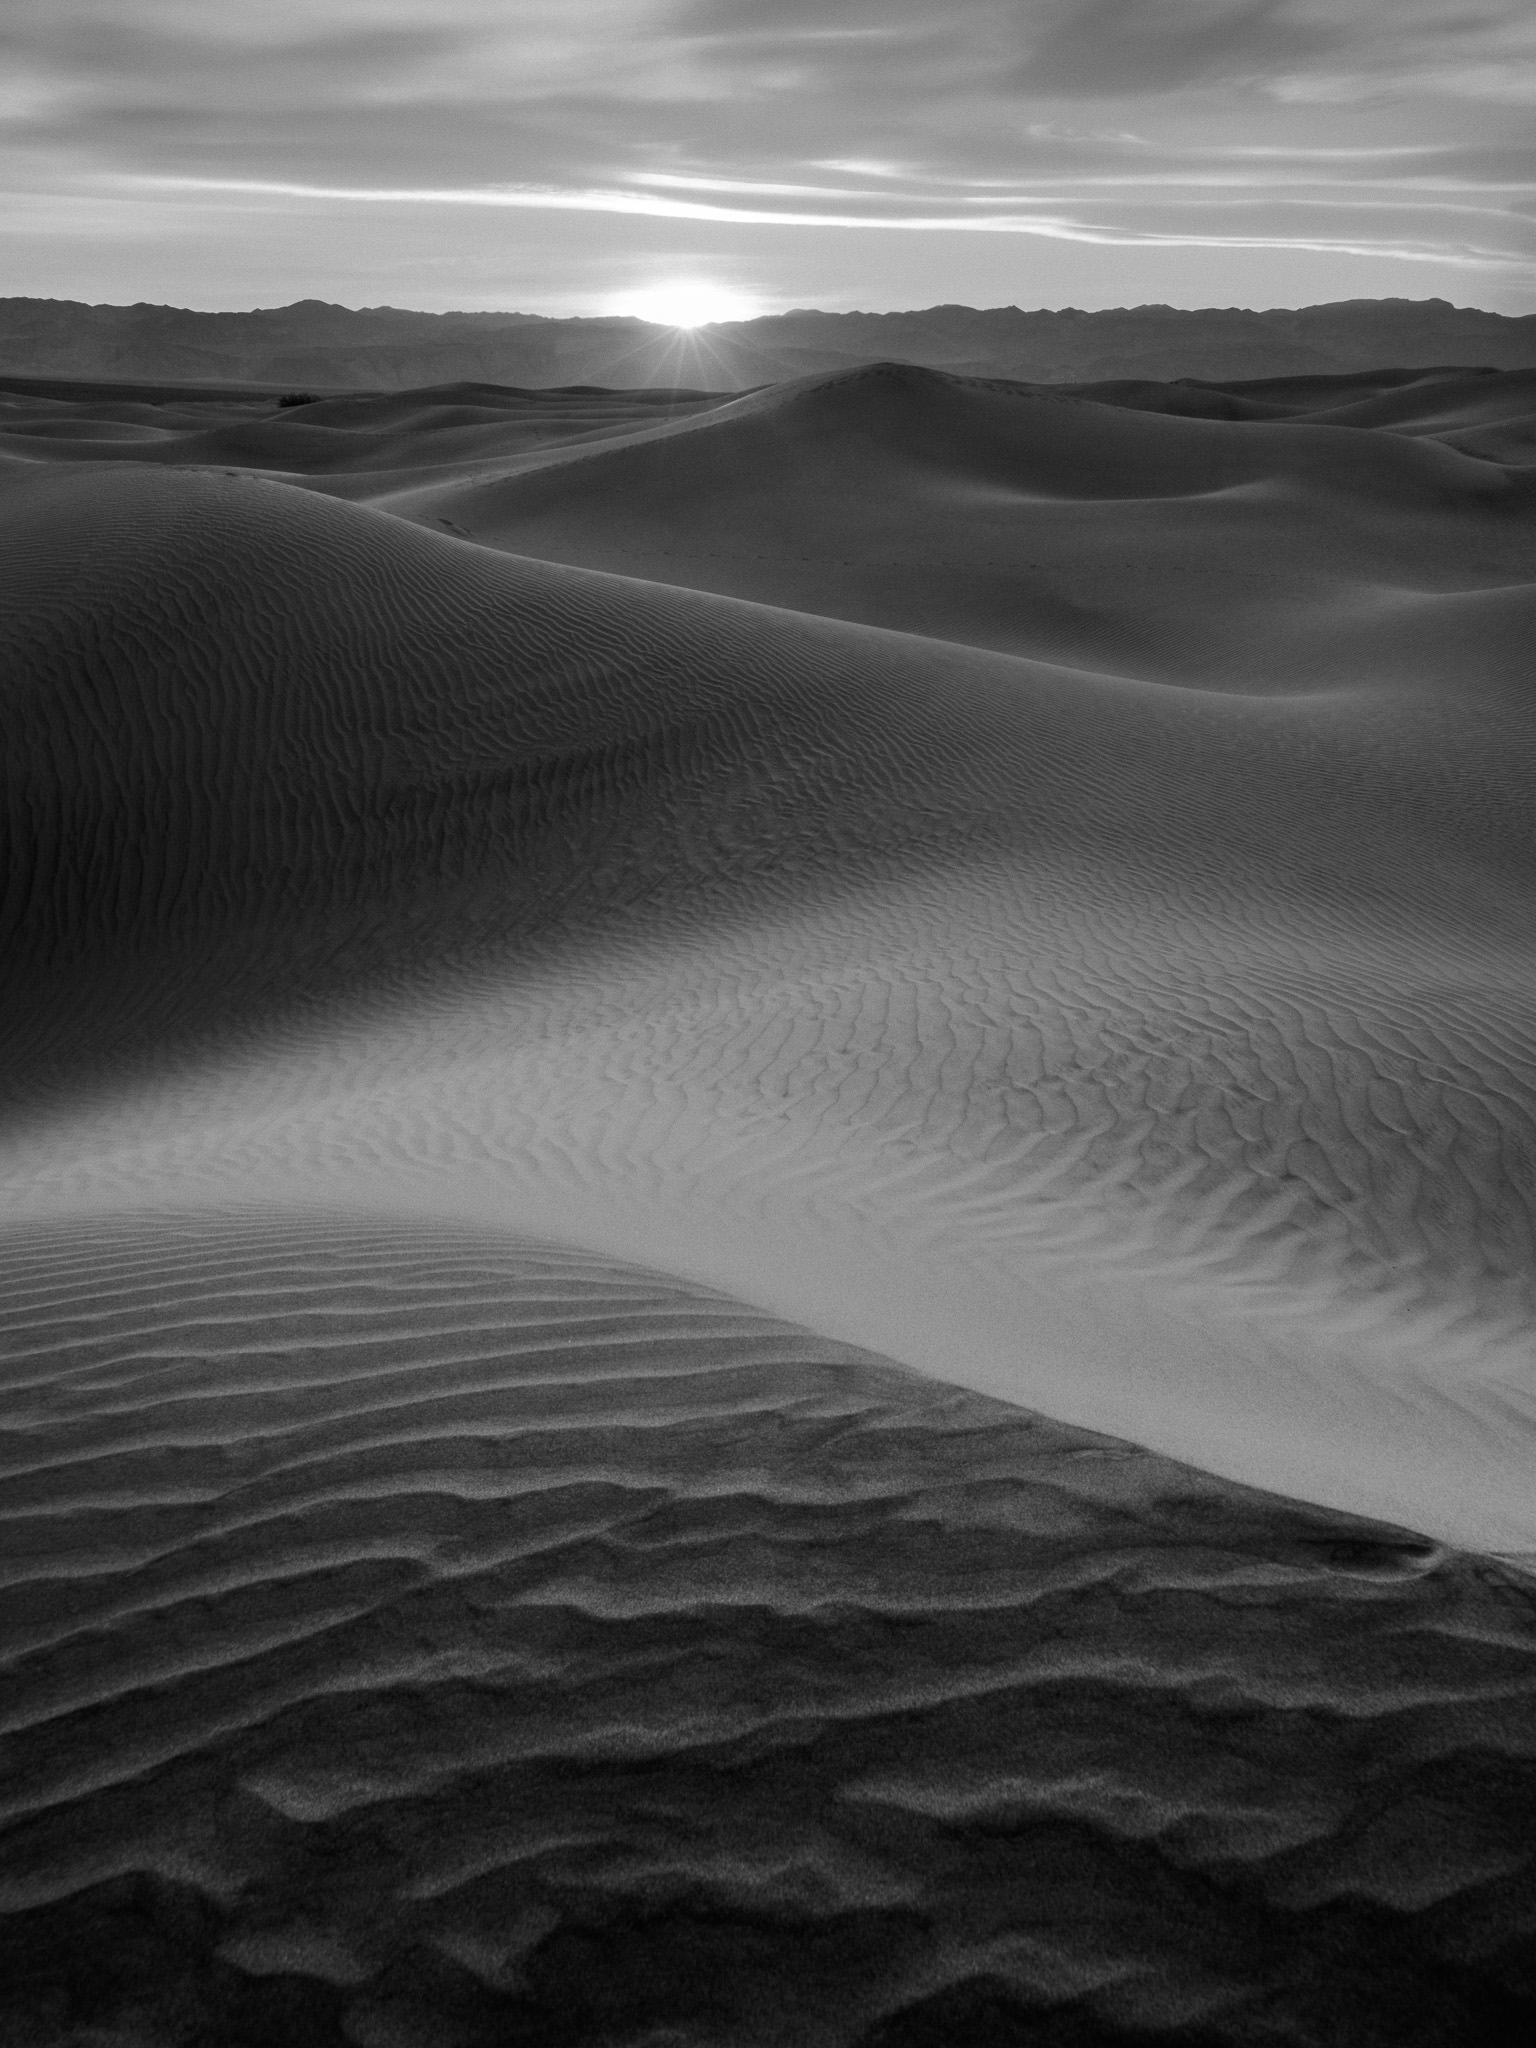
Here, however, my goal was a bit different. Instead of trying to showcase an interesting foreground, I wanted to depict the landscape’s small scale compared to a large, stormy sky:
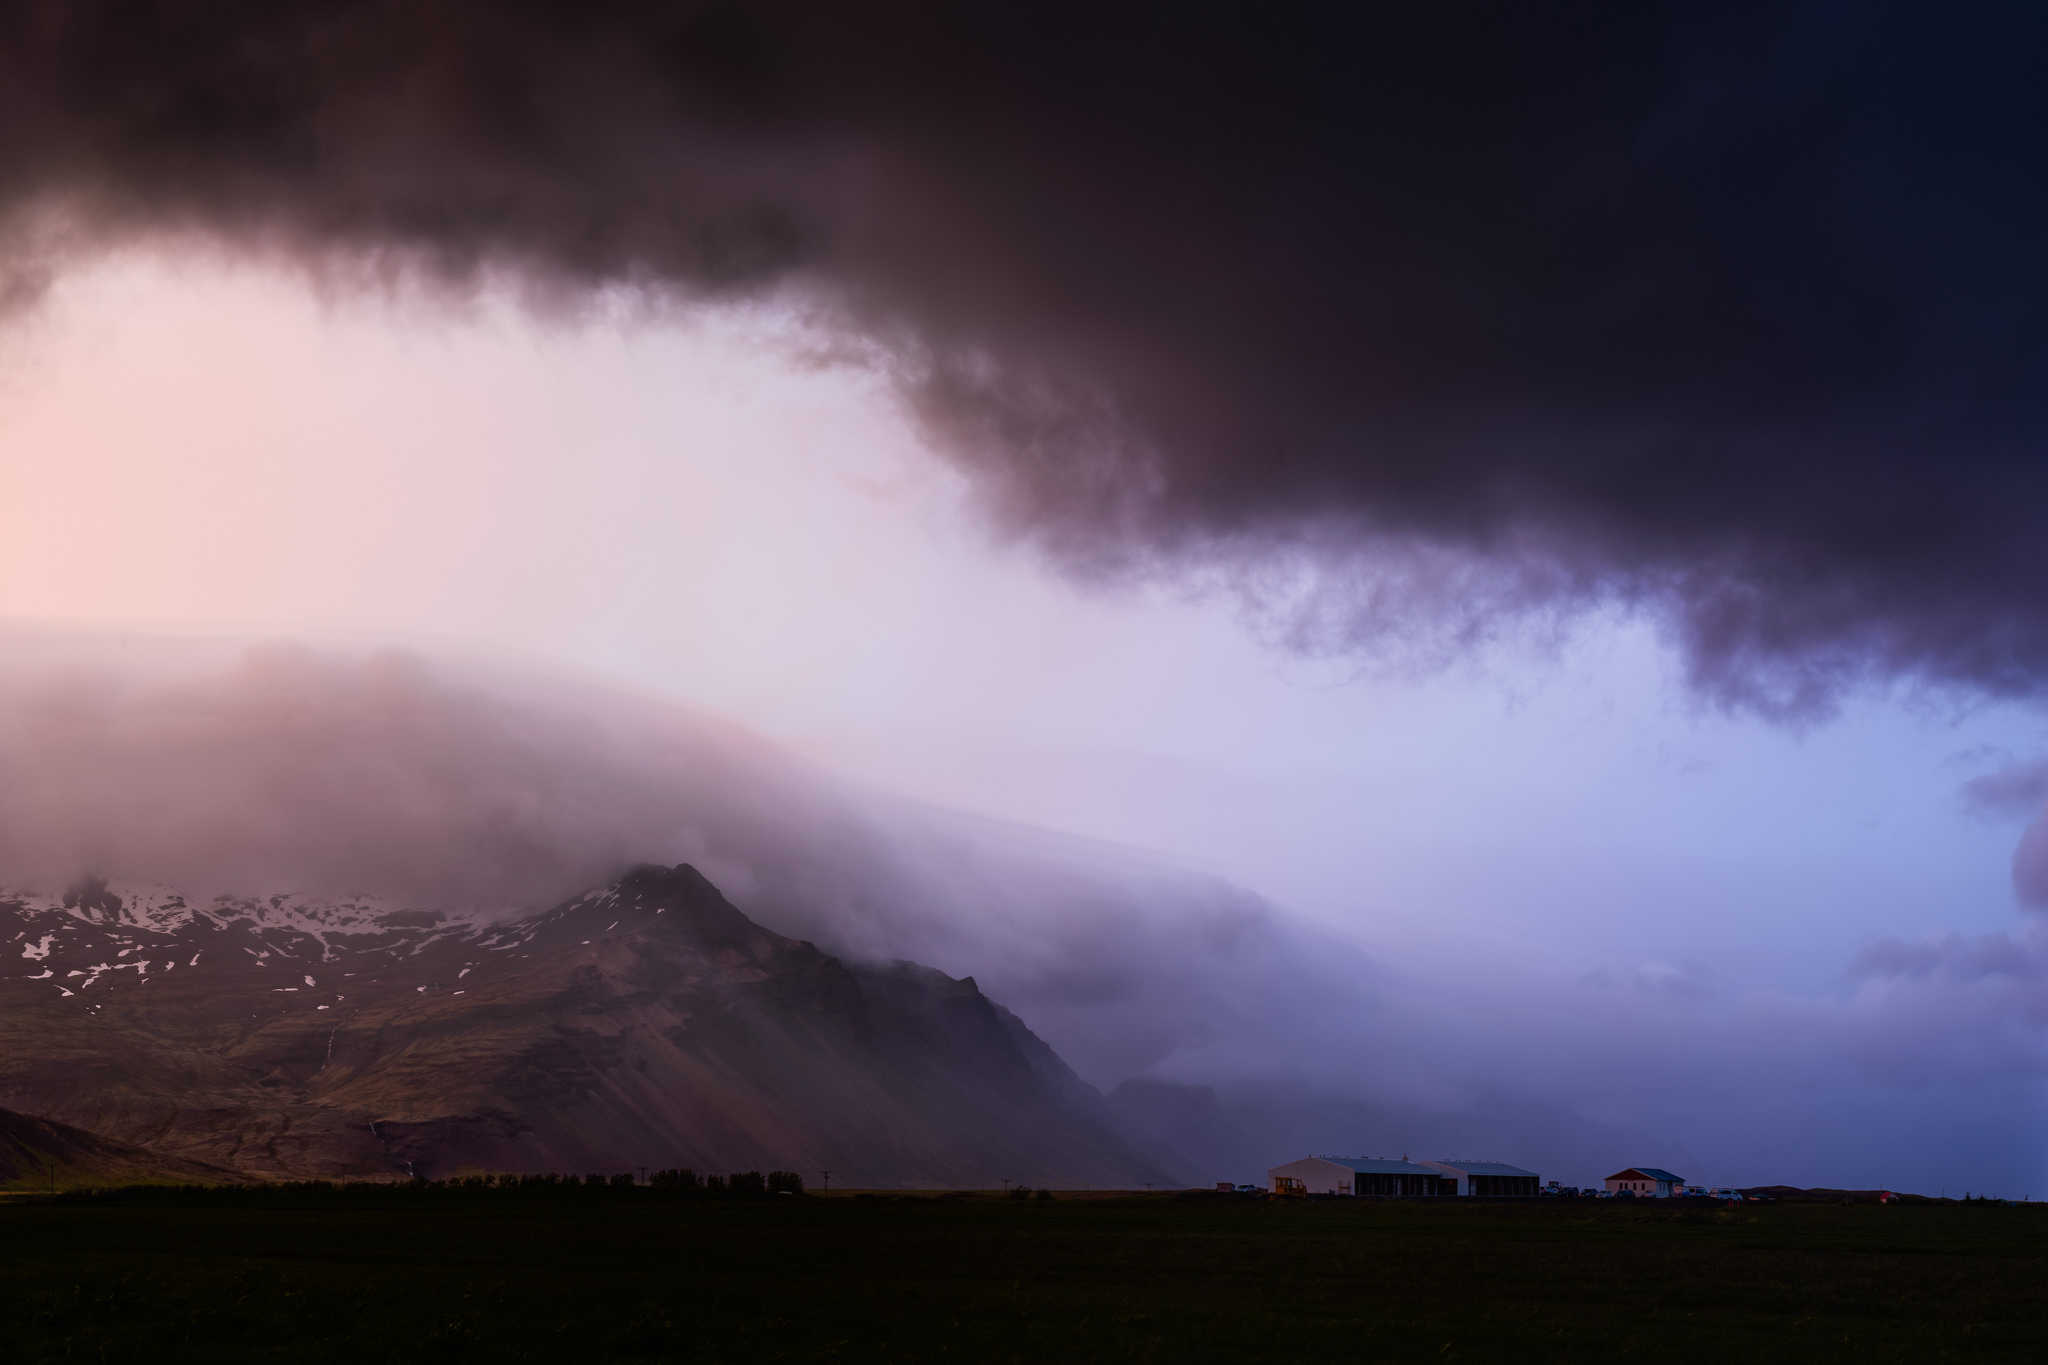
It’s not so much that you should prefer one type of composition over the other, but that this decision is especially relevant at sunrise and sunset. If the sky is filled with magnificent colors, it can be difficult to exclude it completely — but, sometimes, that’s what you’ll have to do.
Although there are some other elements of composition that matter more than usual at sunset and sunrise — such as finding a way to balance the sun, if it’s in your photo — most principles of composition hold up no different than normal.
Post-production Tips
Even if you used a filter, the sky in sunset and sunrise photos tends to be far brighter than the foreground. The solution is post-production.
Your goal is to bring back dynamic range — highlight and shadow detail that might not be visible out-of-camera, but still exists in your RAW photo. That’s very easy in most post-processing software. Just decrease the highlights and brighten the shadows.
However, one area where a lot of photographers mess up is to go too far. If you boost the shadows until the foreground is brighter than the sky, there’s a problem. So, moderation is best.
The same goes for saturation and vibrance. Sunrise and sunset already have so much color that, often, you won’t need to increase the saturation of your photos as much as you might think. I tend to stick to +30 vibrance or less in Lightroom, although your own software may differ. It also varies by image. In this photo, for example, I didn’t alter vibrance or saturation at all, locally or globally:
However, it’s true that cases like these aren’t the norm. Especially shooting RAW, your photo is likely to look faded and washed-out at first, and it will require some processing to get back to normal. Don’t be concerned about minor edits like these — or even major adjustments to recover detail, if your scene had a particularly high dynamic range.
At a certain point, though, the image will no longer look realistic. It’s especially easy to cross that line at sunset and sunrise, when you’re already dealing with intense colors and contrast. So, keep the importance of realism in mind.
Conclusion
There’s a good reason why sunrise and sunset are so popular for photography. The angle, color, and quality of light at these times of day are rare (or impossible) to find at any other.
The most important technical thing to keep in mind is dynamic range. You’ll be working with extreme contrast, and you need to know the right techniques to capture a good shot anyway.
As for the creative side, it’s crucial that you think about the emotional impact that the light is casting on your subject. Is it soft and gentle, or harsh and dynamic? Ideally, you would find a subject that complements the light so that you can send the most powerful possible message.
Keep those two things in mind, and then post-process your photos carefully, and you’ll be good. Taking beautiful sunrise and sunset photos isn’t all that different from photography at other times of day, but it does come with its own set of challenges (as well as opportunities).
Hopefully, you’ll find the tips in this article to be useful next time you’re out capturing the sunrise or sunset. Let me know in the comments if you have any thoughts or questions, and I’ll do my best to help!
Hi, Spencer. Great article. One critique: If you turn 360 degrees, your image will probably look very similar to the previous image. Some might say near identical.
Thanks for the article!
Keith
2.1) Light
First, of course, is the light. It’s not just the color of light that’s distinct at this time of day, either — the angle of light also lowers, and the overall character tends to soften (since it has to filter through much more of the atmosphere).
The fact that the sun is lower on the horizon has some major implications. Most of all, you can turn 360 degrees and get a totally different quality of light.
Oooh, that’s an embarrassing one. Thanks for catching it, Keith, don’t know how it slipped past so many before this! I updated the article :)
Spencer, just out of curiosity since you mention you use +30 vibrance at times, what camera calibrations do you generally find work best for you in Lightroom, if you can share? I’m tinkering with my post processing since what I’ve done in the past I now feel is just too much effort and required quite a bit of Photoshop. Thanks.
I appreciate articles like these. I wish more websites would focus on these aspects of photography rather than the technical equipment or post processing articles that seem to be more common.
Hi Andy, if you mean in terms of the actual “Camera Calibration” section under Lightroom, I almost always use Camera Standard rather than Adobe Standard or any of the others.
Aside from that, it really varies quite a bit from image to image. Decreasing the highlights and increasing shadows is very typical for me. So is increasing the “Lights” slider under the tone curve. I try not to do too much clarity, if any at all. No more than 10-15 points on most images (although there are always exceptions). I also work quite a bit with the HSL sliders, and I frequently add gradients to the sky or foreground to make more selective edits. I almost always adjust things like contrast, exposure, color temperature, and tint, at least to a degree, although the direction of each edit varies from shot to shot. Also, I very rarely bring an image into Photoshop, especially since Lightroom now has HDR and panorama features.
I hope that was what you were looking for!
Hi we all know nd and gnd can stop light from entering to the camera and reduce over exposed area of a scene in a straight forward concept. My question is at the same time can gnd and filter under expose a properly exposed scene by preventing light reflected from the scene or do these filter darken more of a under exposed scene! I am new in DSLR camera world.
ND filters will darken every single photo that you take. However, you can compensate for this darkness by using a longer shutter speed, so your final photo can be the proper brightness anyway! (That’s actually why we use ND filters — so that we can use longer shutter speeds in some landscapes and create a pleasing blur effect for any moving objects.)
GND filters will only darken part of the photo, going along a gradient from dark to no effect. Just like regular ND filters, they do this to every single photo you take. You should use them if one part of your photo (such as the sky) is much brighter than the rest. That way, you can darken the sky while not affecting the foreground very much at all.
If you’re new, I recommend reading our article on photography tips for beginners. If you go through every single tip recommended in this article, you should have a much better understanding of photography! Here: photographylife.com/photo…-beginners
Another excellent article, Spencer. Thank you! I would like to add that if you are someone who does not photograph at these times of the day very often the colors can be so exciting that it’s easy to start “chasing colors”. I’ve found that if I force myself to stick with the composition I originally set up on and deal with the sky colors and patterns given to me then I usually come home with a good result. And sometimes a great result!
Thank you, Dave! That’s a very good technique — scout for a good composition ahead of time, and you’ll have more time to slow down and think while the light is good.
I’m curious as to what you do about WB. I tend to a,ways shoot in Auto WB but am wondering if for sunrises it might be better to pick a preset (or custom). What do you do?
Peter, I tend to shoot with auto WB as well. There are a few different philosohpies as to how to implement WB properly, though.
The good news is that if you’re shooting RAW, you have a lot of flexibility to adjust the white balance in post-production, without noticeably degrading your image quality. For that reason, I find that auto works fine, since it’s quick and easy in the field. It also gives me a decent sense of how my final, edited photo will appear (since I rarely alter it too much).
Other photographers prefer to set a single white balance for consistency. It makes it easier to gain some information about the light you’re photographing, and it also helps a series of photos stay more consistent from shot to shot. So, this might be a good idea if you’re shooting a time lapse.
On top of that, some photographers prefer to set their camera to the unity white balance, where the RAW data’s red and blue multipliers are equal to one another. This is a technique that improves the accuracy of your histogram, which especially matters if you’re exposing to the right (photographylife.com/expos…-explained). However, this also involves bringing your tint to the most extreme green that it can go, so your in-camera JPEG preview will be way too green. I don’t do this personally, and I don’t recommend it unless you really need the most accurate possible in-camera histogram.
Hope that helps!
It does help! Thanks. I’ll just stick to my usual Auto WB and RAW. I don’t like thinking about technical stuff in the field so auto WB… and usually autoISO… works for me. I’ll often 3-exposure bracket a scene too…not so much for HDR (though that’s now so simple without leaving lightroom), but just to have the option to pick the best of the three when reviewing on my computer. Thanks. Peter
Hi Spencer,
I liked it that you supported your narrative with images that speak boldly of light, emotion, composition and artistry. Often, the picture is a lot about technique and not much about the emotion, the energy of the moment, and most importantly, a backstory. You also touched on prudence and moderation when it comes to post-processing, which is I think is the key in a glut of over-saturated, over-processed images we see today that often hide under the guise/excuse of creative expression.
I remain a fan of your work and look forward to your next post in Photography Life.
Oggie
Hi Oggie, thank you, and I’m happy you liked it! All the things you just mentioned — light, emotion, composition, story — are the real foundations of photography. If you get these right, moderation will come naturally, because there isn’t much in the final image that you need to improve.
However, if your photo needs editing, I still say to go for it. I’ve taken photos during a sandstorm with very low contrast and faded detail, and it took some work to get a strong, dramatic landscape photo to appear (which, because of the harsh conditions, suited the mood of the image).
In my mind, so long as you don’t deceive your viewers — i.e., you’re willing to tell them about any edits you made, and you stay faithful to the original qualities of the landscape — post-processing is a natural thing to do. But once it gets to the level of over-processing that is routine today on sites like Instagram or 500px, it really doesn’t appeal to me any more (though clearly it appeals to plenty of others).
Hi Spencer,
Another great article. Personally I see sunset/sunrise the next step in landscape photography should someone want to improve. As you mentioned, the condition are not easy, you need a good understanding of many concepts, and you also need other tools (you described them well) than all your camera settings to really get what you want. Even with the new D850 hehe. But man does your first successful picture worth all the trials and errors. I still remember how exited I was to share it with my friends hahahaha.
The next step for me is after this is “How to create interesting picture in the middle of the day”. Your creative mind needs to start kicking in as the light is not as interesting. Perhaps something to share in your next article ? ;)
Simon
Thank you, Simon. Yes, even with the D850, light and color still matter most of all :)
I have written one article on taking good photos in bad light photographylife.com/takin…-bad-light. However, that is a good suggestion — writing something about how to take landscape photos in the middle of the day. Often, there are still plenty of great possibilities then, particularly in interesting weather conditions (storms, fog, and so on).
Glad that you enjoyed this article!
Hi,
a small tip for rainbows: use polarizing filter to the ends of the rainbow where it hits the ground; it gives a natural and strong boost to colors. Opposite ends have opposite polarization and thus if using polarizer to the whole of the arch, one end is boosted while the other is damped.
Hi Pekka, very true. I did that for the rainbow image in this article, and, otherwise, it would have been much fainter (since it was fading away). Also, thanks for mentioning a point that many overlook — if you’re using an ultra-wide lens, and the entire rainbow is in your frame, don’t use a polarizer. It will end up boosting one end, while rendering the other far more difficult to see. (The exception is if you take a series of photos and rotate the polarizer to emphasize one part of the rainbow each time, then blend the best portions together in the end.)
Yes indeed! Primary rainbows are polarized tangential to their arch:
www.polarization.com/rainb…inbow.html
en.m.wikipedia.org/wiki/Rainbow
Very good article.
Thank you, glad that you enjoyed it!
You mentioned valuable points many overlook. I would stress the most on emotional impact and what we are trying to communicate to the viewer. The combination of light/composition have to relate to the subject bringing out a consistent vision to the viewer. if, on the other hand there is conflict, that conflict has to be intentional. It is all too easy nowadays to be technically capable while ignoring what matters most.
Mazen, well said. Sometimes, this light/subject consistency happens without much effort — a beautiful landscape under a beautiful sunset — but, just as frequently, the two will end up clashing. It’s something that photographers need to be aware of while taking pictures. Everything about an image should, ideally, be completely intentional.
It’s a good point. When you’re “in the moment” and the scene is wowing you with its mood or dramatic colours it can draw your attention away from aspects that might not look so good later to an impassionate viewer who wasn’t at the scene. Years of frustrations with dispassionate camera club judges who ‘just didn’t understand the scene’ taught me this. I try to disengage myself from the emotions by looking through the viewfinder to shut out external influences and looking at the scene as a 2D image, imagining it as if am viewing someone else’s print hanging on a wall. Then I recompose until that image looks good to me.