Some of the most rewarding and relatively easy subjects to photograph are the growing number of hot air balloons floating in the skies. If you have the willingness to wake up early, you can have good luck photographing a very colorful and slow-moving subject to display for your friends and family.
Now I need to make a disclaimer – while there are many pockets around the world that have ballooning, I am fortunate enough to live in the crown jewel for ballooning, Albuquerque, New Mexico in the US. Each October, the city hosts its International Balloon Fiesta, with as many as 600 hot air balloons and over 800,000 attendees participating in the weeklong event. In December, the second largest hot air balloon festival is hosted in Gallup, New Mexico, with some 200 pilots taking to the heavens. Other New Mexico cities host smaller events (20-50 balloons) during the year as well. The open skies and favorable wind conditions in New Mexico result in spectacular viewing and numerous photographic opportunities. However, you should be able to find good hot air balloons to photograph in most locations with a little planning.
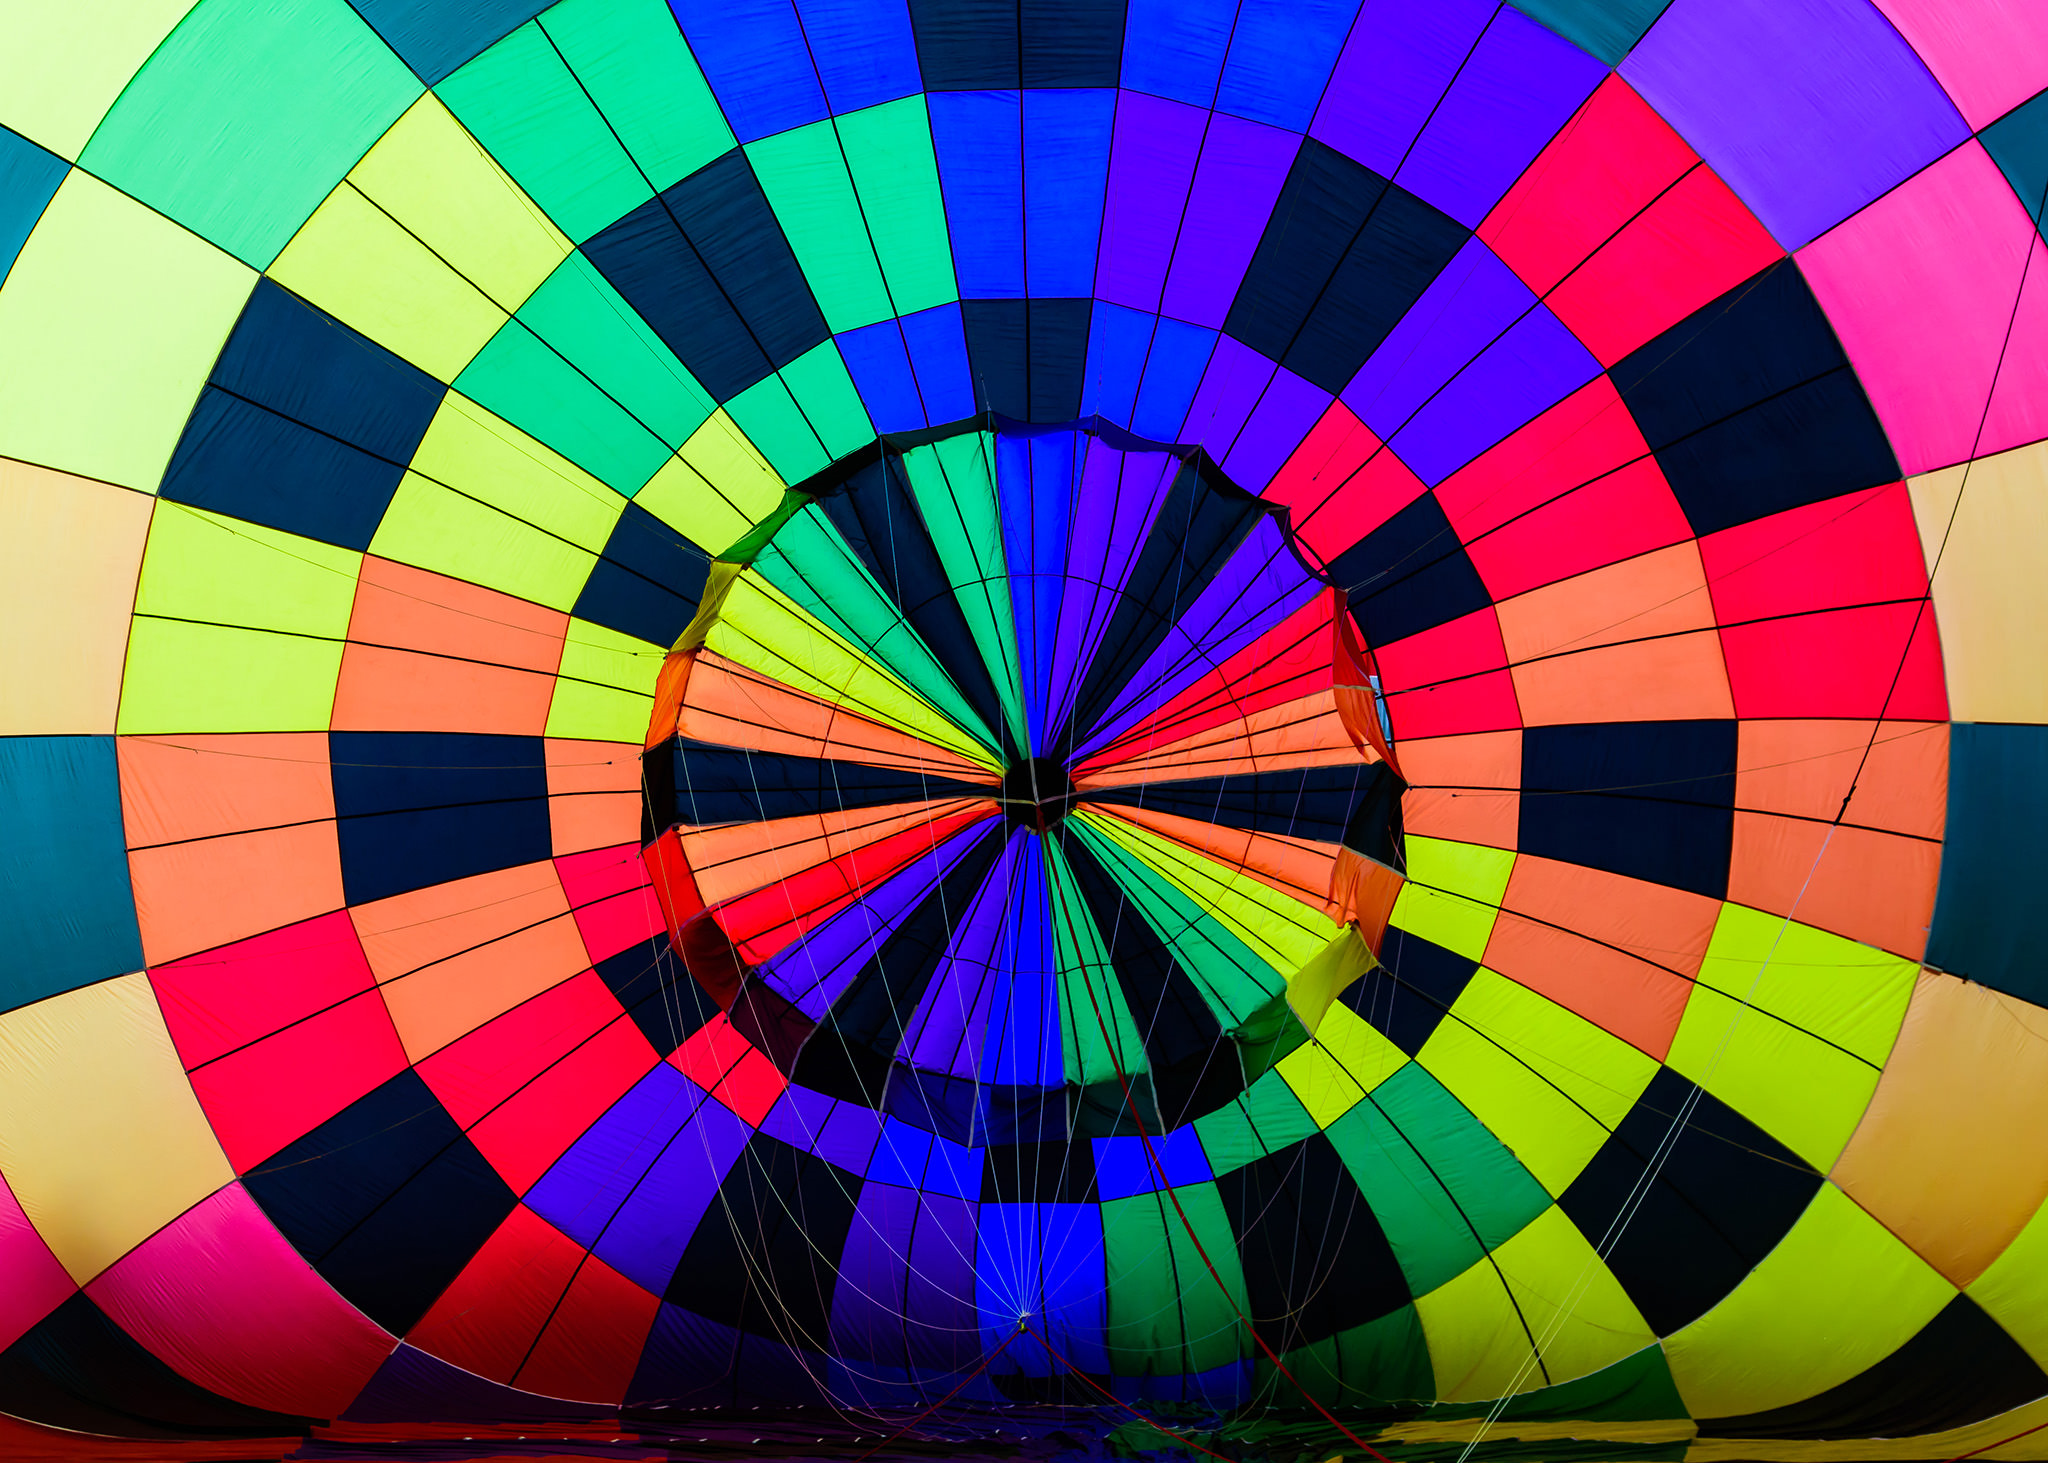
Table of Contents
Pre-planning Your Activity
The best time of year to look for hot air balloons is when the weather begins to turn cooler – fall, to be specific (though I spot one or more balloons aloft almost any day of year when the weather is decent). However, if there is precipitation or winds greater than about 9 mph (15 kph), plan on getting a cup of coffee and mingling with the crews and spectators because the balloons are not going up that particular day.
Be prepared to get to the launch location early to get yourself set up. You will need to dress appropriately, including hats and gloves for the cool weather. Most pilots will inflate and be ready to launch by 7:00 AM. At many of the festivals, there will be a pilot’s briefing to give them weather conditions for the day.

Sometimes, a pilot will release a small helium-filled balloon into the air to identify the wind direction. These are valuable sources of information for you as well in order to pre-position your shooting location. Account for sun as a factor – having it behind you reduces or eliminates shadows on the envelopes, side shots give you some shadow and a sense of depth, and shooting into the sun can provide silhouettes or filtered light through the colorful envelopes.
For equipment, I use a Nikon D750 along with two lenses – a Tamron 28-75mm and a Nikkor 70-300mm. This combination allows me great versatility to get the types of shots I’m seeking. Occasionally, I will use a circular polarizing filter to enhance the blue skies and make a nice contrast to the colors of the envelopes. I don’t use a tripod for the morning ascensions as it just limits my mobility.
Camera Settings
With the low early morning light, and not using a tripod, I usually will start the day with a higher ISO – maybe as high as ISO 1600 – and then gradually reduce that as the day becomes brighter. My shutter speed is generally in the range of 1/160 to 1/320 of a second to aid sharpness. At this point, I am not really concerned with depth of field. Balloons aloft are very two dimensional and don’t require much DOF thought. However, there are other opportunities for very cool photos on the ground where aperture settings are important. I will describe those later.
Photographing The Morning Ascension
While the big prize for the day is capturing the hot air balloons in the air, keep your eyes peeled for the many opportunities to shoot away while the balloons are still on the ground:
When crew members set out the envelope and gondola, it can be a good time to capture them in action, as well as curious onlookers. Look for the connecting carabiners, steaming cups of hot coffee, and knotted ropes to provide opportunities to capture that moment.
Testing the burners: This part is a favorite with the crowds. The pilots will actuate the valving prior to connecting the envelopes to insure that the burners are operating properly. This results in flames shooting straight up from the gondola.
Cold inflate: Once the envelope has been attached to the gondola, a fan is used to begin the inflation process. As the envelope swells, a great opportunity for the photographer exists: capturing the inside of the balloon, which is on its side at that time. Crew members are pretty good about allowing photographers to peer into the balloon and shoot the top (referred to as the “crown”) of the balloon. Spectacular colors, symmetry, and lines are everywhere to be seen and shot. This is a good time to shoot from a kneeling or even prone position in order to evade the unwanted obstacles and achieve better results. Also, pilots are walking around and adjusting their balloon during this time to insure equal inflation and you may be able to capture their silhouette as well. In order to sharply capture the end of the balloon, as well as any ropes and cords attached, using aperture priority mode for the depth of field issues can be handy. This is definitely one of my favorite portions of the entire day.

Hot inflate: when the pilot has determined the envelope has inflated sufficiently, they will continue the process by “going hot”. The pilots will climb into the basket in order to actuate the burners. A good location for photos is directly behind the pilot. When the burners actuate, you can get the orange and blue flames jumping out towards the crown of the envelope. Try including the pilot in your shot. Sometimes I will shoot from the side of the basket to get the profile of the pilot, who will have unknowingly assumed a dramatic pose. In a matter of minutes, the envelope will be sufficiently filled and the crew will assist the pilot in getting the basket and envelope into the upright position. Another opportunity exists here for shots of crew and spectators. Often, I will ask pilots if I can lean into the gondola to shoot upwards at the crown, and most pilots are very accommodating to the request. This is where having a zoom lens comes in handy (I am using the 28-70mm at this point). You can zoom up to the crown with its fullness and uniformity, or pull back to get more of the envelope and many additional lines.
Finally, the balloons are upright and ready to launch. At this point, I will use my knowledge of the wind direction (remember the pilot briefing and helium balloon mentioned earlier?) and move to a location where the pilots will be flying directly towards me after take-off.
Why is this important? Doing so allows me to get multiple balloons in the photos at varying heights and distances. This is also a time where I am going back and forth on which lens to use – depending upon differing wind directions at various altitudes, some balloons could drift away from you. Having the longer telephoto lens available gives me flexibility to get more group shots.
Think about the following when composing the shot:
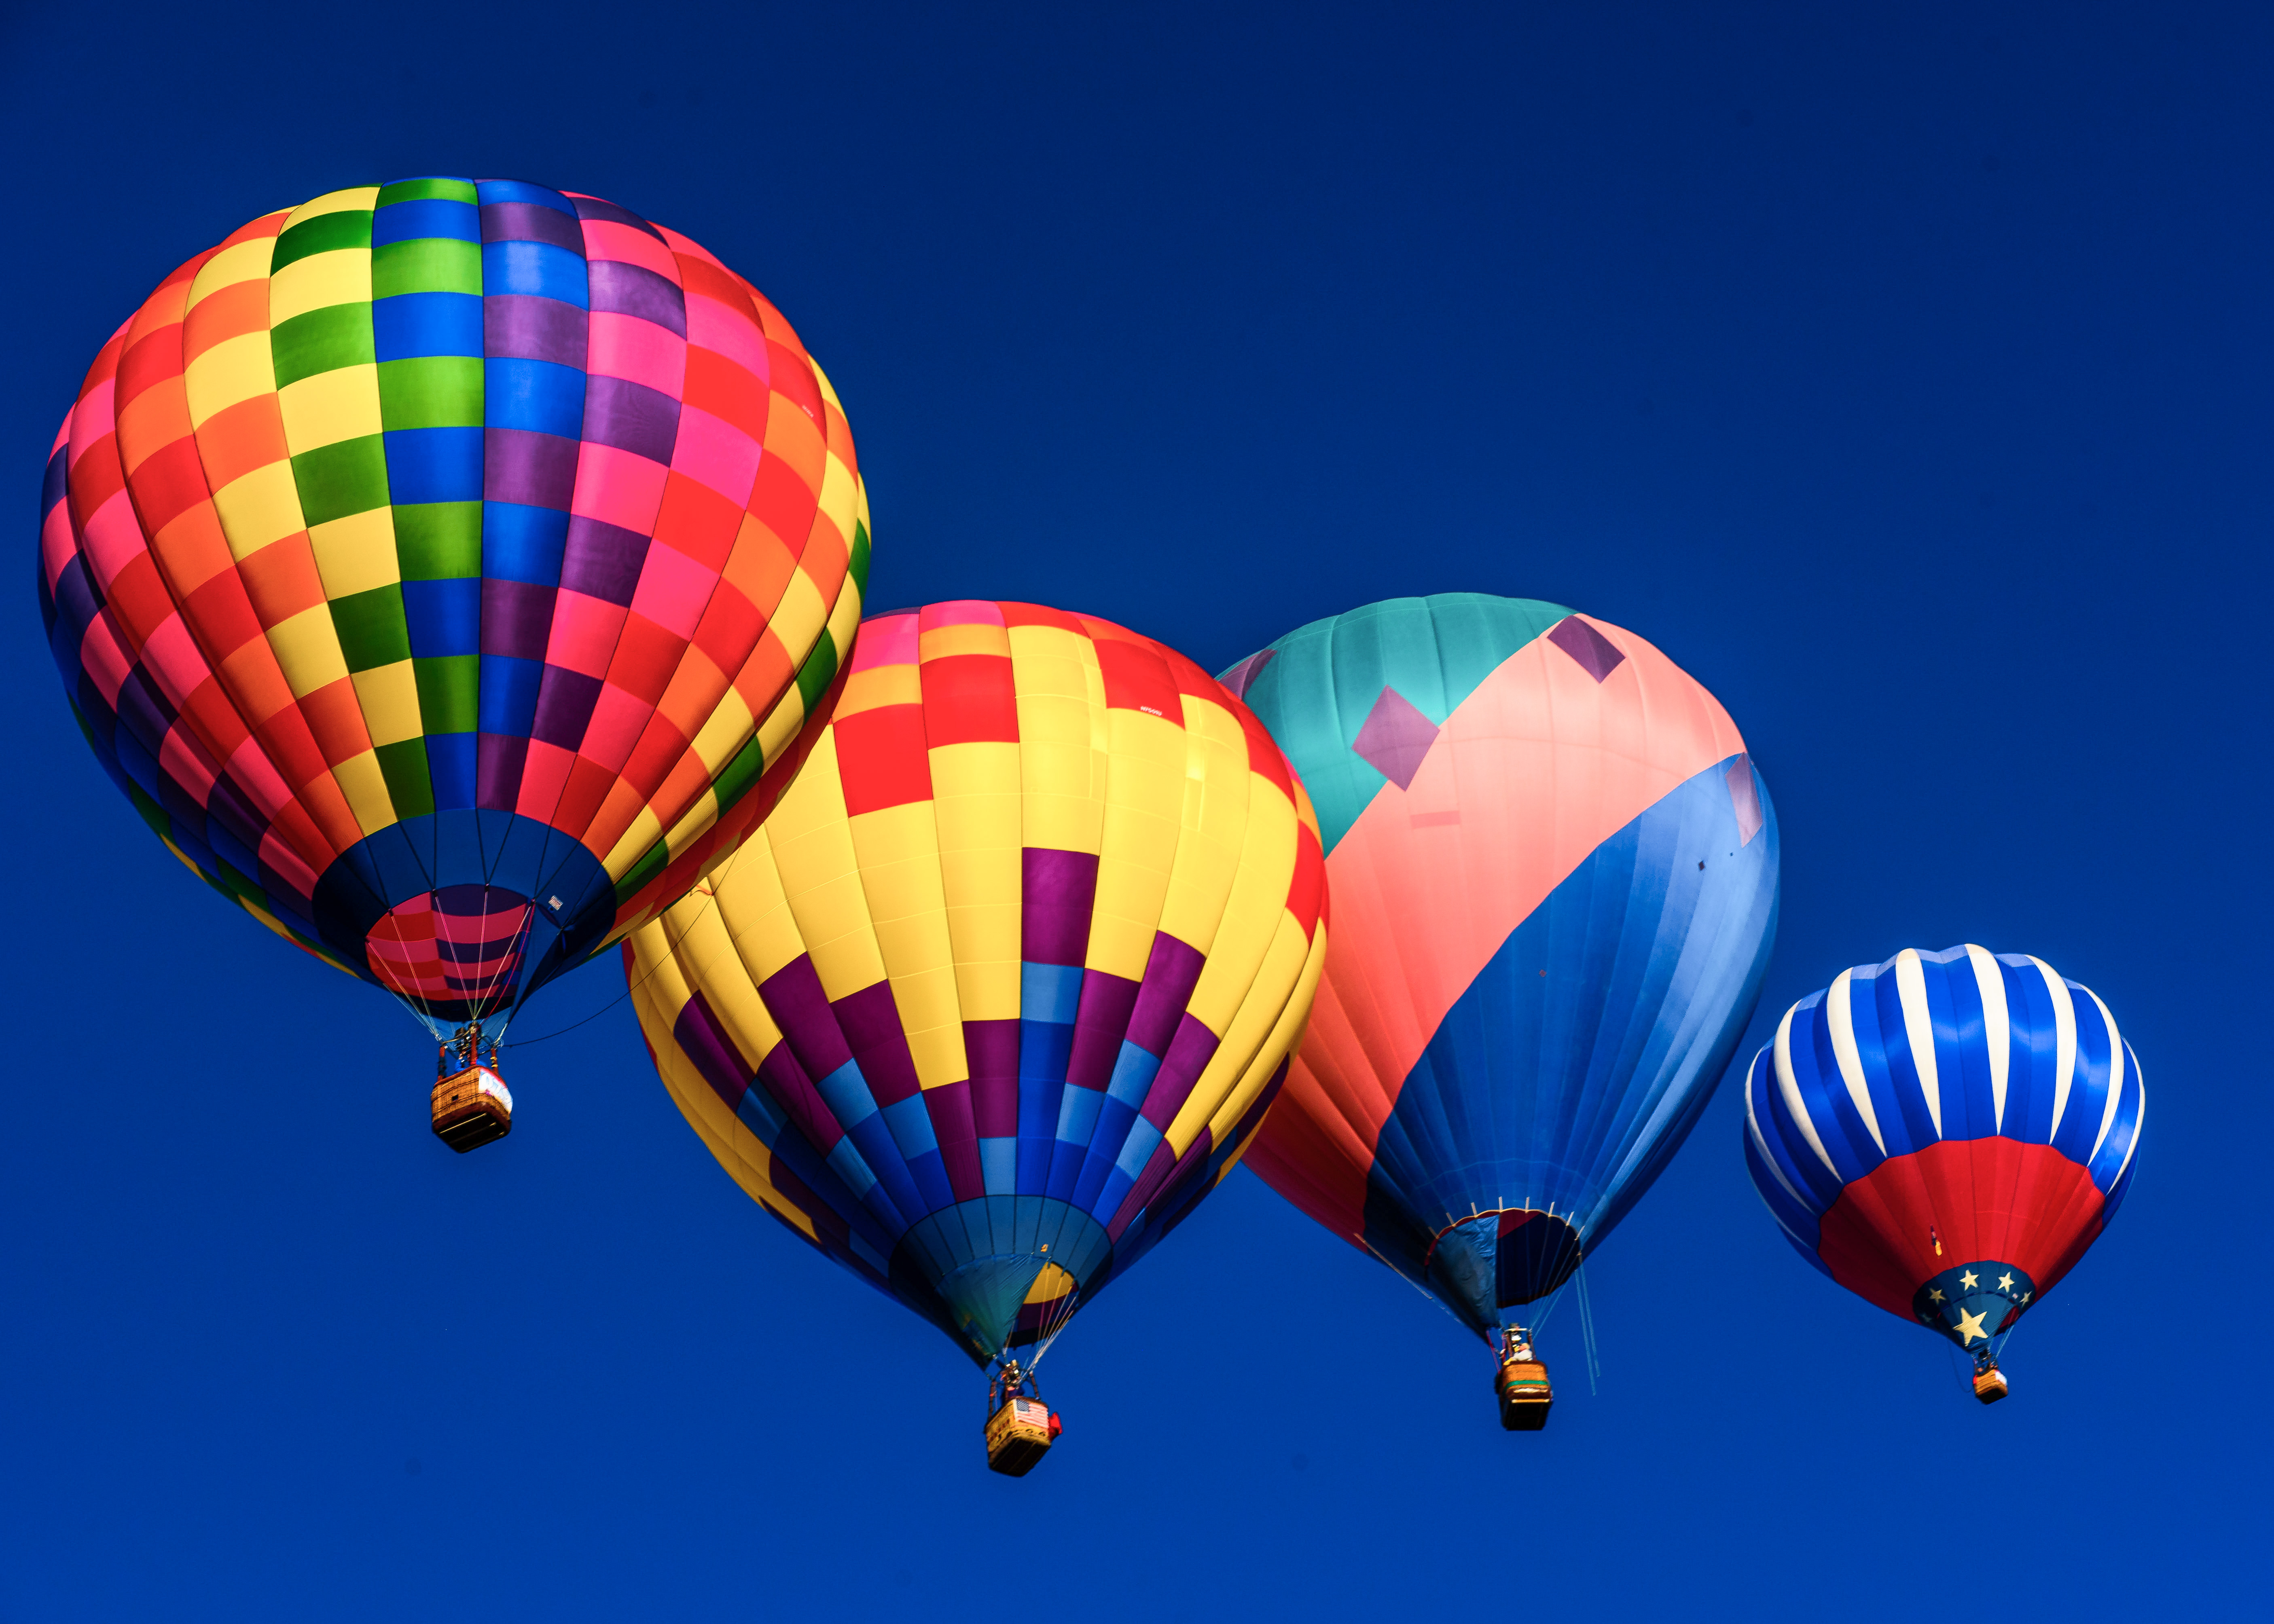
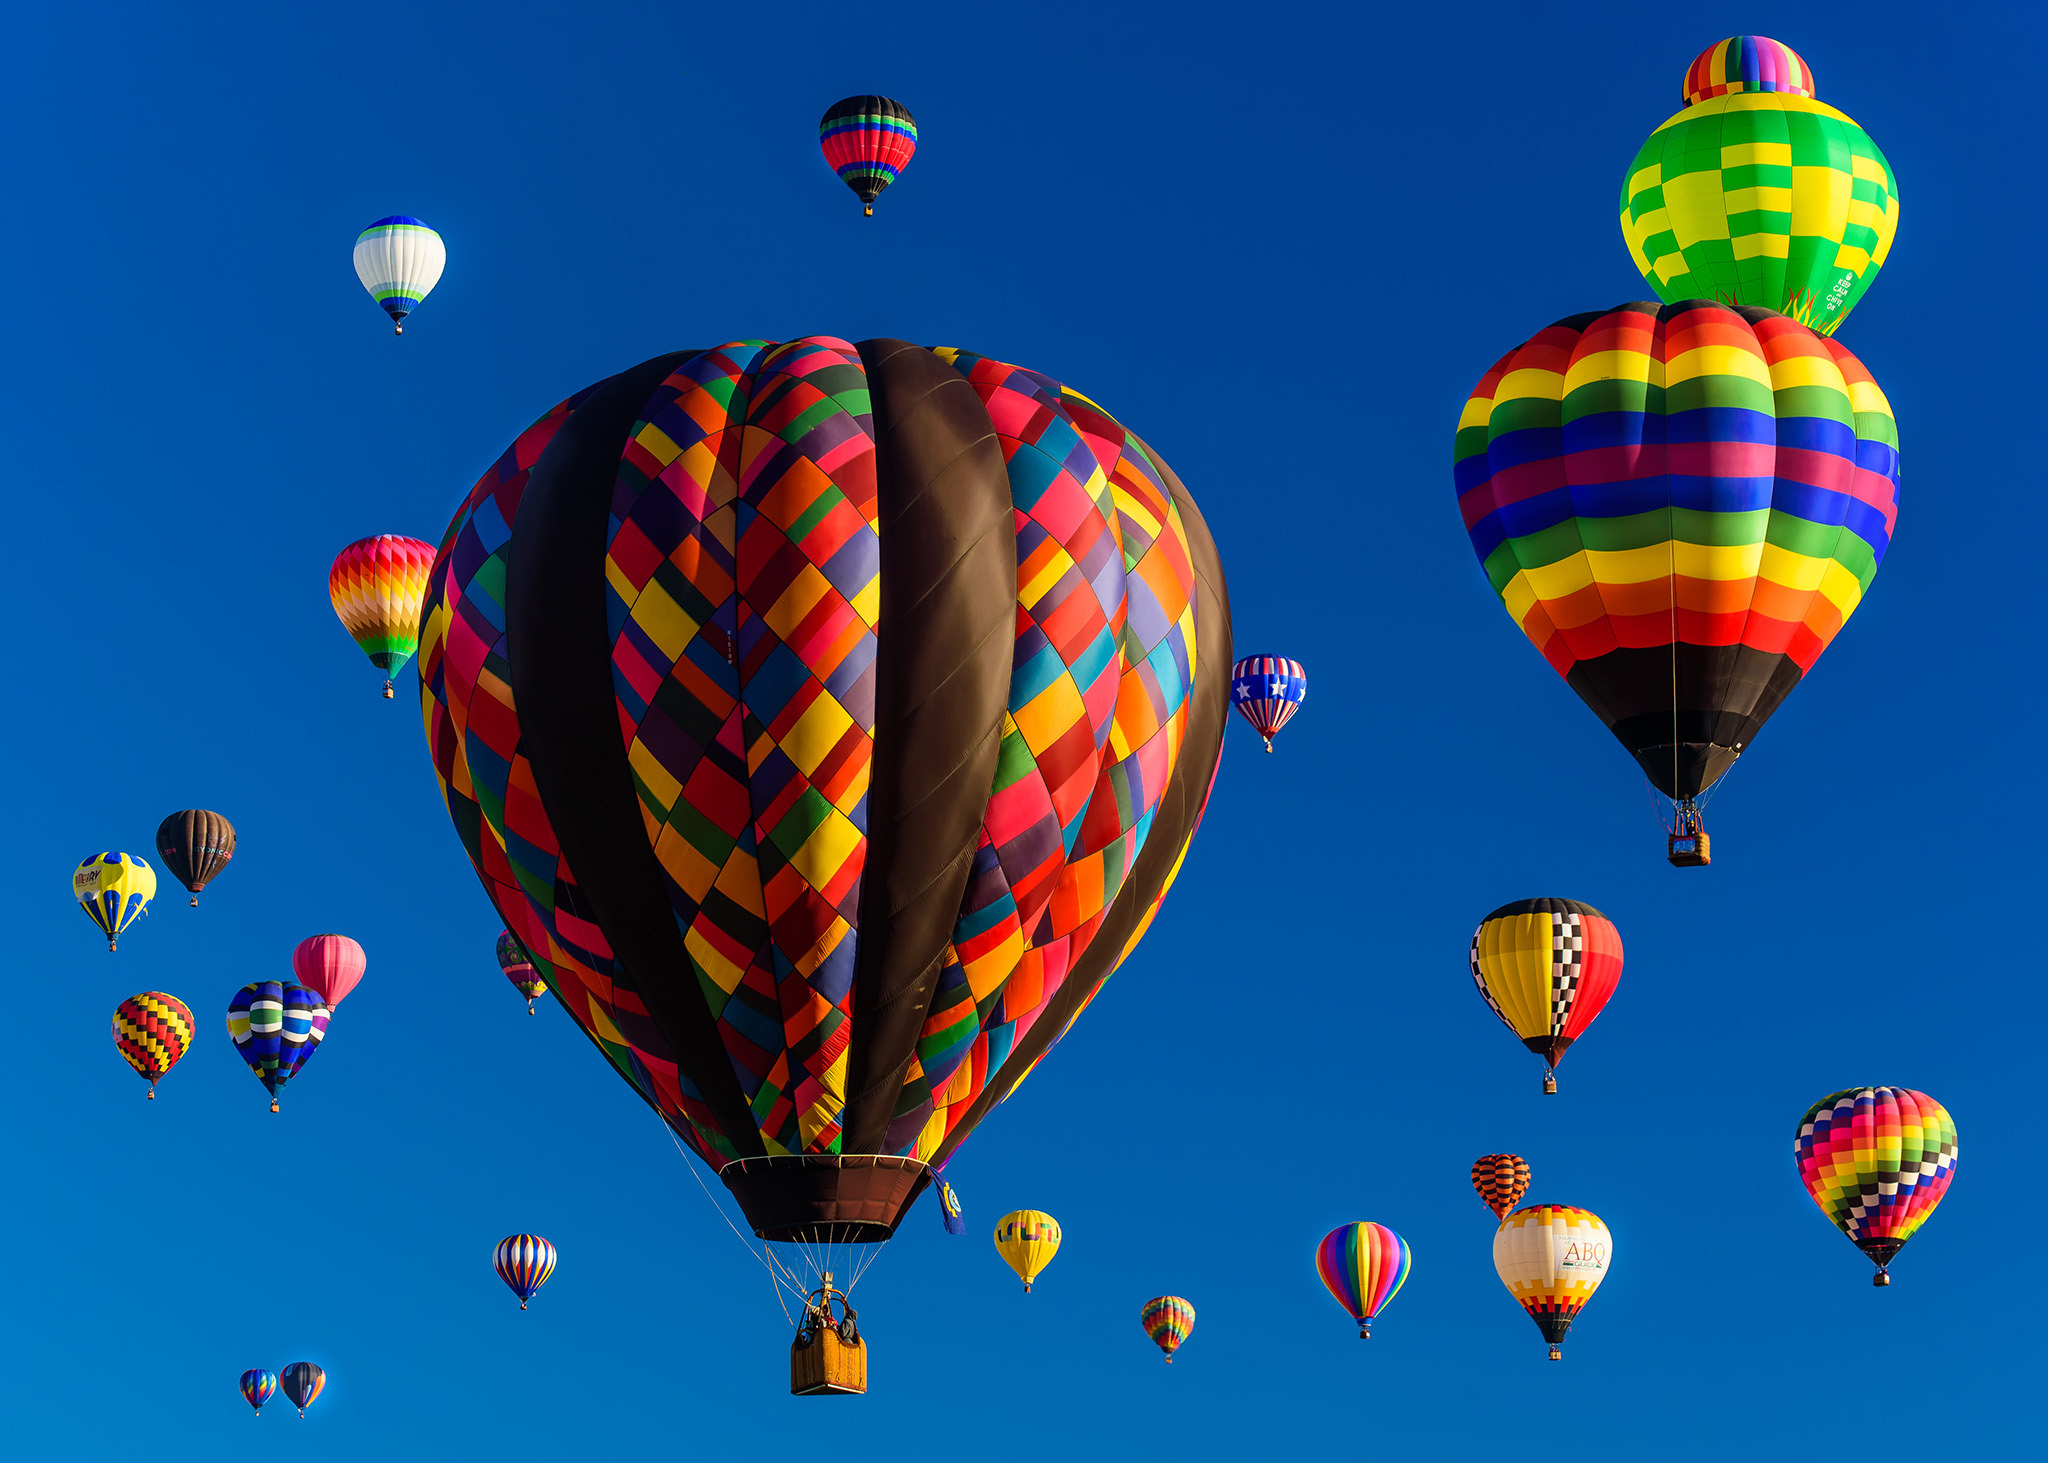
- Do you want a single balloon or multiple hot air balloons in the picture? Each option has its appeal. I have found that the multiple balloon approach generally has more “wow factor” to the viewer of the photo. Note that it is okay to have some balloons be partly covered in the shot. It gives a juxtaposition of sizes, colors and balloon orientation. Pay attention to balloons ascending above others that are still inflating.
- Look for patterns in the sky. Arcs, triangles, and lines formed by the balloons are all real possibilities.
- Be patient. Balloons are slow moving, but they are moving. Find a balloon that is your principle subject. Observe if there are other balloons emerging from behind your main subject. Wait a few moments to allow the balloon and gondola to appear fully in the frame.
- Capture balloons flying directly overhead. This gives a different perspective to the envelope. Be mindful that increasing your shutter speed for this type of shot is essential to reduce camera shake. I generally will use a shutter speed of 1/400th of a second or faster for this type of shot.
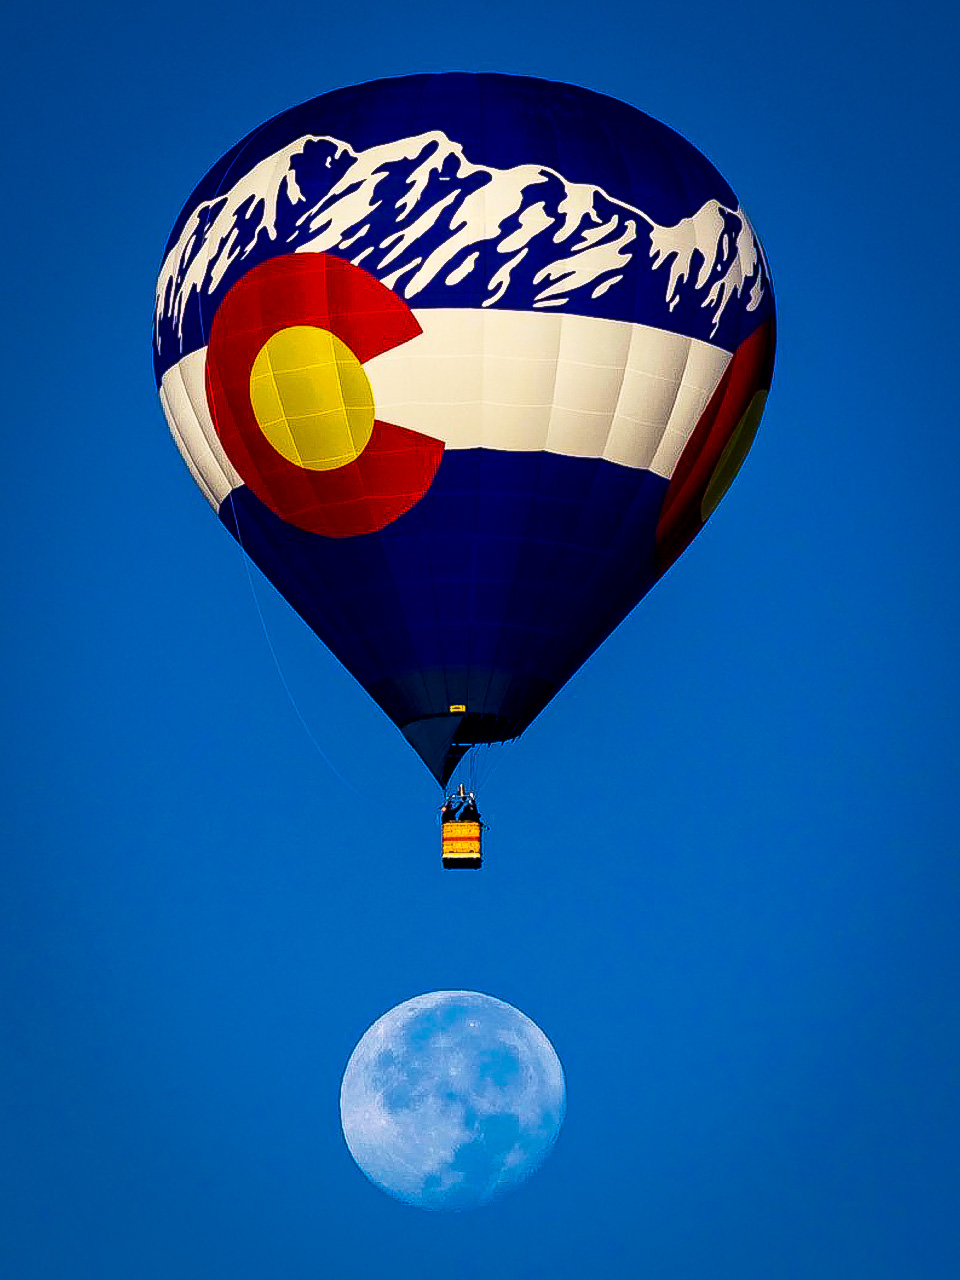
- Look for other objects to capture in the frame with the balloon. These could be clouds, mountains, airplanes, birds or the moon. Some photographers I know like having a plain blue sky to contrast against the colorful balloons. I prefer the days when there are clouds (not overcast though) that can be added into the composition for even more dramatic contrast.
- If a water source like a lake or river is available, reflections of a balloon can be awesome.
All of these ideas can be used for shooting while on the ground. There is one other shooting location that can yield spectacular results – up in the air as a passenger. I am fortunate to have a friendship with a pilot who occasionally will take me up for photo opportunities.
Also, the ability to shoot downwards from the gondola yields great results. Not only do you have topography such as mountains, lakes or rivers available to you but objects like people, cars, buses and trains can add to the composition. Likely, there will be other balloons in the air at a similar height to you. Capturing multiple balloons can provide pleasing results as well.
Photograph the pilot and any other passengers during the flight. These are good keepsakes for them and you can get interesting backgrounds as well. I tend to give away the shots I get of pilots. I figure they are doing me a favor, and it provides goodwill for potential flights in the future.
Here are few more things to remember if you are so lucky to get a flight:
- Space in the balloon gondola is limited, so minimize your equipment. I generally will have just one camera with a lens attached and maybe a second lens. Circular polarizing filters can fit in my pocket. I absolutely carry extra SD cards with me.
- Although it will seem like you are motionless in the balloon, there can be vibration from other passengers moving in the gondola that will contribute to camera shake. I have found a minimum of 1/160th for a shutter speed is necessary to get the sharper shots.
- I try to position myself in the gondola so that unwanted components like ropes dangling from the envelope are not interfering with the shot.
- Be prepared to protect your equipment during the landing. There can be some rather bumpy landings, and you need to secure your camera safely from being jostled by other passengers or equipment.

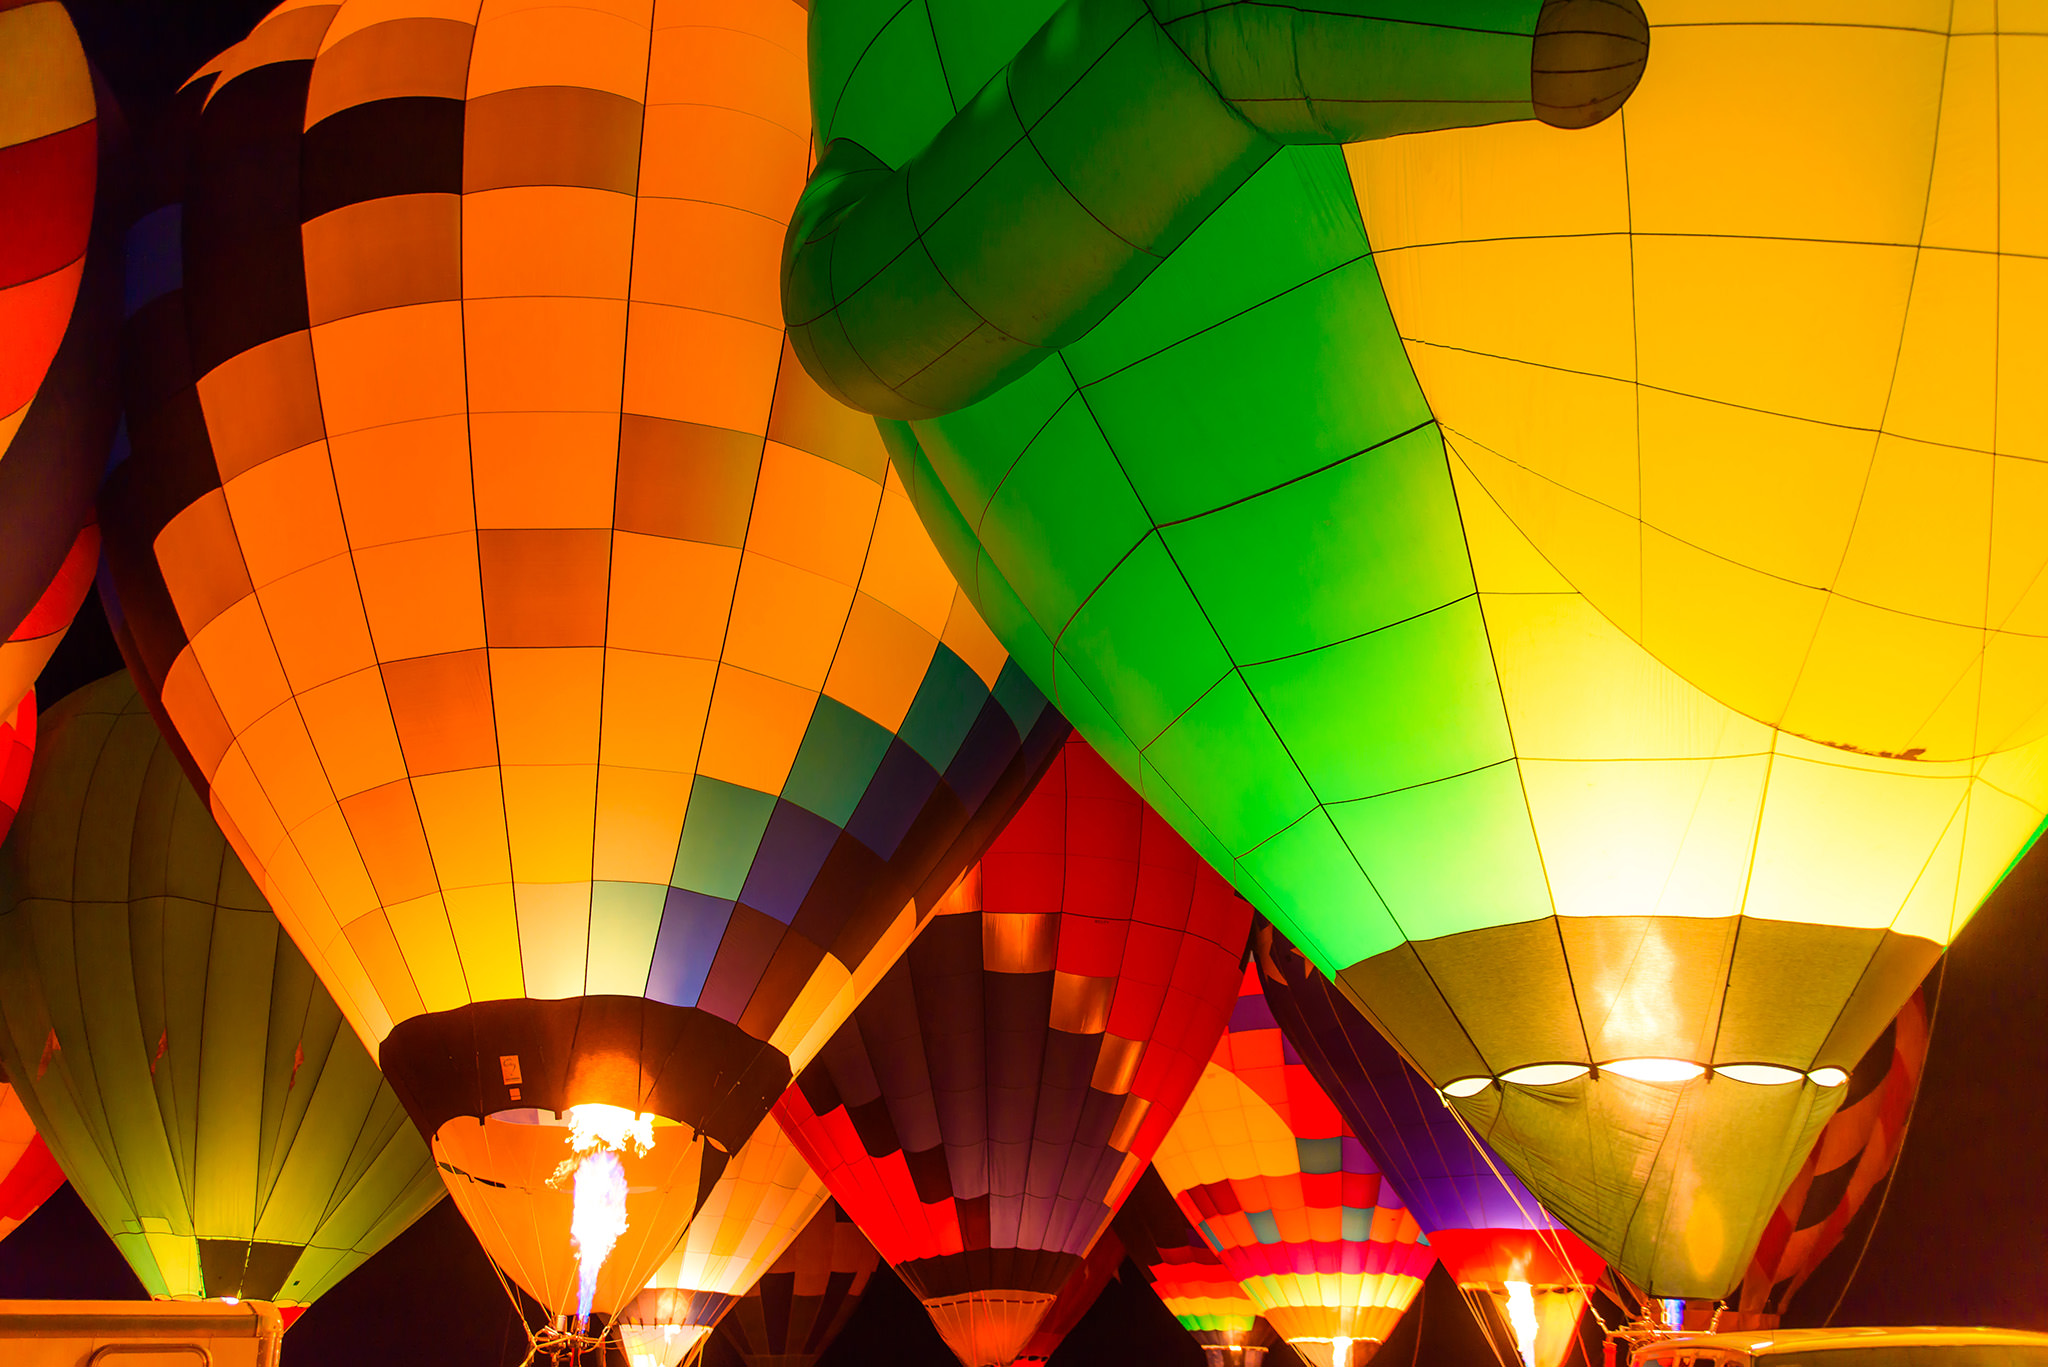
Photographing Evening Balloon Glows
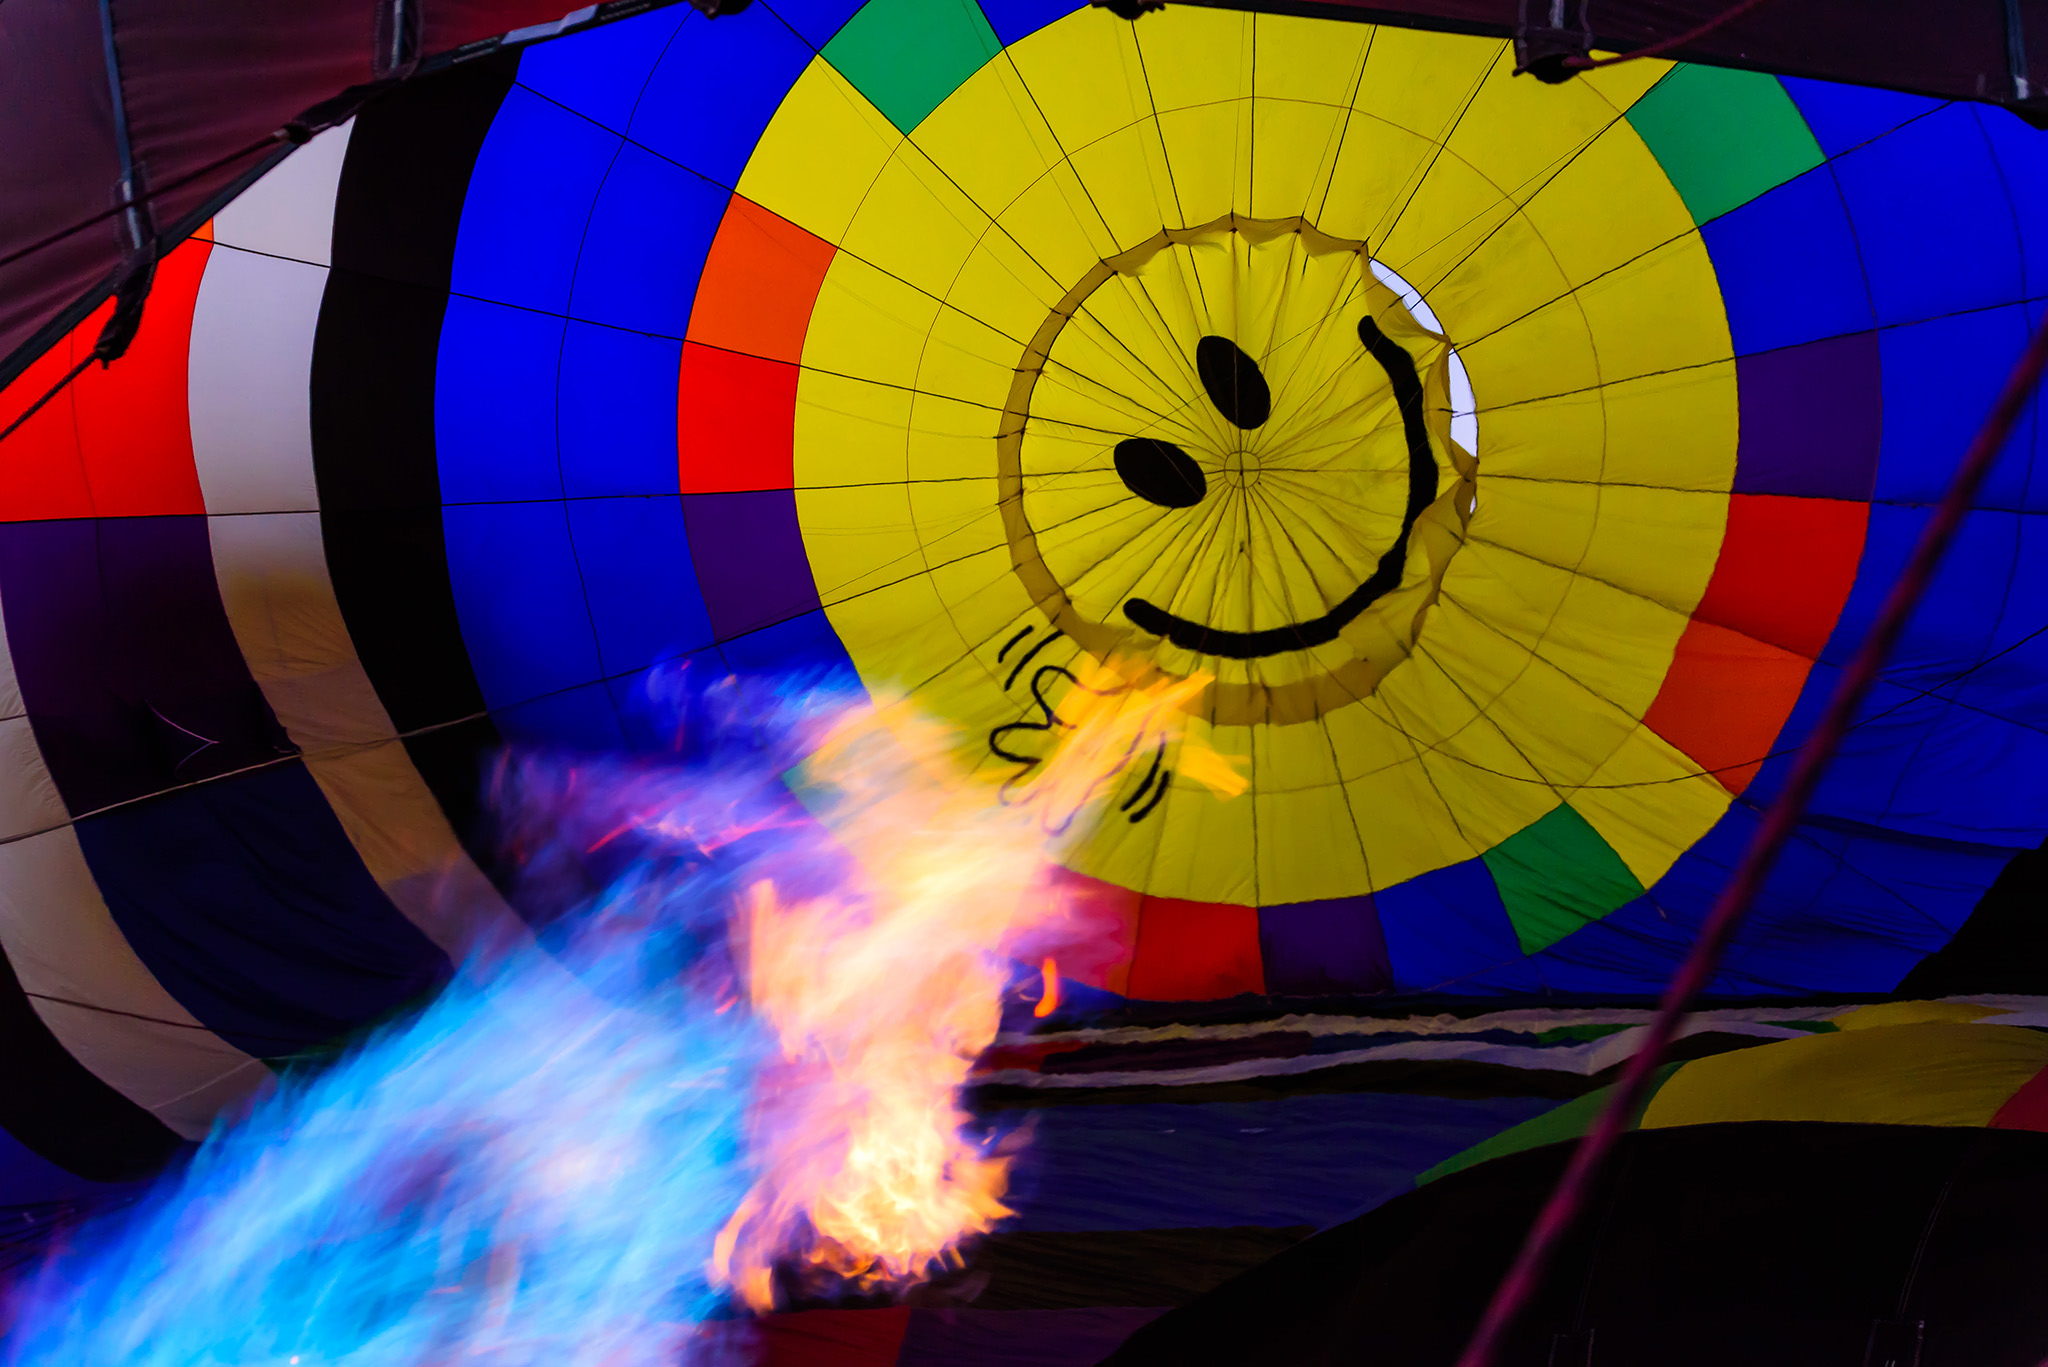
A popular event at balloon festivals is the evening balloon glow. The pilots will stand up their balloons at dusk and then periodically hit the burners to light up the envelopes, giving off a bright and colorful effect. Often, the pilots will synchronize the timing of the glow so that all the balloons are lit up simultaneously. Here are a few important pre-planning details to know.
First, I typically start by picking an aperture that will give me enough depth of field, leaning toward wider apertures if it is especially dark (often striking a balance in the range of f/4 or f/5.6). I start by setting my shutter speed to something like 1/200 to 1/320 second – that may seem fast, but the balloons can be moving pretty quickly. Then, I will use whatever ISO results in a bright enough photo, usually in the range around ISO 640 or ISO 800. Of course, every circumstance is different, and these settings can vary significantly depending upon the conditions.
Since the balloons are tethered to the ground, you will be in close proximity to them. In order to capture an entire balloon, or multiple balloons, it’s best to use a wide-angle lens.
In terms of evening balloon glows, an absolutely great time is the blue hour, shooting the toward the western horizon, to provide a different background lighting perspective. While a tripod is not absolutely crucial, it can be helpful to get sharper images.
Post Processing
Although the balloons seem very colorful in your viewfinder, post processing is still necessary to help the images pop. In the editing stage, I make sure to include a wide range of colors, including greens and magentas that can be very interesting.
Editing software and techniques are widely available in other posts on the internet, so I won’t address it here. Do give attention to the blueness of the sky and any clouds in the frame to enhance the overall photo, and to the colors and saturation of your balloon if photographed during the cold inflate on the ground. Dust particles on your sensor or lens will show up against the sky and need to be edited out for a higher quality end photo. It may seem like a tedious process, but it’s part of the fun and worth your time to get big dividends for the final product.

Conclusion
Hot air balloon photography can be rewarding, not just for capturing the moment, but also for reveling in the unique experience. To maximize this, remember that this type of photography is not about being equipment intensive, but about visualization. It’s better to hone in on colors, patterns, and lines associated with the event and use them to convey the message you want. Look for other objects in the sky to give you a contrast in your composition. Most importantly, have fun with the activity, and make new friends along the way!
This guest post was submitted by Shane Page as part of Photography Life’s guest post contest. To see more of Shane’s work, you can visit his website.
This was a great explanation – simple, concise and answered all the questions I might have! I’ll try it tonite…thank you!
Shane,
I am going to the 2019 Albuquerque Balloon Fiesta. Having not been there previously, I have been looking at whatever info I could find in terms of articles and videos. This article was the most helpful yet, and I have downloaded it to my phone to use as a refresher before going. I have signed up for the Canon photo walks on my first day and be on my own the second day armed with their tips and yours. Your photos are beautiful. Thanks for sharing your expertise. Any other advice welcome. Nikon D500, Tamron 18-400 mm f3.5-6.3, Tokina 11-16 f2.8, Nikor 50 mm f1.4
Wally,
Welcome to Albuquerque! It’s gonna be good time.
1. Your lenses give you a great chance for variety. If you are close up on the field to the balloons while inflating, you won’t need more reach than the 50mm gives you. Try to photograph the interior of an inflating balloon. Probably using an 800 ISO with the 50mm fairly wide open should give you enough light.
2. The balloons generally fly to the south after launch, so try to get to the south end of the field and they fly right towards you. I’m still generally using a wide angle lens at this point.
3. When the balloons reach altitude is when I switch to the telephoto.
4. Look for location F3 on the field for a balloon called “Twist of Fate”. The pilot is a good friend of mine and will be open to your photo opportunities. I may be on the field on Sunday myself, so perhaps we will meet. Go online and purchase your “Park and Ride” ticket. This entitles you to a bus ride to the field and admission. There will be over 100,000 people there on Saturday and traffic in impossible.
5. Definitely go to the evening balloon glow and fireworks for more photo chances. Stay to the east side of the field and shoot west with the blue hour horizon.
Best of luck to you – Shane
Thanks very much. Heading up to Decatur Alabama where they have a Hot Air Balloon Jubilee each Memorial weekend. These tips are invaluable as I have little experience. Major thanks…
I hope you had a successful outing over Memorial Weekend. Thank you for the kind words.
Hi Shane,
Just want to say thank you for the article as it provided amazing insight. Feeling inspired from your pictures!
Thank you, Samantha, for the kind words. I just returned from Ireland where I was photographing their Hot Air Balloon Championships. I hope you get opportunities to capture balloons.
Shane;
You are the MAN! I have been researching online how to best photograph hot air balloons and your post was the BEST! Thank you and your images are fantastic too. I plan the shoot the Lisle, IL Eyes To The Sky event this June 2018 and I will definitely use your tips.
Thank you, Ken, for the kind words. I hope it helped you for Eyes to the Sky. I was in your area just last week so I thought of you while passing through.
Joe – thank you very much for the kind words. The vibrance of the balloons is so different from the muted tones we normally see in our daily activities. They truly stand out in the crowd. I hope you get the opportunity to attend a balloon festival.
Thank for for sharing the wonderful photos and writing. Those colorful compositions and blue sky are incredible. Got to put hot air balloons on my list to visit.
I attend the one in Helen, Georgia every year on Memorial Day weekend…….Beautiful area….3 day event. Sunrise and Sunsets.
Never thought about photographing balloons before, but wow! Inspiring!
Awesome read! In the ’80’s I’d get up at 3am to photograph the ascension of the balloon races in Reno,NV Had an old Pentax 35m and even though I didn’t know what I was doing then, I lucked out and got some good shots. Now I look forward to doing this again!!
Yep. I know that experience well. 4AM wake up call here to catch a Park and Ride to the field for the mass ascension. But it’s worth it to catch all of the activity at dawn and later. I hope you are encouraged to take the plunge again.