Autumn colors are reaching their peak here in Colorado, making it one of the best times of year for landscape photography. I just spent a weekend in the mountains photographing cottonwoods, scrub oaks, and especially aspen trees showing off their deep reds and brilliant yellows. If you also want to photograph the fall colors, here are the things I recommend focusing on!
Table of Contents
1. Location and Time of Year
Different places around the world reach their best fall colors at different times of year. The general rule is that warmer areas have their fall colors happen later in the year, while cooler areas have already started to change colors near the beginning of autumn.
Also, each year, the best fall colors usually occur on different dates, even in the same location. Where I live, the best colors have been trending a bit later most years – somewhere that used to peak during the last week of September now looks best closer to the first week of October. That said, it really depends upon how hot, cold, dry, or rainy the rest of the year was.
That’s why timing and location are so important in fall colors photography. I recommend sticking to a flexible schedule if you can. If you book a hotel months in advance, you’re rolling the dice – be prepared to drive more than you had planned if you want to find the best pockets of fall colors. Camping isn’t for everyone, but I like the flexibility that it affords me in chasing down the areas with the best colors each day. (And sometimes, just one or two days can make a big difference.)
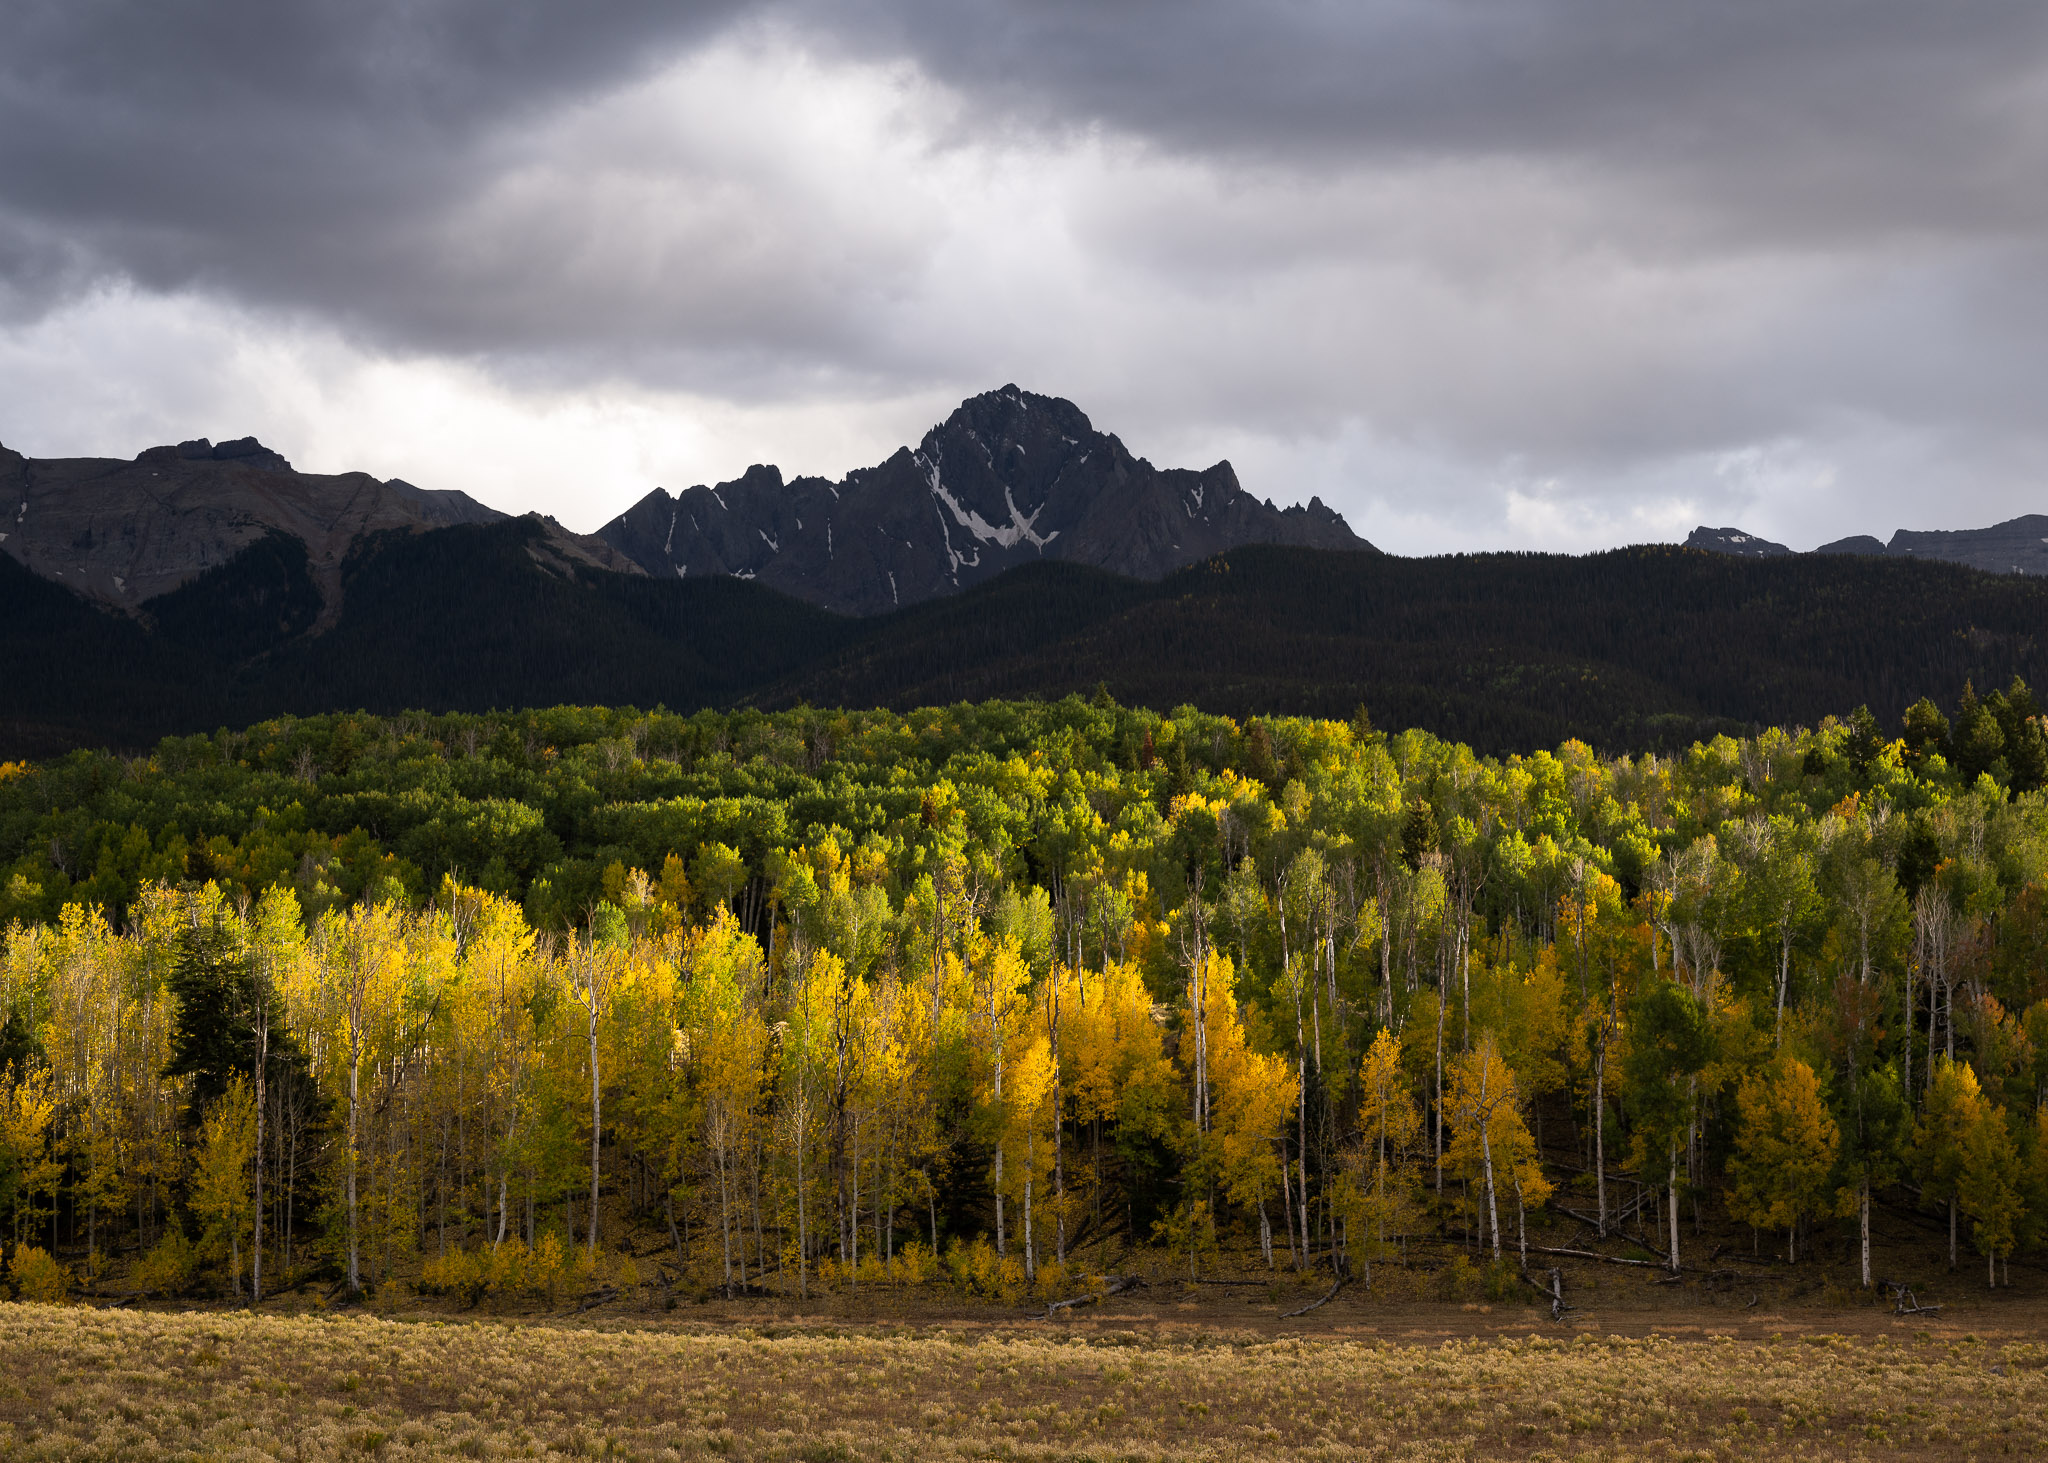
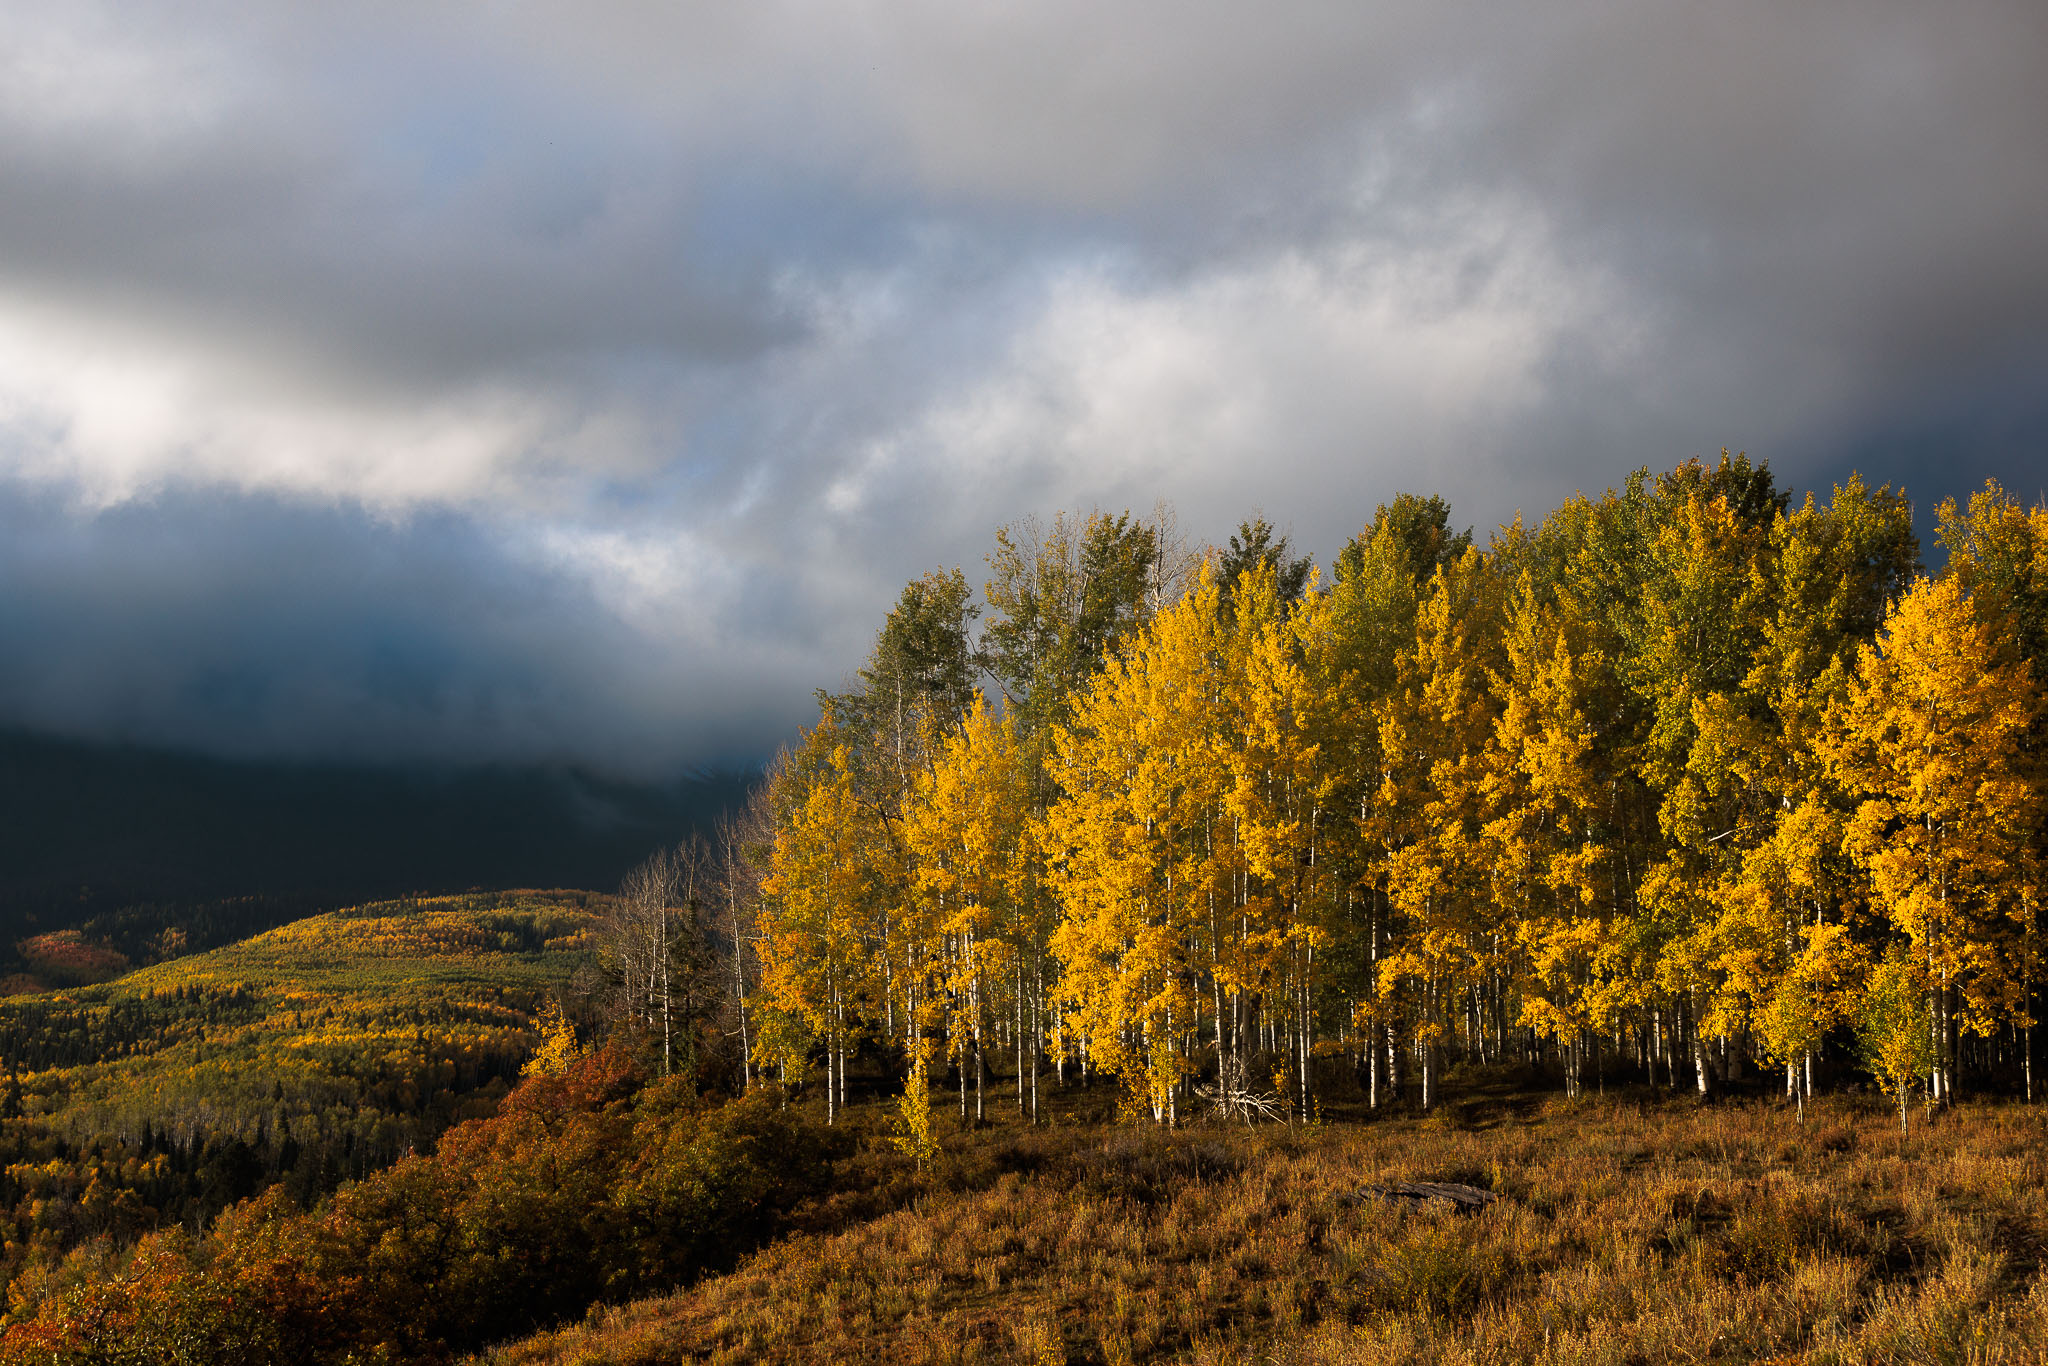
2. Weather Conditions
The same trees will look very different on a sunny day and an overcast day. Direct sunlight is often harsher, but it also gives you the opportunity to experiment with shadows and the direction of light at different times of day. Overcast light allows you to take softer photos, where the leaves themselves can become the primary source of color in the photo.
Chamonix 4×5; Nikkor M 300mm f/9 @ f/20, 1/15 second, Kodak E100, front rise
NIKON Z 7 + NIKKOR Z 24-70mm f/4 S @ 24mm, ISO 64, 1/30, f/11.0
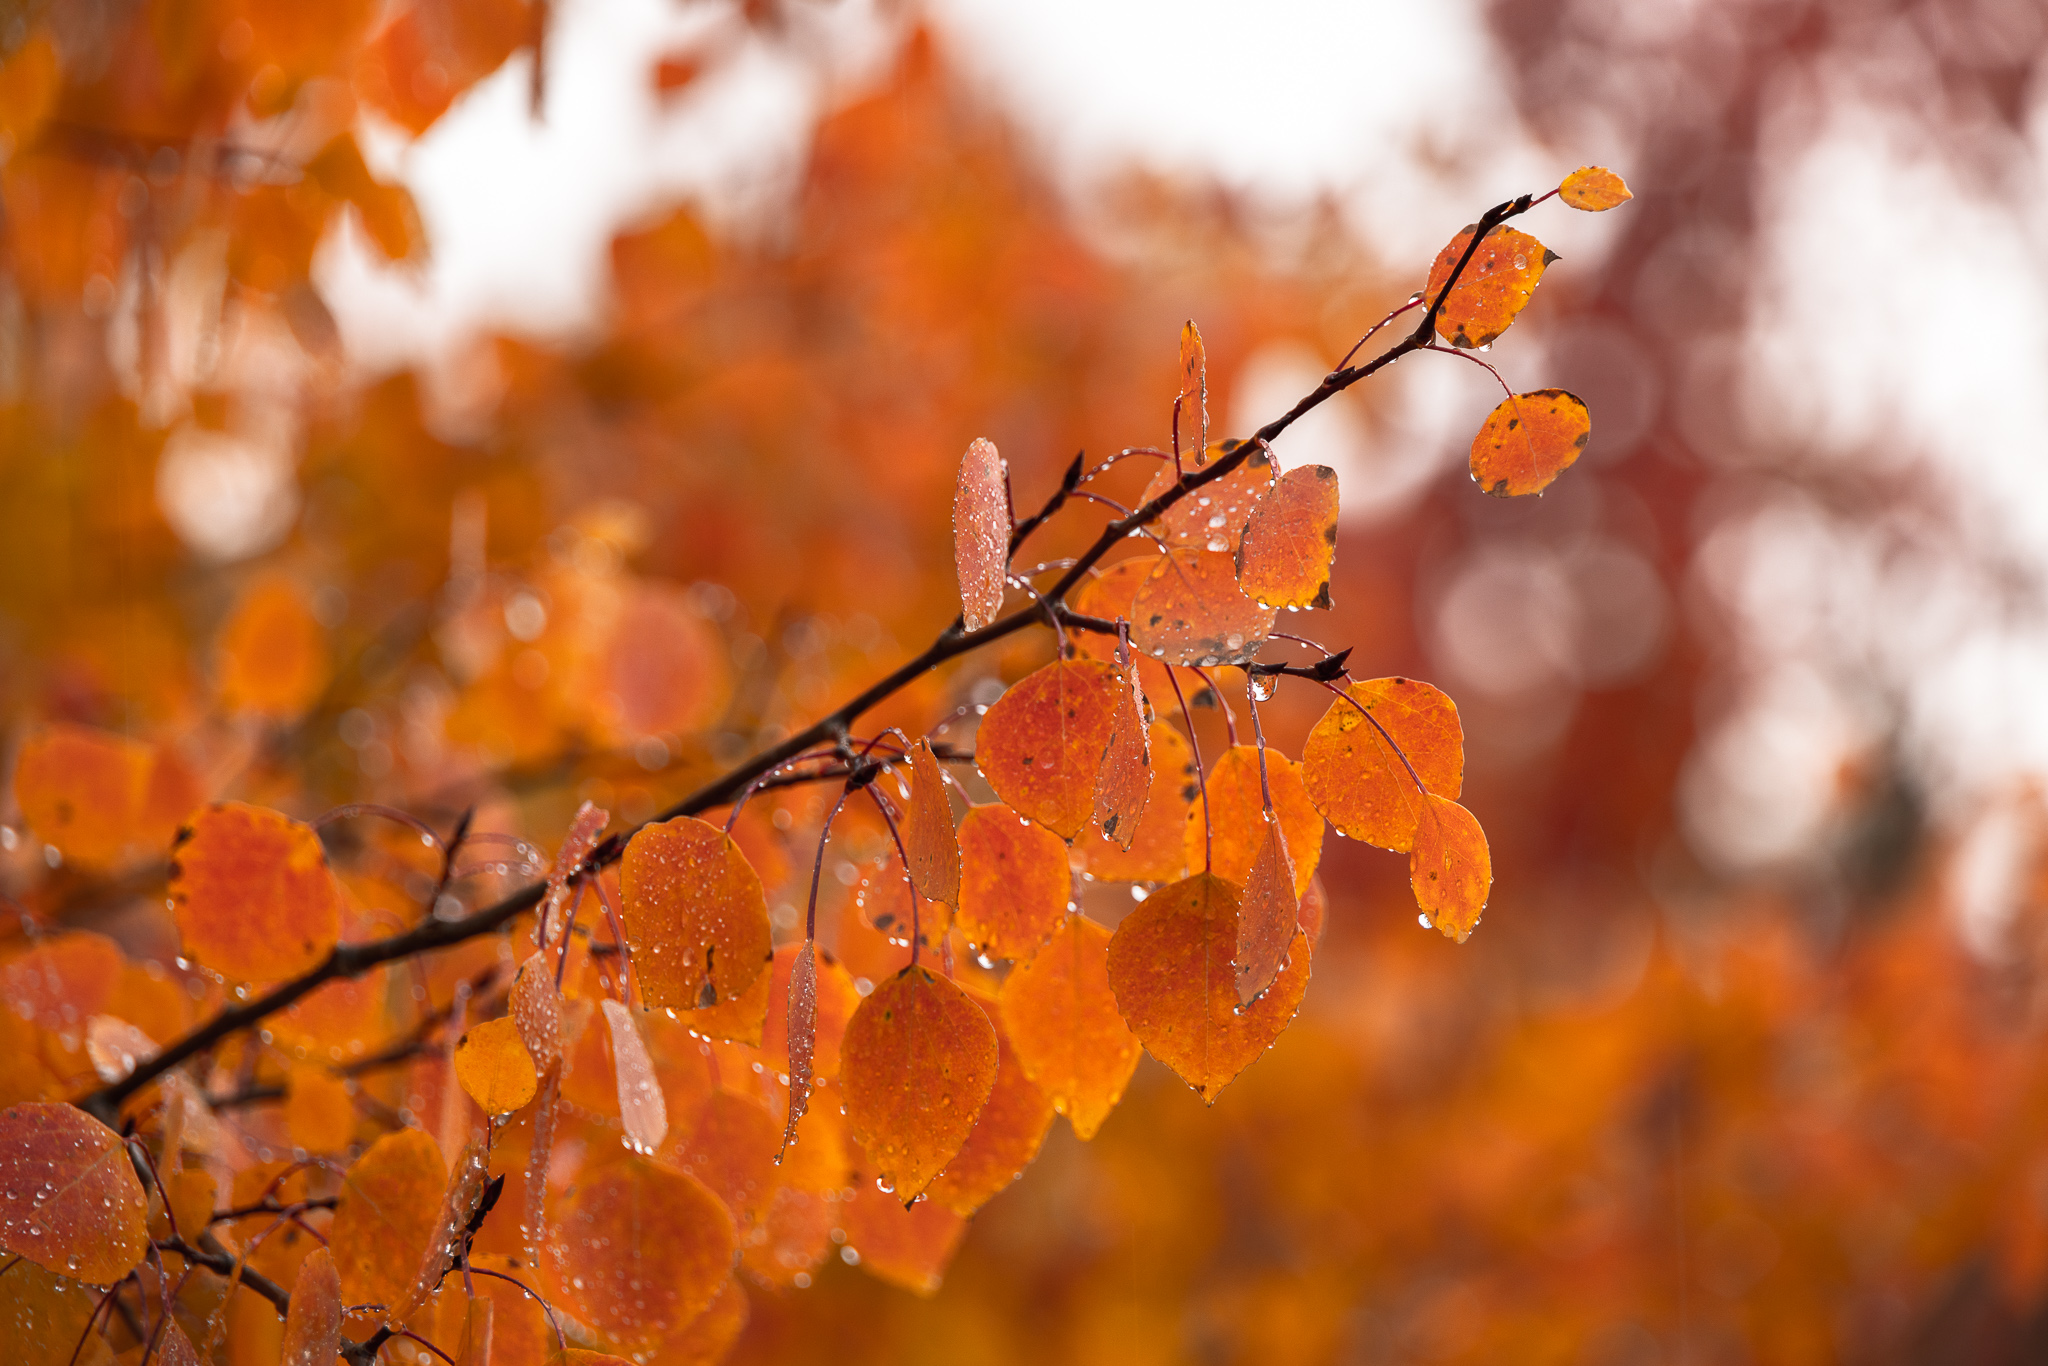
Then there’s the question of rain. I’ve said many times before that bad weather makes good photos, and this is yet another example. Fall colors are simply more vivid during the rain and immediately afterwards. Dew droplets in the morning have the same effect.
One type of weather I usually dislike as a photographer is extreme wind. It’s harder to capture sharp photos in the wind due to the movement of the leaves, but the wind also strips the trees of their leaves in the first place! I’ve seen some beautiful, slow-shutter-speed photos of autumn leaves rustling in the wind, so it’s not always bad. However, for classic fall colors photos, you’ll want to avoid the windiest areas as much as possible.
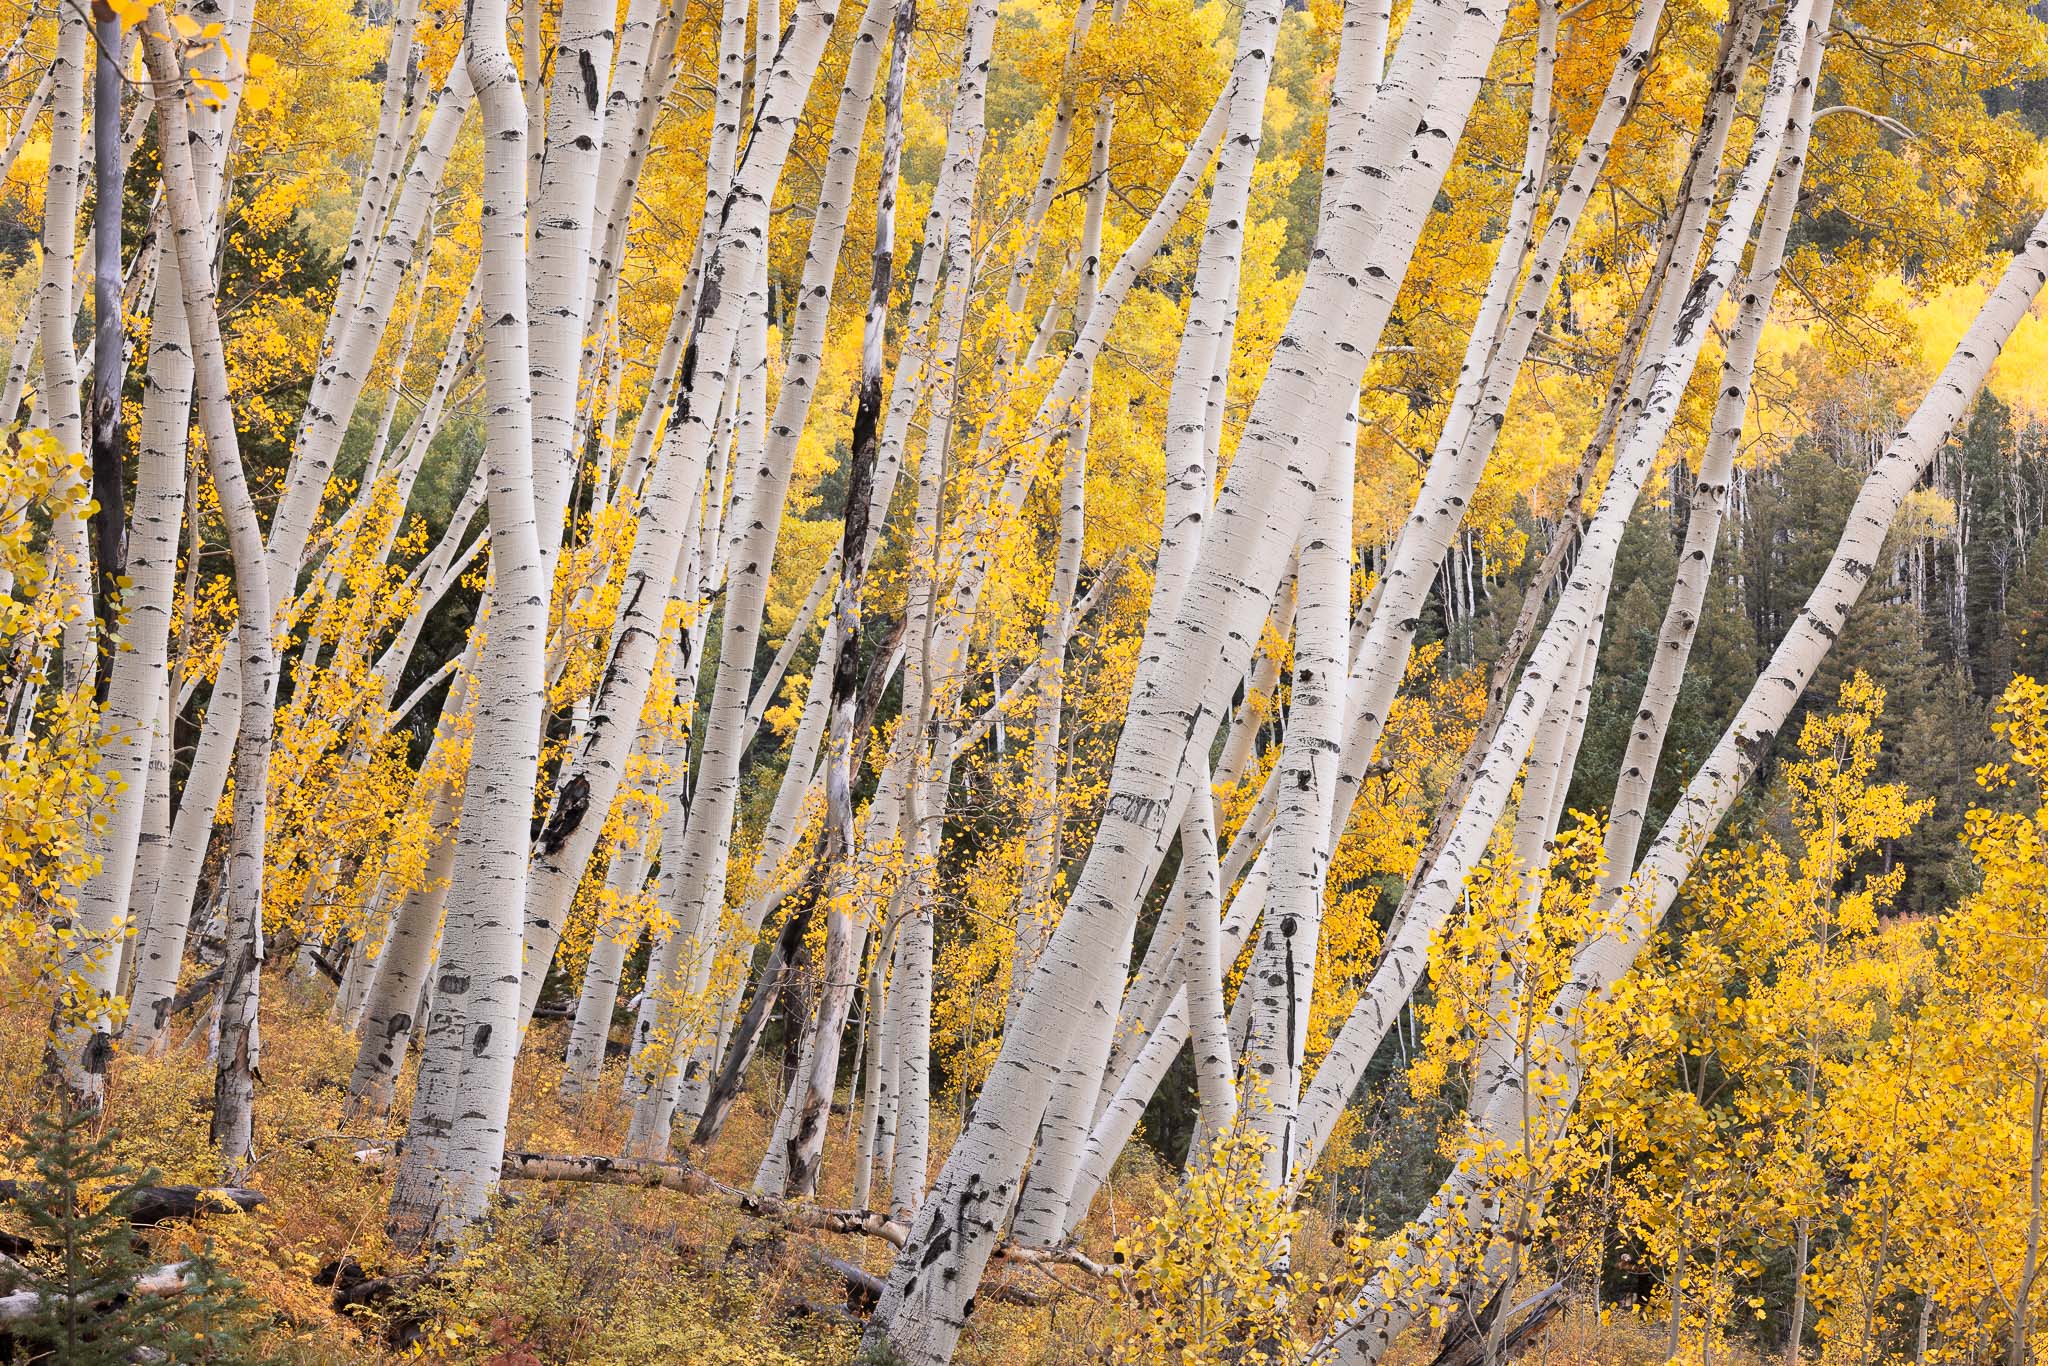
3. Direction of Light
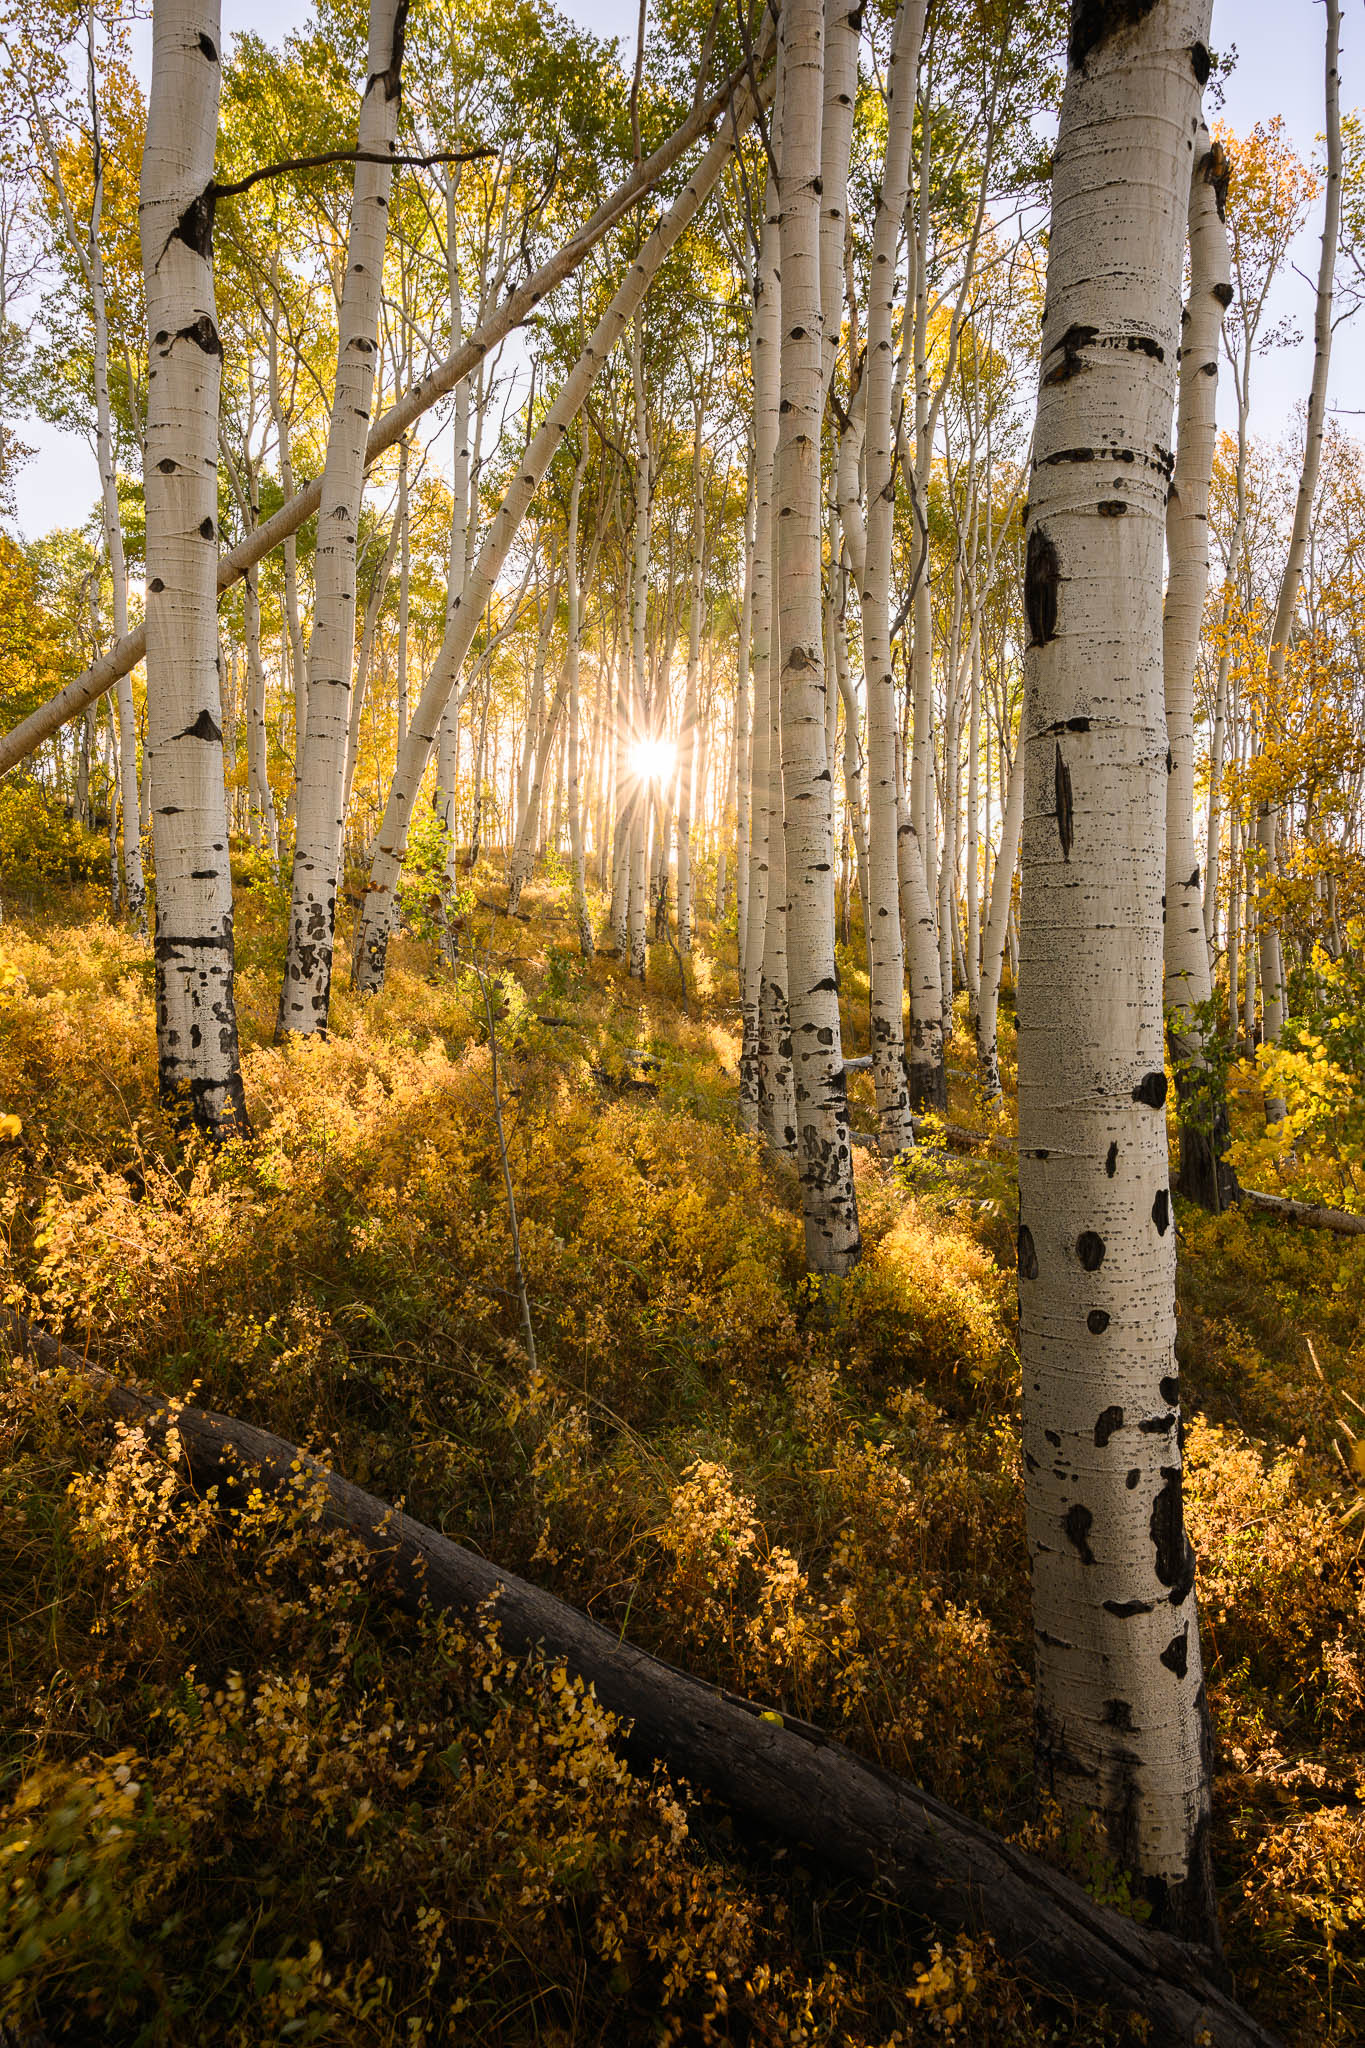
Light is the most important part of photography, and if you’re taking pictures in a forest, you have lots of control over the direction of light. Compose toward the sun for backlighting; away from the sun for front light; sideways for side light. It’s straightforward, but when you’re in the field, it can be easy to forget how much control you really have.
What type of light should you aim for? If you’ve ever tried shining a flashlight through a leaf to see its intricate structure and beautiful colors, you probably know what I’m about to say: backlighting is awesome!
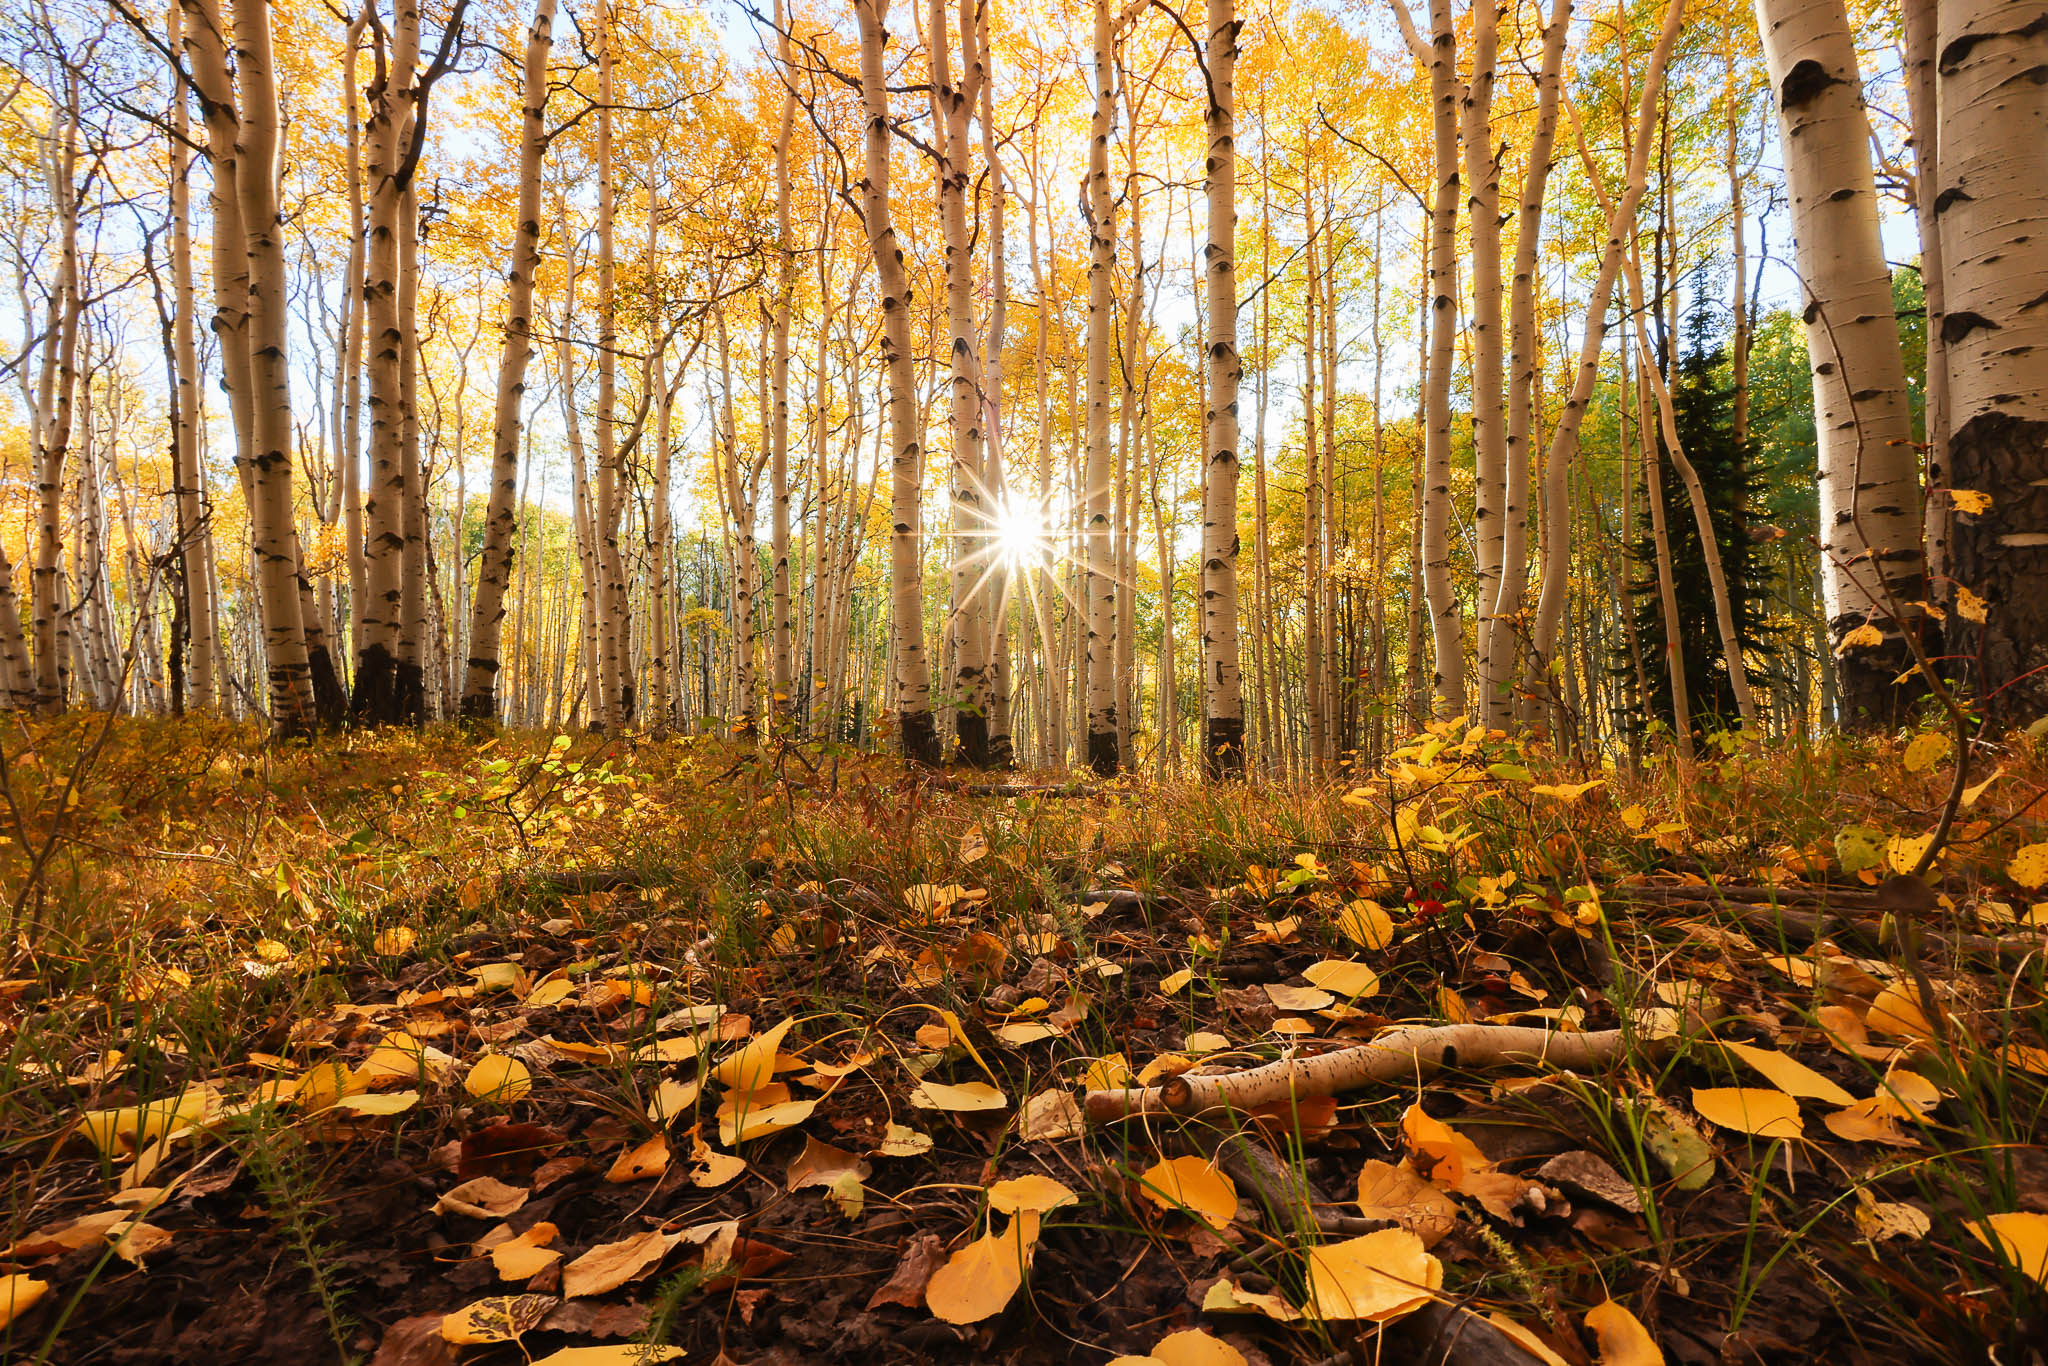
Generally speaking, you’ll get more vivid photos and less chaotic compositions if you photograph trees when they’re backlit. No, it’s not the only way to take good fall colors photos – but if you’re struggling with harsh shadows and busy compositions, backlighting will help. It’s one of the best ways to simplify a photo of fall colors.
Here’s another example (just a couple of quick phone snapshots with no color edits) to show the same aspen forest in two different directions. I took these photos just seconds apart from one another, and personally, I like the colors of the backlit image more:
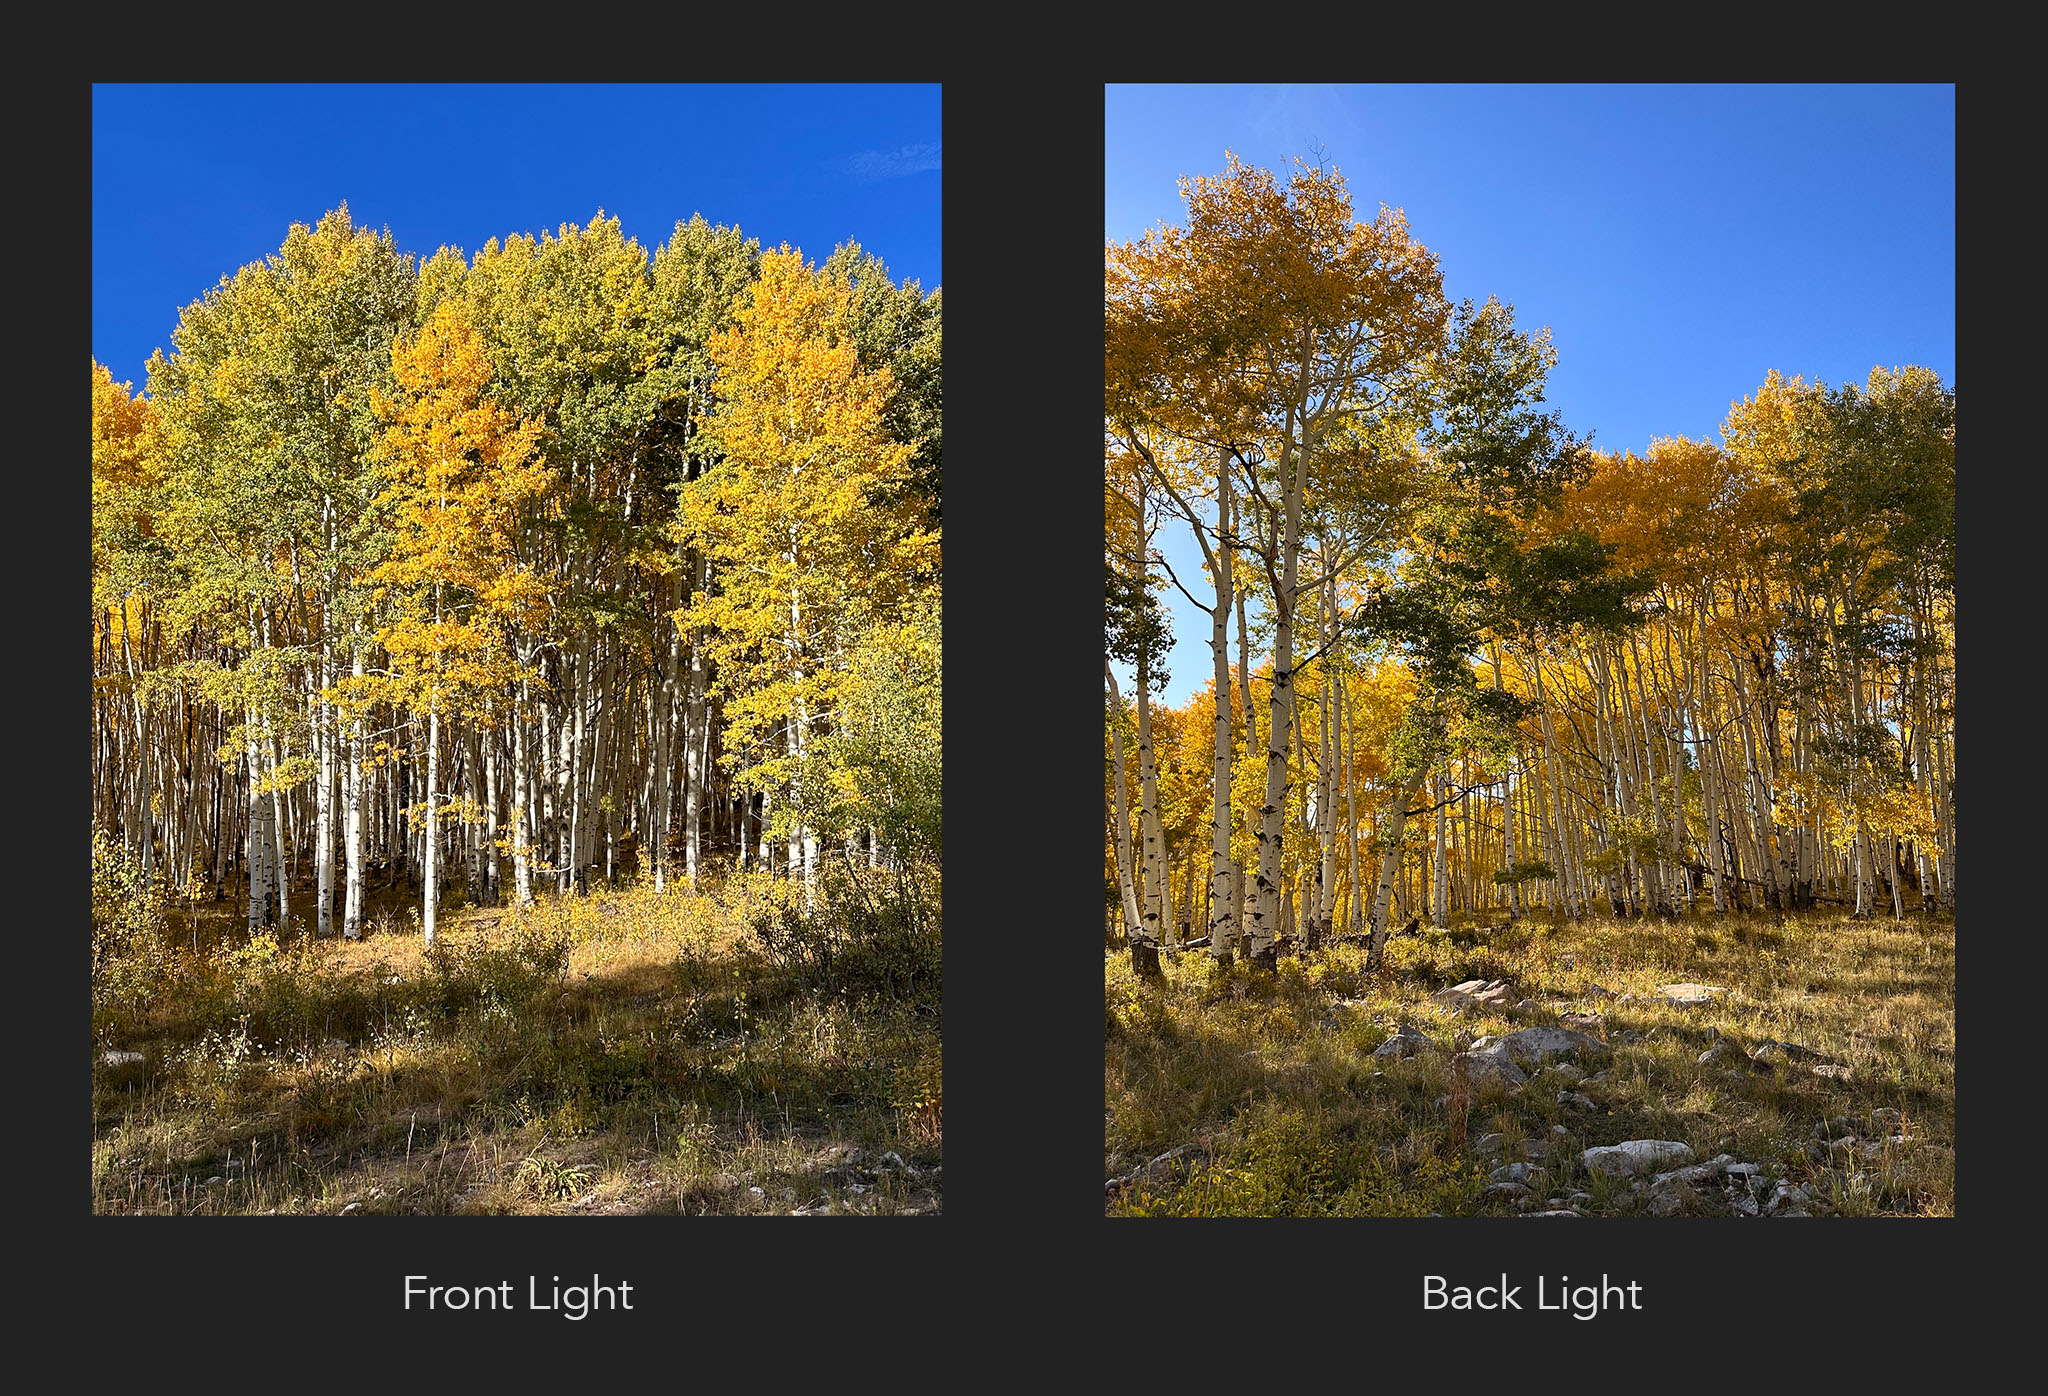
Even if you prefer the photo with front light, clearly, the direction of light is very powerful for fall colors photography. Depending on where you face, you can capture totally different moods in your photos, even at the same landscape.
4. Time of Day
As much as I love backlighting for photographing the fall colors, there are exceptions. Closer to sunrise and sunset, the sun may not be bright enough to backlight a whole forest effectively. As a result, the leaves may be less vivid when backlit, not more. Here’s an example of what I mean:
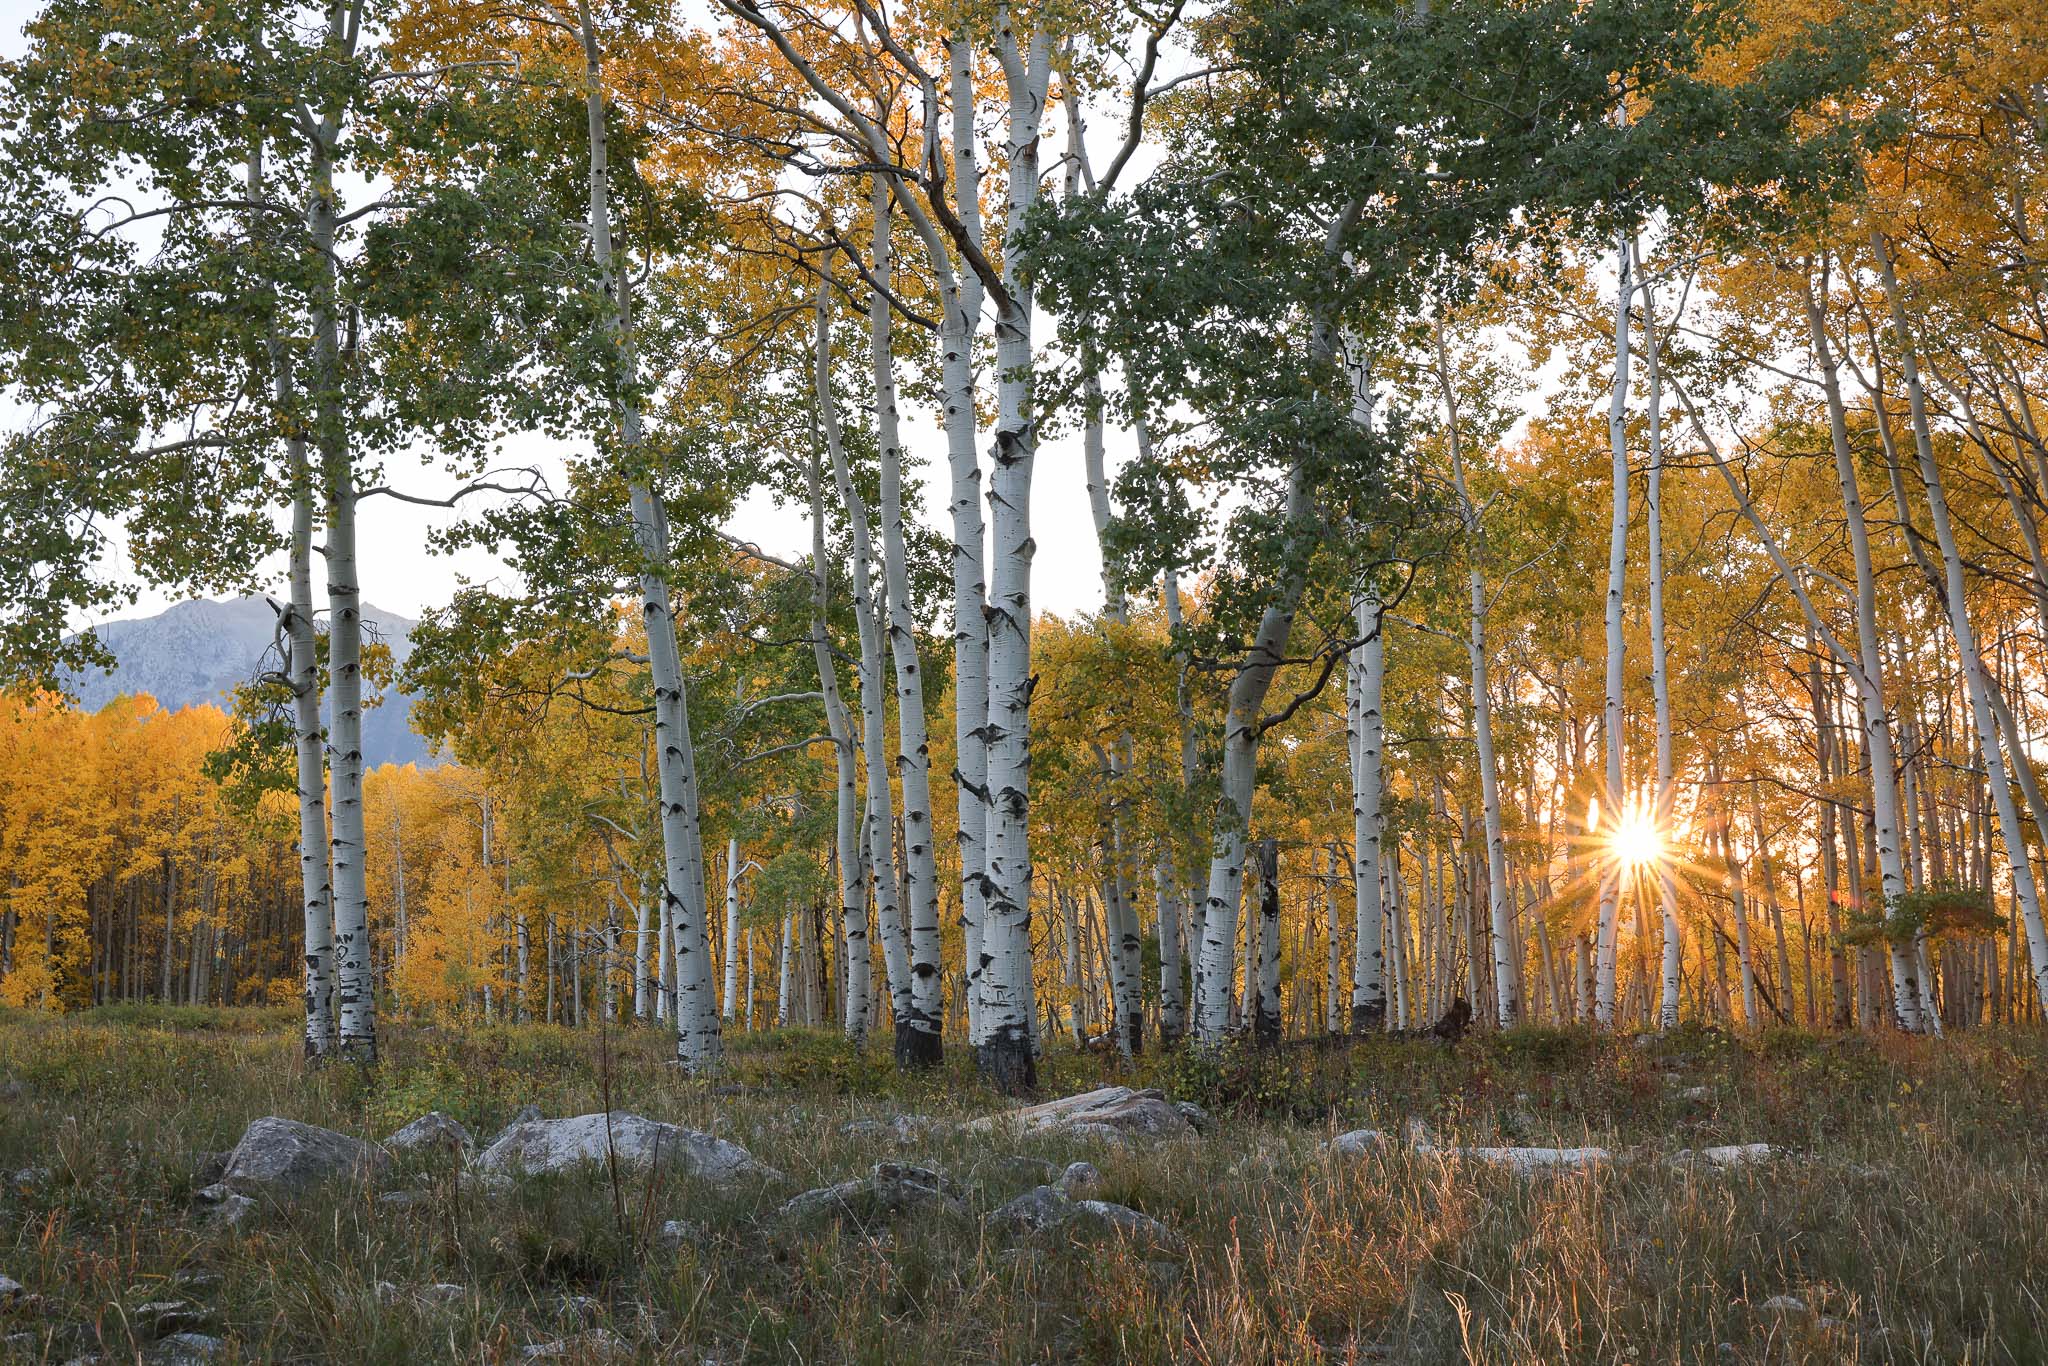
While this isn’t necessarily a bad look, sunrise and sunset are two times of day where I usually seek out front or side light instead. The sun’s rays at golden hour will land on the vivid autumn leaves and produce some beautiful colors.
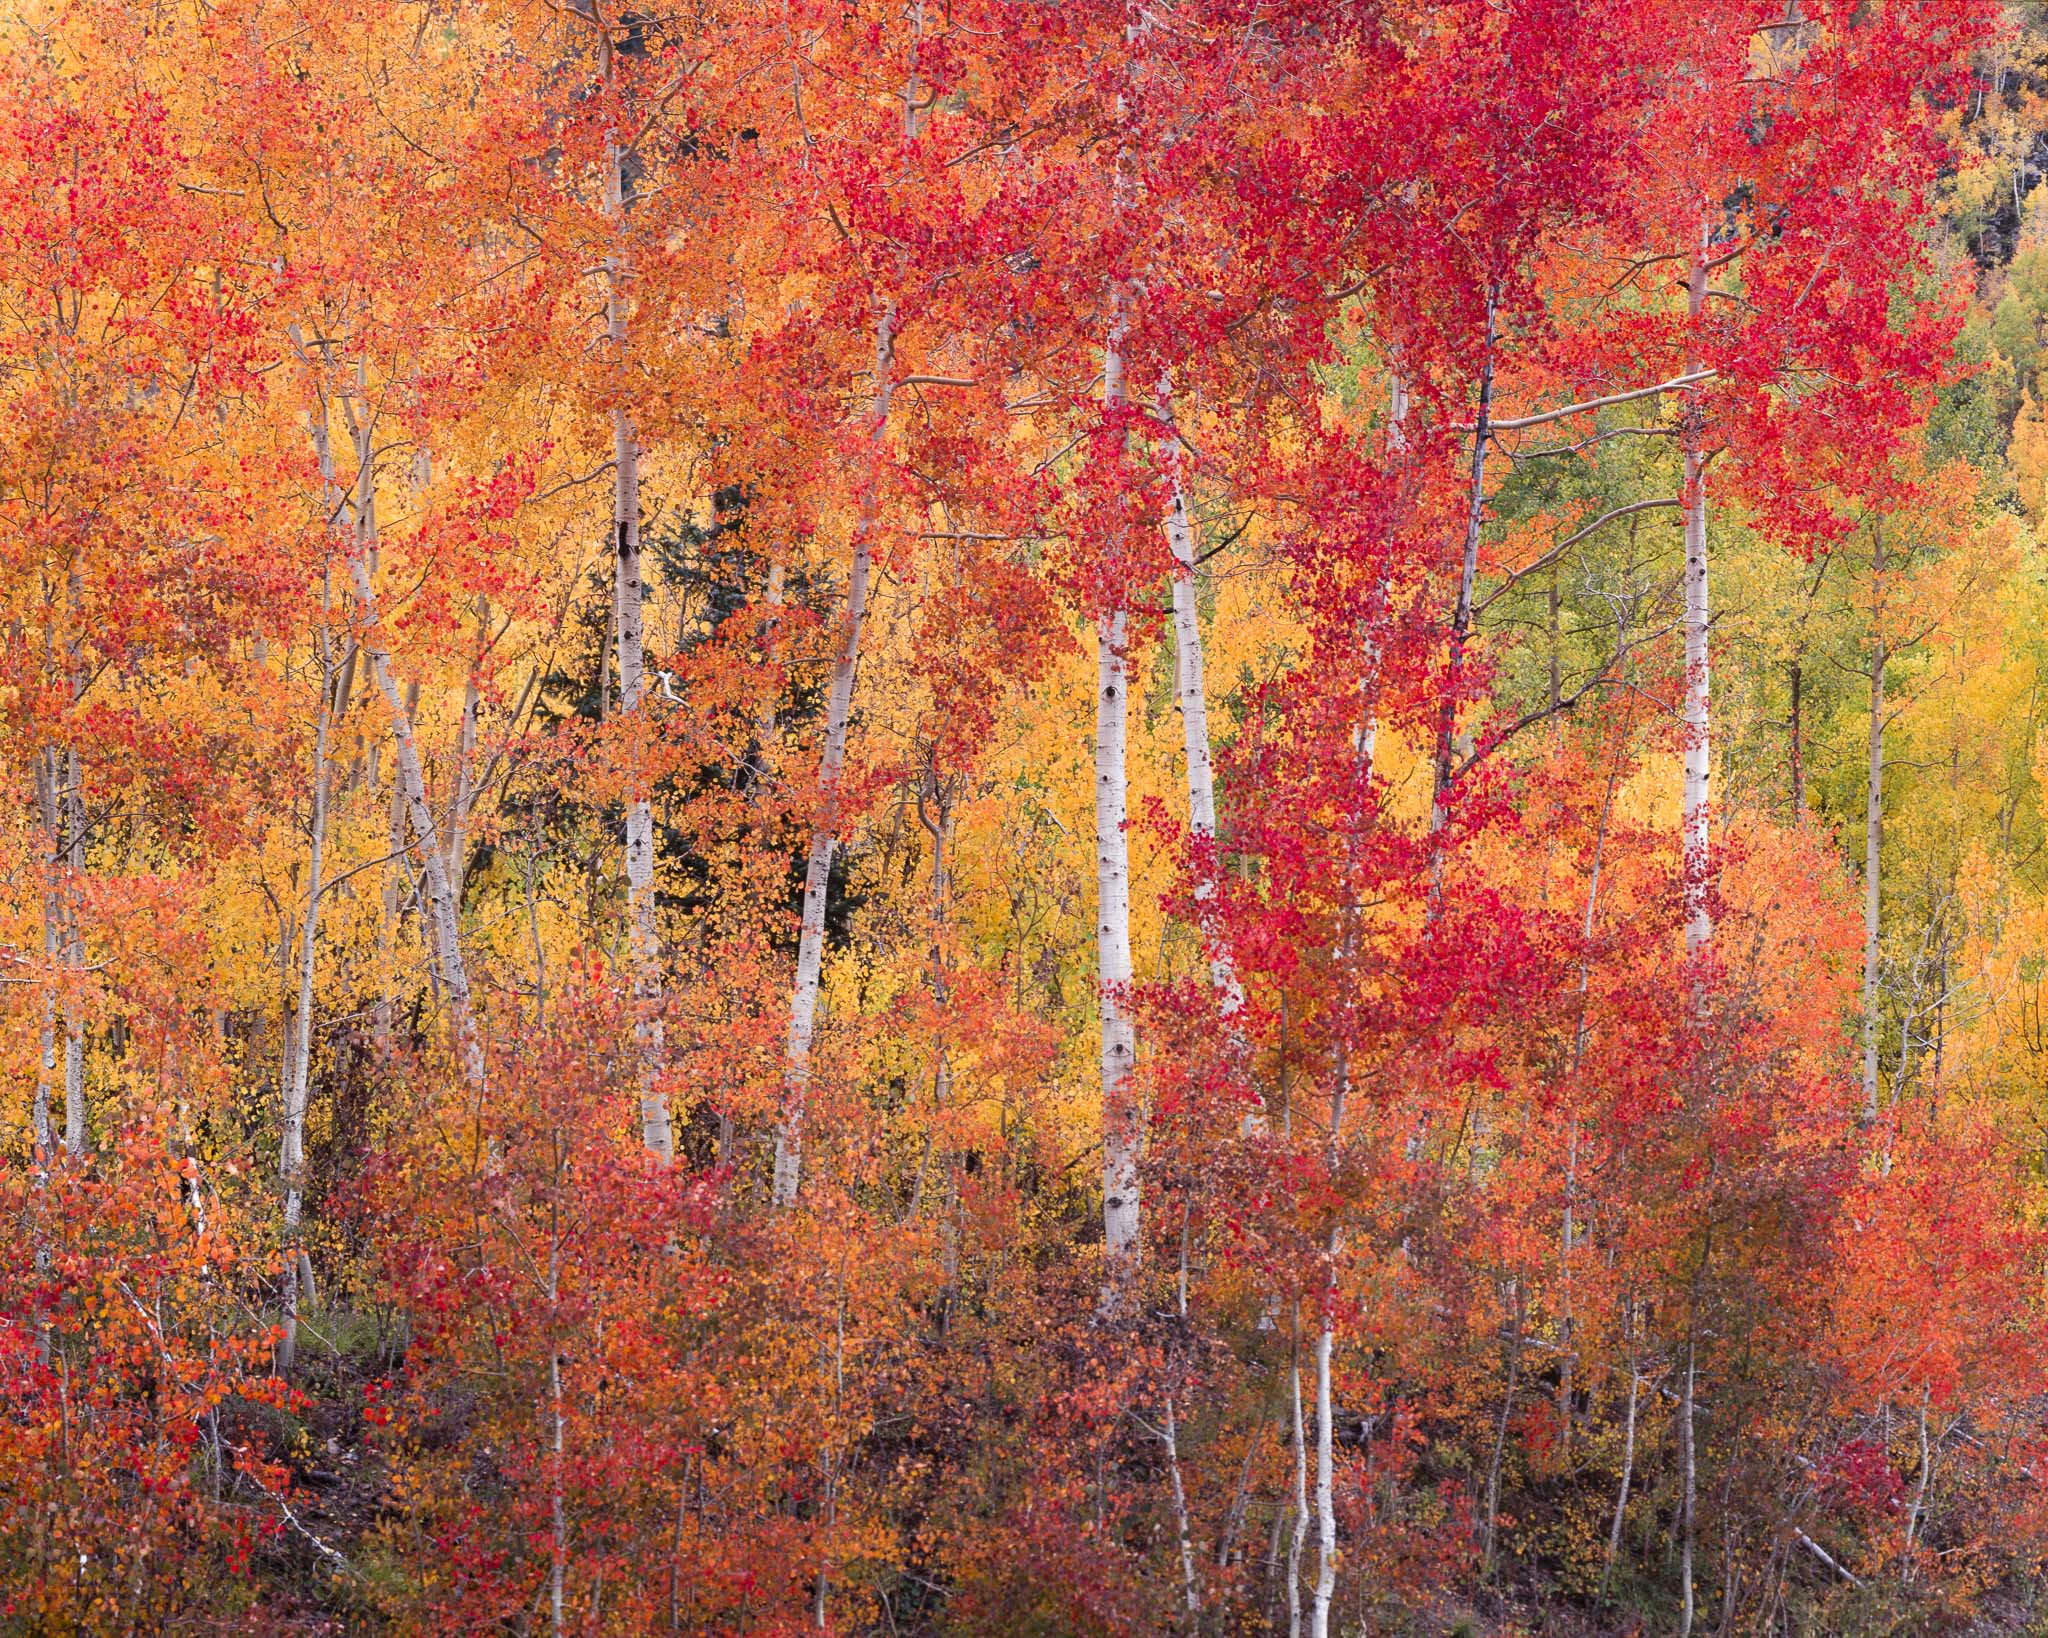
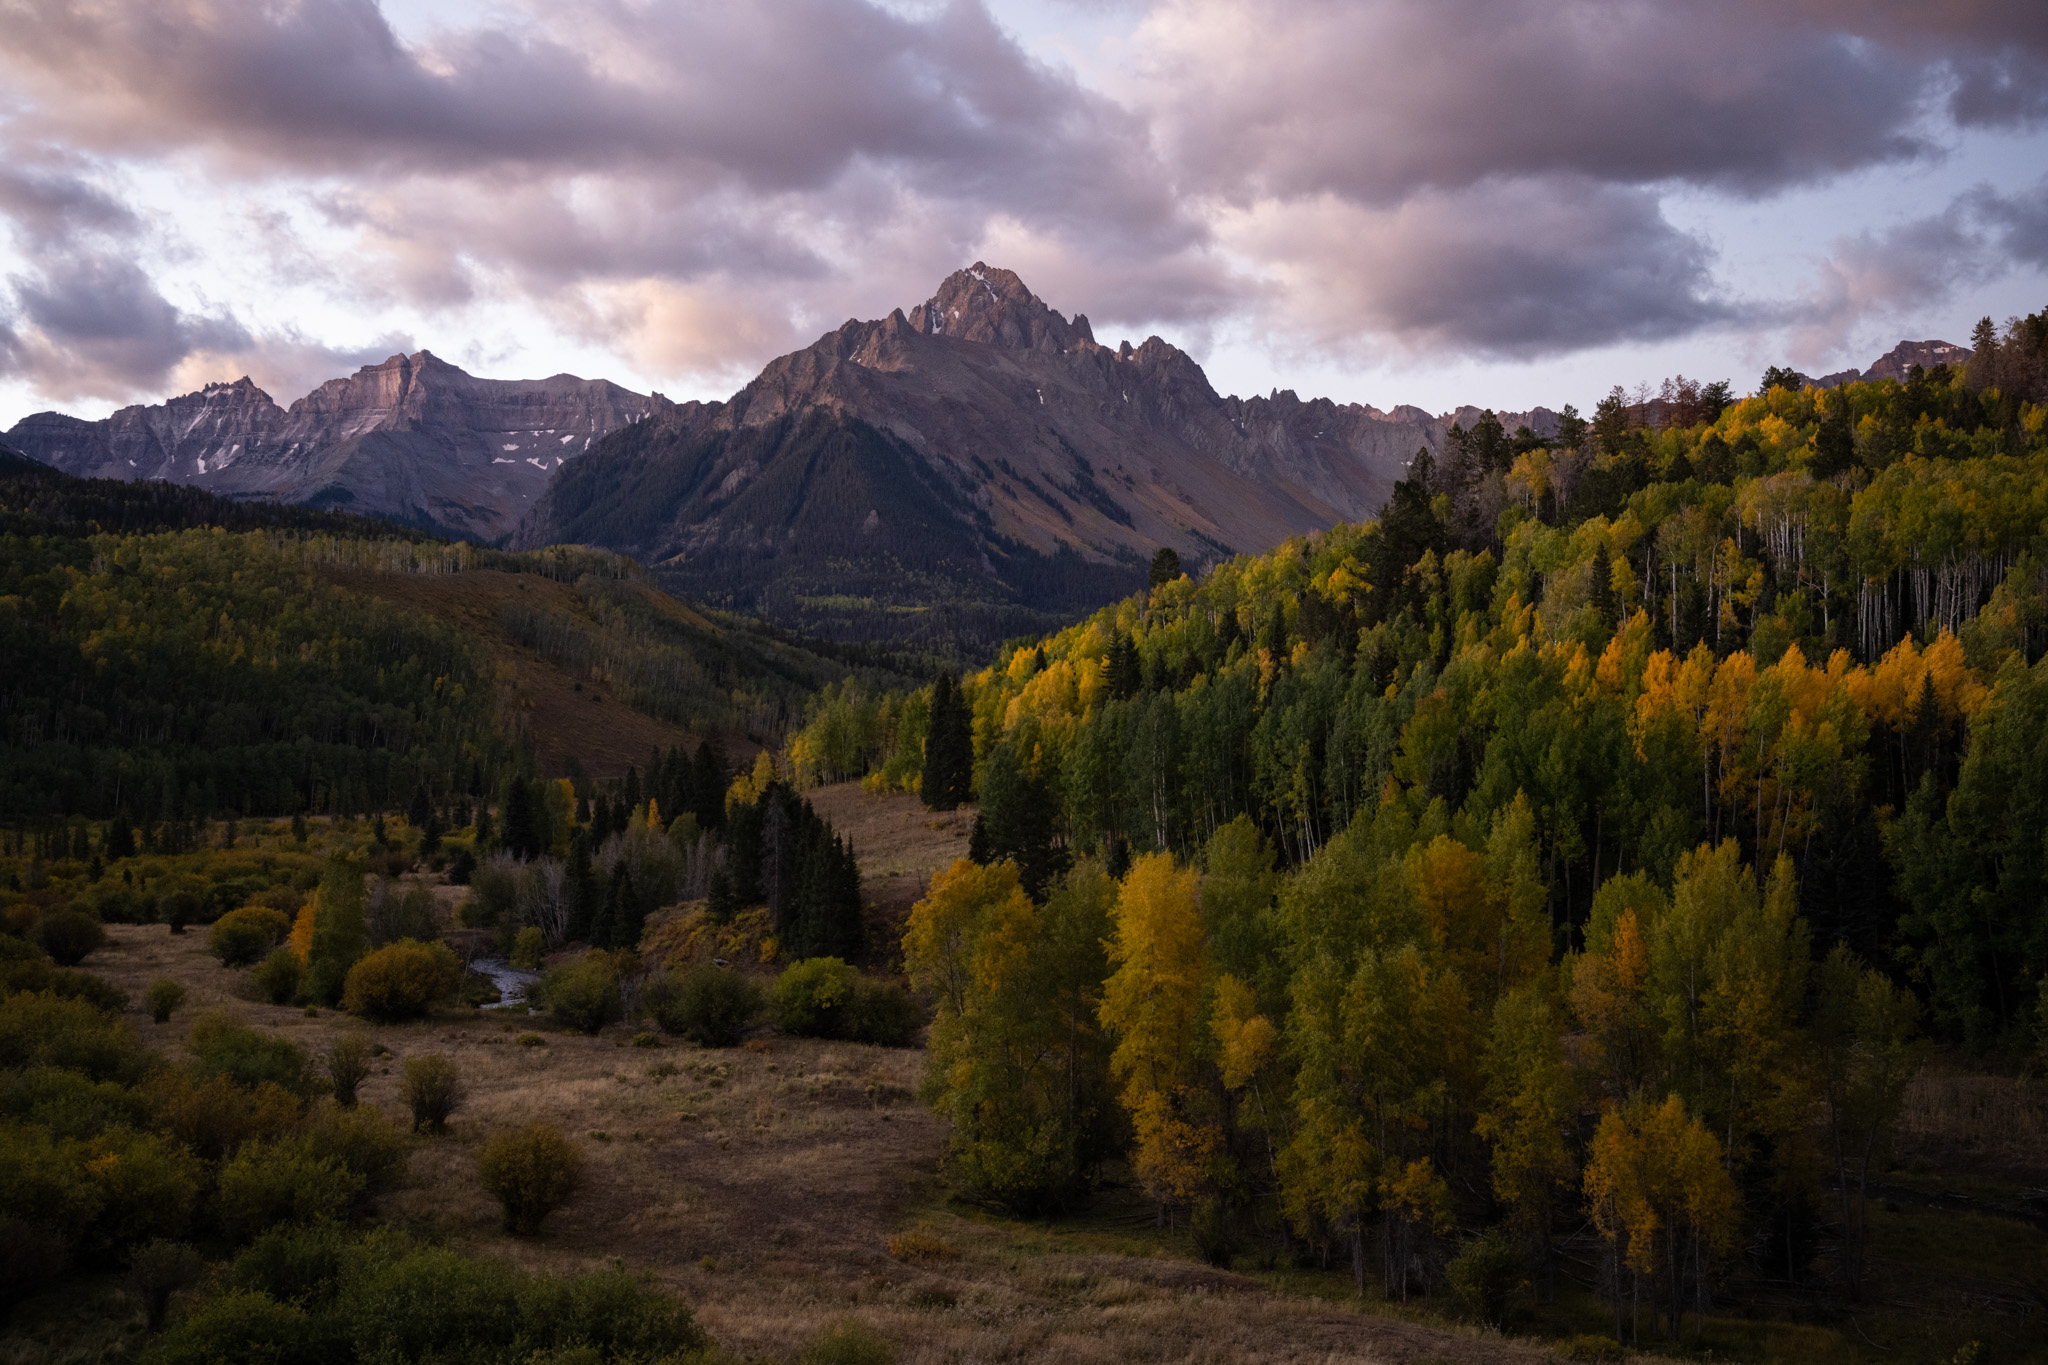
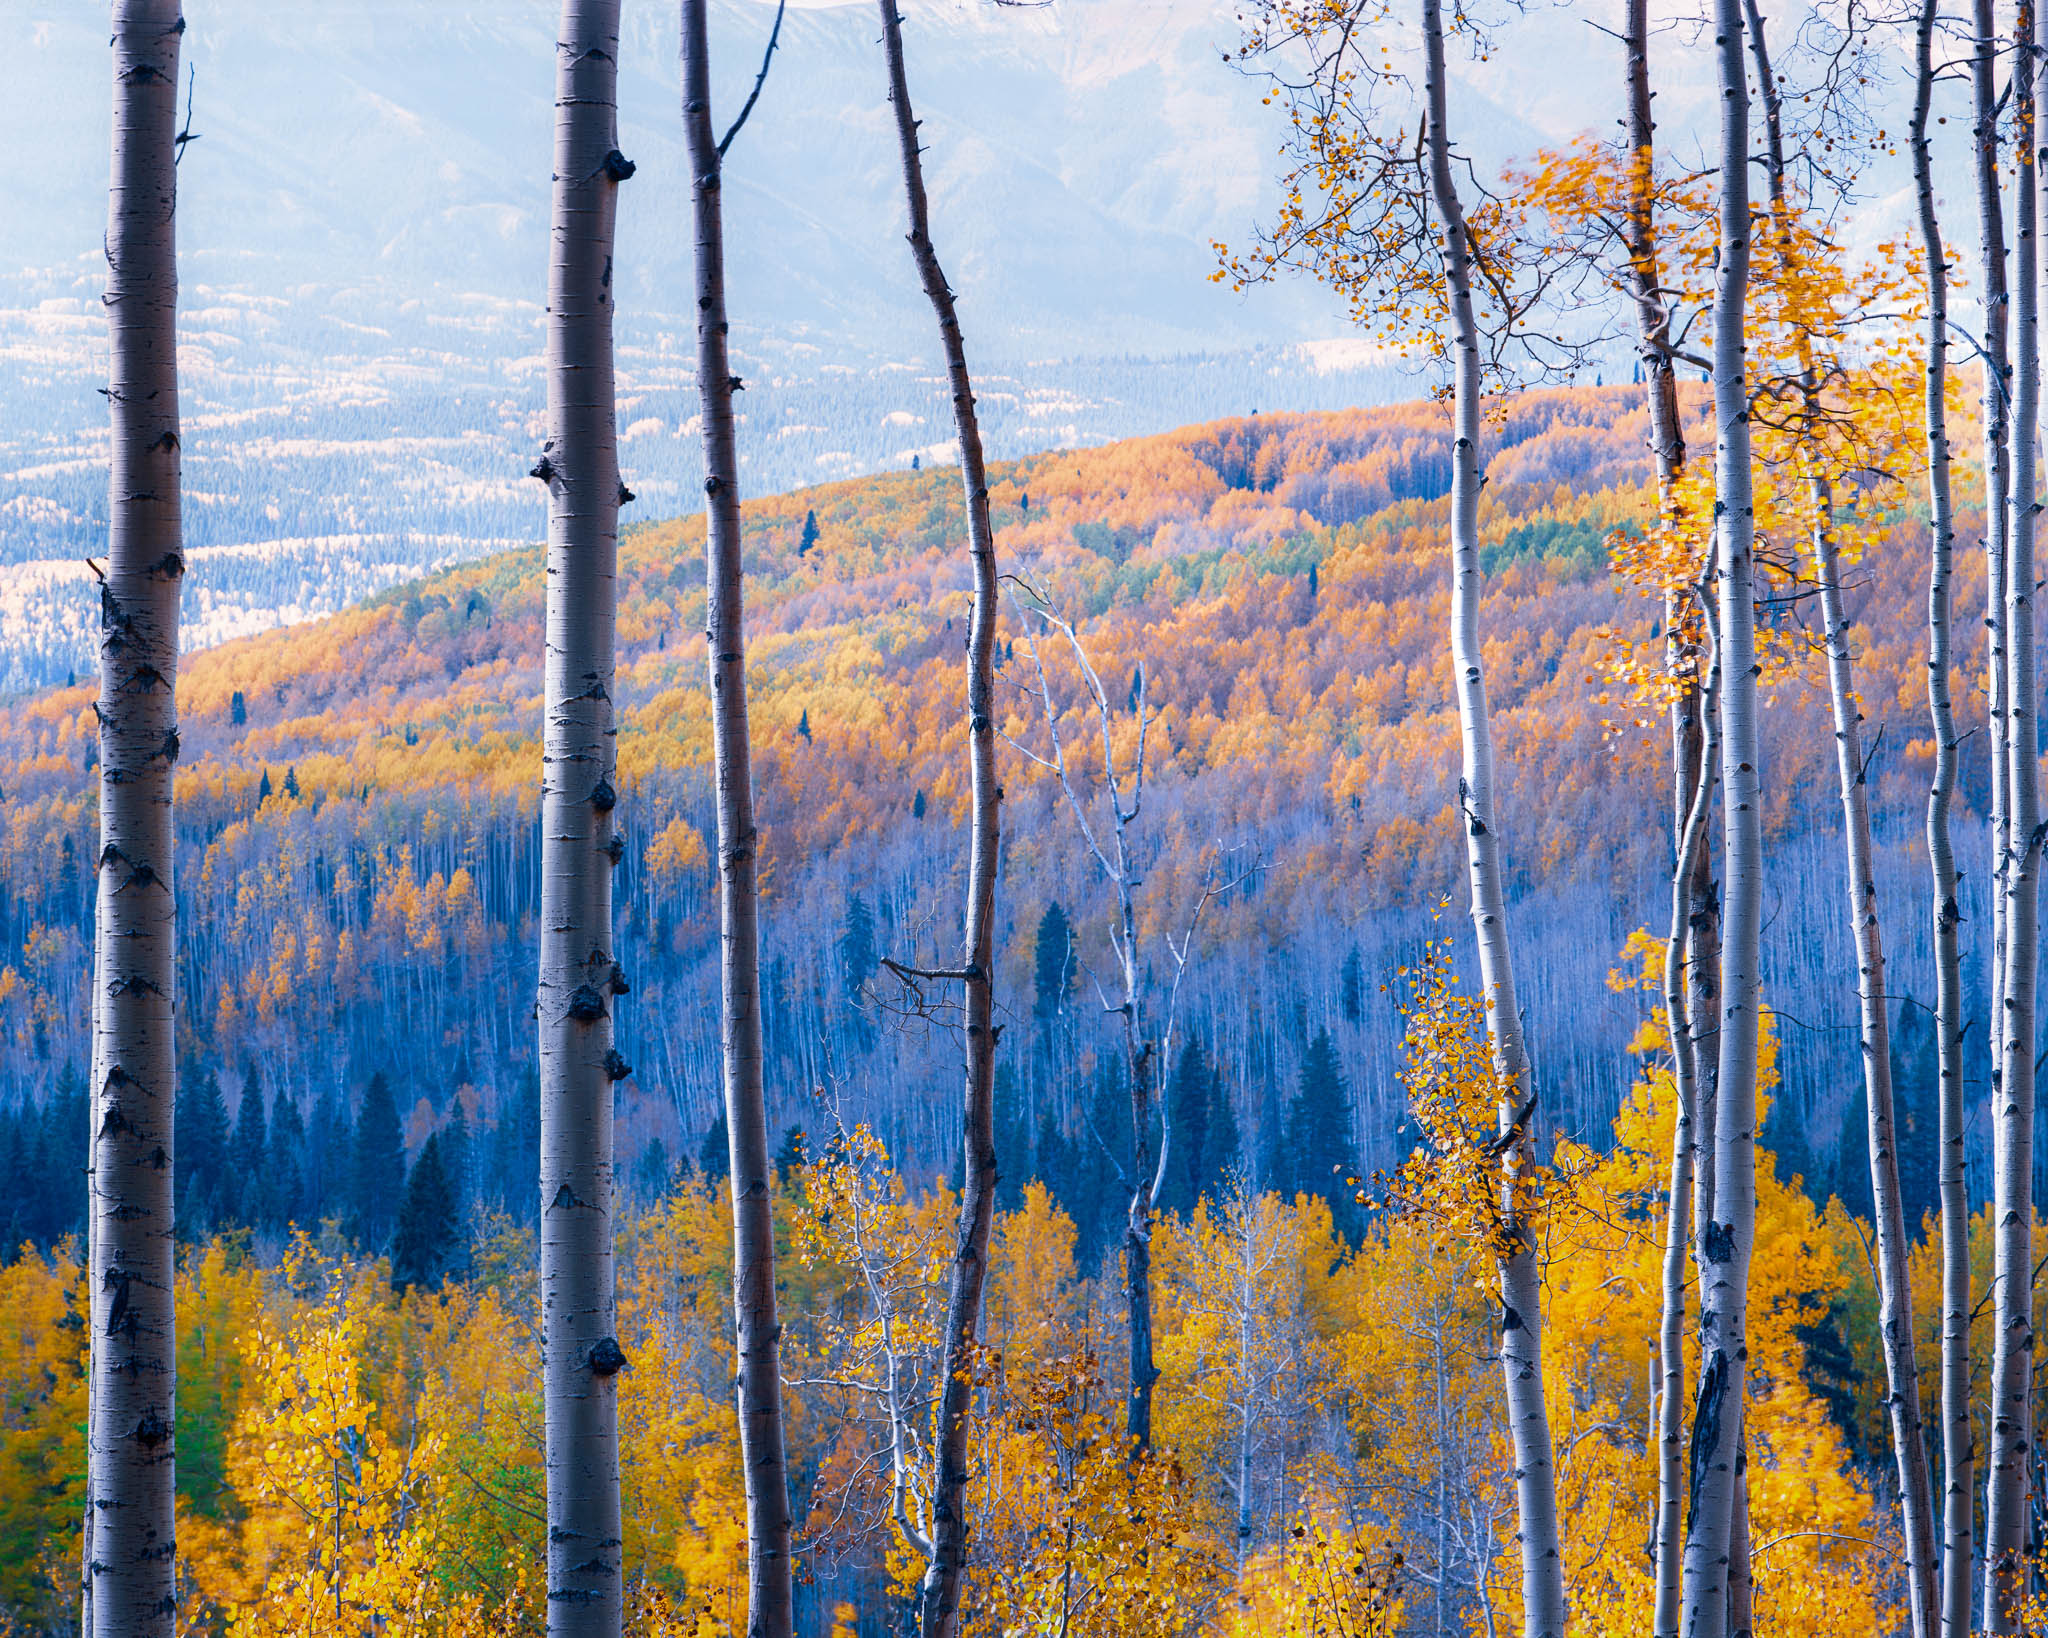
5. Composition
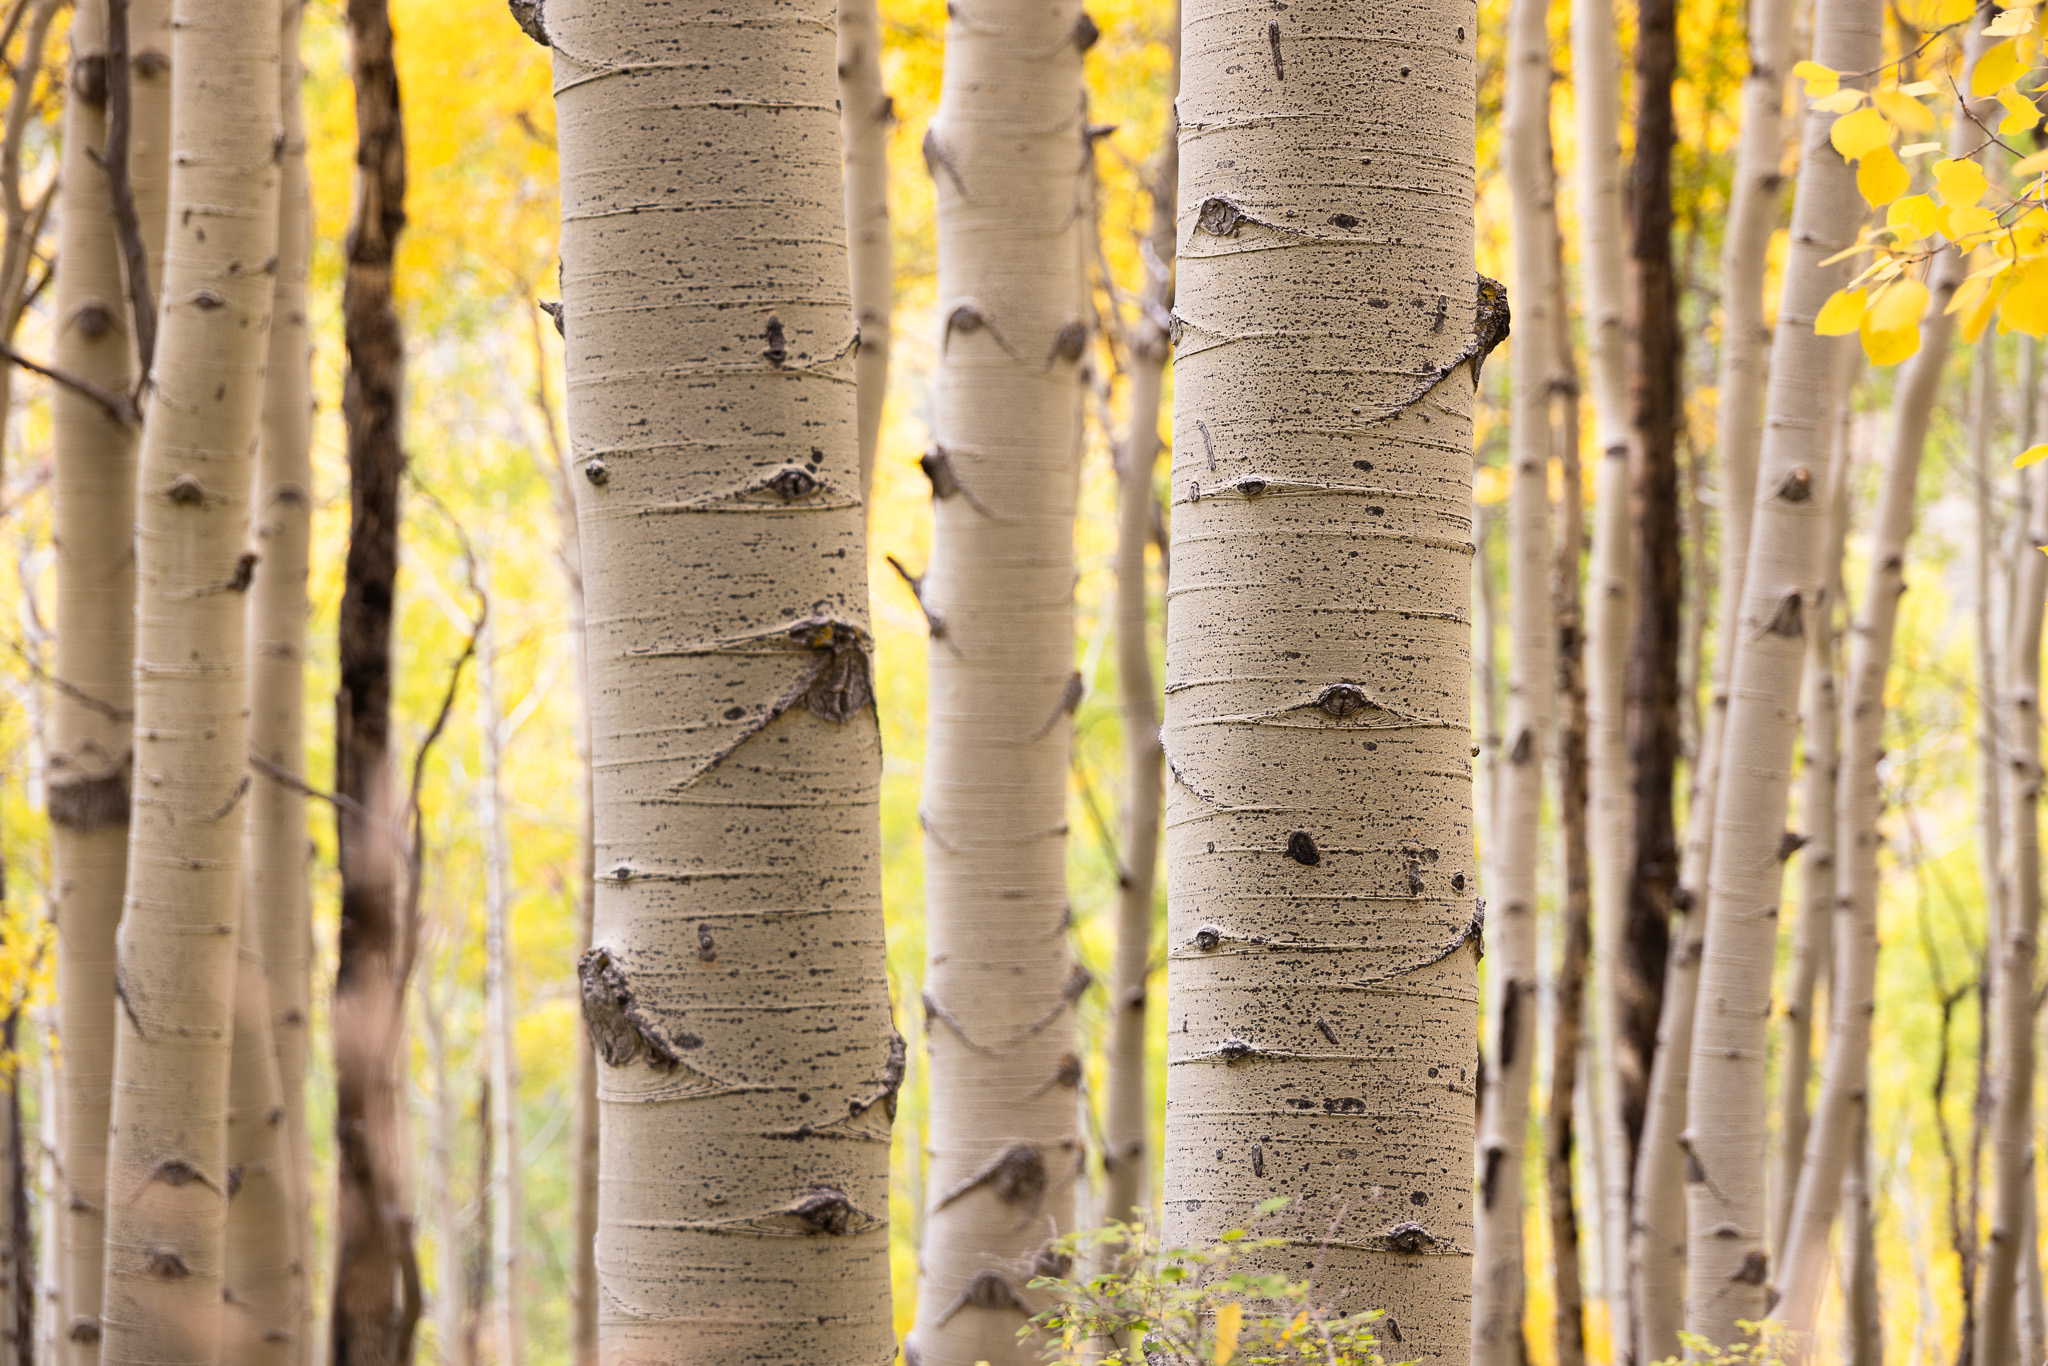
Finally, my favorite topic in photography – composition. It can be difficult to compose forest scenes in a pleasant way because there is simply so much going on. Even if you follow my tip from a moment ago and seek out backlighting, your photos still could be too chaotic if you aren’t careful.
One thing you can try is to seek out abstract compositions. Abstract photography eschews the idea of a single main subject in favor of an emphasis on patterns and details. Stand back and zoom in, and you’ll achieve a sense of compression that makes the three-dimensional forest look like a tapestry of color.
Another option is to seek out a clear subject and allow any other fall colors to act as a backdrop around it. You can accomplish this with a shallow depth of field or simply through careful composition. The subject can be anything – the sun, a particular tree, a road through the forest, or even a distant mountain (where the fall colors may be just small parts of the scene). The key for photos like this, however, is that the subject stands out in some way compared to its surroundings.
NIKON Z 7 + NIKKOR Z 24-70mm f/4 S @ 39mm, ISO 1250, 1/6, f/4.0
In short, you could aim for an abstract composition or for a photo with a distinct subject, but either way, you need to be deliberate about it. Otherwise, it’s too easy to end up with chaotic composition given how busy most forest scenes tend to be.
Conclusion
I hope this article inspired you to go out and photograph some fall colors! They can be some of the most beautiful and rewarding subjects in landscape photography, but it’s not always easy to take good photos of them. Sometimes, the more beautiful a subject is, the easier it is to fall into “snapshot” mode where we just point and click without thinking through the photo.
With these tips in your back pocket, however, you’ll find that photographing the fall colors is an easier process with a higher keeper rate! Like most of landscape photography, it’s all about light, subject selection, and composition. Keep that in mind, and your photos of fall colors can be almost as lovely as the trees themselves.
Thank you for this timely information as always, Spencer!
That last shot with the 8×10 is gorgeous
Thank you, Roy. I really love that spot in person and visit there every chance I can!
I generally shoot jpeg (with a RAW backup) which I hope isn’t blasphemous around here, but I like to try to get it right in the camera and don’t love (am not good at) editing. And what I’ve found critical to having what I see in the EVF/back screen (mirrorless) match what I’m looking at with my eyes, is white balance. And more often than not, the WB that helps me out with fall colors and in particular sunsets, is the shade setting (on Nikon — I have a Z6).
Having said all of that, if you all at PL ever do a photo editing workshop, I’d sign up for it. I’m also in CO.
You could just experiment with the editing program of your choice and teach yourself the basics. Set aside an hour or two, and just work on a copy of your images (with both your camera’s inbuilt jpeg adjustments, and the raw version of the same image) which you think have potential (colour, composition etc). Crop it, experiment with the sliders etc, import and export to different file formats. If you do something which you can’t reverse, just delete it and start again. For Lightroom, a good source of advice is The Lightroom Queen (Victoria Bampton), and for Capture One there is a big user community (linked via the program itself) or The Image Alchemist. Other programs would have something similar freely available. There are plenty more. Money spent on guides, webinars and courses is often much better value than satisfying your GAS! Thom Hogan is another very good source of information, both hardware and software. Last resort, Google is your friend.
Not blasphemous at all – everyone has their own method! White balance is crucial to this whole process, whether you’re adjusting it in post or if you’re baking it into a JPEG.
We’ve considered doing a photo editing workshop before. I don’t know if there’s interest in people flying out to meet us in person for something like that, but I could do a virtual workshop if there’s interest. And anyone who lives nearby, like you, could drive out and join us in a classroom we would rent somewhere.
Nice article again :-) , did you also use a (dydium) redhancer filter combined with slide films in the past? With digital it’ll give somewhat strange results and difiiculties with the white balance. Nowadays it’s used to block light pollution from Sodium and Hg-lamps to obtain better contrast while imaging the milky way. Well, broadband spectrum LED lights are basically ruining that strategy as well.
Thank you, Bjorn! I haven’t tried one yet for my film photography. It looks like a good tool – I’ll see if I can find one to test.
Yes–autumn color, especially aspen! Love the backlighted yellow–but in the Tahoe region of the Sierra I’ve found especially spectacular Red aspen. That will vary a lot by location, timing, and whistling the right tune, but that only makes it more of an adventure.
Art, those bright red groves are an incredible sight! I haven’t see a lot of them this year in Colorado so far. Just one or two, way in the distance.