Whether it’s an iconic skyline or some cool local architecture, photographing a cityscape can be a great way to create interesting compositions without having to trek into the wilderness. Getting successful cityscape shots requires a bit of preparation, gear knowledge, and location scouting. In this beginner’s guide to photographing a cityscape, I’ll detail all the decisions you need to make in order to take better photos of cities.
Table of Contents
Equipment Choice
Just like with the broader category of landscape photography, cityscapes can be shot with almost any capture device. I’ve used everything from my iPhone to advanced tilt-shift and telephoto lenses. Any choice of lens and camera can work, depending on the scene and compositional choices you make.
That said, let me go through the most important considerations when choosing equipment for photographing cities.
Lenses
To capture the most “typical” cityscape, you’ll want to consider the focal lengths in the middle of the range. In 35mm equivalent terms, this means 24mm through about 70mm.
Ultra-wide and fisheye lenses can work (I particularly enjoy working with them in dense urban scenes), but will be less versatile than a midrange zoom.

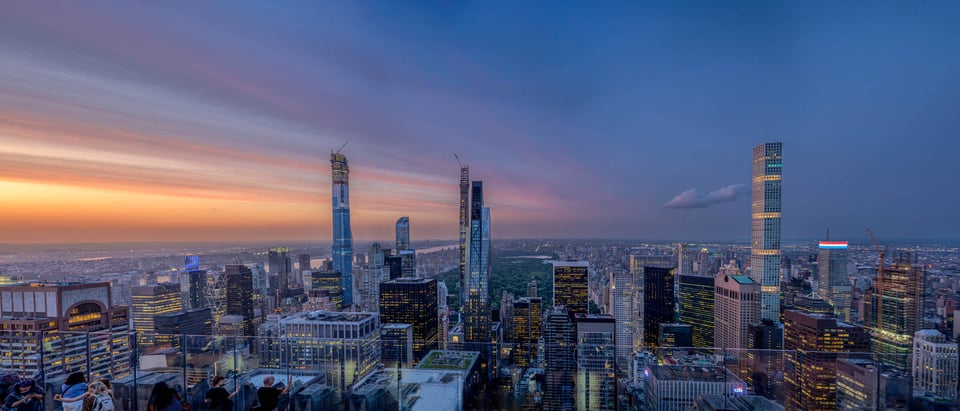
Telephoto lenses can also work well for cityscapes, especially if you’re standing a bit further away from the city and want to take a classic skyline photo. When you stand back and zoom in, there’s a nice perspective compression that makes all the buildings look the right size relative to one another. I took the following panorama at 140mm.
When it comes to lenses, I find that a fast aperture isn’t a priority for cityscapes. Instead, I’d rather keep my gear light and less noticeable. I primarily bring f/4 zooms instead of faster-aperture zooms and primes, and I’ve rarely found them lacking.
Tripod
Perhaps against the conventional wisdom of “traveling light,” I like to bring along a tripod to capture cityscapes. While it can be cumbersome and might not be allowed everywhere, having a tripod can make a big difference.
On one hand, the value of a tripod should be obvious for nighttime and blue hour cityscape photos. But it can be just as useful in daytime. During the day, a tripod allows you to use a neutral density filter or image averaging to minimize pedestrians in your photo.
Fortunately, your tripod for cityscape photography is unlikely to deal with loose surfaces and super long lenses. In general, you can get away with smaller, travel-sized tripods. I’ve previously used a Gitzo Traveler tripod, but any light and sturdy tripod will work here.
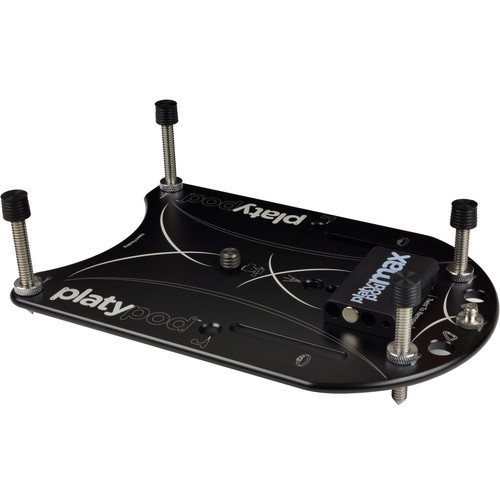
If you’re in an area that is particularly unfriendly to tripods, don’t despair. There are options like the Platypod and GorillaPod that both take up less space and are less likely to attract the attention of security. You can also clamps like the RRS Multi-Clamp that allow you to attach your camera to a fence or railing.

As a final option, don’t disregard just bracing your camera on a railing, platform, or other stable surface. You may not be able to use multi-second exposures, but you can still get better results than shooting entirely handheld.
Other Accessories
I like to use a nondescript bag for cityscape photography. Bright orange, multi-pocketed bags are great in Zion, but they tend to spotlight you in NYC. Think Tank discontinued my current bag, the Perception 15, although their Urban Approach line seems like a reasonable replacement.
For additional accessories, you can consider adding some filters. The first one I’d consider packing are a strong neutral density filter to reduce the light coming into my lens (again, to use longer exposures and minimize pedestrians during the day). The other is a circular polarizer to reduce or enhance reflections off glass and water. Other filter options have never fit into my workflow, but you may have some personal favorites.
Lastly, I consider my phone an essential piece of gear when shooting cityscapes. Between navigating, calling an Uber, booking tickets, and storing previously scouted spots, it’s even more essential than ever. Throwing a portable battery bank into your bag to keep your phone charged is never a bad call.
Camera Settings
The choice of camera settings for a cityscape can vary widely depending upon the scene in front of you, but some photographic maxims still apply. I’ll go through the main considerations here.
ISO
First, you’ll want to choose the lowest possible ISO that allows an appropriate shutter speed. If you’re shooting from a tripod, this means you’ll almost always be able to shoot at base ISO. Unlike a lot of landscapes, there are often few surfaces affected by the wind, and blur of moving objects like cars can even be desirable.
Aperture
Medium aperture choices like f/5.6 to f/8 (or the equivalent on your camera) work well for cityscapes. It’s rare that you’ll need extensive depth of field, nor the ability to isolate a particular subject, when photographing distant buildings. So, since f/5.6 to f/8 are usually the sharpest apertures when depth of field is no concern, they’re a great choice.
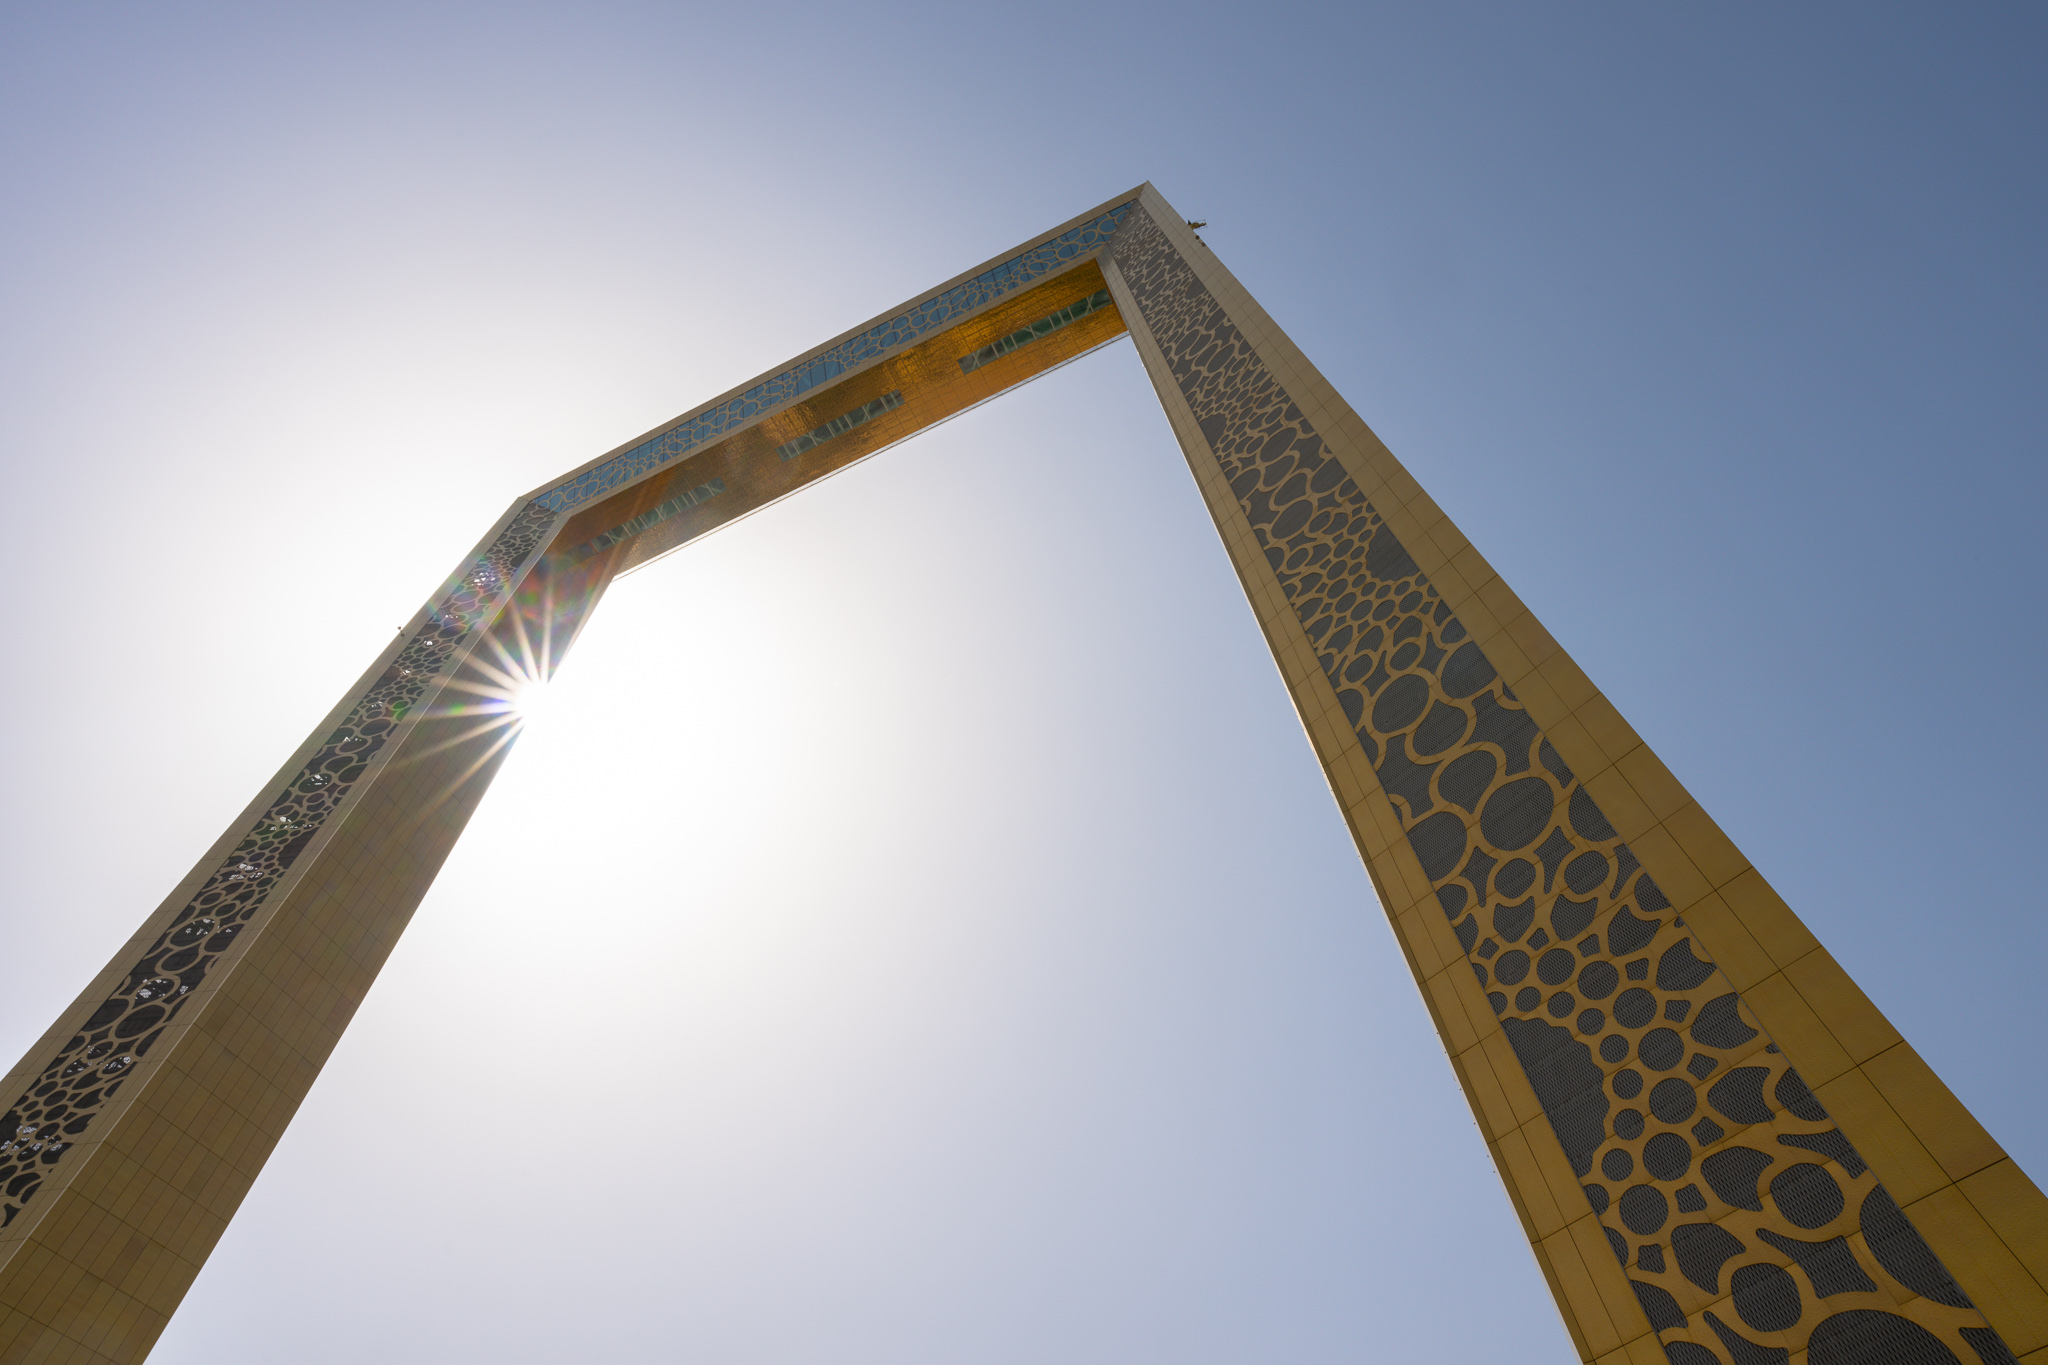
On some lenses, choosing a very narrow aperture like f/16 can enable “starbursts” or sunstars around point light sources. This can be useful for nighttime shots with street lamps, for example, as well as daytime photos where the sun is in your picture.
Shutter Speed
As for shutter speed, the same universal rules still apply. When shooting handheld, aim for a shutter speed that follows the reciprocal rule, or faster. (In other words, at 50mm, a shutter speed of 1/50th of a second or faster.) This can reduce the impact of shaky hands.
Even if you’re shooting from a tripod, you need to make sure that your shooting platform is stable. Sometimes, a skyscraper or dock can move slightly. It may be imperceptible to you in person, but it will show up in your photos. Even the rumble of a busy street can be enough to jolt your tripod, so always zoom into your photos from time to time to make sure they’re sharp.
VR/Image Stabilization
Vibration reduction or image stabilization is also useful, particularly when shooting handheld towards blue hour. While you’ll still want to turn it off when on a tripod, VR has saved a number of my evening and low light shoots.
File Formats
If you’re still shooting JPEG, consider making the switch to RAW. Cityscapes can contain very mixed lighting sources, covering the gamut from daylight to fluorescent bulbs, LEDs, and neon signs. Having the greater latitude to adjust your exposure and choose your white balance can make a big difference. Check out our guide on RAW vs JPEG for more information.
Focus
When it comes time to focus, I find autofocus is a great choice over manual, just for ease of use. Cityscapes are often rich with contrast and details that your camera’s autofocus system can easily latch onto. My preferred setup is a single, selectable point in AF-S mode (AKA single-servo autofocus on some cameras). Since cities don’t move much, complicated tracking modes and AF-C are both unnecessary.
For the trickiest focusing situations, however, I do like to zoom in on the live view and check focus manually. This is occasionally necessary in low-light conditions, or when photographing bright, backlit points of light that can fool your autofocus system.
In any case, there’s usually enough time in cityscape photography to slow down and get your focus exactly right. Whether that’s autofocus or manual, it’s worth the effort.
Bracketing
For some cityscapes, having a degree of flexibility in your exposure can be very helpful. Shooting a bracket of exposures doesn’t mean you have to merge them to HDR (although this can be easy and natural in Lightroom). In some cases, it simply means you have more room for error when choosing the best single exposure.
To enable bracketing, most cameras have a BRKT button or menu option. You can also just do it manually by setting a positive or negative exposure compensation when taking pictures. For most cityscapes, I find that +1, 0, and -1 EV is sufficient, although you can include +2 and -2 in very contrasty situations.
Composition
Cityscapes present a vast range of compositional opportunities. Thanks to the huge range of subjects, you’re free to create almost any composition you can imagine. Whether it’s a vertical focusing on a singular unique building, a panorama covering the entire skyline, or anything in between, cities are rich with creative possibilities.
Compositional rules aren’t written in stone, and some of my favorite shots break the rules anyway. But I’ll go through some of the important considerations I think about below.
Single Buildings
Instead of capturing an entire skyline, you can focus your composition on a single noteworthy building in the city. It’s akin to a landscape photo of a waterfall or tree instead of a wide vista. The “single building shot” lets you highlight something out of the ordinary, or to distill down an environment to a quintessential vignette.
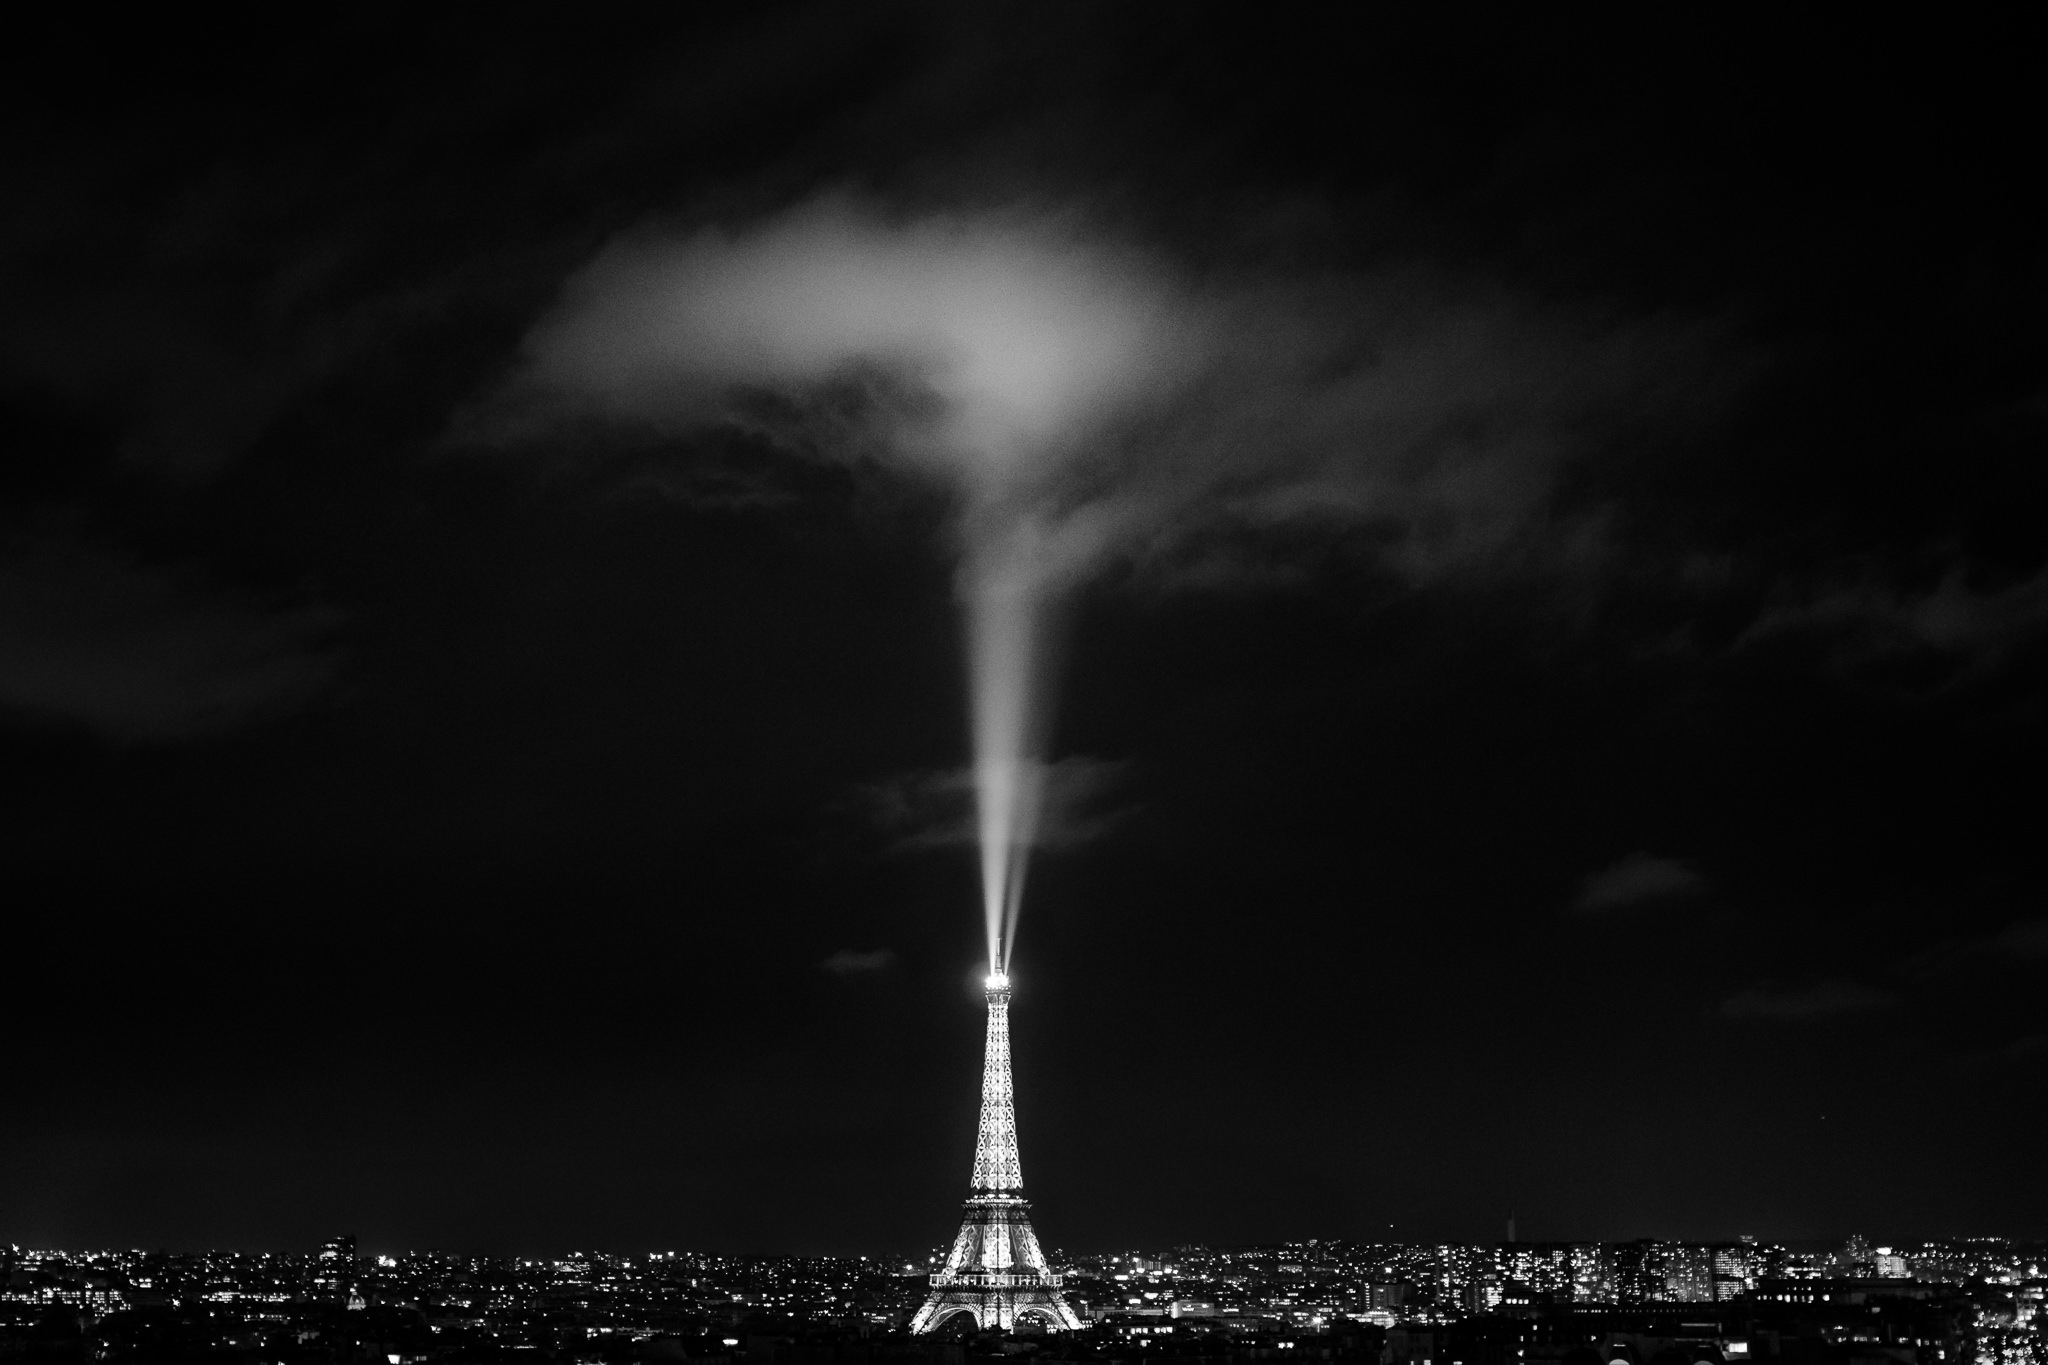
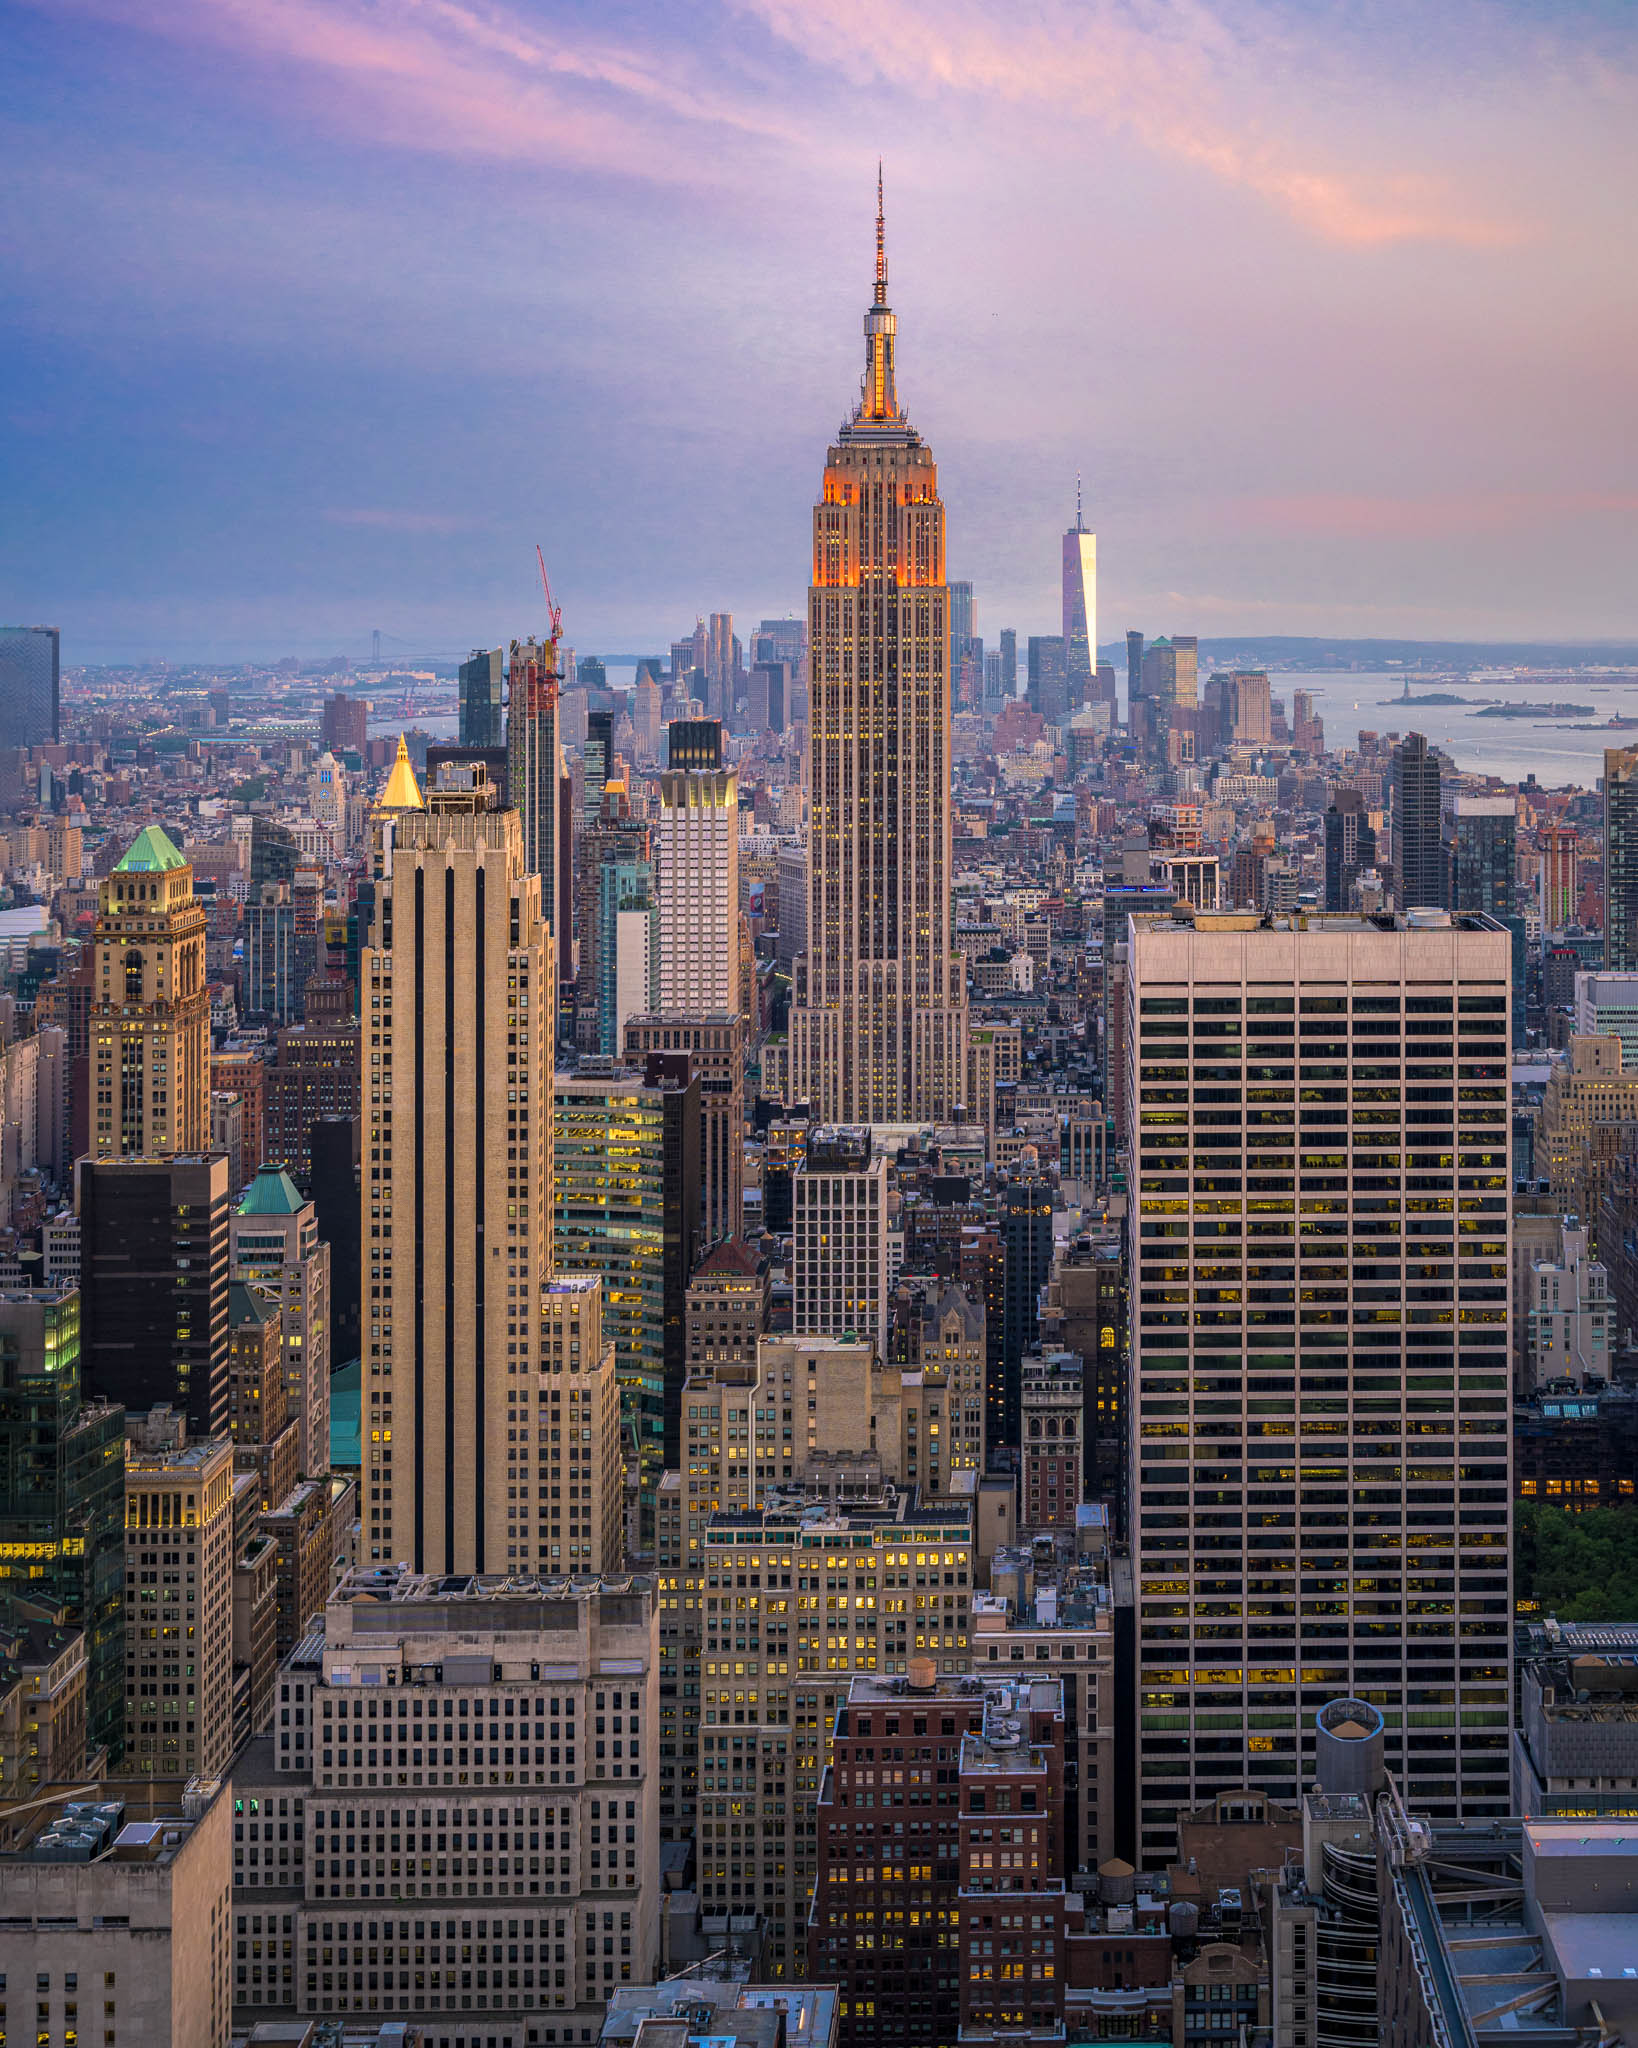
I also consider this type of photo to be virtually required at certain sites: Think the Eiffel Tower in Paris or the Empire State Building in NYC. You and I both know that if you go there, you have to get “the shot” of that iconic building. While some might argue that this stifles creativity, a part of my enjoyment from photography comes from documenting my trips, and I just wouldn’t feel complete without at least grabbing that one frame.
Composition on these iconic single buildings can be difficult, as every conceivable angle has already been explored, snapped, uploaded, and probably made into a postcard. Depending on how you want to approach the shot, you can go for the classic postcard angle, and look at it as an exercise in technical skill, or mix things up and get creative with it. Perhaps you can make a reflection off a passing taxi or puddle work, or go even more abstract with it, capturing an iconic part of the building instead.
On any single building, however, one of the most important things to watch is your camera’s tilt and vertical alignment. Tilting your camera back to capture a skyscraper can lead to an issue with your photo’s verticals, making it look like the building itself is falling backwards.
While this can be corrected for with a tilt/shift lens (an expensive, dedicated piece of kit), you can also make keystone correction adjustments in Photoshop or Lightroom. Using the Transform panel in Lightroom or ACR, you can adjust the vertical tilt of the photo and straighten out those lines. This isn’t free, however, as it’ll effectively crop into your image and stretch some pixels, lowering your level of detail and altering your composition.
Skylines
On the other end of the spectrum, capturing a comprehensive shot of a city’s skyline can also present challenges. One of the biggest is finding a particular subject to anchor your shot. With so much going on in a skyline shot, your viewer may not be able to easily identify a subject.
To help with this, think about the basic elements of composition. You can use leading lines to carry your viewer’s eye across the frame, or patterns in the lights and colors of the city to create a dazzling photo. A little dodging and burning can enhance these effects, directing attention where you want it to go in the frame.
Finding Locations
Depending on the cityscape you’re photographing, finding a new angle may be almost impossible. While this can seem daunting if you’re looking for a completely unique take, it does make it easier to research potential locations. Just by consulting hashtags and local photographers’ social media feeds, you can find plenty of inspiration.
If available, tourist transit options like a hop-on/hop-off bus can be a great option. I’ve been to a number of major cities, and they all offer a similar service: For a day rate, you get a ticket that entitles you to ride a bus that circulates between major tourist points of interest. You can jump on and off subsequent busses and explore major points of interest in the city, at a cheap rate.
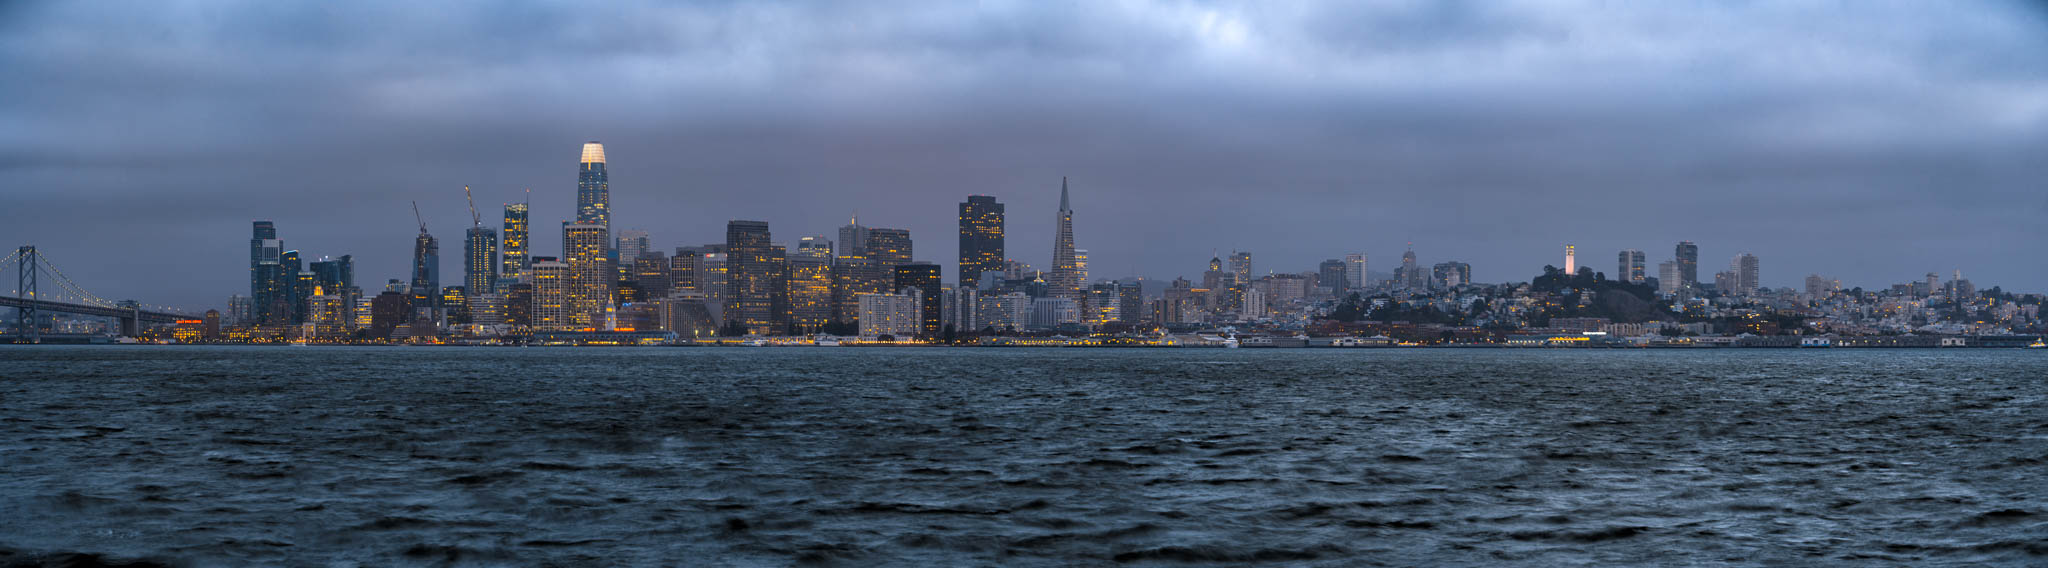
Occasionally, these bus lines will even offer supplemental routes or tours that are even more tailored to photography. In San Francisco, for instance, the line offered a special viewing stop of the city from across the Golden Gate bridge, as well as a special route that went across to Angel Island, among other areas.

Conclusion
Regardless of your approach, photographing cityscapes can be a great way to capture the unique feel of the location you’re at. I hope this article gave you a good idea of the requirements of cityscape photography, and how to take better photos of this exciting subject yourself.
Regarding the reciprocal rule, at a Nikon Q and A in UK, I was informed that for my Z7.2 Japan advises 4x lens but tutors suggested I should get away with 3x. For my 85mm I aim for around 1/250.
I think it’s a case of “more is always better”. Especially with VR, I’ve been able to get away with far less than 1/ the focal length, but it’s not consistent. I like to set auto ISO one notch above the middle option, then adjust based on the situation.
I like your photos here guys! Very well crafted! I agree with your tips, since I am spent 60% of my photography time shooting cityscapes and urban environments. Generally, I prefer prime lenses for the edge to edge sharpness and small size (plus the Aperture, but for my other projects, not so much for cityscapes). There are few zooms that can give comparable image quality to primes and there are expensive and heavy.
What can I add here? Well, the time and weather factor. You can experiment with any time of day/weather/season combination even on the same spot and you will end up with different photos! The reflections on urban surfaces (like windows or metal structures) are dramatically different between dawn and dusk and the shadows creates different patterns as the light changes direction. Also, you can use the mist, the rain or the clouds to your advantage! For those reasons I got in love with cityscape photography… is a genre with endless possibilities.
Alex, killer photos and thanks for sharing the tips. I love the Empire State Building photo. Perfect light!
Thanks! I was fortunate to have great conditions, as I literally had one entry ticket for the viewing platform – I’d love to spend a week or two in NYC just waiting for perfect light, but sometimes you can just get lucky.
You are right about the need for a tripod; verticals and horizontals are extremely sensitive and have to be nailed.
But bear in mind that a tripod can cause lots of problems in an urban setting. You break regulations if you encroach on a sidewalk or road. You can unwittingly violate anti-terrorist laws that prohibit photography in certain sensitive locations. Police frequently think that using a tripod makes you automatically “commercial”, and that this requires an expensive license — both wrong in the US, but try arguing with a cop.
Here’s how to do it: Unless you have a contract with a paying client, or are using a model, your shooting is purely personal. You use a tripod because you are a serious hobbyist, or you have a disability such as tremor (if true; never lie to a cop, ever, this means you). If you do have a paying client, make arrangements ahead of time, with the client paying the fee. If the client won’t pay the fee, he doesn’t want it very badly, does he?
Excellent photos and tips indeed! Thanks a lot for sharing this goodness with us.
When it comes to tripods, a light, compact carbon-fibre tripod is better than any other tripod. Why? Because a tripod that is small and light enough to carry without digging into your shoulders or weighing you down is a tripod you will have be carrying with you instead of leaving it at home or in your hotel room. I’ve had very good experience with a carbon-fibre Sirui traveler tripod that collapses to just 13″ and weighs just over 2.4 pounds incl. the ballhead. Yet it holds the weight of a mid-size DSLR with a standard zooms lens, so it would easily hold a DSLM, too.
Nonsense: It’s not 13 but 16″ for the tripod. The weight is correct though.
I think a tripod is a great option, but as some other commenters have mentioned, they aren’t always allowed in certain locations. I like a travel tripod and some of the smaller alternates like a tabletop tripod or platypod for keeping a lower profile.
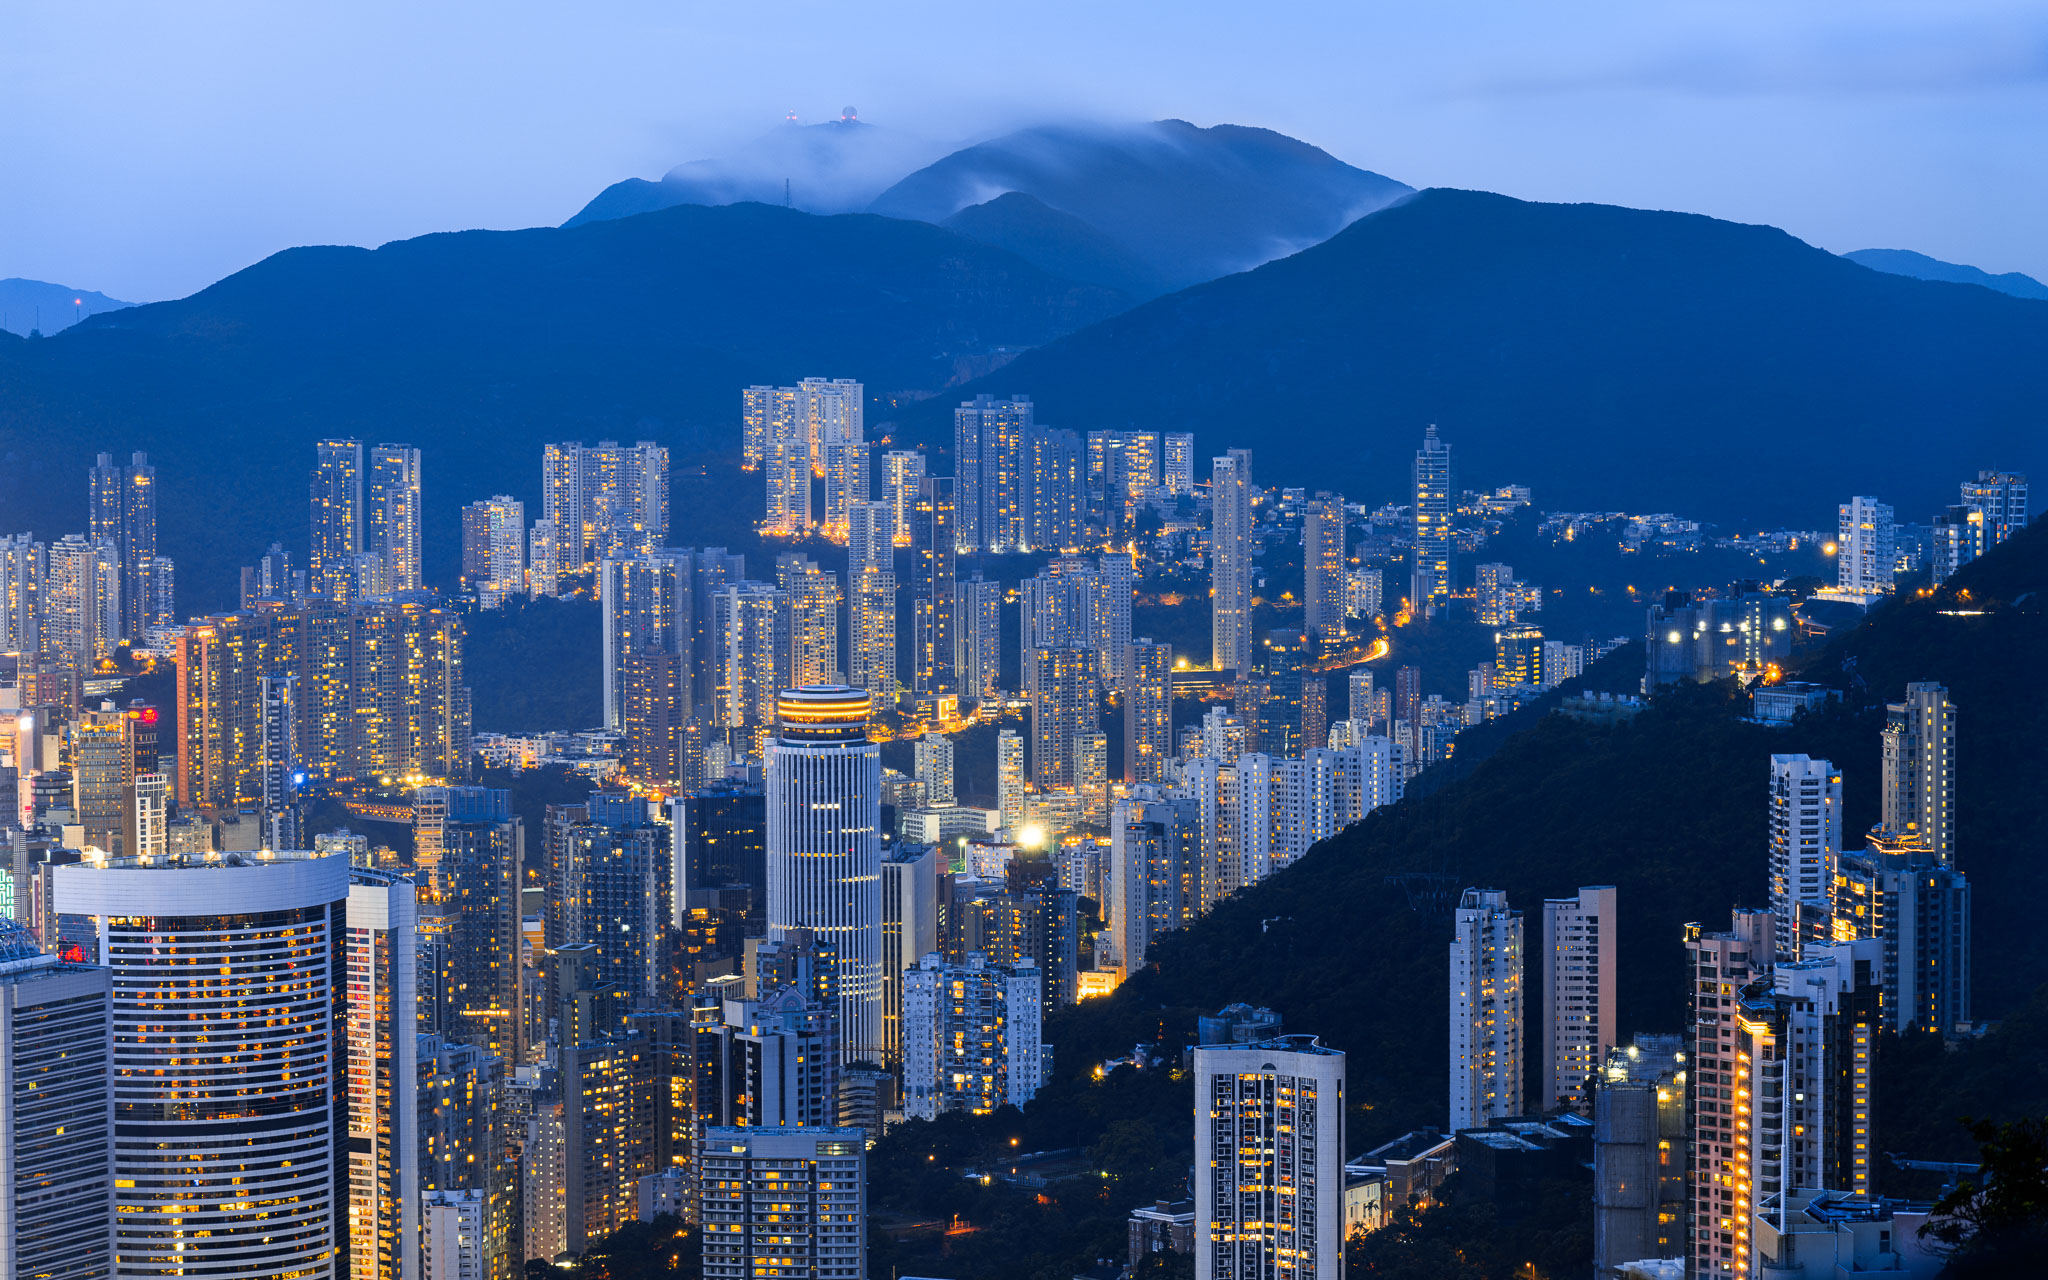
Alex, that blue hour shot in Hong Kong is just superb! Well done, lad!
I’m glad you liked that shot, thank you, Willy! My apologies for the confusion – this article has some photos from multiple members of the Photography Life team. I’ve added copyright information here and will do so in future articles with multiple photographers’ images.
Dang! I blamed the wrong person! Thanks for the clarification, Spencer. You get the “Well done, lad” comment instead. I still like that shot immensely. :-)