Bird photography, especially wild bird photography can be quite challenging. There are many articles on the Internet that cover everything from “bird photography tips” to “the art of bird photography”, but I found that many of them are not detailed enough for the beginning photographer who just wants to go out there and shoot.
You might think that photographing birds is similar to other types of wildlife photography, but actually, it is so different that it’s practically like being on another planet! But fear not, because this guide will tell you everything you need to know about getting started with bird photography.
Table of Contents
Lenses for Bird Photography
Hundreds of articles have been written and endless debates have been had about the best equipment for bird photography. And, it’s definitely true that there are probably as many ideal bird photography configurations as there are birds (just over 10,800 in case you were wondering).
However, before getting into details, I’m going to tell you the most important part of equipment considerations in bird photography: a long lens, or in other words, a lens with a large focal length.
What focal length is ideal for birds? Well, if you’re in the mood for detailed discussion, my friend Libor has written a bit about this topic in his article, What Makes a Good Wildlife Photography Lens? But, to keep the discussion here concise, the ideal focal length for birds ranges from 400mm to 800mm and even beyond when you use teleconverters. However, by far the most popular focal lengths are 500mm and 600mm.
Can you photograph birds with shorter focal lengths? Yes, you can. Bigger birds will often fit your viewfinder well with a 400mm lens and even more occasionally, a 300mm lens will work if you’ve found a very tame individual. But by and large, and having photographed more than 600 different species of birds, there is no doubt that most of the time you’ll need at least 500mm to get a decent amount of reach.
Don’t think you’ll have to spend a fortune though. There are plenty of lenses that reach 500mm or more, either with primes or zooms, and they fit almost every budget. I like to divide lenses up into two categories: the kind that are fairly easy to walk around with and handhold, and the kind that really do need a tripod a lot of the time. I’ve made a list of both of these kinds to help you out. Here are the lighter ones:
| Mount | Lens | Weight | Cost |
|---|---|---|---|
| Canon EF | Canon EF 100-400mm f/4.5-5.6L IS II | 1.64kg (3.62 lbs) | $2399 |
| Canon RF | Canon RF 600mm f/11 IS STM | 0.93kg (2.05 lbs) | $799 |
| Canon RF | Canon RF 800mm f/11 IS STM | 1.26kg (2.78 lbs) | $999 |
| Canon RF | Canon RF 100-500mm f/4.5-7.1 L | 1.365kg (3.01 lbs) | $2599 |
| Fuji X | FUJIFILM XF 100-400mm f/4.5-5.6 R LM | 1.375kg (3.03 lbs) | $1499 |
| Fuji X | FUJIFILM XF 150-600mm f/5.6-8 R LM | 1.605kg (3.54 lbs) | $1599 |
| Micro 4/3rds | Olympus M.Zuiko ED 100-400mm f/5-6.3 | 1.12kg (2.47 lbs) | $1399.99 |
| Micro 4/3rds | Panasonic Leica DG 100-400mm f/4-6.3 II | 0.985kg (2.17 lbs) | $1597.99 |
| Micro 4/3rds | OM SYSTEM M. Zuiko 150-400mm f/4.5 TC1.25 PRO | 1.88kg (4.14 lbs) | $7499.99 |
| Nikon F | Nikon AF-S NIKKOR 200-500mm f/5.6E ED | 2.3kg (5.07 lbs) | $1396.95 |
| Nikon F | Nikon AF-S 500mm f/5.6E PF | 1.46kg (3.22 lbs) | $3296.95 |
| Nikon Z | Nikon Z 180-600mm f/5.6-6.3 VR | 1.95kg (4.30 lbs) | $1696.95 |
| Nikon Z | Nikon Z 400mm f/4.5 VR S | 1.245kg (2.74 lbs) | $2996.95 |
| Nikon Z | Nikon Z 800mm f/6.3 VR S | 2.385kg (5.26 lbs) | $6496.95 |
| Pentax K | Pentax HD PENTAX D FA 150-450mm f/4.5-5.6 DC | 2.0kg (4.41 lbs) | $1896.95 |
| Sony E | Sony FE 200-600mm f/5.6-6.3 G OSS | 2.115kg (4.66 lbs) | $1998 |

Here are the ones that require a tripod unless you are Hercules:
| Mount | Lens | Weight | Cost |
|---|---|---|---|
| Canon EF | Canon EF 800mm f/5.6L IS USM | 4.49kg (9.90 lbs) | $12999 |
| Canon RF | Canon RF 600mm f/4 L IS USM | 3.1kg (6.83 lbs) | $12999 |
| Nikon F | Nikon AF-S 800mm f/5.6E FL | 4.59kg (10.12 lbs) | $16296.95 |
| Nikon Z | Nikon Z 600mm f/4 TC VR S | 3.26kg (7.19 lbs) | $15496.95 |
| Nikon Z | Nikon Z 400mm f/2.8 TC S | 2.95kg (6.50 lbs) | $13996.95 |
| Sony E | Sony FE 400mm f/2.8 GM OSS | 2.895kg (6.38 lbs) | $11998 |
| Sony E | Sony FE 600mm f/4 GM OSS | 3.04kg (6.70 lbs) | $12998 |
Some people prefer primes while other prefer zooms. For most birds, I never find 500mm too much reach but for very large birds, a zoom can come in handy. For example, don’t be surprised that the massive Emu will hardly fit your frame at 500mm, though you’ll definitely get a head shot.
Thus, it’s hard to discount the value of a zoom. Also if you’re interested in birds you may be interested in other animals. Zooms can accommodate almost any sort of creature and they usually have better magnifications so smaller things like insects and butterflies will be all the more flattered with a zoom.
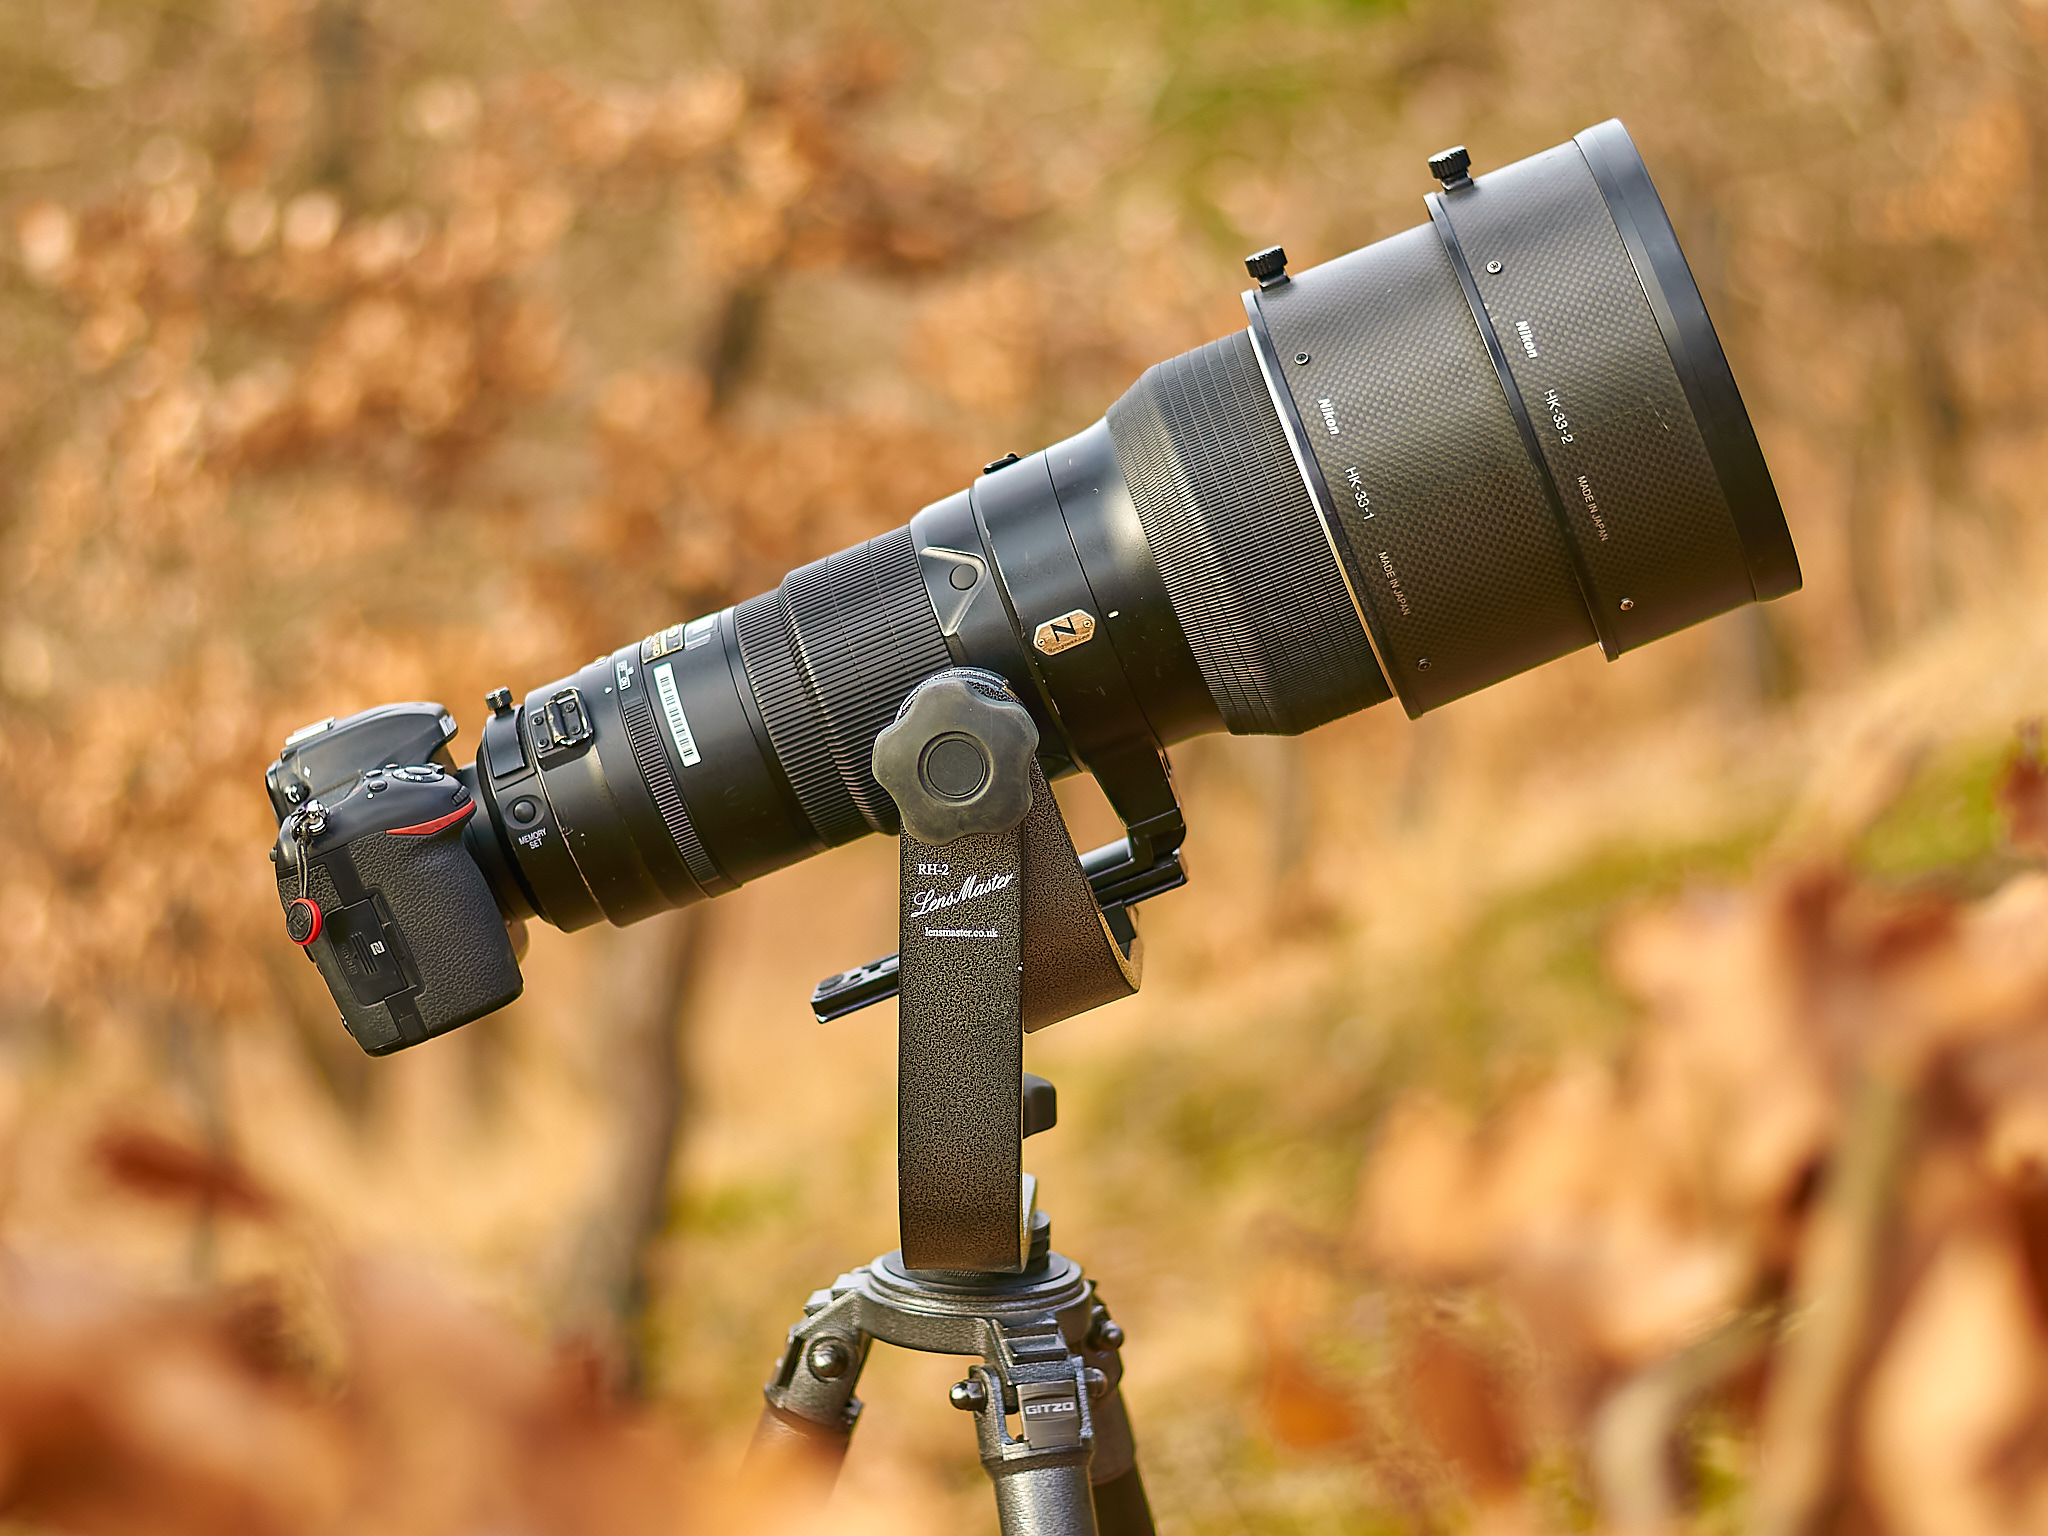
Finally, what about tripods? If you use heavy 500mm or 600mm lenses, a good tripod system (a tripod and a tripod head) is a must, simply because hand-holding these lenses is not practical. If you don’t know where to start when it comes to tripods, check out our detailed guide on choosing a tripod. Ideally, you want solid carbon fiber legs that can hold a lot of weight and a gimbal head, such as the Wimberley WH-200. Such a setup would be able to handle heavy lenses very well and provide enough flexibility to shoot birds in flight. Lastly, go for the Arca-swiss quick-release system, because that’s pretty much the standard now for handling heavy gear.
Cameras for Bird Photography
Cameras for bird photography can be a bit more varied than the lens in that almost any camera can be used for bird photography as long as you have the right lens. But what camera you get or need depends on what kind of bird photography you want to do.

If you just want to photography perched birds, almost any camera will do. However, better autofocus helps because birds do move around a lot, even when they’re hopping from branch to branch.
If you’ve got your eye on birds in flight, which is one of the most popular genres of bird photography, then you need a camera with good autofocus. If you want a fast-focusing full-frame camera, be prepared to pay top dollar. Here are the top mirrorless full-frame cameras for bird photography today:
| Camera | Weight | Cost |
|---|---|---|
| Nikon Z8 | 910g (2.1 lbs) | $3996.95 |
| Nikon Z9 | 1340g (2.9 lbs) | $5496.95 |
| Canon R5 | 738g (1.62 lbs) | $3399 |
| Sony A9 II | 678g (1.49 lbs) | $4498 |
| Sony A1 | 737g (1.6 lbs) | $6498 |
If you’re eyes water at the price of the latest full-frame mirrorless cameras, don’t despair because there are plenty of used DSLRs out there like the Nikon D850, D500 and the D5 at very reasonable prices. If you have to choose between a camera like the D500 or a less expensive mirrorless camera like the Nikon Z6, I’d go with the D500 every time.
Now, the latest full-frame mirrorless cameras like the Nikon Z8 and the Sony A1 are of course top notch, but the difference between an older DSLR and the latest full-frame beast makes about 1% of difference when you factor everything else you need to come home with winning bird capture.
You can also save money by going with as smaller sensor. The Canon R7 has good enough autofocus for most situations, and it’s not that expensive at $1399, and it can handle probably around 80% of the situations the top-notch full-frame cameras can.
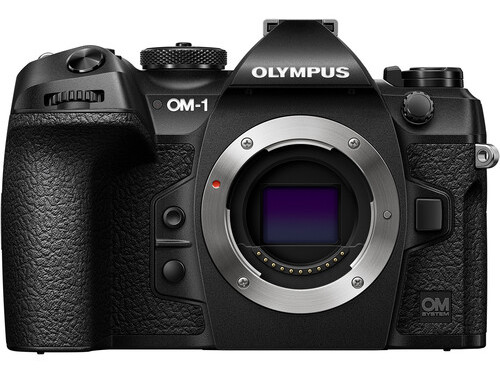
Then you’ve also got the micro four thirds camera, the OM System OM-1, which has amazing autofocus at a fraction of the price ($1999) of the full-frame options.
Don’t forget to check out the used camera market, because you can often get these cameras at much cheaper prices than the ones listed here.
How to Find Birds
Two difficulties might find you when trying to find birds to photograph. The first is that birds are not always easy to find, and the second is that you have to find them in environments that actually make for good compositions. Sometimes I’ve crawled through the grass, all scratched up by brambles, only to find a bird perched in the worst possible branch! (Birds also know when you’ve got a camera and they will hide just to have a little fun.)
So, how can you find birds? The most obvious method to find birds is to use eBird. This website is well-worth signing up for, and they don’t spam your email account or have a ton of useless social media features. On eBird, you can view a map that tells you the best hotspots for birding in your area.
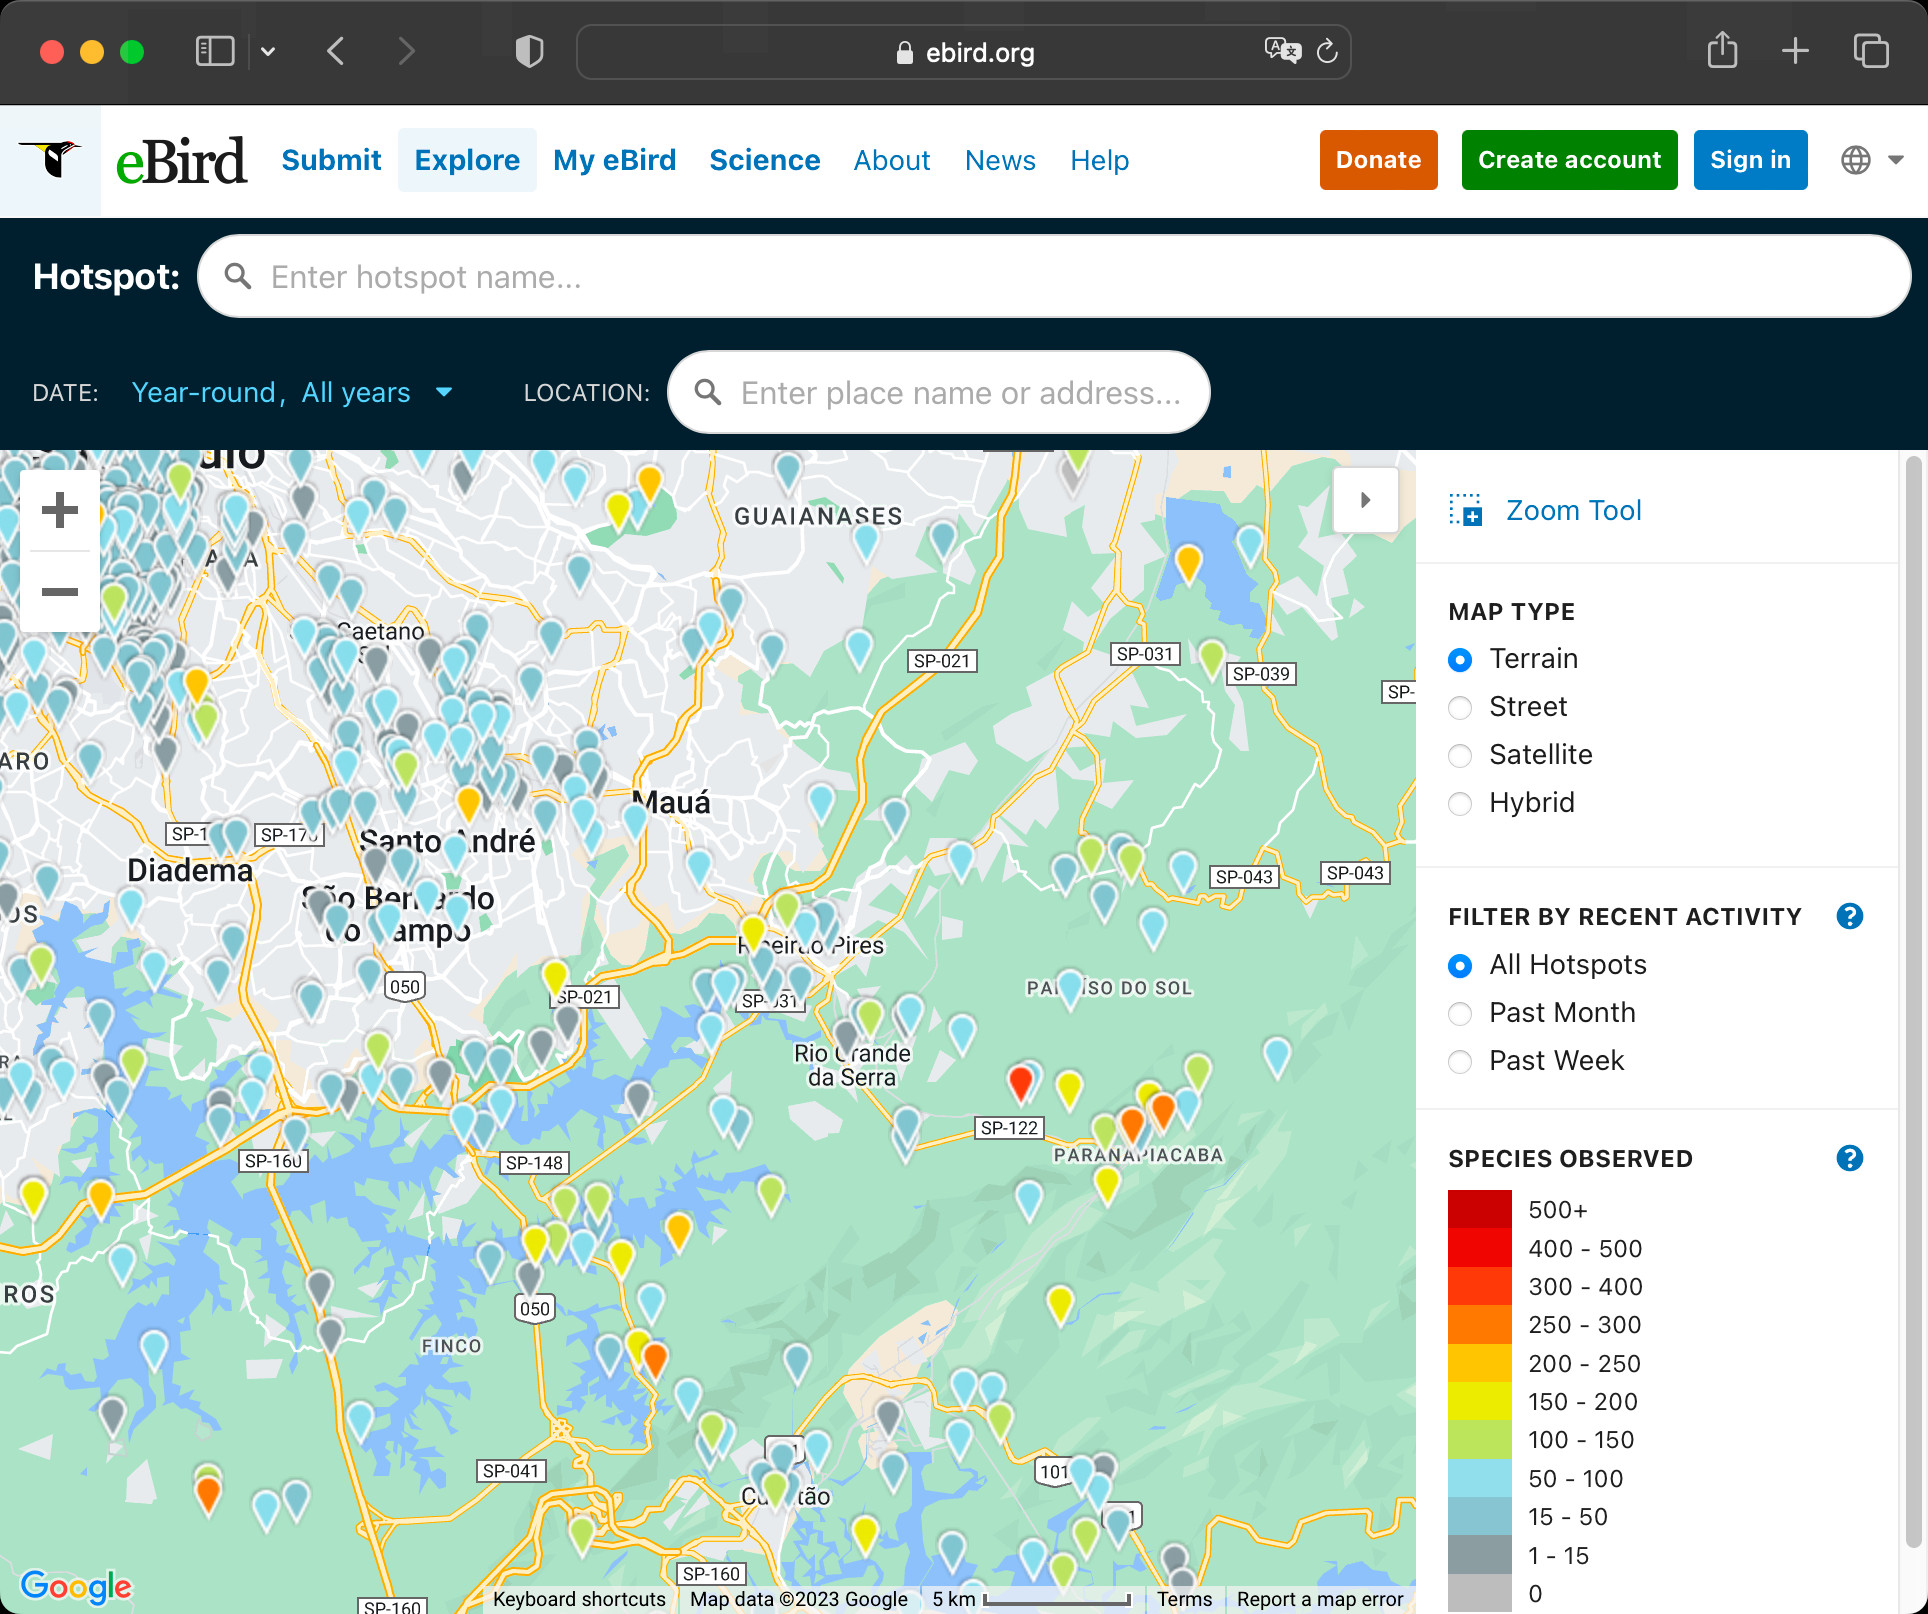
Of course, not all birding hotspots are ideal photography spots, but many are. You can also figure out which birds were seen at each spot, which will help you find new subjects of which you previously did not have photos.
It pays to get to know your birds. Pick up a field guide and learn a little about your beautiful little subjects. Not only will the knowledge of bird behaviour help you understand where to find them and what to look for when shooting them, but you’ll also have a good time learning about nature when there are no birds to shoot.
You can also ask other photographers. I’ve found quite a few good spots just asking random photographers I’ve met on trails!
Once you’ve found the ideal location, the most important advice I can give you is visit it at least a dozen times. You’ll find new hidden areas, ideal perches, and little streams around which little birds will congregate for a quick bath. You’ll notice new patterns and new species gifted by the passing of the seasons.
And time. Time is the true secret of bird photography beyond cameras and lenses and secret locations. If you sit long enough and wander far enough without any expectation, then you’ll eventually find something beautiful deep within the wonders of our natural forests and landscapes.
Travelling will expand your portfolio but you need to be prepared for new areas. Don’t think that you need to travel to get great shots, but if you do find yourself abroad, focus your entire mind on finding what wondrous creatures populate those distant shores.
How to Photography Birds: Best Settings
Once you’ve found your bird and you’ve got the ideal camera for the job, what’s next? You have to know the ideal setting for bird photography! I’ve already written one article on the best settings for birds and my friend Libor wrote a specialized article for birds in flight, both of which I highly recommend. However, it doesn’t hurt to go over the basics.
The most important thing for bird photography is shutter speed. Why? It’s because birds are fast and you don’t want to get a shot full of motion blur unless you’re doing it intentionally. On the other hand, you don’t want your shutter speed to be too fast because the best light for bird photography is often when there’s not much light, and so if you’re too fast then you’ll be losing valuable light, resulting in a noisy image.
Luckily, here’s a handy table that tells you the most ideal starting points for shutter speeds:
| Situation | Safe Recommendation | Typical Range I Use |
|---|---|---|
| Perched, still birds | 1/400 | 1/40-1/640 |
| Walking or slowly moving birds | 1/800 | 1/500-1/1500 |
| Running and darting birds | 1/1200 | 1/800-1/1500 |
| Birds in flight, slow | 1/2500 | 1/2000-1/3200 |
| Birds in flight, fast | 1/3200 | 1/2500-1/8000 |
Of course, because you want to control your shutter speed, you’ll want to be in shutter priority or manual mode. If you’re in manual mode, then you’ll want to have auto ISO turned on most of the time unless there’s a good reason not to turn it on.
Are there other important settings for your equipment? Indeed there are. Are you shooting in Raw? I never recommend using JPEG for birds. Lighting is too erratic and thus I’ve never met a bird photographer who ever used JPEG. Do you have your shake reduction on? For perched birds, you’ll find your lens’ shake reduction and your camera’s IBIS to be indispensable.
If your camera has different modes, set one for birds in flight with a very fast shutter speed and another for perched birds. Birds will stop flying when you increase your shutter speed and they’ll start flying when you’ve got it low. Tricksters, they are.
Have you got two cards in your camera? Set your camera to backup your shots because that Blakiston’s fish owl isn’t coming back.
How to Photograph Birds: Composition
Even more important than the best settings is composition. Good composition in bird photography is like all other genres of photography, but it also has an added layer of difficulty because you need to be extra quick to realize a good composition, and you can’t ask your subject to come back for a reshoot.
One of the best ways to help yourself compose well is to take stock of your surroundings when you get to a new photography spot. Look around and determine which spots will give the best blurred backgrounds, where the problem areas are, and the best places to stand or sit. If there are too many branches or even human-made objects behind an area, then your background is likely to suffer.
Next, figure out where the important elements are in your scene. Do you want to show the bird with some environment? Then pay attention to elements like the shoreline, food sources, and surrounding plants. You don’t want a flower to obscure your bird in the wrong way. In some photos, the horizon may produce an out of focus line in your shot. Make sure that doesn’t cut right through the bird’s head, which will look quite awkward.
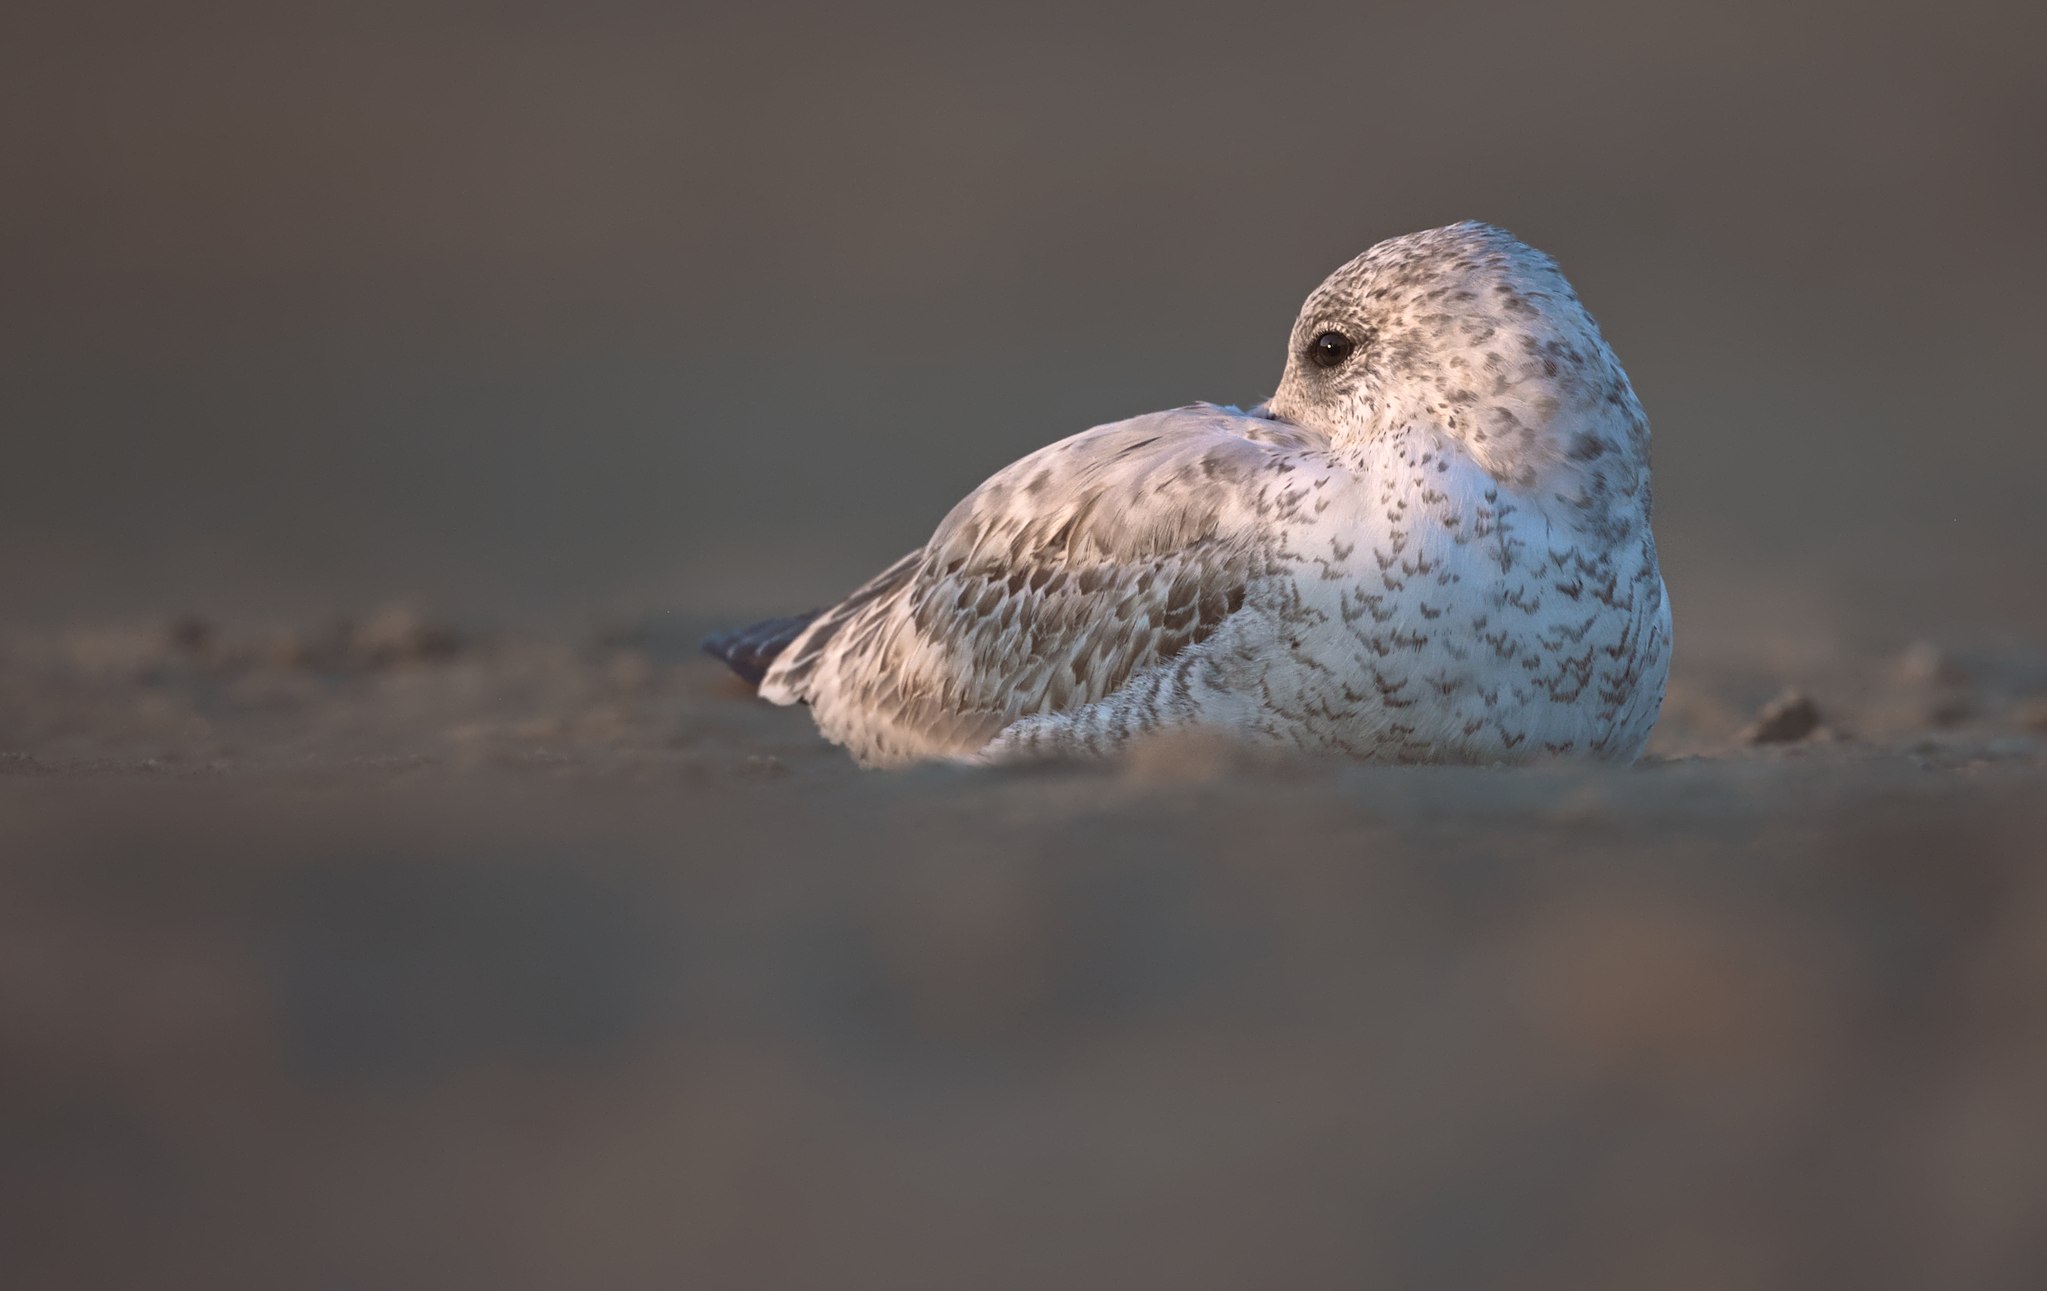
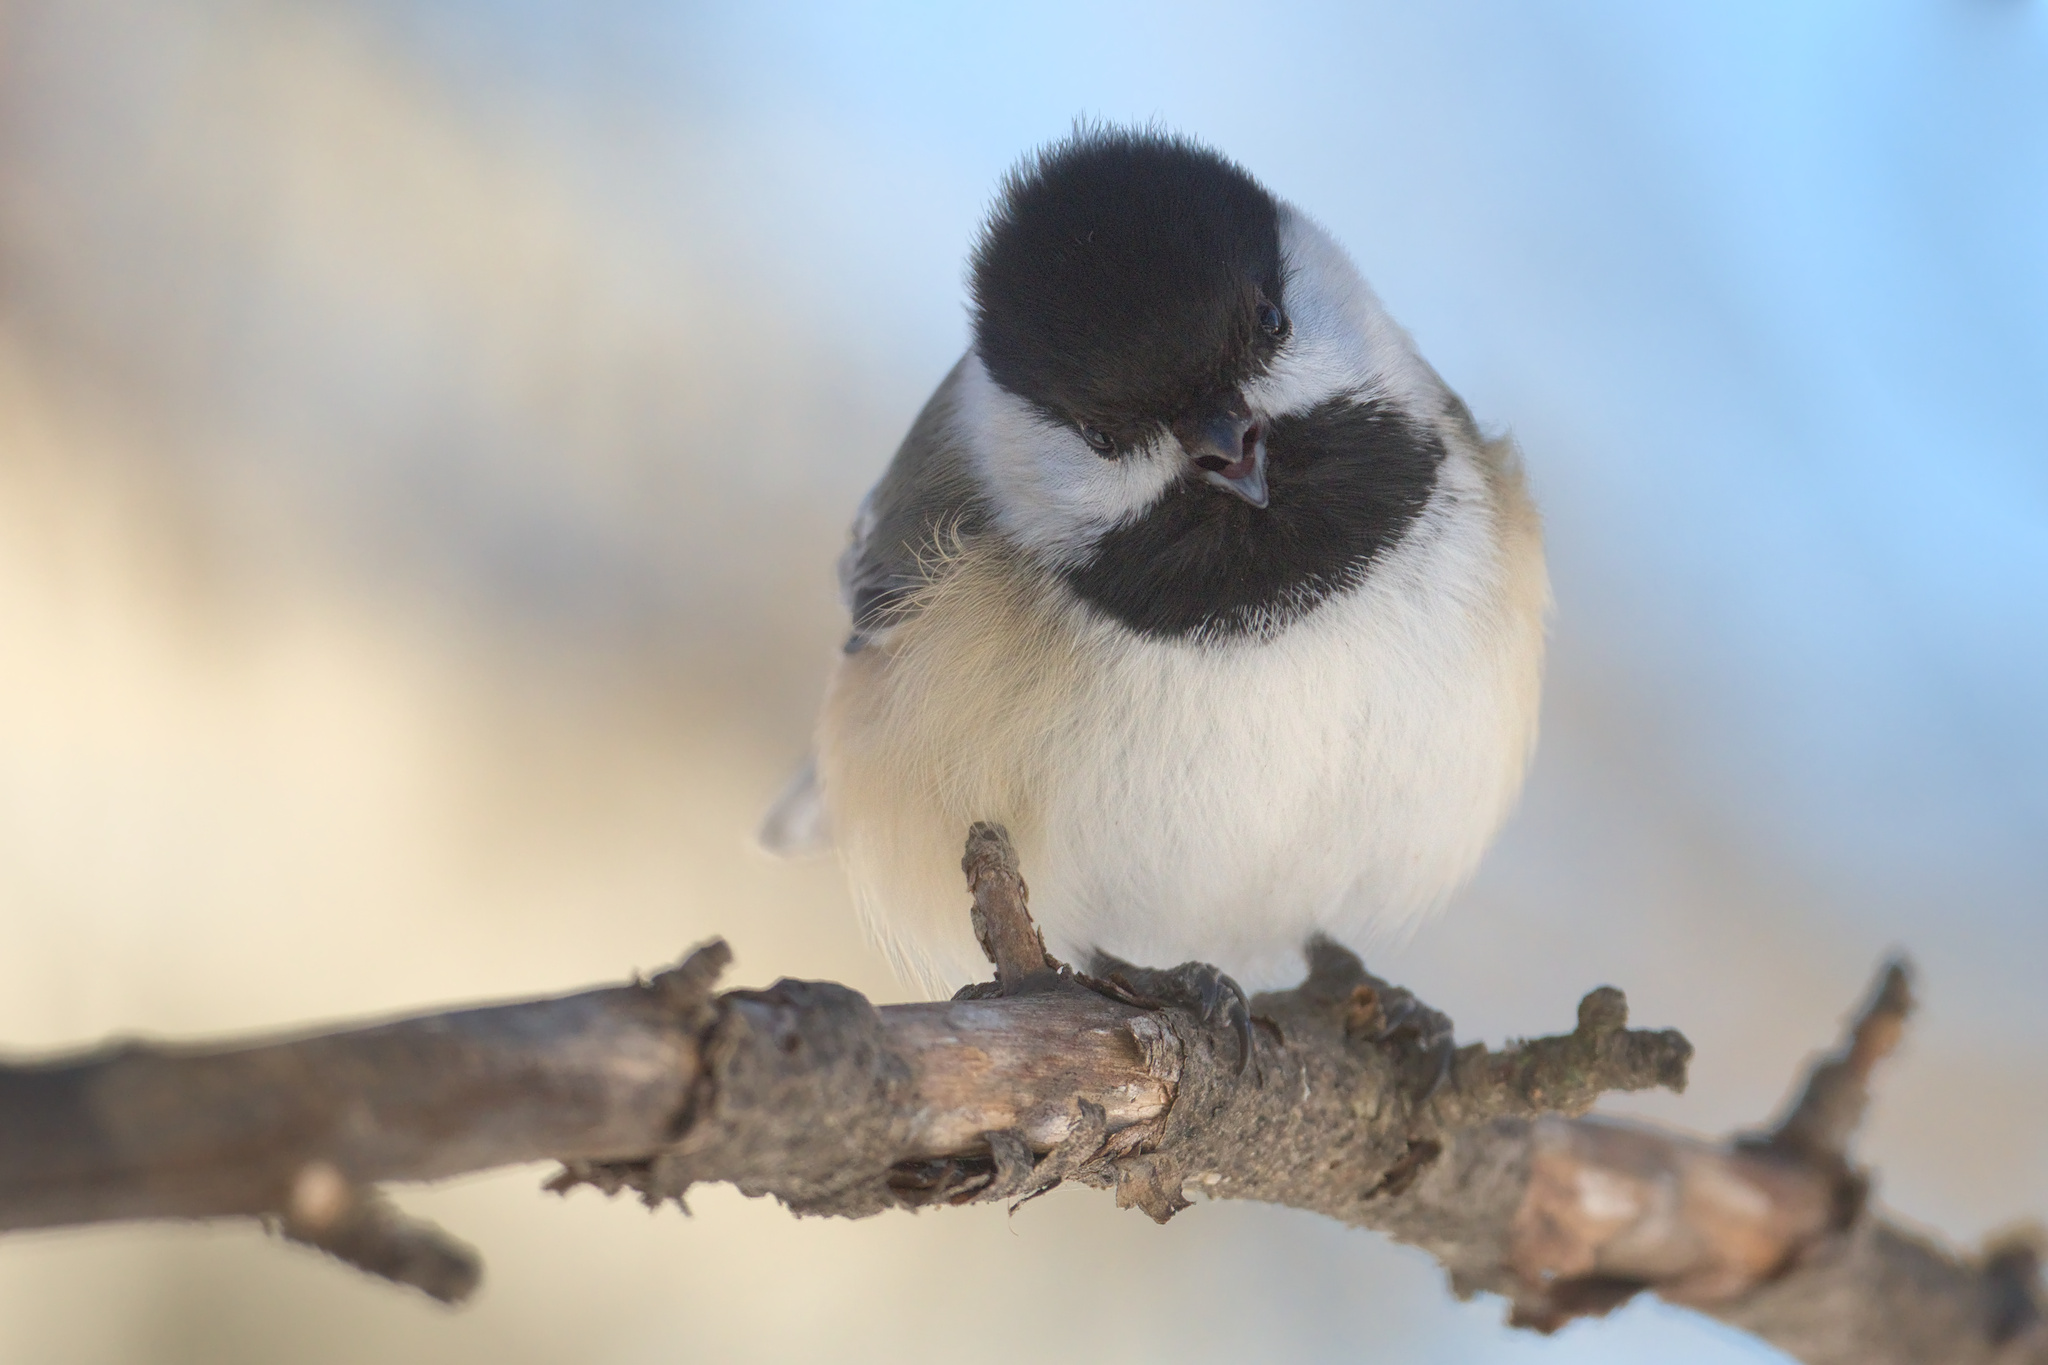
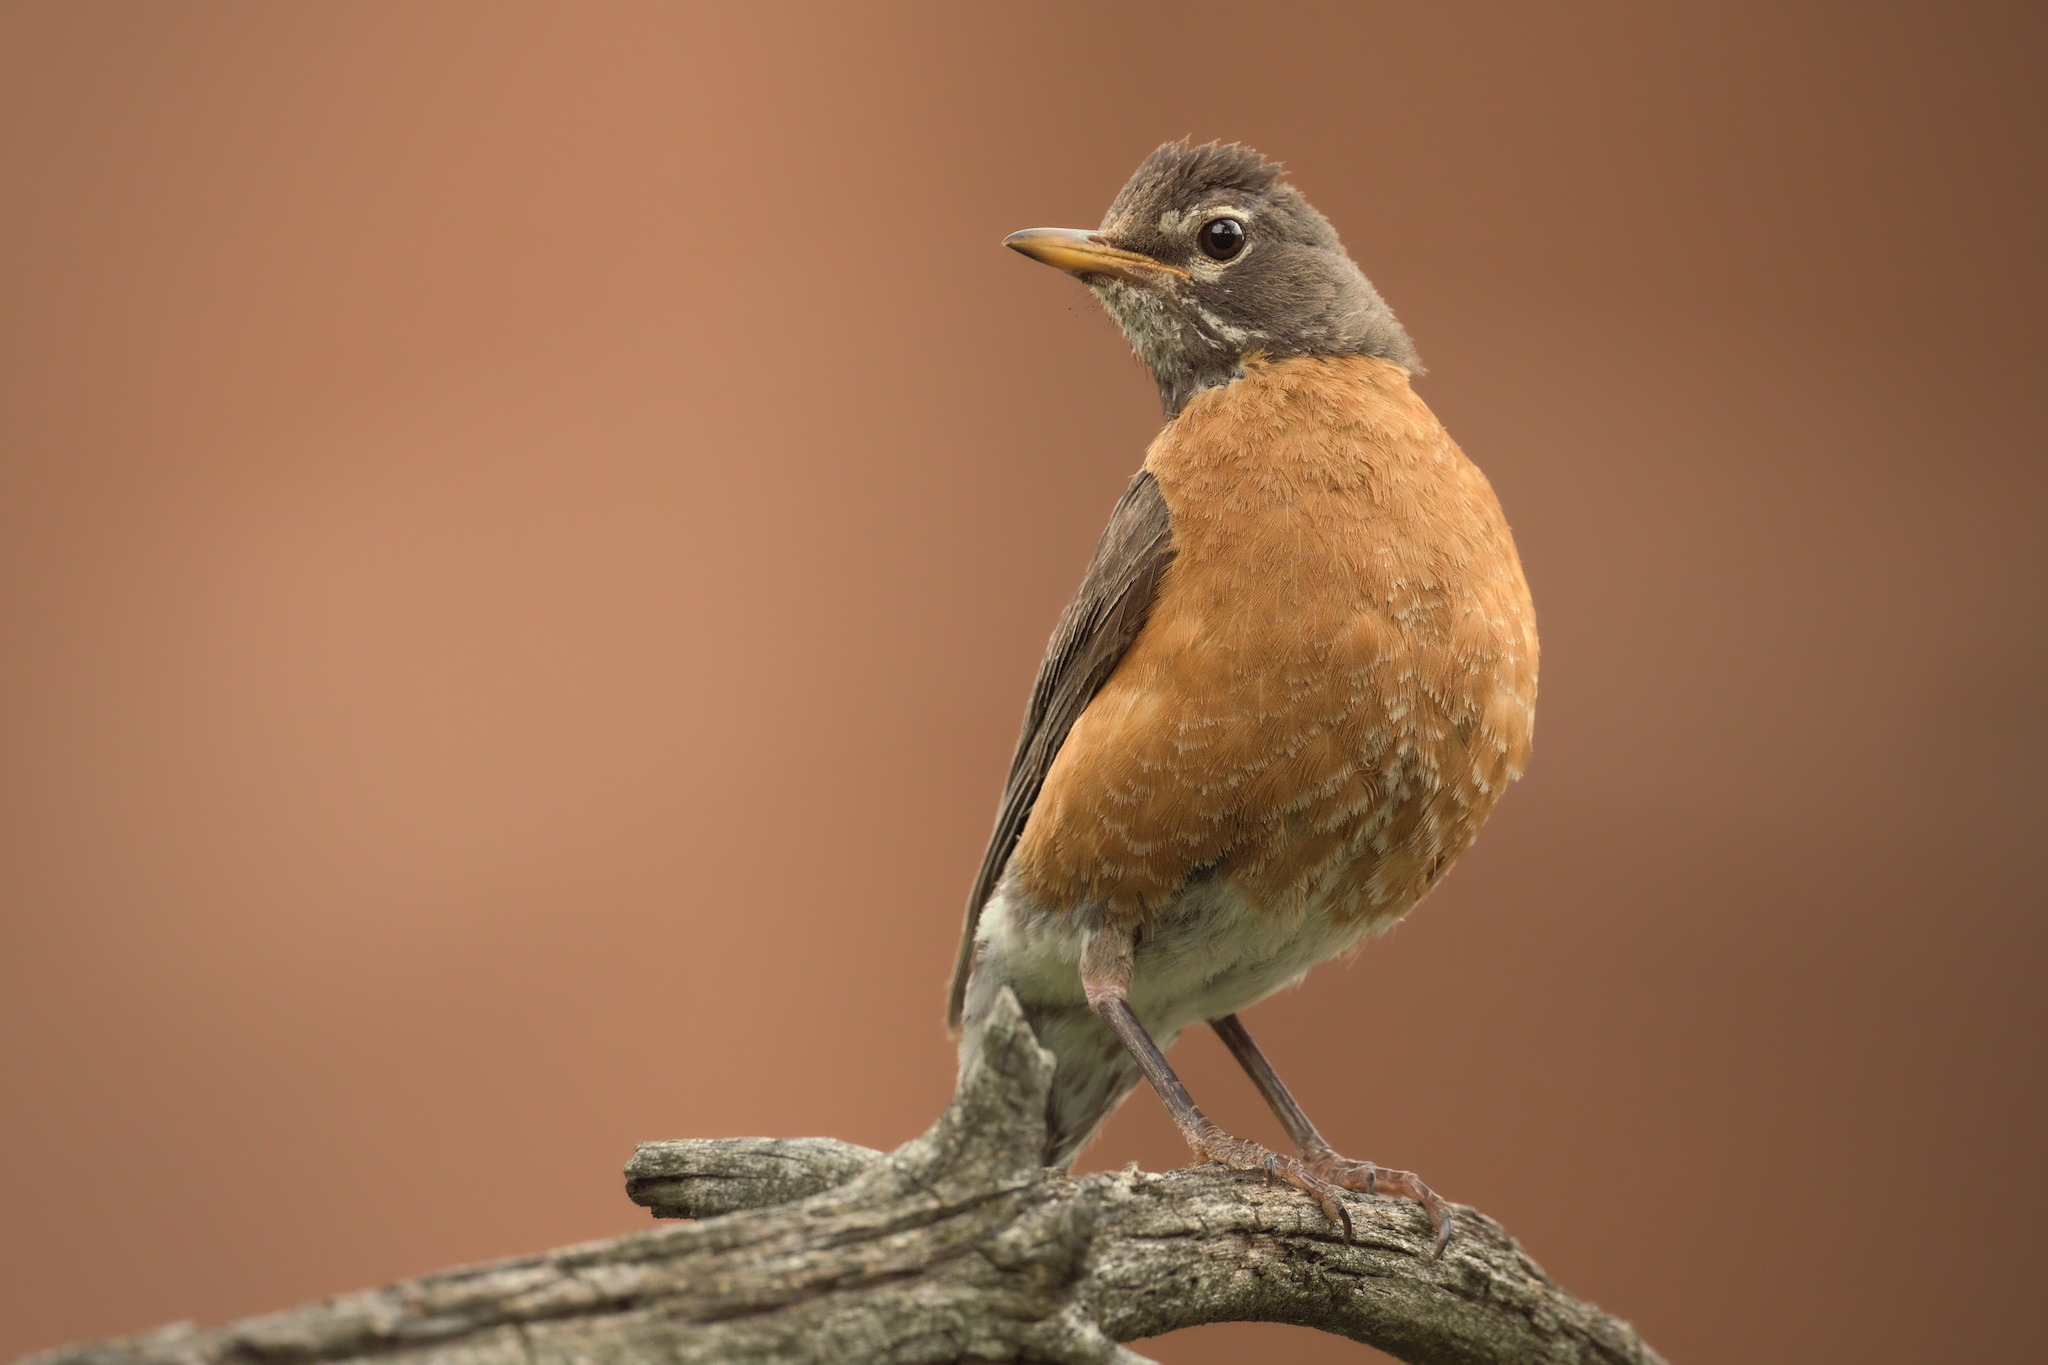
If you’re taking a portrait without much environment, make sure there aren’t too many distracting elements. The key here is an attractive background. It doesn’t have to be completely smooth and in fact that might be a bit boring at times. Regardless, it should be harmonious with the bird itself so that intricate patterns or bokeh balls don’t break up the outline of the bird.
Finally, there’s posing. You can’t command birds to stand this way or that, but you can wait for the right moment. Don’t take your shot so that too much of the bird is closer than the plane of focus, resulting in a distracting, blurred body. Birds often look best when their heads are pointed in a different direction than their body.
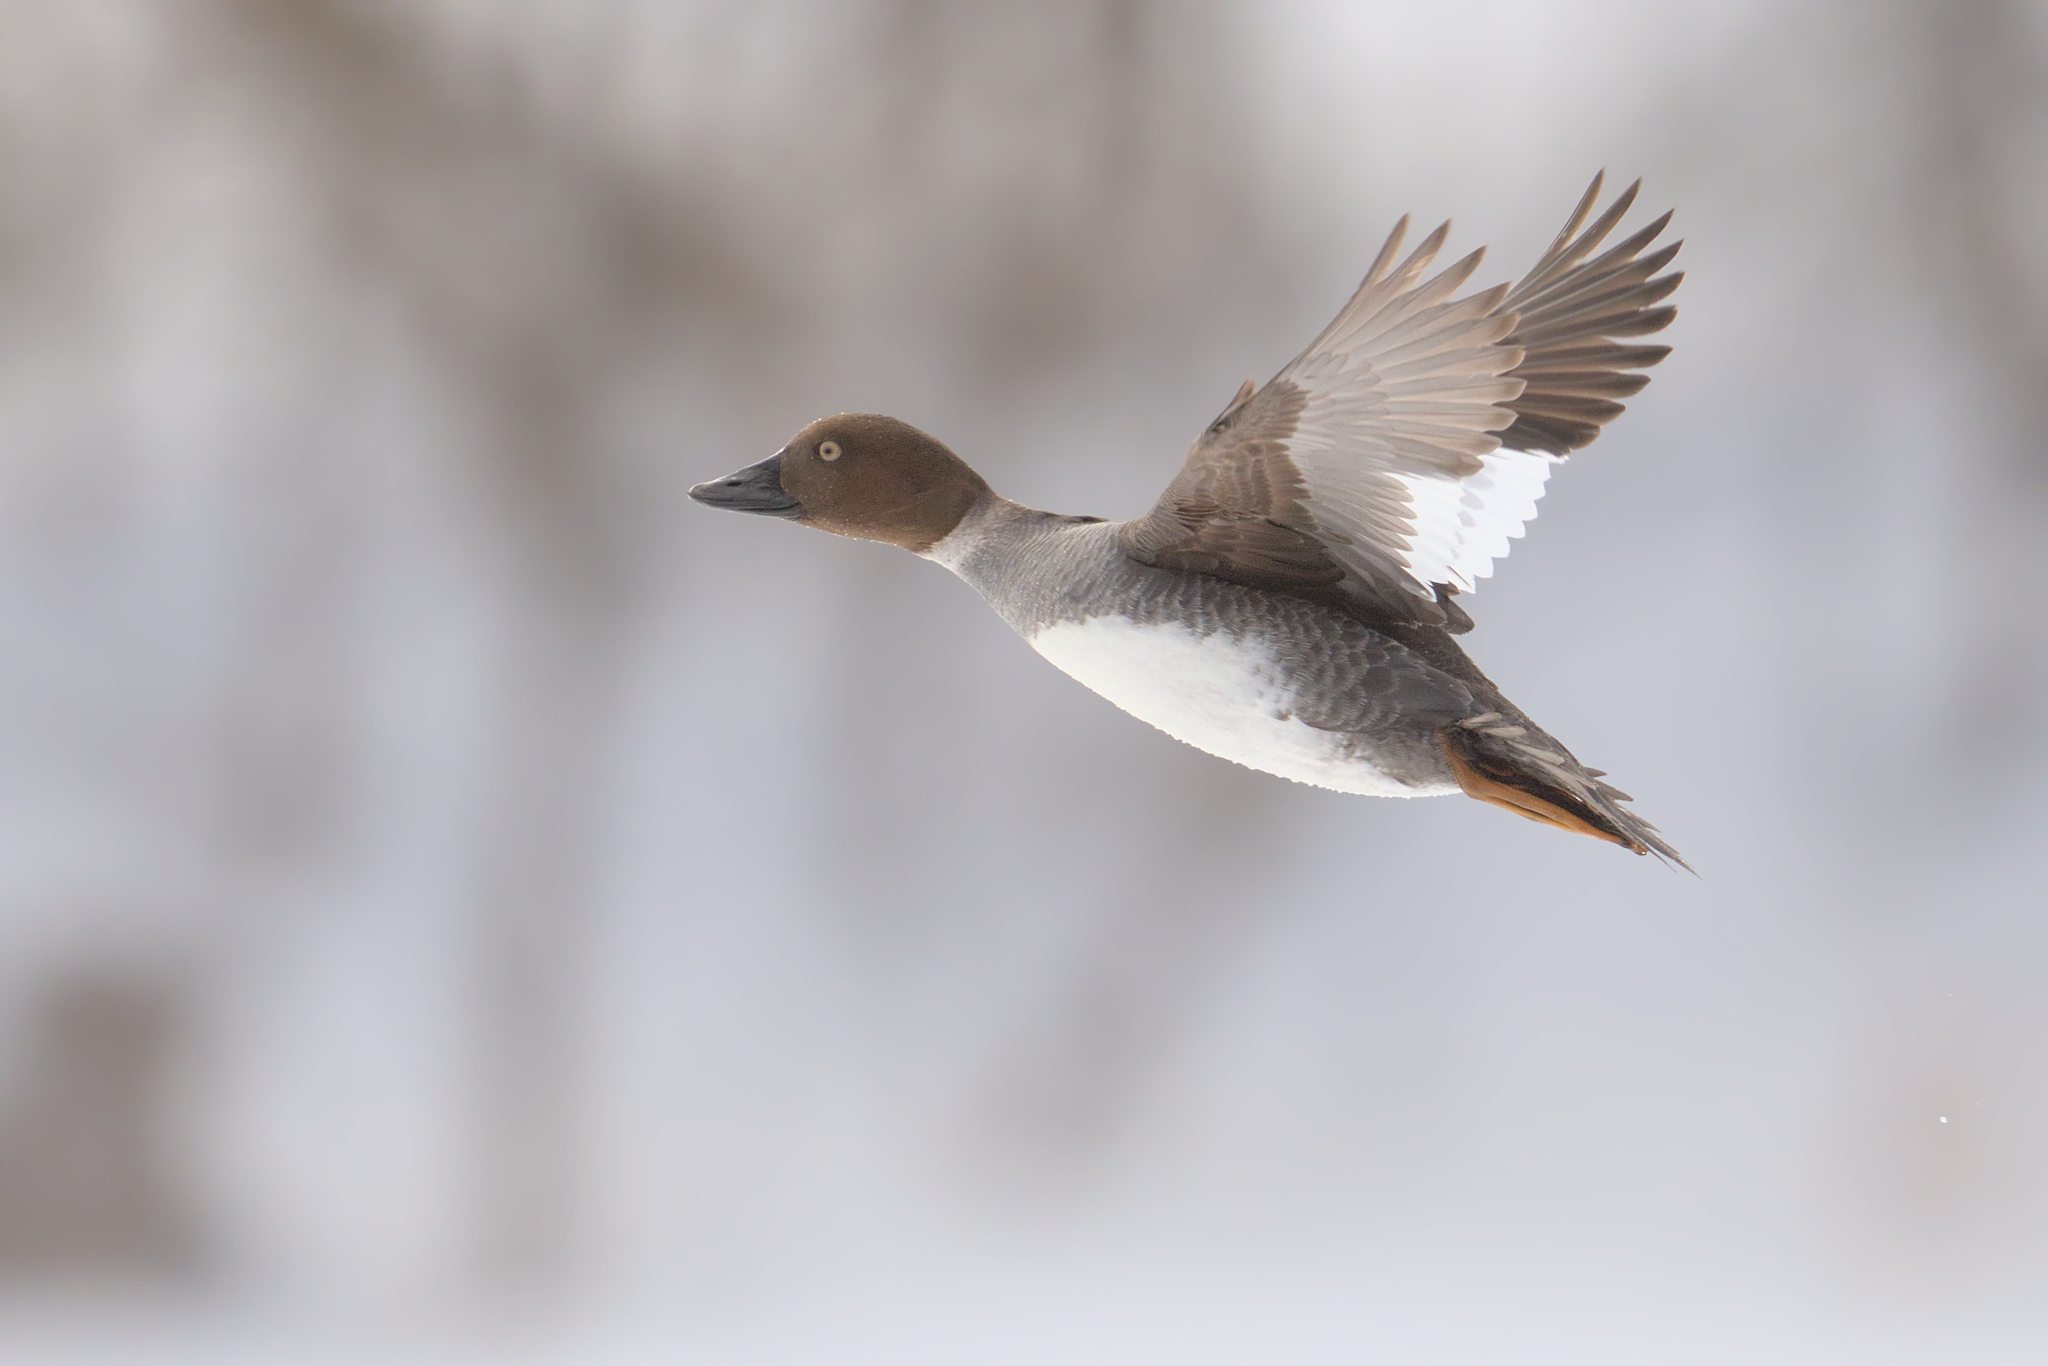
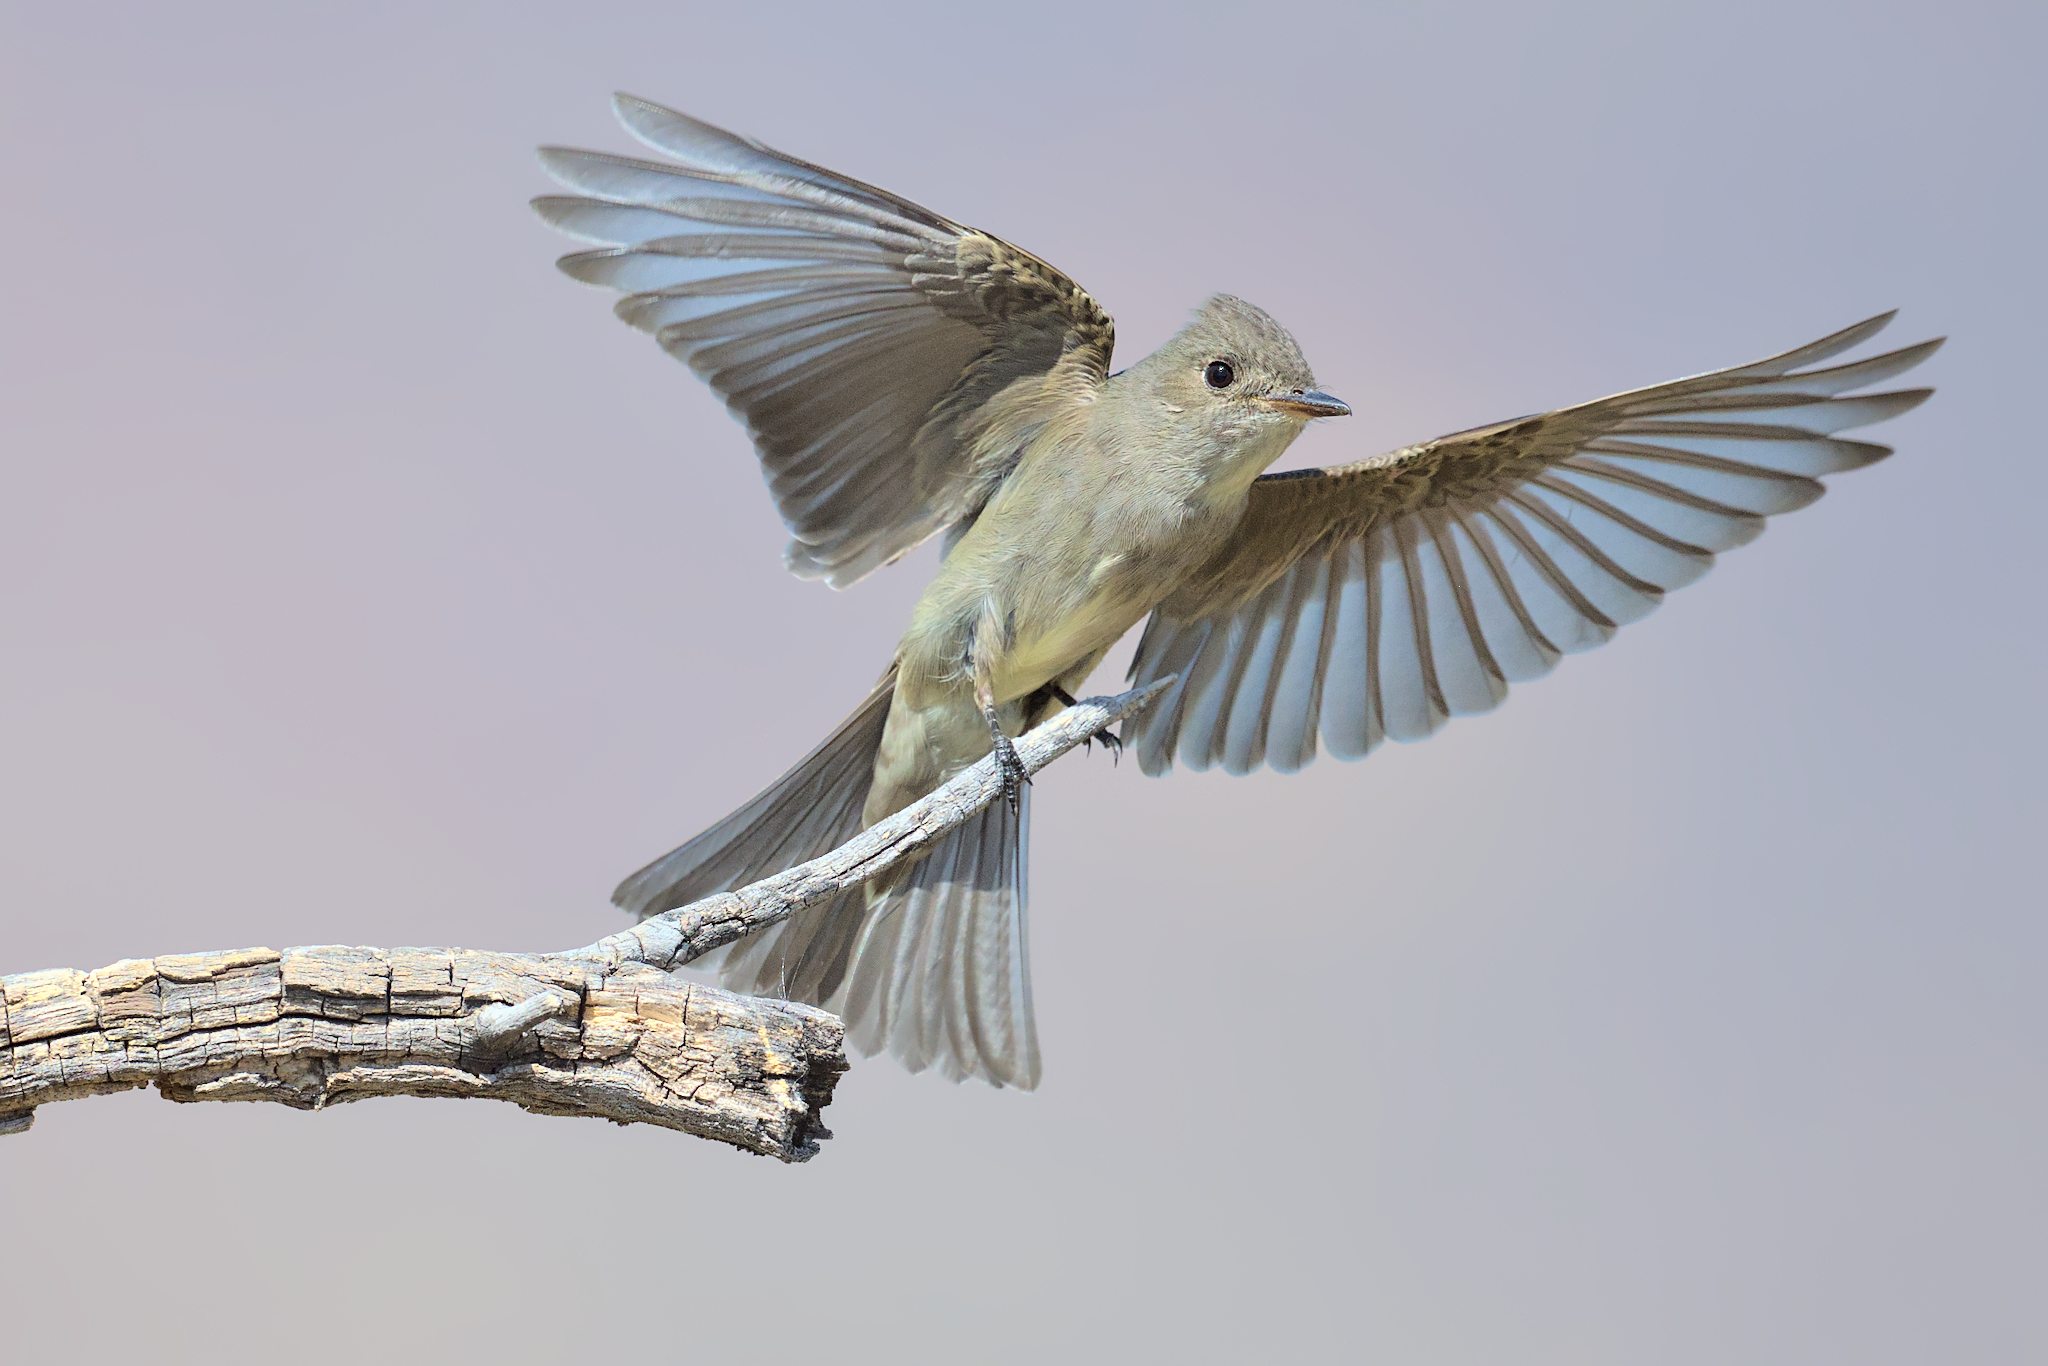
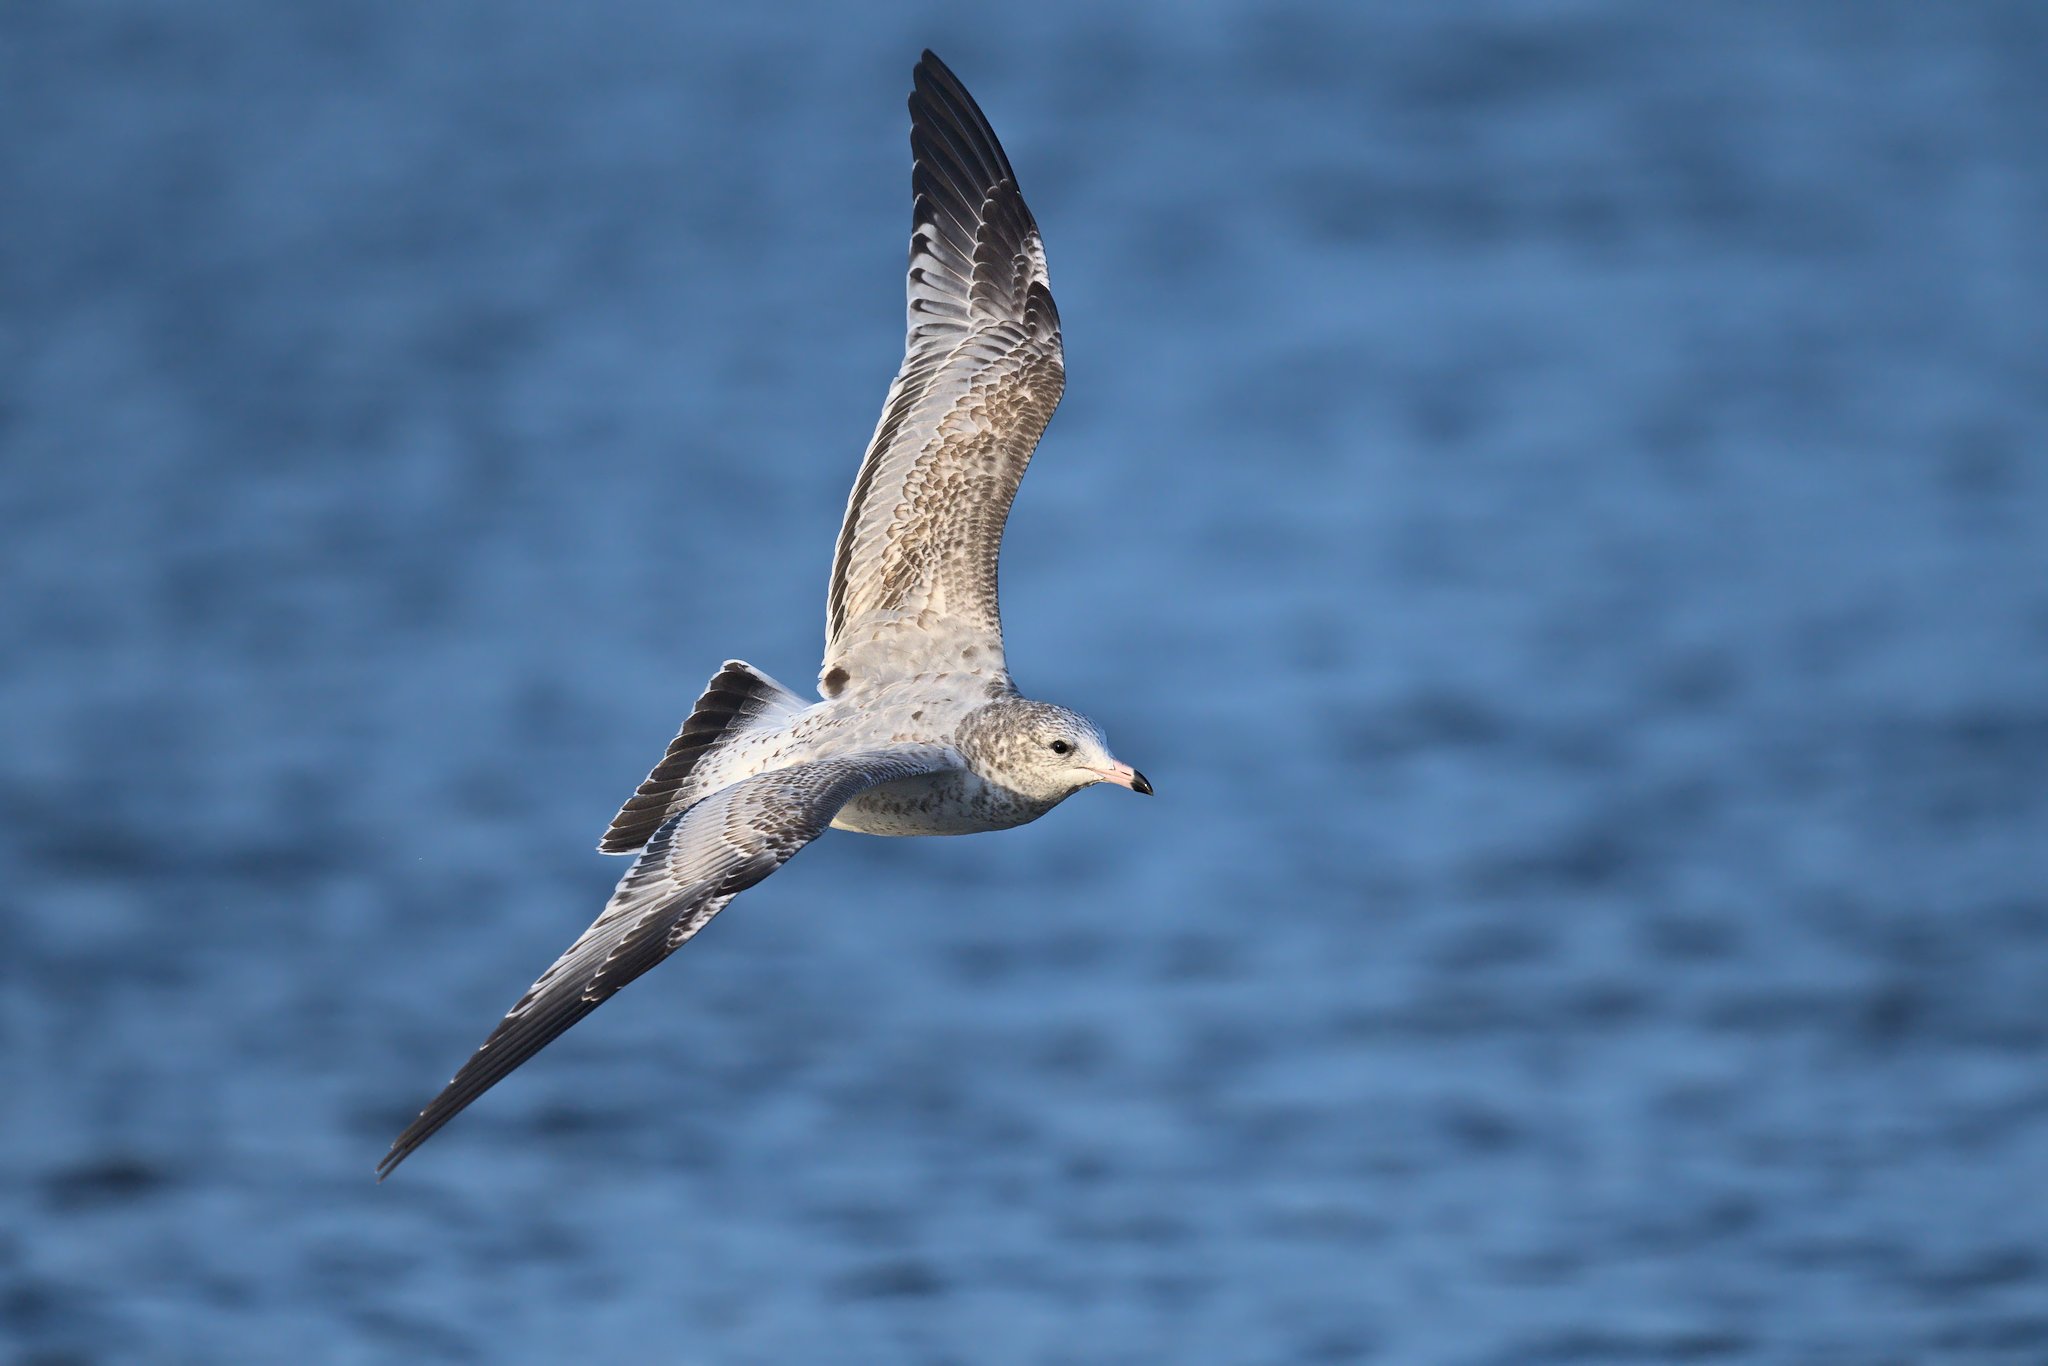
Flying birds generally don’t look good when their wings are crumpled too much. They should look like they are actually flying, and have graceful power about them rather than looking like they’re about to fall out of the sky. For birds that fly more slowly, consider using slightly slower shutter speeds to blur wingtips a little to give a sense of motion, but whether you do this is an artistic choice and it should fit the scene.
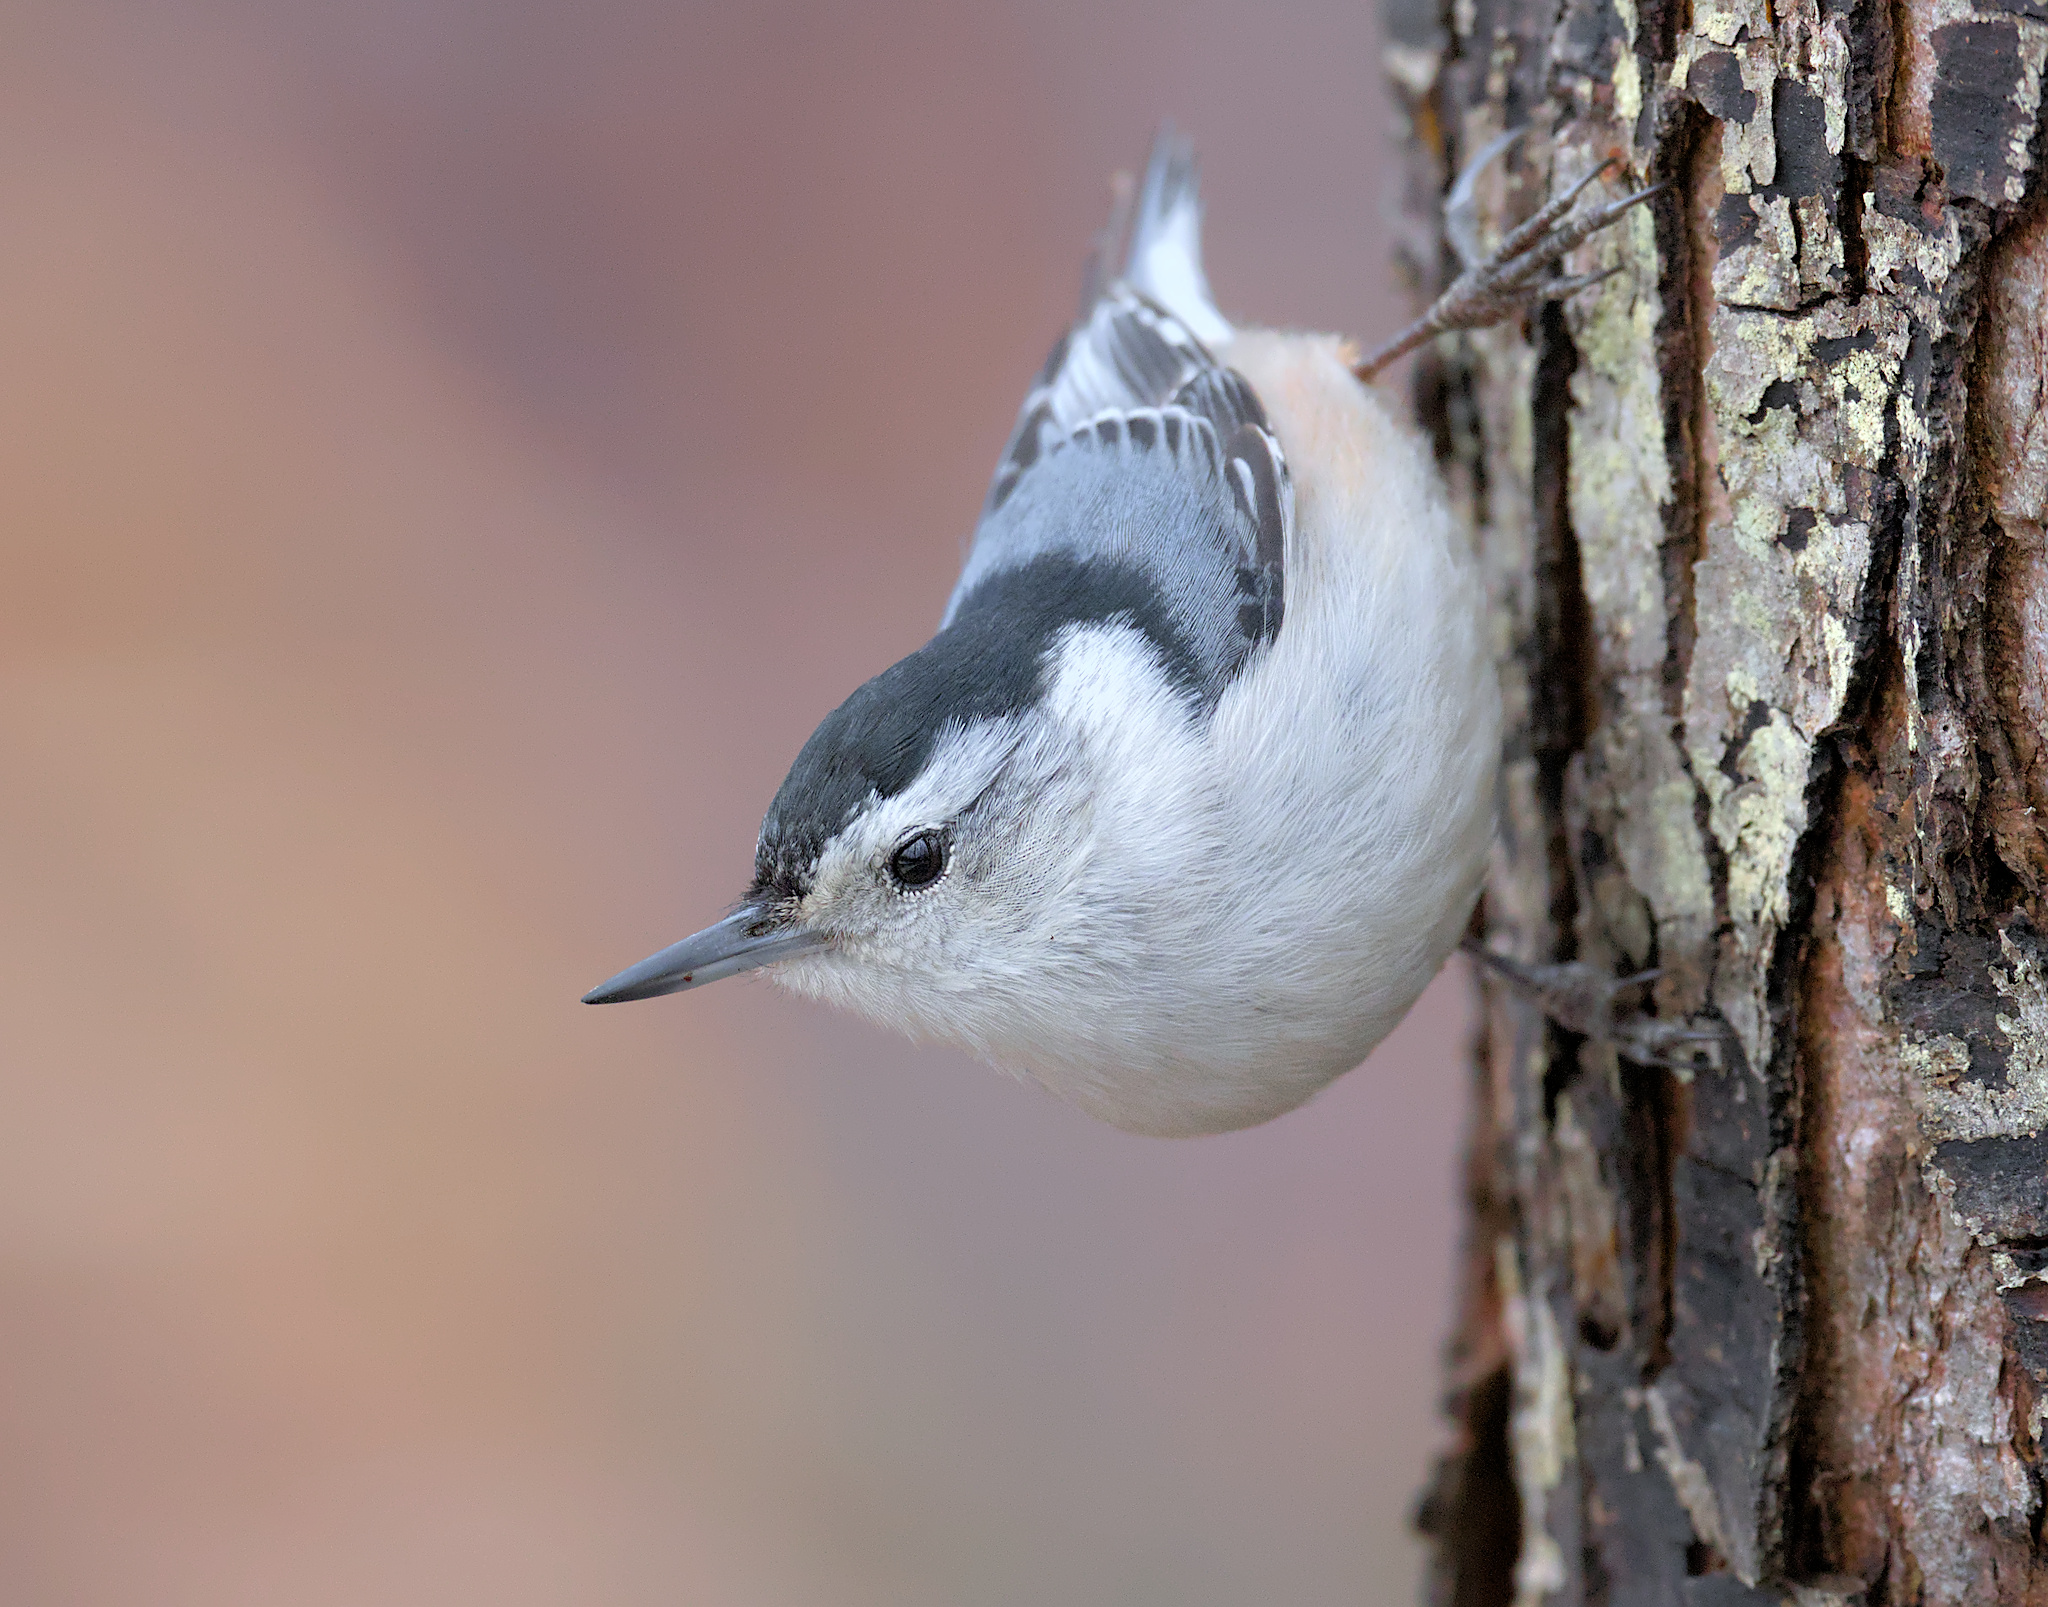
Finally, like humans, make sure you get a catchlight in your bird’s eye. A few birds have unusual eyes that don’t reflect light very easily but most do, and there’s nothing worse than a lifeless-looking eye from an absent catchlight.
Being Nice to Birds
Like everything else these days, bird photography is very competitive, and that is not always helpful for the plight of many birds that are suffering habitat loss. Although photographing birds is relatively benign, and displaying photographs of birds mostly helps them because it raises awareness for their plight, it’s still good to keep in mind some ethical considerations.
Although one could debate the ethics of wildlife at length, there is really one simple rule that surrounds most of these discussions: do not stress the animal. In other words, don’t get too close. This especially applies to nesting birds that may even abandon their nests if you bother them too much.
There are also debates on whether feeding birds is ethical. Some countries actively support it, while other governments like Australia warn against it. Personally, I don’t recommend feeding birds but if you do, use high-quality bird feed and never human food like bread.
In general, think about whether you might be intruding too much in the bird’s personal space. The best photographs of birds are the ones in which the birds look peaceful anyway.
Once you’ve gotten your bird photographs, you’ll need to postprocess them. Postprocessing is crucial in bird photography because the lighting conditions are so challenging. Bird photos are often a bit noisy so it helps to denoise a little, and of course you’ll definitely want to crop if your lens wasn’t long enough.
Lighting is hardly ever perfect for bird photography, so a bit of dodging and burning can do wonders. Some random bright object near the edge of the frame like bright specular highlights can be tuned down, and the tonal separation on the body of birds usually benefits from a well-applied tone curve. Occasionally, I do very slightly brighten catchlights, but by a very small, almost imperceptible amount.
Pay special attention to sharpening. Bird feathers are finer than most other types of structures and people expect to see feather detail. On the other hand, oversharpening can very quickly look unnatural.
In fact, the perception of detail in a shot isn’t just dependent on how many details are on your subject, but also how smooth your background is. A good, smooth background can enhance the perception of sharpness. To this end, I prefer using a mask to do a bit of sharpening, and I often even increase the strength of the sharpening effect ever so slightly near the face of the bird, since that is where the eye gravitates to first.
In general, I don’t recommend heavy postprocessing in any sort of photography, and instead I aim for a natural look without excessive denoising. I also prefer not to retouch significantly except in minor cases. For example, if there’s a random piece of dust floating in the air I might remove it, but I wouldn’t go so far as to alter the branch structure of trees, though if there is a tiny branch poking out by a dozen pixels, I might remove it.
In fact, if you’re finding yourself heavily postprocessing, then it might mean that you need to find better light and practice technique. Even the best postprocessing in bad light cannot come close to a mild touch in amazing light, and if you can achieve the latter more often, you’ll advance far more as a bird photographer compared to if you spend all your time with the latest enhancement software.
Conclusion
I hope I’ve shown you that beginning bird photography isn’t difficult. Although it requires some particular techniques, getting some decent photos of birds should be fun and enjoyable, and bring you some excellent wildlife experiences as well. Immerse yourself in wild areas, move like a ninja, and then come home with some fine photographs of our feathered friends.
Great article and well condensed practical advises.
Thx. a lot!
Thank you!!
hi nice article, Do you recommend any camouflage for the camera?
Photos in examples are not sharp.
Take for example these photos on IG. How can they achieve this level of sharpness? Pure lense quality and money, right. I am a pro with a 2500 dollar lens an never can get this king of tack sharpness. Guess I just don’t have or want to invest in fast prime large FL lenses 15k and above like nat geo photogs use.
www.instagram.com/p/CU5…=copy_link
Awesome tips!
Thank you for this excellent primer on bird photography. I’m a fairly experienced former photojournalist, but have never shot much wildlife, especially birds. Your suggested camera settings and strategy for using auto ISO and aperture-preferred mode were particularly helpful. Now to get out with my new D500 and long lenses and get some practice!
Hi Nasim,
I was wondering, where did you take the flycatcher (below the cedar waxwing) photo?
Thanks,
Ram
Thank you for the great info. I am an avid birder just starting out with photography. There is one gentle reminder I would like to add. Always place the welfare of the bird before the photography. I have watched as photographers flushed birds from the safety of cover, redirected them from critical life sustaining activities during nesting and migration by using playback, and trampled critical habitat to get that close-up. If the bird shows any behavioral changes in response to your presence then back up. If this places the bird too far away for your liking then get a longer lens or settle for a more distant shot. This wonderful hobby can coexist with our respect for wildlife. Happy shooting.
Ten years ago, I had an inexpensive camera and I was successful to take great pictures of wild birds in Saudi Arabia. Photography is an art, it is just like writing a poem.
Deprnds on how you define “Great picks”
To reach this level its all about money honey.
www.instagram.com/p/CU5…=copy_link
So good article, thank you very much. You have give me more usefully information than some books I have read. Many bird photographers recommend to shout in S priority mode, but I was doubtful because I thought that if I always want a hight speed shoutting, so why to use a mode where you modify it; it makes much more sense to fix a high speed, and have control on aperture to try to chose between a blurred background or a deep of field !