Photographing a wedding can feel overwhelming. There are must-capture moments with no option for a re-do. There are clients who may be extremely stressed, other vendors who are trying to do their jobs, and drunk guests at the reception. Welcome to the crazy world of wedding photography! Below are my tips for how to photograph a wedding without a problem.
Before we begin, a quick note. You’ll notice that most of the items on this list are actually things to do before the wedding. This is intentional, as the right preparation will put you in the best position for success and avoid as many problems as possible.
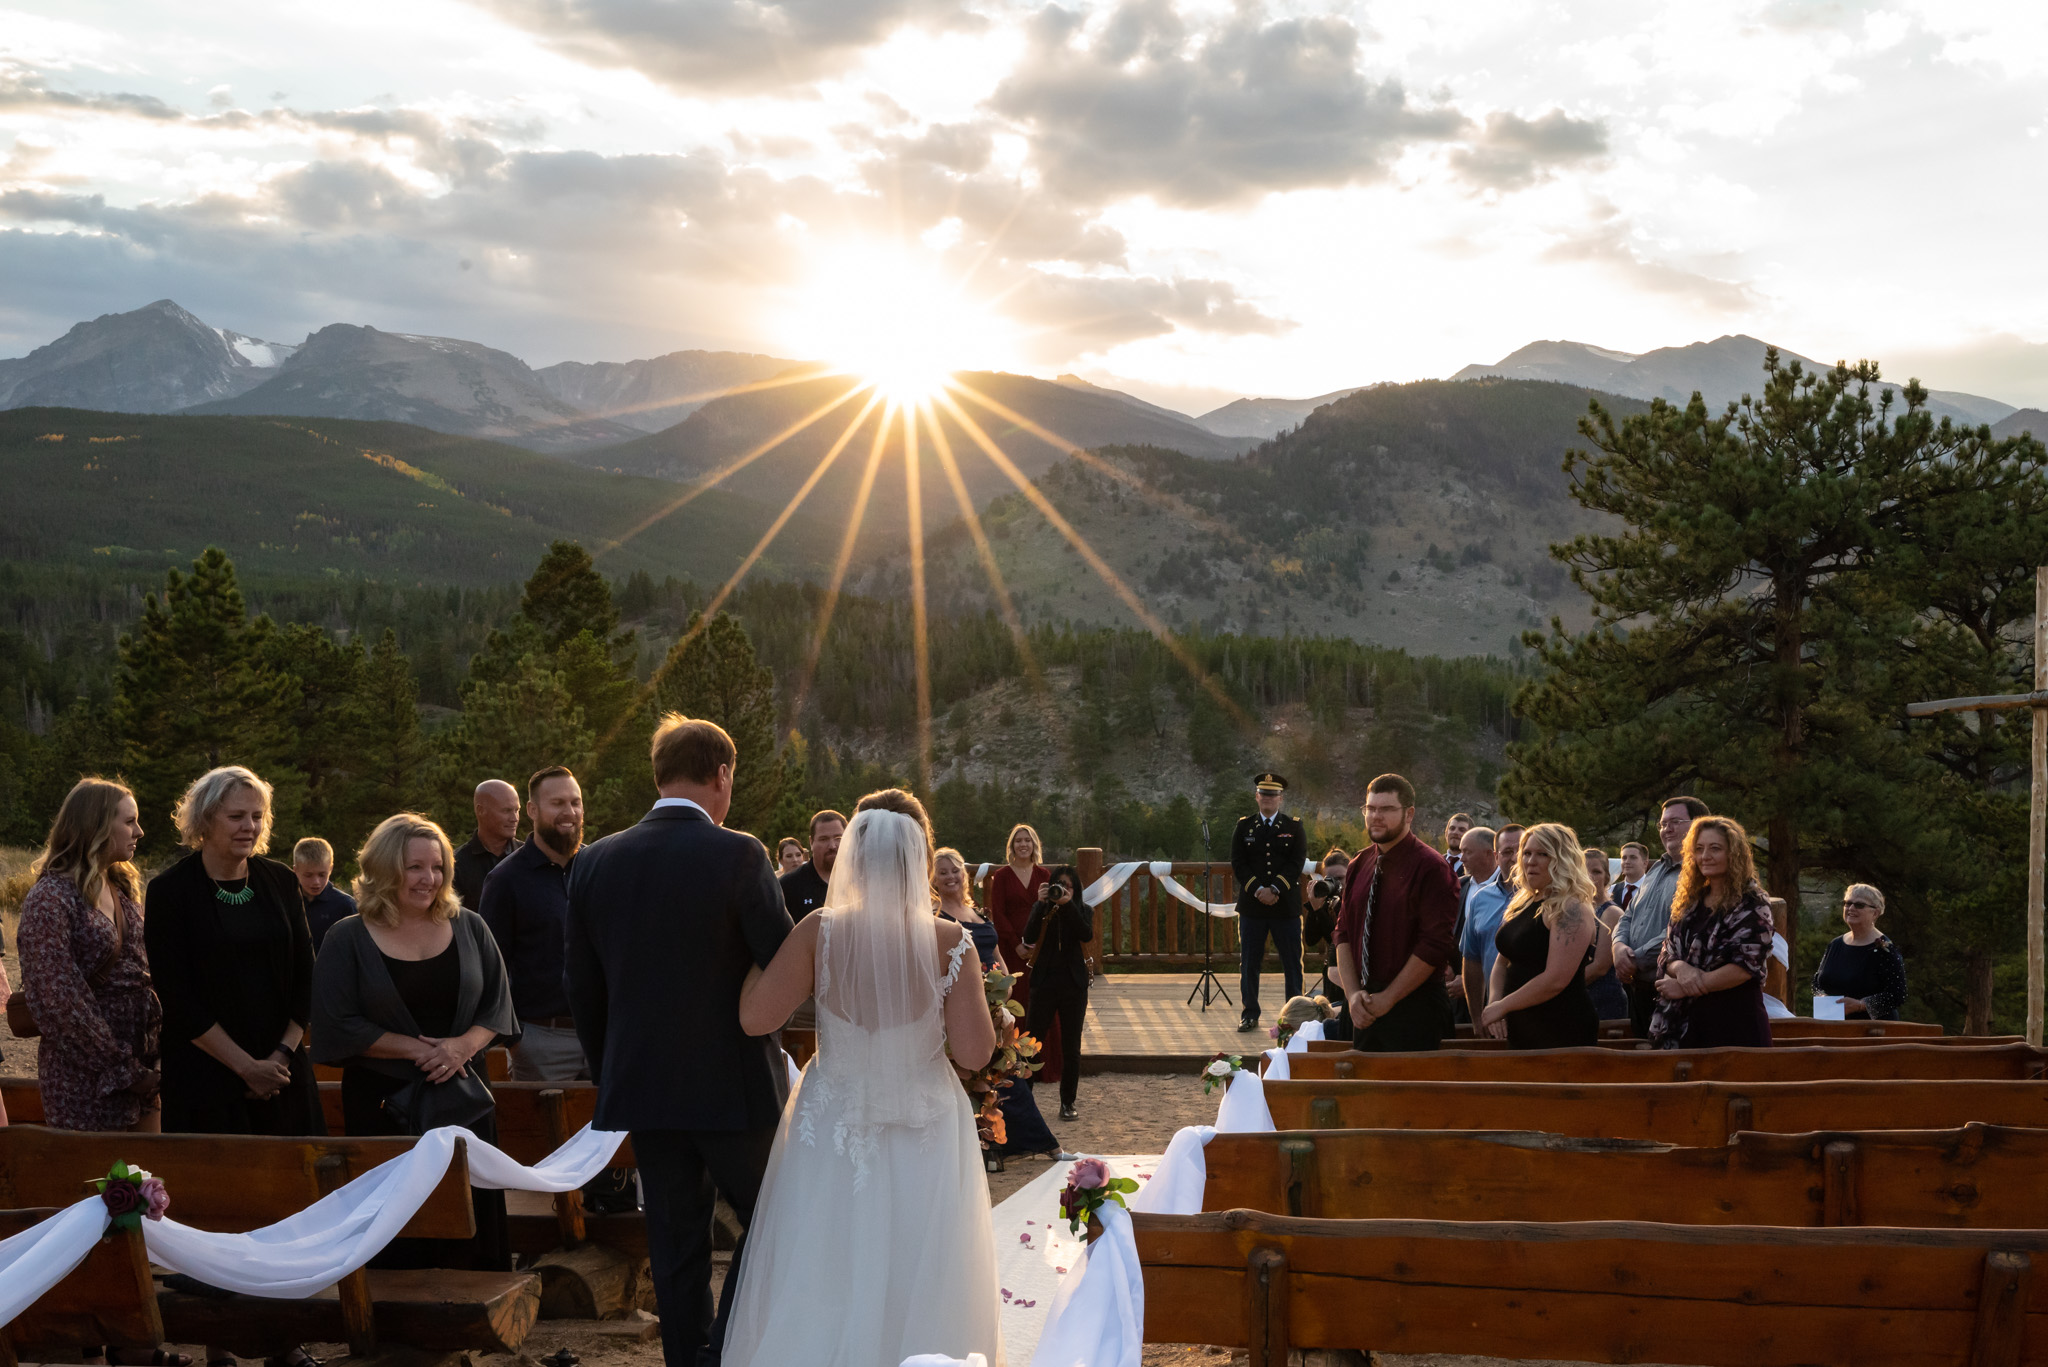
Table of Contents
Communicate Expectations Up Front
So much of a wedding photographer’s business is built on trust. Someone is hiring you to capture what should be one of the most important days of their lives. They need to trust that you will actually show up and capture the can’t-miss moments. But even beyond that, you are going to be someone they spend a lot of the day around, so they need to trust that you’ll enhance their day and not take away from it. I consider it critical to prep your clients in advance for what they can and cannot expect from you.
For this reason, I always have a meeting with the couple (usually via Zoom these days) before I even think about sending them the contract. This meeting serves two important purposes. First, it allows us to get to know each other; they can start to get comfortable with me and my demeanor, and I can begin to understand what is most important to them. Second, it allows me to clearly explain what they can expect should they choose me as their photographer. During this meeting, I set expectations about:
- What it’s like to work with me before the wedding
- What my role will be on the wedding day itself
- Turnaround times, approximate number of images that will be delivered, etc.
By covering all of this before they sign with me, it allows me to ensure I’m working with people who are comfortable with me, my style, and what I will deliver to them, which all helps to reduce problems down the road. A few negative reviews online can create a huge problem for a wedding photographer, and those are much less likely if everyone is on the same page from the start.

Have a Good Contract
This item could be its own article, but for the purposes of this article, know that having a good contract is important. The contract should support the expectations you’ve set in the pre-hire meeting. It also needs to cover many other things such as compensation and what happens if they postpone their wedding (which has happened a tremendous amount over the past two years).
Many photographers even include what I call a “walk away clause,” which basically states that if the photographer feels unsafe for certain reasons, they can leave and will not have to refund any money. This can be a good item to consider for anyone, but especially for women, as I’ve heard a few (not many, but a few) horror stories.
The bottom line with your contract is that it should protect both you and the couple. It needs to give them confidence that you are going to deliver what you said you would, while also giving you confidence that the event is going to be what the couple said – and that you are going to get paid for it.
Get a Copy of the Day’s Schedule (Or Help Make It!)
It is essential to have a copy of the run-of-show for the day. The schedule gives you an idea of when you should be where, and it also lets you plan your time to capture every type of image that you need.
Pro tip: In your first meeting with the couple, offer to help them build their schedule. This provides two huge advantages:
- It adds value for the couple who may not yet have a detailed schedule planned.
- It allows you to have a voice in when, where, and for how long you will be able to do posed pictures.
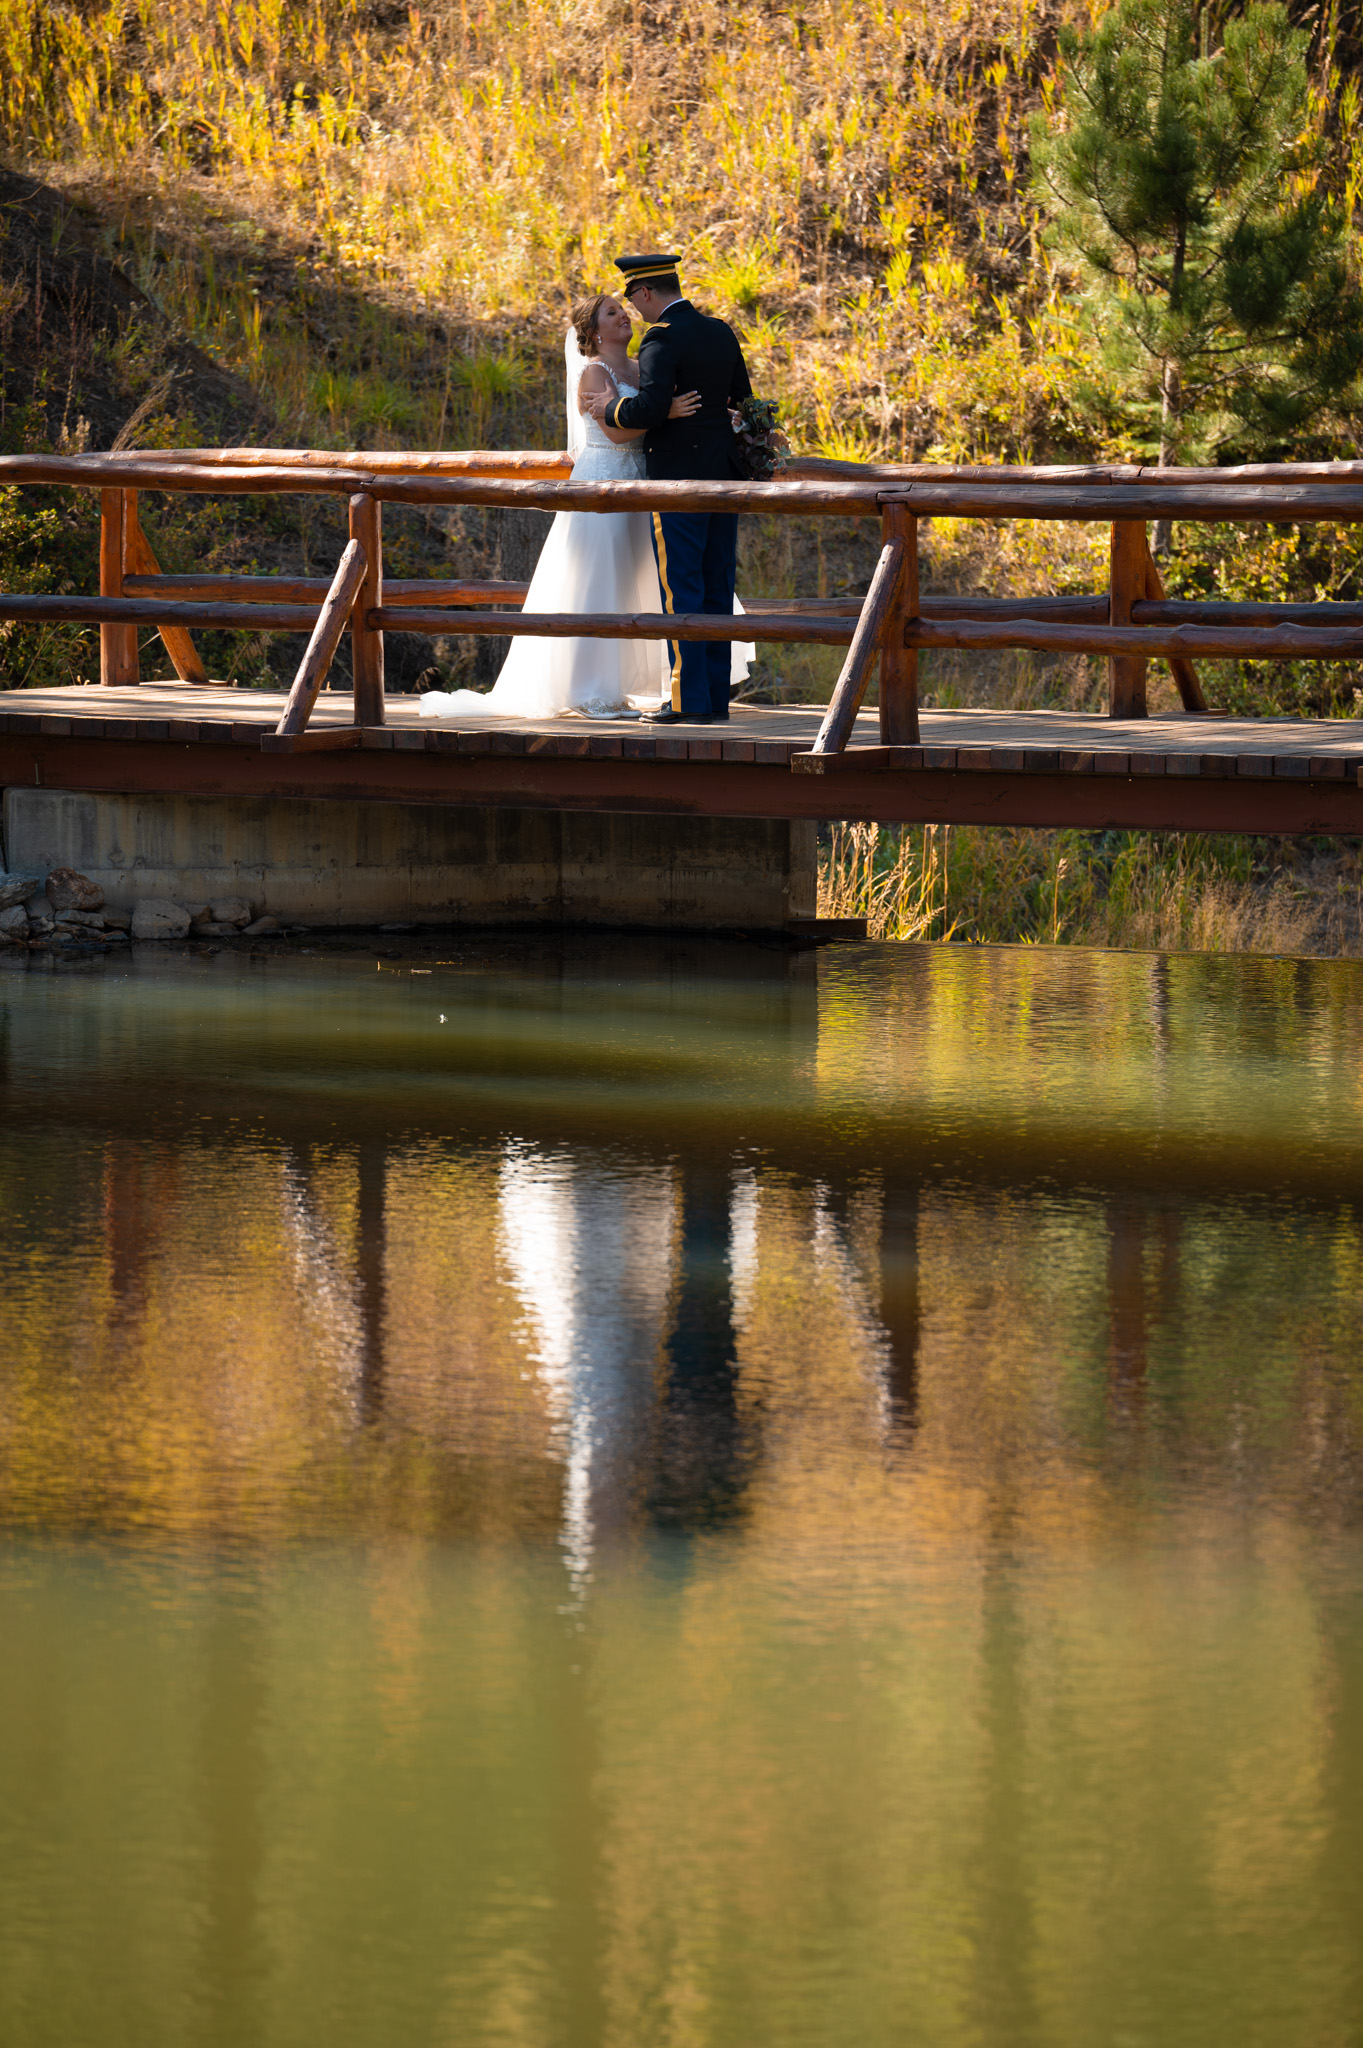
If you’re a wedding photographer who likes to take a lot of posed and/or formal photos, it’s especially important to manage your time and use the schedule to your advantage. For example, if you plan to take photos of the couple with picturesque light at sunset, you’ll need to make sure that sunset isn’t in the middle of the reception toasts!
This is also why talking to the couple early is such a big deal, before the schedule is completely set in stone. You have to advocate for what you need in order to fulfill what the couple is hiring you to do. Don’t assume that the couple, wedding planner, or anyone else is going to give you the time you need if you don’t ask for it beforehand.
Do an Engagement Session (If Possible)
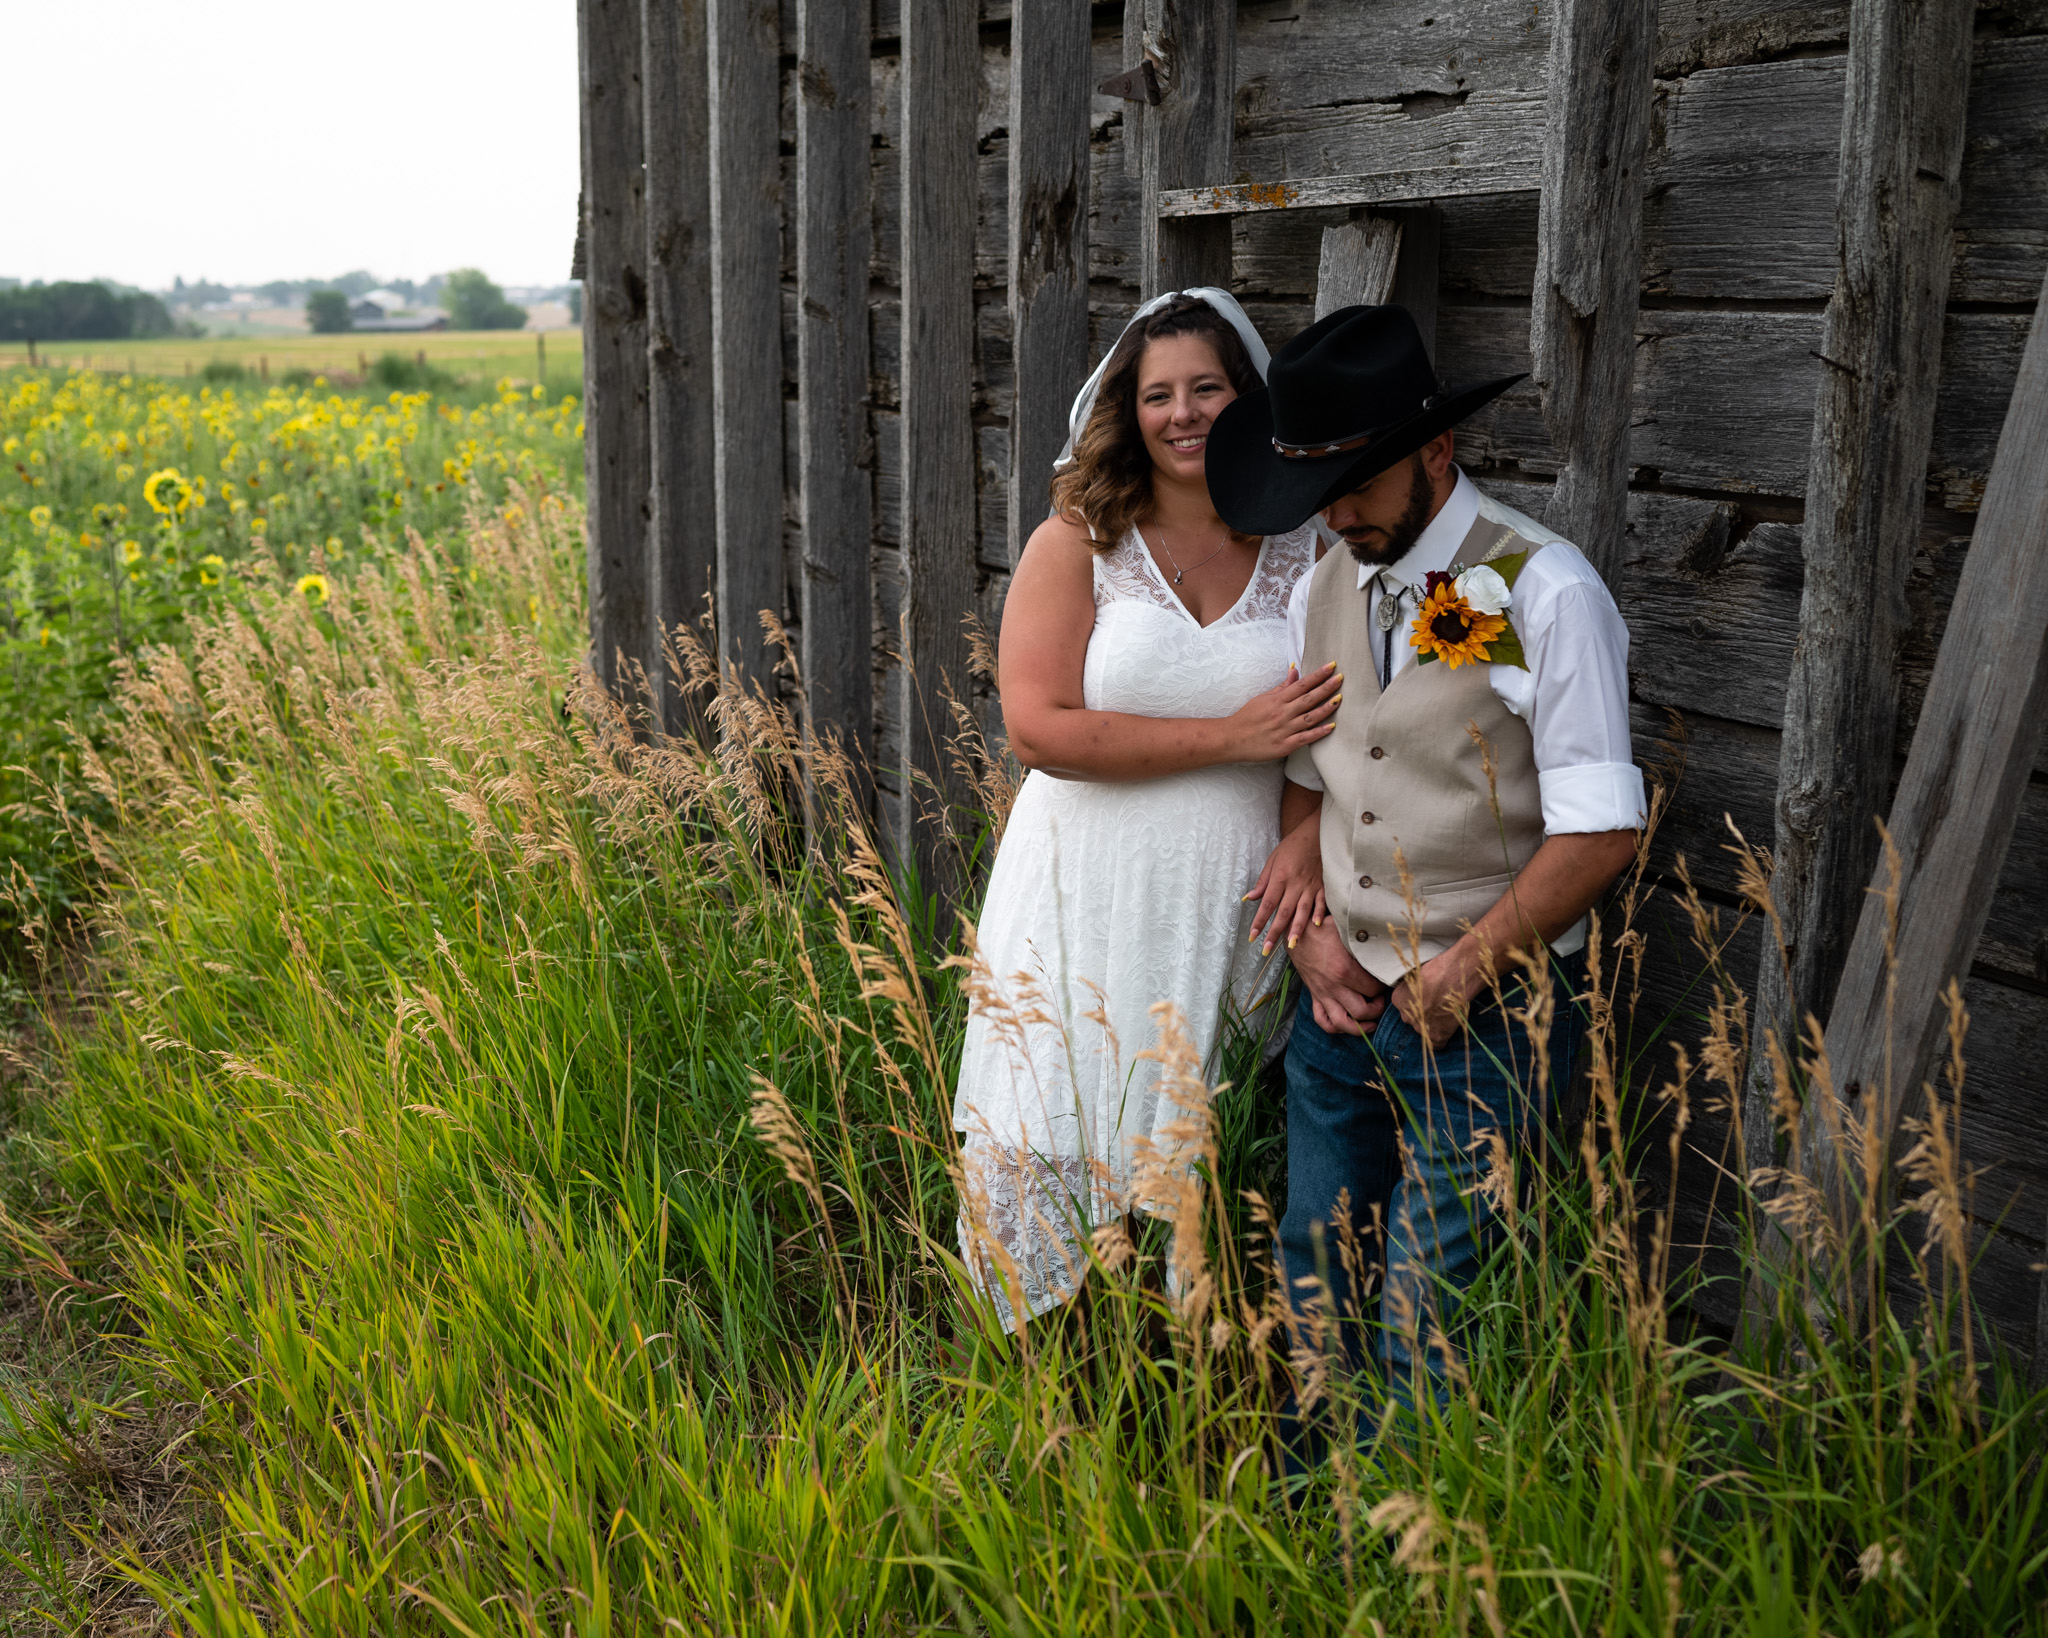
Engagement sessions are one of the most important – if not the most important – steps to a smooth wedding day for my business. Why? It all boils down to comfort and trust. Let me run through two wedding day scenarios.
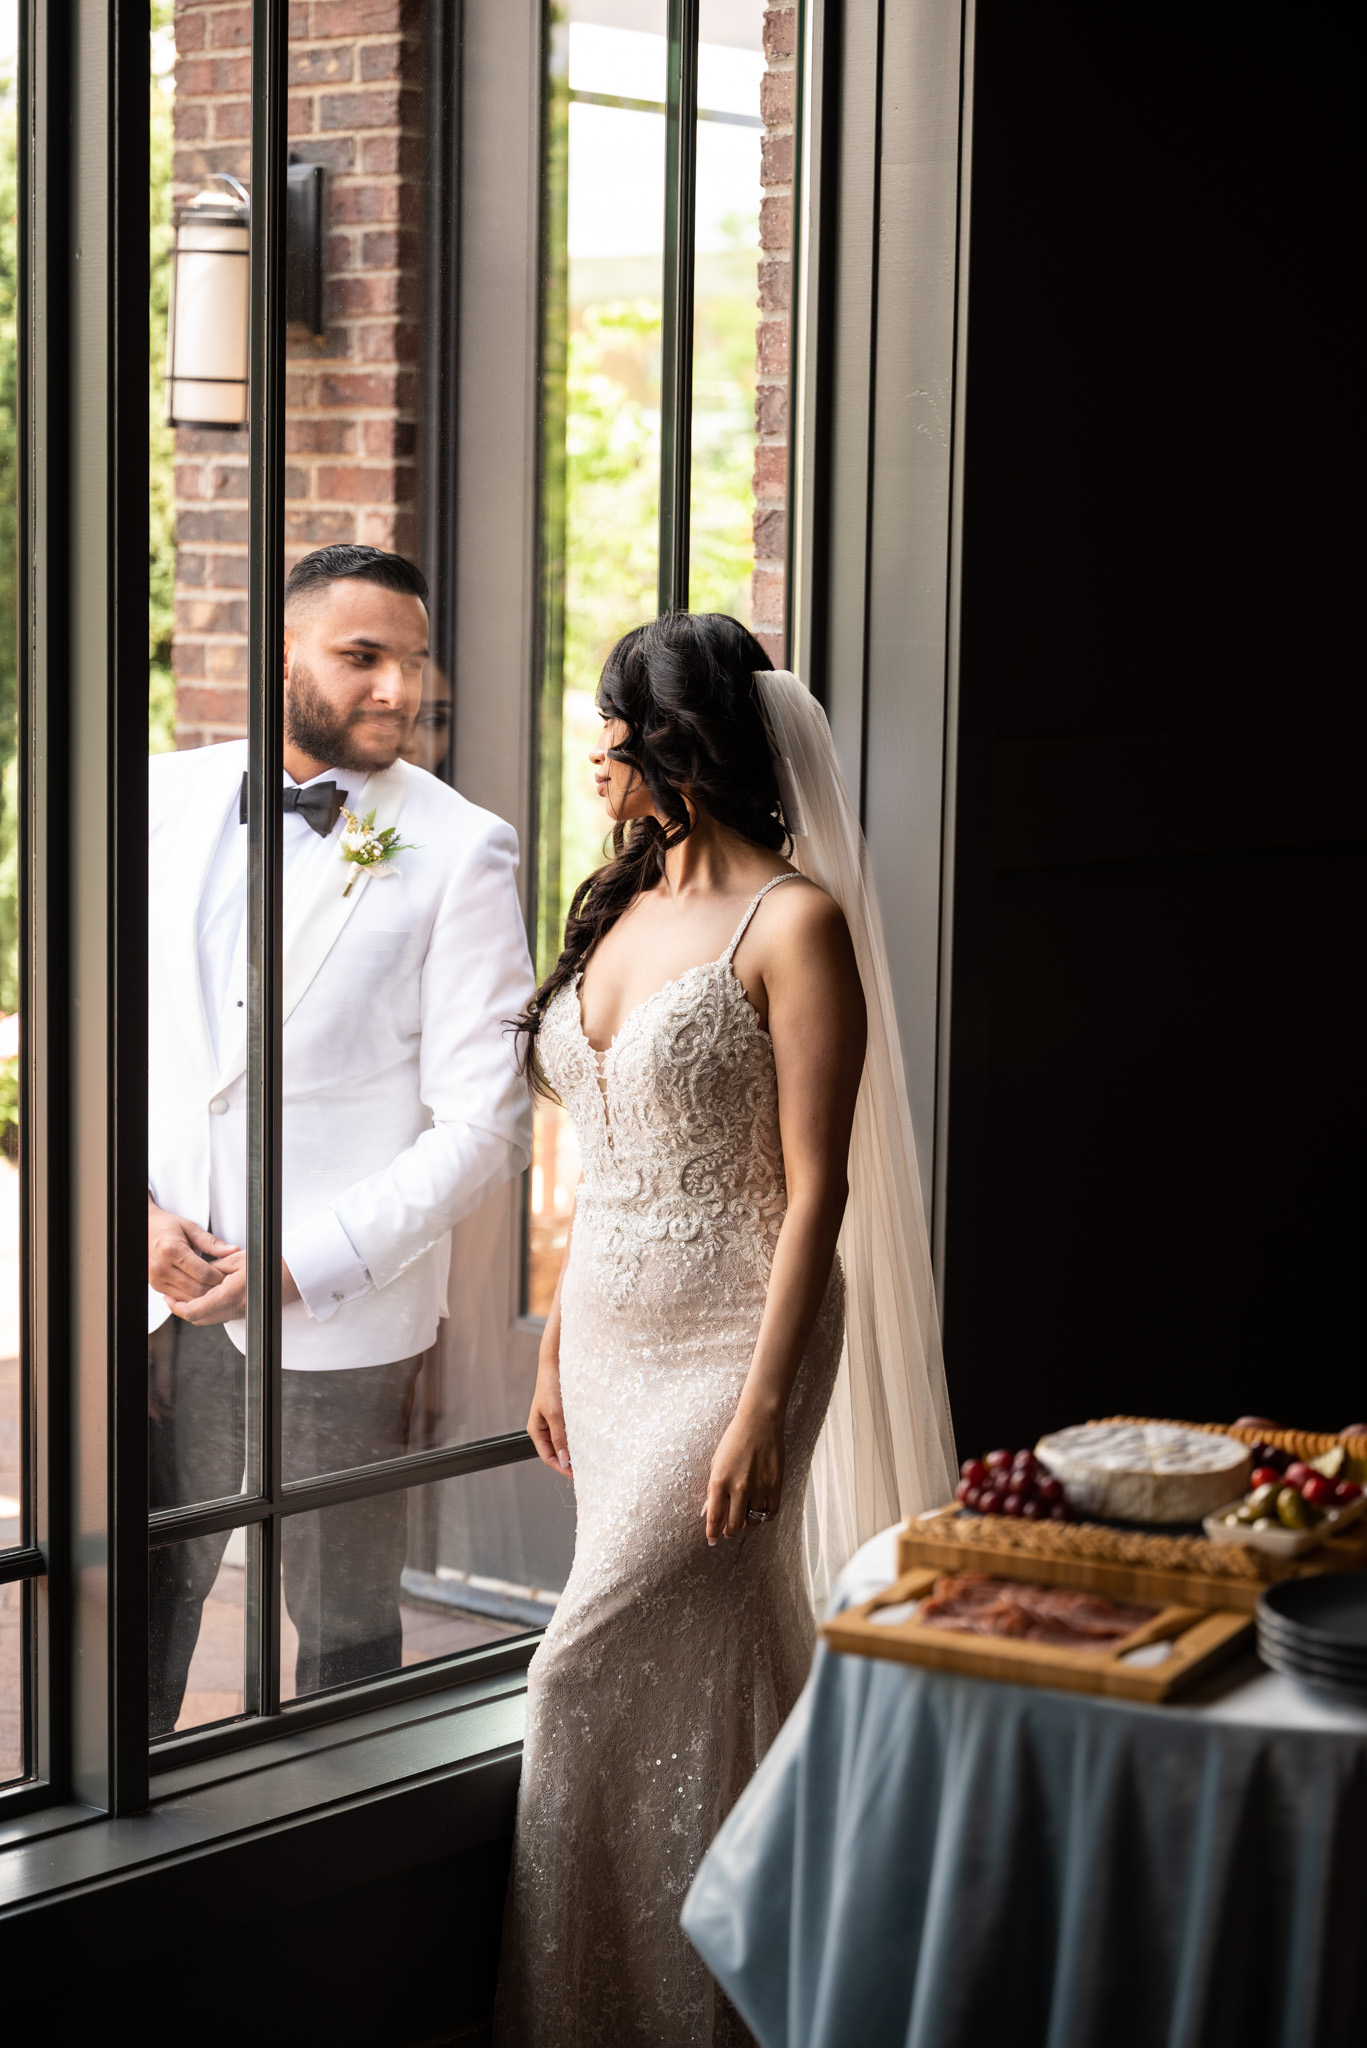
Scenario One: You had an engagement session with the couple in advance. They’re comfortable with you already – both being around you and also just seeing your photos of them. You show up on the wedding day (often starting with the bride getting her hair/makeup done), and you are greeted warmly, like a friend.
Scenario Two: You did not have an engagement session or take any photos of the couple ahead of time. You arrive to the wedding day and introduce yourself to the couple in person for the first time a few minutes before you start taking their pictures.
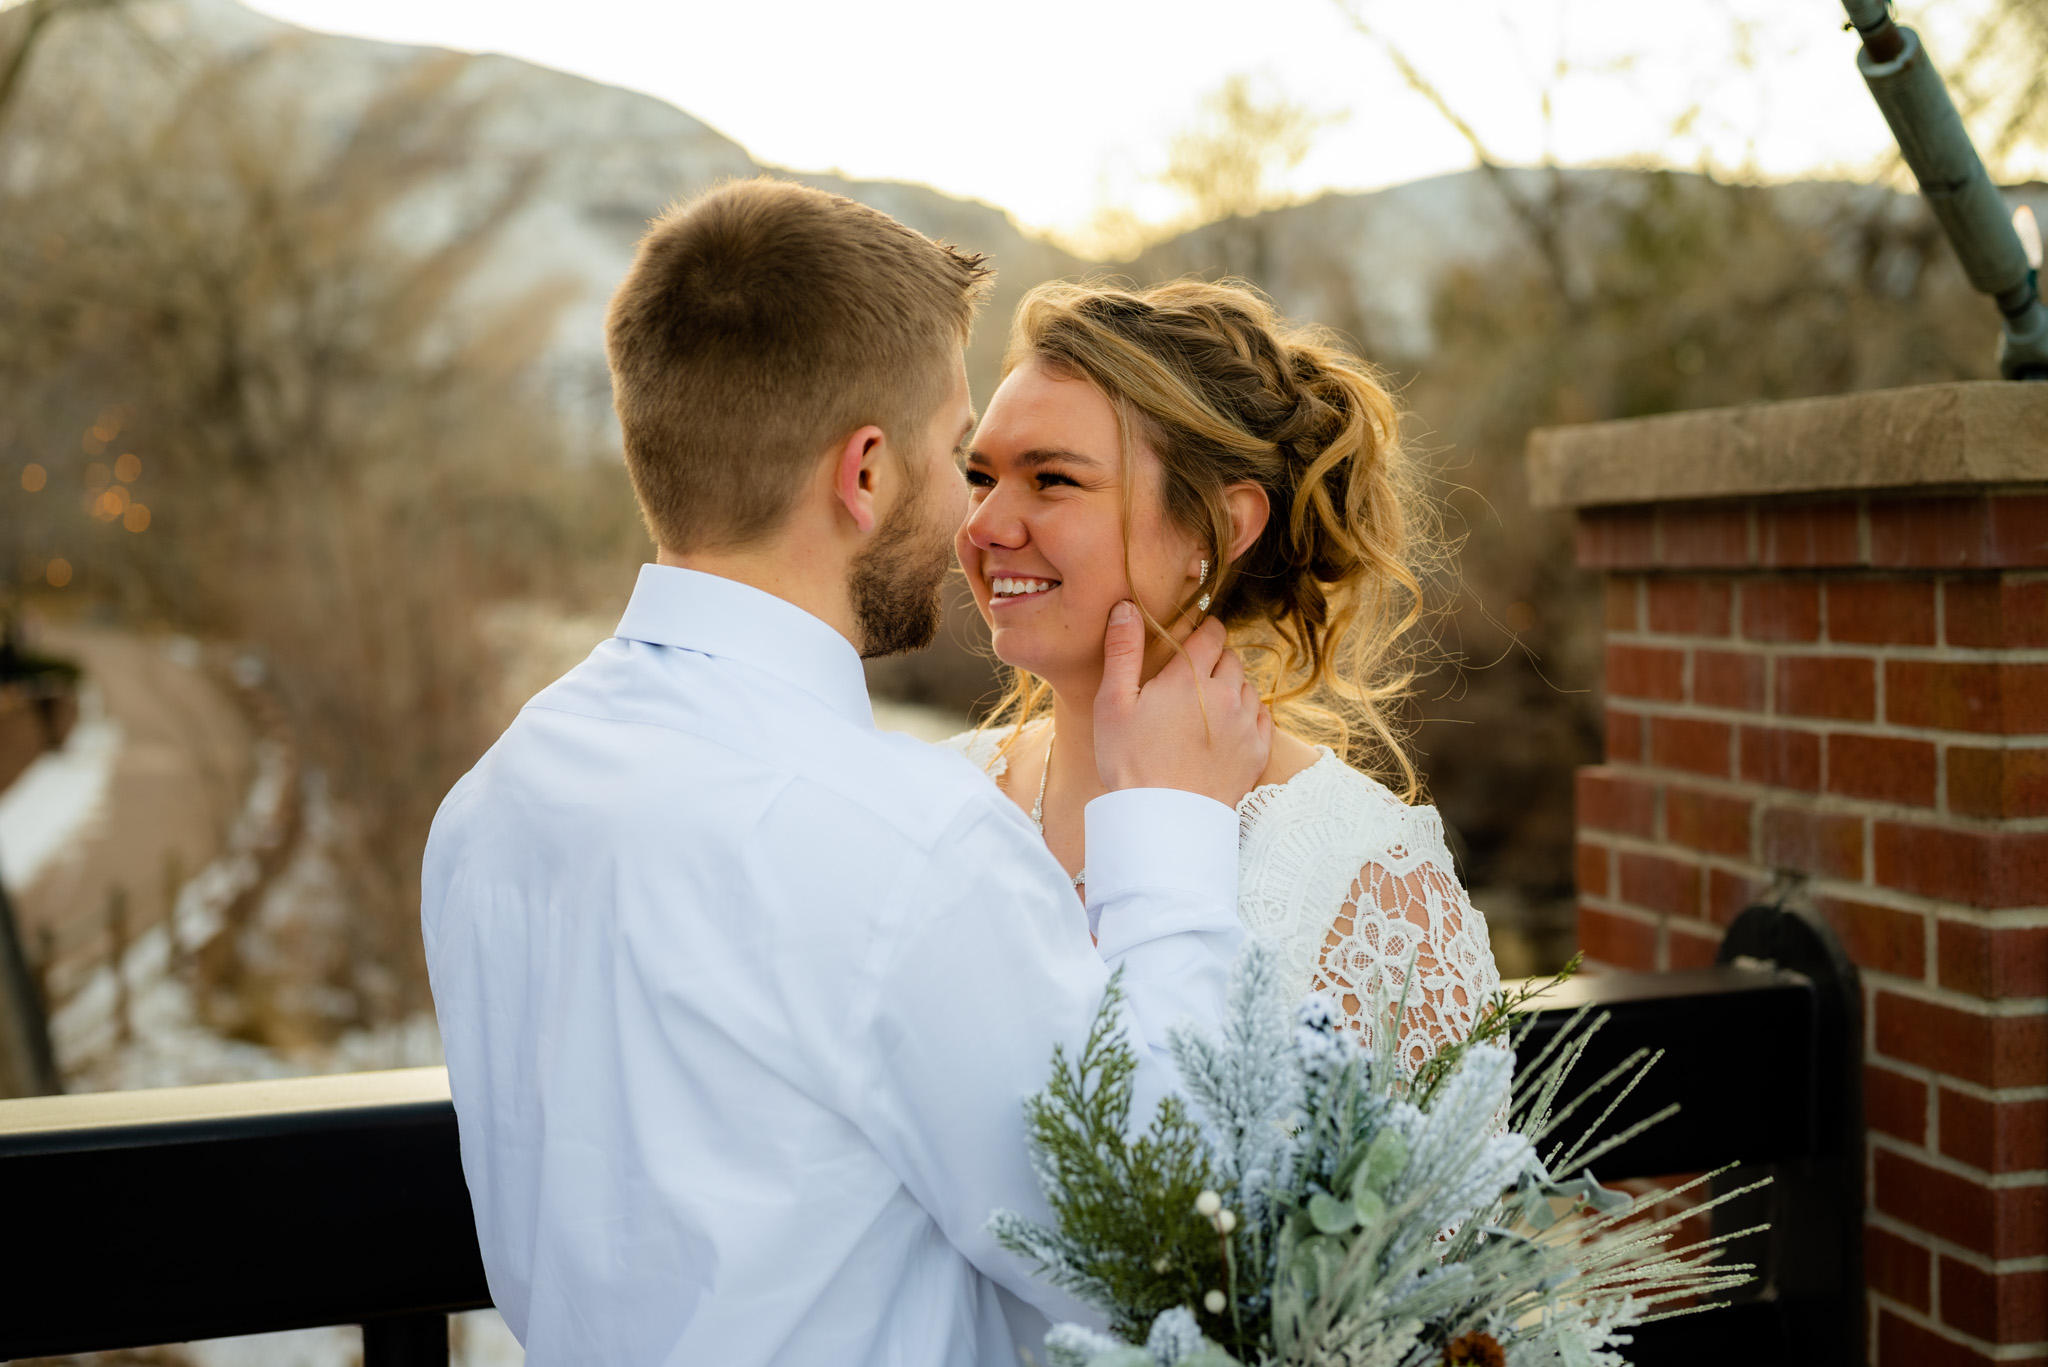
In my experience, scenario one leads to a better experience and better images every time. Discomfort shows in peoples faces in photographs, so there is tremendous value in the couple being comfortable with you from the first shot on the day of the wedding. For this reason, I include engagement sessions with virtually all of my wedding packages. It is as much for my benefit as it is for theirs.
Sometimes, it is not possible to do an engagement session (last minute booking, elopement where they don’t live close to you, and so on). I don’t do them 100% of the time, but I do them as often as I can.
Create a Client Questionnaire
A well thought out questionnaire can avert many potential problems on the wedding day. I send one to my clients about 6 months before the wedding. There are a few major things I’m trying to accomplish with a questionnaire:
- Figure out unique, important details. At most weddings, there are details with crucial stories behind them that you won’t know unless you ask about – i.e., the bride’s veil is held in place by her grandmother’s pin. Ask questions about important things they are bringing to the wedding or wearing.
- Learn the family and friend dynamics. These can sometimes be complex, so it’s valuable to know about the couple’s parents, siblings, grandparents, bridal party, and so on. Ask questions about who will attend the wedding and how they relate to the bride and groom.
- Familiarize yourself with cultural and religious details. Some religions do not allow photographs for certain parts of a ceremony, while other traditions you will want to make sure you are in the right place at the right time to capture the unique moments. Ask if any of these will apply in the wedding you’re photographing.
I print a copy of the completed questionnaire and keep it in my bag on the wedding day in case I need to refer back to it for any reason.
Coordinate With Other Vendors
From an organizational standpoint, there are two main types of weddings: those that have a wedding planner and those that do not.
If the couple has hired a wedding planner (and day-of coordinator), it is likely that they will be running much of the show. Chances are good that you will work directly with the wedding planner in cases like this.
On the other hand, if they have not hired a wedding planner (and especially a day-of coordinator), my experience is that I usually become the runner of the show. As the photographer, you will likely spend more time close to the couple than anyone else, family included. You may even be the one keeping them on schedule and reminding them where they need to be next. The task does get a bit easier once the reception starts, when I usually find it helpful to coordinate with the DJ and allow them to start running the show.
If the couple has hired a separate videographer, it is especially important to communicate with them. Given that you will both need to capture many of the same moments at the same time (first kiss, first dance, and so on), it is vital that don’t get in each other’s way by accident. I like to reach out to the videographer in advance if I haven’t worked with them before to introduce myself, and usually will suggest we meet up 30 minutes early on the day of the wedding to chat and sync up.
In general, talking with other vendors is always a good way to make sure the wedding goes smoothly and no one steps on anyone else’s toes. The other vendors may also be able to tell you what’s going to happen next so that you can stand in the right spot to capture the photos you need.
Make a Pre-Wedding Gear Checklist
You will likely be bringing more gear to shoot a wedding than many other types of photography, so I find it especially helpful to make a day-before checklist. This list does contain the bodies and lenses I want to bring, but the most important part for me are the other items. Here’s my abbreviated checklist:
- Charge all batteries (including several spares)
- Clear memory cards and bring spares
- Sync your camera times
- This one is critical. The first time I shot a wedding with two bodies, the times on the cameras were off by about 30 minutes. This meant that when I imported all the images from both cards and looked at them sequentially… it was a mess. It took me way longer than I care to admit to organize that wedding gallery.
- Also, if there will be more than one shooter at the wedding (you hire a second shooter or you are the second shooter), make sure to sync with the other photographer at the beginning of the day, for the same reason.
- Charge your flashes and/or bring extra disposable batteries
- The lighting you’ll need will vary dramatically based on time of day and location, but I always bring at least one on-camera flash and one off-camera flash (Godox AD200) with trigger, just in case. Some off-camera flashes will die quickly if you don’t remember to recharge them the day before.
Rent Any Gear You Need But Don’t Have
Weddings can be push the limits of your gear. While everyone will have opinions on what you “need” to shoot a wedding – even though it varies based on the type of wedding and location – there are some things you will almost certainly need. Below are my recommendations, along with the gear that I typically use for most weddings.
1. Two Camera Bodies
Having at least two camera bodies is a must for me. I personally shoot two bodies all the time with a double strap, but even if you only intend to shoot with one body, I would still bring a second one with you. That way, if your main camera breaks or anything else happens, you have a backup.
Also, I strongly recommend cameras that have two card slots, which you should set to write a duplicate of each shot. Redundancy is nice to have for many forms of photography, but it’s essential for weddings. To me, having the first kiss shots only stored in one place (especially if it’s an SD card you’re going to load in a few hours) is just too much risk.
I shoot most weddings with Nikon Z5 and Z6 II cameras. If you can get two of the same body, even better, since then they will have the exact same settings, features, button locations, etc. This can be a big help when you are switching between bodies throughout the day and need to react quickly.
2. Lenses That Fit the Situation
You don’t need the holy trinity of 2.8 zooms plus a bag full of fast primes to shoot a wedding, but you do need lenses that fit the situation. For example, if the ceremony is in a large church where you have to shoot from the back and cannot move around (this is common), you will need something with more reach. Or, if you know the ceremony will be dark and/or you can’t use flash at certain times, you will need some fast glass to get enough light. (As a side note, these are both good examples of why you should scout the venue ahead of time and figure out its rules for flash while you’re at it.)
The following is not meant to be a “correct” list of lenses for a wedding. It is great to have your own style and look as a photographer, which includes the lenses and focal lengths you use in different situations. Instead, it’s my typical wedding kit, pending some changes based on timing and location of the shoot:
- 70-200mm f/2.8: This lens is on one of my bodies nearly the entire wedding. I shoot a majority of most ceremonies and bridal portraits on this lens, along with many of the reception shots.
- 35mm f/1.8: This is the other “workhorse” lens for me on a wedding day. For most ceremonies and receptions, 35mm gives me the wider perspective I want without being too wide. The f/1.8 maximum aperture is helpful in low light, non-flash conditions.
- 105mm Macro: It’s a specialist lens that I use for a couple shots and then put away – but for those few shots, it makes a huge difference. This is not a “must-have” lens, and I shot many weddings before getting one, but I am very glad I got it and it is in my bag for 100% of weddings moving forward.
- Other Primes: 24mm f/1.8, 50mm f/1.8. You can also get f/1.4 versions (especially of a 50mm lens) if you expect to be shooting in especially low light, or you want some very dreamy bokeh and shallow depth of field. The 24mm is for cases when I need a wide angle lens without hassle.
- Other Zoom: 24-70mm for wider shots. You can go with an f/2.8 or f/4 depending on whether you need to use it indoors in low light or not.
I’ve worked with many wedding photographers whose favorite wedding lens is an 85mm, and you’ll notice I don’t even have one in my bag. Although 85mm is a classic focal length, I find that for my style of photography I rarely shoot at a wider aperture than f/2.8. Since I always have the 70-200 on one of my cameras, I can already shoot 85mm f/2.8 and don’t need a separate prime. But if you are all about that 85mm f/1.4 look, go for it!
I’ve never had a client ask me what gear I shoot with – they generally don’t know or care – but this doesn’t mean it isn’t important. They don’t care what you use, but they absolutely care that you create the images they want.
Unfortunately, the cameras and lenses above are expensive, easily $10,000. If you have the gear already or the means to buy it – great. If not, don’t let that discourage you. Instead, rent the key items that you don’t have.
Renting will do two things. First, it will allow you to get some higher quality shots for your portfolio, which is important for booking more weddings. Second, it will let you experiment with what gear works best for you and your photographic style before you spend thousands on that lens or camera body.
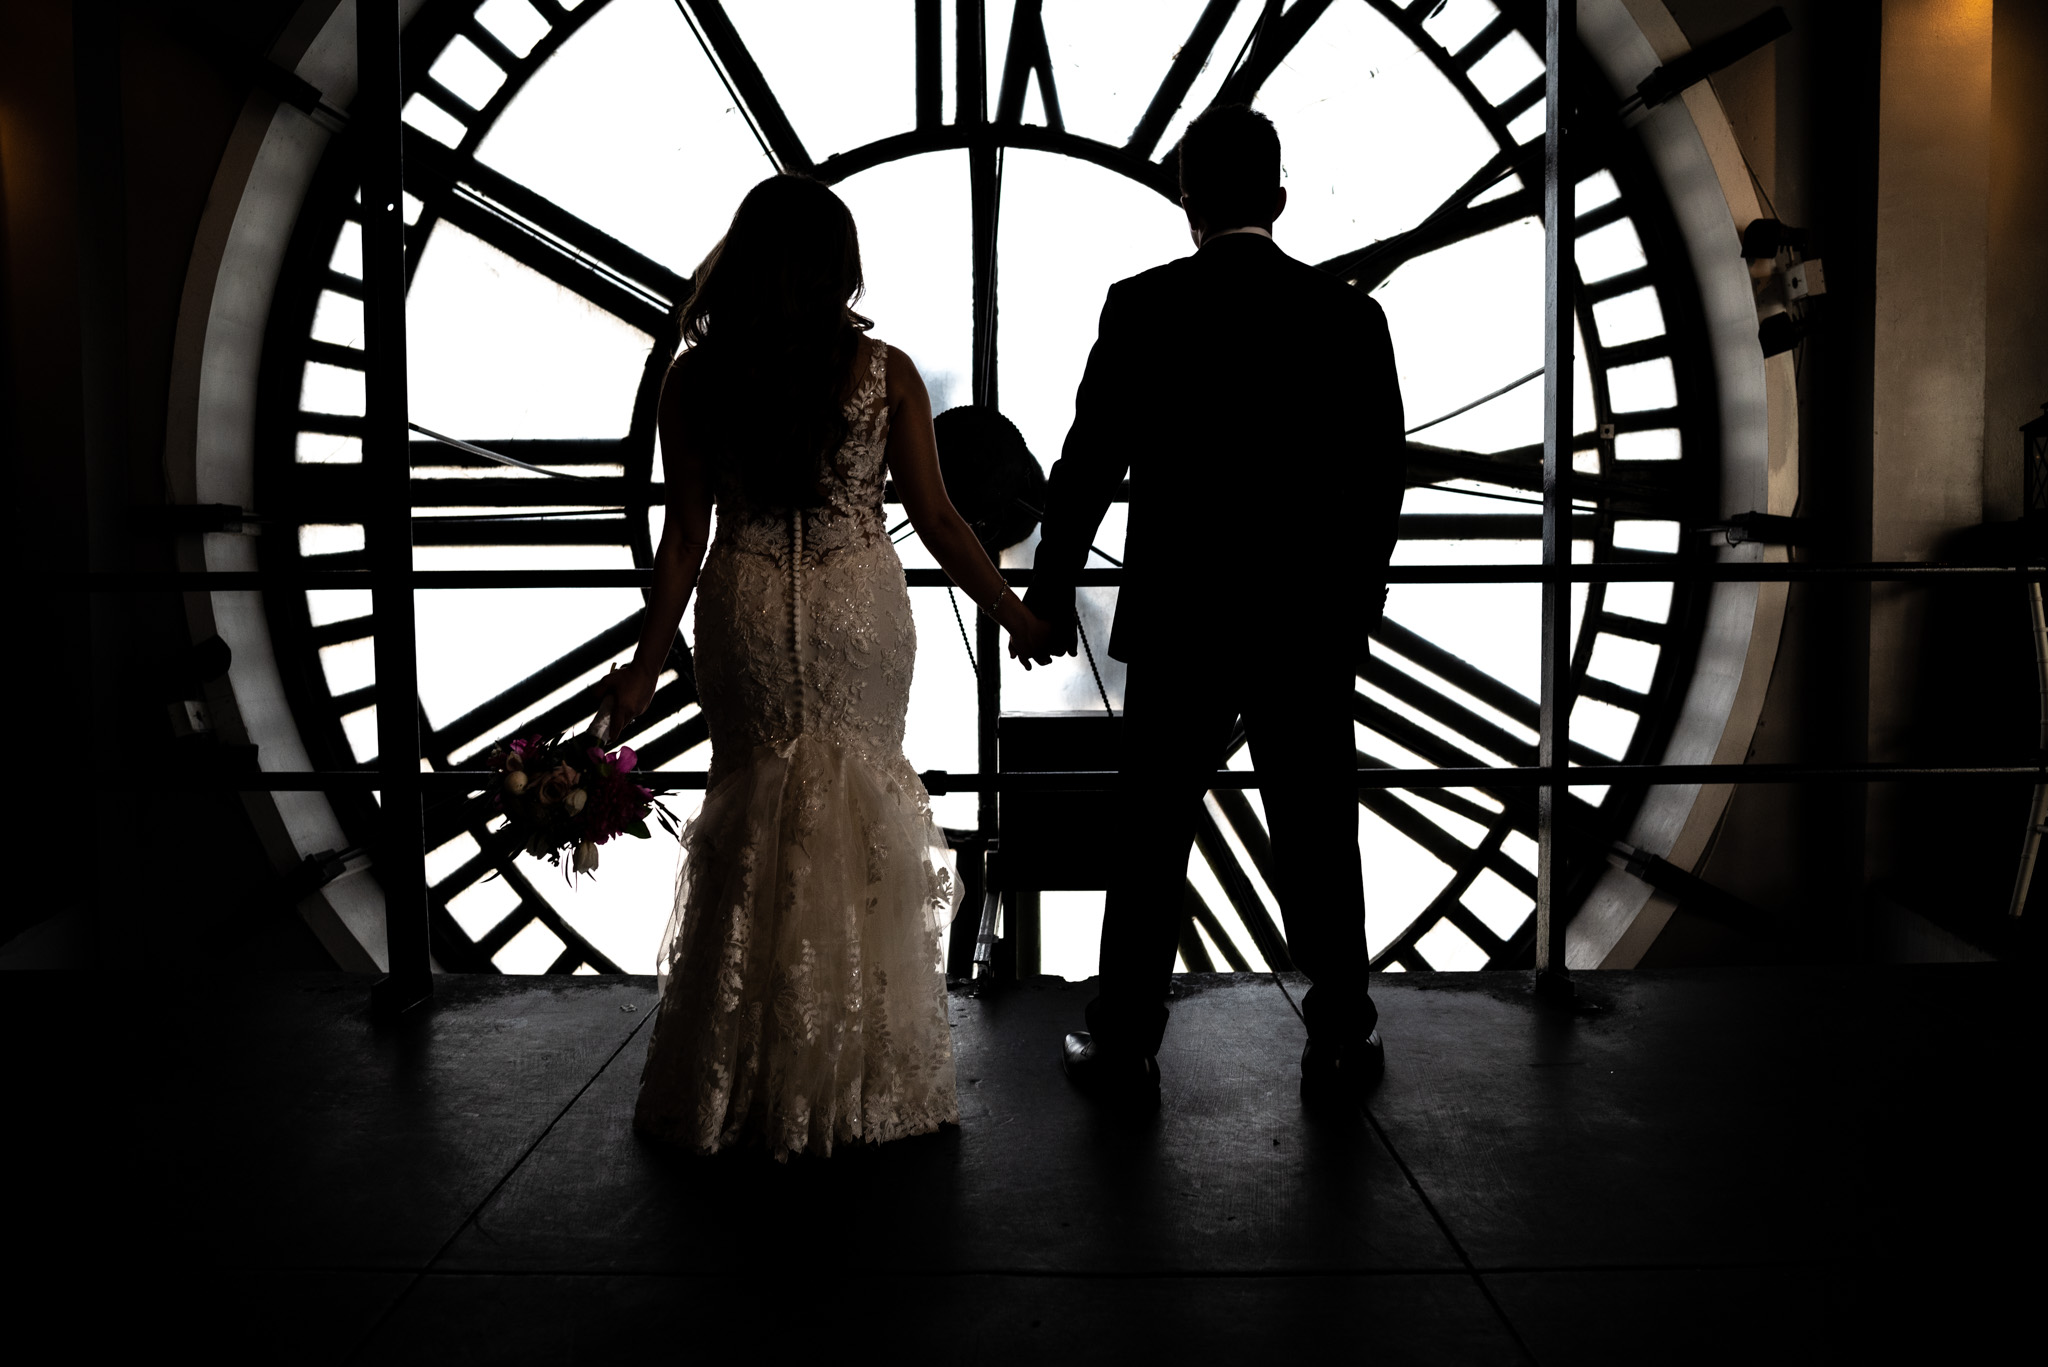
Scout the Location in Advance
If you are photographing a location you haven’t been to before, it’s important to know what type of environment you are walking into. This helps with what gear to bring, and also with knowing where to take good portraits. Even if you have been there before, it’s best to visit again, as things can change.
That’s great when the location is a reasonable distance from you. But other times, scouting in advance may not be possible or practical. In those cases, go online. Use maps with satellite and street-level views. Check the venue’s social media to get a feel for the space. This will be time well spent, as it allows you to hit the ground running much better on the day of the wedding (and bring the right camera gear tailored to the location, too).
Arrive Early
This one is simple: Get to the wedding early. It’s not just terrible for the wedding if you get there too late, but arriving early also lets you do some last-minute checks and sync up with the other vendors. Give yourself enough of a buffer to get there no matter what accident or situation will inevitably delay you. My rule of thumb is to show up early enough that you still have time to drive back to your hotel room/home in case you forgot a critical item.
Don’t be Disruptive
This is the most important item on this list. No shot is worth ruining the experience of the couple or their guests.
I was a guest at a wedding recently where the bride was walking down the aisle, and the photographer was standing between the bride and groom, blocking their views of each other. Terrible!
If the couple and guests are left with a sour taste about you afterwards, no amount of good images will make up for this. Plus, with long lenses and modern cameras that are good for cropping, you don’t need to be that close in order to get those types of shots anyway. The best wedding photographers don’t attract attention during the most important moments of the day, so that the couple can concentrate on each other and their family and friends.
Bonus Tip – Eat When the Couple Does
This one doesn’t always work out, but when possible, try to eat when the couple does. It may seem like the right thing to do is to wait until all the guests have gotten their food before grabbing yours, at least in a buffet situation. But even though this is sometimes the best or only option, I find it’s better to grab food immediately after the couple if possible.
Nobody wants pictures of themselves eating, so by eating at the same time as the couple, you are not missing anything, and you’re then available and ready as soon as they are done. This can give you an extra few minutes to steal them away for a few minutes for sunset portraits or any other shots you had in mind (depending on what they want, of course). It’s a small thing that can make a difference.
Conclusion
I hope that the tips above will help you photograph your next wedding without a problem. Or, maybe they’ll give you the confidence you need when you’re photographing your first wedding! Everyone starts somewhere, and hopefully this helps no matter what level you are.
One final note: It is not possible to eliminate all problems at weddings all the time, because oftentimes they are completely out of your control. What is in your control is how you react to these unforeseen issues. Keep calm, stay professional, and roll with it the best you can.
I hope that you found this list helpful. Any tips you’d add, or anything you want me to go into more detail in a future article? Let me know in the comments below!
After 32 years and over 700 weddings I have finally found an article that is 100% correct – even though (like another commentator)I also started on a Yashica 124G then a Hasselblad before turning digital very very gradually (because 35mm is miniature to me). The only addition I would make is to put one memory card from each camera in your pocket (preferably zipped or buttoned) before leaving the location, leaving the second card in each camera (never use a camera with one card slot for weddings) – I am aware of a tog who worked all day then had his cameras stolen as he left with the cards still inside them!
Hi Alan,
Thanks so much for the comment and sharing your experience!
You are absolutely correct, memory card management during the day is critical, and I like your idea of taking one card out in a pocket and the other in your camera. I know a few fellow photographers who bring a laptop and won’t leave the venue until they are transferred on their as well, just to provide another location. Cannot have too much redundancy with data!
Very helpful article!! Although i am not in the pro photography i love to read such information. Wedding photography is difficult. I remember on my wedding day (many years pre pandemic) the crazy situation in which my photographer (and personal friend) tried to make his work! Lots of people, a hot mid-summer day here in Cyprus (45 Celsius) and the after party… Lovely memories!!
But i thing something is missing from your article. You didn’t mention the video! Its another aspect of wedding photography and it demands separate camera body and tripod and lenses. From what i know many wedding photographers has another aps-c or MFT camera for video recording.
Thanks for the comment – that sounds like a hot but fun day!
Regarding video, you are correct. I did not include much information in this article about video, as I find most of the time nowadays the couple hires a separate videographer. I sometimes do hybrid coverage (photo and video), and perhaps I will write a dedicated article to that at some point!
When I photographed the first wedding in 1974 I was 13 and for 30 years I photographed weddings, for many years I used a yashica mat 124G, it did not have autofocus, it did not have light metering, the flash did not have TTl and we had to change the film in 30 seconds and calculate when we would have to do it because each one only allowed 12 shots, and it was unforgivable to miss at crucial moments.
Customers paid by the number of photographs printed in 18x24cm when we arrived at lunch or dinner, the groom asked how many photographs I had already taken because I didn’t want to exceed the budget of 100 photographs.
And now I ask myself what can go wrong in a job like this with these facilities? There is only one thing that can go wrong, the (very, very) inability of the photographer.
Sorry for the candor.
Hi Victor,
Thanks for sharing your experience – I agree, wedding photography is certainly easier now than what you describe in the 70’s. I can’t imagine trying to get a full wedding now in 100 shots!
Thanks, Adam, interesting article.
Glad you found the article interesting, Terence!
Dear Adam
Thanks for the well-written article.
I noticed that 7 out of 8 images presented here were taken with the Nikon Z5.
Frankly, the main concern that’s holding me back from getting the Z5 is it’s ‘-2 EV low-light focusing’ capability. After looking at your images, it seems like the Z5 is able to auto-focus well for your indoor-lit shots.
Would you be able to share your personal experience on the Z5’s low-light focusing capability? Is -2 EV sufficient for most types of indoor-lit situations?
Thank you.
John
Hi John,
Thanks for the comment!
Until recently, I was shooting weddings and concerts with Z5’s (I upgraded a few months ago to the Z6ii). My experience with the Z5 was that most of the time, I had no issues focusing under reasonable circumstances. However, I did run into times when it was quite dark where it hunted a lot. In particular, this seemed to happen either when the subject was pretty far away, in fog, or heavily backlit (like on the dance floor with part lights). It was typically not a big problem, as I was either able to burst shoot and find the one in focus or manual focus and get it right, but I did occasionally miss a shot.
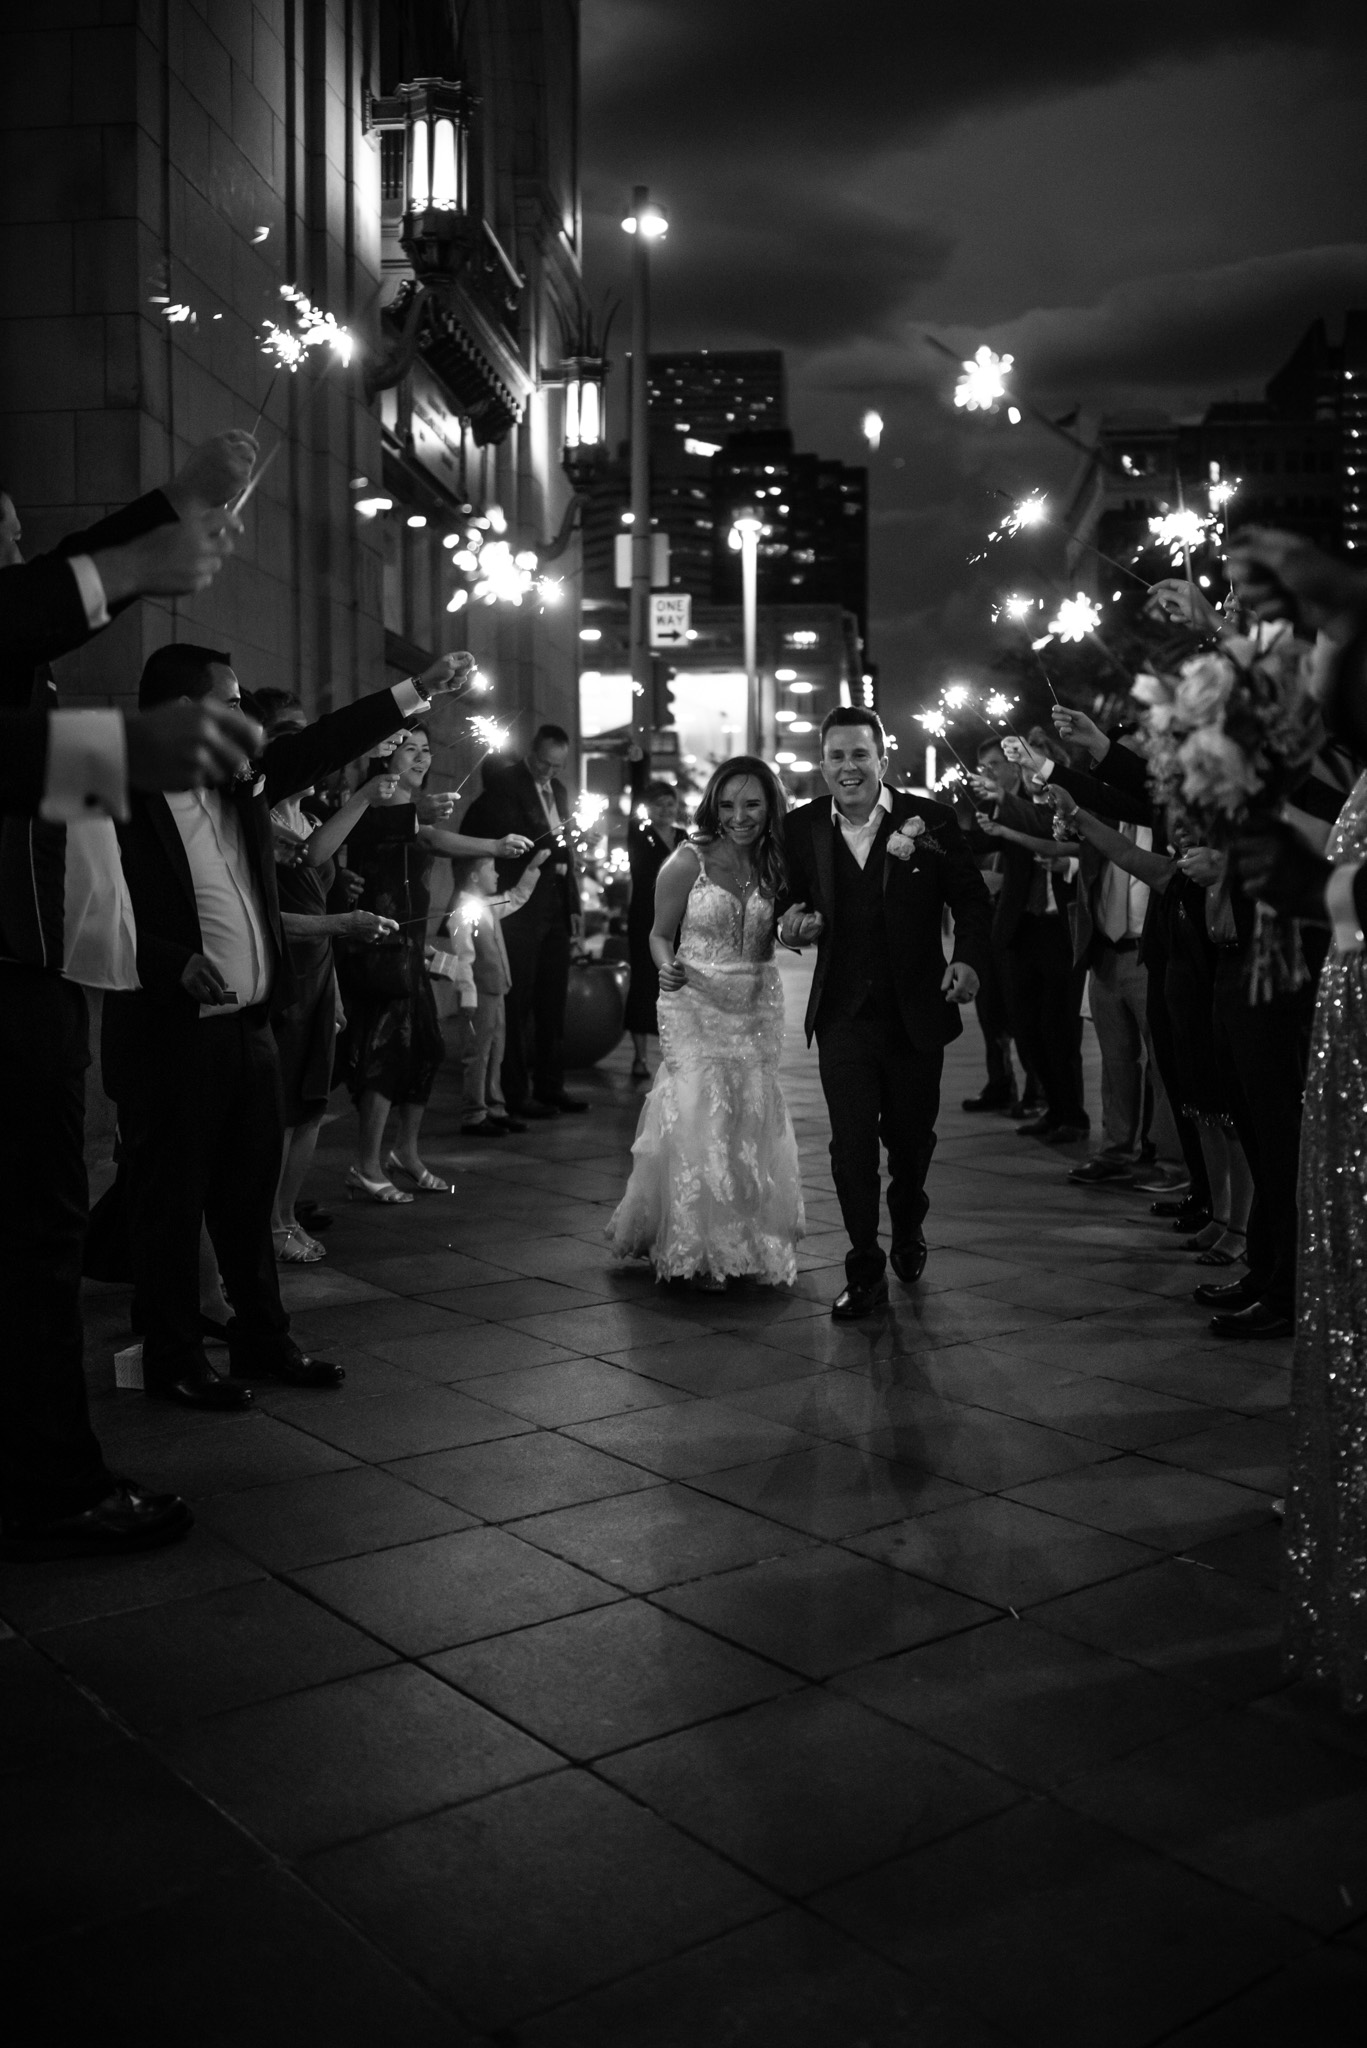
That being said, I have noticed a significant improvement in autofocus with the Z6ii, especially with eye/face detect when the subject is farther away. This, along with video capabilities (I’ve been doing some hybrid work lately) are the main reasons I upgraded. If I shot mainly portraits, I wouldn’t have upgraded, but for weddings, and even more significantly, concerts, the upgrade was warranted. I do think that the Z5 is the best full frame value on the market, but I so often work in low light that the Z6ii was a worthwhile upgrade for me. For example, the last image in this article (sparkler sendoff) was the one where I struggled to focus the most, even though it was outdoors. The autofocus couldn’t figure out what the subject was, and often jumped to the sparklers. I took about 15 images of this moment, and only 3 were acceptably in focus. I’ve done a similar sendoff with the Z6ii, and almost every shot was in focus.
Bottom line to answer your question – I think whether or not the Z5 will work for your needs is less about if you shoot indoors, as it is adequate in many indoor situations, and more what type of lighting you often encounter. If you often shoot in very dark or challenging lighting (backlight, etc), then I would go for the Z6ii if possible. If you are doing more general purpose, including some better-lit indoor situations, the Z5 should be fine for that.
Hope that helps and happy to answer any other questions.
Dear Adam
Thank you so much for sharing your experiences so generously with all the readers on this forum. I’m sure everyone reading your feedback will benefit tremendously as well.
With appreciation, John
You are most welcome! Glad you found it helpful and looking forward to sharing more articles!
Also think so
So many great tips here! I’m hoping to get into the wedding business in the future, so this was really helpful. Thank you!
Erin, glad you found the article helpful! And the wedding business can be very rewarding, I love it!
As an amateur photographer, this is a good and actionable list of considerations – Thanks. I especially appreciated the section on not being disruptive. I dare say we’ve all been to weddings where the photographer acts like they are the star of the night … instead of the bride & groom.
Chris, thanks for the comment! Glad it was helpful. And agreed, it is painful to watch that situation play out!
I thought this article was so concise with info and a great read for anyone hiring a photographer. I will pass it onto my friends who are getting married.
Thank you for the comment! Glad you liked it!