The process of organizing pictures is a time-consuming, but crucial task. Keeping your images organized and backed up will save you a lot of time and headache in the future. Therefore, it is essential that you do it properly early on and keep a consistent system in place. Photographs are our precious memories frozen in time, and we simply cannot afford to lose them. In this article, I will provide detailed information on how you can organize your digital photographs on your computer and implement simple backup practices.
Whether you take pictures with your smartphone or a dedicated camera, you have most likely accumulated thousands of images over the years. Those images are probably scattered all over the place – some on your phone, others on your computer. And if you previously ran out of storage, you might have dumped some onto an external drive as well.
But what if you were able to put them all in a single location, properly organize them in an easy to remember manner, then store them in a safe and reliable location? It sounds like a hard job, but it is extremely simple and effective, as you will see below.
Please note that this is NOT a guide for serious photographers with large image catalogs. If you are a photographer looking for ways to organize your photo library, please see my article on “organizing pictures in Lightroom” instead.
Before we go through a detailed, step-by-step process of organizing your photos, below is a quick “TLDR” version.
The Best Way to Organize Photos
- Find All Printed Photos. If you have printed images, find every single one that you want to preserve and digitize. Go through all prints and family albums. Considering reaching out to other family members to locate more photographs.
- Digitize Printed Photos. Once you locate all the photos, use a good-quality scanner to scan the photos in high resolution.
- Locate Digital Photos. Go through every device, starting from your smartphone all the way to external drives to locate every digital photograph you have.
- Use a Single Storage Device. No matter how many photos you have, it is best that you put them all in a single storage device. If your current storage device has insufficient storage, buy an external hard drive with enough capacity to fir your entire photo library.
- Use a Solid Folder Structure. Once you put all the photos in a single location, come up with an easy-to-remember folder structure that you can use consistently for all your photos today and in the future. I recommend splitting your photos into folders organized by year and event name.
- Organize All Photos. After you decide on the folder structure, go through all the images that you previously scanned, as well as your digital photos, then organize them. This is going to be the most time-consuming process.
- Backup Your Photos. Now that you have all the photos properly organized by folders, it is time to back them up. Use several local storage locations to back up your photos. Also, consider using online cloud storage to store another backup.
Now that we went through the quick summary, you might want to read the full version of the article below.
Table of Contents
1. Locate All of Your Photographs
Start with your computer and try to locate every single picture. Common places to look for photographs are in your “My Documents” or “My Pictures” folders, but you might have pictures in other folders as well. Just search your computer for all files with “JPG” extension and see what it finds. Do the same for all RAW images you might have scattered in different locations as well.
Create a local folder on your desktop and move all your pictures there. If you have other computers at home, perform the same search and try to find every single picture. Next, go through your mobile devices and see if you have any pictures stored there too. Copy them all to your main computer, into the same folder that you created earlier.
Now it is time to look for your pictures on the Internet. Log into your mailbox and search for all emails with image attachments. Extract whatever you can find and save them to the same location. Next, go to all social media and photo sharing sites that you have accounts in and look for pictures there. You might find your pictures in your friends’ albums too. Request your friends to send the high-resolution versions of the photos to you. Try to remember if any of your friends took your photos on their cameras and if they did, give them a call or message them to send the original / high-resolution versions of your photographs. Save all new photos to the same temporary folder that you created on your desktop.
2. Storage and Backup
Before thinking about how to organize your images, think about where you will be storing your images and how you will be backing them up.
2.1. Where to Store Your Photos
Some people like to store pictures on external drives and other storage media, but I store all of my photographs on a dedicated storage drive. Hard drive storage is very inexpensive today and you can buy a very large-capacity drive for less than $100.
If you have a small number of pictures, you can easily store them on your computer’s main drive. However, if you have a large collection of photos, then it might be best to put them on a separate hard drive, or ideally, on a dedicated external storage device (like network-attached storage).
2.2. Where to Backup Your Photos
No matter where you store your pictures, the first thing you need to think about is how you will be backing up your images. NEVER fully rely on a single storage device, whether a hard drive, a memory stick or a memory card. All electronic equipment fails at some point, and leaving your precious data in one place is simply a bad idea. No matter where you decide to store your pictures, decide where you will be backing them up at the same time. Do NOT make the mistake of backing up your data into the same medium. The backup must be on a different physical device, otherwise, it is not a real backup. Ideally, you want to follow a 3-2-1 backup rule and keep your data in multiple locations, across different backup media.
For backup purposes, I use dedicated external storage that has exactly the same folder structure as my primary storage where I keep my photos – it is basically a “Mirror”.
3. Create Main Folder Structure
Now that you know where to store your images and backups, it is time to think about your folder structure strategy, i.e. how you will be actually storing your photos. There are many ways to do this and everyone can give different suggestions. Let me show you the way I do it and I will leave it up to you to decide if it works for you or not. I first start with the root folder and create a folder called “Photos”:
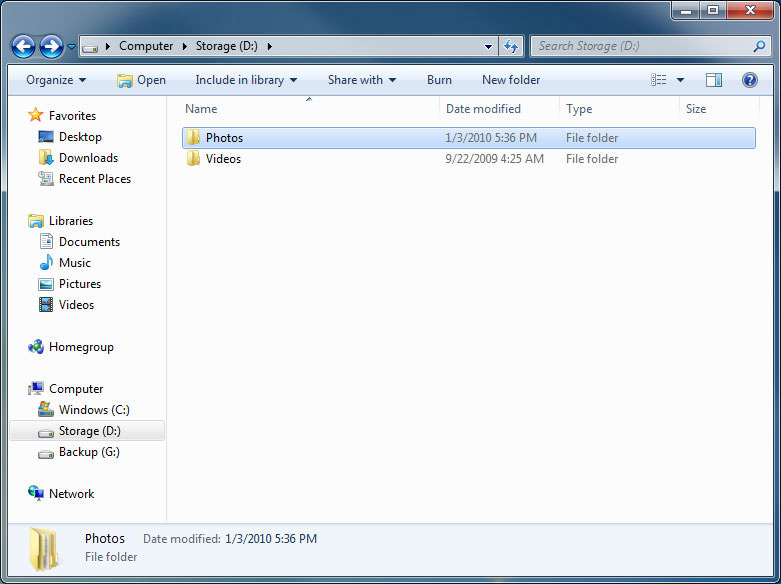
As you can see, I have another folder for “Videos” as well.
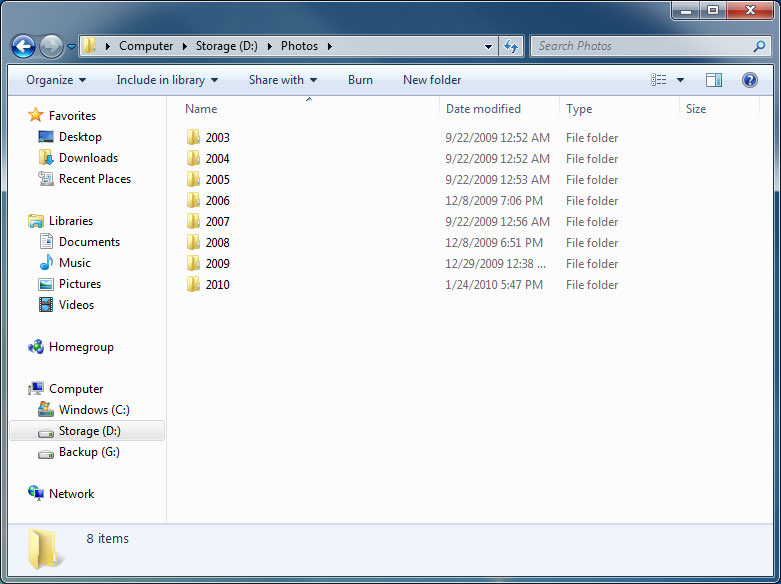
Next, I create folders for each year, one by one:
4. Create One Folder Per Event and Move Photos
Then under each folder, I create one folder per event:
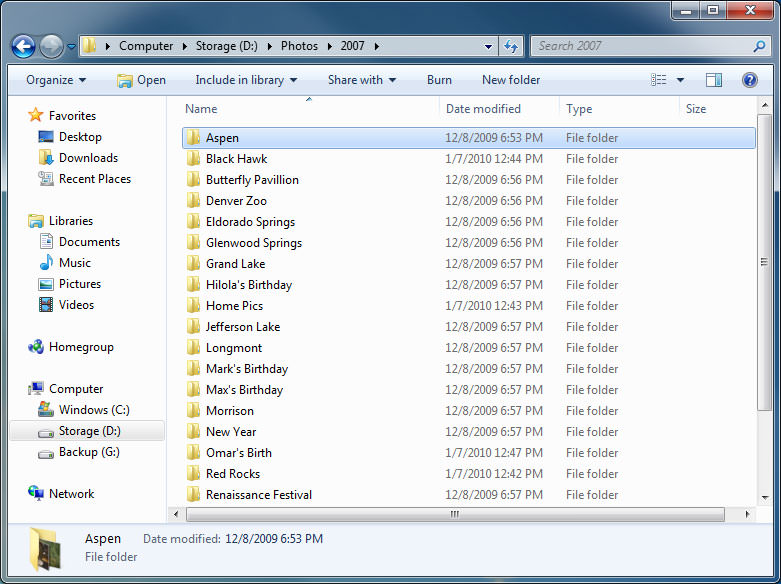
Examples of events are: “Mom’s Birthday Party”, “Christmas Celebration”, etc. – whatever fits the description of an event. If you have one large event that has smaller sub-events, then create one main folder and smaller subfolders underneath. For example, if you have something like “California Vacation”, it could have several subfolders inside such as “Disneyland”, “Universal Studios”, etc. Go ahead and create events for one year based on what you have.
For storing images, I organize them by dates, event description and a sequence number:
Now upload your photos into appropriate folders. This is the hard part, because you will have to go through all of your photos one by one and sort them through.
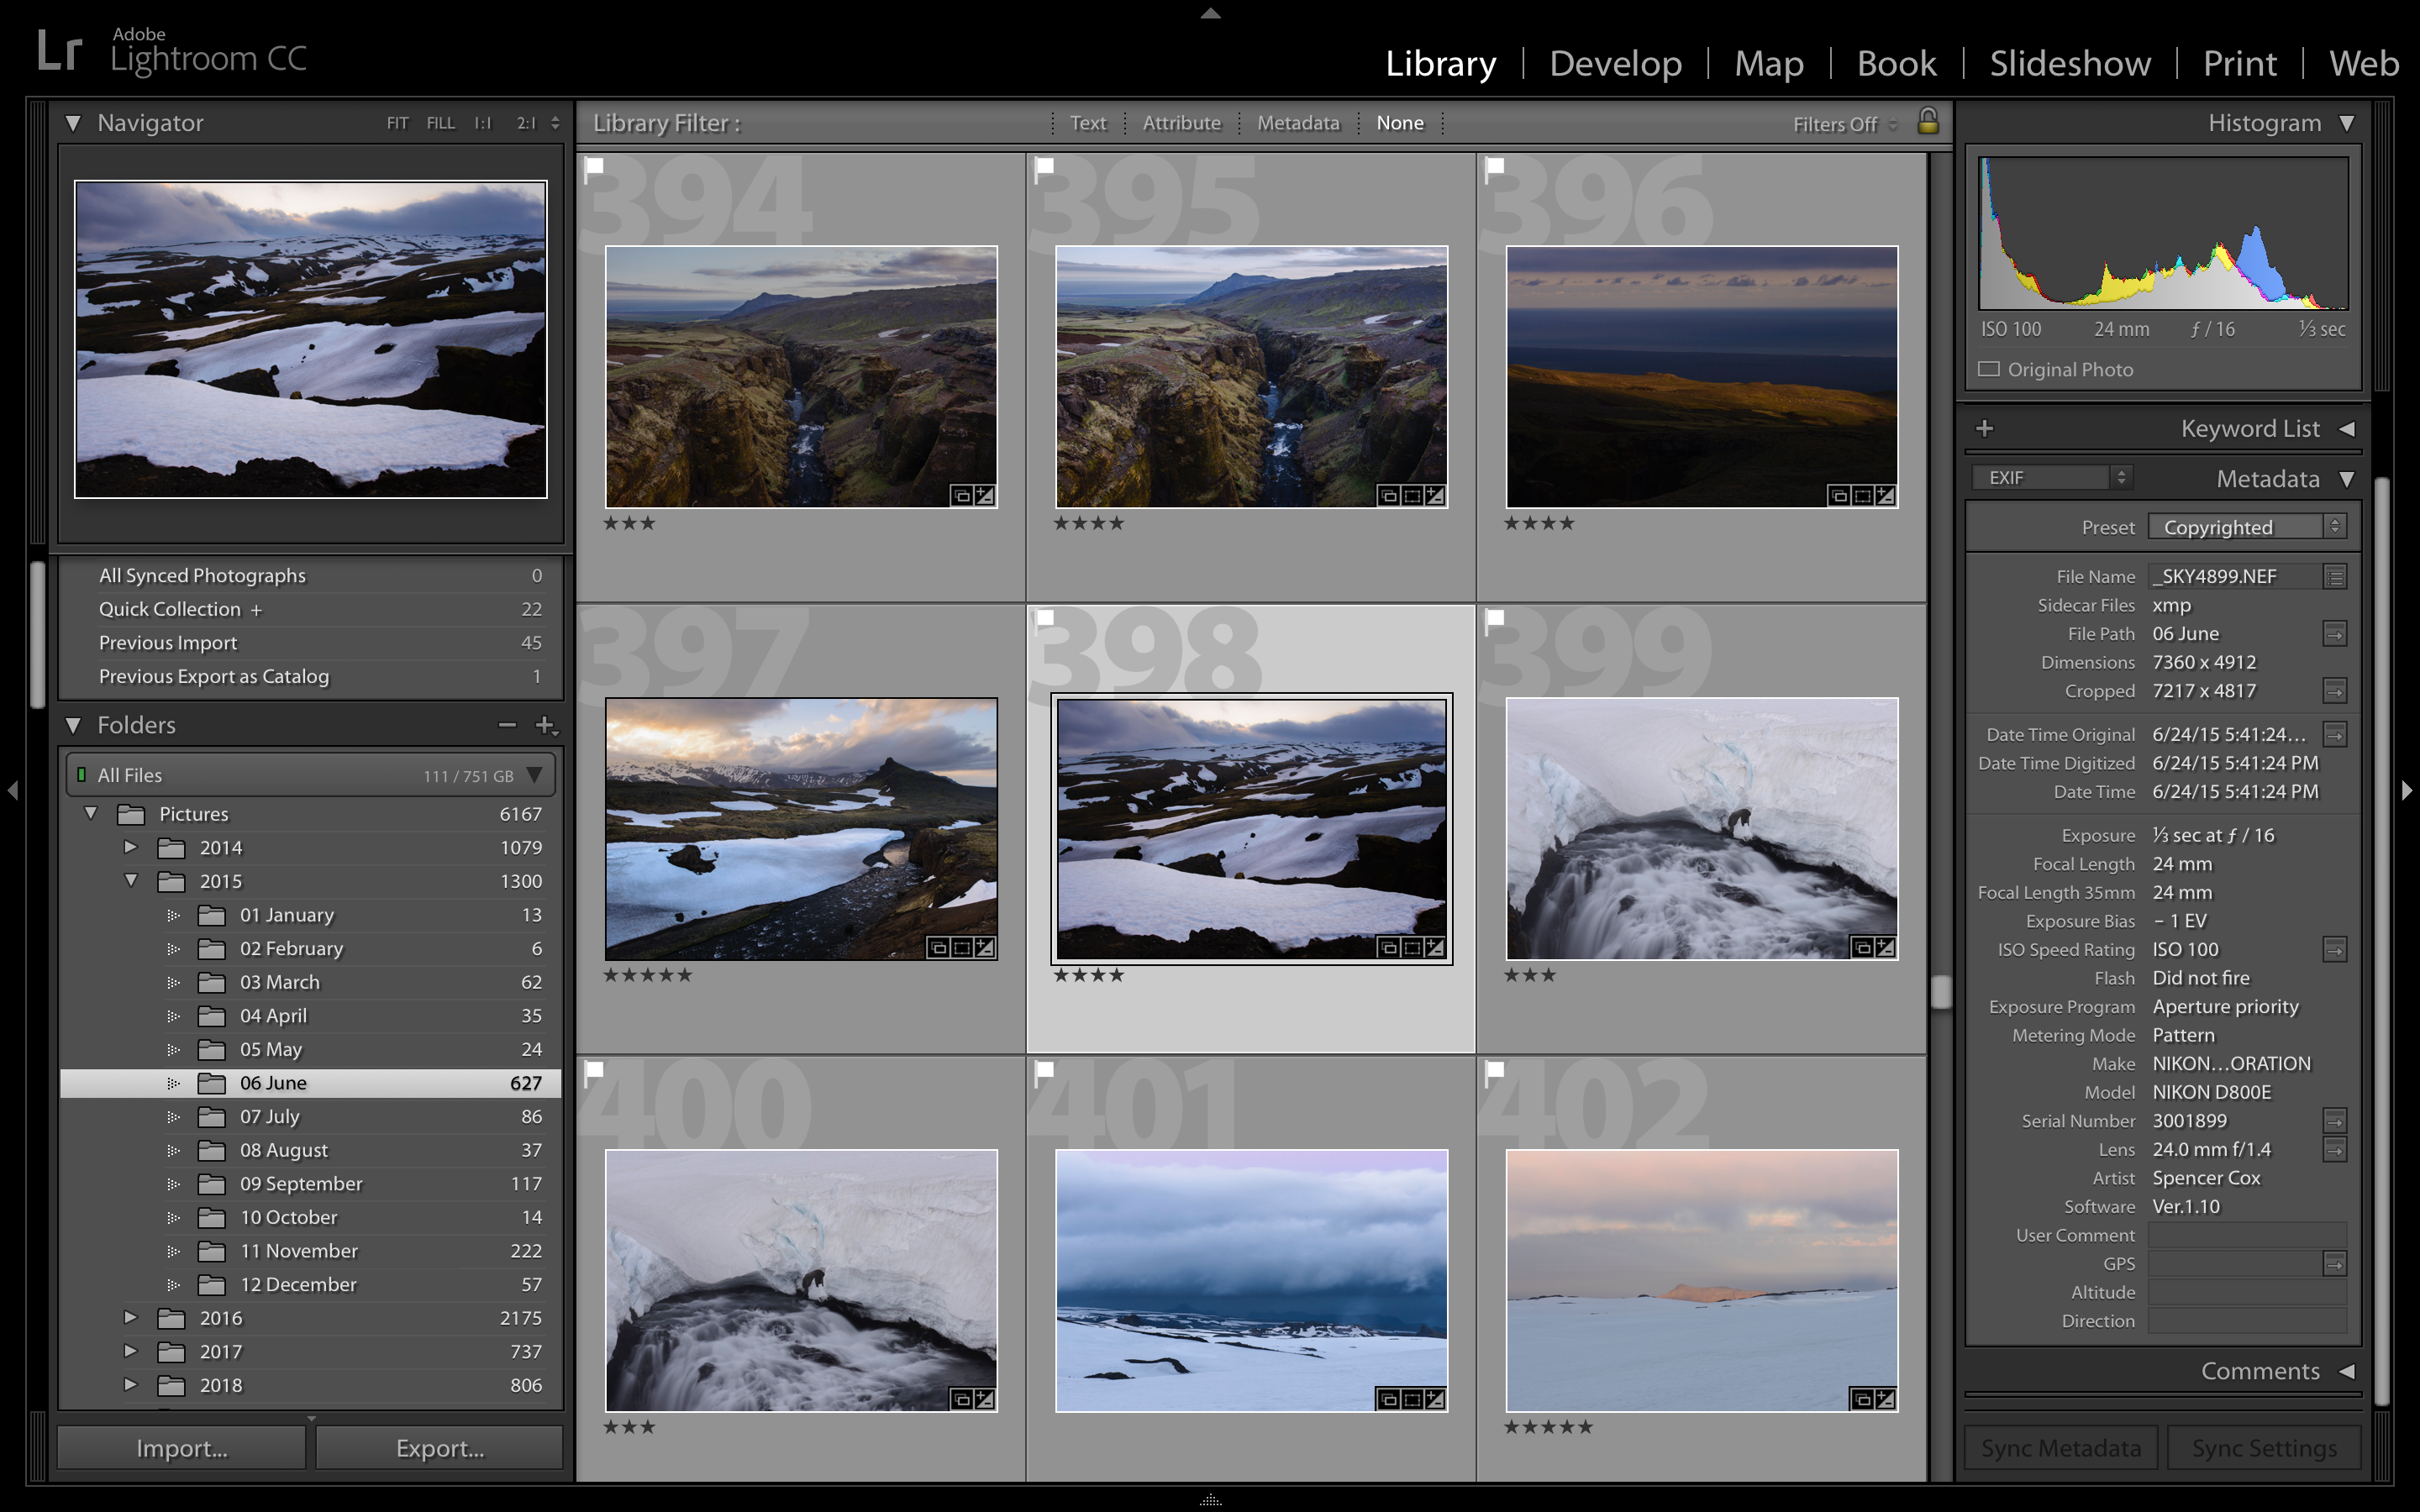
Just looking at the picture by itself is not easy, as you might not remember when it was taken and where. What I suggest, is looking at the information that is stored inside the picture. Almost every digital camera today stores vital information such as Camera Type, Date and Time right into the picture when it saves it. This information is called “EXIF” (read my “What is EXIF?” article to find out more about what EXIF is and how you can read this data from images). Anyway, most modern operating systems such as Windows and macOS have the native capability to access this information via “Properties” or “Get Info” functionality:
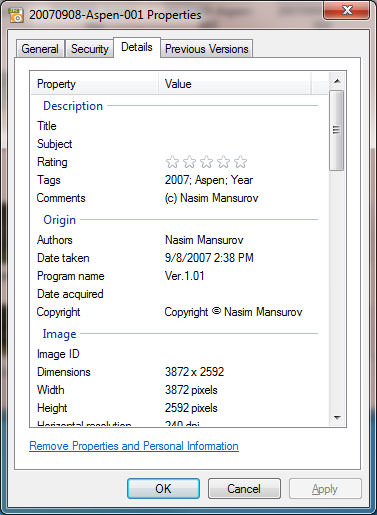
Look at the “Origin->Date” field for the date when the picture was taken. Other information such as “Camera” might be useful to determine what camera the image was captured with. Move all of your photos into appropriate event folders and make sure that nothing is left in your original temporary folder that you created on your desktop.
5. Rename Your Photographs
Unfortunately, many cameras produce images with weird filenames like “DSC1005.JPG” that do not make any sense. I highly recommend renaming all of your images to make it easier to locate them in the future by a simple file name search. Again, you can do this in many different ways, but I will show you the easiest method.
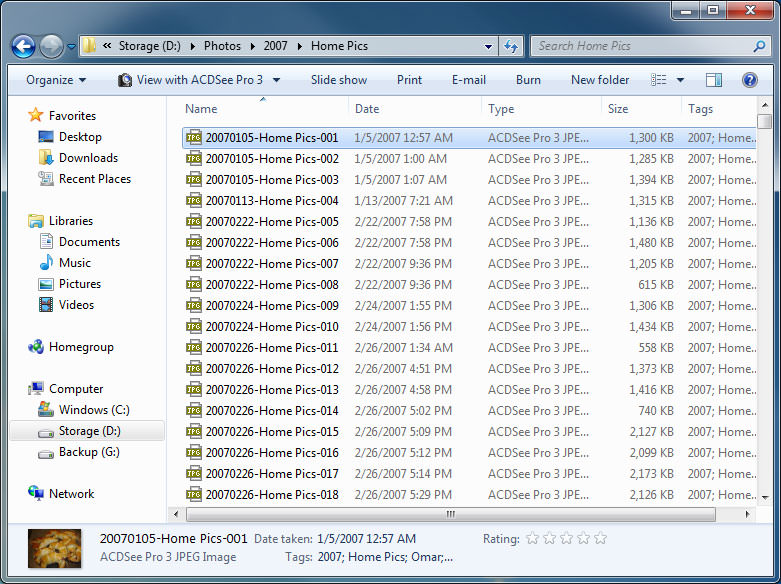
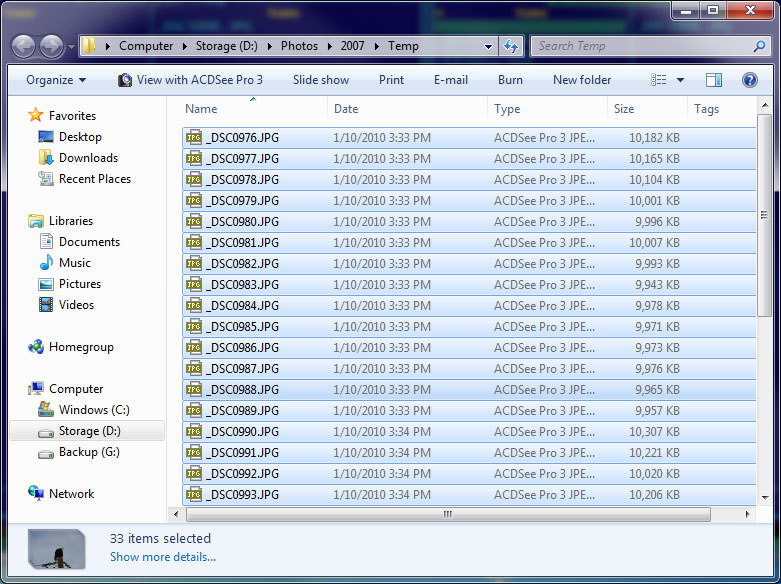
Go to one of the folders that contains your pictures. It is a good idea to start with a small folder, so pick one with only a few pictures. First, sort all your images by date by clicking on the “Date” column (you should be in a “Detail” view for this to work). Then select all pictures by clicking on the first one and then pressing CTRL+A (select all):
Then right-click on the first image and click “Rename”:

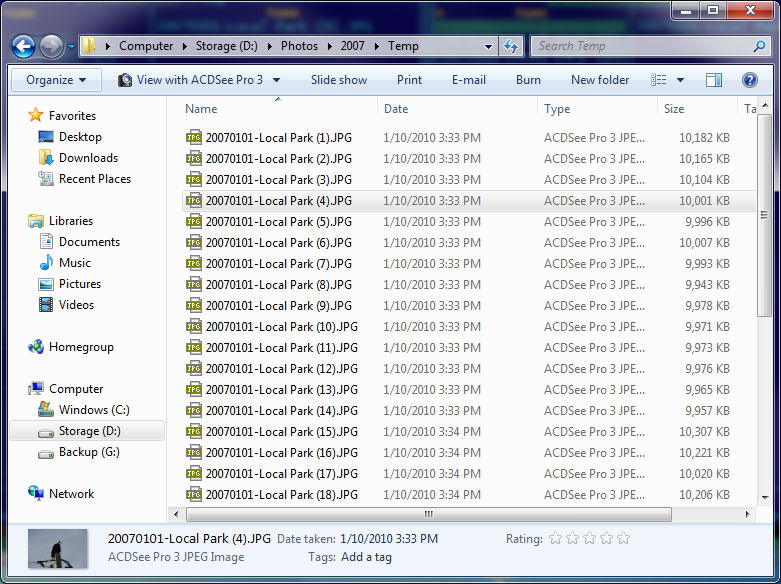
Then type the date, dash, event name and press “Enter” (for example: “20070101-Local Park”). I prefer to use the year first, then month, then day; because if your files are somehow mixed up in one folder, it will be easier to differentiate them by year, then month then day. If you start with a month, it will all get mixed up, because the months are repeated every year:
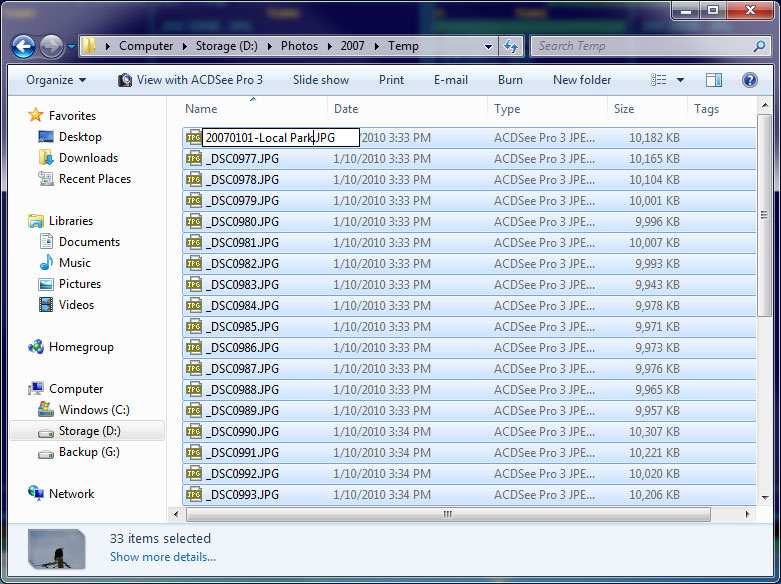
You should now see that all your files got properly renamed. The system will automatically add a number in brackets at the end of the file, which represents the file sequence number:
Do not worry if something got messed up. You can go back to what it was by simply undoing the changes (“Edit”->”Undo Rename”) or hitting “CTRL+Z”. You can also rename files multiple times, if needed. Repeat this process as many times as you have folders and make sure that everything is properly renamed.
The above process works in Windows OS, but you can achieve similar results in macOS as well. There are also very good third-party software options that might give you more options. My favorite tool is Adobe Lightroom. If you are interested in proper image organization, see my article on how to organize photos in Lightroom.
6. Backup Your Photos
Now that you have everything organized and renamed, it is now time to back up your data. Since you are just storing bare files, there is no need for some special backup program. All you need to do is to copy your files from the current location to a different one (ideally, a different device). Just go back to your main folder, select your “Photos” folder, right click on it, select “Copy”, then go to your destination drive’s main folder, right-click on an empty area and select “Paste”. This should start the process of copying pictures from one hard drive to another.
How often should you be backing up? I suggest performing backups every time you add more photographs or when you work on your pictures. I personally try to do it every time I upload new photos from my camera and I highly recommend that you do the same. Unfortunately, most people do not recognize the value of backups until their equipment fails. I once lost two weeks of my photography just because I forgot to backup my photos! Lesson learned, now I try to backup as often as I can and I store my images in four different locations – I do not want to ever lose my data again.
If you have any questions or concerns, please feel free to ask in the comments section below.
Hi Nasim. Thank you for this helpful article. I like the idea of having event folders rather than dated folders. I was just wondering what do you do with your RAW files? I often shoot jpg + raw which is great for editing if the jpg isn’t good enough but not so great for having an organised photos folder.
Hi Nasim, thank you for this! helped me confirm I am was the good track :)
Do think I have some additional helpfull things. I’ve been reorganizing my files and administration and now picutres are up. Coming from there I have 3 tips:
1. cloud storage. I have pictures and administration both on cloud and hardware.
2. I changed a setting in my camera that adds the date stamp (yyyy/mm/dd) as file name. Check your camera, i assume most models these days have this.
3. The use microsoft PowerRename. Like i mentioned i redid all my administration and couldn’t have done it like this without this program. You can mass change file names.
It works as follows: select all 33 photo’s you took at the Local Park and open is in powerrename, then you’d like to replace the ‘DSC’ from your file to ‘Local Park’. there are 2 bars. fill in ‘DSC’ in bar 1 and it selects all files with DSC, then in bar 2 fill in ‘Local Park’ and it replaced that.
I do not have any afilliation with Powerrename. I just thought id’share my discovered gamechanger.
So most of my photographs are printed and in boxes upon boxes I am attempting to do a coffee table pictorial book, but I am overwhelmed. Then there’s the Internet with literally thousands of pictures of my subject. HELP!
This is the most common and best solution overall, which I follow. However, changing file names or folder names, and organizing new files into the right folders are not easy to practice constantly in my huge NAS photo storage while all my family members are taking photos and videos and backing them up to the NAS. There are a bunch of good tools, but all force me to keep using their tools, and expensive. I’ve used Google photo, Mylio, and adobe lightroom. I just want to organize my files in my Synology NAS in the way this article suggests in minimum effort.
So, I built a tool helping organizing photo and video files into the folders exactly the way you mention here and tagging and searching files. One thing I noticed is changing the file name is not good practice. I think it’s better to put tags to files and search by the tags. The filename itself is a piece of good information as well and changing the file name with only one keyword doesn’t satisfy me.
I put the tool in MS Store. It’s only for PC. I hope you save some time with it. This doesn’t mean replacing a tool such as Google photo or Adobe Lightroom, but an additional tool. I hope it helps.
www.microsoft.com/en-us…gz39fsf1pf
I have struggled mightily w this project. FIRST time I have encountered clear instructions!!!!
Many kudos and thank you’d!
Hi Nasim, this was a great article! You’ve clearly thought a lot about how to organize photos. If you’re looking for a solution that does all this and more, I’d suggest Mylio. It consolidates photos from all different sources, organizes them efficiently into one library, then syncs that library to all of your devices (macOS, Windows, iOS, Android). Originals can be stored anywhere you want, and your mobile devices get optimized versions to save space. That means you can manage your photos from anywhere while keeping the originals safely preserved at home. I used to have pictures scattered all over the place – my phone, externals, SDs, folders on my computer, Facebook, shoeboxes, random thumb drives – and now I have them all catalogued in Mylio. Speaking of Mylio, I love organizing photos so much that I decided to work for them. The current software is free to use for up to 25,000 photos and 3 devices, so I’d definitely recommend trying it out.
Hi Nasim, this is great for storing originals!
What do you do for:
1. original files are rarely stay unedited (of course using side-car files). How do you store final images? Same file tree/mirrored file tree?
2. if you do store them, how do you sync them when you have updated the edit of original file
3. do you create projects using original images (example: books). do you store them?
4. how do you share? i guess, exported pictures are used for sharing…. Do you back them up?
In my mind my & my family collection of images shouldn’t be organized in a way that no one in my family understands (Example: no one in my family can convert RAW files with edits to a JPEG)
In other words, if I’m not here anymore (hopefully not soon :) ), how my family can use my collection of family images…
Also, we as photograph should strive to a final product – edited picture, book, etc rather than original RAW file and side-car file to be viewed in Lightroom :)
Hope it all make sense.. And would really appreciate your opinion.
Thanks a ton! Really helpful.
This was very helpful. Thank you.
Very Confused. I sync to Google Drive etc. and if you do what you suggest and break how it is organised on Google photos when you sync you will get duplicates. Should you not.
1. Leave in one folder with no subfolders
2. Export to your owner hierarchy once in Lightroom once edited >
The above will allow you sync to google etc as and when and bring in new ?