Photographers love chasing after image quality, including maximum sharpness, detail, and resolution. Most likely, you’ve wondered at some point how to take higher-resolution photos, or increase the resolution of images you already have (whether photographs or digital illustrations). This article explains step-by-step how to increase resolution quickly and easily in common post-processing software. It also includes a comparison of five popular options for upsampling images to find which one yields the best results.
Note that this article mainly approaches the topic of resolution from the perspective of photography, although the final comparison among software options also includes a digital illustration component.
Table of Contents
What Is Resolution?
In photography, resolution is the amount of detail in a photo. This is determined by factors such as focus precision, lens quality, and camera sensor pixel count. If you print your photo, other factors come into play as well – the size, display medium, and quality of the print, and so on.
People use the term “resolution” to talk about more than just the level of detail in a photo, though. It also can refer to more specific things like lens resolving power, pixels per inch in a print, and total pixel count of your digital image. That last usage is one of the most common, and it’s also the focus of this article.
When photographers ask about increasing an image’s resolution, pixel count is typically what they have in mind – turning something like a 200 × 200 pixel photo into a 1000 × 1000 pixel photo (just to pick arbitrary numbers).
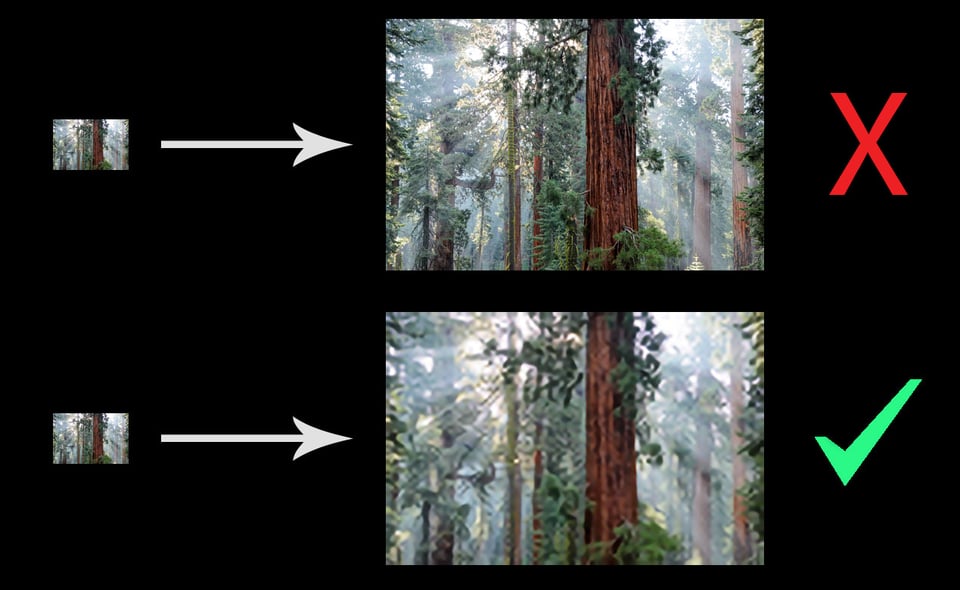
Of course, it’s not enough just to add pixels if the apparent image quality of your photo doesn’t improve along the way. Otherwise, why bother increasing resolution? Unfortunately, it’s not easy to get a good photo out of a low-res original – but it isn’t impossible. You still can get impressive results if you do things right, as shown below.
Increasing Resolution in Photoshop and Other Post-Production Software
Most major post-production software can increase the pixel count of an image. That’s not the hard part, though. The difficulty is in getting any meaningful detail along the way (or even the illusion of it).
Hopefully, you won’t be surprised to hear that CSI-level “enhancing” of a low-resolution thumbnail is only possible on television. No matter how good your post-processing software is, you can only go so far to improve a low-resolution photo. Depending upon the software you use, sometimes the best-case scenario is making a pixelated image look out-of-focus instead!
But that doesn’t mean the situation is hopeless. It still can help to increase the resolution of an image (meaning pixel count in this case) in post-production through a process known as upsampling. Personally, this is something I do when creating large prints – more than a meter/three feet across. It also helps as a last-ditch way to improve an image that otherwise could be unusable.
If that sounds good enough for you, here’s what you need to know in order to increase resolution using some common post-production software.
How to Upsample in Photoshop
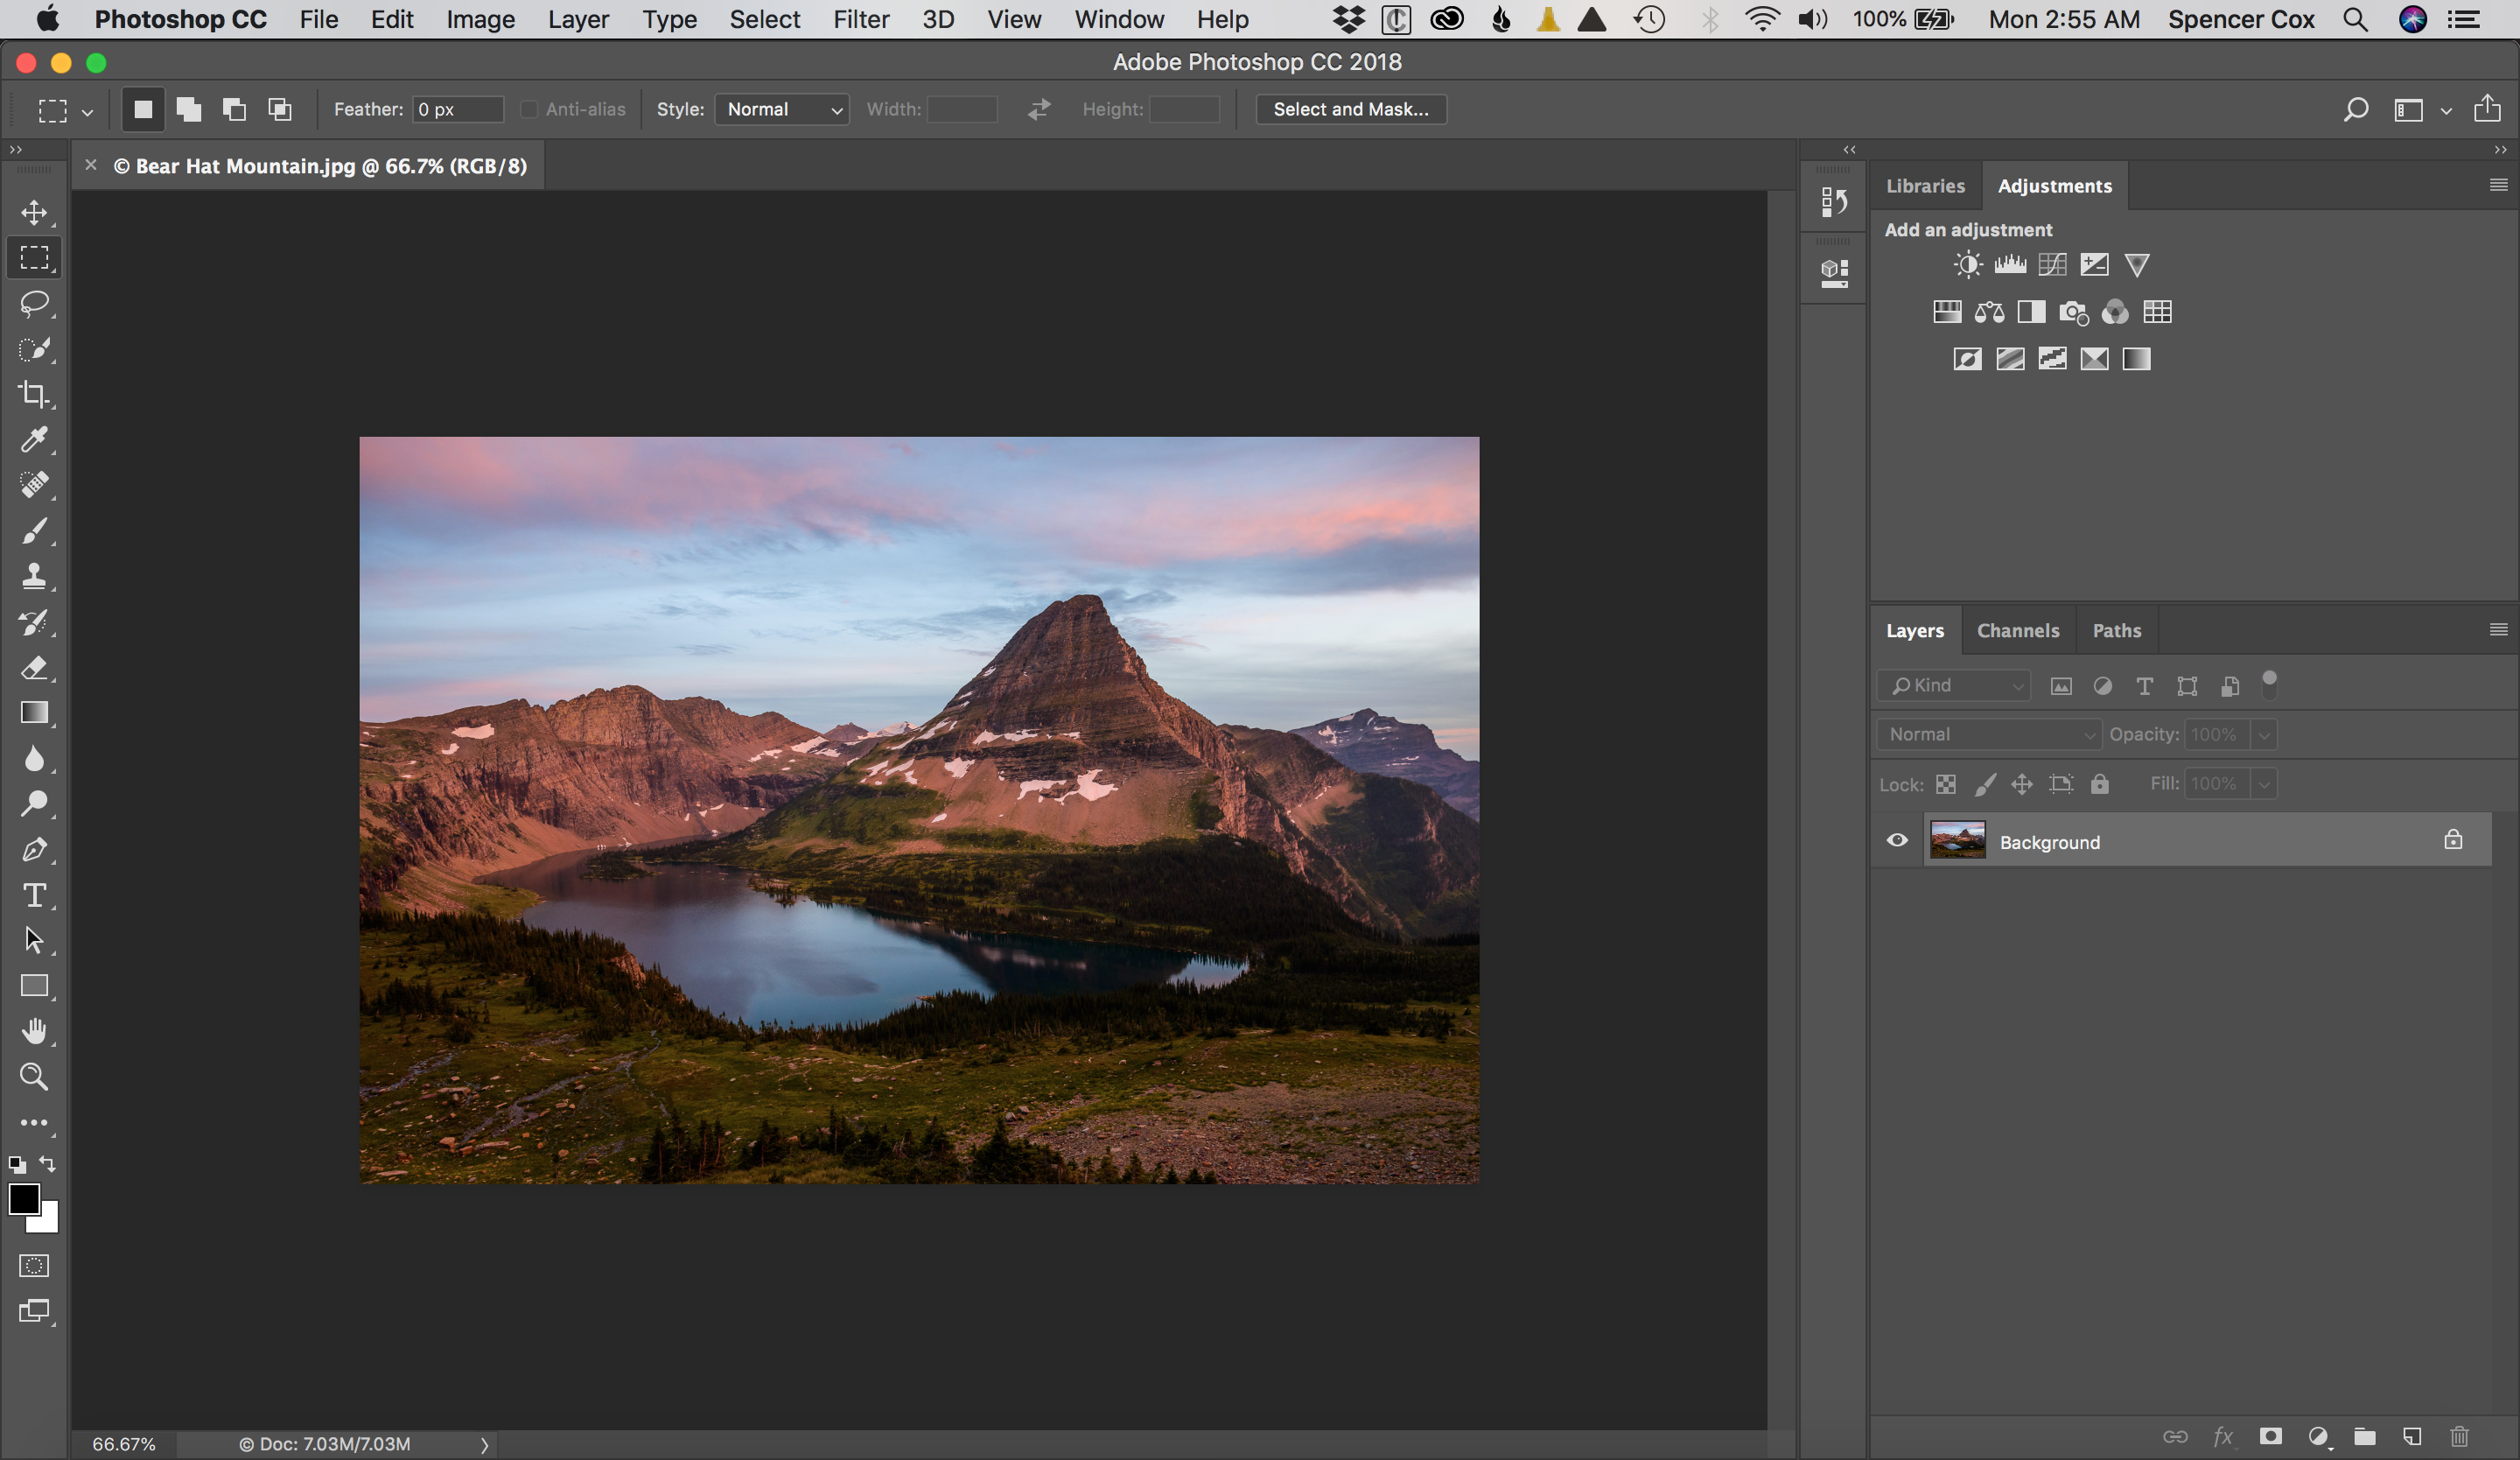
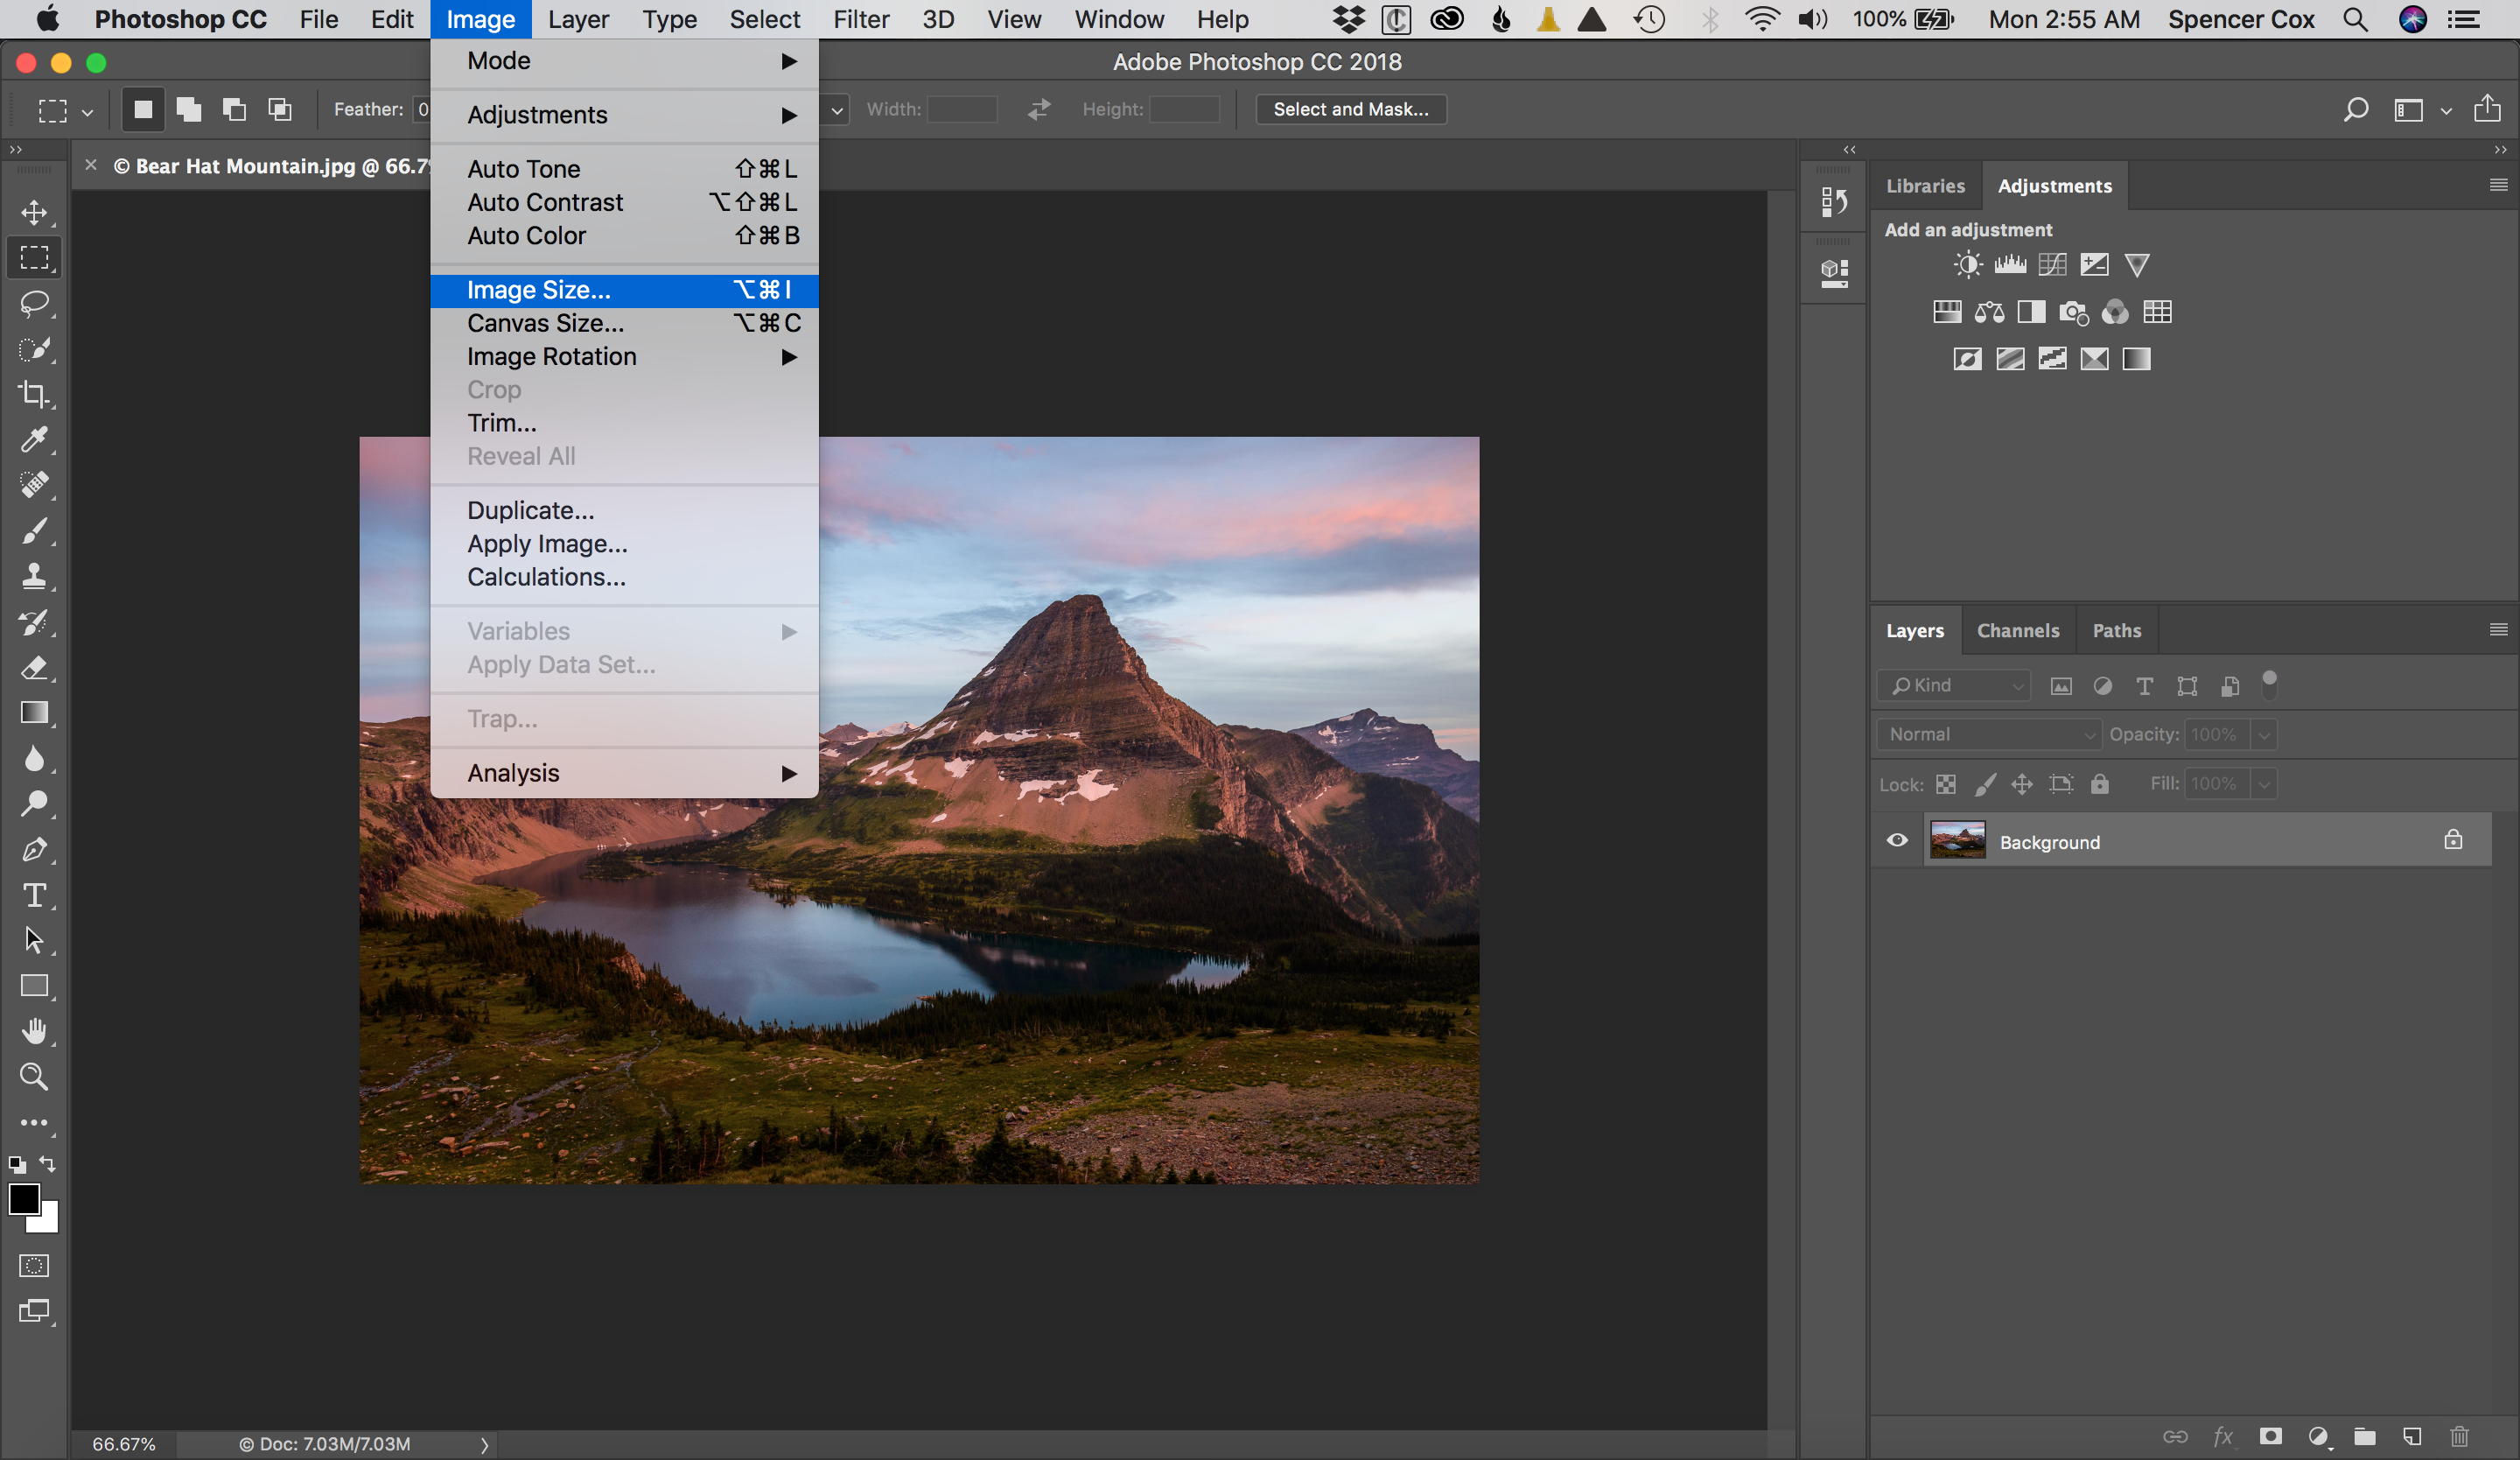
It is very quick and easy to upsample an image in Photoshop. You simply go to Image > Image Size, type your desired pixel dimensions, and select the upsampling method you prefer. (Hint: If you have Photoshop CC, the new “Preserve Details 2.0” is what you should choose, as you’ll see in a moment.)
After you’re done, you may want to sharpen the photo slightly, although it depends upon the image. Overall, this is a very quick process.
If you prefer screenshots, here is how it looks in Photoshop CC:
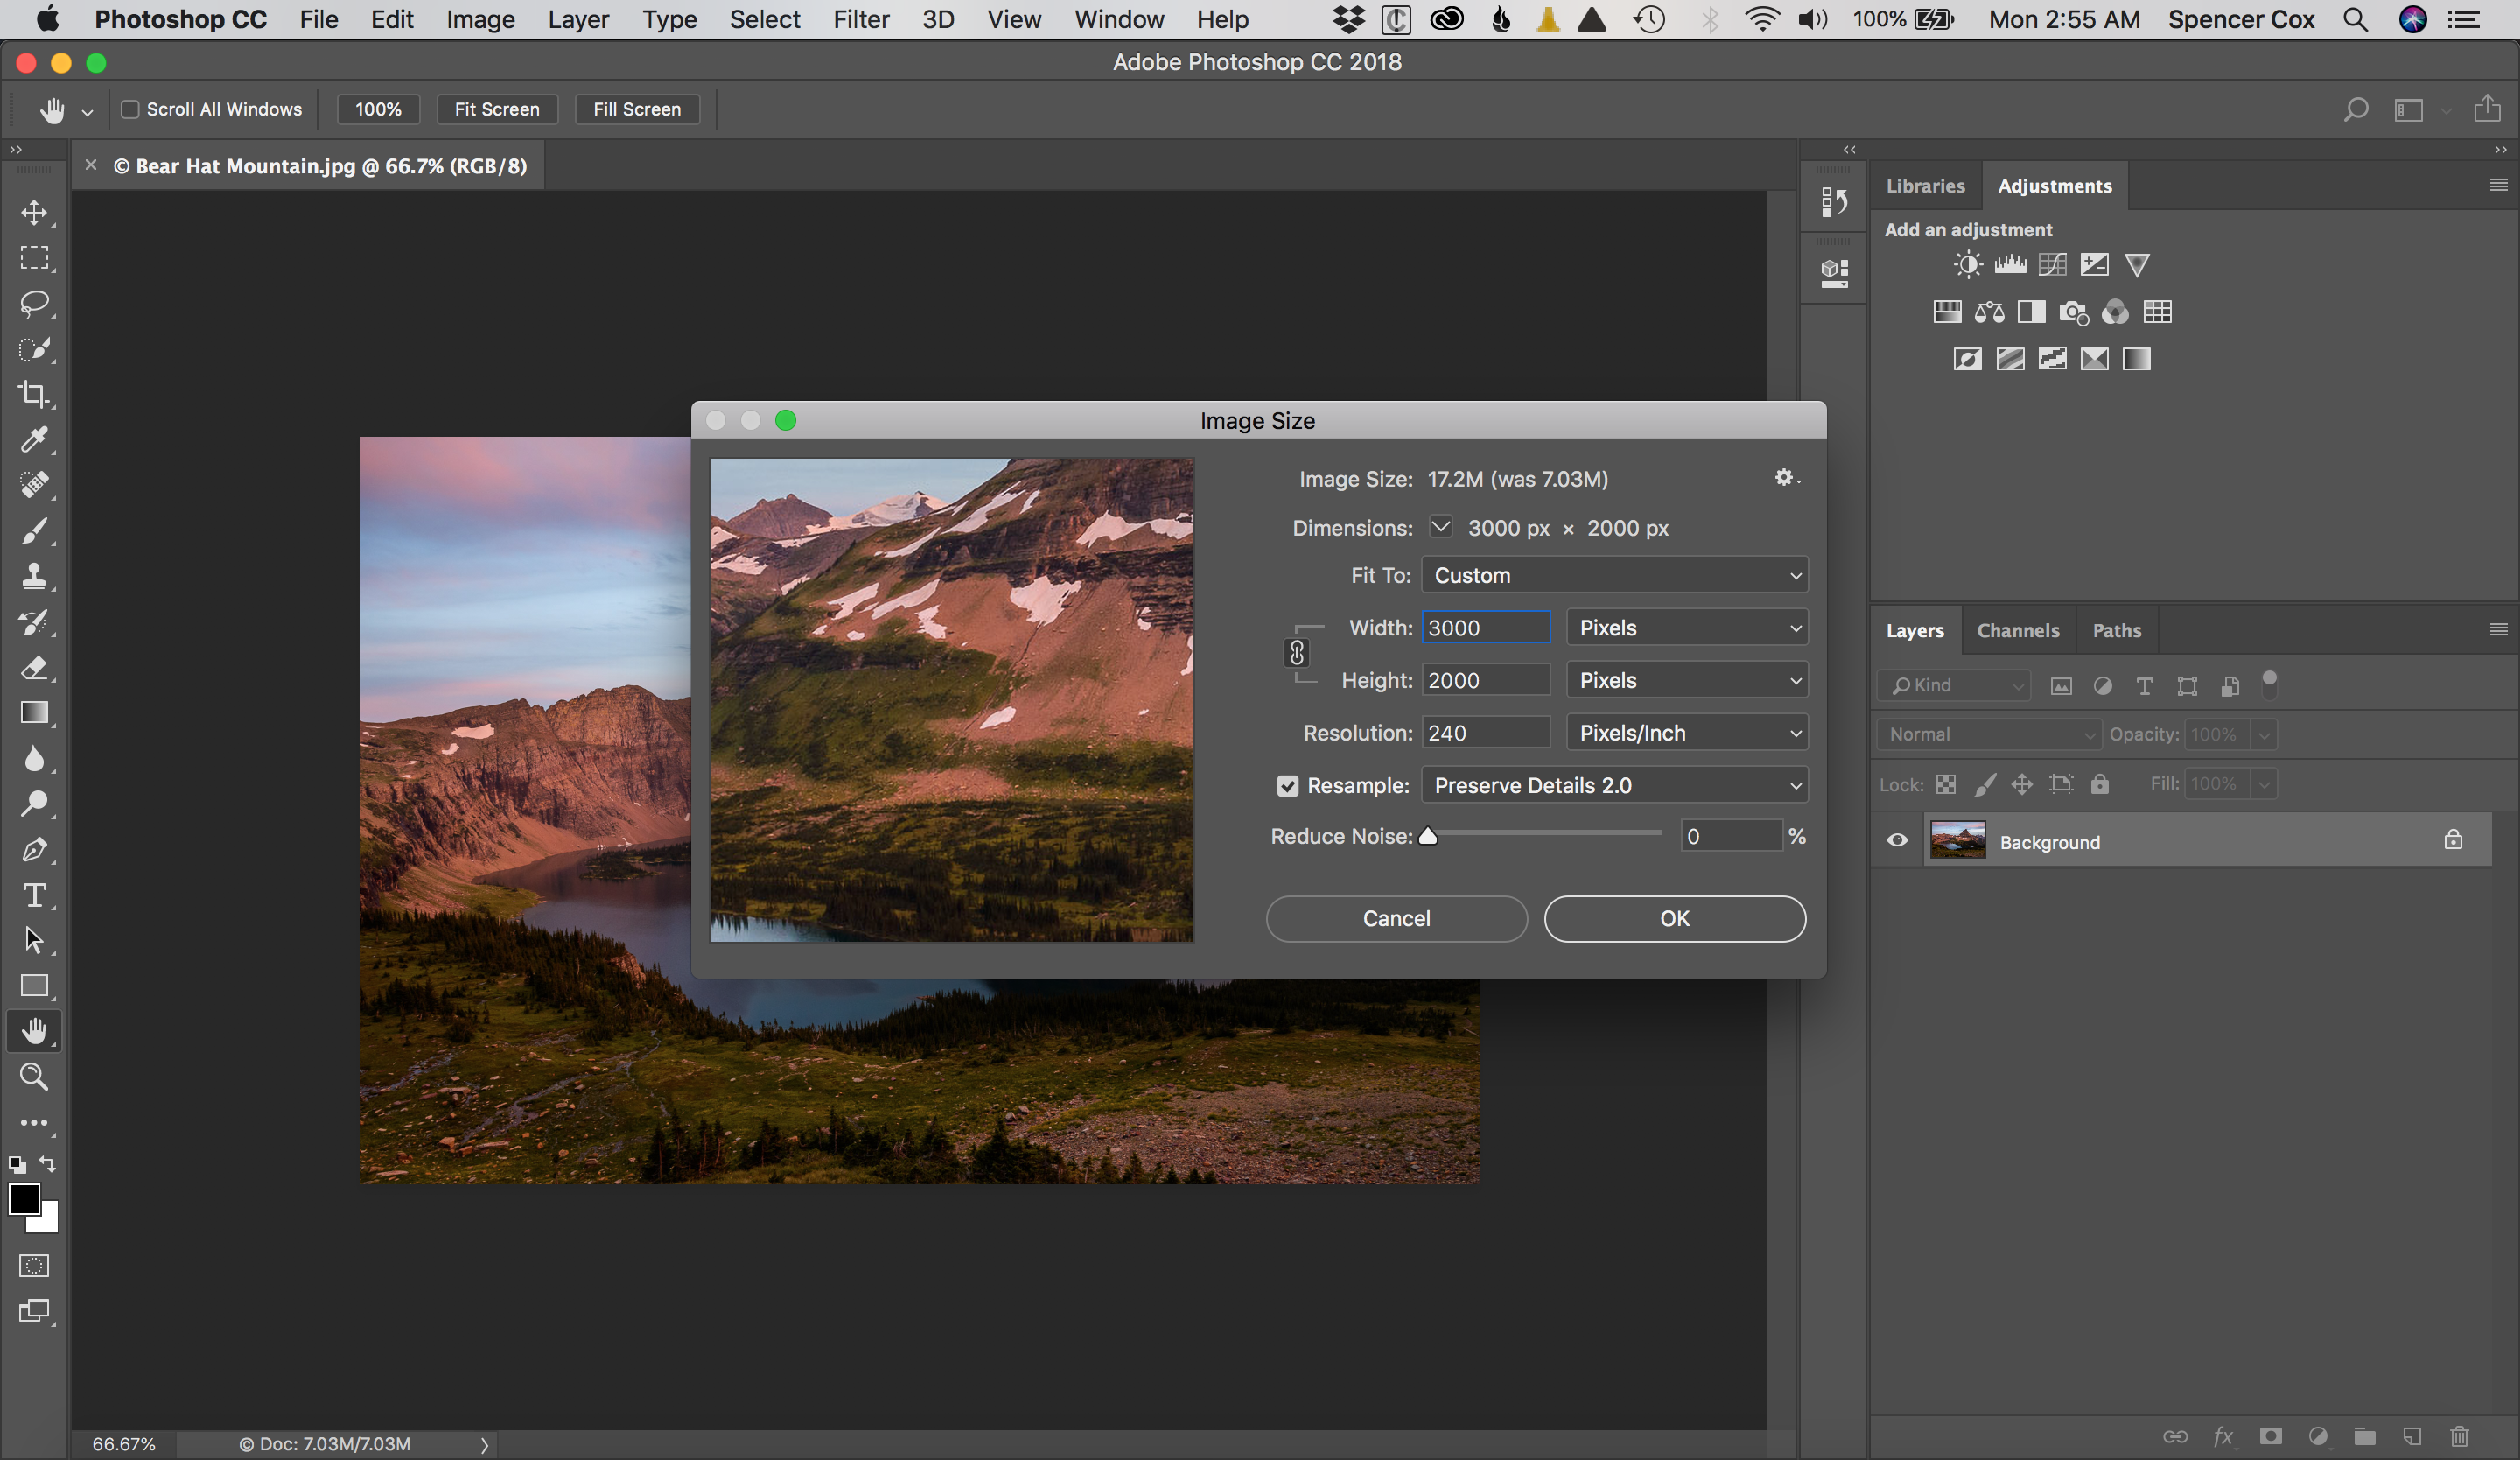
Personally, this is the method I use in order to upsample a photo for printing. To be specific, I’ll generally upsample the photo to get a 300 PPI image (pixels per inch) at my chosen print size, since anything greater than that is overkill.
Using Dedicated Upsampling Software
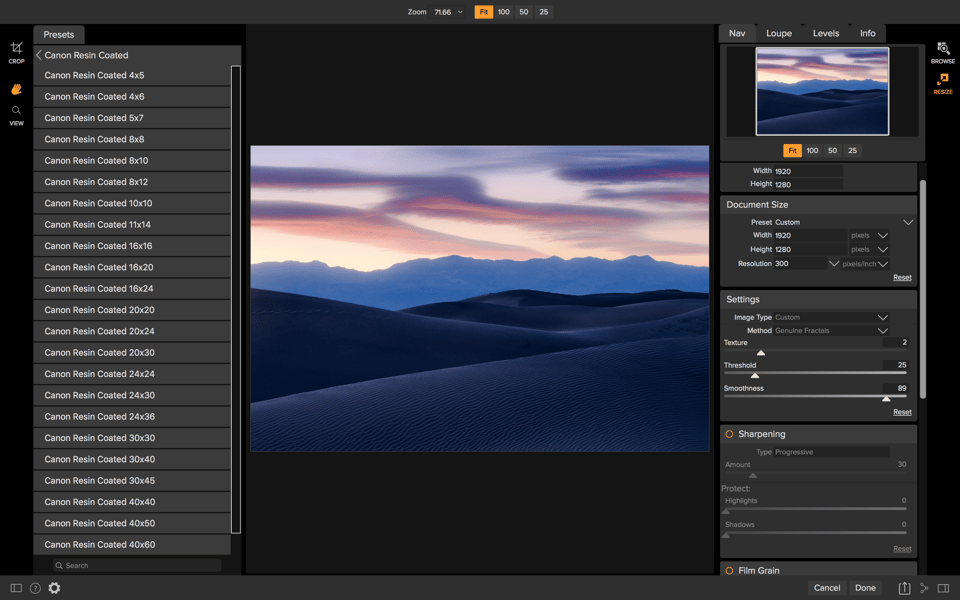
Many photographers already have Photoshop, and, not surprisingly, it’s the most popular tool for upsampling images. Still, you’ll find a number of dedicated options on the market specifically for this task. Historically, the best-known of these options was called Genuine Fractals. It eventually changed names to Perfect Resize, and now ON1 Resize, but it’s still the same program under the hood.
Just because it’s standalone software doesn’t mean it’s the best, though. As you’ll see in the comparison section below, Photoshop CC’s “Preserve Details 2.0” algorithm beats out ON1 Resize convincingly. Still, if you don’t have Photoshop CC, some of these dedicated resizing programs may be worth checking out. If you do have CC, there’s not much of a reason to buy them today.
Free Alternatives
Along with the many paid software options available, a few free tools can do the same thing. The open-source photography software known as GIMP is one of the most popular, not just for upsampling but for broader photography work as well. Upsampling in GIMP is a simple process akin to upsampling in Photoshop. Click Image > Scale Image and select your upsampling options, then consider sharpening the photo after the fact.
Beyond GIMP, there are some websites which will upsample your images for free. Also, you may already own software with upsampling capabilities without even realizing it, such as Lightroom (which can upsample upon export). Before you pay for another product, it’s worth checking what you already own.

What About the Future?
Some companies are already developing software that increases resolution by analyzing the scene and recognizing elements within it – as opposed to “dumb” calculations like nearest-neighbor pixel values, which is generally what we have today. Huge names like Google and Adobe are getting in on this business, and we might see some products implementing these new technologies before long. (With Adobe’s most recent Photoshop CC upsampling algorithm, tested below, we already are seeing hints of what this will be like in the future.)
Still, these technologies are not fully mature. Some of them are limited purpose algorithms, focusing only on a certain type of image, like people’s faces viewed from a certain angle. Others are more general, like Adobe’s, but not up to the same level as the specialized options. And since most of them aren’t yet available, it’s a bit of a non-issue anyway. Still, it will be exciting to keep an eye out for whatever developments may occur!
Upsampling Software Comparisons
I thought it would be useful to test some of today’s most popular upsampling software to see which options do the best job of increasing resolution. I wanted to test both a photograph and a digital illustration to see if there were any major differences. My method was to start with a 300 × 300 pixel version of each image, then upsample each to 900 × 900 pixels.
Keep in mind that I only tested two images for this comparison, and you may find slightly different results with certain photos and illustrations of yours (or different amounts of upsampling). Still, this should give you a good idea of the relative strengths of each software package for increasing resolution.
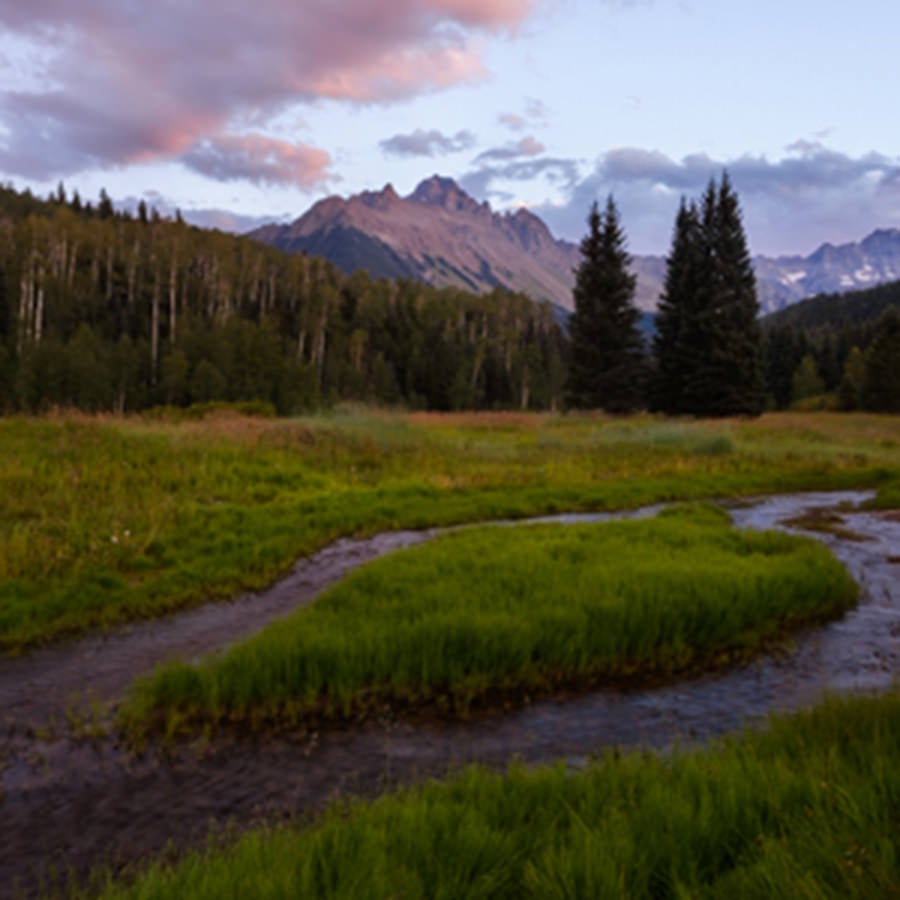
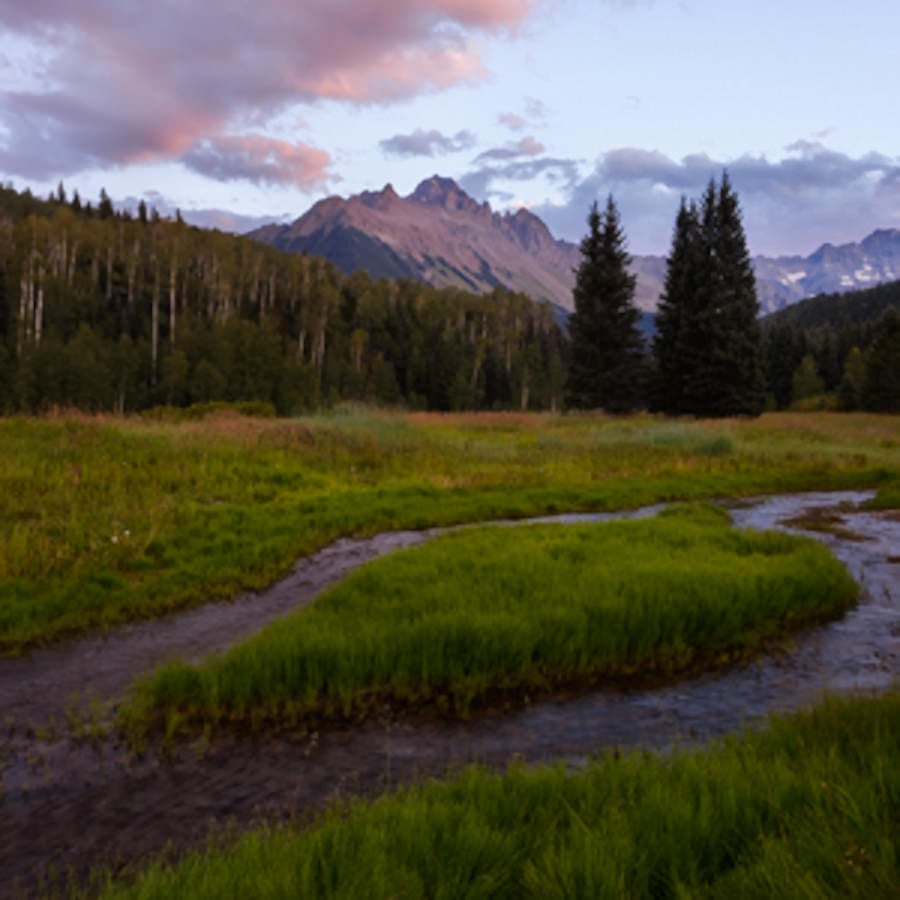
With that disclaimer, here are the original 900 × 900 pixel versions of both the photo and the illustration:
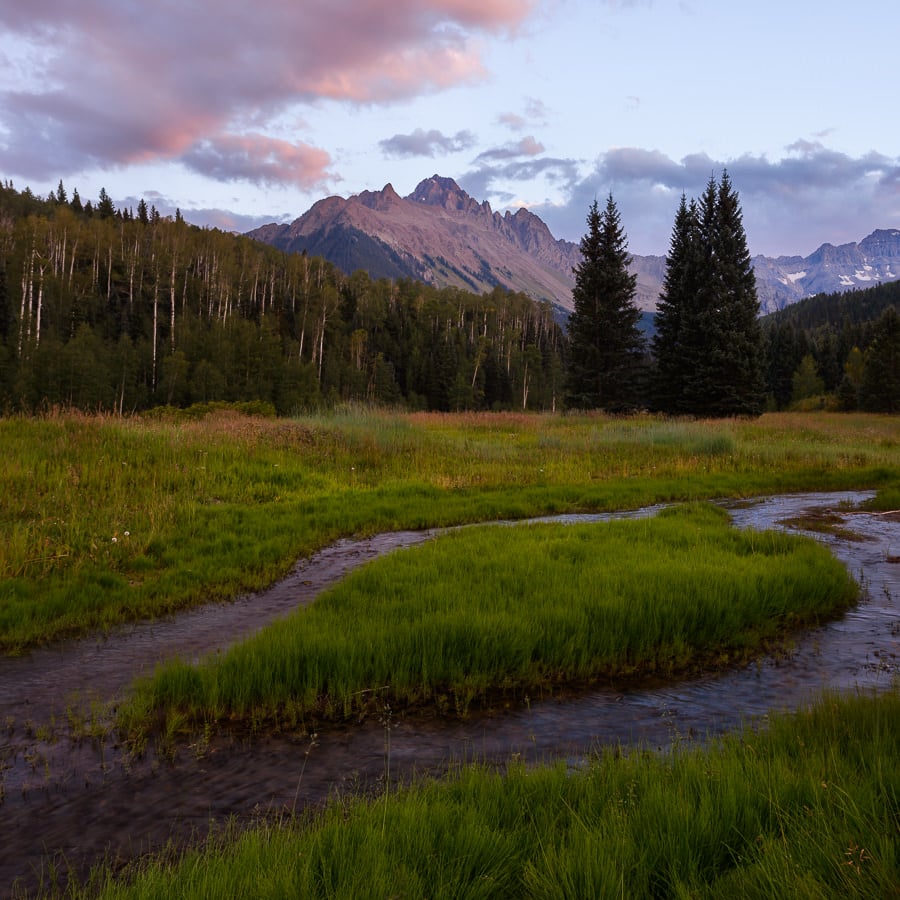

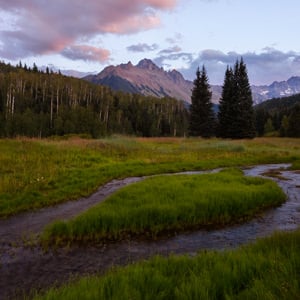
And here are the 300×300 pixel versions I used in the upsampling process:

How did each program fare? Take a look at the results:
Photoshop CS6 (Bicubic Smoother)

This is roughly what we’ve seen in the past with upsampling software. It doesn’t look great, but it’s better than pixelation. Adding some sharpening can help, so long as you do it after the upsampling step.
Photoshop CC (Preserve Details 2.0)


This, on the other hand, is just outstanding. Photoshop CC’s experimental “Preserve Details 2.0” feature is so new that you need to enable a menu option in order to use it in the first place (Preferences > Technology Previews). It works well for both the photo and the illustration – not at the level of the original 900 × 900 pixel image, of course, but much closer than I would have expected.
Note that you need to rasterize the layer before upsampling (by right clicking on the layer and selecting Rasterize Layer), or it won’t work. The image will resize, but not with the new algorithm. If you see a drastic difference between Photoshop’s upsampling preview and the actual final image with higher resolution, you’re doing something wrong.
GIMP

GIMP is a great Photoshop alternative, mainly because it’s free and surprisingly comprehensive. It works fine for resampling images, too, although it’s not at the top of the pack. GIMP’s landscape image is slightly better than Photoshop bicubic smoother’s attempt, but the illustration has more jagged edges.
This isn’t a bad result by any means. With some sharpening, it is still respectable – certainly better than nothing when you make large prints.
Dedicated Software: ON1 Resize (formerly Genuine Fractals and Perfect Resize)
The best-known image resizing software on the market, at least in the past, was Genuine Fractals. Today it goes by the name ON1 Resize, and it sells for $60 – but it’s also included if you buy the regular ON1 Photo RAW processor for $120 (sometimes on sale), so you may already own it. The good news is that it has more upsizing options than any other software here, and it’s also near the top of the pack in image quality. The bad news is that the new Photoshop algorithm still beats it pretty significantly. But as you can see, ON1 Resize certainly is no slouch:


It does a good job making the landscape image look crisp, although part of that is due to built-in sharpening within the ON1 resampling options. Still, it picks up detail in the river that didn’t exist in Photoshop’s bicubic smoother algorithm, which is a good result.
The same is true for the illustration. It’s slightly ahead of Photoshop’s bicubic smoother, although not by a tremendous amount (especially taking the somewhat more aggressive sharpening into account). On balance, ON1 Resize does a good job, but it is not at the level that I recommend paying $60 unless you know you need some of its more advanced options.
Online Program: Photo Enlarger
There are a number of online services to enlarge photos. Many of them require an account or cost money, but some of them are free. I tested all the free options I could find, and the best results came from what also appeared to be the most popular option, “Photo Enlarger.” It actually did a surprisingly good job – second best on the illustration and third on the landscape:


Specifically, the landscape photo has a decent amount of detail in the river and grass without looking over-sharpened. The elephant illustration looks quite good, too. Although it has some moderately noticeable jagged edges, it still looks better than almost all the other conversions (with only Photoshop’s “Preserve Details 2.0” winning out). That’s a great result for a website.
Upsampling Software Rankings
To be frank, I went into this comparison expecting to see only minor differences between the different software options. Instead, it turns out that Photoshop CC’s newest algorithm is very clearly better than the other options on the market, both for photography and for digital illustrations.
I’ve made it clear before that I am not the biggest Adobe fan – in large part because they no longer sell standalone versions of their top software – but I absolutely have to give credit where credit is due. Whatever artificial intelligence juice they’re using in the “Preserve Details 2.0” algorithm clearly works well.
Here’s how I would rank each software’s attempt at increasing resolution in the photograph, from best to worst:
- Adobe Photoshop CC, Preserve Details 2.0
- ON1 Resize 2018
- Photo Enlarger (online option)
- GIMP
- Adobe Photoshop, Bicubic Smoother
And for the illustration:
- Adobe Photoshop CC, Preserve Details 2.0
- Photo Enlarger (online option)
- ON1 Resize 2018
- Adobe Photoshop, Bicubic Smoother
- GIMP
It was interesting to see that the two lists are so similar, with only minor shuffling. Apparently, good upsampling software works well no matter what type of image you throw at it.
One thing that surprised me was the quality of the free online option, Photo Enlarger, which punches above its weight in image quality – although it doesn’t have nearly as many advanced options as some of the other software here, since it’s designed for more day-to-day work. Only Photoshop’s “Preserve Details 2.0” was able to beat it both times, and that algorithm is just on another level.
Increasing Resolution in the Field
The comparison above demonstrates that all hope is not lost if your photos don’t have enough resolution. However, the best method (by far) for capturing higher-quality photos is to get as much as possible right in the field. Start with a sharp photo and crop as little as possible.
That requires a few things. First, you need to start with good photographic technique if you want to get high-resolution images (going back to the original definition – the amount of detail in a photo). Use a tripod whenever possible, and make sure your shutter speed is fast enough to freeze any motion (from your subject or yourself, if shooting handheld). Lock focus properly on your subject, and don’t use too high of an ISO. In short, learn the proper techniques for taking sharp photos.
However, if you want to take things another step further, that’s also possible. Personally, if I feel a wave of inspiration while I’m taking pictures, I sometimes try to capture an especially high-resolution image to print as large as possible. This can be done easily by taking a panorama (combining multiple photos together) instead of a single image – potentially increasing your pixel count several times over.
There are other methods to increase the resolution of an image in the field as well. You can try focus stacking in order to increase your depth of field artificially (and use sharper apertures along the way). Other photographers will take multiple photos of the same scene – not panoramas – and average them in post-processing software to reduce noise and improve low-level detail. Quite simply, you have many options available.
But even if you don’t use any special techniques like stitching panoramas or averaging several exposures, any camera today can capture high-resolution photos suitable for a large print. The upsampling techniques covered earlier are useful, but they’re mainly intended for salvaging especially low-res images or printing larger than normal.
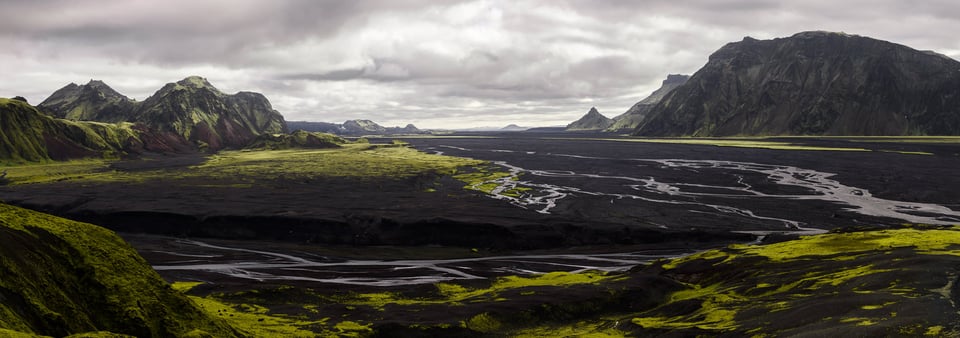
NIKON D800E + 105mm f/2.8 @ 105mm, ISO 100, 1/10, f/16.0
Conclusion
Hopefully, this article helped you learn how to increase the resolution of your images properly, with top image quality and minimal pixelation. You certainly don’t need to upsample every photo you capture, but it’s a good step to take before making large prints. And, if you ever have a very low-resolution photo that you need to enlarge to the point of usability, you now know how to get it to where you want.
If you have any questions about resolution, upsampling, or post-processing techniques, feel free to leave a comment below!
Are you considering an update to this? There are many products available now.
You should use an even more powerful telephoto. All that is said here applies to all type of pictures. And keep in mind: CSI style sizing does work ONLY on TV! :-)
Thank you! Very well explained. Documented. :)
I’m a photographer too and this has been an issue since I have my prints
enlarged 3 – 4 times at my exhibition.
You might also find this interesting, it’s a google’s solution to upsampling images using
neural network algorithm.
ai.googleblog.com/2016/…chine.html
…and sites that incorporate this technology
letsenhance.io/boost
I’m just hoping Adobe will incorporate this in their future products
since the results are just incomparable from any other methods.
You might wanna take a look in to it.
Maybe at the end of the day, “nearest neighbor” is the most genuine
Many thanks for taking the time to research and write this article. I found it very helpful.
One paid product I’ve been using is Tobaz Studio. I usually do basic editing in PS but if I want to add special effects to the image I’ll use Topaz. But Topaz has recently come out with a new upsampling software called A.I Gigapixel that is quite amazing. As well as adding detail it does a good job of controlling or removing noise in the image. At $99 it’s a little expensive but if you are doing a lot of upsampling and need sharp, detailed images this software will do the job.
I bought ON1 Resize 2018 based on the results of this article.
My thinking is I would get a bit better clarity than my CS6EE gives me using Bicubic Smoother.
For starters, this product installs yet another VC++ runtime (2015) on the system.
This is added to all other VC++ runtimes. Too much clutter.
The current Dot-Net-Frameworks run on all Win7 and newer versions of Windows, without VC++ multiple runtime libs.
Resize 2018 is not a true plug-in to Photoshop.
It is a spawned EXE run from the File | Automate menu.
On my very fast i7 cpu, 32gb RAM, Samsumg SSD, the code feels slow and fat.
I find the user interface to be obtuse.
Resize 2018 creates an Explorer context menu, for opening files from Explorer.
My first attempt to open a 474×580 PNG crashed Resize with an infinite “not responding” window.
This is lame. I sent a note to ON1 support.
Last, on 72 dpi images, I can see no detectable improvement between Resize 2018 and CS6 Bicubic Smoother when increasing the size by 50%.
I fully plan on keeping Resize 2018 on the system.
Disappointed in spending $60+ for a system that changed from the 2017 version, and still has basic operational problems.
I just noticed that PhotoZoom Pro 7 can be downloaded (for free) and used as a fully functional demo, leaving a watermark on the image. It’s bedtime here, and I might not be able to find the time to investigate this until late tomorrow at the earliest. Anyone else want to try it and report back? Especially compared to Photoshop and Affinity Photo. They seem to claim they can effectively deal with artifacts (especially the JPG variety) in the original. It’s those edge sharpening and JPG artifacts that I found trip up the Lanczos 3 algorithm in Affinity Photo, although that can be avoided by avoiding sharpening before enlarging, and using TIFF files converted from RAW.
Hi Spencer, I have never done any upsampling and do not actually think I will ever have a reason to do so. But one thing in your essay raised a question in my mind. I noticed that you took a high res photo and chopped it down to 300×300 PPI image size, and then upscaled it to 900×900 PPI. Does this not have an effect on the result of your upscaling? In other words, if you took an old photo that was originally 300×300 PPI and upscaled it, might not your resultant sharpness be different than what you get when you start with with a high res crop? Just curious. :)
I tried up-sampling the 300×300 landscape image to 900×900 in Affinity Photo using the Lanczos 3 (non-separable) algorithm and got some nasty edge artifacts, and I wondered why since up-sampling 24 MP D750 images worked nicely. The D750 images were exported from RAW as 16 bit TIFF files. I looked more closely at the 300×300 image magnified so I could easily see the pixelation. There seems to be some crude edge artifact in that image, and I’m guessing that it was JPEG edge artifact. That could explain why this algorithm was giving bad results in the same way I got bad results with edge sharpening artifacts. I tried it with Lanczos 3 (separable) and that seemed to be a little less sensitive to this artifact noise.
In summary of my two comments: Use RAW files and not JPEG files, never sharpen before up-sampling, suppress noise as much as possible before up-sampling, and if you have to export to do the up-sampling, always export as a 16 bit TIFF file (which is good advice in general anyway).
Also, examining the original 300×300 images magnified, there is nothing in it that actually looks anything remotely like a solid line on top of the mountains; just blocks of grey blogs that barely suggests a line. So, Photoshop with the preserve details option is not actually preserving details at all: it’s creating detail, and the edge along the top of the mountain is an interpolation of some sort. I also see no evidence of the edge artifact noise I see in the original, so it’s also doing some sort of noise cleanup, which makes me worry that it could be cleaning up other things that you might not want to be cleaned up.