A discussion on image cropping sparked up the idea to write this post after I exchanged a couple of comments in my “How to Photograph Birds” article with Tim Layton, who was concerned with cropping bird images and losing resolution for printing. He suggested to try to increase the size of cropped images with a product called Genuine Fractals 6, so that he could get to 8×10 or larger sizes. Since I have had experience with Genuine Fractals in the past and used it for some of my work, I decided to write a quick article about professionally enlarging photographs for printing, in addition to doing a comparison between the resize tool within Photoshop and Genuine Fractals 6 Pro. (UPDATE: As of 2018, we now have a more comprehensive guide to upsampling photos, including a comparison of five different ways to increase the resolution of an image.)
Table of Contents
1) How Large Can You Print?
One of the most frequently asked questions by photographers who do not have much experience with the printing process is how big they can print their photographs from their DSLR cameras. Traditionally, the rule has been to divide the width of the image in pixels by 300 to get the highest quality print size in inches. For example, if you are shooting with the Nikon D90 camera, the image resolution is 4,288 (width) x 2,848 (height). This literally means that there are 4,288 horizontal pixels and 2,848 vertical pixels on the image sensor. If you multiply these numbers together, you will get to 12,212,224 pixels or 12.2 megapixels – the total number of pixels available on the sensor. So in the above case with the D90, dividing 4,288 and 2,848 by 300 gives 14.3 x 9.5 inch size prints. Why divide by 300 and what does that number mean? This number represents “DPI” (dots per inch) or “PPI” (pixels per inch), which means how many dots/pixels per inch the printer will print on paper. The more the number of “dots” per square inch, the more dense and close to each other the printed dots will be, resulting in smooth transitions and less space between those dots and therefore less “grain”. 300 dots per inch gives magazine-quality prints, while lower numbers below 150 introduce more grain and fuzziness to the printed image.
Given the above information, how large could you print an image from the Nikon D90 camera? Now that you know what dots per inch means, the first question that needs to be asked, is how good of a quality the print should be. Take a look at the following chart:
- Nikon D90 12.2Mp 300 DPI (Highest Quality) – 14.3″ x 9.5″
- Nikon D90 12.2Mp 240 DPI (Good Quality) – 17.9″ x 11.9″
- Nikon D90 12.2Mp 200 DPI (Average Quality) – 21.4″ x 14.2″
- Nikon D90 12.2Mp 150 DPI (Poor Quality) – 28.6″ x 19″
If you wanted to make the highest quality print for publication in a magazine at 300 DPI, you could easily print a full standard 8″ x 10″ page and could even afford cropping the image to fully fit the page or print at non-standard sizes all the way to 14.3″ x 9.5″. Some professional photographers print at 240 DPI and find it pretty good for the work they sell, so you could go a little lower. Going below 240 DPI, however, is not acceptable by most photographers due to loss of quality and “fuzziness” or “blur” (if the image is not properly resized) in the images.
So, does it mean that you are limited to such small prints with your DSLR camera? What if you want to hang your beautiful picture on a 24″ x 36″ frame? This is where proper image resizing can help you achieve great results with your prints.
Printing photographs during the film days was pretty easy – photographers already knew the print size from 35mm or medium format films and it was easy to find out what sizes could be printed without losing much details and sharpness. With the invention of digital photography, everything is now different, at times more complicated with all the DPI/PPI language and image resizing options with different algorithms. The new advancements in digital image processing are now allowing much larger prints with minimum loss of quality and details. Let’s take a look at the two most frequently used methods to enlarge images by professionals.
2) Enlarging Images Using Adobe Photoshop
Adobe Photoshop is the most popular graphic program used for enlarging images. The tool within Photoshop to enlarge images is called “Image Size” and it is available under Image->Image Size in the top navigation menu. Once you open an image and go to Image Size, you will see something like this:
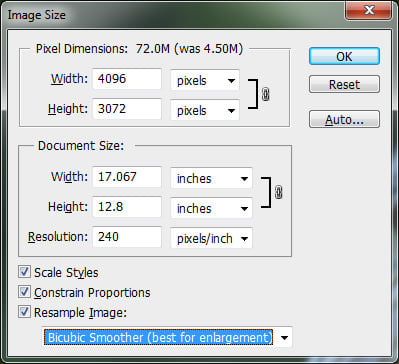
The initial width and height indicate the size of the image you loaded into Photoshop. In the above example, I took an image that was 1024 x 768 and quadrupled its size by changing the width to 4096 (the height automatically changes since I have “Constrain Proportions” checked). As I increased the size, the middle section is pointing out that if I printed that photograph at 240 DPI, I would get a 17.067″ x 12.8″ print size. If I change the value from 240 to 300 DPI, the print size gets lowered to 13.653″ x 10.24″, while keeping the image size the same.
Let’s jump to a real example and see what we get by enlarging a photograph using Photoshop. Here is a bird image I picked that I shot earlier this year:

It has plenty of details and is very sharp, so it is a good sample to test. Here is how the image looks like when viewed at 400%:
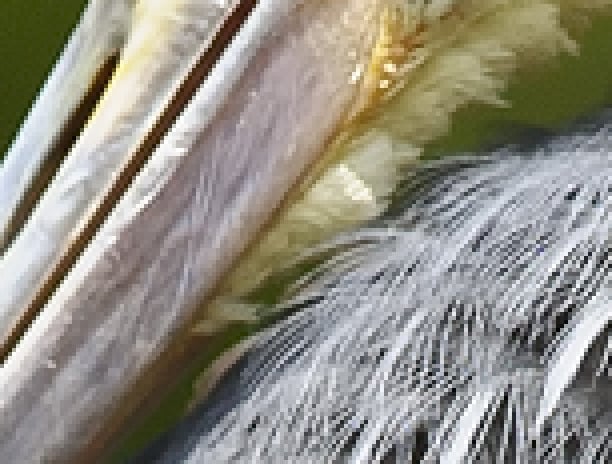
As you can see, it is very “pixelated”, meaning that there are lots of squares in the image. This happens because the original image is comprised of pixels and when you increase the size of the image, the only thing the computer can do is increase the number of pixels that represent a single pixel. In the above case, approximately 4 pixels now represent a single pixel, because the image is viewed at 400%, hence the “pixelated” image. If you were to do the same for print, it would not look good at all with all those squares. To fight this problem, Adobe came up with several image interpolation algorithms that go through the image and convert the square pixels to smooth transitions for both increasing and decreasing image sizes. However, Adobe highly recommends not to increase the sizes of images, because the additional pixels are created by analyzing the neighboring pixels and then coming up with a neutral colored pixel in between to have a smooth transition, which ultimately results in blurry details. Take a look at the following image that was enlarged through Photoshop using the “Bicubic Smoother” image interpolation algorithm:

As you can see, the pixelated areas are gone and replaced by smooth transitions. However, the edges are now too smooth and the image lost some of its sharpness that was there in the original image. This might not be very noticeable when the image is viewed from a distance, but when viewed very closely, the lack of sharpness will be quite obvious. Some additional sharpness could be added manually after resizing, but it has to be done carefully, as sharpening could introduce more artifacts and unnatural-looking details.
3) Enlarging Images Using Genuine Fractals
One tool that is quite popular among photographers for enlarging images is OnOne Software’s Genuine Fractals 6 Professional – an advanced resizing tool for professional photographers that is specifically designed for enlarging images for large and gigantic print sizes. Compared to Photoshop, it has a more complex algorithm that not only analyses the nearest neighbor, but also does a decent job at retaining the sharpness and details of images. Here is how it looks like:
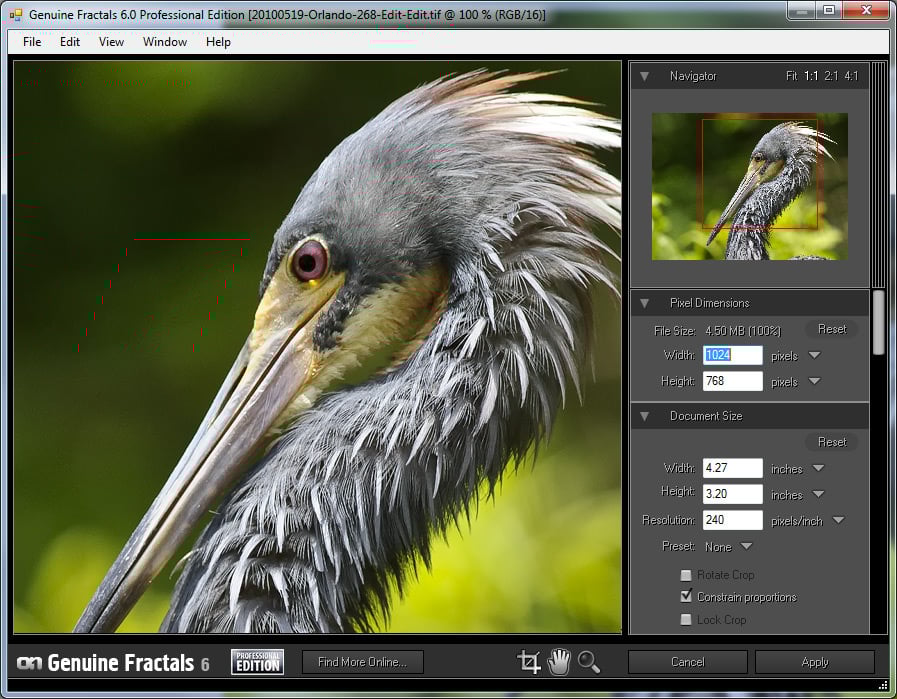
Using Genuine Fractals 6 is very easy – all you have to do is type the new image dimensions or indicate the print size from the “Document Size” panel and the program will automatically enlarge the image and crop it to the selected print size. For more control over transitions, the program allows you to specify the type of image using the “Texture Control” panel:
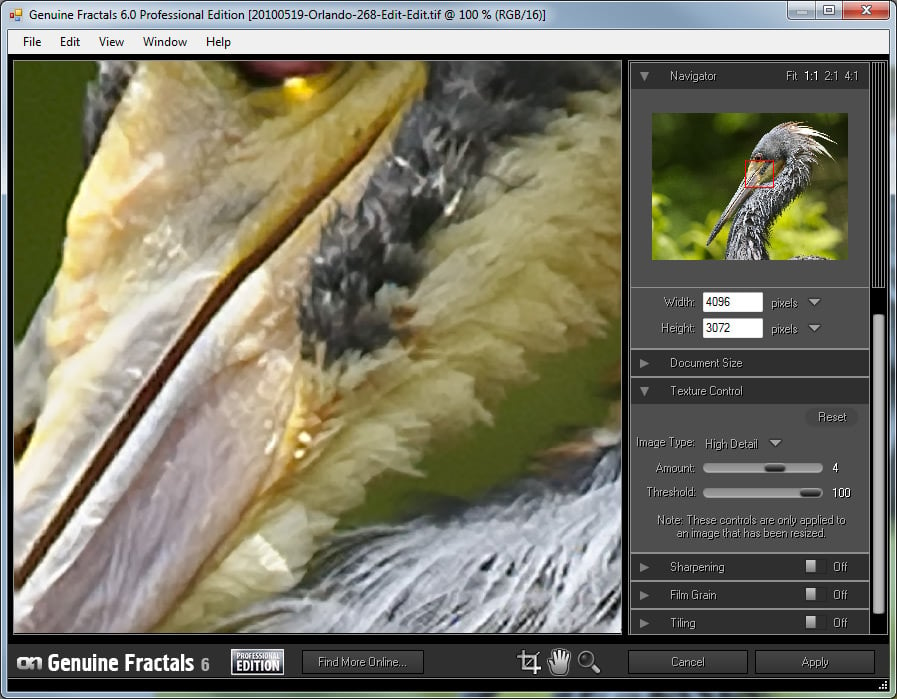
As you can see, I picked “High Detail”, because I wanted to retain as much detail as possible for feathers and other parts of the bird. Here is how Genuine Fractals rendered the image after I clicked “Apply”:
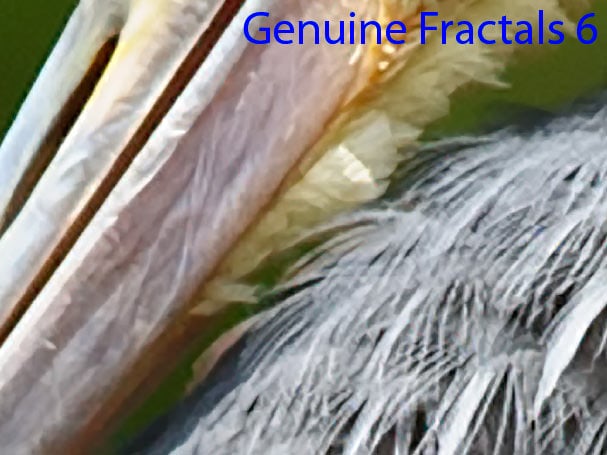
Now compare Photoshop’s Image Resize with Genuine Fractals 6 Pro:
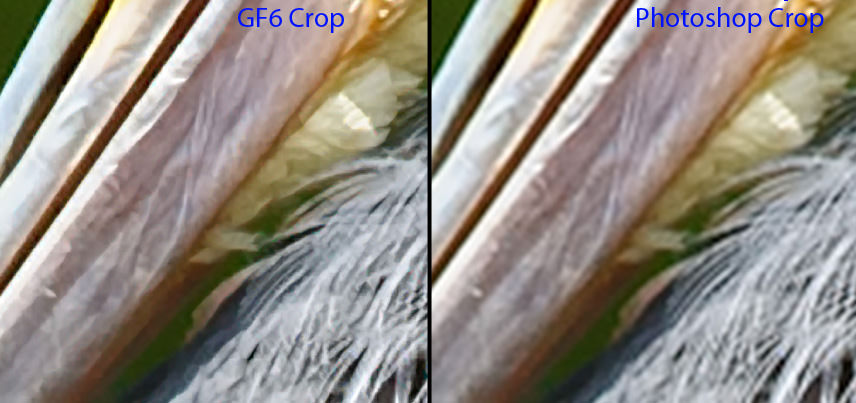
Pay attention to the amount of blur from the Photoshop image (right) and relatively good retained details on the Genuine Fractals image (left). And that’s without applying any additional sharpening on the Genuine Fractals image!
4) Enlarging Images Using BenVista PhotoZoom Pro
Another software package that is very similar in its functionality to Genuine Fractals is Benvista PhotoZoom Pro. Here is how the product looks like:
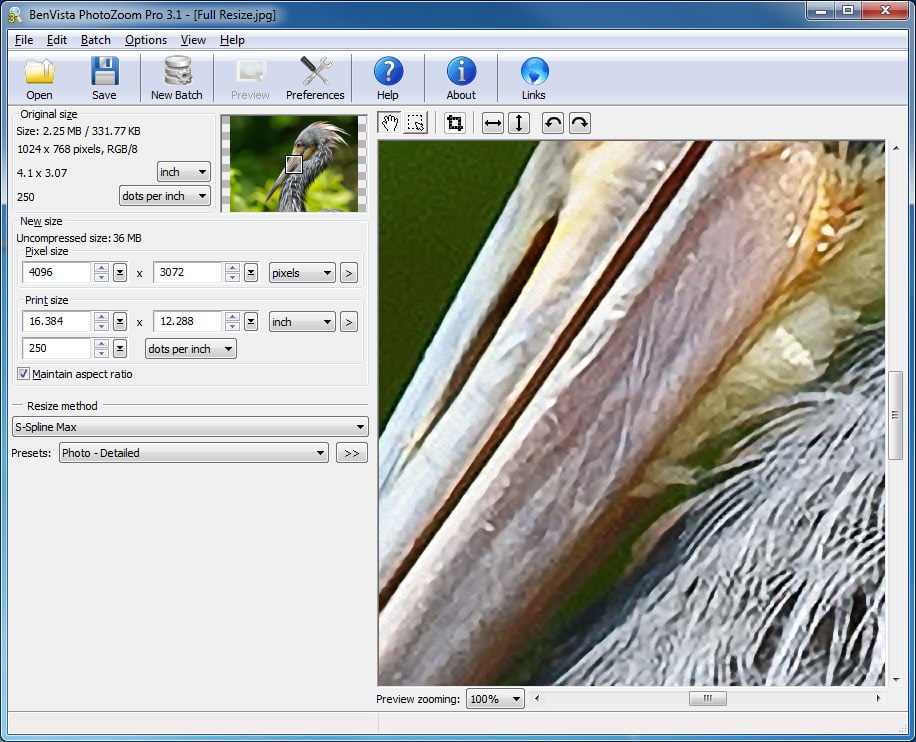
And here is the same image processed by PhotoZoom:

Compared with Genuine Fractals:
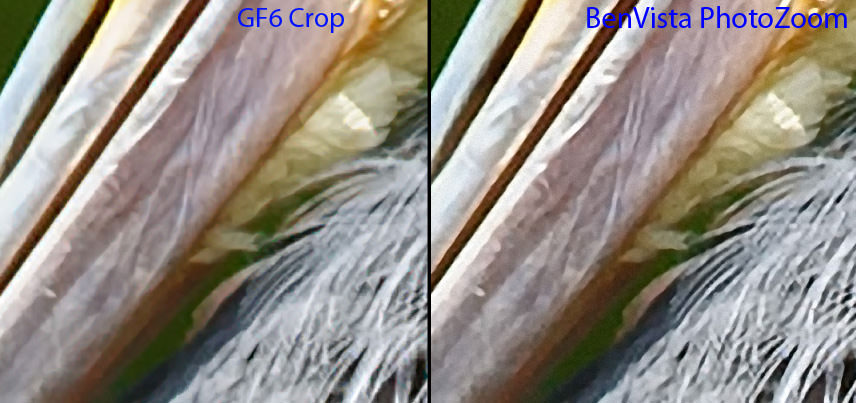
BenVista PhotoZoom seems to retain sharpness a little better than Genuine Fractals, especially in feathers. I used the “S-Spline Max” patented algorithm to get the above results and chose the “Photo – Detailed” preset.
5) Conclusion
If you are thinking about printing your images on large paper, you do not have to be limited by the number of megapixels on your sensor. As I have shown above, you can enlarge your images using the available tools and algorithms for proper image resizing from various manufacturers. I’m sure there are other products in the market that can achieve the same or similar results, so you can certainly give them a chance and see how you like them. If you want professional-looking prints, however, you should seriously consider investing in such great tools as Genuine Fractals 6 Pro or BenVista PhotoZoom that will give you large prints and still preserve as many details as possible. And, again, if you would like to see an updated article on increasing image resolution, take a look here.
Please let me know if you have any questions in the comments section below.
Your assertion “This number represents “DPI” (dots per inch) or “PPI” (pixels per inch), which means how many dots/pixels per inch the printer will print on paper.”, which appears above under 1) How Large Can You Print? is flawed fundamentally and, is another example of how the confusion between DPI and PPI is propagated. PPI refers to the resolution of a digital image, while DPI refers to the amount of ink a printer will lay down on a print medium.
I am stuck…I am trying to write a devotional/photo 8×8 book in hopes to publish it. I am a novice at best in photography. I struggle with knowing if my photos will be quality enough to display in the book. This is self publishing at this point in time, and I cannot afford to submit photos that are lacking in sharp clear fashion. Any direction you can offer would be greatly appreciated.
Thank you,
Cat
I very much enjoyed your article. Have you written any additional material on taking old black and white photos, reshooting them with a new DSLR and then enlarging with the tools you described above?
Hi, I’ve clicked pics on my android phone camera. I would like to blow up the pics I’ve taken to big size. Could you give some guidelines for that too?
You indicate that enlarging 400% means that four pixels will represent each original pixel. Actually, enlarging by 400% means that 4 high x 4 wide or 16 pixels will represent each original pixel. A 200% enlargement produces 4 pixels for each original pixel. The ratio of 16:1 does show that this is quite a challenge to create a 400% image in software without obvious pixellation of the resulting enlargement.
Hi am begginer n like to buy new dslr . currently i dont hav dslr
I want to invest thatfor bussiness for wedding n baby photography sp plz suggest best dslr for bussiness n lens also
Thank you very much for this. Very helpful.
Hi Nasim! I love your work :)
I recently had a client ask me “how large” they can print an image made with a Nikon D700, shot with the Nikkor 50mm f/1.4 lens (outdoors/presumably good light – haven’t done the session yet)
I have been researching this, and can’t find a conclusive answer.
I trust your work and eye immensely. I would love to know how large you have been able to print from a 12MB photo, before the image is too compromised to be considered a “pro” print. The printing labs recommend letting them do the resizing, so I would be sending a full-res JPEG (or TIFF??). I am concerned that, if my client orders a 20×30″ or larger print, it will not measure up to professional standards.
I would love an article on this subject too, if you ever have time! Most of what you see out there is personal opinion in photography forums.
Thanks for ALL of your articles! I’m now a full-time wedding and event photographer, and your site was invaluable when I was starting out :)
Hi Nasim,
Awesome article – very helpful.
I have a Nikon D90 and I want to blow my photos up to 60-100 inches.
Will this be doable as per your above recommendations with Benvista or Genuine Factuals? How large can I go with my 12.3 MP D90 if I used BV or GF?
I am going to Yosemite next week and want to make sure I can get the images to those large sizes I mentioned above.
My friend years ago would stich together a bunch of images and make a Pano in order to increase pixel size.
So in sum, to get 60-100″ size prints do I:
1. Use my existing D90 and just use BV or GF
2. Use my existing D90 and do panos with or without BV or GF?
3. Get a new SLR with higher Megapixels and if so which Nikon model would I and what would minimum Megapixels on that SLR need to be?
Thanks a lot.
Regards,
Rod
this helped during my photoshop exam