With almost all of our cameras featuring video capabilities (I’m looking at you, Nikon Df), most of you have probably considered going beyond the occasional family video. However, like photography, video requires post-processing for best results, and the prospect of buying After Effects, Premiere Pro, and SpeedGrade just to get your toes wet is daunting for many photographers. What you may not know is that you already have a powerful video-editing program in Adobe Photoshop CC, or CS6 Extended. This is an easy way for photographers to play around with film without purchasing hundreds of dollars worth of software, and is surprisingly effective. I’m certainly not a professional videographer as my example video will show, but I have enjoyed editing a few shorts, just for fun. The two most critical aspects of editing for video (not including cuts/sequencing) are color-grading and sharpening, both of which can be done relatively painlessly in Photoshop using tools you’re already experienced with.
If you’ve not tried editing video in Photoshop before, this post will cover my workflow as I edit a video based around how I cooked the breakfast shown in the photo below:

The first step is importing your video clips. Open your first one in Photoshop, and you’ll notice the “Timeline” window at the bottom of your screen. You can click the “+” icon in the “Video Group 1” row to import the rest of your footage.
Now that all the videos are loaded in Photoshop, you can drag them into the order you want, and trim them down to the lengths you want. You can trim videos by cursoring over the beginning or endpoint of a clip in the timeline and dragging in, or by clicking the scissors icon to cut the clip in two and delete whichever part you don’t want.
If you want to adjust the volume of any of the clips, you can click the icon in the upper right hand corner of a video in the timeline to bring up audio options. You’ll want to do this now, before we get to color-grading. Unfortunately Photoshop has very limited options for audio, so I typically just use it to mute clips if necessary.
Now that all the sequencing and audio is worked out, right click each layer in the layers palette and convert them to smart objects. You’ll want to do this individually so it doesn’t merge all the clips.
Next up, I like to select “Video Group 1” in the layers palette and duplicate it. This adds another row to the timeline above your original footage, with all the clips duplicated. You don’t need this yet though, so click the eyeball icon on the new group to hide all those videos.
The next step is color-grading. You can use almost any adjustment layer you’d like for this, I tend to apply a curves layer to each clip. My favorite method is to go through the RGB options, dragging the endpoints in until they just touch where the histogram starts to rise up. This maximizes contrast, as it clips the whites and blacks, and it also makes for a pretty accurate white balance adjustment. Further adjustments are done by placing three adjustment points on each RGB curve: a highlights, midtones, and shadows point. Slight adjustments of these allow for excellent control of colours. You can also save some time by simply adjusting the main curve, but you won’t have the same control as with separate curves for red, green, and blue.
You can see how I’ve pulled the curves endpoints to touch the histogram:
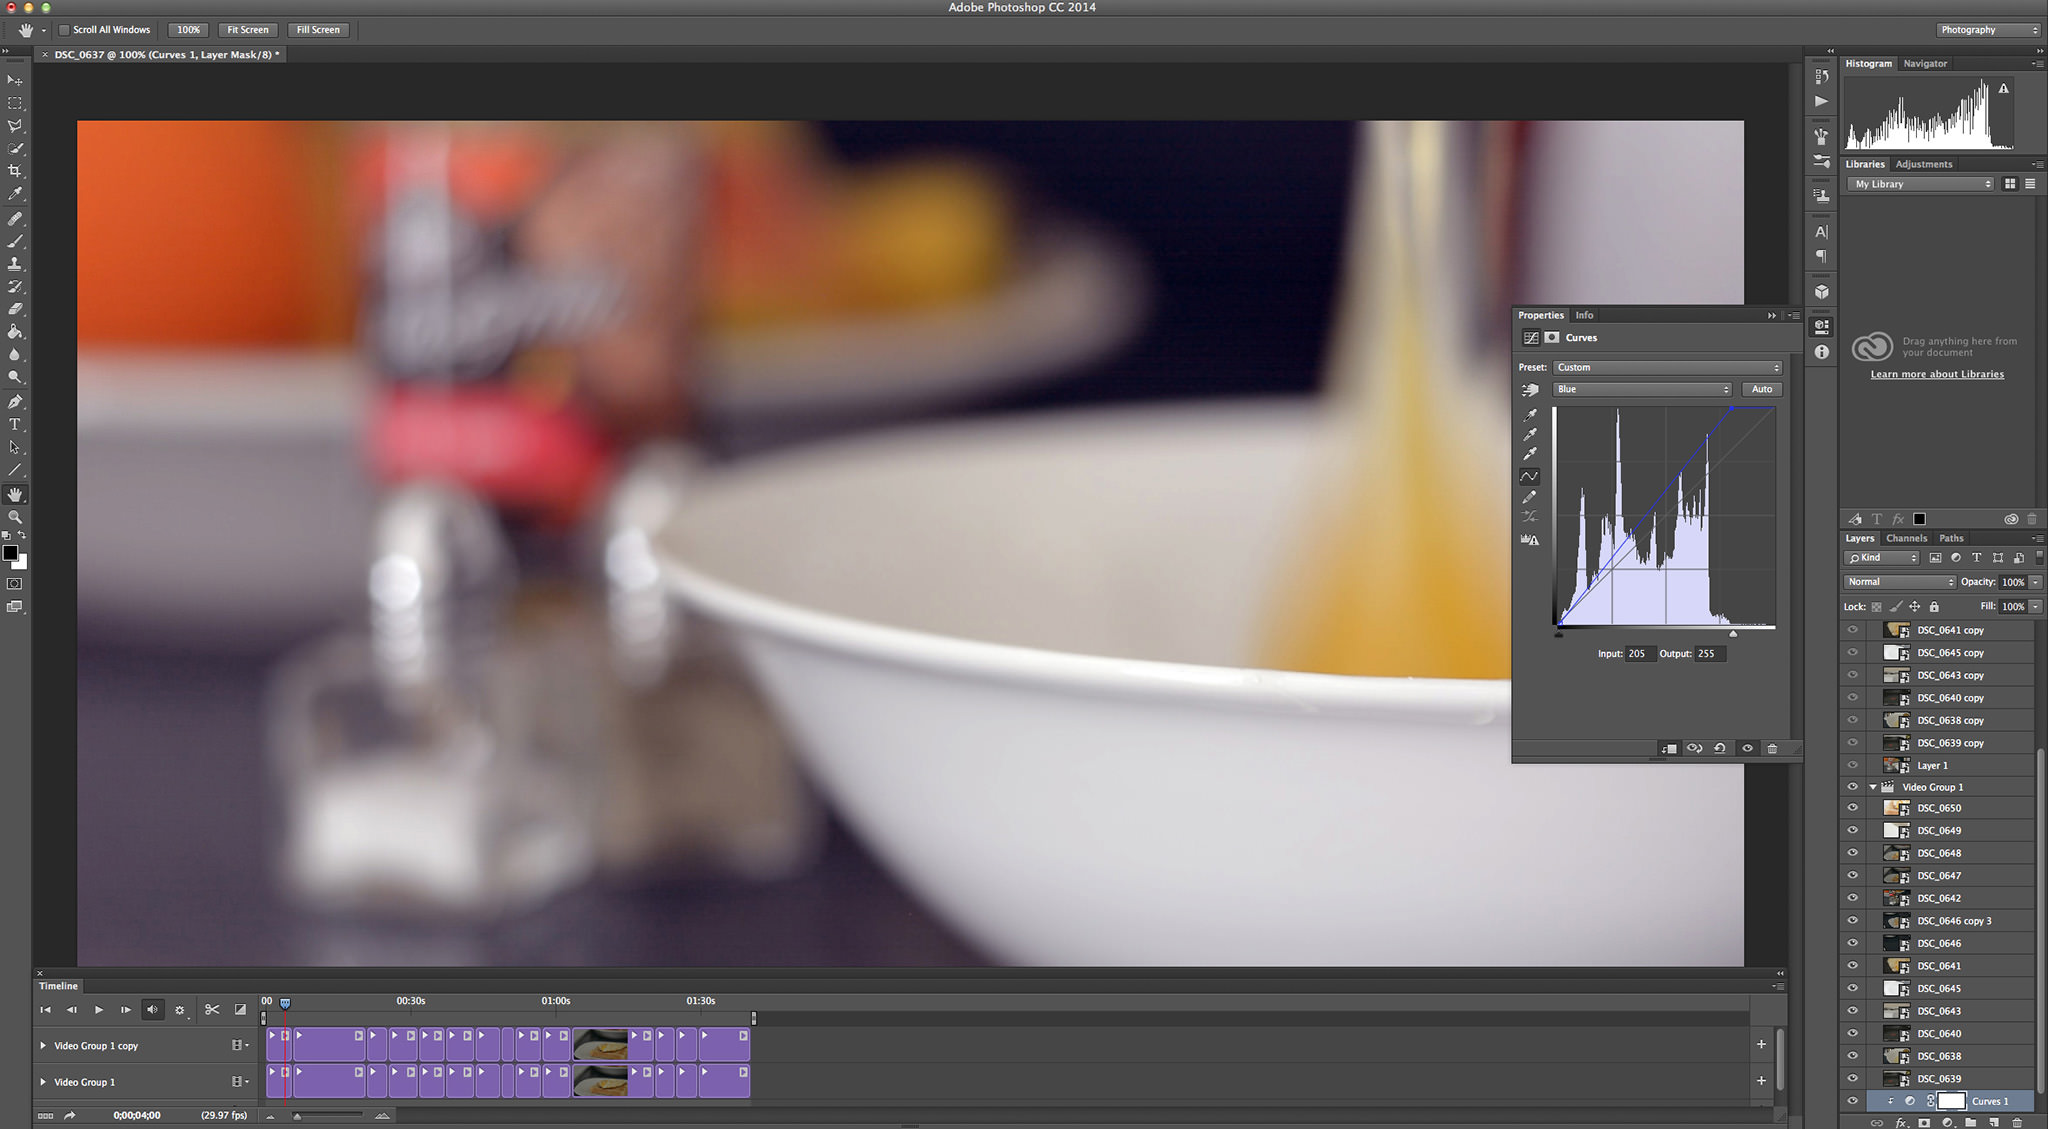
If the footage you’re working on is all in the same light and equally exposed, you could probably use one adjustment applied above all the clips. If not, make sure that each adjustment layer is clipped to the video you want it to affect. Otherwise your first clip looks very strange after a few layers have been edited…
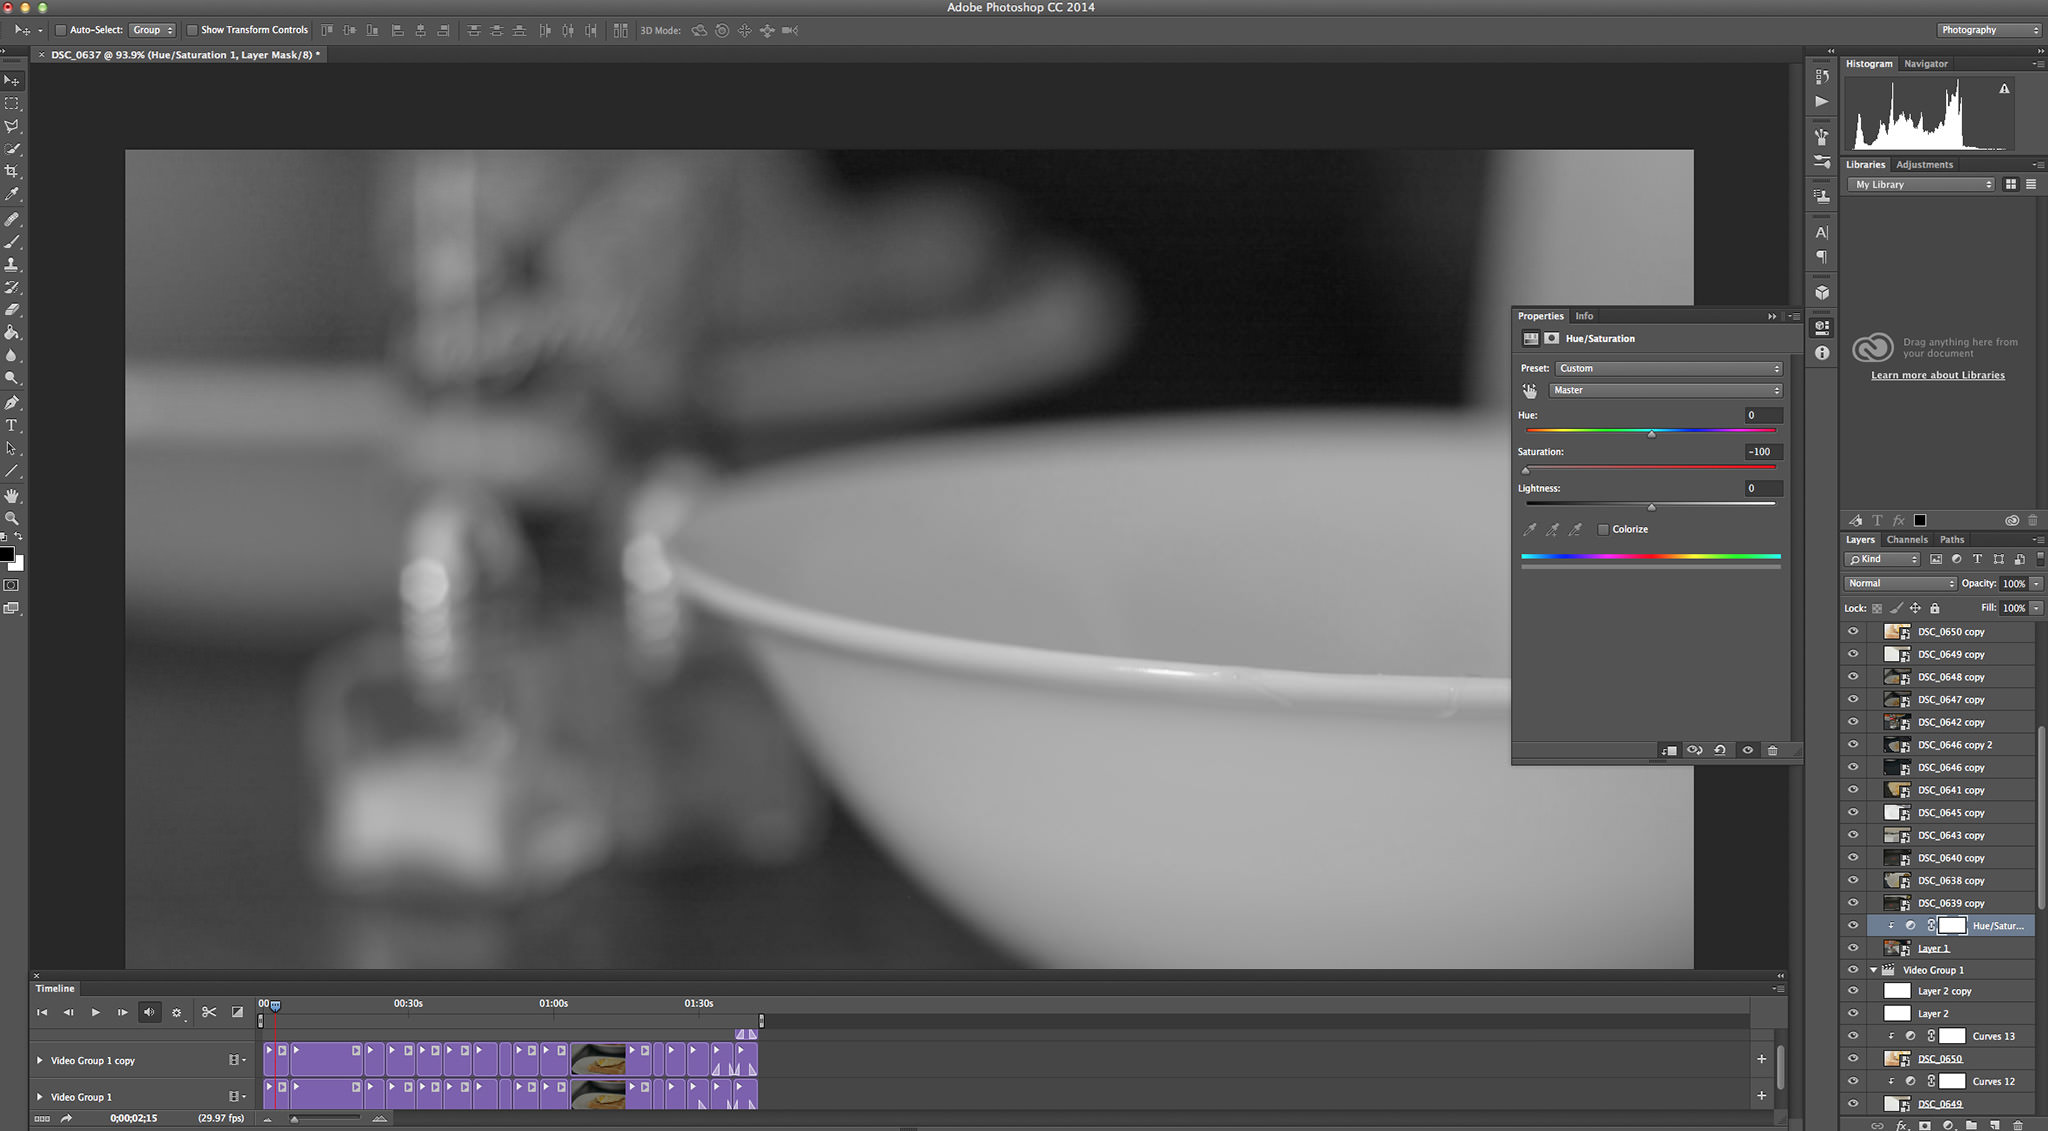
Now that the colours are satisfactory, I move on to sharpening. This is where that video group we copied comes into play. Make it visible again, and apply a hue/sat layer to each clip, with saturation set to -100. As far as I can tell, you’ll need to do each one individually, otherwise the next steps don’t work.
Crank saturation down completely, as shown:
With the videos de-saturated, go through them and apply a high pass filter to each (Filter – Other – High Pass). This is my preferred method of sharpening, since you have complete control. In the high pass menu, set the radius so that you can see micro-contrast and fine detail, without ugly haloing around edges. Usually 0.5-1.5 is the range I’m in. Once the filter’s applied, you can change the layer’s blending mode to linear light, and select an opacity which looks good. 50% is a good starting place, give or take. You can toggle the layer’s visibility or slide the opacity around to view the effect of your sharpening on the video.
Below is the high pass filter’s adjustment window:

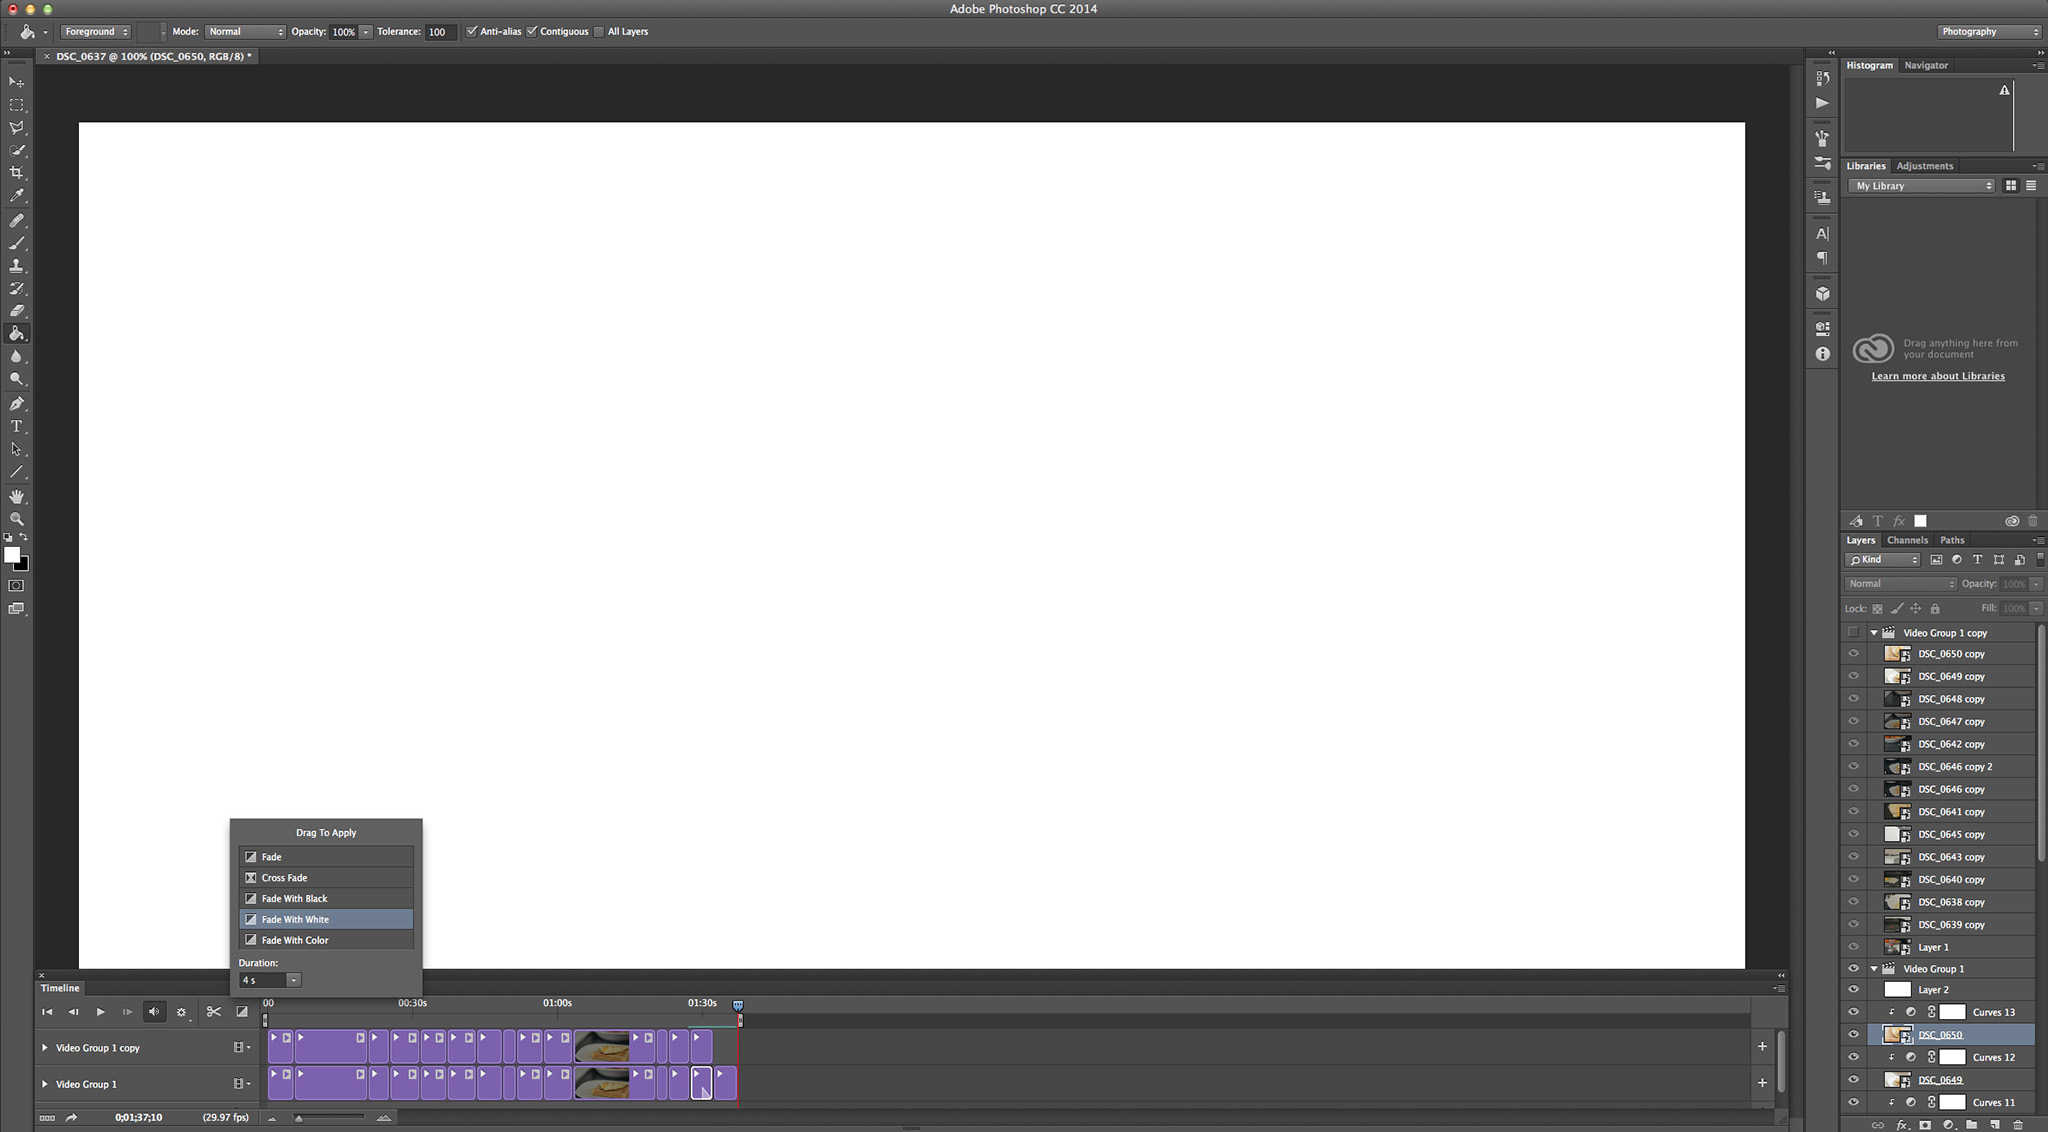
After you’ve color-graded and sharpened your film, run through it one last time to make sure all the layers are clipped properly. You can also add new layers and text effects for slideshows/credits/whatever, and add simple transitions between clips. The new layers are just like normal photography layers, and transitions can be accessed by clicking the half shaded square icon beside the scissors in the timeline. Then you just select the duration and drag into your video.
Transitions are simple to use, and fairly basic. Still useful for 90% of what you need though:
With your video finished, click File – Export – Render Video to bring up your rendering options. Select whatever file type you’d like, and Photoshop will export your video to your hard-drive.
Since Photoshop’s pretty much useless for audio, if you want to play with sound fades and music tracks a little more I recommend importing the video into iMovie or whatever other software program came with your computer – as far as I’ve found it’s much better than Photoshop.
With that all said, here’s a quick short I shot one morning, and edited using Photoshop with the techniques outlined above. I’ve also included a version with the left half left without adjustments, so you can see the difference Photoshop made. It’s sometimes subtle, but it makes a difference.
Final Video:
https://www.youtube.com/watch?v=kkwtTTB07PA
Comparison:
https://www.youtube.com/watch?v=ALLU3upOysw
If you shoot any videos with the intent of editing them, I recommend lowering the contrast settings in your camera and setting the white balance via grey card. With raw photography you can get away with doing a lot more in post-production, but you need to coddle video.
Hopefully this has helped inspire some of you to try your hand at video, and I’d love to hear any other editing techniques I may have missed!
This guest post was submitted by Lauchlan Toal, a food photographer based in Halifax, Nova Scotia. When he’s not shooting food, he enjoys experimenting with other genres of photography and learning new tricks in Photoshop. Some of his work can be seen at www.lauchlantoalphotography.com.
ROBLOX
DFFFFF
I am very much new in photography. I shot some of the still photos with my Canon Mark III n thought of making a video merging them in photoshop cc. Before exporting or rendering I wanted to keep the footage saved to work later. I am using my laptop which is an ASUS with intel i3. But I could not save as the message was PSD file can not be saved as the file was bigger than 2 GB. Can any one help me out. Tapan Mondal, India
Hi Tapan, PSD files are limited to 2GB, so if you have a larger file than that you’ll want to save it as a PSB (it’s essentially the same as a PSD, but allows for larger file sizes).
Hope that helps!
This is an amazing tutorial on color correction. I got some nice set of information and got to know how to add perfect color. Thanks for sharing this post.
Thanks for the information so creative and inspiring. Greetings.
This tutorial is so much helpful. I will definitely edit a video with the help of Photoshop. And I think this tutorial will be a best guideline.
Thanks a lot for sharing.
Any recommendations site for learning video for newbie. Thanks in advance.
Hi Norman, to be honest I haven’t had much experience with video-centric sites. dfilmschool.com might be a good place to start, however – they seem to have some good posts like this one dfilmschool.com/dslr-…oot-basic/ that get you started with the basics. Hope this helps, and happy shooting!
Helpful article. I like your comparison video and the improvements you made to the footage. Nicely done. But just one thing: My Gawd, what have you done to that egg!?! I almost called the waiter to send it back to the kitchen!
Thanks Steve, I admit that my culinary finesse (or lack thereof) takes a bit of a hit when I film the process. Once I get a bit more practice with video I’d like to do a project where someone else is in charge of the cooking – might even offer a quick video as a freebie to my next client just for the chance.
Really relevant, thank you for this
Glad you like it, I think that video is definitely becoming more important to photographers.
I don’t know why Adobe doesn’t include these advanced controls in Premiere/Speedgrade. They are very useful to have!
While I’ve not tried any of Adobe’s video specific programs like Premiere Pro, the tools PhotoShop gives you are very impressive – a shame if the other programs don’t have similar functionality. I think they have variants called “waveforms” and things like that though, so if you have Adobe’s video editing software you might want to look into that!