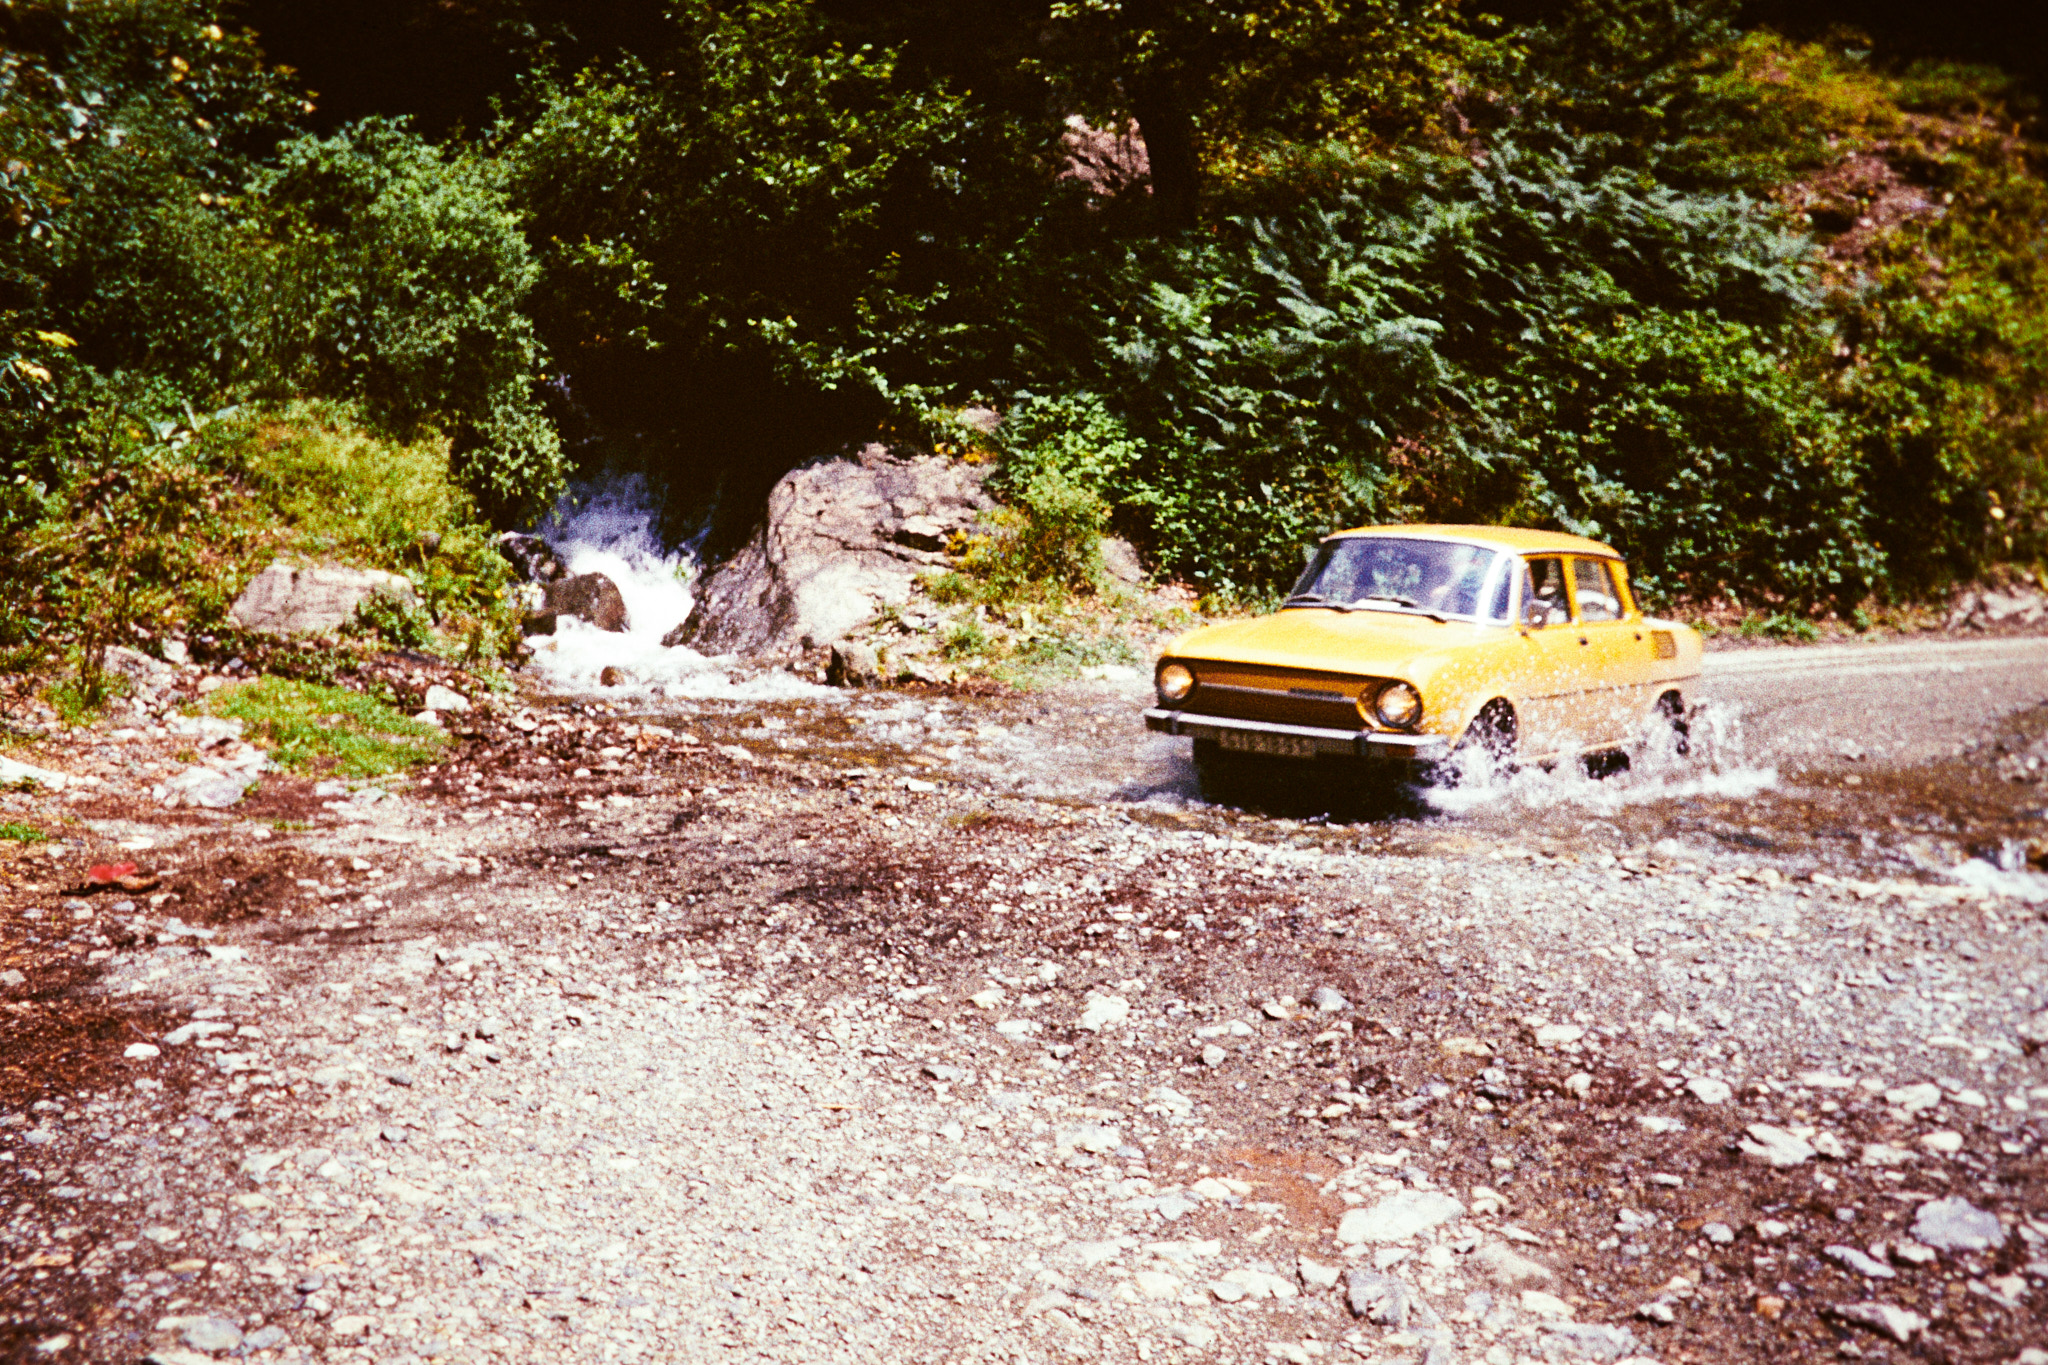
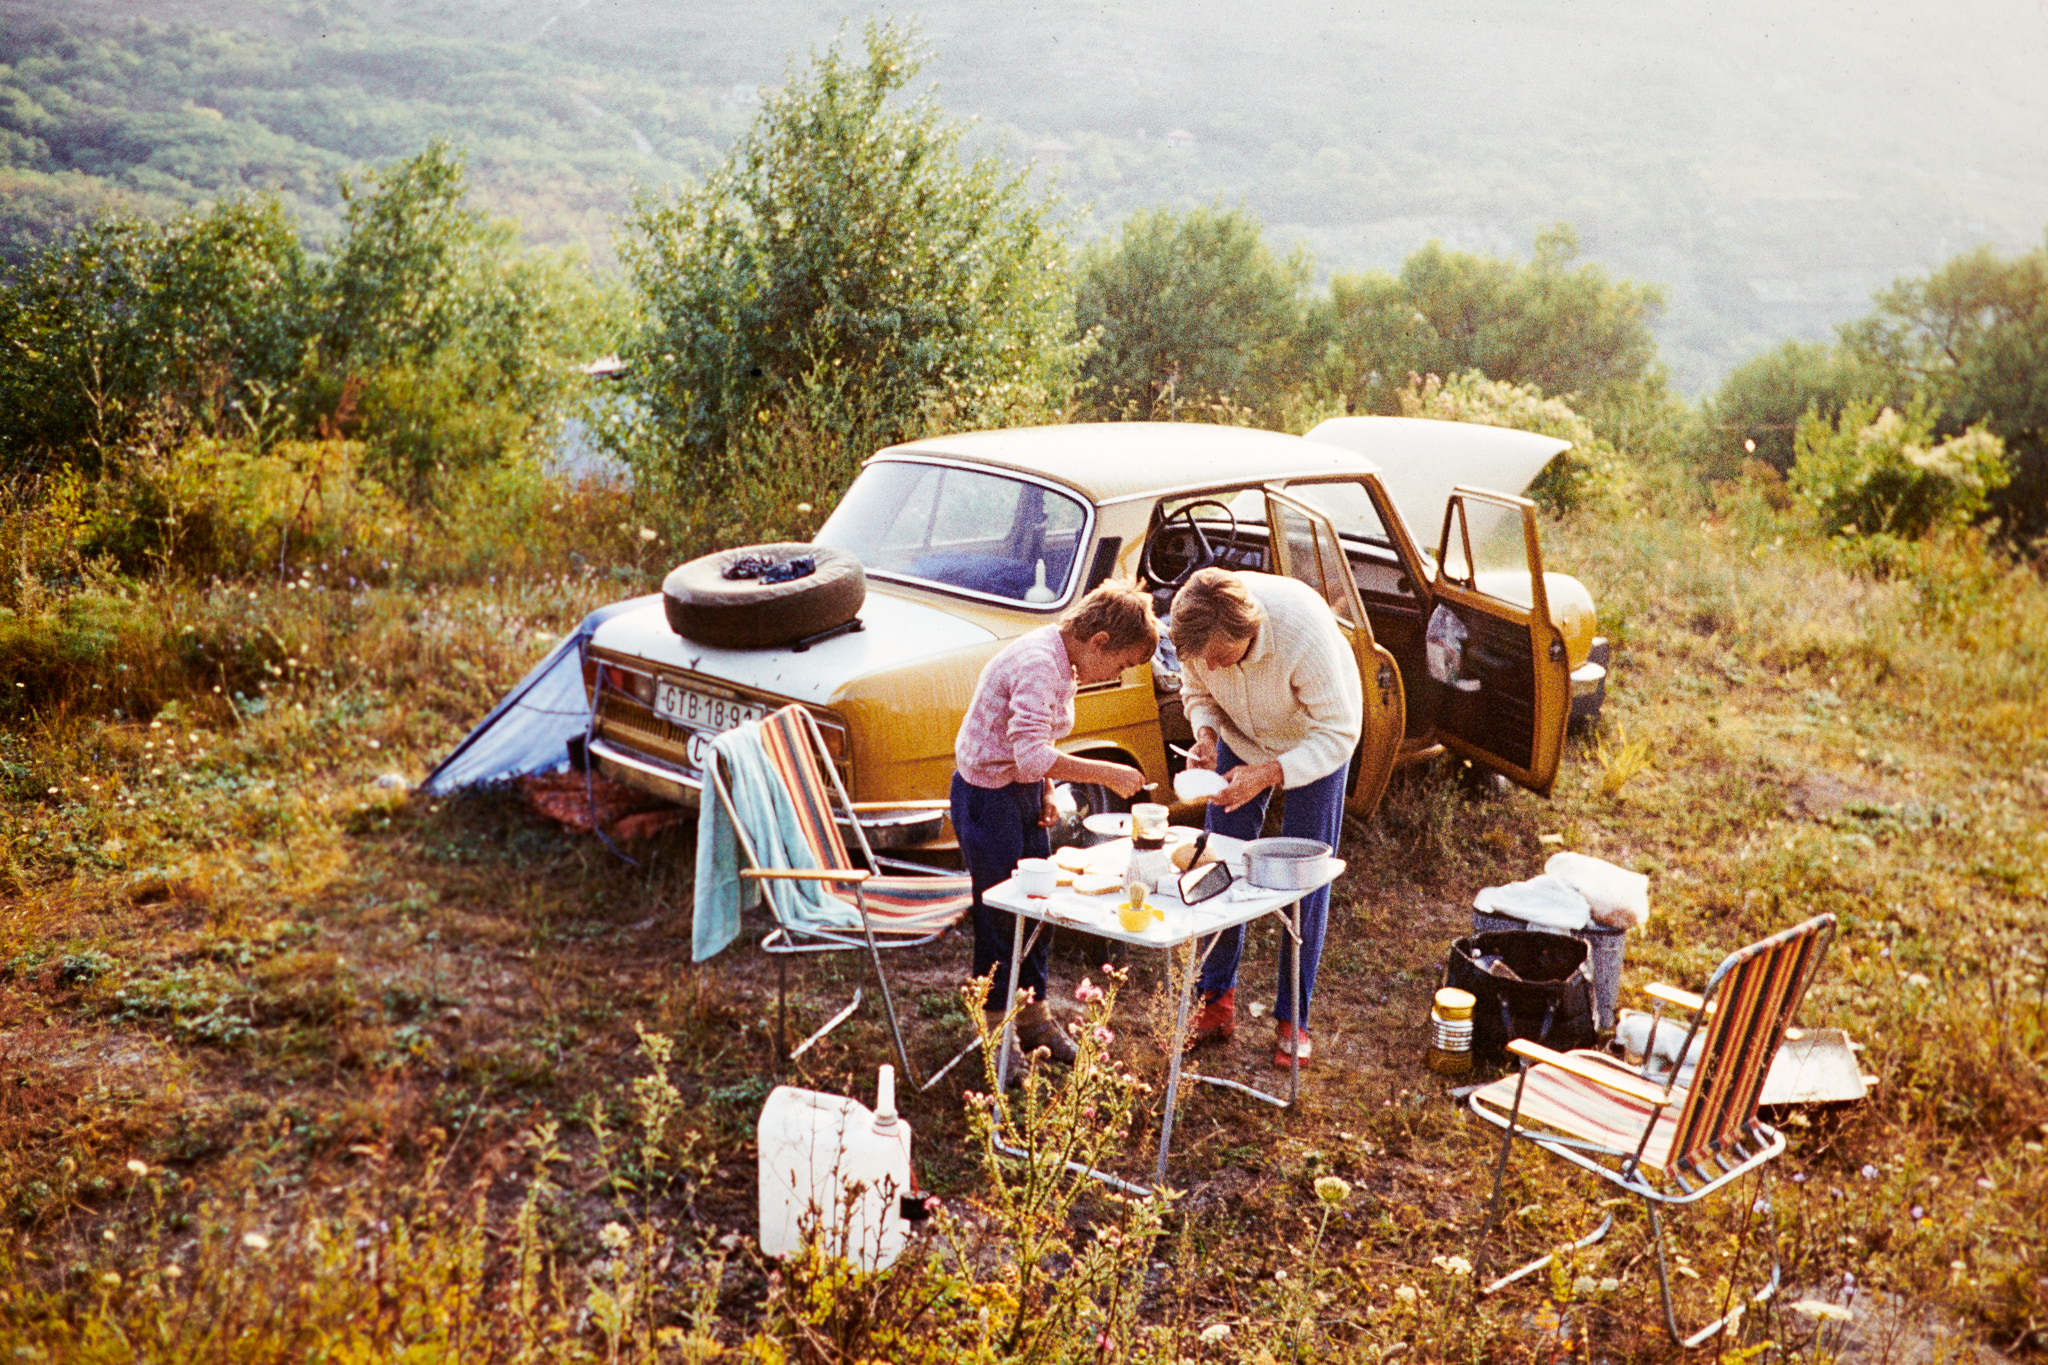
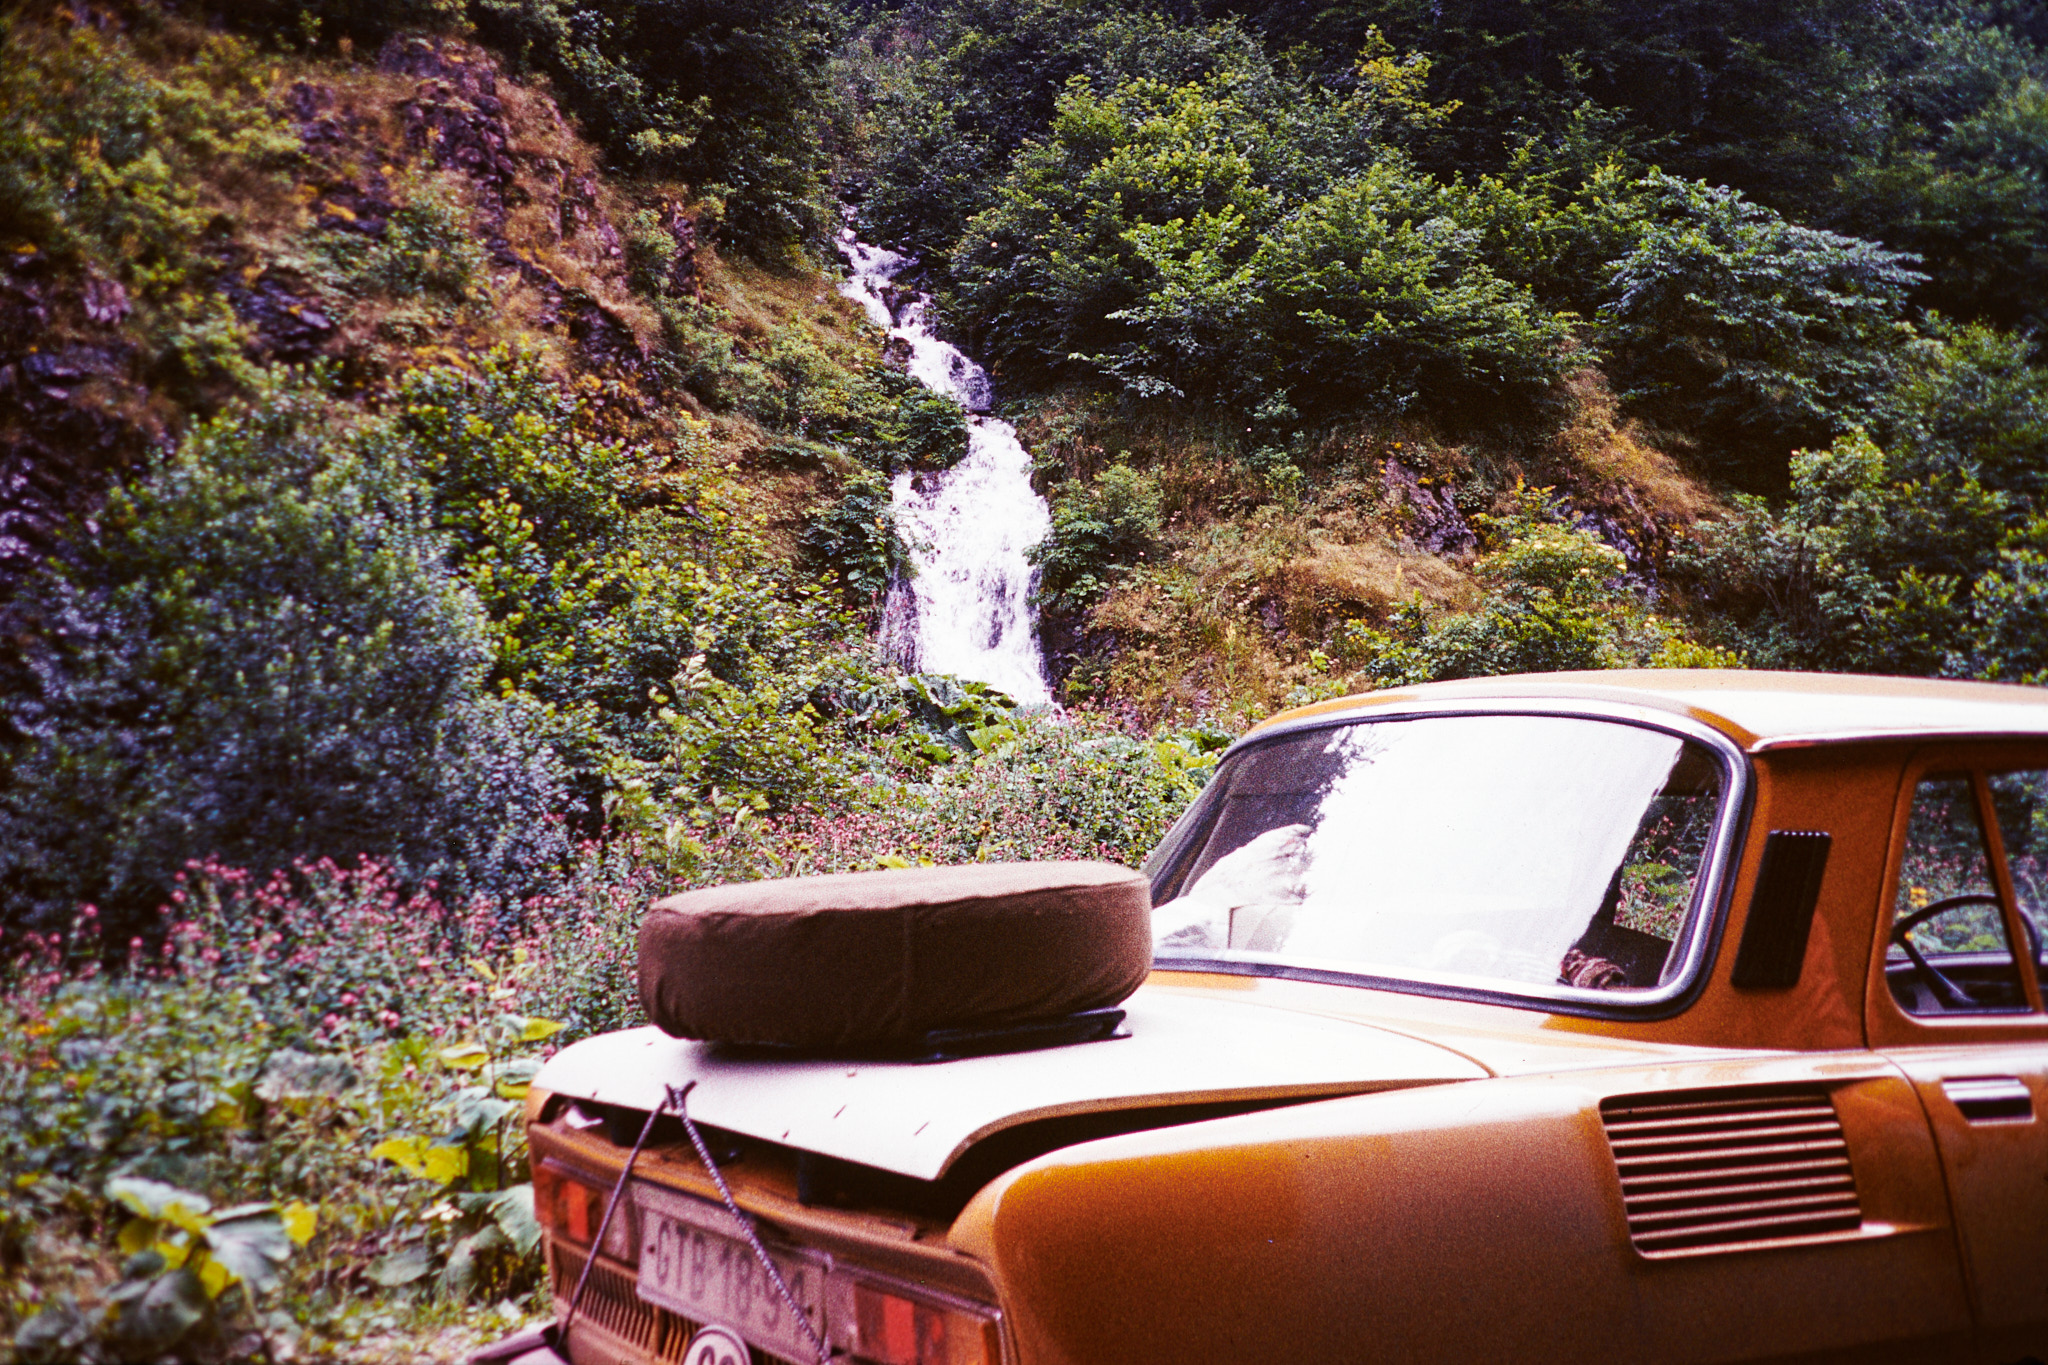
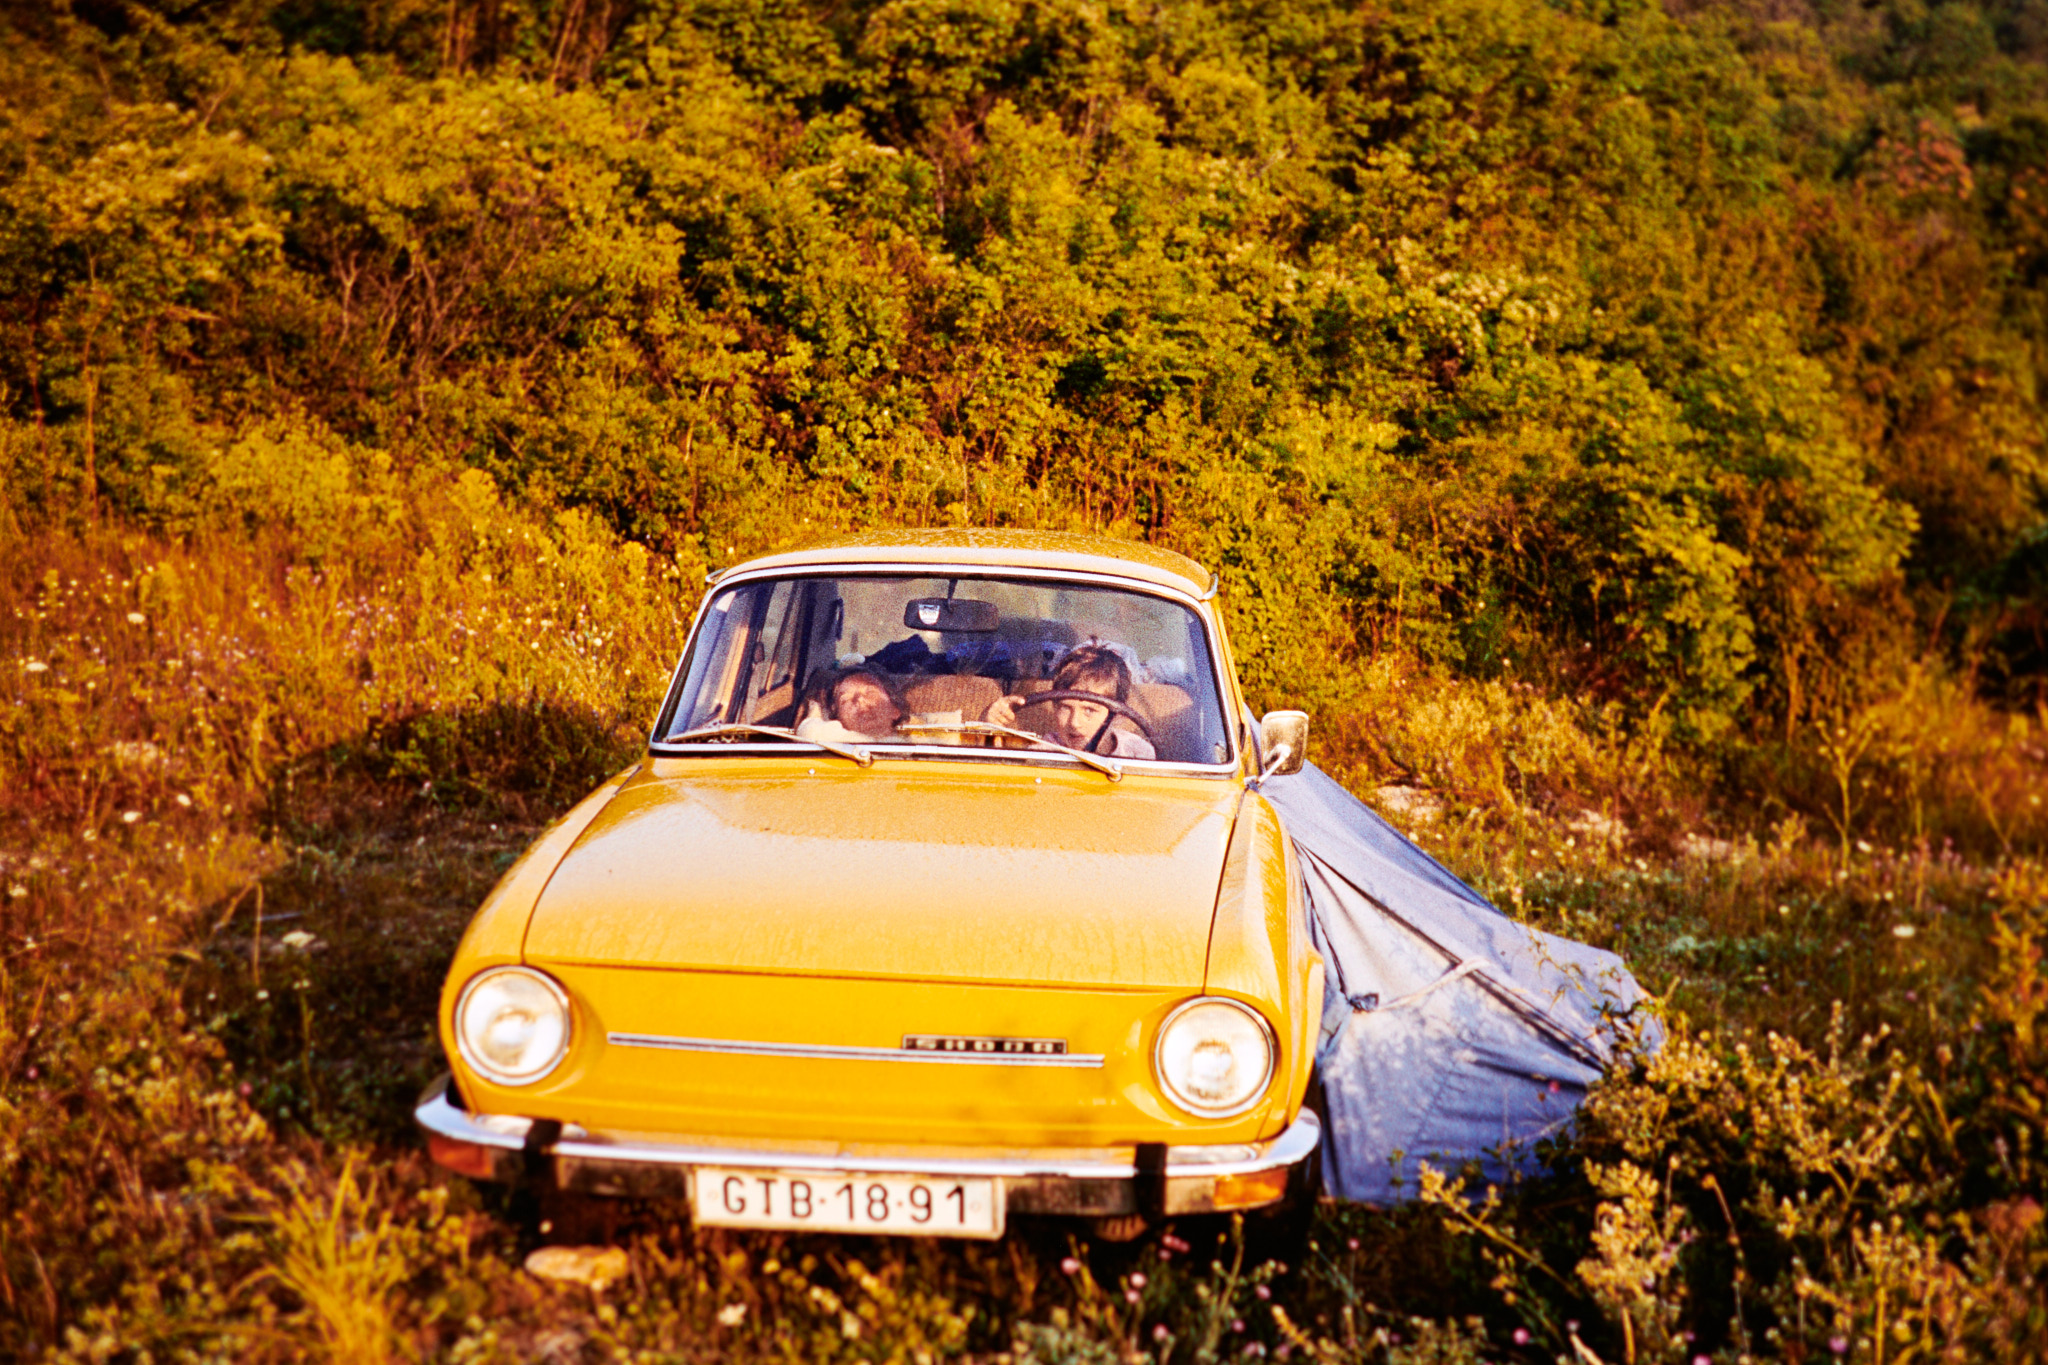
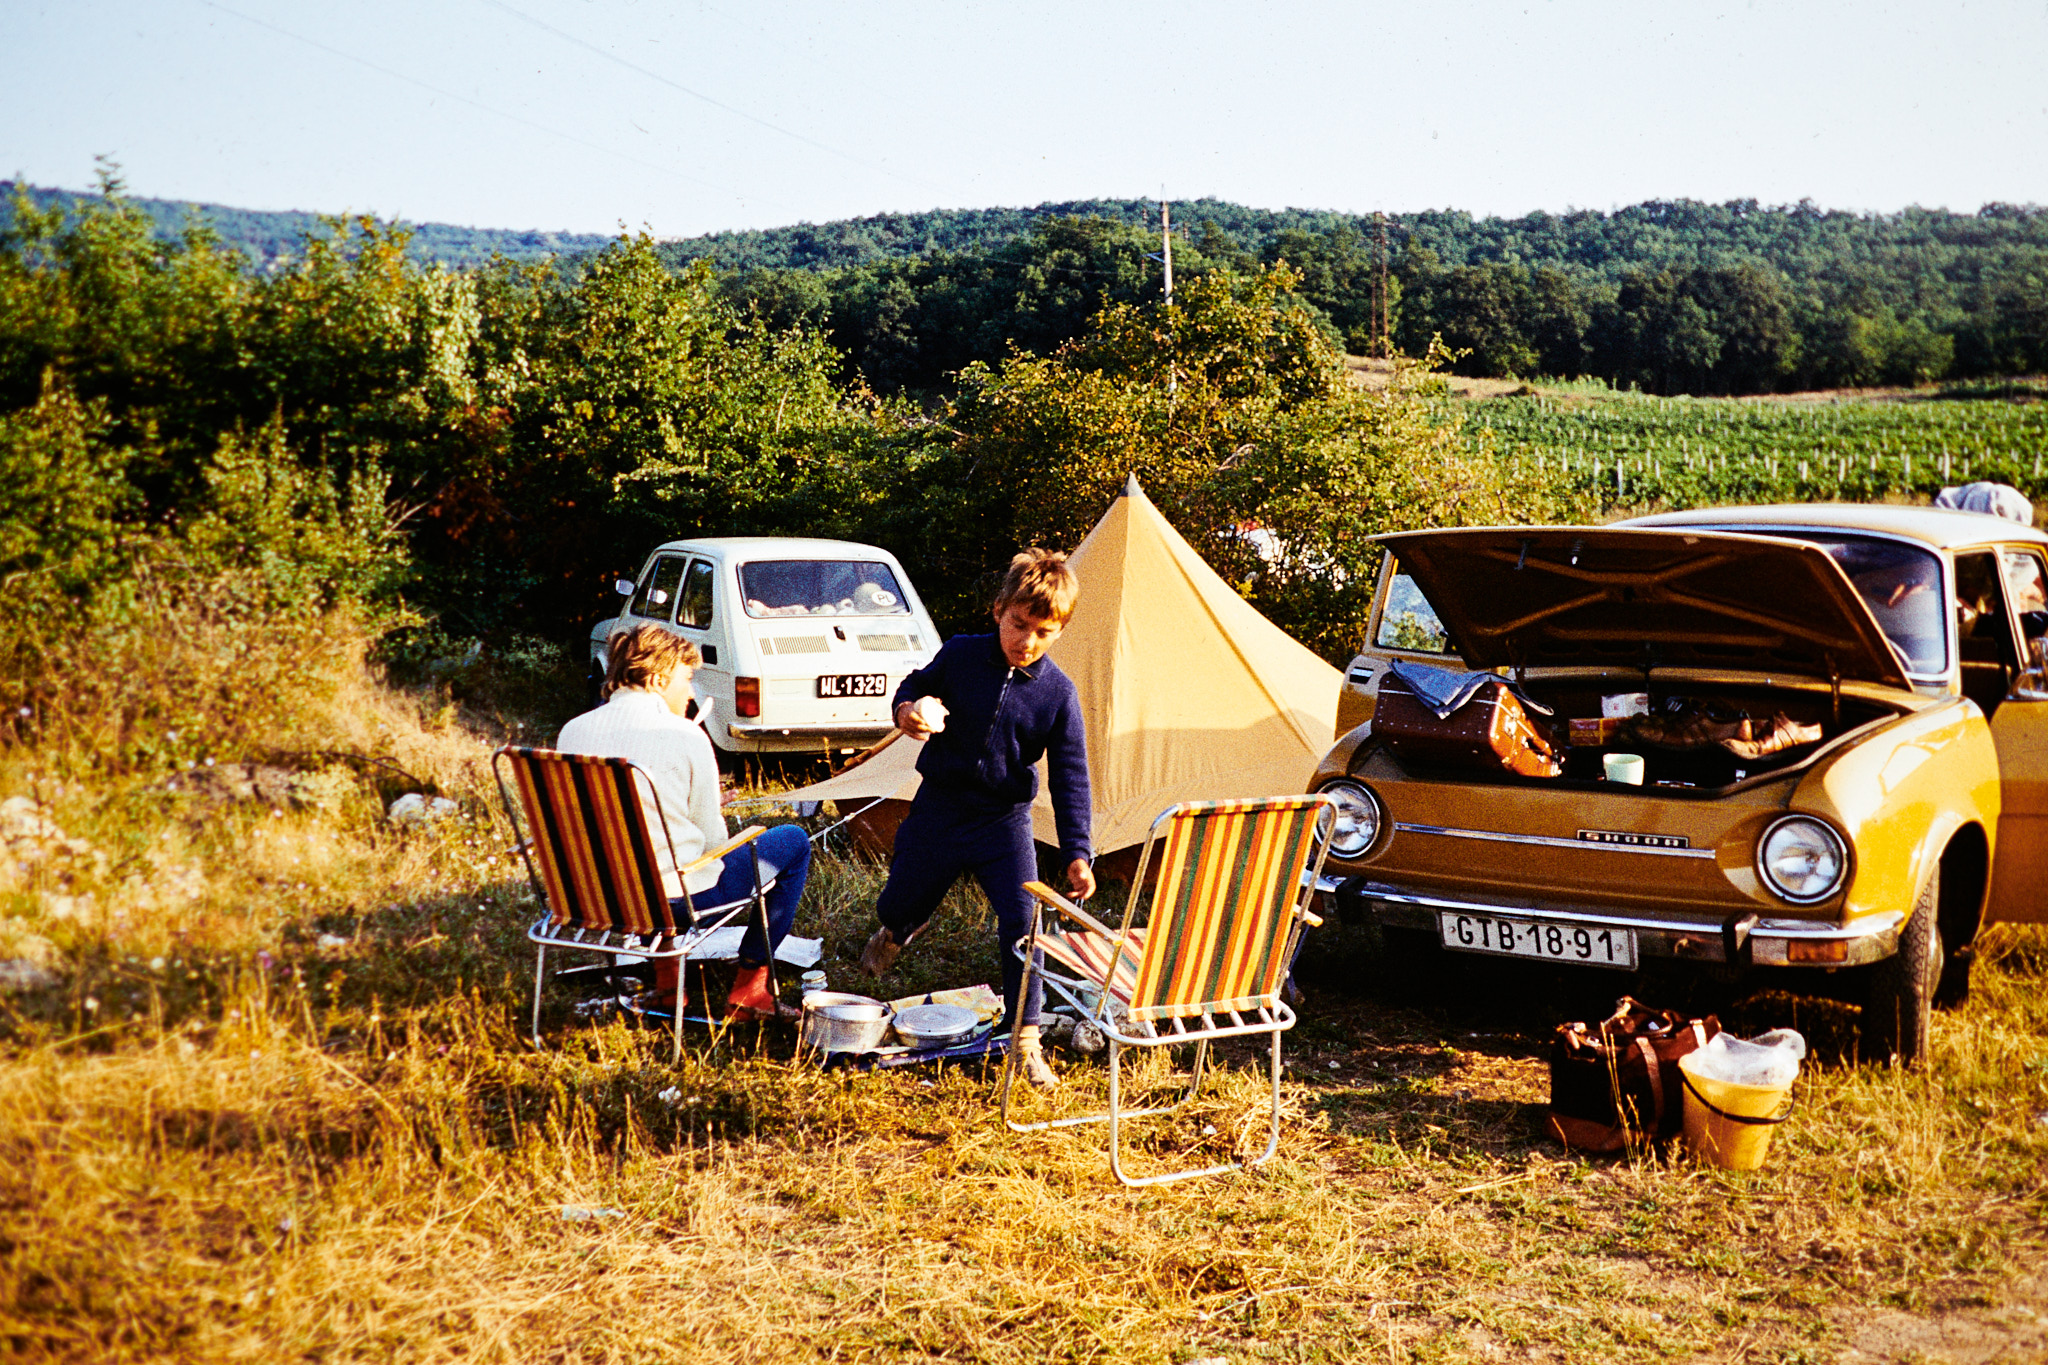
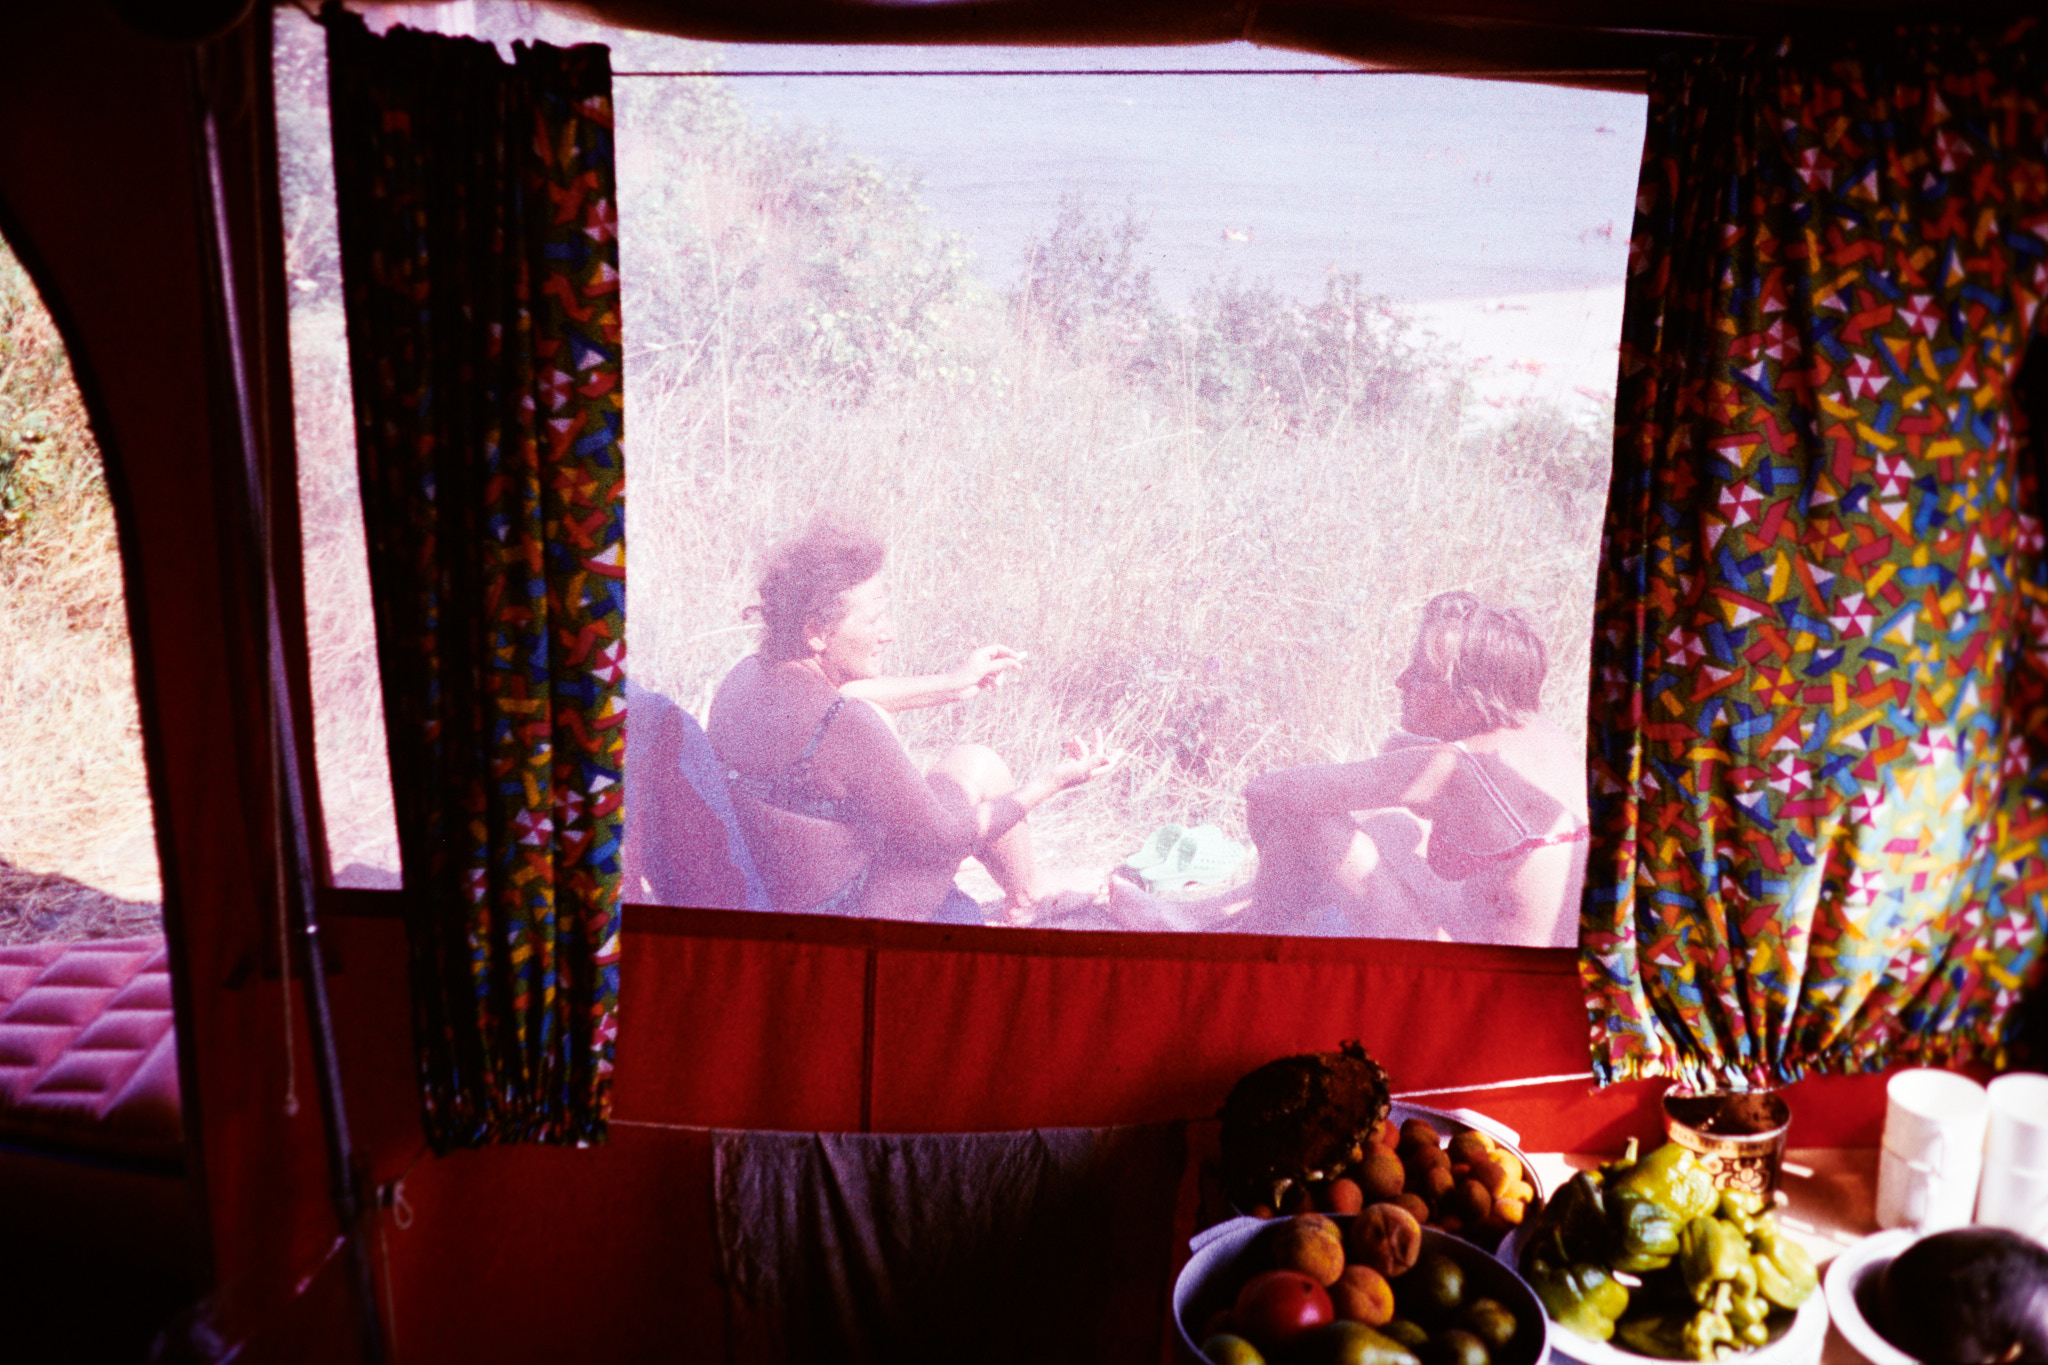
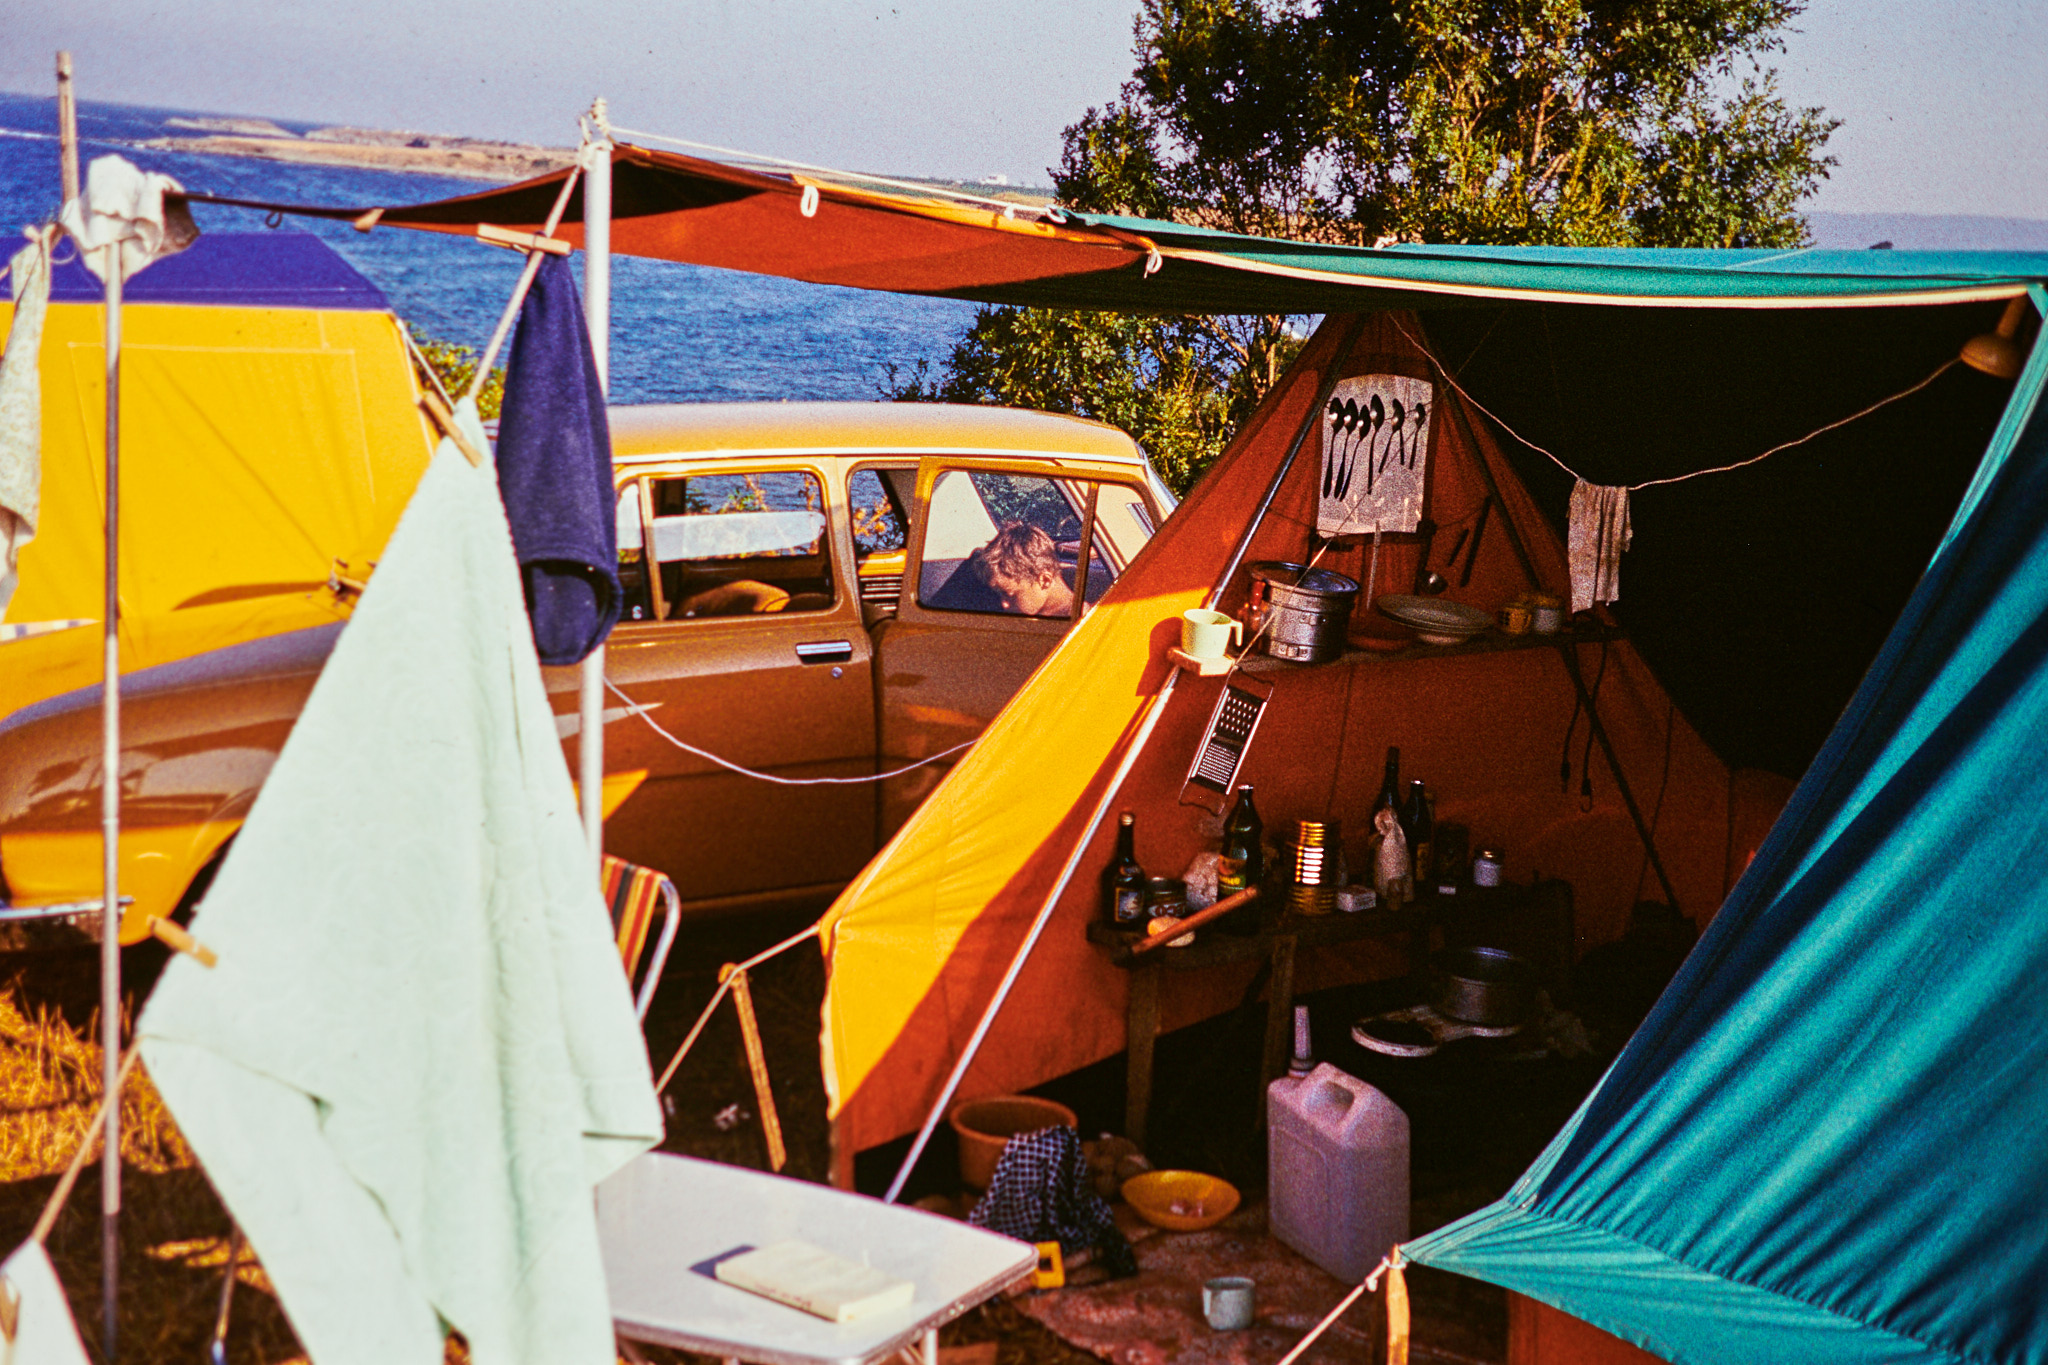
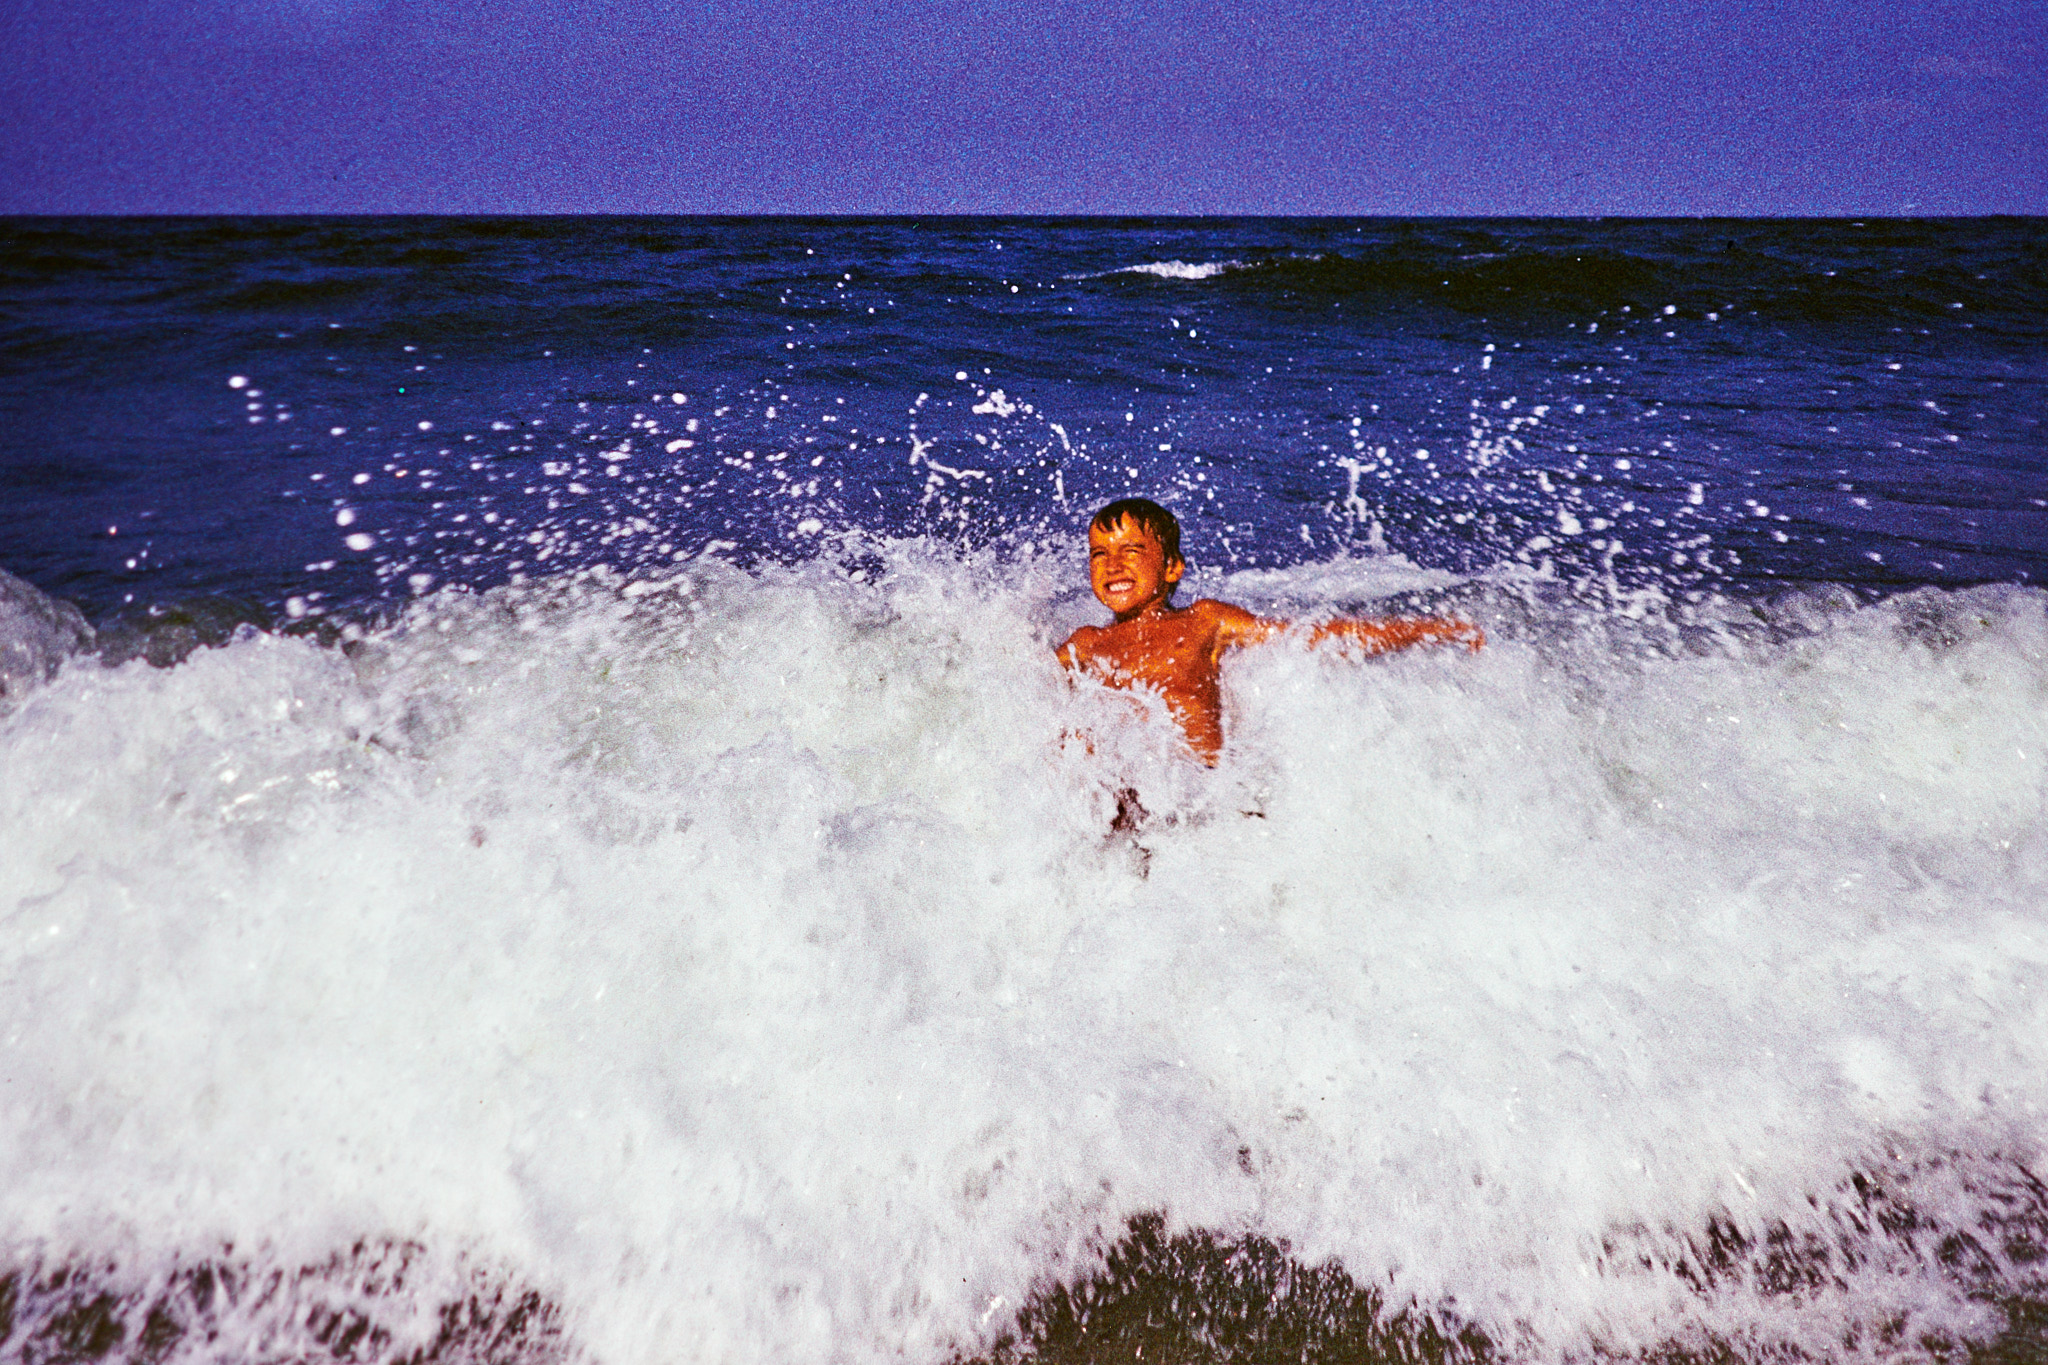
The title of this article is exactly what I had to figure out when a large box of slides from my dad landed on my desk a few weeks ago. It was a family treasure waiting to be archived. At the same time, my black and white negatives sensed an opportunity – I could hear them from the closet calling out, “Digitize us!” But how, without a scanner? It’s quite simple, actually. Here’s how to do it.
In this article, I’ll show you how to digitize your analog 35mm film archive without a dedicated scanner. Of course, you can’t do it entirely without some special equipment. But it’s quite possible that you already have the most important pieces of gear in your bag already, namely your camera and lens.
However, to make things a little more complicated, not every camera and lens is ideal for this purpose. The best choices are the Nikon D850 and D780 DSLRs. Both of these cameras have an interesting feature: they can digitize 35mm negatives (both color and black and white) and automatically convert them into a positive image.
Unfortunately, this feature seems to have died out with the move to mirrorless. If you want to use a different camera, you will have to do the conversion from negative to positive manually in post-processing (although even that is nothing you can’t handle).
The other thing you’ll need is one of four macro lenses: AF-S DX Micro NIKKOR 40mm f/2.8G, AF-S Micro NIKKOR 60mm f/2.8G ED, AF Micro-Nikkor 60mm f/2.8D, or (only if you’re working on a Nikon Z camera) the Nikon Z MC 50mm f/2.8. Unfortunately, the most commonly used type of macro lens, a 105mm f/2.8, is not suitable for the process I’m about to describe because its working distance is too long.
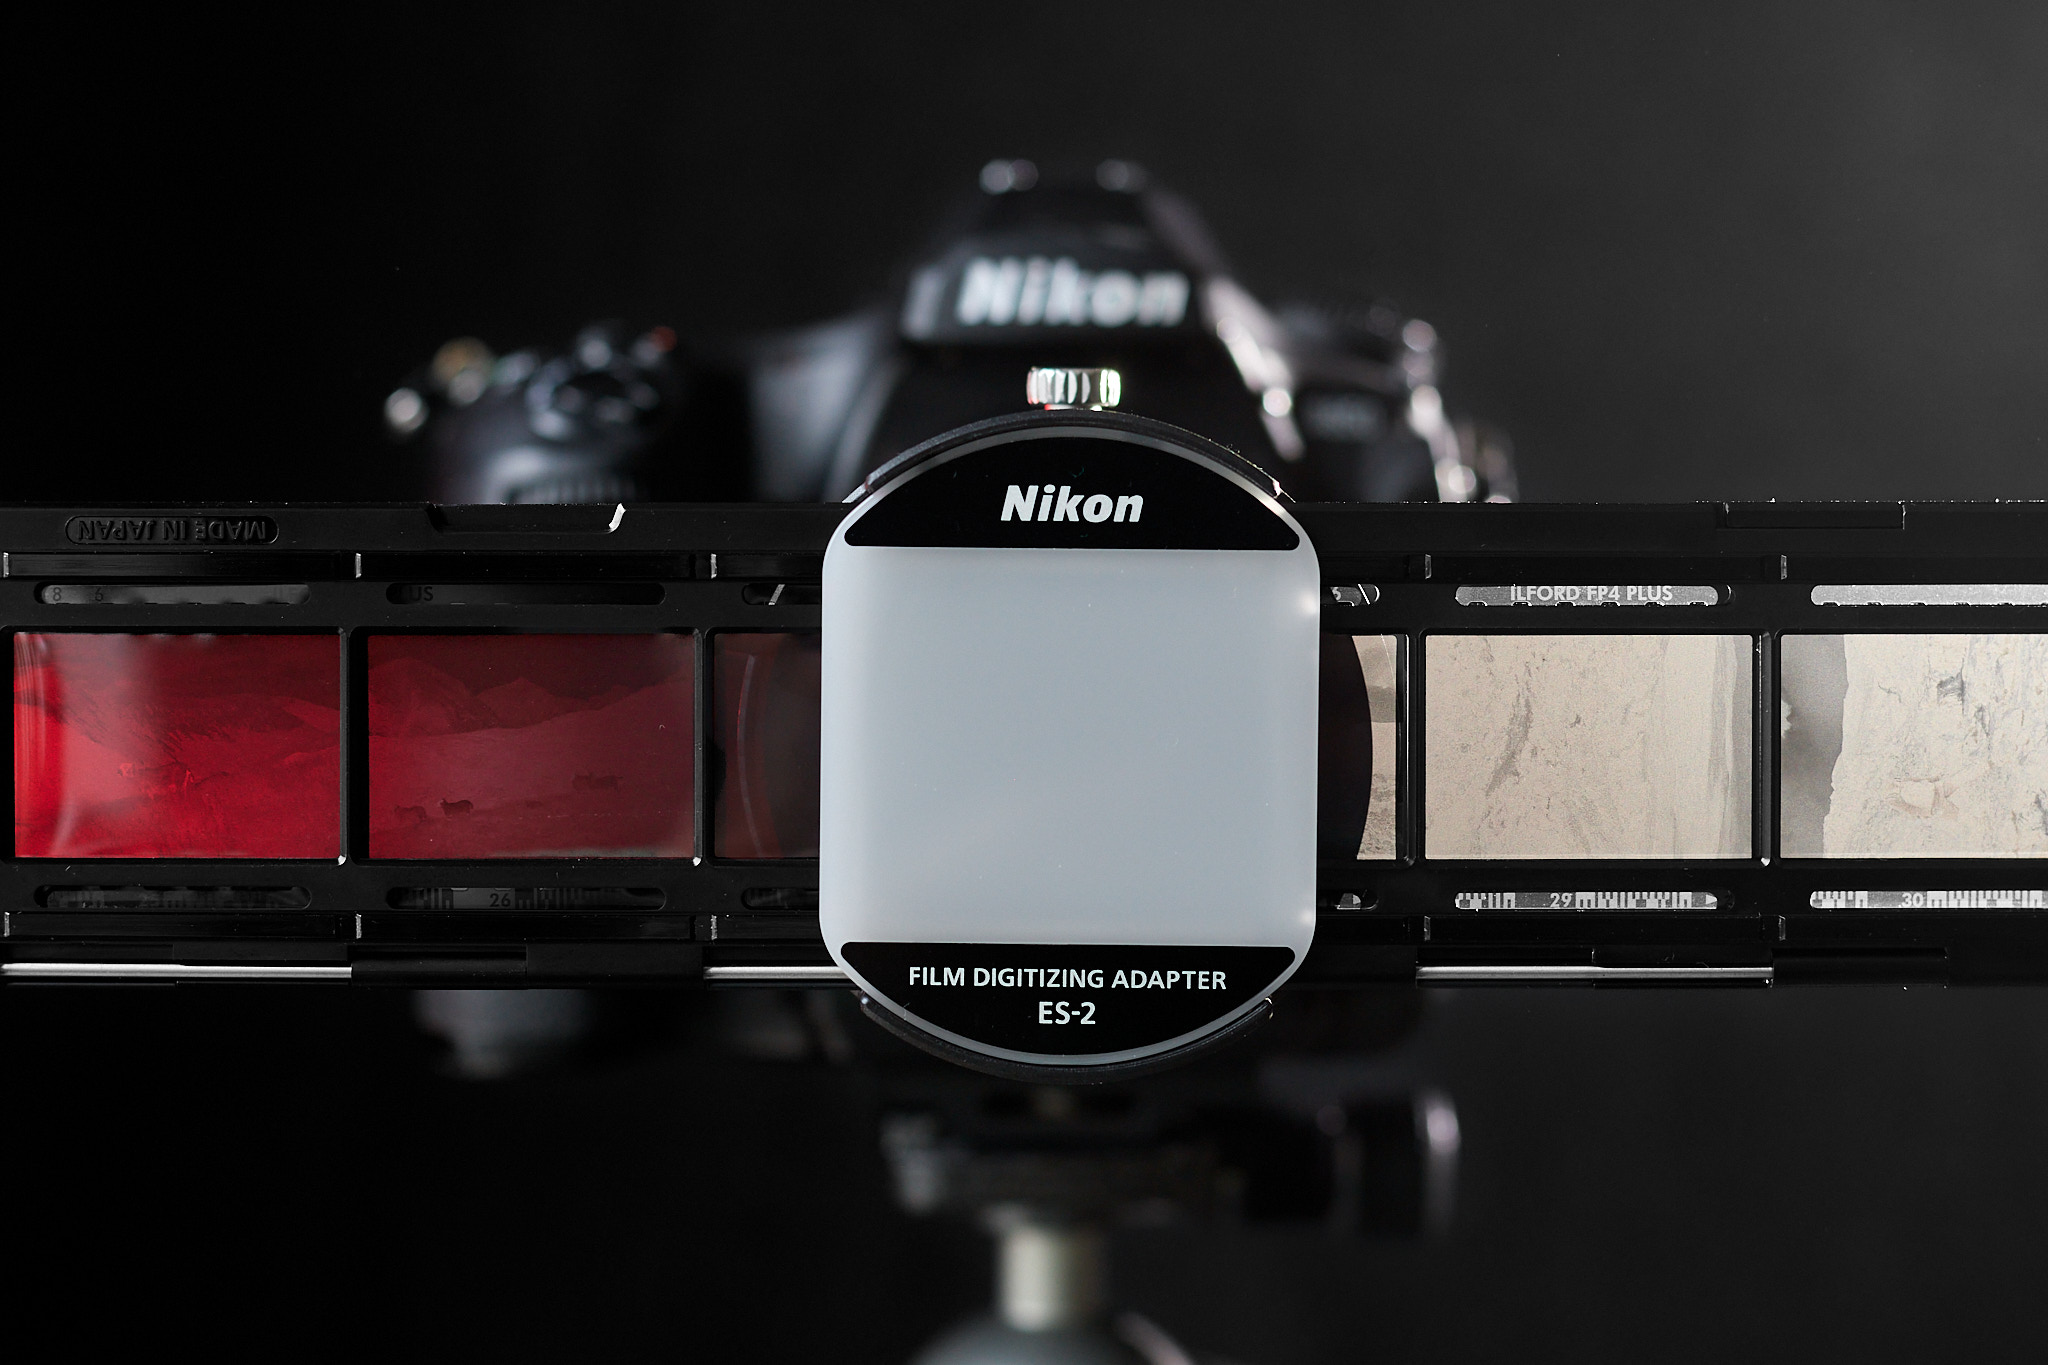
The last piece of the puzzle before you can get started is the Nikon ES-2 Film Digitizing Adapter Set (for $140). The Nikon ES-2 is simply a device that holds a strip of film at an appropriate distance from the lens. It attaches to the lens like a filter; a 62mm thread and an adapter are included in the set.
An integral part of the adapter is a matte glass, the purpose of which is to diffuse the light so that the entire window is evenly illuminated. The simplest, cheapest, and perhaps best light source to use is a window. To avoid color shift, position your camera so that a plain white or gray background is in front of the lens. Alternatively, another source of neutral light, such as a lightbox or a high CRI fluorescent lamp (CRI 95 or higher), will come in handy.
There doesn’t need to be a lot of light. After all, the camera, the digitizing set, and the film are one unit. You can shoot at base ISO, and even at long shutter speeds, there is almost no risk of motion blur (unless you touch the film strip or holder directly). I still recommend using a tripod for comfortable work.
Digitization Procedure
What you will need
- A Nikon DSLR or Z mirrorless camera (though preferably a Nikon D850 or D780)
- One of the four suitable macro lenses I discussed earlier
- Nikon ES-2 film digitizing adapter set
- Tripod
- A suitable light source or window
- A neutral background
- Air-blower to remove dust from the film
- Software for negative inversion (if using a camera other than D850 or D780)
- Your typical post-processing software
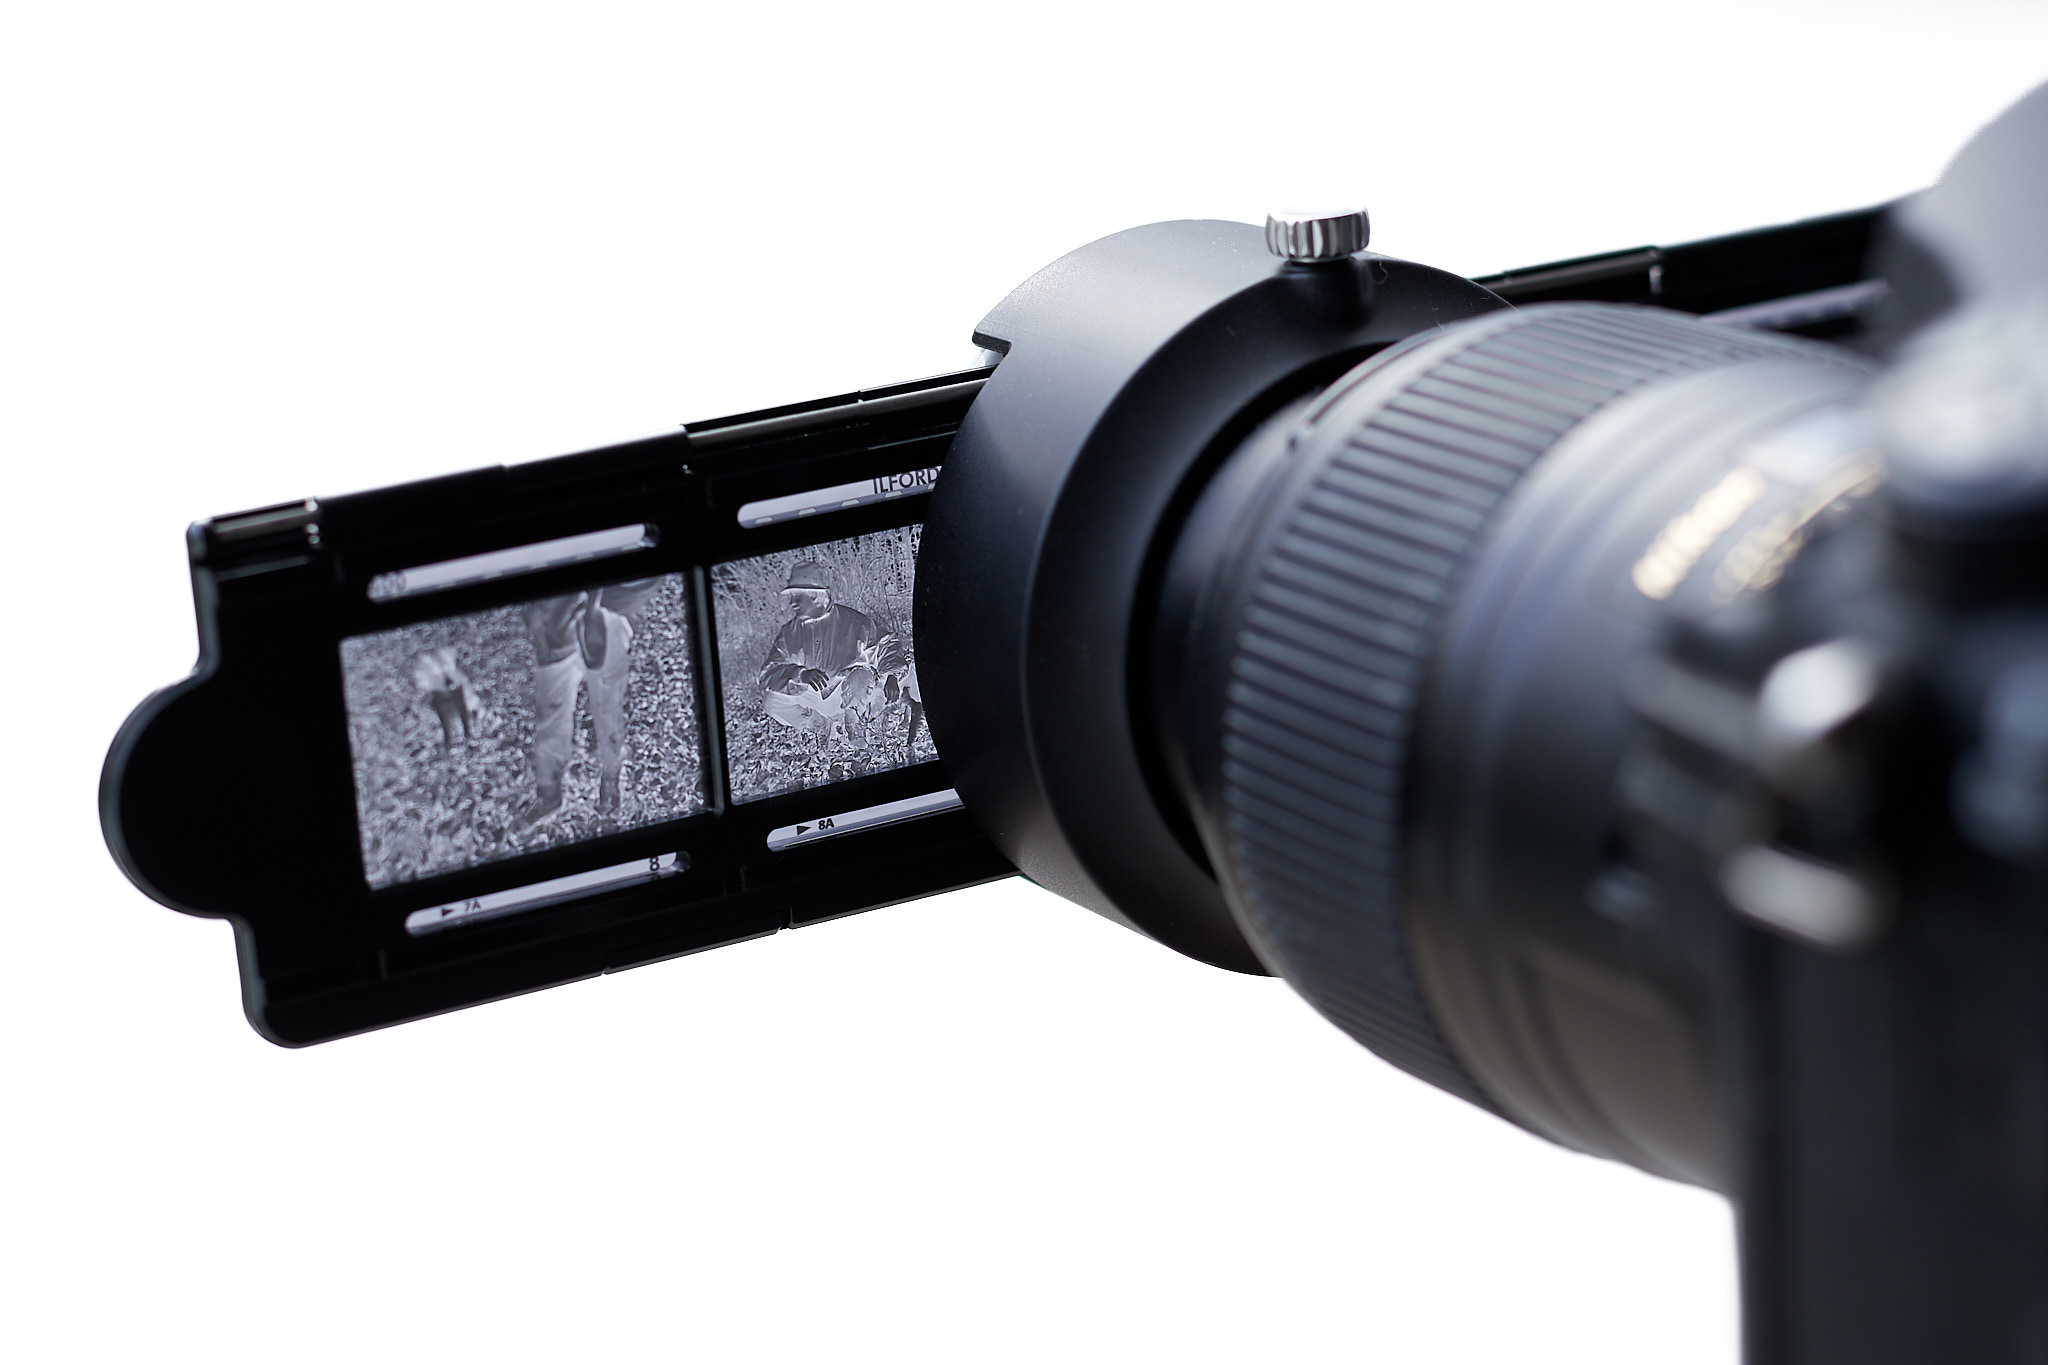
Place the camera and macro lens on a tripod. Make sure you have a suitable light source (see above) and screw the 62mm adapter onto the filter thread of the lens. Onto this, attach the ES-2 film digitizing adapter and lightly secure with a screw. It’s very straightforward once you have the adapter in front of you.
For digitizing negatives, which are typically archived in strips of six frames, use a strip film holder. Carefully insert the negative into it. To keep your photographs as clean as possible and to save you from subsequent retouching, I recommend cleaning the negatives of any dust with an air blower first.
Now the holder can be inserted into the digitizing adapter. After loosening the screw, the digitizing adapter on the metal tube (through which it is attached to the lens) can be moved back and forth.
I recommend starting by focusing the lens manually at the shortest focusing distance first. Then, move the digitizing adapter with the film inserted to the plane where the image will appear sharp in the viewfinder or display. From this position, move the adapter about 1mm forward, level the horizon, and secure with the screw.
With this procedure, you will have to crop little or nothing from the digitized image, as the image on the film will be transferred to a full-frame sensor at a 1:1 scale.
Now comes the aforementioned unique feature of the Nikon D850 and D780, the digitizing process itself. Activate Live View on the camera and press the “i” button. Select “Negative digitizer” and confirm with the OK button. Select between color negative or monochrome negative, and press OK again. After these steps, you will see a preview of the image converted to positive on the display.
The camera will set the exposure automatically. The default settings are ISO 100, aperture f/8, and shutter speed according to the level of light coming through the negative onto the sensor. If the film is flat, leave the settings as they are. If the film is warped due to improper storage, you can use a narrower aperture, such as f/11 to f/16.
The only thing you can do in auto mode to affect the look of the digitized photo is adjust the brightness setting. In preview mode, press the OK button and then adjust the exposure as needed. If you’re not sure, you’re better off making several variations and then selecting the best one.
The last step before digitizing is to focus accurately. I have found that autofocus only works reliably if the film is further away from the lens (which is not ideal because it leads to a frame that will need to be cropped in post-production). I recommend turning AF off and focusing manually on the grain at maximum magnification in live view.
Done? Now all you have to do is press the shutter. The resulting digitized image is saved to the card as a full resolution JPEG. Personally, I would prefer if the image was saved as a converted RAW or at least a TIFF, but I understand that for most of these images, JPEG would be the optimal output.
If you would like a greater degree of manual control over the whole process, of course the negative can be digitized without using automatic conversion.You can shoot it in RAW format as always and convert the negative file to a positive in your photo editing program.
I tried this procedure for a few photos and eventually abandoned it. Primarily for time reasons. The automatic conversion is done as soon as you press the shutter button; with RAW, it’s just the beginning. The image needs to be converted to positive and, in the case of a color negative, the strong color shift caused by the tint of the film base needs to be removed. It’s good when you’re digitizing only a few of your most important 35mm photos, but not for a batch of hundreds or thousands of negatives.
Still, if you do want to go the RAW route, a plugin for Lightroom Classic called Negative Lab Pro is worth checking out. This makes the conversion relatively simple and consistent, and you can apply it to a batch of photos. However, editing the subsequent photos can require exporting them again as a TIFF, because Lightroom’s sliders still recognize it as a negative image until you bake Negative Lab Pro’s edits into the photo.

When digitizing slides, you’ll follow a similar procedure as before (of course, apart from the omission of the negative conversion step). You can choose to shoot in RAW, RAW+JPEG or go the easiest route, JPEG.
If you’re outputting a JPEG, I recommend setting the Neutral or Flat profile in picture control. Slides are a fairly high-contrast medium, and using more aggressive profiles such as Vivid will often result in clipping of the highlights and shadows. In the case of digitizing to RAW, it doesn’t really matter, but you will get a more accurate preview on the display.
Digitizing slides will also differ from digitizing negatives by using a different type of holder. Instead of six frames, only two frames will fit in the slide mount holder of the ES-2. These are unfortunately designed only for the thinner, more modern frames. The older ones used to be a bit thicker. I’d rather not even mention the vintage pieces consisting of two slides taped together. Such slides will have to be digitized by other methods, or undergo lengthy disassembly and digitization in a strip film holder.

Results and Other Digitizing Options
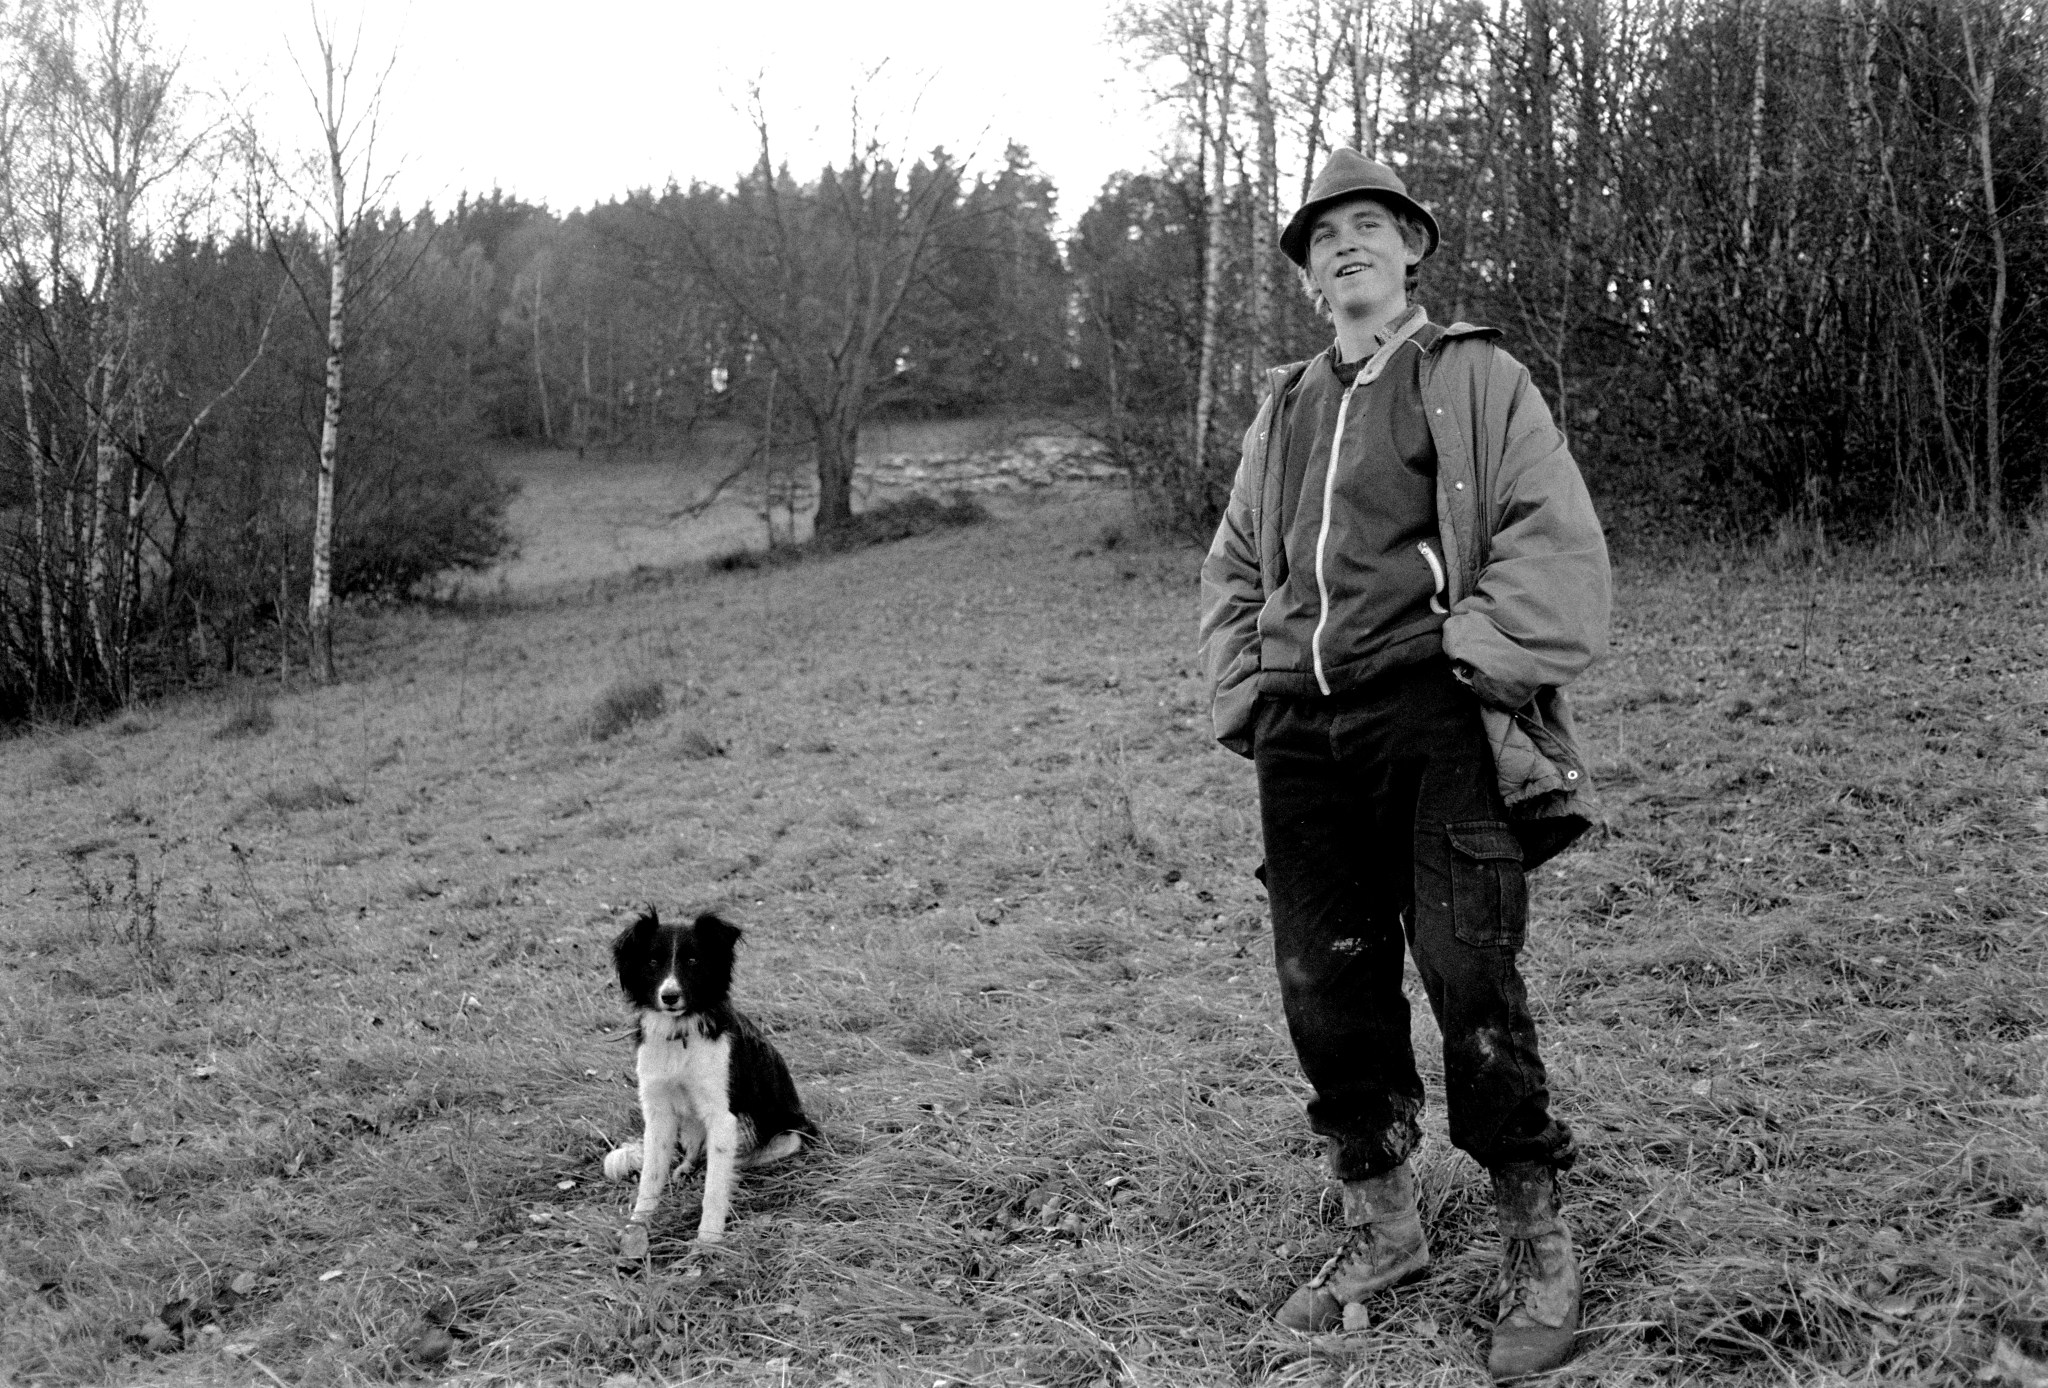
What do the resulting digitized photos look like? I’d say the automatic feature of the Nikon D850 does a great job. It can really turn a large number of photos into ones and zeros very easily and relatively quickly, with good results. Once you get everything set up, the whole digitizing process is very smooth. I was really surprised at how accurately the camera software can convert a negative to a positive.
And so with all the good and bad. If the negative has a color shift or faded colors, it stays as it is. This is another time when you may want to use RAW instead of the automatic JPEG process.
Is using a DSLR the best way to digitize your analog archive? I think there is no universal answer. Of course, the truly quickest way would be to outsource the task to a professional lab dedicated to digitizing old film. But such a thing can cost hundreds if not thousands of dollars, and it takes away some of the flexibility that you get from being able to choose between RAW and JPEG.
Another way to digitize negatives or slides is to use a dedicated film scanner yourself. Unfortunately, high-quality 35mm film scanners like the Nikon Coolscan 9000 ED are hard to find these days, and they tend to be very expensive (sometimes more expensive than the Nikon D850). One advantage is that they can automatically remove dust and scratches, a common problem with old analog film. Flatbed scanners, meanwhile, are more of a stopgap solution – they will usually take longer to use and require more manual edits/crops to look right.

The method presented today is what I would recommend to most photographers instead. And if we also consider the price, it is definitely the most efficient option, assuming that you already own a DSLR or mirrorless camera. Then all you need to do is buy a few small things and you can start digitizing your 35mm film archive relatively cheaply, quickly and easily.
A nice explanation on how to do things. This made me pick up the necessary stuff to finally digitalise all the slides an photos from my good old Minolta days (I still love this camera and if I find a way to get real good results from scanning I probably start taking pictures with this camera again, I just feel like doing some „real“ photography where you put everything to use you learned over the time to take good pictures without being able to check the results right away.
I have to admit that I‘m still not satisfied with the results of the workflow described here, there’s still to much noise and some colour problems but compared to my first tries (that really looked atrocious) I was able to improve the picture results to a level I can work with.
I use the F-Mount 60 2.8 G and tried 35mm colour negatives (Kodak UC400) as well as some colour slides. For processing I used the Grain2Pixel Plugin for Photoshop. My first try was with the Z9 as it is: way to much noise, I would have been able to count the grains if I really wanted – 45MP ist way to much for 35mm negatives. Next try was with my trusty D800: improved noise, but still grainy, not to happy with some colours, focusing can be tricky. After that I came up with the following setup that gave me the best results: I use the Z9 in DX-Mode. To use this setup with my lens I have to use the longer lensadapter instead of the (correct) shorter one. This has the advantage that I only use about 20MP wich gives me away better noise performance. Don’t get me wrong, the results still look somewhat grainy at 100%, but it’s way better than before. I also set up the ES-2 in a way that I clipped between 0,5 to 1mm on each side of the frame – this makes aligning everything easier (and there shouldn’t be anything important that close to the edges anyway), even though I have to admit that I still see the edges sometimes (this may be a flaw of my adapter, I have the feeling that even though I really tightened the knob I can still rotate the front element way to easy, that makes it especially difficult when you work with the longer slide for negatives).
To get a cross reference I ordered the Epson V600 photo scanner and I‘ll compare the results to this setup to see what gives me the best results in the end. I‘ll update this post accordingly and maybe throw in a few examples for comparison.
Hello Libor and thanks for the detailed article!
I have a Z6 and bought a used 60 mm for 250$, with the ES-2 and the Ftz adapter it works like a charm for sliders, easy and quick ” scanning”.
Great to hear that! I wish you lots of great memories converted into ones and zeros.
I’ve done this with hundreds of slides, color negatives, and b&w negatives using the D850, the Nikon 60mm and the ES-2. Works great. I use Topaz AI to denoise the images in post. This reduces the size by more than half and results in higher quality images. The Topaz denoising seems to work well on the noise inherent in the 35mm. Also note that you can’t (yet) use Adobe LR to denoise jpegs, and you can’t generate raw with the built-in negative converter, so Topaz is a viable option for jpegs.
Topaz can work very well for this purpose. I tried DxO PureRaw for digitizing slides, but it didn’t work very well for me. It increased the sharpness of the individual grains rather than sharpening the photo.
Fast workflow. 60mm plus FTZ adapter on Z-series full frame works fine. Use a TTL flash (on TTL) a foot or two from the ES-2 and the flash/camera combo dials in the exposure for you regardless of density of slide or negative and flash duration is so short you can just handhold the camera/slide duper a couple feet from the flash and let the ground glass do the rest. White balance is dialed in because of known K value of flash (set camera at flash WB). Single point autofocus either directly on subject of interest or about 1/3rd distance from edge of frame to let DOF cover the bend of the film in the slide mount. Bracket +/- 1 stop if desired to cover your bases so you don’t have to reshoot or you can blend in HDR if desired (usually I find the latter is no better than pushing/pulling shadow/highlight sliders in LR).
Great, thanks for the addition Verm. This eliminates the need for daylight (which we so desperately need now in the spring) and also makes the color conversion more accurate due to the exact K value.
Interesting but almost no one has a D850 or D750.
Also I do use a scanner that corrects all color shifts and restores faded slides etc.
Finally the scans go directly to the computer and the desired file.
Sorry, I have tried the camera routine of one at a time vs 12 at a time all corrected and where I want them.
I have a D850 and have many times considered buying an ES-2 to digitize my 35mm negatives and slide. I also have the Nikkor 105mm Macro lens, but sadly that is not compatible with the ES-2. And furthermore, when I check the recommended lenses, AF-S Micro NIKKOR 60mm f/2.8 ED or AI AF Micro-Nikkor 60mm f2.8D are no longer availabel for purchase from Nikon.
Is there some other digitizing adapter that might work with my 105 Macro lens?
After reading some of the other comments below, and thinking about the problem a bit more, I think I will try and “jimmy” up some sort of a bracket to hold the D850 (with 105 macro) and some sort of a negative/slide holder – holding the subject material parallel to the focal plane and at an appropriate distance for the 105 macro. I suspect, once I take that project on, I will iterate through a couple prototypes. Should be fun.
I have tried scanning 35 mm negatives with a Canon flatbed document scanner with limited success. I am hoping that the macro lens on D850 will yield at least as good or better a result.
Thanks for the article.
Peter
I use the digitizing adapter on a Z6 but the main problem isn’t taking the photo, it’s selecting the pictures that’s worth saving. It’s especially difficult with negative film strips. Including all pictures and then discard a lot of them after a lot of work…. well…
The second problem is to sort all pictures out, I have got some 15.000 pictures in my wardrobe…
Thank you for using the correct term instead of the pervasive misnomer “scanning”.
I try to use correct terms, on the other hand I understand that using words like scanning is tempting for many people. It’s a certain example of modern newspeak, where we try to cut down on “redundant” words. Sometimes, unfortunately, both form and content suffer.
Hi,
This is so helpful as I have boxes of my Dad’s slides that I would love to try this method.
Quick question , I do have a D850 and you also suggest this lens as an option a “Nikon AF-S DX Micro NIKKOR 40mm f/2.8G “ which is an available at B&H for $276.00 .
My question is given this is a DX lens and I am using my full frame D850 will this option work as well as the other lens you recommended but are either more expensive and/ot harder to come
By?
Thank you Libor.
I see that our motivations for digitizing the analog archive are the same, that’s great, Lancej. However, I’m not sure exactly how the 40mm f/2.8G will work on the D850. I haven’t tried this combination, but I assume the camera will automatically detect the DX lens and adjust accordingly. Since you’ll be using the rear LCD for focusing, that shouldn’t be a problem. The only thing I can think of is that the resolution will drop, but considering how sharp the old negatives were, I don’t see that as a big deal. Good luck with converting old memories to the new form.
I use a variety of Sony bodies, DSLR, SLT or mirrorless, a macro lens (usually 100mm, but shorter can be better with an APS-C body), cheap light box and a tripod. I don’t think I’ll be buying a load of Nikon kit just for this simple task.
I did borrow a film scanner, but it took forever to scan a single frame – so I gave up with it.
Of course, if you have Sony equipment, it’s pointless to buy a D850 and everything else just to digitize negatives. The process you write is perfectly applicable to any DSLR/mirrorless camera. It just requires more experience and skill in post processing.