Unless you have been living under a rock, you’ve probably seen the articles this past half-decade talking about the pretty massive comeback of film. Despite its “death” being declared by hundreds of articles in the early 2000s, film has seen demand increase steadily since about 2014.
It doesn’t appear as though this resurgence is slowing down any time soon. More photographers are appearing on YouTube and other popular websites (including here at Photography Life) speaking on how film has helped their photography improve, or helped them enjoy photography even more.
Companies such as Kodak, Fujifilm, and Harman Technology (a.k.a. Ilford) have kept the art alive, and now some companies are even releasing new (!) film stocks, like CineStill. All of this would have been unheard of just ten years ago.
Whether you’ve decided to get back into film or are still considering it, I think it’s helpful to have a refresher on some of the basics. In this article, I’ll discuss how to develop black and white film yourself at home.
Overall, it’s an easy process, although it does require some practice. When you get the hang of it, using film can be more enjoyable, less expensive, and more customizable – since you can do things when developing your own film that wouldn’t be possible by sending it to a lab.
Table of Contents
Choosing Your Film
The first step to take, before even thinking much about developing, is to determine which black and white film you would like to use. Plenty of options exist, with new films appearing on the market from time to time, which can make this choice seem rather daunting.
Companies such as Ilford, Fujifilm, and Kodak have all been around since the inception of film – or thereabouts – which means any of their films are going to be a solid starting point. There are also newer companies making films, such as Fomopan, Lomography, Cinestill, and others. To be honest, choosing a film is a rather personal debate, with each film stock maintaining various characteristics which you may or may not enjoy.
Perhaps the most important variable to keep in mind is the ISO/ASA of the film, which plays a big part in your amount of grain, as well as the optimal shutter speed and aperture for your subject. Unlike with digital, of course, you cannot change the ISO/ASA of the film once it’s loaded.
If you are a fan of shooting handheld, it would not be a bad idea to choose a film with a higher ASA – generally about ASA 400. Granted, the grain will be more noticeable the higher the ASA, but there is something aesthetically pleasing to this – something that simply isn’t pleasing in digital most of the time.
On the other hand, if you’re using a tripod and you require a lot of detail, a slower film is better. Usually this will be around ASA 100 or 125, but there are some films that go even lower than that.

Personally, I have had luck using Ilford’s films, and I like that their dedication to black and white film photography has never wavered. For my large format 4×5 photography, I find myself using Ilford FP4+, which is an ASA 125 speed film. I have also used Ilford Delta 100, along with Ilford HP5, an ASA 400 speed film. All of these films have different characteristics aside from just their ASA, especially in terms of contrast. Test them out before choosing one; it’s part of what makes film photography such a personal art.
If you plan to do a lot of night photography, you may want to consider Fuji Acros II, an ASA 100 speed film which has virtually no reciprocity failure. Reciprocity failure is an aspect of film photography which we may cover in a later article. Essentially, it means that some films need to be exposed longer than expected once your exposure gets several seconds or minutes long.

Developing Methods
Now that you have chosen your film, and hopefully exposed a few wonderful photographs with it, it is time to begin thinking about how you plan to develop your film. The biggest choice is the development method you plan to use. These days, there are three main at-home developing options: trays, daylight tanks, and processors.
While tray developing is the tried-and-true method – and is arguably the cheapest – it also takes a bit more practice to get right, especially when developing roll film like 35mm and 120.
On the other side of the pricing spectrum are film processors, such as the Jobo CPP-3. These are quite costly machines, but they come with the benefit of ultimate control, as well as doing all the work for you. (Depending on the processor, it can be as easy as pouring the right chemicals into the designated bottles, telling the machine what film and process you’re using, and standing back while it works.)
For the sake of this article, though, I’ll discuss the most common at-home developing method: daylight developing tanks. These tanks allow you to develop in broad daylight, which makes things much easier than with tray developing.
You still need to load your film into the tank in the dark, but that applies to any of these methods. With daylight developing tanks, at least, the process can be done in daylight after you’ve snapped the lid on tight.
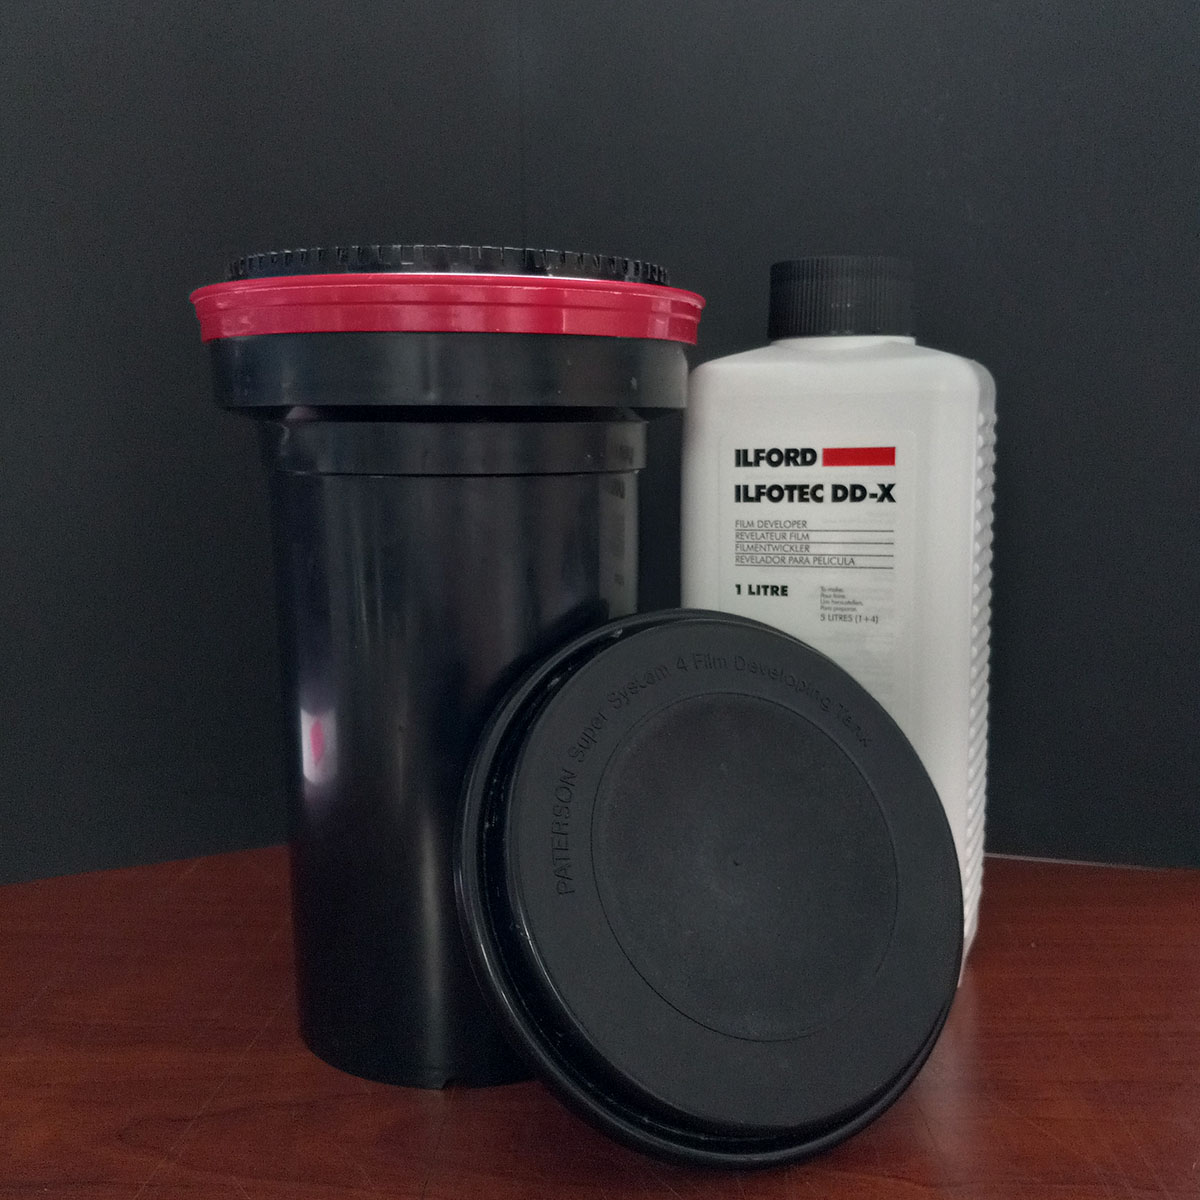
Because of their popularity, a number of daylight developing tanks are available. The Paterson tank system is one of the more common, though there are also basic stainless steel tanks (like the Kalt Stainless Steel 35mm tank) as well as Steerman Press’ systems, though these are only for sheet film (4×5, 5×7, 8×10).
I have found success with the Paterson tank system, which I have used for 35mm, 120, and 4×5 film development. Though I have plans to try other tanks in the future, the Paterson is what I currently recommend, if only because I know how well it works.
Other Developing Equipment
Along with your daylight tank, you will need an assortment of other gear in order to get started. The nice part of black and white developing is that much of it, I have found, is optional, making the process not only cheaper but easier as well.
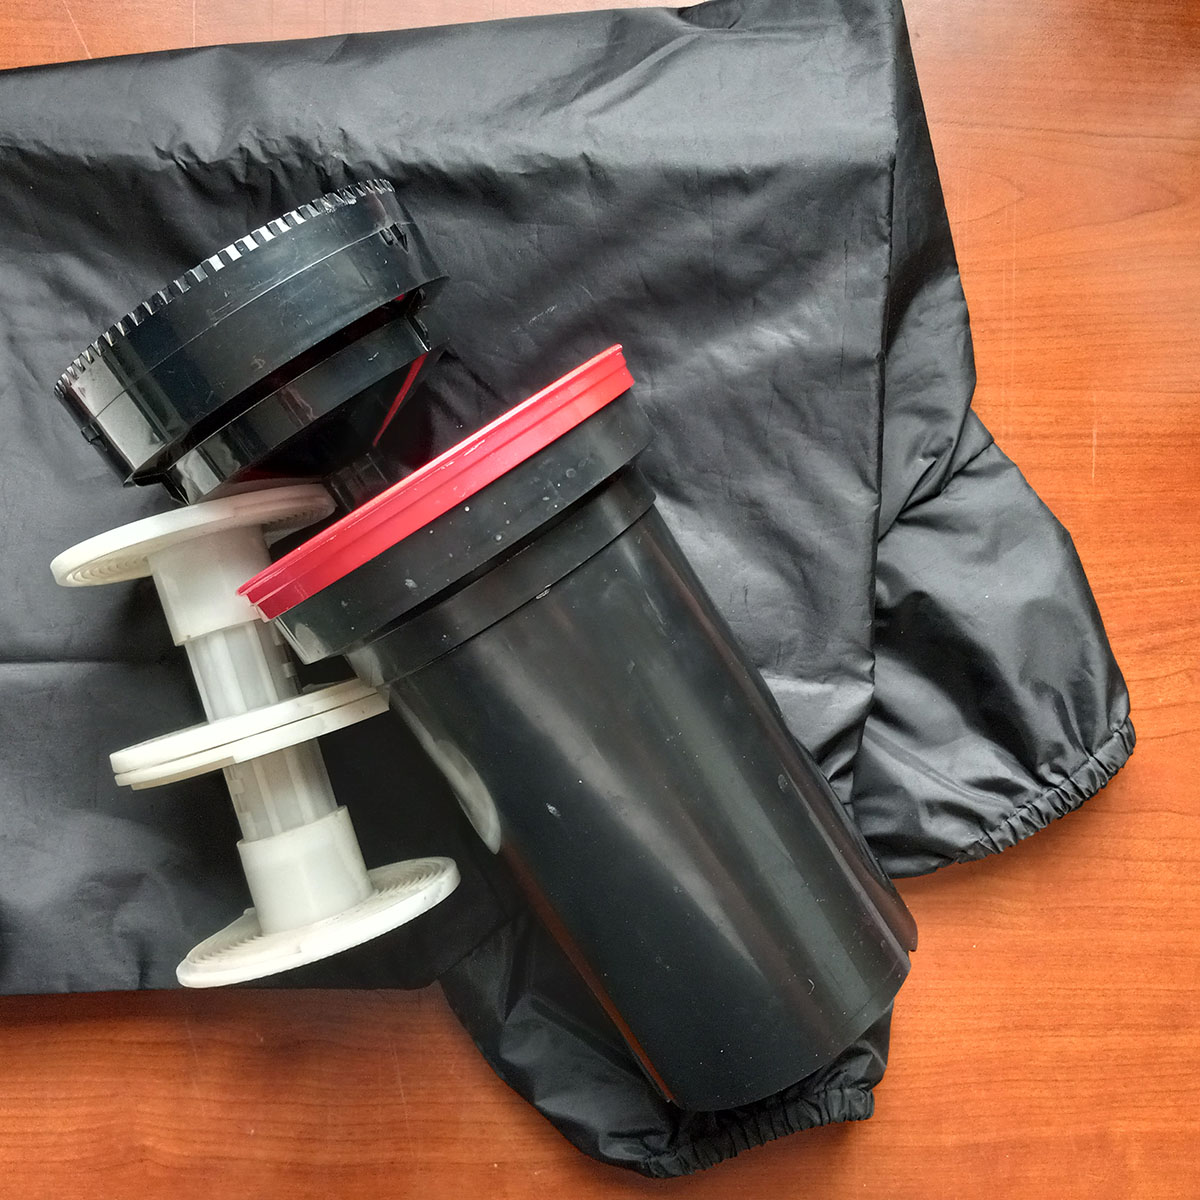
You may have noticed that your daylight tank doesn’t come with any accessories. As it stands, you’re only getting a black or gray container to keep light from reaching your film. In order to do anything with it, you are going to need a film reel (or multiple, depending on the size of the tank you purchased). Plastic film reels are the easiest to load and can be purchased at a fairly reasonable price. These here are also adjustable, meaning you can use them for both 35mm and 120 formats, in case you decide to start with one and try the other later down the line.
Something you may want to consider purchasing as well is a dark bag, or a film tent, which is much nicer and easier to use, though much more expensive. Though this is optional, it makes developing in the day that much easier, as you don’t need to find a place void of light (like a closet) or wait for night.

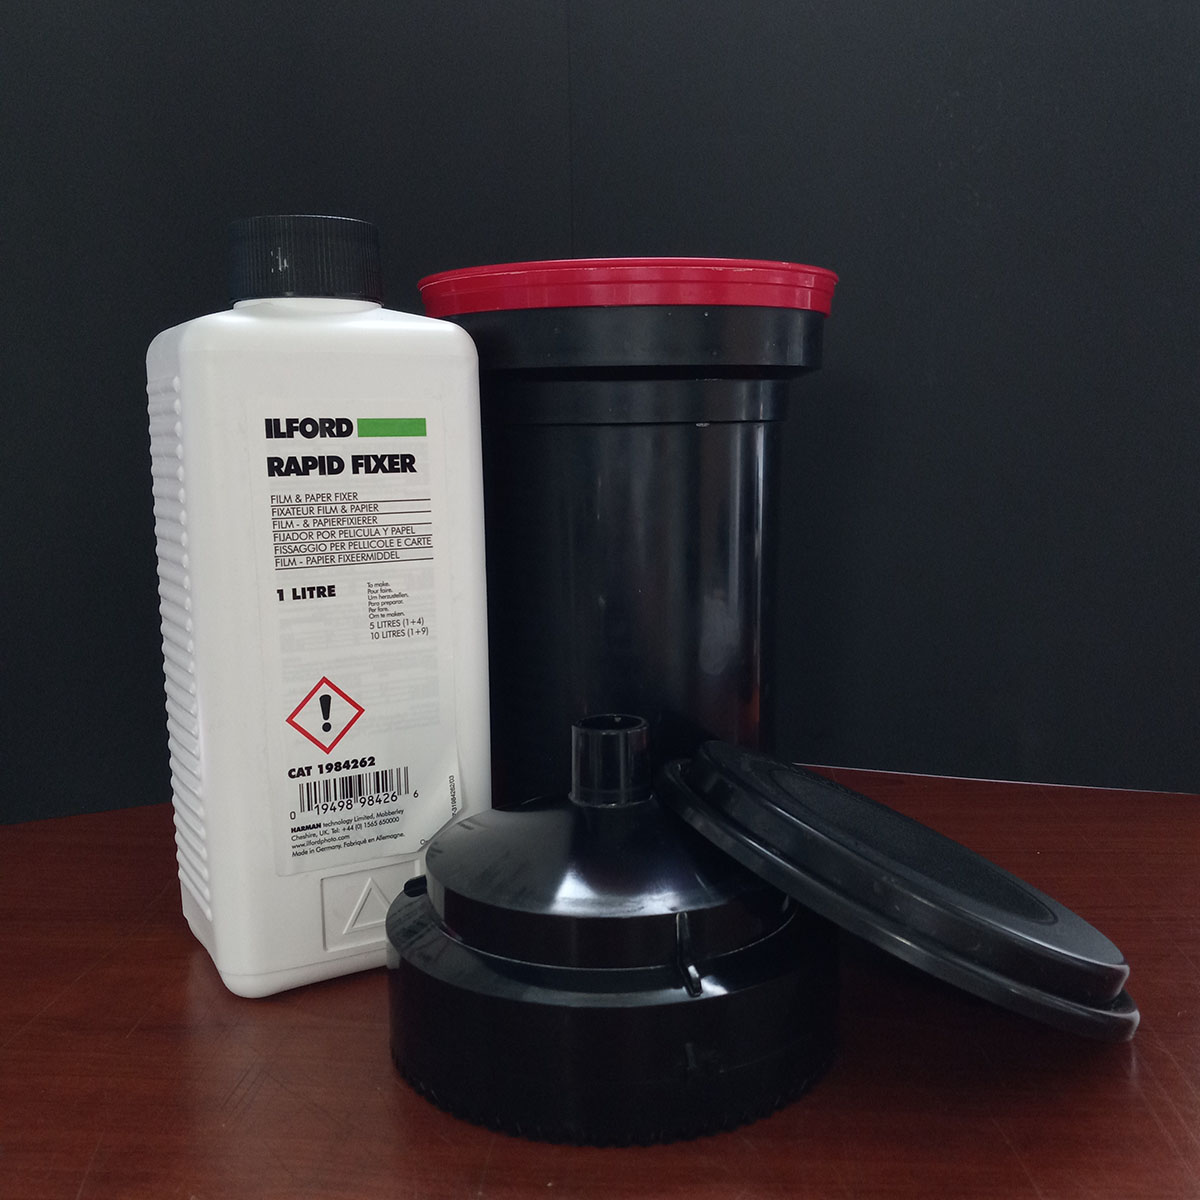
You may also want to consider purchasing bottles for storing your chemicals. Again, this isn’t necessary – and may not even be useful, depending how often you develop film – but is always a nice option to have. You’ll want to ensure the bottles are either black plastic ones or amber glass, as these will prevent light from ruining your chemicals. Though I use amber glass bottles, I still keep them stored in the dark under the kitchen sink, just in case.
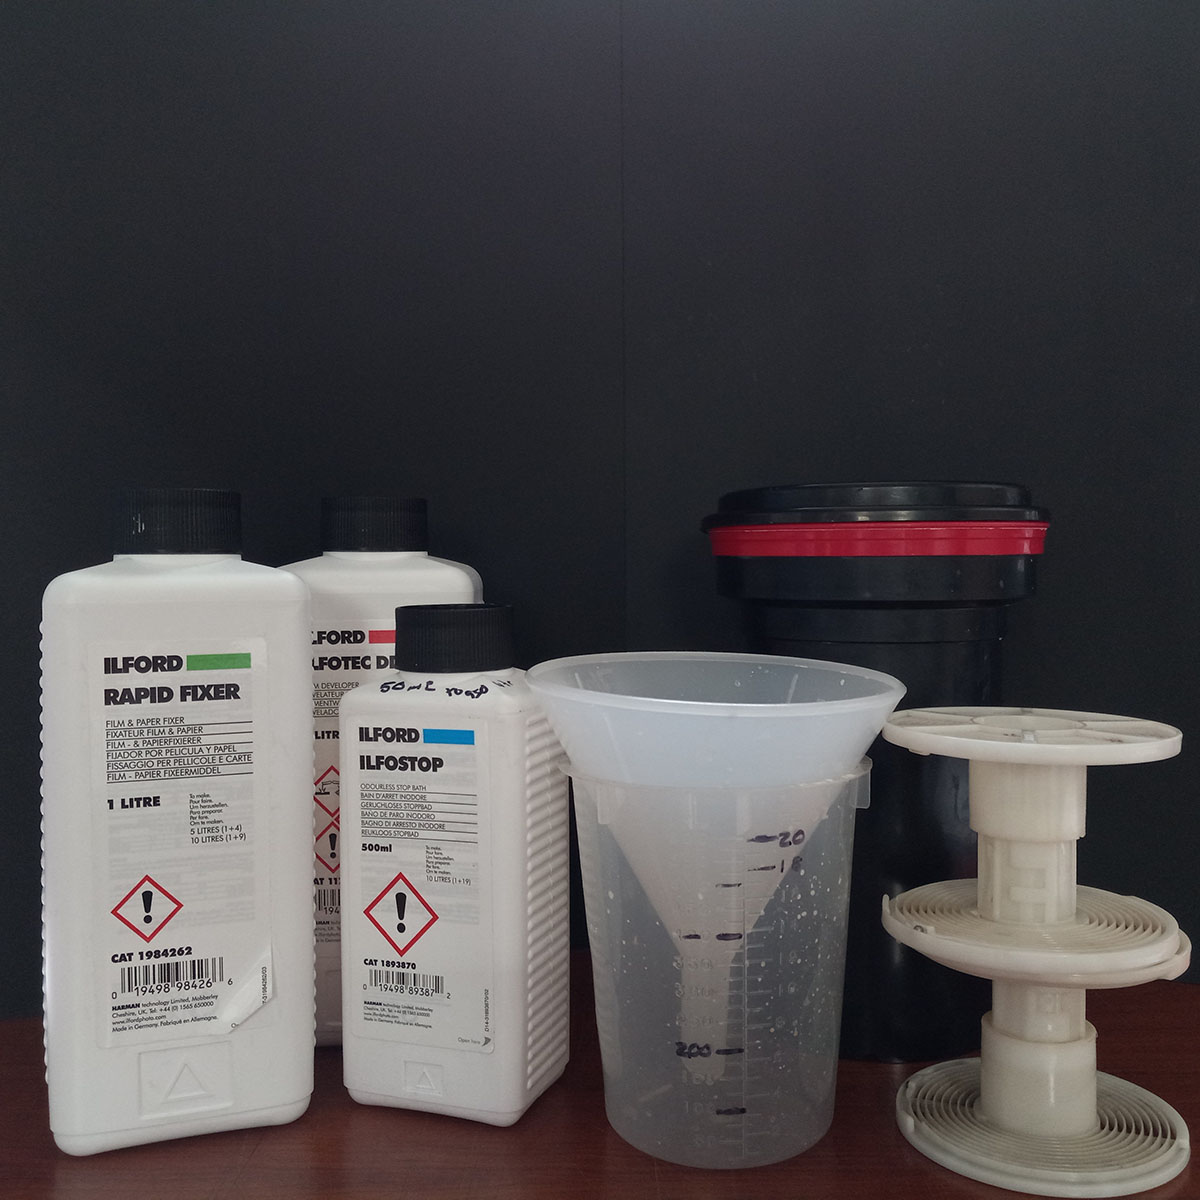
Along with all this, you should look into buying plastic measuring cups or beakers to dilute your chemicals. BH Photo has a great set which can be purchased here.
A lot of photographers recommend the use of a thermometer, in order to ensure the chemicals are kept at the proper temperature throughout the development process. Although it is encouraged by film companies and other photographers, I have not faced any noticeable issue by not using one. Your mileage, however, may vary. (If you plan to develop color film in the future, it is vital you purchase a thermometer or, better yet, a sous vide.)
Sharp scissors and a can opener are also helpful pieces to have (if you’re developing 35mm film). The scissors are necessary for cutting the leader off the film, and later for snipping the negatives into strips, so the sharper the blade, the better. A can opener is helpful for prying open the 35mm film canisters, but is only required if you A) want your fingers and fingernails to stay intact, and B) are using 35mm film. The 120 film format and sheet film aren’t in canisters, and therefore a can opener is not needed.
(In looking up some of these chemicals on B&H, I came across a film processing starter kit as put together by Paterson. Though the price, at $100, is a bit off-putting at first glance, it will likely end up saving you money in the long run, since it has all the basics needed to develop 35mm or 120 format film.)

Necessary Chemicals
Now for the fun part: the chemicals. There are some great DIY options out there – such as Caffenol, where you typically use coffee as your developer. I plan to try it in the future, simply for the sake of saying I did; until that point, I cannot speak for the results you will achieve. If consistent results are what you want – I’m sure they are – you will want to buy true chemicals from an online retailer such as BH Photo or Adorama. Just like with film, there are numerous choices of developer out there, with Ilford and Kodak leading the pack.
It is important to note that there are two options for your developers: powders or pre-mixed liquids. The liquids are what I have always used, and therefore recommend, as they are easy and cannot be messed up. There are pros and cons for both, per usual, so it is ultimately up to you what you decide to try. Powder developers tend to have a longer shelf life but are harder to mix and can be dangerous if accidentally breathed in.
For developers, I have always had luck with Ilford DDX developer, as it provides consistent results across all the films I have tried thus far. Another option is Kodak Professional HC-110 Film Developer, which plenty of photographers swear by as well.
Next, you may want to consider purchasing a stop bath, which, as the name suggests, stops the film from further developing. Again, Ilford Ilfostop Stop Bath is a solid option here, but you may also use tap or distilled water for a few minutes to stop the development process.
Fixer is the next chemical required for this process. Ilford Rapid Fixer has been my personal choice for a number of years now, though Kodak Professional Kodafix Fixer is another solid choice.
It is worth mentioning there is one alternative option here. Cinestill makes a Monobath formula (Cinestill Film DF96), which is a combination developer and fixer. If memory serves me right, this developer is among the newest to the market – take that as you will. Lots of advanced photographers dislike monobath because it drastically cuts down on the customizability at play with your development, and is said to have worse tonal separation than other developers. However, it makes developing film a bit easier, since you only need one chemical bath instead of three.
You may also want to consider a product known as Photo-Flo. This wetting agent is run through the film tank after the final wash, and it helps to prevent streaks or water marks appearing through the drying process. Though it is optional, it is not a bad investment, as it is diluted quite heavily and therefore lasts a very long time compared to your other chemicals. Kodak offers Photo-Flo 200 Solution as a 16 oz bottle, and Ilford offers Ilfotol Wetting Agent as a 1 liter bottle.
Finally, depending upon the hardness and PH balance of your tap water, it may be smart to pick up some distilled water to ensure no mineral deposits are left on your negatives, which may scratch or entirely ruin them. This is also a smart option if you plan to mix powdered chemicals.
Safety & Disposal
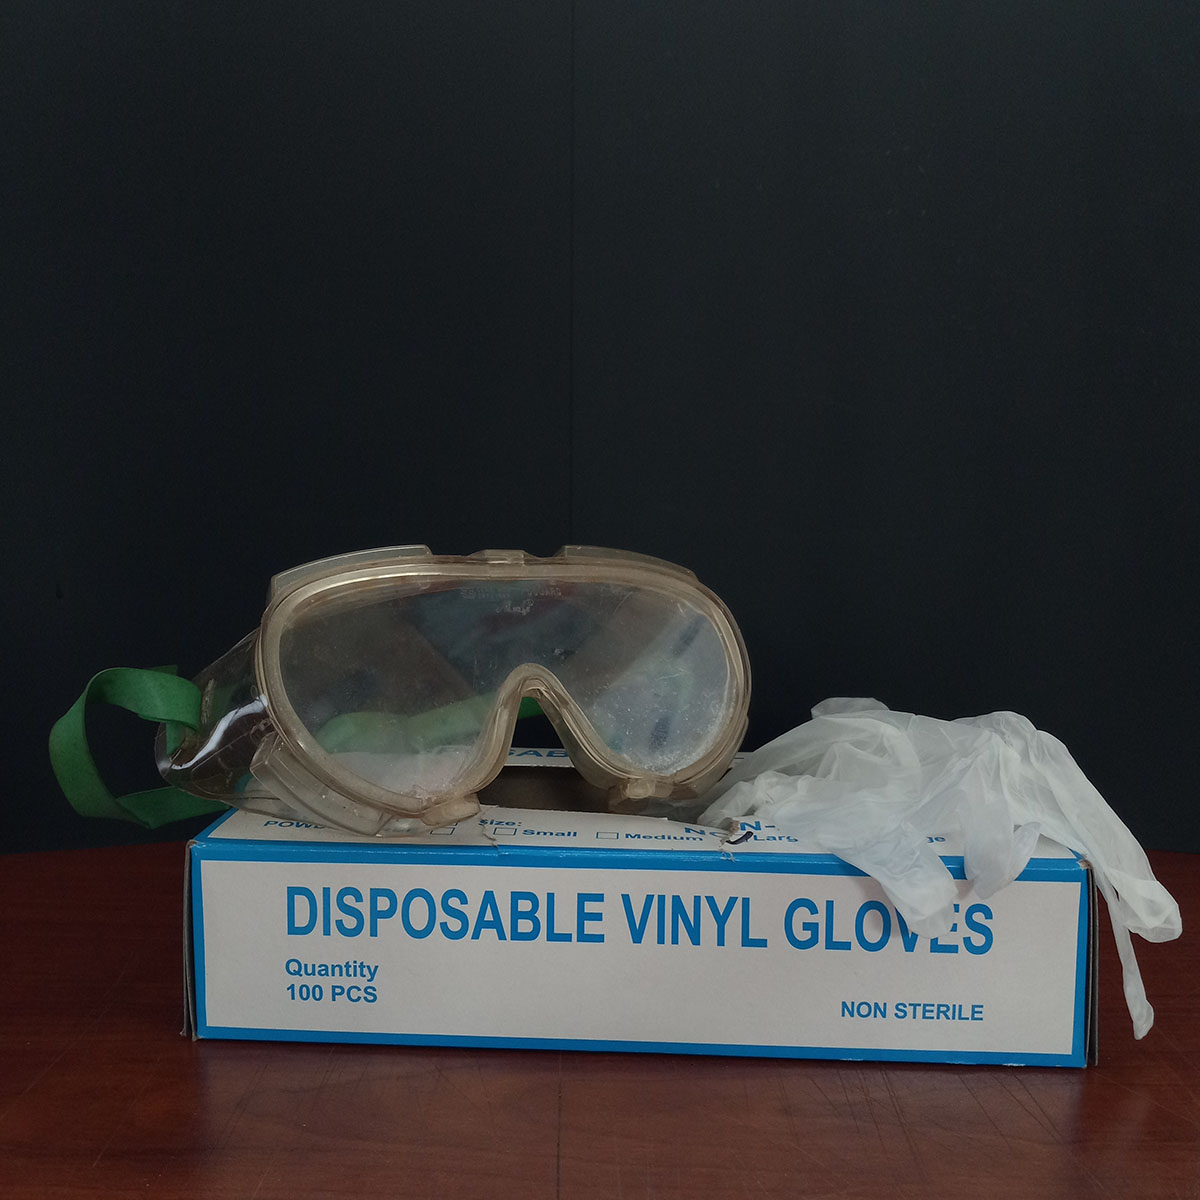
Film development chemicals are completely safe if you follow the proper precautions, but you do need to use them safely. It is important to wear gloves while developing film, plus close-toed shoes and potentially other protections depending on the toxicity of the chemicals you’re using. If your skin comes in contact with these chemicals, immediately wash the affected area with soap and water before continuing with development. Further, make sure there’s proper ventilation in the room you are working in.
Also of importance is the proper disposal of these chemicals, once used. Do not pour them down your kitchen sink, especially fixer. Instead, keep a gallon jug or something similar to pour the wasted chemicals into. From there, check with your local regulations regarding where to drop them off for proper disposal.
The Process
With all that said, we are finally able to get to the fun part: developing the film and seeing our photographs!
First, mix and dilute your chemicals, and go through the steps in your head. Prepare each chemical bath beforehand, and figure out your development time now. Once the chemicals are ready, it’s time to load the film.
Step One: Loading the Exposed Film
How to load your exposed film into the daylight tank depends on the film size you’re using.
Supposing you are using 35mm film, either go into a pitch-black room or use your film changing tent to prevent any light from reaching the film. Pry one of the ends off your film canister using your can opener. From there, carefully pull out the film – it will begin to unravel a bit as you do so – and find the leader (that’s the uneven part at the end of the film). Use your scissors to cut the leader off, being careful not to cut too far back and ruin your first frame. This cut doesn’t have to be perfect.
Now, slide the film into the reel, between the nubs on the reel, and keep feeding it into the spool until you run out. This will definitely take a bit of practice since you’re doing it in pitch blackness. It can be irritating the first few times you try it. (That’s one reason I prefer sheet film!)
Though this isn’t the cheapest option, it may be best to practice loading film onto the reel with an unexposed roll of film in the daylight. This way, you can get a hang of it all before trying it “for real.” The few dollars you lose by doing this will, in the end, save you a ton of hassle.
Once the film is entirely fed into the spool, place the reel on the center column of the tank and push it in. If you are developing a second roll of 35mm film in the same tank, repeat the process with this roll. Then, place the funnel cap on the container, and twist until you hear a click. This means your container is sealed and light-tight. You can now turn on the lights or open your film tent.
The process is largely the same with 120 and 4×5 film, although actually easier to load the film onto the appropriate reels when the size is larger.
Step Two: Pre-Washing The Film
An often neglected process when home developing film is the initial wash. Though this is not necessary, and there is plenty of debate whether it does anything useful with modern films, it is still something which should be considered.
To put it quite simply, before pouring in your developer, just pour in some water to wash away the anti-halation dye layer of the film. When you pour out the water, you’ll see this layer wash away, typically dying the water green or purple.
Most times, I only run my film through one or two pre-washes. This, I find, is enough to get rid of a decent bit of the dye without wasting too much water.
Step Three: Developing the Film
You’ll want to set a timer on your phone at this point – or a stopwatch if you’re old-school – since the next few steps are time-sensitive. As little as thirty seconds difference in development time can alter your results.
Almost every type of film has a different recommended development time, and it also depends on your developer (and the results you want to achieve). You can also find the information online by Googling your film and developer names. The longer you develop the film, the denser it will get – especially in the highlight regions of your image, which leads to higher contrast.
With your timer, tank, and developer ready, its time to initiate development. Slowly pour your developer of choice into the tank and start your timer. Don’t forget to put the additional lid on top of the tank! Since the next step is to shake/agitate the tank, you’ll spill tons of developer on the floor otherwise.
How you choose to agitate your film is ultimately up to you. Some people recommend placing the tank on its side and rolling it back and forth, while others prefer to flip the tank upside down and back again a few times. Others, still, keep the lid off the tank and use the agitator stick to rotate the center column.
Regardless your choice, you’ll want to aim for consistency with this process. The harsher your agitation, the faster development and the more contrast in your film. (The same can be said when it comes to how often you agitate.) A baseline is to agitate the tank for about 10 seconds at a time, roughly once or twice per minute. Otherwise, hold it still.
Step Four: Stopping the Developer
Once your development time is up, pour the developer back into the bottle. You can typically reuse your developer a few times without adverse effect. If you have chosen to purchase stop bath, now is the time to use it.
The length of time for this process is considerably shorter – around a thirty seconds to a minute is a safe bet – as it is stopping the residual developer that’s still clinging to the film. If you decided against purchasing stop bath, simply run tap or distilled water through the tank for a minute or two, which should do the trick.
Unlike the developer, you’ll need to discard the stop bath after this point, as it usually cannot be used again.
Step Five: Fixing the Film
It’s now time for the fixer, which will permanently fix the image onto the negative, allowing for your to bring your film out of the tank and into the light. A safe bet for fixing is around five minutes. If you cannot find any information regarding time, it’s best to over-fix than under, in this situation.
You’ll want to do with fixer as you had with developer: agitate for roughly ten seconds at a time, once or twice per minute.
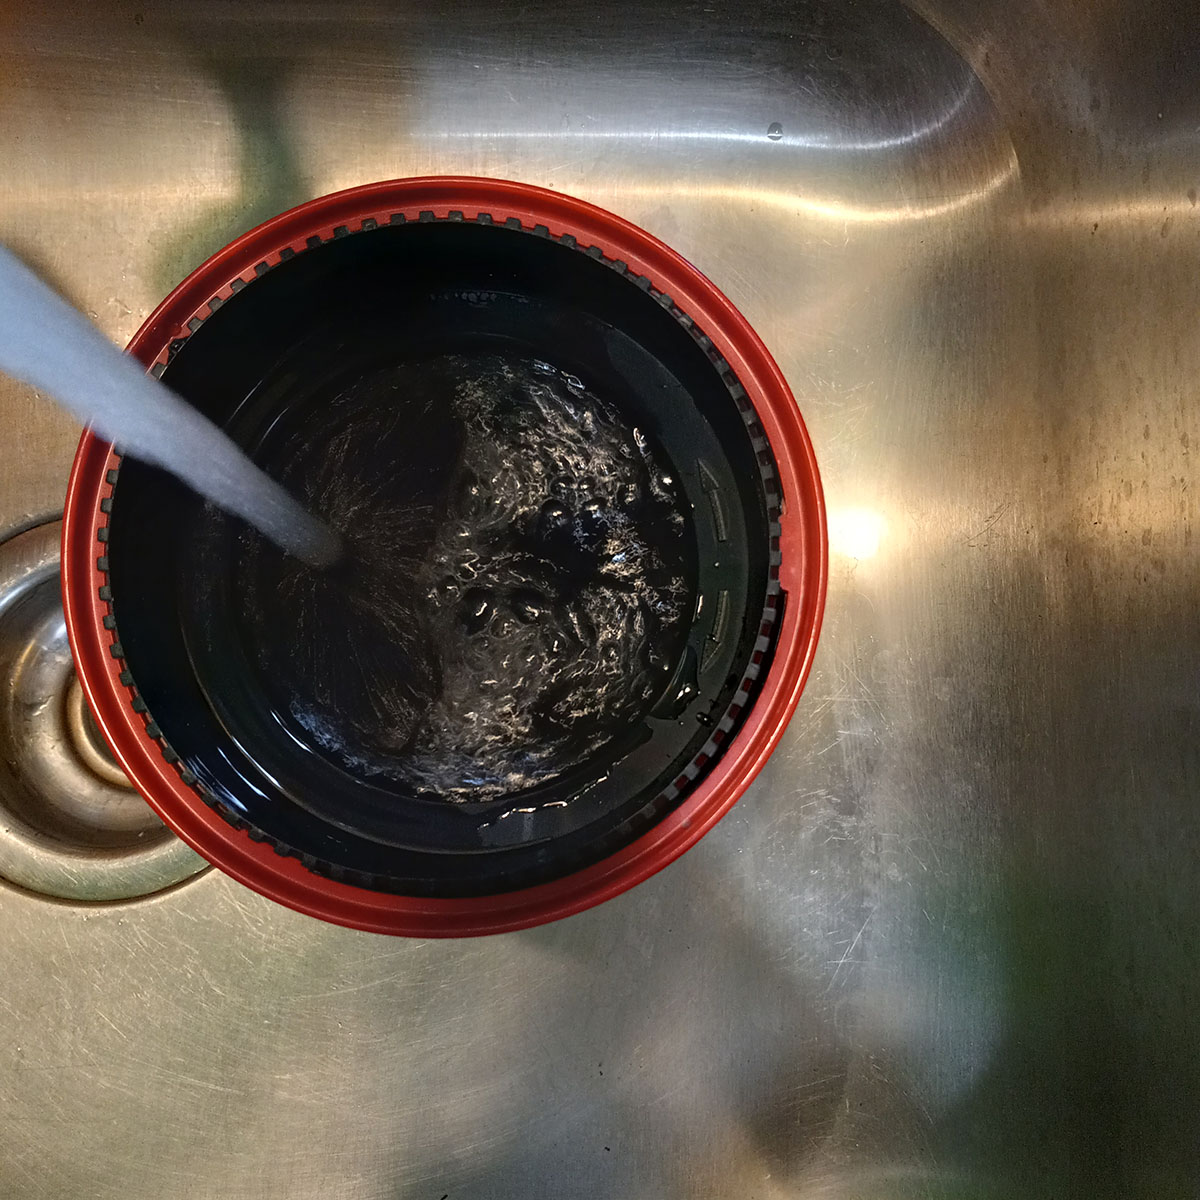
Step Six: Washing the Film
We are officially down to the wire now, folks! Pour your fixer back into the bottle (just like developer, it can be used a few times before having to be replenished) and run tap water through the tank for around five minutes. You can also fill the tank and empty it a few times, swirling the water around inside the tank. This method tends to use less water, and works out just as well. The point is just to remove the residual fixer from your negatives.
Step Seven: Photo-Flo
If you chose to purchase Photo-Flo, now is the time to use it. This is the final step in the process, at least as it pertains to chemicals. Follow the time and mixing instructions found on the container. Usually, this step takes under a minute, and then you can remove your film from the tank.

Step Eight: Drying the Film
Supposing all went well in the development process, you may now take the funnel cap off the developing tank and bring your film into the light. If you purchased Paterson’s starter kit, you will have film clips for hanging your film to dry; if not, you can use clothes pins or small to medium binder clips, which are what I use.
Try your best to keep your wet negatives away from dust, as well as away from vents due to fluctuating temperatures. While in an ideal world you would have a designated film drying cabinet, not all of us have the time to build one or the money to buy one. Instead, I have chosen to tie a string from wall to wall in my closet, attaching the binder clips through the string, which has worked out well for me.
Roll film like 35mm and 120 has a bad tendency to curl while drying, which can be a major pain when it comes time to cutting the negatives into strips or scanning them. To prevent this, you can use an extra binder clip or two to the bottom of the film strip; this will provide enough weight to keep the film hanging straight, keeping it from curling.
It’s important you do not handle your film as it dries; leave it alone until it is bone dry before taking it down. Depending upon the temperature and humidity where you live, this can take from a few hours to as long as a day. If I develop film in the afternoon, I typically wait until the next morning to take it down, just to be safe.
To store your film, keep it inside a dedicated negative sleeve. Print File makes a number of different archival storage pages for various film types, and there are plenty of other, similar companies that make long-term storage sleeves for your negatives. This will help to prevent scratches, dust, etc. from forming over time.

Conclusion
With that, you have officially developed your black and white film at home. Congratulations! While a number of photographers still opt for sending their film to photo labs across the country – which ultimately helps keep the industry alive and often makes things easier for those photographing a lot – there is truly nothing like doing it yourself.
Developing your own film at home brings you closer to the wonderful, hands-on process of photography. It also provides you with a huge level of control over your negative’s contrast, tonal separation, grain size, and negative density, among other variables. By changing individual aspects of the process – from the chemicals themselves to the length of time for development – you will be able to dial in the exact method to help your photographs really shine.
“ Unlike the developer, you’ll need to discard the stop bath after this point, as it usually cannot be used again.”
My experience is the exact reverse. Most developers diluted to working solutions become single use. Stop bath can be reused and typically last long. They have a colorant added that will change colour when they become unusable.
Yes, I have recently begun using various other developers, including Pyrocat HD which is, as you mentioned, single-use. Given that when I had written this piece, my primary experience regarded Ilford DDX, I did not account for other developers not acting the same.
I’ll see about amending that statement for better clarity. Thank you.
I’ll pass along a little lesson I learned about developing b&w film that I learned while working as a staff photographer for several magazines back in the day. An issue I encountered was that if I developed Tri-X too long, the grain would increase and the prints would show it. The solution I arrived at was to expose the Tri-X at ISO 200 and develop it so that the resulting negatives were quite flat. 6 minutes in Rodinal 1:50 at 68 degrees F with agitation for 5 seconds per 30 seconds did the trick. I would then print the flat negatives on contrasty paper, usually a #4 paper. That’s because I found that while developing longer would increase the contrast and GRAIN, printing on a higher-contrast paper did not – the prints showed a nice long dynamic range with smooth texture and little or no apparent graininess. Anyway – I can still taste the fixer; I’m so grateful that my days in the lab are long since over.
p.s. I loved the Paterson tanks! They just worked – much nicer than steel tanks.
Just one suggestion: if you are processing roll film in a “daylight” sealed tank, it is considered to be good practice after each agitation, to give the tank a fairly sharp rap on your counter top. This will help to dislodge any bubbles that might have formed due to agitation and which might be “sticking” to the surface of the film … such bubbles can inhibit the chemicals’ access to the film emulsion, causing tiny under-developed or under-fixed areas.
A very good point here, Ryan. I tend to forget about doing it and thus forgot to include it in the article. Thanks for the reminder!
I would like to make a bit of promotion for the old Leitz/Agfa Rondinax daylight developing tanks. They exist in 35mm et 120 size, are dead simple to use, and do not need a darkroom or changing bag to load the film.
Warmly recommended if you don’t have a lot of films to develop at once (they are limited to one film at a time).
A more modern (and expensive) incarnation is the ars-imago LAB-BOX.
Thank you for pointing this out. I vaguely remember when the more modern incarnation came to light, but I did not provide them much consideration. They are certainly an option, albeit one I cannot speak on as I have not used them. Perhaps one day I will give them a shot.