As photographers, light is something we are constantly concerned about. We need some sort of light source coming in, but from where and how much is always the question. A soft sun glow during the early hours of the morning or right before sunset is ideal, but often times wedding ceremonies or a client’s schedule does not allow for those prime shooting times. Light can take a normally plain image and transform it into a powerful and exciting picture, but what happens when you are dealing with harsh midday, overhead lighting? Luckily, there are a couple ways of dealing with this problem while still achieving beautiful pictures that both you and your clients will be happy with.
1) Shade – Even Lighting
The best way to avoid distracting facial shadows from midday lighting is to bring your subjects into a shaded area. That shade can be provided by a large tree, a building or really anything that is casting a big enough shadow to fit your subject. What we want to do is create even lighting where no direct sun is hitting the face or body, allowing the subject to be evenly lit. Make sure you are not using patchy shade where spots of light are coming through. This will cause uneven lighting and your subject will have spots of light hitting their face and body.

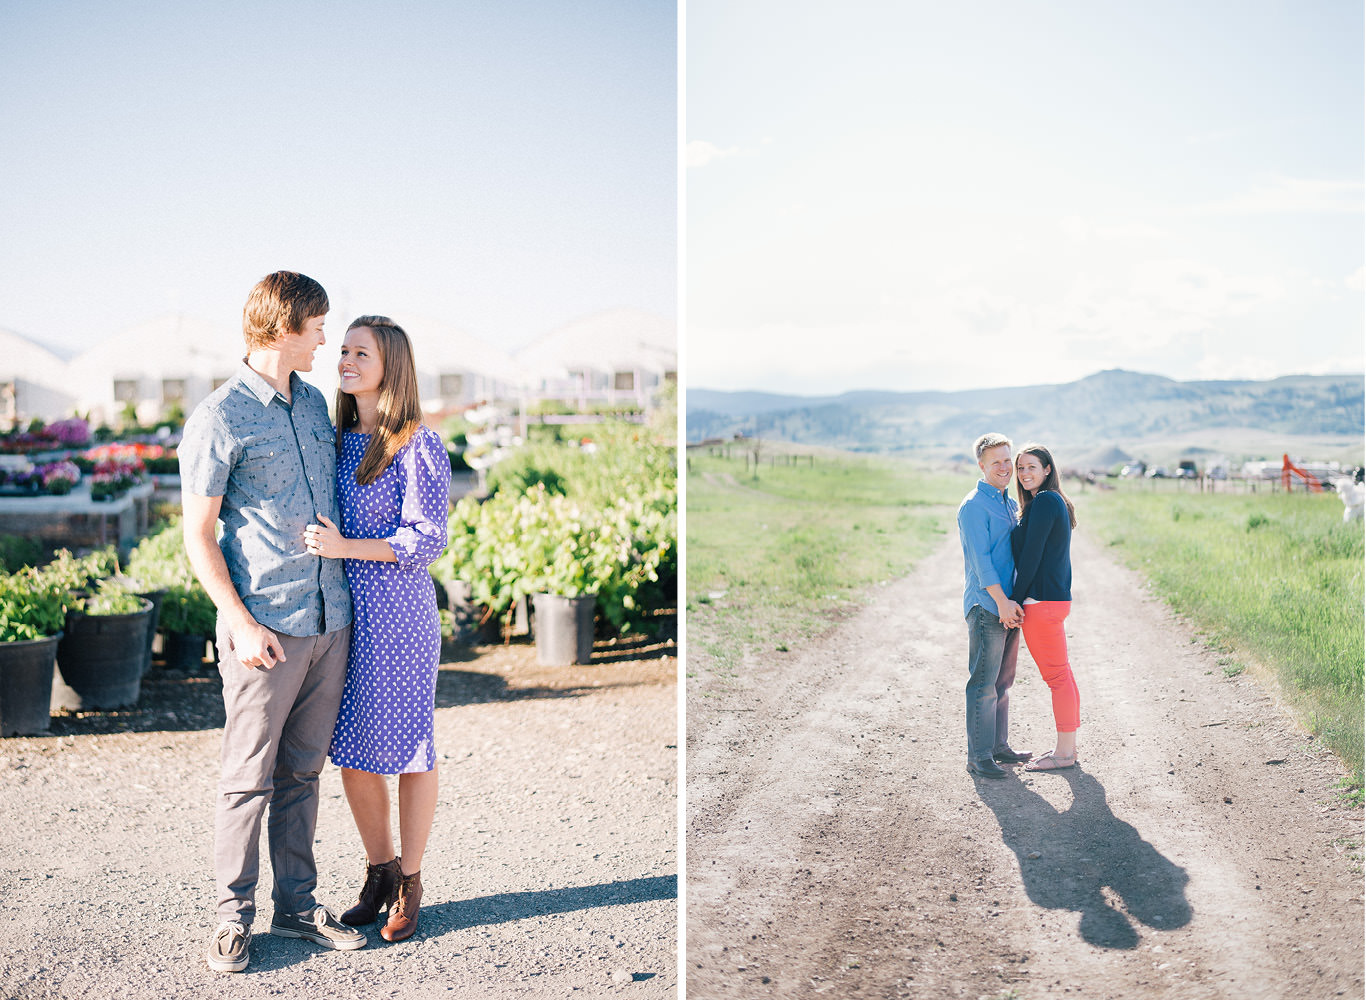
2) Backs to the Sun – Back Lit
If no shade is available, position your subjects with their backs to the sun. Doing this will block most of the direct light and cause their faces to be evenly shaded. This is called back lighting. This is sometimes easier to do with one subject because you can position them perfectly to make sure no sunspots are making their way onto the face. With two or more individuals it can be more of a challenge. Keeping their faces closer together can help eliminate some of the light spots coming through or you can use the taller subject to block the sun off of the shorter person. Make sure to expose for the subjects’ faces or they will be too dark to see any detail. Something to note is that the background will be overexposed when metering for the face in a situation like this.
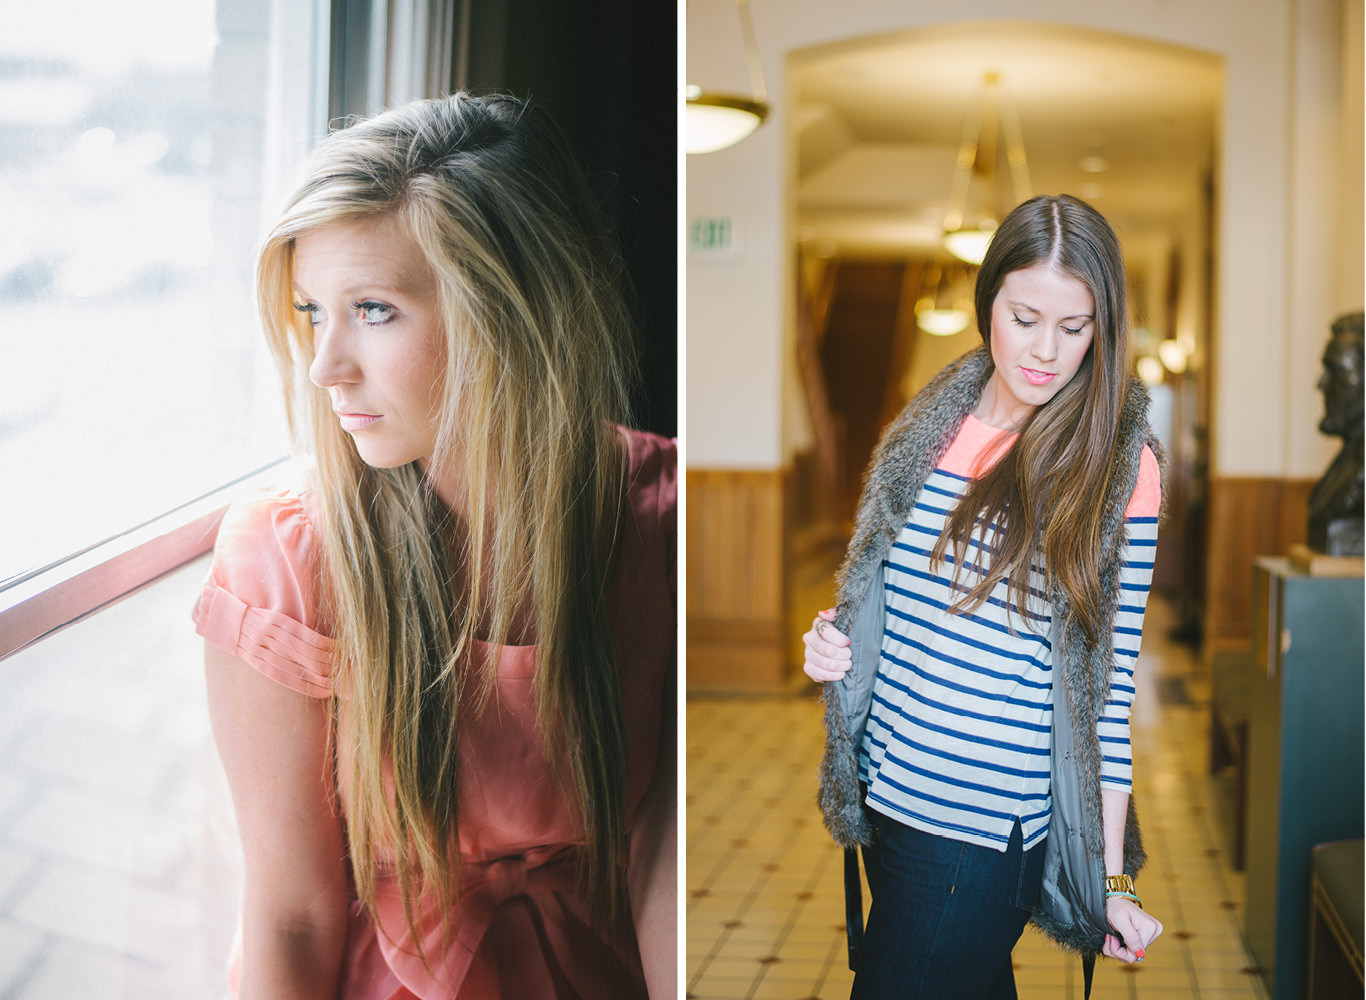
3) Go Inside – Window Lighting
Another great way to deal with harsh light is to take your shoot indoors. While many photographers would prefer to shoot outdoors, using window light in an interesting indoor location can be a great alternative and still allow for soft and natural light to be used. This can also be a fun challenge for those who may be looking for a way to get their creative juices flowing again. Simply face the subjects towards the window and the flood of light coming in will be just enough to perfectly light up your subject.
There is a big difference in harsh, unwanted light that causes shadows and using a light source to purposely create shadows on the face or body. Although indoor locations may be used to escape the harsh light, windows can be used in a creative way to make images appear more dramatic with shadowing. Experimenting with where the subject stands and how they are angled next to a window can be fun and create depth in an image.
For more examples of how to deal with harsh lighting please visit my website, Jenna Bechtholt Photography.
I wish you had more items connected with Canon
…I did not see any mention of a scrim. Especially if you have a way of utilizing the diffuser that accompanies most 5 in 1 light modifiers. Cheers everyone from Florida (“THE” Sunshine State:)
-Tal
I have a Nikon D90 and am learning about white balance. When taking photos of my wife’s paintings in the home at night (under incandescent lighting), I’m not able to find a white balance that provides correct color. Any tips?
Have you tried using Kelvin white balance? You have a lot more control over your settings that way!
Thank you, Jenna. I’ll give that a try.
Flash can work very well. Put a very portable modifier like, for example, a Lumiquest Sofbox III (and I have no affiliation w/the company) on your flash; let the flash meter your subject and the camera meter the background. This works very well on its own, not to mention there will be many times when you have no shade, can’t go indoors, etc. And, yes, you’ll still want to turn your subjects so that they don’t squint into the sunlight.
You could also post some tips on Flash Sync Speed & High Speed Sync techniques for Fill Flash in Sunlight.
This would be really helpful.
Also midday lighting isn’t always bad, if you’re far enough north (like the UK or scanaweden) then the mid day sun during the autumn and winter is coming in from the same direction that most people would position a key light anyway (ok you’ve still got to deal with hard light but it can look good).
“How to deal with harsh midday lighting–go inside or go in the shade.”
f-cking brilliant!
“…use the taller subject to block the sun off of the shorter person.”
– very simple but effective
So what I have also tried to do if there is no shade available is to backlight the subject as discussed above but also bring in a white reflector (gold/silver will likely blind your subjects) and provide the fill light needed on their faces. Just a touch of reflection can bring up the exposure on their face(s) and do a really nice job making the image more evenly lit.
Also note it’s a good idea if in open sun to shoot in a direction in which there is a dark background. Perhaps some trees, a building wall, etc. This prevents the background from being blown out completely by the sun and thus taking the eyes away from the subject of your photograph; the people. So, in summary, my kind of “checklist” for this type of thing is.
1) Turn their backs to the sunlight so they are backlit.
2) Put a reflector of some kind bouncing some of the light coming from behind them back into them (almost always white, even just a piece of foamcore is great).
3) Shoot at an angle or direction in which there is a dark background if possible.
Jon
You can also bring a billion ws of lighting i.e. something brighter than the sun (easier done with a leaf shutter and very high synch speeds).