White balance is one of the most basic and yet trickiest aspects of photography. Although the white balance you’ve set in-camera may look good most of the time, in other cases, you’ll need to correct it in post-processing. Today, I will show you several ways to correct your white balance in Photoshop.
Table of Contents
How Does White Balance Affect My Pictures?
White balance affects how warm or cool your pictures look. We’ve written a complete guide to white balance here that you should check out if you want to refresh yourself on the topic.
In practice, changing your white balance has more than one effect on a photo. It affects an image’s color cast, flatness, and saturation.
Color Cast
One of the biggest problems caused by using the wrong white balance is a color cast in your image. Take a look at the photo below:
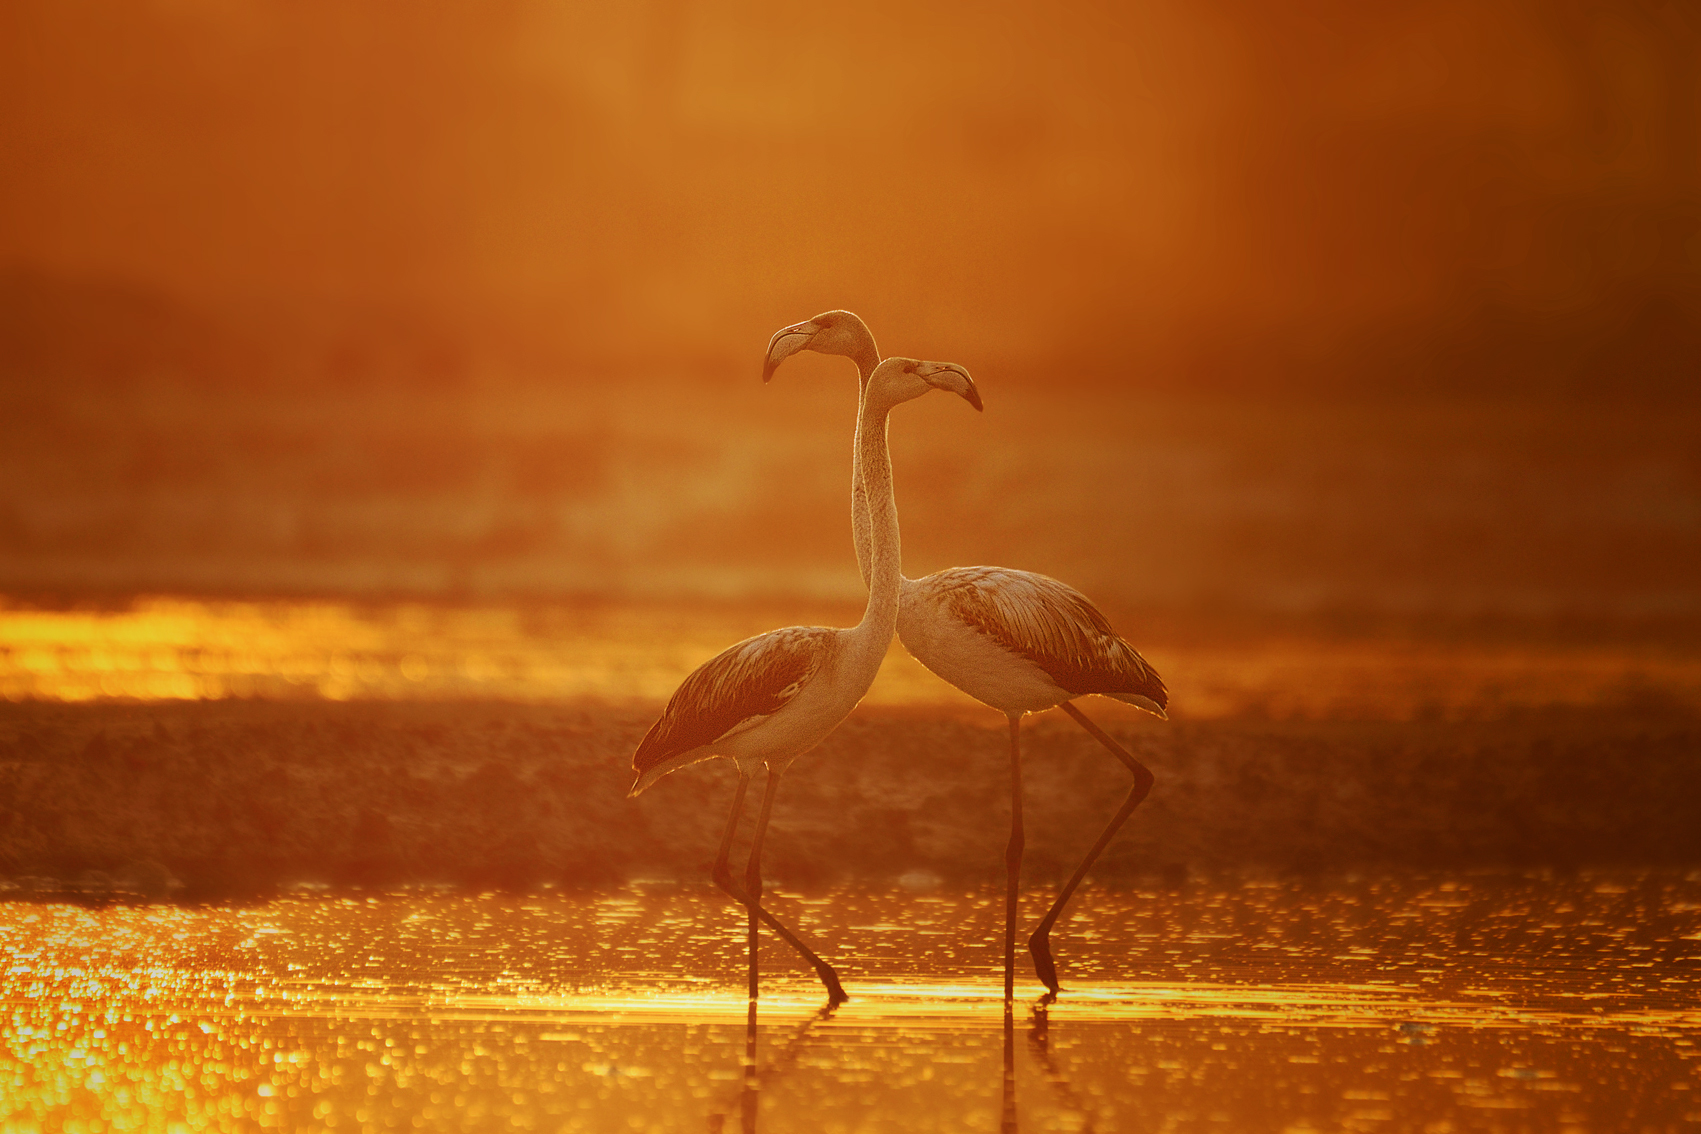
The image is almost an orange monochrome, with a dramatically warm color cast. I don’t mind an overall warm tone to this image (it is sunset after all), but this goes too far even for me.
I took the photo above with an in-camera white balance of 8000K. If you haven’t read the guide I linked a moment ago, 8000K is a slightly warm white balance that creates “neutral” tones on an overcast day. Since this wasn’t an overcast day, but rather a golden-colored sunset, it made the photo extra warm/orange in tone.
On the other hand, consider the shot below. I set the white balance at 8000K here, just like in the image above. The difference is that they were shot in different lighting. This time, I took the picture in the middle of a cloudless day:
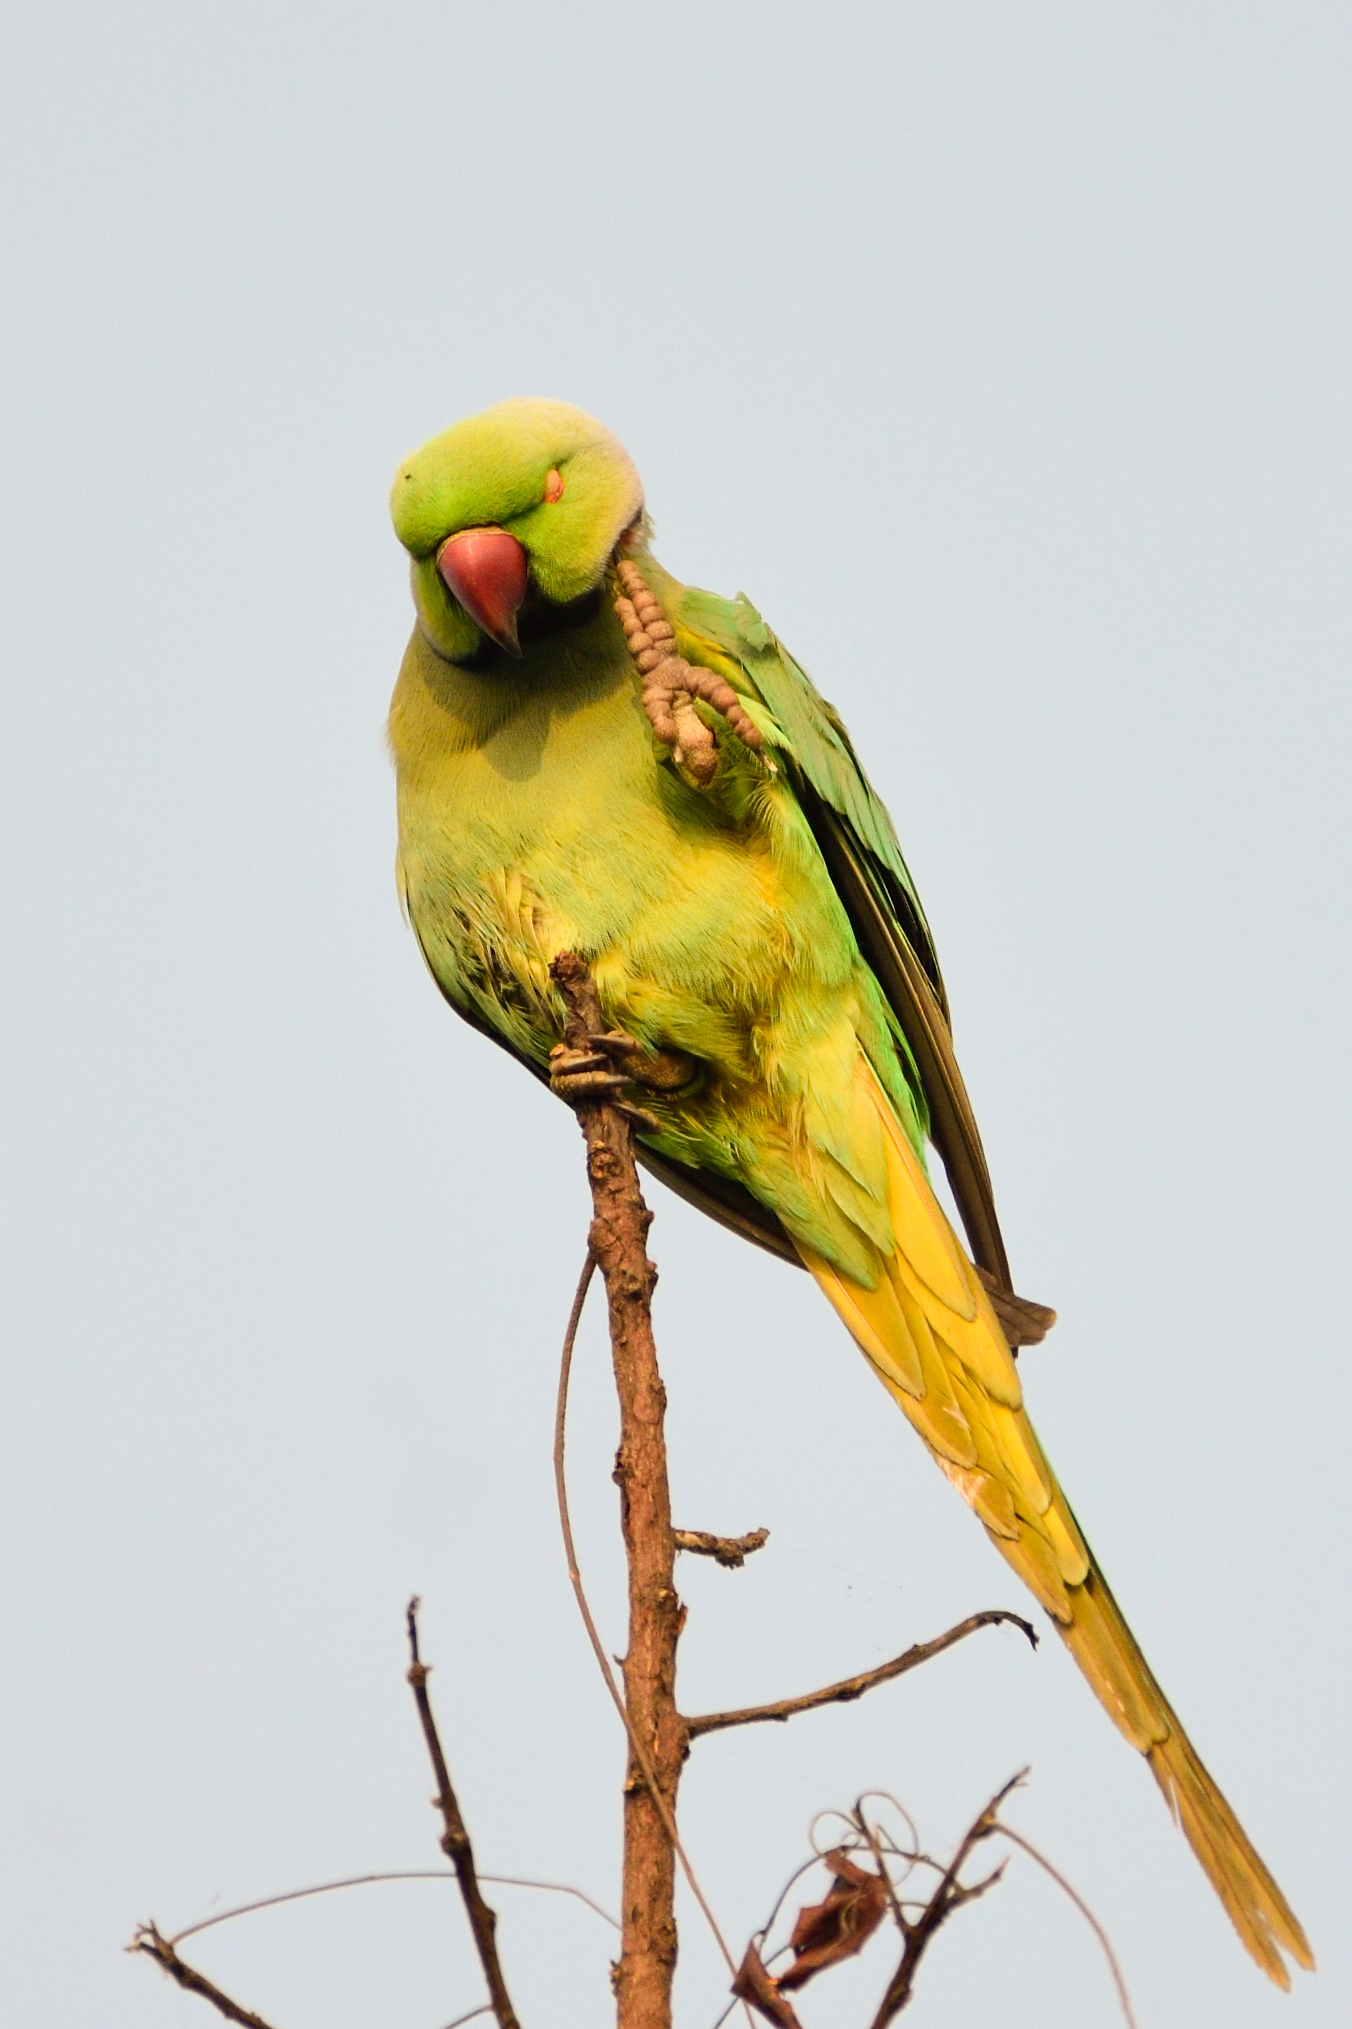
It definitely has less of a warm color cast this time, but it’s still leaning in that direction. The result is that the sky (which should look fairly blue) is rather faded, with some muddy-looking colors. Also, the parakeet is supposed to be green, but has a yellowish tint. If you just use the proper white balance, you get this instead:
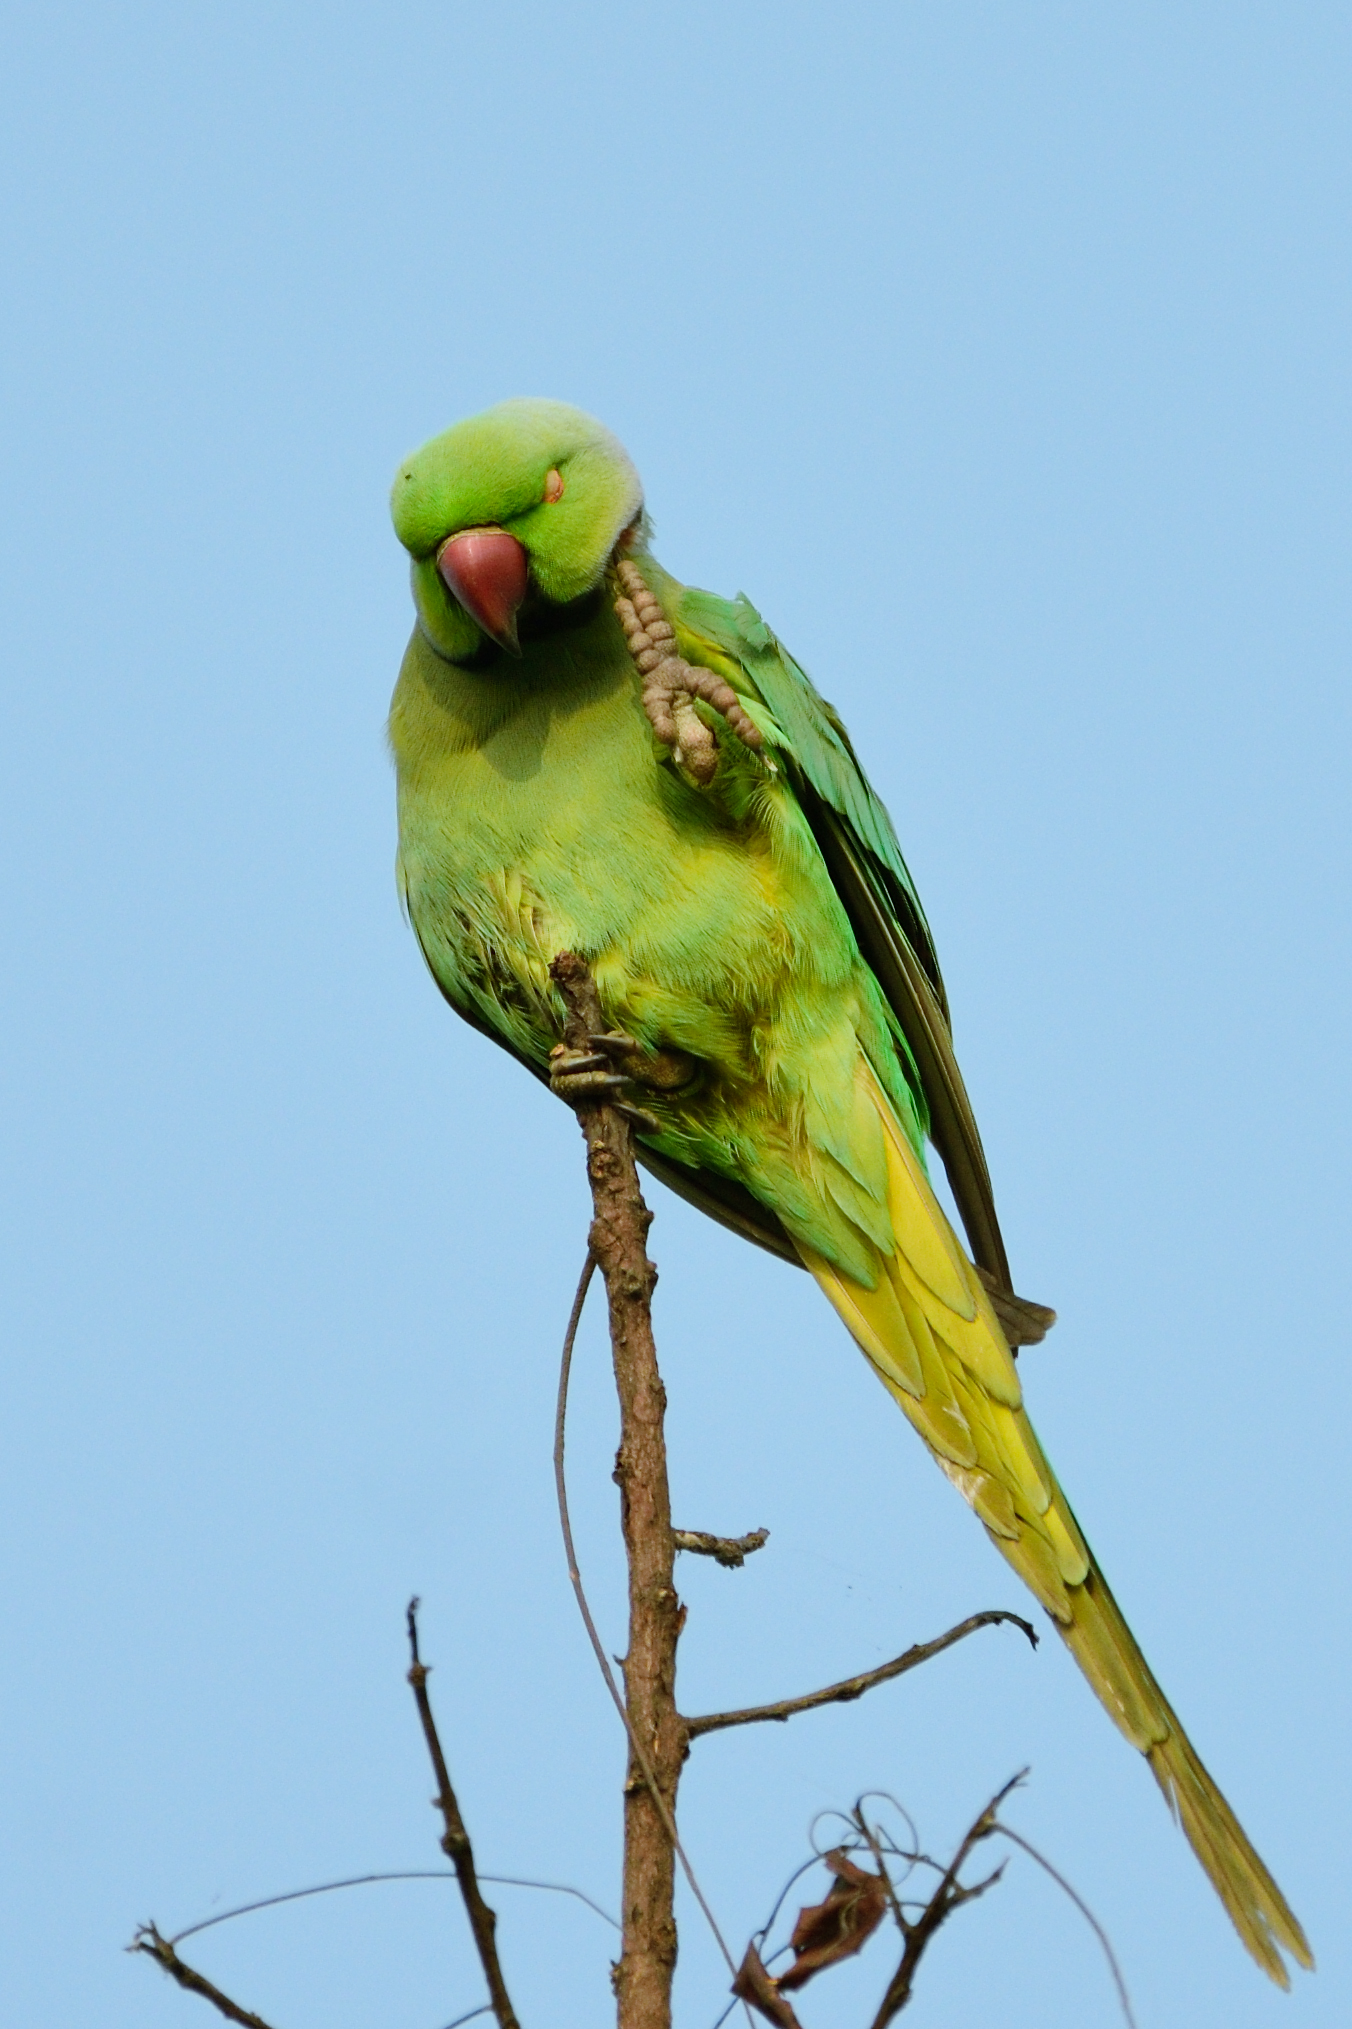
The difference is obvious. The sky looks a lot better, even though I did not alter any other setting like saturation.
Flat Images
You may have already noticed it in the samples above, but images with a color cast can seem somewhat flat. For example, consider these photos:
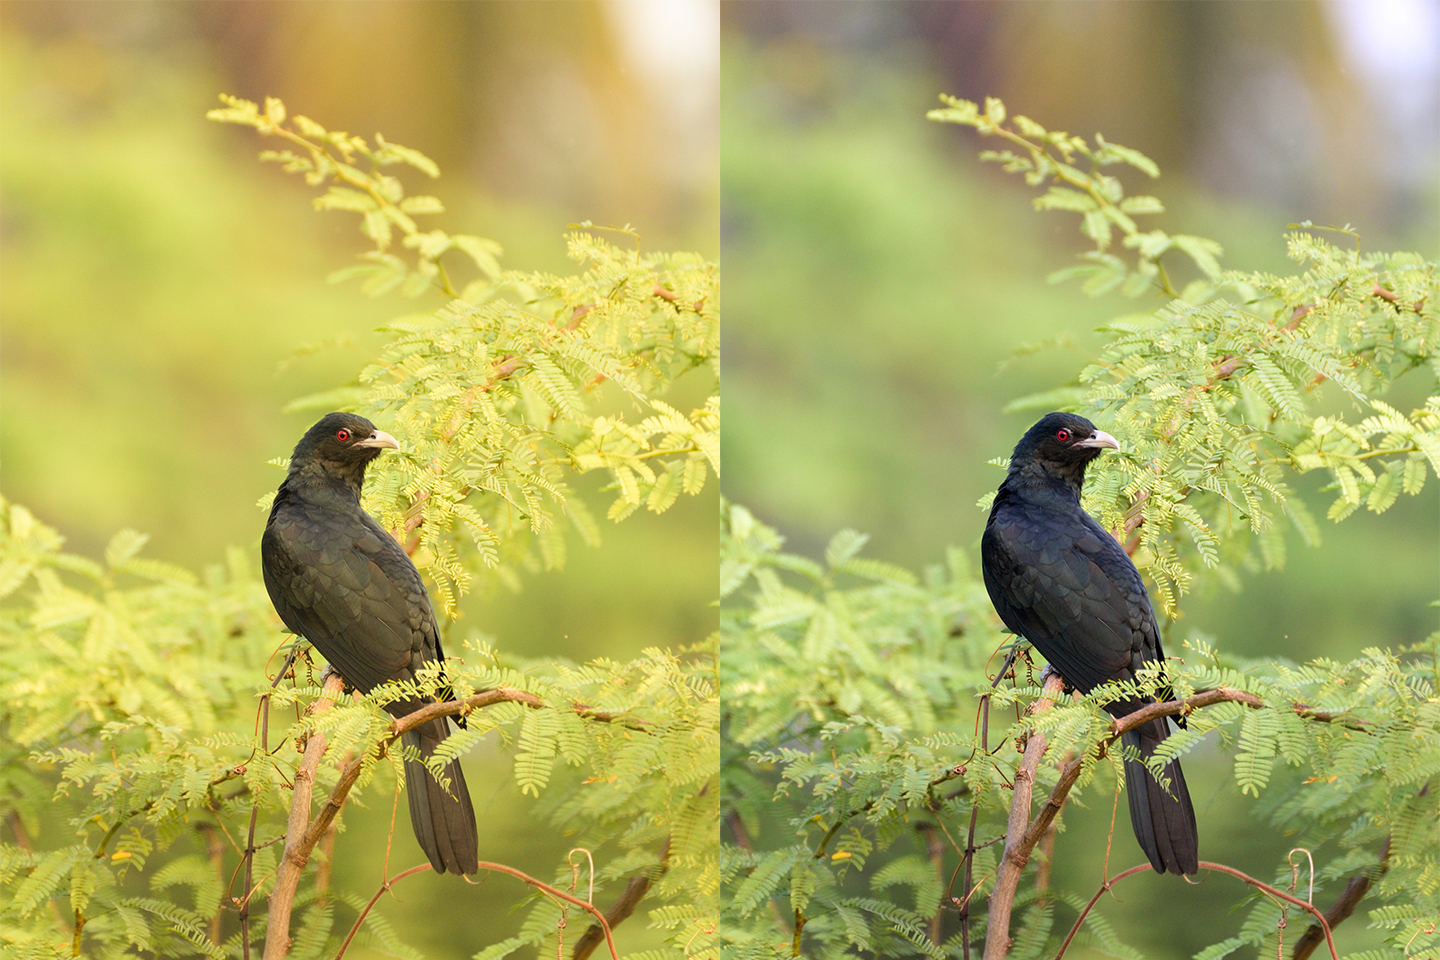
I didn’t change any settings like contrast or exposure here, just white balance. And yet the image on the right has noticeably deeper shadows and looks much better.
There is also better subject separation in the right-hand image. For example, the bird’s beak stands out against the background better when there is no color cast.
Saturation
Many of us love to shoot during the golden hour, but it can be tricky to get properly-saturated images. White balance is a useful tool here.
For instance, compare the two images below. If you’re interested in a higher-saturation look, you can use a warmer white balance like 8500K. Or, if you want a more muted image, a cooler white balance like 6000K could be the way to go.
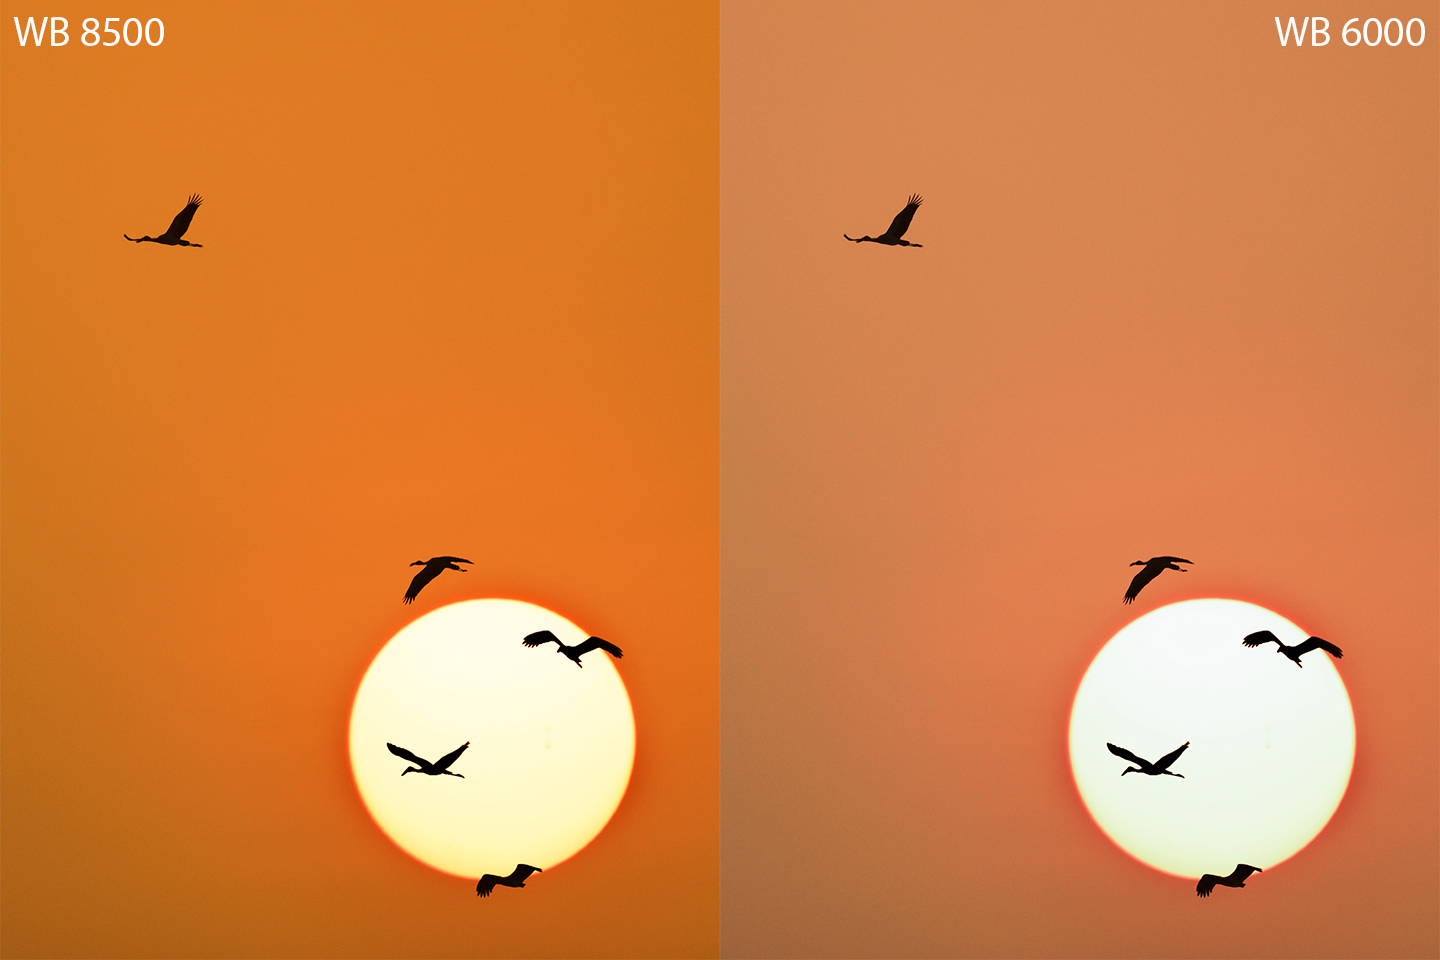
It’s not that one image is better than the other; they’re different artistic interpretations of your subject. So, by using white balance creatively, you can take images that match your photographic vision as best as possible.
Fixing White Balance with Photoshop
There are many ways to adjust white balance using Photoshop. I will take you from the simplest to the most advanced.
Adobe Camera Raw
Adobe Camera Raw (ACR) is a plugin that allows you to import RAW images into Photoshop and make basic adjustments. You can even adjust non-RAW images like JPEGs with this tool by clicking “Filter > Camera Raw Filter” in the top menu bar.
When you open an image in ACR, the white balance adjustment is near the top, called Temperature:
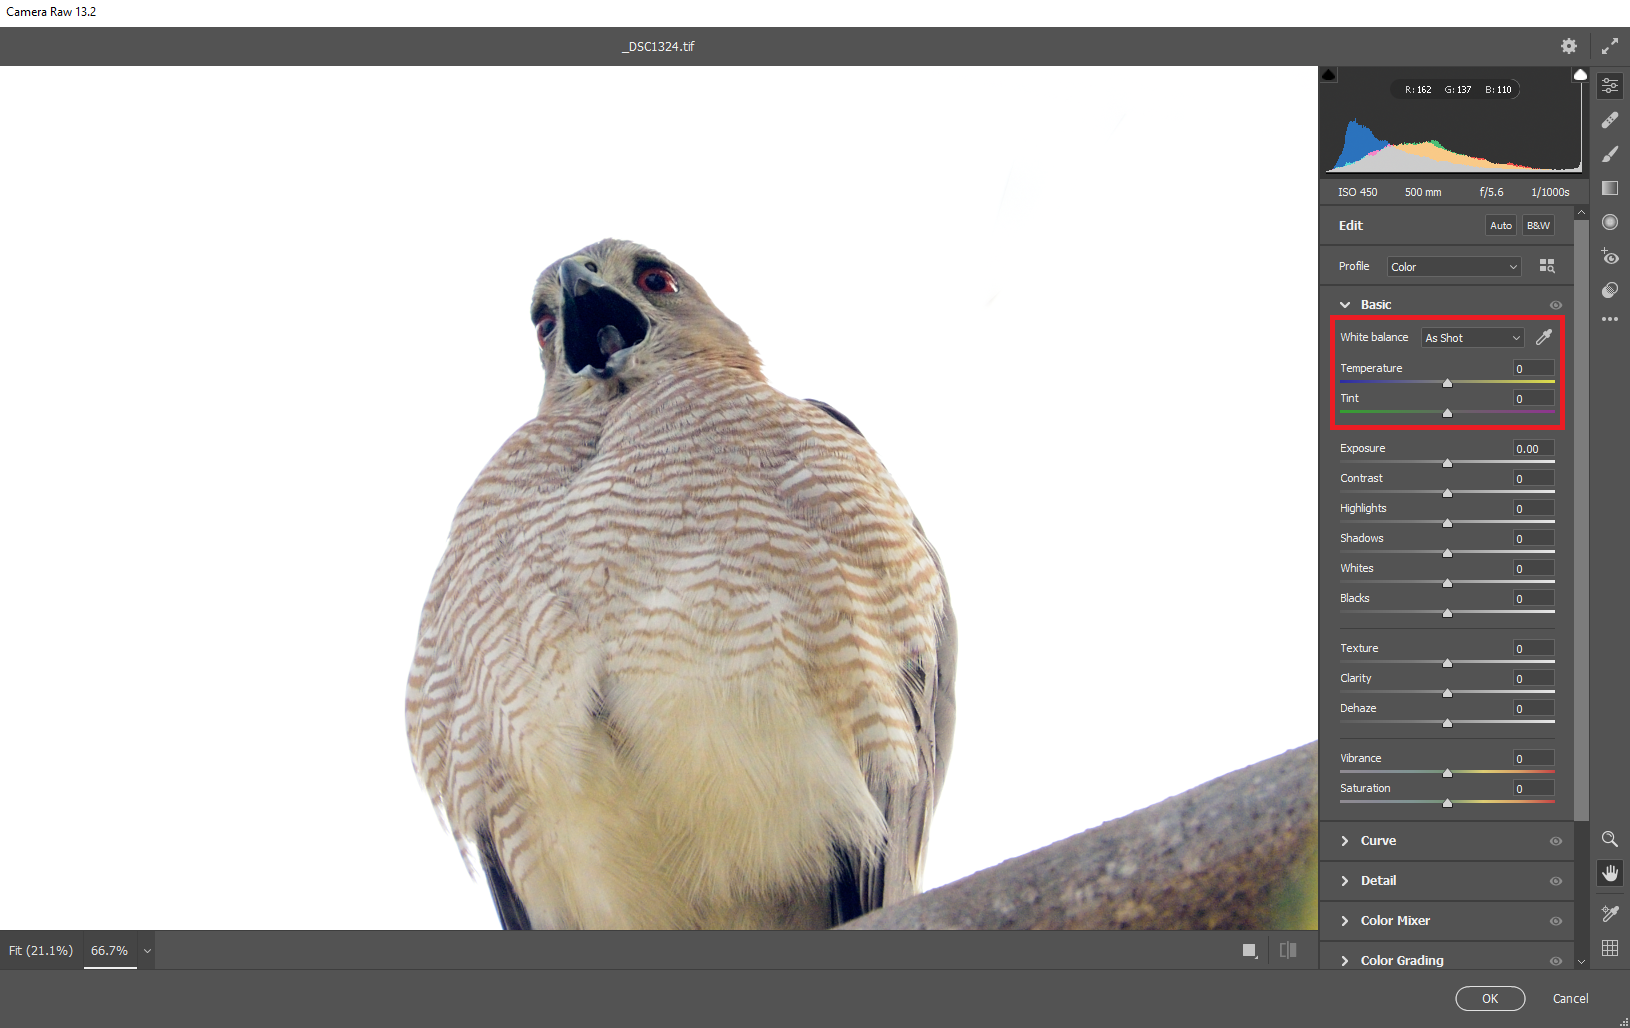
You can adjust the white balance by moving the Temperature slider. You can also use the eyedropper to select a neutral gray portion of the image and Camera Raw will automatically adjust the white balance (and the Tint) so that area you click appears as gray.
Note that it’s easier to adjust the white balance of RAW photos, TIFFs, PSDs, and other minimally-compressed files. If you adjust a JPEG too far, you might notice some color problems or compression artifacts.
Automatic White Balance Adjustment Using Curves
Curves are a popular tool in Photoshop. Although you might think of the Curves tool mainly as an exposure/contrast adjustment, it can also be used for white balance and color correction.
First, there is a one-click solution using Curves that works most of the time. Take a look at the picture below:

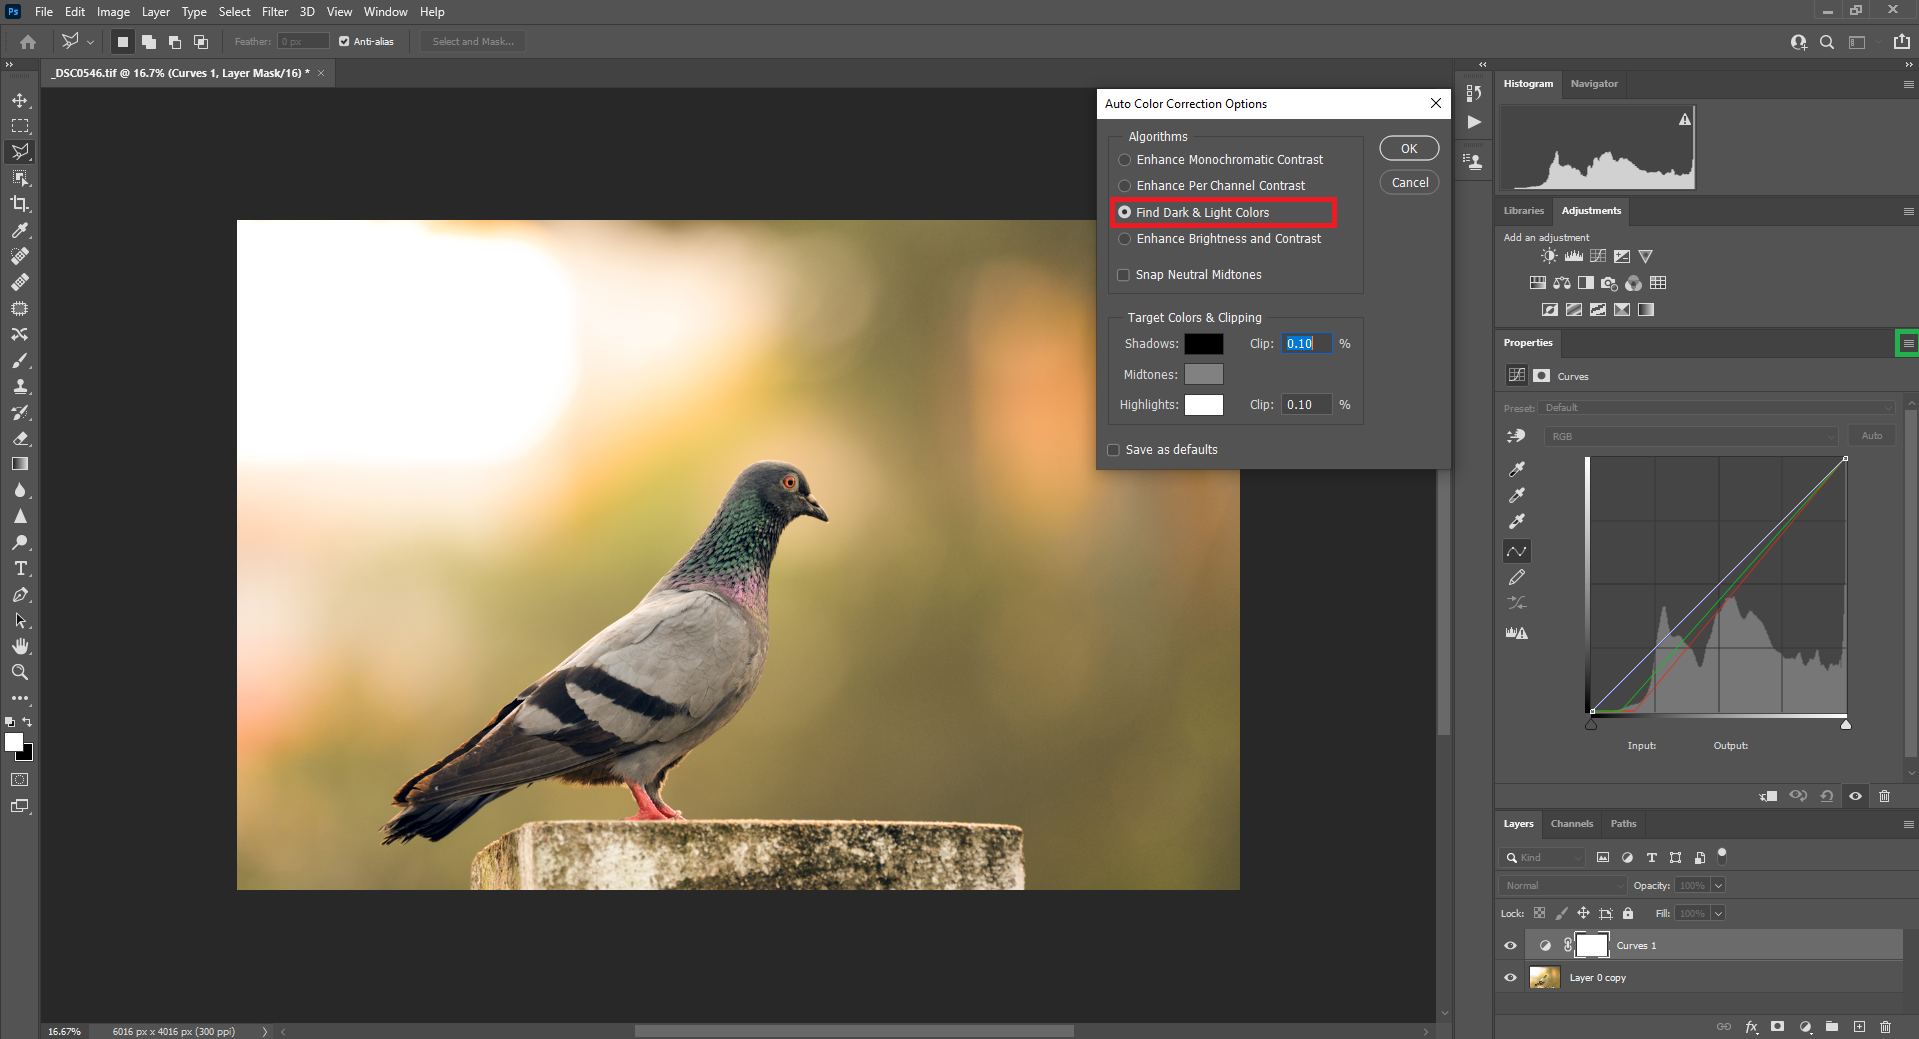
To automatically fix the white balance of a photo in Photoshop, follow these steps:
- Add a Curves adjustment layer
- Click on the right edge of the Properties tab (marked green in the screenshot below)
- Select Auto Options from the menu that appears; it will pop up the Auto Color Correction Options window
- Select the “Find Light & Dark Colors” option from the window (marked red in the screenshot below)
- Click Ok
This screenshot shows the effectiveness of automatic correction:
Manual White Balance Adjustment Using Curves
You can also manually adjust the white balance of an image using Curves for even greater control.
Just as you did for the automatic color correction as above, create a Curves adjustment layer. You will see a drop-down list to choose between RGB (the default), Red, Green, and Blue. First, select the Red option.
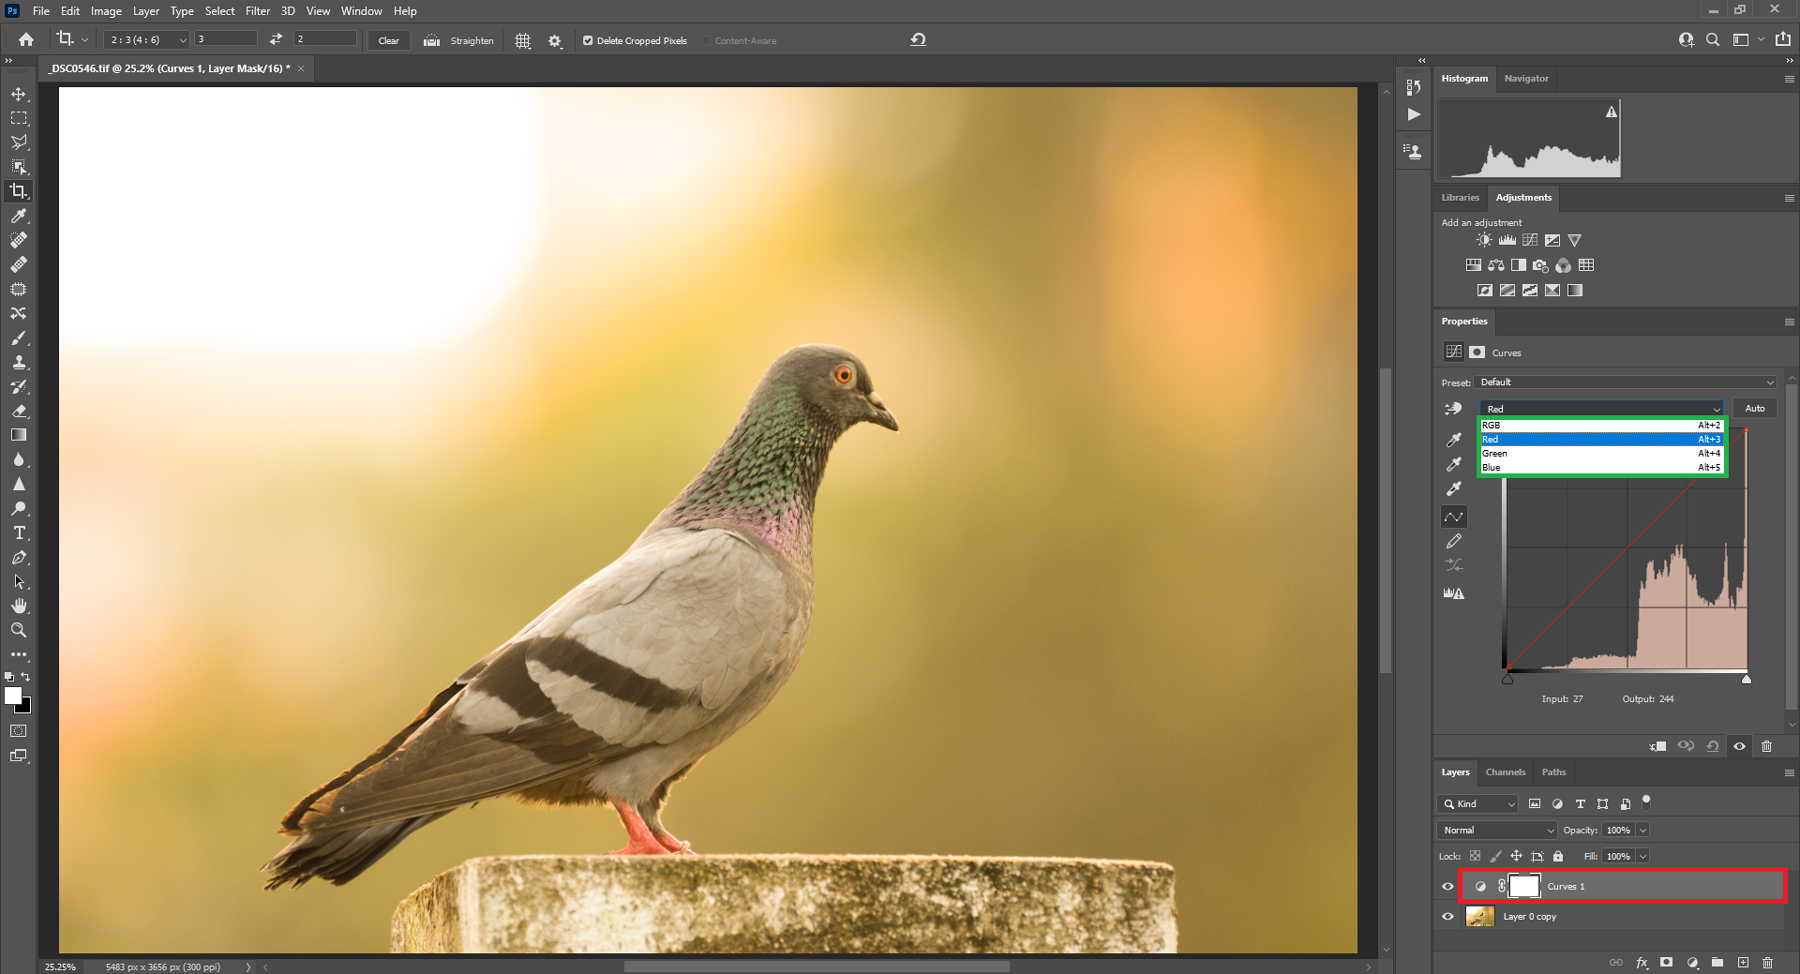
When you’ve selected one of the specific colors – red, in this case – the tool alters that color and its complement. For example, when you increase red, cyan is reduced.
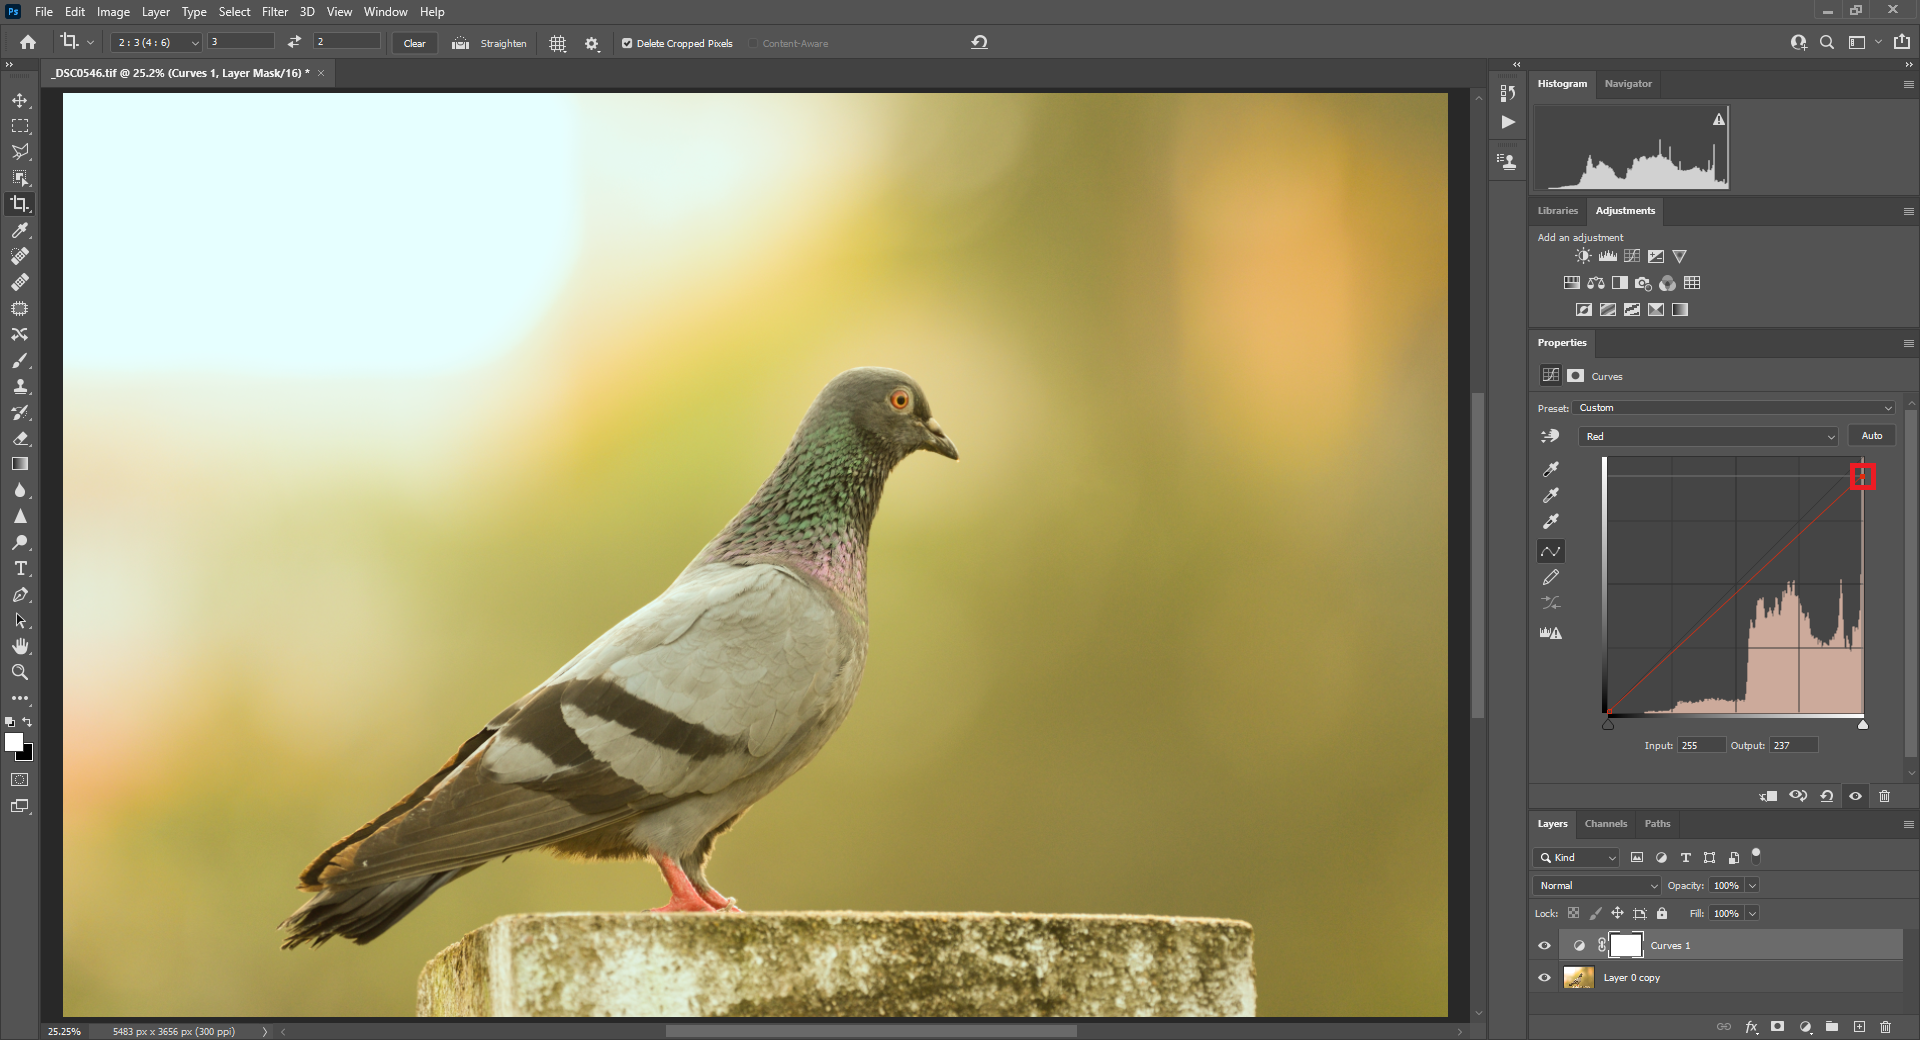
Since this image has a warmer color cast, you need to reduce the reds in the highlights, mid-tones, and shadows. To do this, drag the red line from the right upper edge a bit down until the reds improve.
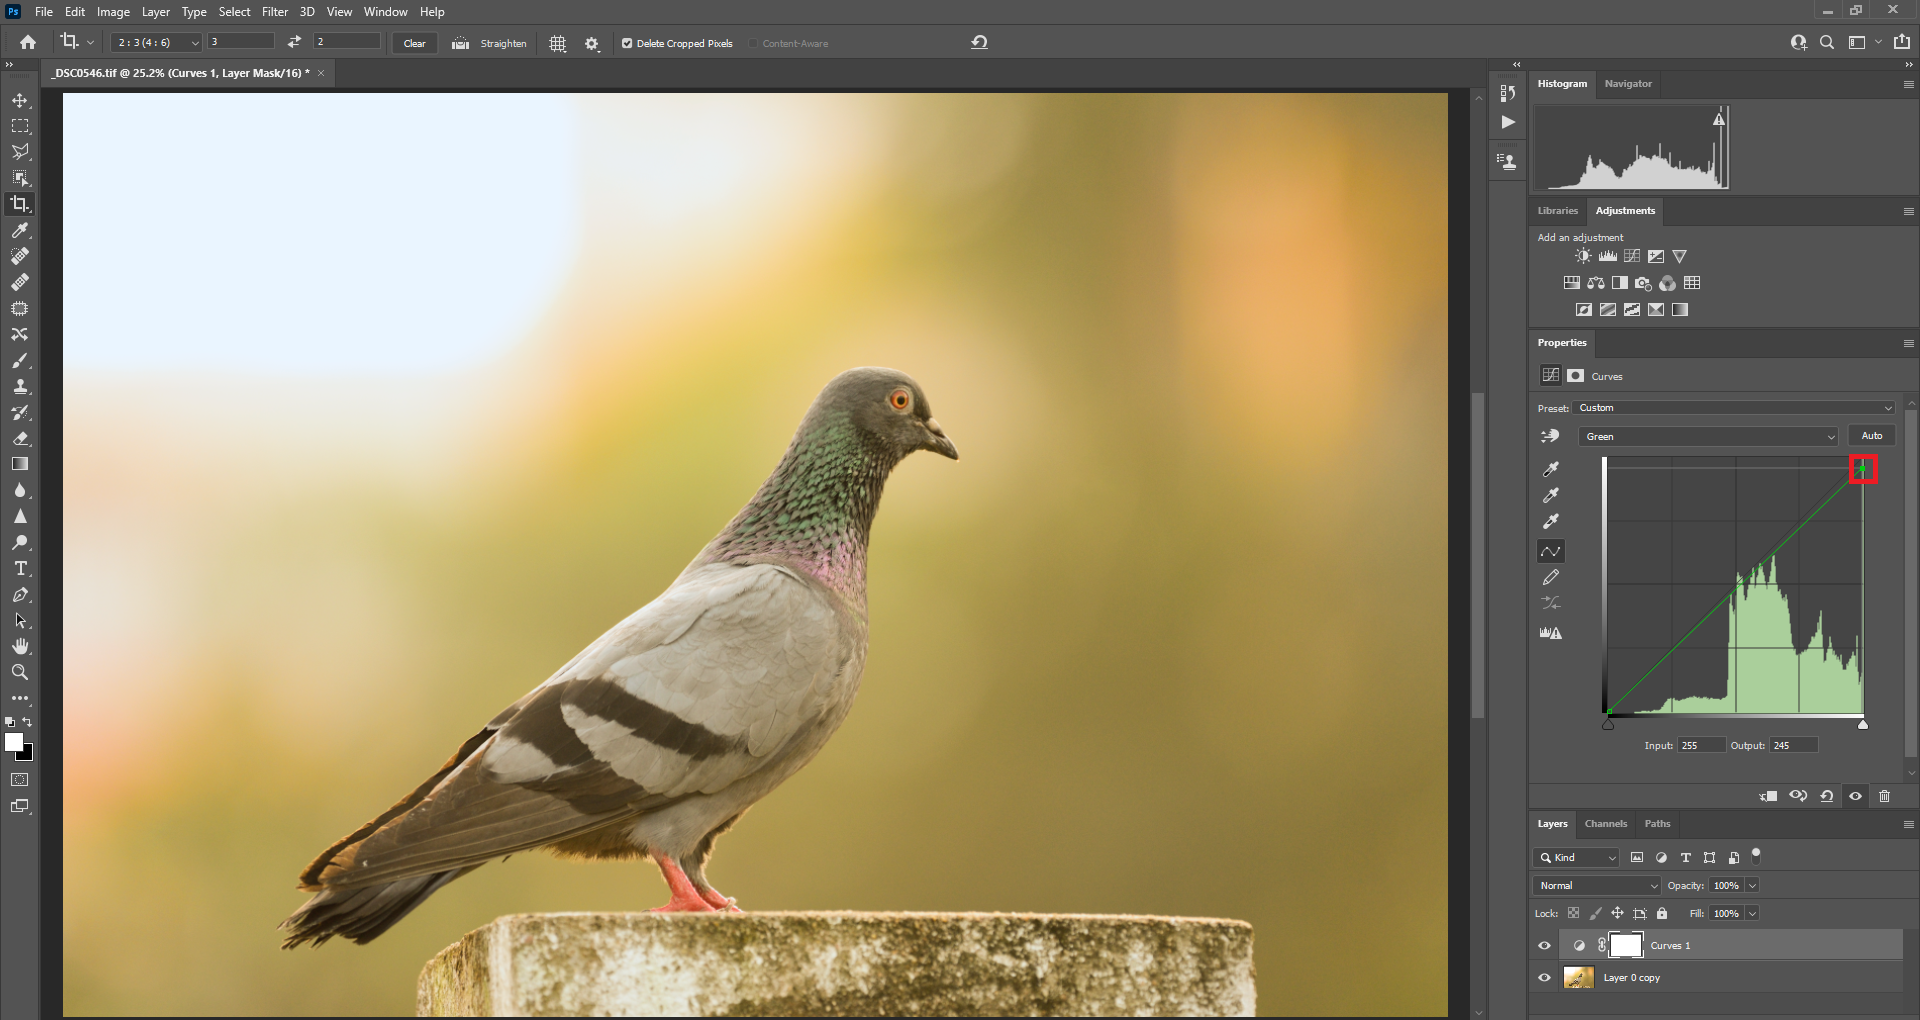
As you can see in the illustration above, the warmer color cast is controlled. But the image looks green, so bring down the greens as well, similar to what you did with the reds as shown in the illustration below.
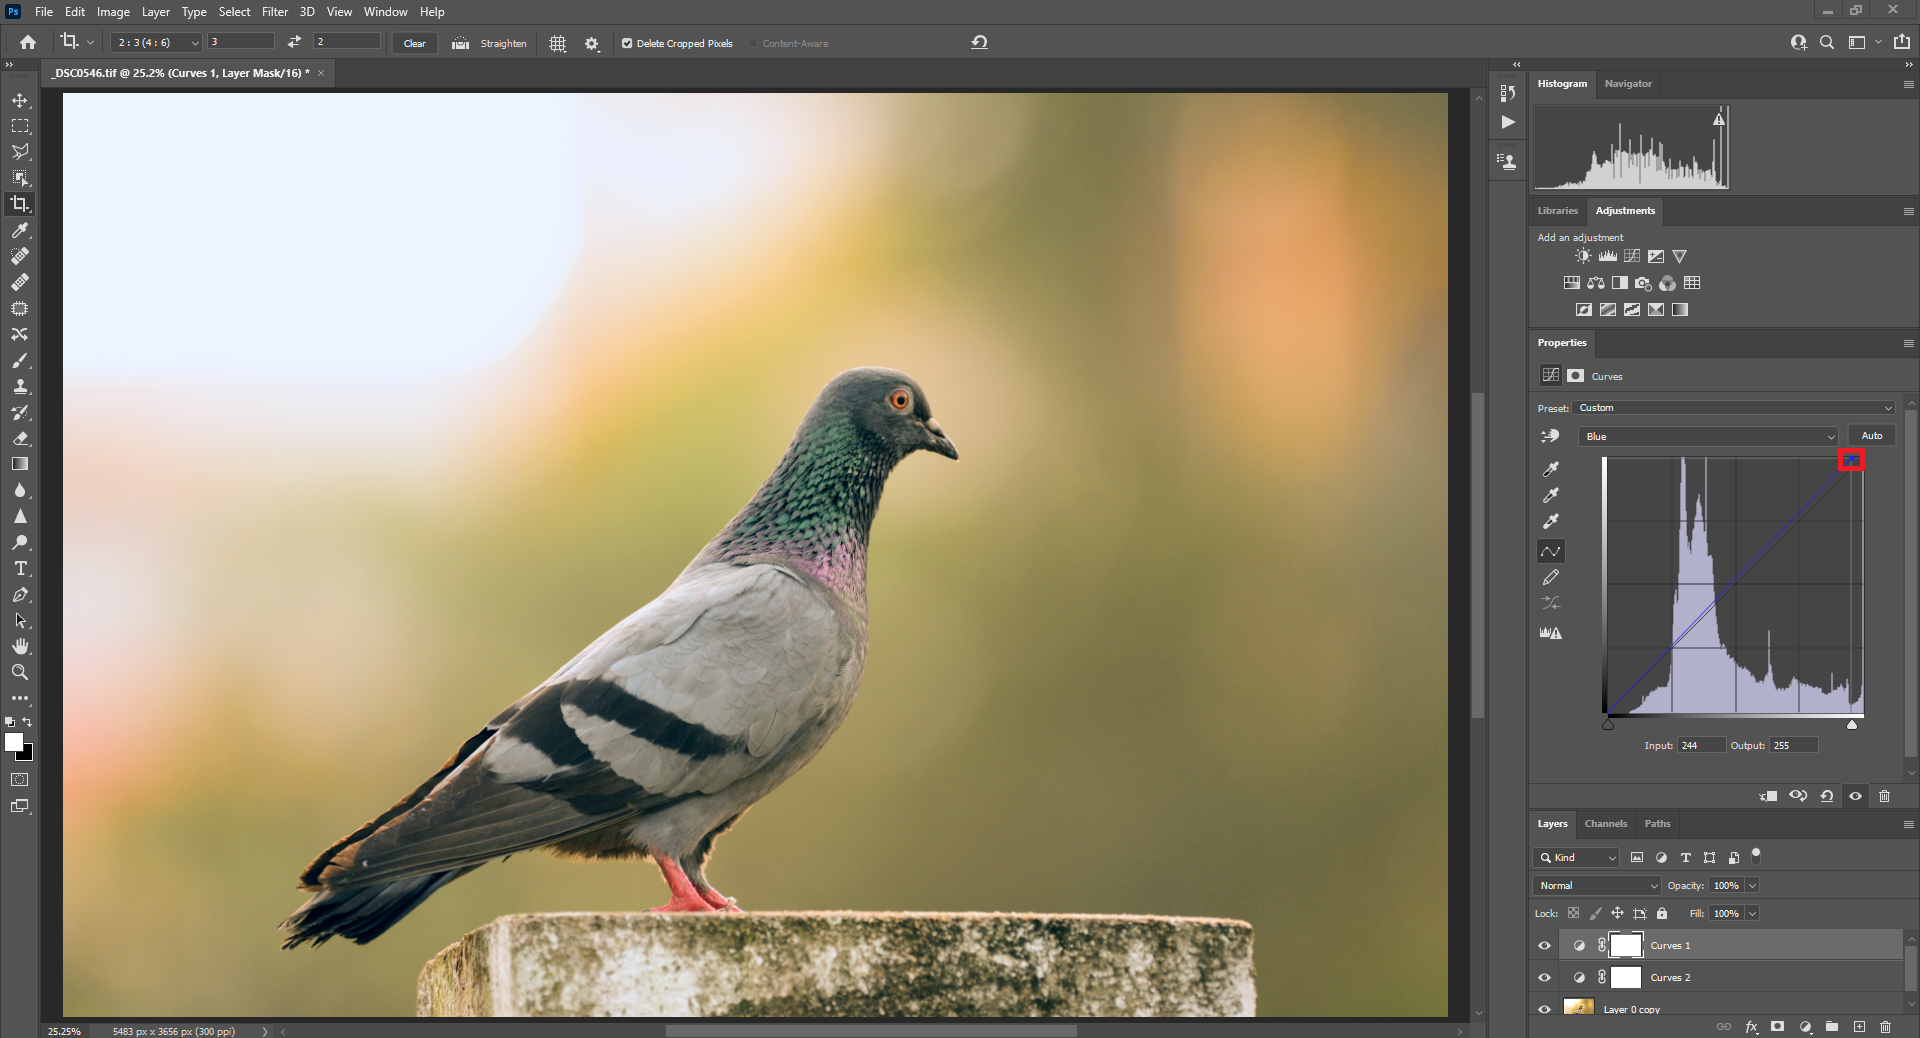
Now, the green channel looks better. But the image still looks to have a slightly warm tone. Adding a bit of blue to the image will set the final tone of the image as shown below.
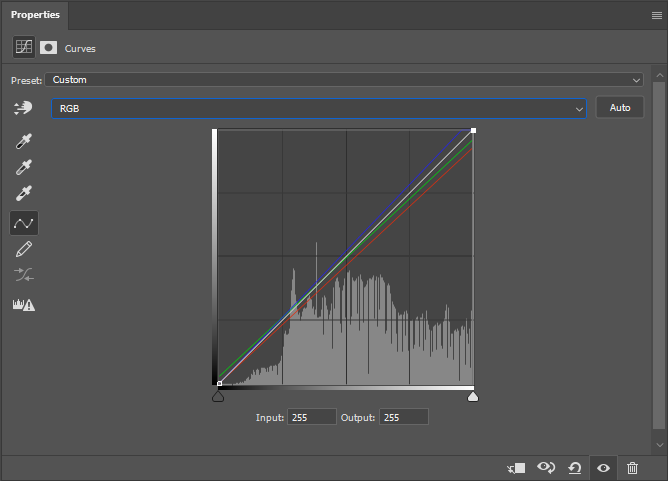
Now the image looks natural. The whites in the upper left corner are without a cast. Now if you choose RGB, the properties of the adjustment layer are as below.
Below, I’ve shown a comparison of the original image, automatic Curves adjustment, and manual Curves adjustment.

Most of the time, auto adjustments work pretty well, especially in the recent versions of Photoshop. But with tricky images – especially when there are multiple sources of light with different color casts – manual adjustments come in handy.
Lastly, since Curves is an adjustment layer, you can use it in combination with layer masks to selectively reduce your adjustment in certain parts of the image. This gives you a lot of flexibility.
Conclusion
Although cameras are fairly good at automatically choosing the right white balance, they are not going to be perfect or always to your taste. I hope you feel more comfortable now adjusting the white balance in Photoshop when necessary. If you wish to add any pointers or have questions, please leave a comment. Happy shooting and editing!
SIR, IN OUR OLD DAYS EDITING WAS NOT POSSIBLE FOR FILM CAMERA SO WE ARE NOT AWARE ABOUT IT. BUT AFTER TAKIBG MAX EFFORTS IN TAKING PHOTO IS IT NECESSORY TO EDIT IT?
I frequently used colour balancing filters with film photography, especially with colour reversal film (slide film).
Notably, Wratten number series 80 to 85:
en.m.wikipedia.org/wiki/…ten_number
Many thanks for your work here, very helpful for me, clear and complete!
Thank you for that clear and concise explanation. Very helpful.
Thank you. This will be enormously helpful. I regularly shoot speakers and singers in a space with walls painted a kind of light adobe color which is a nightmare for my camera’s auto white balance. I KNOW these steps will improve my photos – I’ve just taken a “slider approach” in the past, not always with the most pleasing results.