Color calibration should definitely be an essential part of every photographer’s workflow. Otherwise, it is impossible to tell whether the colors that are displayed by your monitor are truly accurate and whether what you see will match the print. There are many ways to do it and the process can be fairly simple or complex, depending on how accurate you want to reproduce the colors and whether you are also printing your work in-house. The simple method involves a hardware colorimeter for color profiling your monitor for everyday photo editing and image viewing, and there is also an end-to-end professional-grade color profiling that requires very concise calibration of all display and output devices, such as printers. In this article, I will only focus on simple methods to make your monitor show more or less accurate colors, so that you could rely on it for everyday photography needs.

Table of Contents
1) Why is Color Calibration Important?
One of the big misunderstandings about color calibration, is that people think that it is only needed for printing. Wrong! It is needed for everything – from viewing your and other people’s work, to processing your own images in Adobe Photoshop, Lightroom or any other software. If your monitor is not properly color calibrated, you are most likely not seeing everything in images you view. For example, a smooth and beautiful sunset might appear as pale, and a black and white picture might appear too dark or too bright.
I personally did not pay much attention to color calibration for a long time and I suffered greatly as as result. At the time, I produced very inconsistent work, because I was looking at wrong colors during post-processing. My images often ended up with over-saturated colors and strange tones, and having no idea about things like ICC color profile, I would often end up stripping all the metadata from my images, including those color profiles. One day I had a chance to view my images on a color-calibrated computer and after seeing how bad the images looked, I realized that it was time to change. At first, I thought that perhaps I could use some free color calibration tools that were already built into my operating system in order to get more accurate colors. I did not see how I could justify spending a few hundred dollars on a colorimeter, when my monitor cost me that much money in the first place. However, over time, I realized that selecting a proper monitor and color calibrating it was critical, especially if I wanted my photography to be taken seriously. Thankfully, once I had a proper setup, I was able to go back and re-process my images. I am glad I did not wait too long, because starting from that point of my career, I was able to produce solid work that looked consistently good.
If you have never properly calibrated your monitor in the past, you will be shocked to see how different your and other people’s images will look after proper calibration, especially if you have a lower-end monitor. Thankfully, good colorimeters make it very easy to calibrate any monitor – as you will see from this article and the accompanying video further down, it does not take a long time and does not require any technical knowledge.
2) What Kind of Monitor Do You Have?
Without a doubt, your choice of a monitor is very important for accurate color reproduction. If you purchased a monitor for under $300-400 dollars, it most likely comes with a “TN” or “Twisted Nematic” panel that cannot accurately display colors due to limited color gamut and dithering, and might not have a good viewing angle. That’s because such monitors were never designed for color critical work in the first place – they are consumer-grade monitors designed for basic computing, gaming and other needs. While we have already provided our recommendations on best monitors for photography, if you would like to identify the type of monitor you are using for viewing and editing photographs, take a look at this article and see what you have today. Perhaps you have a solid monitor worth calibrating, or perhaps it is time to upgrade to something better. It is important to have a reliable monitor for color calibration, because cheap consumer-grade monitors might shift their colors and brightness levels from time to time, potentially making color calibration less accurate and effective overtime. Therefore, if you have one of those cheap monitors and do not want to be plagued with inaccurate colors and tones, I highly recommend replacing it with a better monitor.
3) Visual vs Hardware Calibration
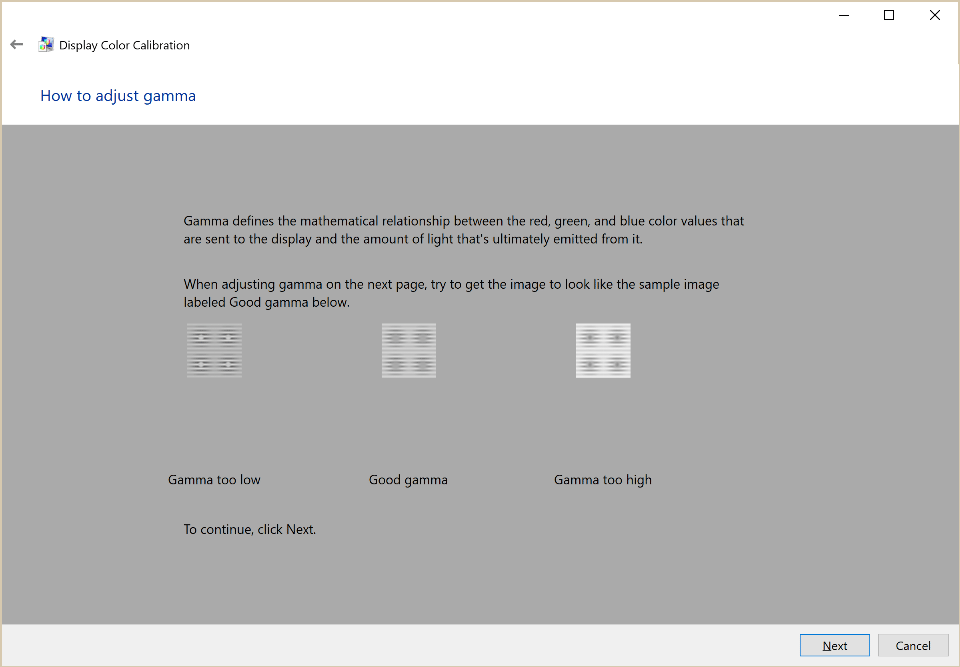
When it comes to color calibration, you will find plenty of free and commercial tools that will allow you to calibrate your monitor via software-only visual comparisons, or by using a hardware colorimeter. One of the free tools might come as part of your operating system and is usually available for both Windows and Mac platforms. For example, Microsoft’s “Display Color Calibration” is part of all the recent Windows operating systems such as Windows 10, which allows you to adjust your monitor’s gamma, brightness and contrast, and even color balance:
While it might sound like a good idea to use such tools to calibrate your monitor, aside from perhaps setting the gamma setting, all other adjustments are potentially very dangerous and that’s for one simple reason – you cannot use your own eyes to adjust colors, brightness or contrast, because it is all very subjective. People’s perception of color in particular is very different and for that reason alone, it is not worth touching these built-in or free tools you might find online to calibrate your monitor. And if you think you can just sit down with a color chart and do side-by-side comparisons and adjustments, good luck with that process, as it will never work, since even the type and quality of the paper are going to make it impossible to make proper comparisons with your monitor that is most likely backlit.
In order to accurately profile a monitor, the colors that the screen outputs need to be analyzed and compared with real colors and that is only possible with a hardware colorimeter, such as X-Rite i1 Display Pro. A colorimeter works by analyzing colors coming out of a display and provides necessary adjustments to color, gamma, brightness and contrast via software. Once the calibration process finishes, these adjustments can be loaded via software each time the computer is rebooted, or if the monitor you have has a built-in look-up table (LUT), the information can be stored within the monitor itself. Because of all this, there is always going to be a huge difference in accuracy between these two methods, which is why hardware calibration is so important. Lastly, hardware calibration process consumes significantly less time and can be performed on a periodic basis without much hassle.
4) How to Calibrate Your Monitor
Before starting the process of hardware calibration, make sure to start out by resetting your monitor settings to factory defaults. The reason why you want to do this, is because you do not want to start calibrating a monitor that already has too many manual adjustments that might have been performed before. On some monitors you can revert to factory defaults through a menu setting, while on others you can press a combination of buttons to revert to factory settings. If you cannot find a way to do it on the monitor, check out the monitor manual to find out how you can reset to factory defaults.
Perform the following:
- If your monitor and your video card have a DP (Display Port) connection, make sure to connect the two with this cable instead of DVI or HDMI.
- Make sure that your monitor is in an area where sunlight or other light sources do not reach it directly.
- Leave the monitor on for at least 15-20 minutes to let it heat up.
- Make sure that the screen resolution is at its optimal setting. If you have an LCD monitor, push the screen resolution to the highest allowed number, also known as “native resolution”.
- Make sure that your video card is outputting in highest bit mode.
- Uninstall all existing color-calibration tools and software.
- Install color-calibration software that came with the colorimeter (ideally, you want to get the latest software version from the manufacturer’s website).
- Run the software and follow the instructions.
Once the calibration process is complete, make sure to only use color-managed software applications to view or edit your images going forward, as detailed in section #7.
5) Calibration Hardware – Colorimeters
The most popular hardware calibration colorimeters on the market today are the following:
The first two, X-Rite i1 Display Pro and Datacolor Spyder are usually the most popular colorimeter options today and they are both between $150-250. I personally used to own a Datacolor Spyder Pro colorimeter, but found X-Rite i1 Display Pro to be far better in accuracy, especially when profiling multiple screens that needed to look consistent.
6) The Process of Monitor Calibration Using Hardware Calibration
The process of calibration is very easy. You just run the wizard and do what it asks you to do. Depending on how accurate you want the calibration to be, it can take as little as 5-10 minutes, and as much as 30+ minutes, especially if you are going to rely on third party tools like ArgyllCMS / DisplayCAL. If you are still worried about the process, take a look at the below video to get an idea about what you will have to go through:
7) Use Color-Managed Applications
You would be surprised, but many applications do not support color profiles, as explained in my “is your browser color managed” article. One of the most basic applications that we expect to be color-managed is the Internet browser. But unfortunately, even some of the most popular browsers might not fully support ICC color profiles. Take a look at the following images:


If you have a color-managed browser such as Firefox, Apple Safari or Google Chrome, both images should appear the same or very close. If you are using a different, or perhaps an older browser that is not color-managed, the second image will appear to have dark blue/purple sky and yellowish sand.
All applications you use must be able to read ICC color profiles that are saved into images (tagged with sRGB color space when saving for the web). For example, the Photos app that comes with Windows 10 cannot properly display images, because ICC color profile are completely ignored, whereas the most current versions of other software tools such as Lightroom, Photoshop, ACDSee and others, have this capability built-in. After your images are exported from post-processing software, never completely strip all metadata out of those images, as it will most likely wipe out ICC profiles as well.
8) Conclusion
As you can see from this article, calibrating your monitor is extremely important, especially if are serious about your photography. Unless you only play computer games and watch movies on your computer, you should never use free and built-in software calibration tools, because they are unreliable and inaccurate. Ideally, you should use a reliable colorimeter, which you can profile your monitor with and use going forward to calibrate any device you are planning to use for editing or viewing your images. Don’t skip on color management and calibration and don’t cheap out on a solid monitor – those are too important to ignore in photography. Lastly, if you are also into printing and publishing, keep in mind that color management does not end with monitor calibration. You will need to calibrate every output device, but that’s a much more complicated topic for a different day…
If you are ready to move up in your knowledge on this topic, see our detailed article on the Basics of Monitor Calibration and for a very detailed guide on calibrating Dell monitors, see our article on How to Calibrate Dell Wide Gamut Monitors. Both of these articles were written by a professional color consultant, who is much more knowledgeable on this topic than anyone in our team.
Please let us know if you have any questions in the comments section below!
Hi I am Blogger and I write different
blogs for different users.
amirsoft
You have just written a few words, but you have clarified everything about it. Thanks for your needful article. I Hope this will help the beginner. I also want to share this article fixthephoto.com/best-…iting.html
Nasim,
Re Color calibration
I am now entering the world of digital photography. I want to make sure each purchase counts. I am searching for the right laptop and simultaneously considering the right calibration tools. I expect to show online on my own website at least and some other sharing but I expect to print my work as well. It seems my camera store has computers set up for photo editing. One of the computer screens has Pantone Validated. Can this replace a free standing calibration tool? If not, is Pantone a needed at all? Thanks
Hi,
Thanks for a great article. I use an Eizo screen for my editing usually but I need to be able to edit on the go too. I’m looking at buying a laptop, probably Dell at the moment. I know a laptop screen won’t be as good as my screen, but I want to buy the best possible laptop that will allow me to calibrate the screen as best I can. What should I be looking for in the spec. Is it screen resolution, the graphics card or something else? and which ones are best?
Thank you
Hi Nasim. If I have color accuracy of my monitor 95percent sRGB and 74percent adobeRGB, does it mean, that colors on my screen are accurate and if I view it on another device with 100percent RGB, it’ll be there same?
I received a BenQ SW320 32 ” monitor from my children as a birthday present (which I really love – the difference is incredible with less expensive monitors)
I am an advanced photographer yet only a retired hobbyist. Having said all this, I understand I need a monitor calibrator.
I have read numerous articles and I am somewhat confused. What do you recommend? I follow you on your site and have improved reading your opinions and comments. For this, I thank you.
Great article! It doesn’t specifically touch on laptop monitors for PC. Is it possible to calibrate a laptop monitor using hardware calibration in windows 10?
Hi Nasim,
You suggest that the screen and computer should be connected by DP if this is avaiable, instead of DVI or HDMI. Why would you prefer DP? Is this better than HDMI?
I presently have three color calibration programs installed i1DisplayPro, DisplayCal, and Color Navigator. Is it necessary to uninstall all of them then reinstall a single one to properly calibrate my monitor?
I own the Datacolor Spyder 4 Pro hardware calibration system. Works well but I always have a hard time getting the colorimeter to sit flat against the monitor screen. Kind of a pain, actually.