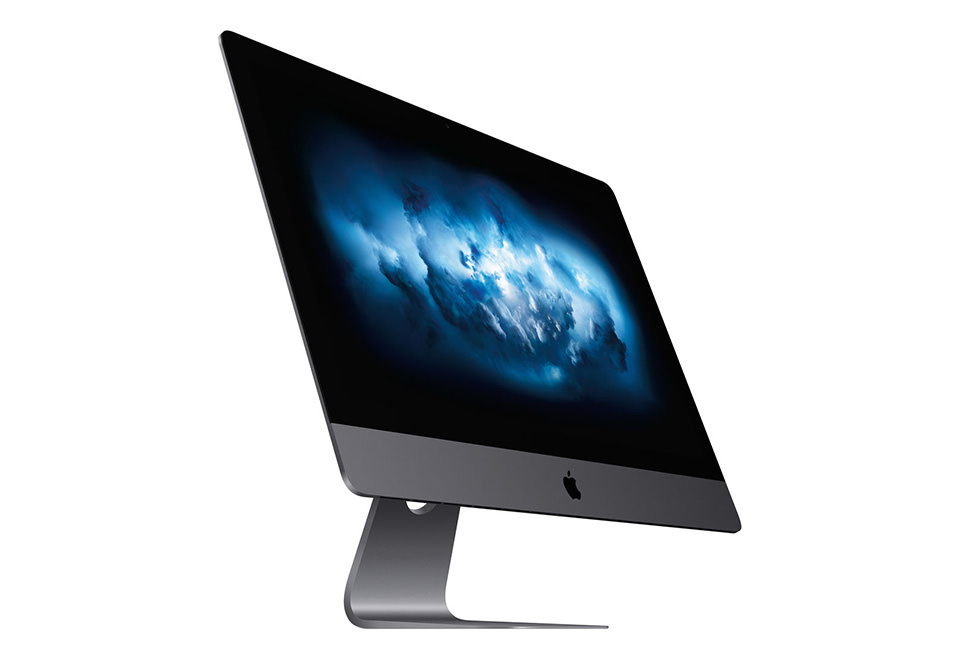
In this article, I want to focus on purchasing an iMac for photography needs and what types of considerations one has to keep in mind when selecting one. I have had quite a few requests from our readers on this topic and many wonder what type of an iMac would suffice for photography work without breaking the bank. After doing quite a bit of research before purchasing my iMac and consulting with other Mac experts, I believe I found a couple of configuration options that are optimal for photography work for the next few years.
Before we go into the recommended configuration, let’s explore one of the most frequently asked questions – should one get an iMac, iMac Pro or a Mac Pro for photography needs?
Table of Contents
iMac vs Mac Pro
Without a doubt, the Apple Mac Pro “Cheese Grater” is an absolute beast. Running powerful, workstation-class Intel Xeon processors with up to 28 cores, up to 1.5 TB of RAM, up to 8 TB of fast PCIe NVMe flash SSD storage, up to 2x powerful GPUs and plenty of expandability options, the Mac Pro is a dream machine for any content creator. However, despite its many strengths, it is not a machine I would recommend to most of our readers. Why?

Primarily because of its cost. For the most basic Mac Pro, you are looking at shelling out $6K, which will come with a mere 256 GB of SSD storage! It is puzzling why Apple even bothers selling the 256 GB option because that’s clearly not enough. The next “step up”, which is a bare minimum in my books, is the 1 TB SSD option, which you will need to spend another $1,400 for. So for the most basic and “workable” machine, you are looking at spending at least $6,400. Add a solid 4K IPS wide-gamut monitor, and you are looking at $7,500+. Want to get the new 32″ Pro Display XDR? Add another $6K on top of that. I just don’t see the point of spending this kind of money on a machine that you will be using to edit images.
The thing is, machines like the Mac Pro and the iMac Pro are better suited for demanding, multi-threaded applications that can fully take advantage of their processing power. Unless you stitch a lot of super high-res panoramas, or edit 4K+ content and need all the CPU cores, RAM and GPU you can get, there is no point in getting them. For standard post-processing work in Lightroom and Photoshop, the iMac is going to be your best bet, plain and simple.
A pretty decent build with the latest generation iMac Retina 5K will cost around $2K – that’s a huge difference in price! In fact, if you spend a bit more and get an 8-core Intel Core i9 CPU, you will be able to potentially outperform the basic Mac Pro when running Lightroom and Photoshop. These applications are not optimized for more than a few cores anyway, so if you can get a CPU with a faster base clock, you will be able to squeeze quite a bit of performance out of the regular iMac.
When purchasing my iMac a few years back, I went with the most basic 8 GB configuration, then bought third-party memory and upgraded the RAM myself, which was super easy, and I saved a lot of money (more on that below). With the latest 2019 iMac version, it is now possible to get up to 128 GB of RAM! So if you stitch high-resolution panoramas and need as much memory as you can get, the latest iMac is a pretty serious option.
iMac vs iMac Pro
Apple released its high-end iMac Pro in late 2017. With this release, the company wanted to appeal to those who want even more power from the iMac line of products. With up to 128 GB of RAM, up to 4 TB SSD, fast AMD Radeon Pro Vega 64 GPU and 10 Gbit Ethernet, these machines are phenomenal in terms of performance potential. They are the most powerful all-in-one desktop computers today.
The iMac Pro is a completely different beast compared to the iMac. Similar to the Mac Pro, it is a workstation-class machine that is optimized for those who run very demanding tasks that are able to take advantage of multi-core CPU performance. Unlike the Mac Pro, it has no upgrade options, but it does have a very compact form factor, typical of an iMac.
Compared to the iMac, it has very different configuration options and obviously a much higher price. While the cheapest iMac can be bought for under $2K today, the cheapest iMac Pro costs around $5K, while its most expensive configuration runs at a hefty price tag of $12K! And that’s for a now 3-year old machine. Ouch.
At the same time, the iMac Pro is a very powerful machine that has its uses. Those who run memory and processor-intensive tasks that need as many resources as possible, such as when stitching high-resolution HDR panoramas, or when working with 4K+ video content, will definitely benefit from the iMac Pro. This is the type of machine that video production studios often use.
Before the Mac Pro was announced, I actually ended up buying the iMac Pro when a local computer store was running a very nice promotion, so I was able to get it for less than $4K. Later on, I was able to perform a RAM upgrade through OWC, loading it up with 128 GB of RAM. It is a beast of a machine that I have been using for all my work, including video editing. Spencer also bought an iMac Pro for his needs, and he loves the performance he is able to squeeze out of it when editing 4K footage.
While both of us are heavy iMac Pro users, we do more than just photo editing with our machines, which is why we needed them in the first place. I personally love the fact that the iMac Pro comes with a 10 Gb Ethernet port so that I can edit photos and videos directly off my network-attached storage (the iMac is limited to 1 GbE). Unlike my massive PC desktop, the machine takes very little space on my desk, and I am able to connect two wide-gamut external monitors for multi-tasking.
Now, if I were editing images without running CPU and RAM-intensive jobs, I would be more than happy with a regular iMac. So if you are wondering which one to get, the answer is going to be very similar to the Mac Pro – it is not worth it for most photographers out there. Not only because of the much higher price tag but also because of the same reasons highlighted earlier – applications such as Photoshop and Lightroom are simply not optimized for Intel Xeon processors with tons of CPU cores. You are going to be paying a lot of money for very small performance gains, if any.
In summary, the iMac Pro is not a machine I would recommend for everyday photography needs – the regular iMac is going to be your best bet.
21.5″ iMac vs 27″ iMac
When working on high-resolution images, the lower the resolution of the screen, the more you will be scrolling from one area of the image to another when zoomed in. With modern cameras now sporting 30+ MP sensors, it might make sense to move up to higher resolution screens.
Apple has been packing Retina 4K+ screens on its iMacs for a while now for that reason, and those IPS screens are pretty decent for displaying images. So what iMac would be best suited for photography? The 21.5″ version with a 4K screen or the 27″ version with a 5K screen?
Unless you have desk space limitations, I would go for the 27″ Retina screen. With its 5120 x 2880 resolution, you have a lot of real estate in terms of monitor desktop space, even for displaying several application windows. But the biggest benefit is the physical monitor size – a 27″ screen is huge in comparison to a 21.5″ screen. There is simply no comparison between the two.
CPU and GPU Considerations
Unless you have budget constraints, it would make sense to get the latest and greatest iMac, which is basically the Early 2019 model with Intel’s 9th-Generation CPUs. The current architecture supports up to 128 GB of RAM, which is more than plenty for all photography needs. Heck, even the most basic 6-core Intel Core i5 CPU is going to be great for post-processing.
Buying the current generation iMac will also help keep its resale value higher for a couple of years. However, do keep in mind that computers, in general, are never a good investment in the first place – expect to lose value very quickly. With the fast pace of technology, that’s just the way it is! Remember “It’s All About The Pentiums” by Weird Al Yankovic? “My new computer has got the clocks, it rocks, but it was obsolete before I opened the box!” LOL, so true! While it might be a good idea to get the “latest and greatest” to be set for the next few years, if the newest technology is far more expensive than something that is only 5-10% slower, that marginal performance increase might not be worth the investment.
What about Intel Core i5 vs Core i9? Depending on the workload, the performance difference between the two can vary quite a bit. You probably won’t see a huge difference in applications like Lightroom and Photoshop that have a hard time utilizing more than a few cores anyway, but for exports and other tasks that can take advantage of more cores and hyperthreading, you will be better off with an Intel Core i9 CPU. If money is not an issue, go for the 8-core i9 CPU.
Aside from lack of future upgrade options, one of the drawbacks of the lower-end iMac is its somewhat weak AMD Radeon Pro 570X GPU. With both Lightroom and Photoshop supporting GPU acceleration, you certainly get a performance boost when using a faster video card. Unfortunately. if you choose to upgrade to the higher-end AMD Radeon Pro Vega 48, you are looking at adding another $500 to the cost of the machine.
Note
Keep in mind that not everything is GPU-accelerated in Photoshop and Lightroom – only certain tasks are. In Lightroom, for example, sliders and tools like gradient filters are GPU-accelerated, whereas the adjustment brush and spot healing are not. See my “What is GPU Accelerated in Lightroom?” article for more details.
If money is not an issue, go for the AMD Radeon Pro Vega 48 GPU, as you will be able to accelerate the performance of most post-processing software out there, including Lightroom and Capture One.
Storage Considerations
With the iMac having so many different storage options (512 GB to 2 TB PCIe SSD and Fusion Drives from 2 TB to 3 TB), choosing an appropriate storage option can also be challenging. You must choose your storage option carefully, as you will not be able to upgrade it in the future.
My personal recommendation is to stay away from spinning drives when buying computers. PCIe flash drives are much faster, and they have lower chances of failing or building up “bad blocks” overtime. With the iMac getting pretty hot under full load, putting a spinning drive might not be the best idea. But that’s not the main reason why I would recommend a PCIe flash drive. When choosing your Lightroom storage option, it is always best to place your Lightroom catalog and cache in the fastest drive you have available.
Keep in mind that Lightroom stores not only its catalog file but also preview images under the same folder structure. While a Fusion drive can off-load the catalog into its faster SSD memory, your preview files will most likely still reside in the spinning area of the drive, slowing access times down. So you are going to be better off by placing your Lightroom catalogs in the faster flash storage.
What about storage space? Flash memory gets expensive fast, so what size is optimal? This is strictly a budget-driven question. If you have a large budget, get the largest PCIe Flash drive, which is 2 TB. But if that is too expensive, 1 TB will also work. Personally, I would avoid 512 GB, as it would be too limiting – once you load up your Lightroom catalog, it will eat through that storage too quickly, especially with full-size previews.
Now, if you end up choosing a small flash storage option, or if you already have a Fusion drive, there is no need to be overly concerned. You can still use an external storage device, such as the Samsung Touch Portable SSD, or an external NAS / DAS if you need a lot more storage. The Samsung Portable SSD is so small and lightweight, that you can leave it dangling off your iMac’s Thunderbolt port on the back of the machine.
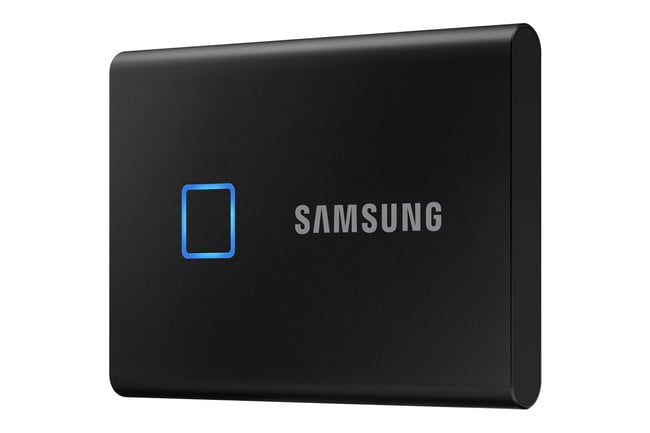
Although such drives are based on PCIe NVMe Flash technology, keep in mind that their speeds are still limited when compared to the ultra-fast flash drives on the iMac. A typical flash drive on the iMac is 2x to 2.5x times faster in comparison, so there is a noticeable performance difference between the two. So ideally, you should try to get as much SSD storage as possible on the iMac.
RAM Considerations
When choosing an iMac, always choose the least amount of RAM. Apple wants you to shell out $600 for 32 GB, $1000 for 64 GB of RAM and there is not even an option to buy 128 GB. Buying RAM separately does not void the iMac warranty, so you don’t have to worry about that at all!
When buying my iMac a while back, I went with the 8 GB configuration, got 32 GB RAM sticks separately, which only cost me $150. I saved $450 going this route! If I were to buy the latest Early 2019 iMac, I would do the same and buy 64 GB DDR4 2666 Mhz SO-DIMM kit from OWC for $350 – that’s a whopping $650 in savings. And for those who want to max out the iMac, the 128 GB kit is $680 – still far cheaper than the 64 GB option offered by Apple.
Installing memory is super easy. All you have to do is open the rear RAM panel on the iMac, remove existing memory and swap it out with the new memory. The procedure is not technical at all and if you have trouble with the process, you can ask someone else to do it for you. Folks at OWC made a 2-minute video that shows the process right here. It took me a couple of minutes to do it for my iMac, and the machine booted up without any issues.
So unless you want your money down the drain, don’t buy the most beefed up iMac – buy memory separately and install it yourself to save hundreds of dollars.
Please note that the above does not apply to the iMac Pro. If you are planning to get the iMac Pro, please make sure to pick your RAM options wisely at the time of purchase, since upgrading RAM is going to be much more difficult, and it will void Apple’s warranty.
In summary, when picking your iMac configuration, make sure that you take CPU, GPU and storage options very seriously before you commit. Those components are very hard, or potentially even impossible to upgrade – some components might be soldered to the motherboard. However, this does not apply to RAM. You can buy it separately and upgrade at any time.
iMac and iMac Pro Recommendations
Based on the above, below are my recommendations for the latest iMac (Early 2019) with Intel’s 9th-Generation CPUs:
- Apple 27″ iMac 5K, 3.0 Ghz Intel Core i5 Six-Core, AMD Radeon Pro 570X, 8 GB RAM, 1 TB Flash Storage – $2,299
- Apple 27″ iMac 5K, 3.7 Ghz Intel Core i5 Six-Core, AMD Radeon Pro 580X, 8 GB RAM, 1 TB Flash Storage – $2,599
- Apple 27″ iMac 5K, 3.6 Ghz Intel Core i9 Eight-Core, AMD Radeon Pro Vega 48, 8 GB RAM, 1 TB Flash Storage – $3,449
- Apple 27″ iMac 5K, 3.6 Ghz Intel Core i9 Eight-Core, AMD Radeon Pro Vega 48, 8 GB RAM, 2 TB Flash Storage – $3,849
Personally, I find the most value in the third option at $3,449. With the fastest Core i9 CPU, AMD Vega 48 GPU and 1 TB of storage, it is a very powerful desktop that could process anything you throw at it. However, if my budget was limited, I would just go for the first option.
For RAM, it all depends on your needs. I would recommend going with 32 GB RAM minimum for those who are on a tight budget, but if you want to be able to quickly stitch large panoramas, go for either 64 GB or 128 GB.
- OWC 32 GB DDR4 2666 Mhz SO-DIMM (2×16 GB) – $154
- OWC 64 GB DDR4 2666 Mhz SO-DIMM (2×32 GB) – $349
- OWC 128 GB DDR4 2666 Mhz SO-DIMM (4x32GB) – $679
The iMac Pro models are all very expensive, so you will need to look at the different configurations purely based on your needs, as the cost of the machine is going to go up dramatically depending on what CPU, RAM and SSD option you are going to pick.
Hope you found this article useful. If you have any questions, please feel free to ask in the comments section below!
I’m having trouble evaluating critical sharpness on my new iMac 27″ 5K. Is anyone else having trouble doing this at such a high resolution?
Love the insight and breakdown of each category; I just recently bought a 2017 iMac 21.5 inch display with the i5 processor and 8gb of ram (so lowest model of 2017) and was wondering if this was a good purchase for photos and graphics or if I should really sell this and upgrade to a better unit? Any help/advice would be greatly appreciated 🙏🏼
Very comprehensive article, Nasim! A colleague photographer friend finds that the iMac 27″ 3.3 GHz 6-Core Intel Core i5 with 32 GB DDR4 RAM, an AMD Radeon Pro 5300 4 GB Graphics Card, and a 1TB SSD can handle the Z7’s high-res files in Photoshop 2020 nicely as well.
hi,
i need to replace my old MacPro(early 2008)trough problems with mobo
a new pro is out off question,for the price
so i have a few questions about the new iMac
i look now for the 10e gen cpu iMac,make it a useful difference between 8 or 10 core…
also for the Gpu,i am thinking on Pro 5700xt bsce i use also DaVinci Resolve and that need Ram
i will also order 10-Gigabit Ethernet and 2Tb SSD and 64Gb memory
but i am more concerned with the heat when this is all mounted
should this give problems,i heard some rumours on some forums
thanks
thank you so much!! I have been trying to figure out what would be best for me being a wedding photographer and I have looked at several articles but this one was by far the best information !
I mainly use my my iMac for lightroom editing. Currently I have a 2013 27″ iMac, I installed a 1 tb SSD drive about 2 years ago, I have 16 gig ram, it’s starting to lag a bit, the fan cuts on frequently.
I’m not too up on the lingo of guts of a computer. Would you recommend waiting for the new releases of the iMac coming out sometime this year, or would the current model be just as good…?
Thanks!
concerning the apple warranty—for the 27 In machine the most ram apple will put in is 64g. I If I put in 128 g withe 4 x32g cards will that affect the warranty?
Hi, great article but my brain is having a hard time condensing the bits that I need… I’m a budding photographer that was looking at purchasing the $1400.00 iMac 21.5
I don’t need things to run super-fast, So, I’m ok with wait times and adding external memory as needed. If I’m also alright with having a smaller screen than the 1st option on the list, couldn’t this machine do the job for me? I may want to fool around with animations later and work with editing $k video but hopefully, there are some add ons for that maybe that would work …
Hi, Angelica!
Fellow Photographer Angelica here!
I recently just purchased the iMac 21.5in 4k display last week and am returning it…I primarily use Photoshop and Lightroom and these wait times are far longer than you’ll be willing to endure…in the span of 30min, I was only able to MINIMALLY edit 3/4 pictures. It was painful. I am still trying to figure out which is the best pic, I am unsure if it is the 8GB of ram that is not enough for the apps or what.. but I do not recommend the lowest tier as my purchase was the middle..
Very comprehensive comparison and open ideas and comments for all options. This is very useful for me when I upgrade from my aging 27″ iMac late 2015 i7 w 3T fusion drive to an updated model.
As I’m gravitating towards video more, I’ve been eyeing a iMac Pro to replace my late 2014 retina iMac, but I just can’t see paying top dollar for a 2017 design. Makes no sense. Apple needs to do a refresh of the iMac Pro lineup, stat.
Apple did just that recently.
Have a look at the Apple site.
Looks like a wizard line up – back to total flexibility and upgradeability at last.
Not the Mac Pro (can’t afford that), but iMac Pro.
Oh OK, my bad.
But isn’t the iMac Pro enough for you?
What could they do to refresh it from your perspective?